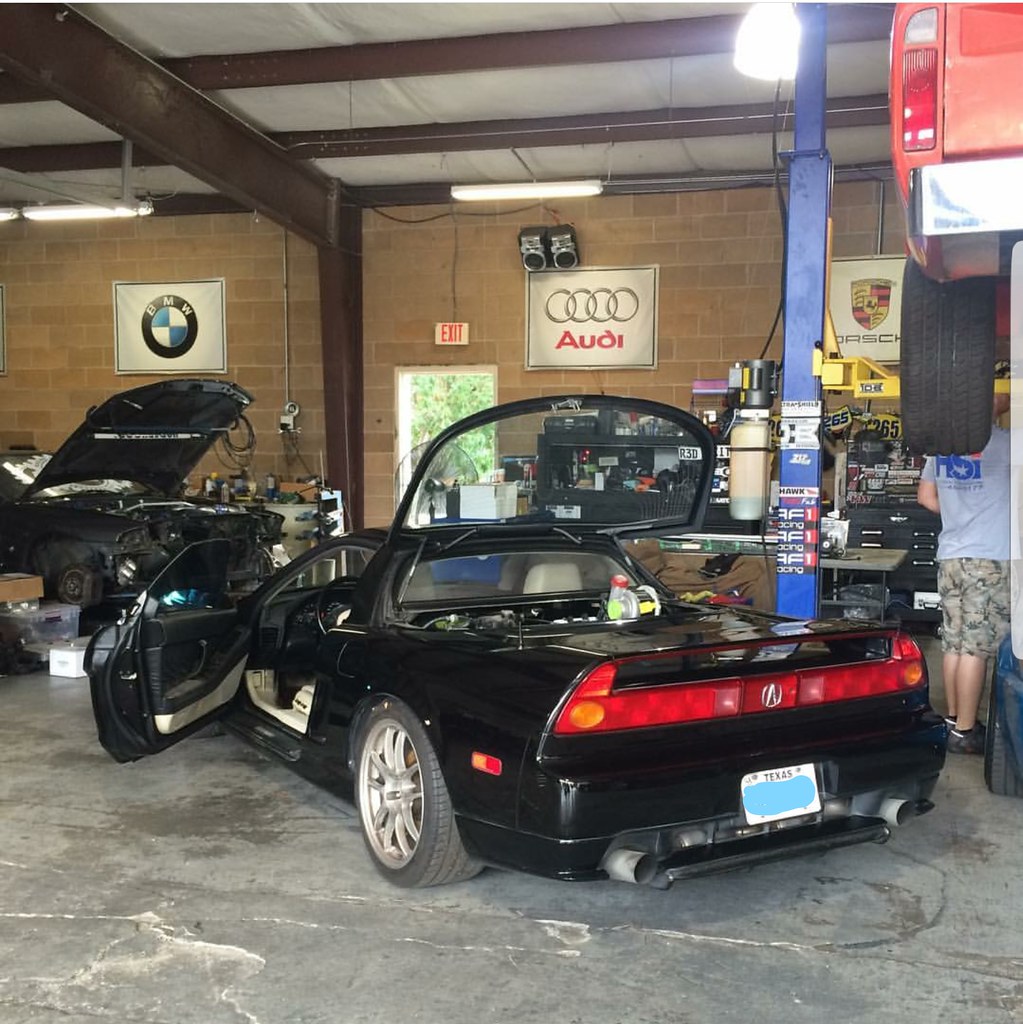
So I had been thinking about setting up a build thread for a while. I just wanted to wait until I was closer to my build being done first. The shop, IDB Racing, has been in the process of moving to their new shop slowly over the last couple of months. I wanted to wait until the engine that I am having built by Wil the shop owner finish with the move and now that the shop move is over the project is back on and I am pretty pumped with the progress. IDB Racing has been working on NSXs for years now with everything from routine maintenance to full on builds so I was more than happy to work with Wil to have it all done by him. Plus his eye for quality over “just good enough” is what attracted me to the shop in the first place.
From the beginning I always knew I wanted a NSX as it was a car that I could grow with and not feel the need to replace again. So the quest was on and it eventually led me to Orlando one weekend to go pick her up.
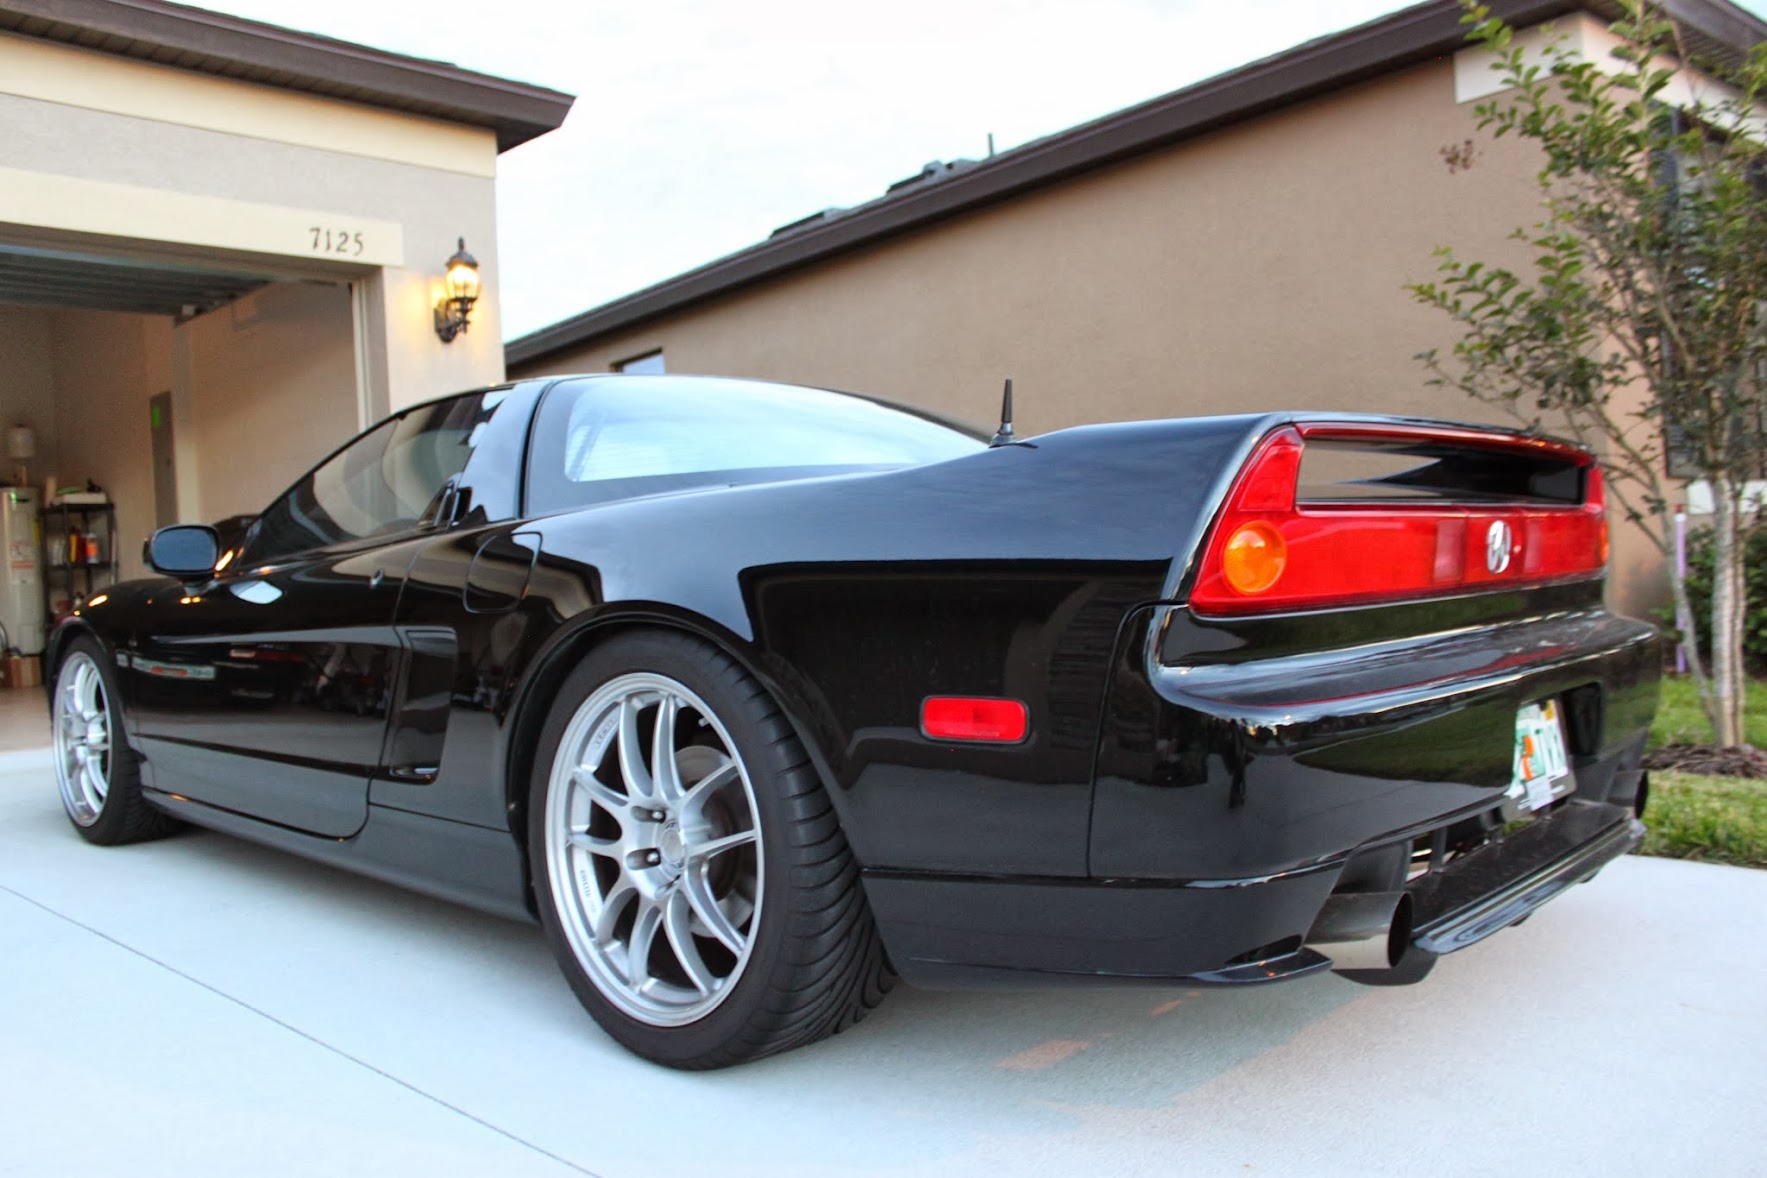
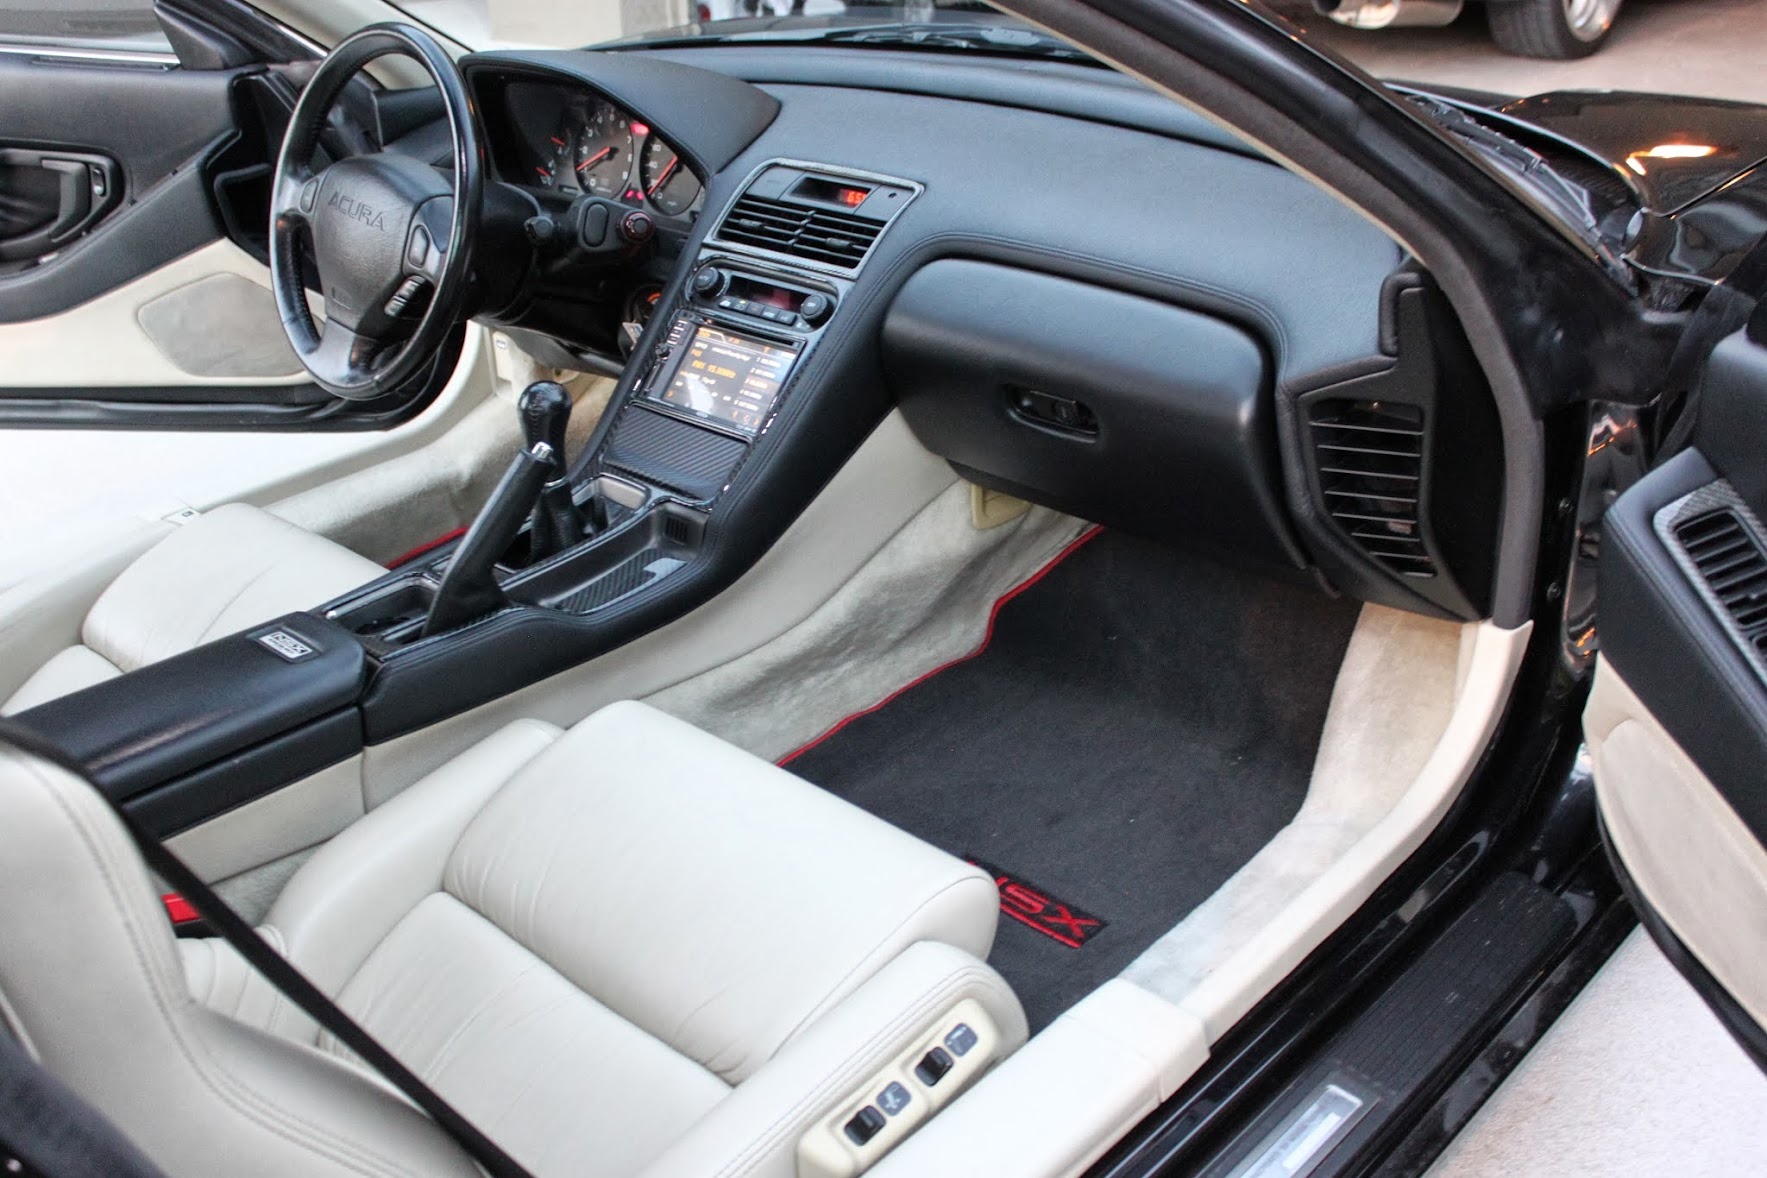
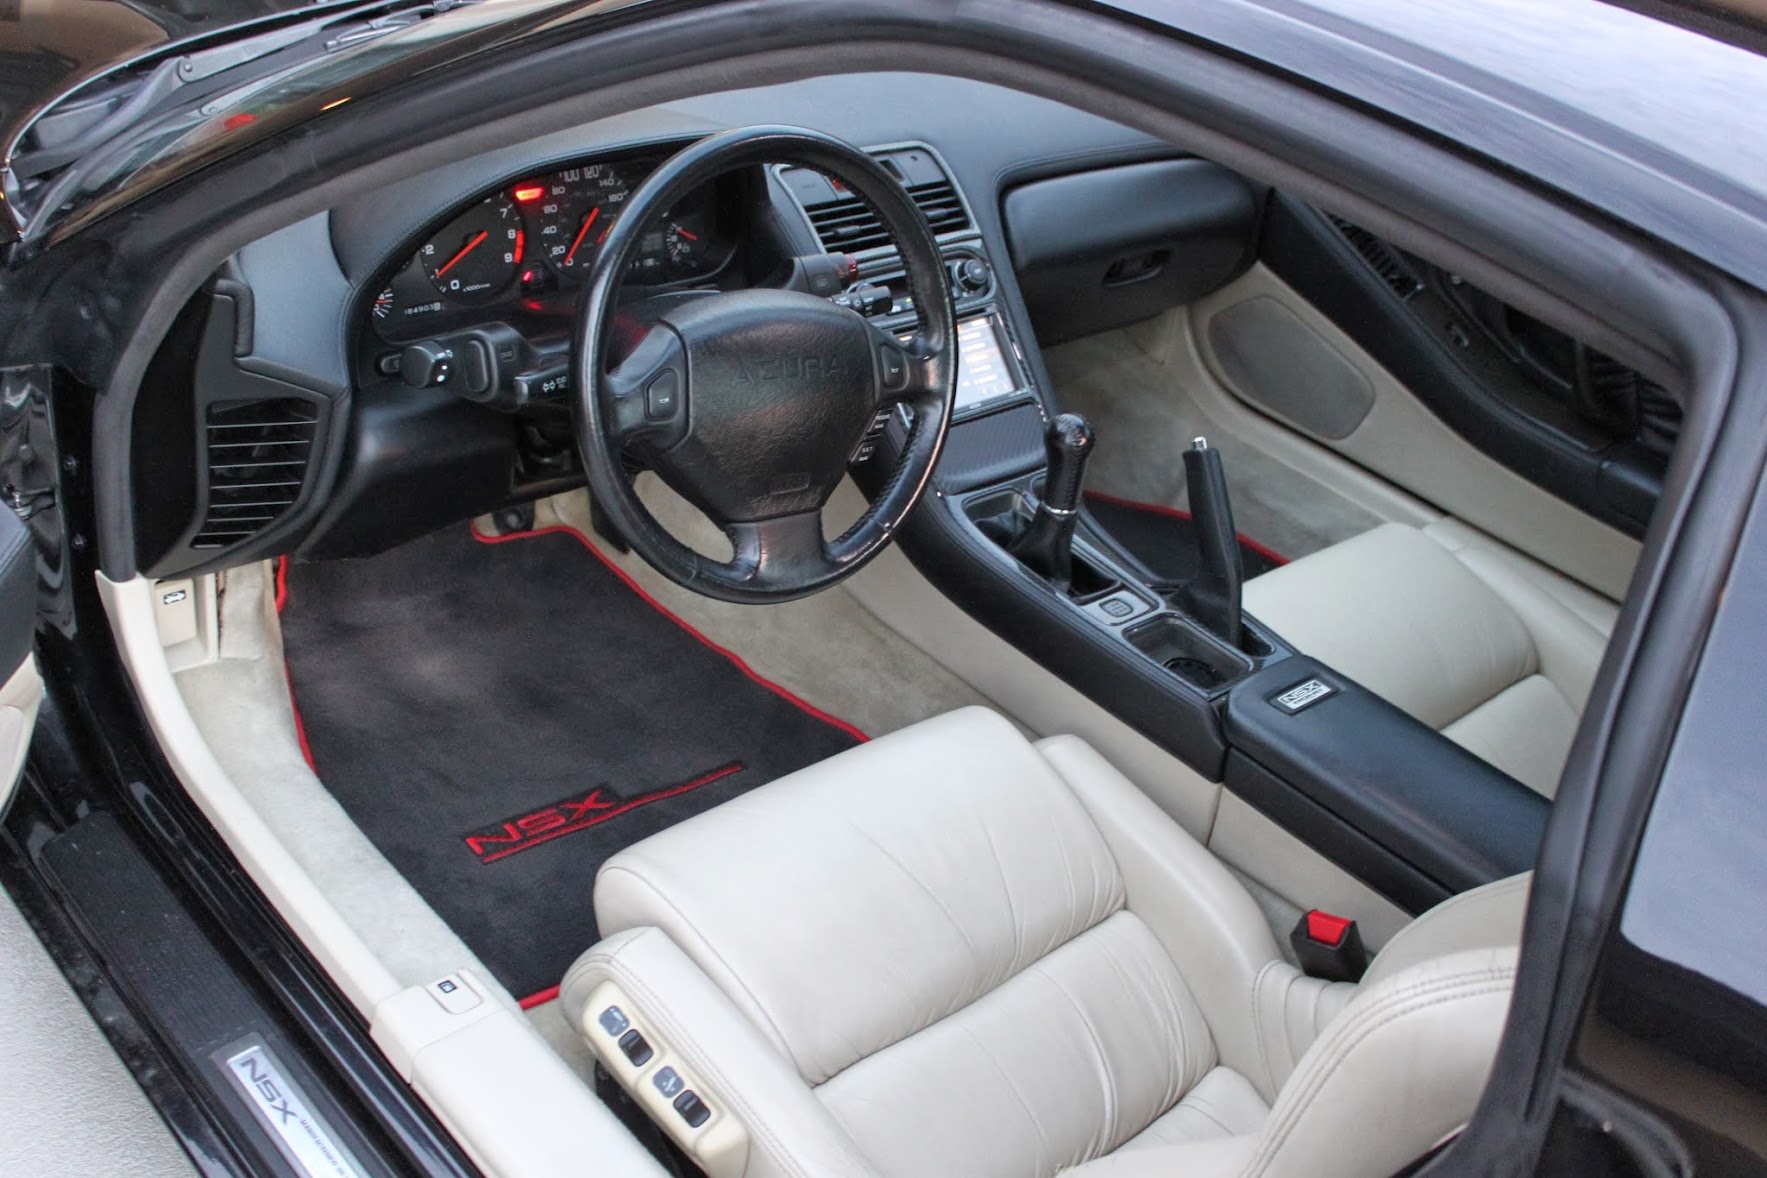

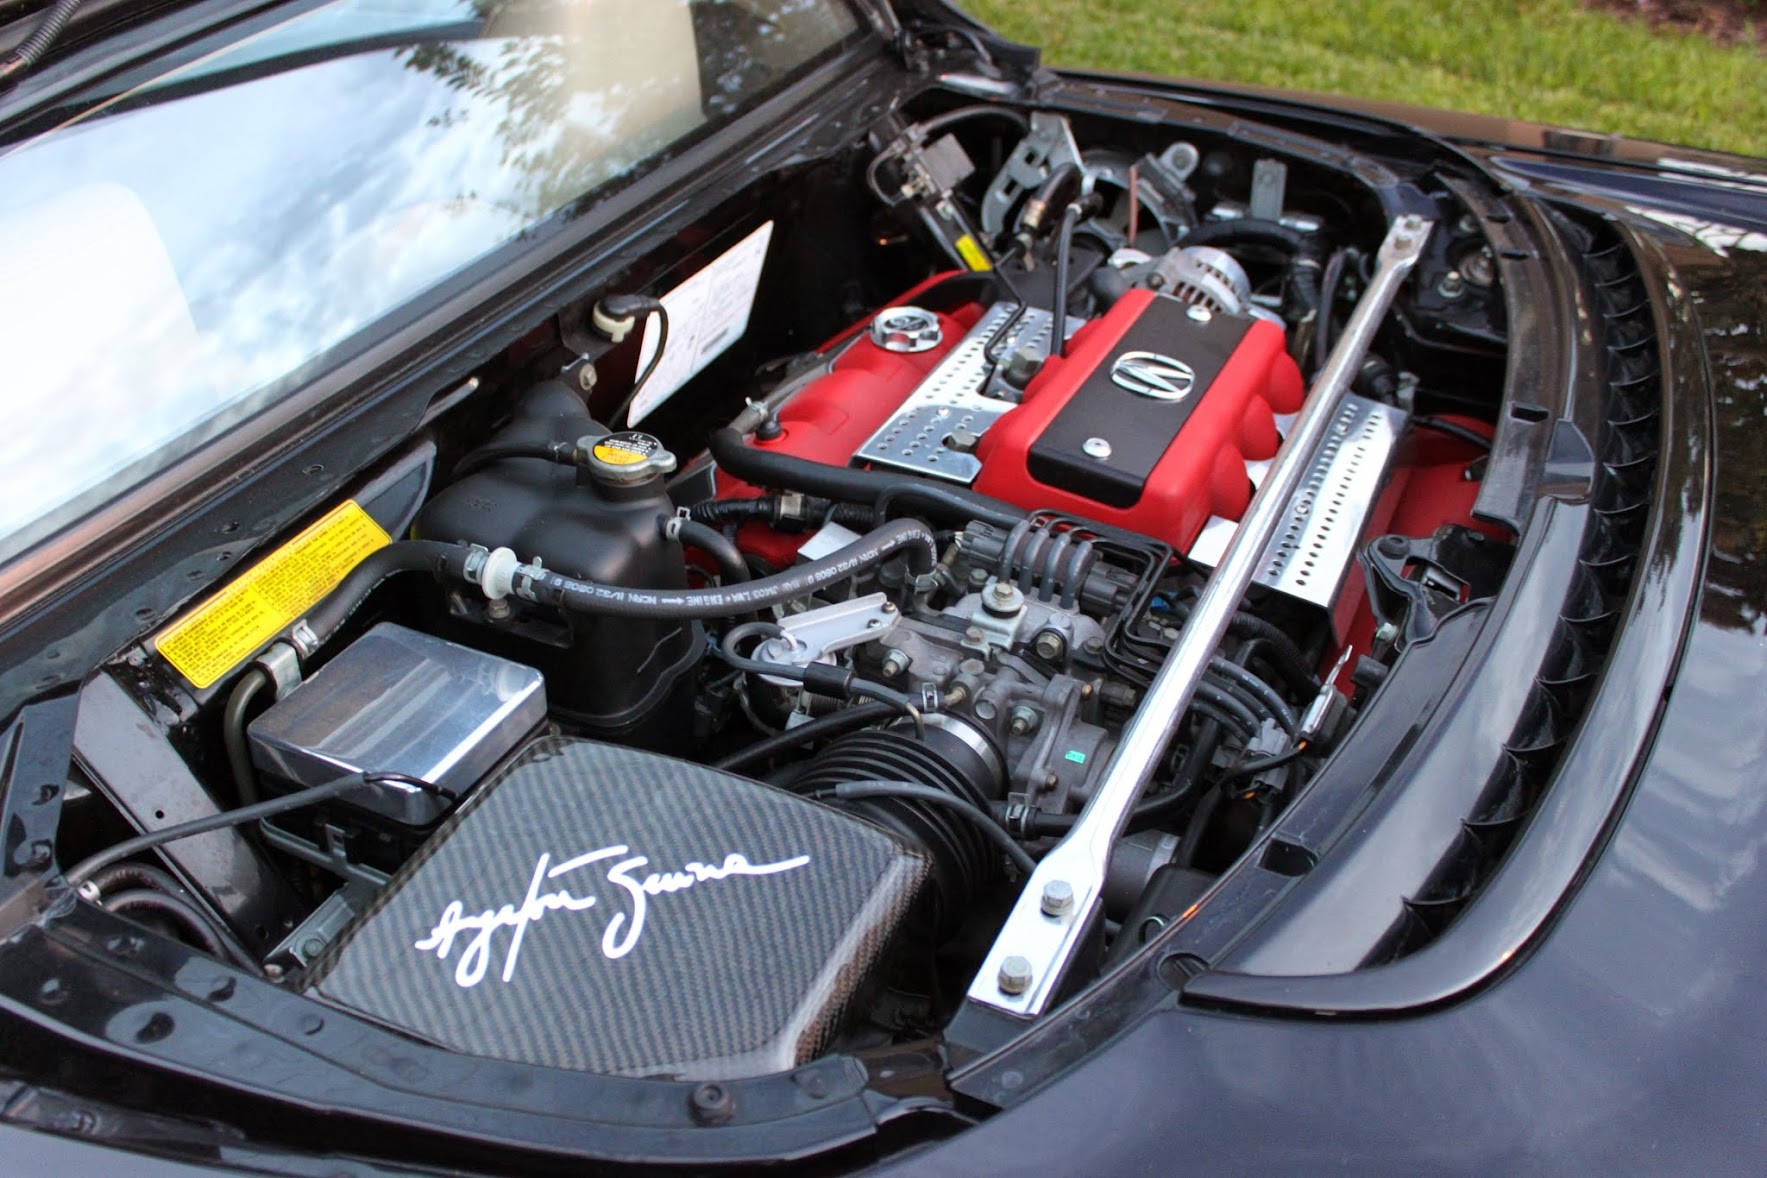
1992 Berlina Black with white interior NSX. 84,000 on the tach and a serious ring binder of all maintenance since mile 1. The car has been pretty well kept over the years, and just to show how reliable it was I drove it back from Orlando. As soon as I got back to Houston I got the routine maintenance completed on it. So the timing belt, timing cover, water pump, cleaned and regreased the driver/passenger window rails, plugs, cam seals, valve cover gasket set, upgraded LMAs to springs over piston, valve adjustment, and cleared texas inspection.
 Engine Maintenance 2 by Jones
 Engine Maintenance by Jones
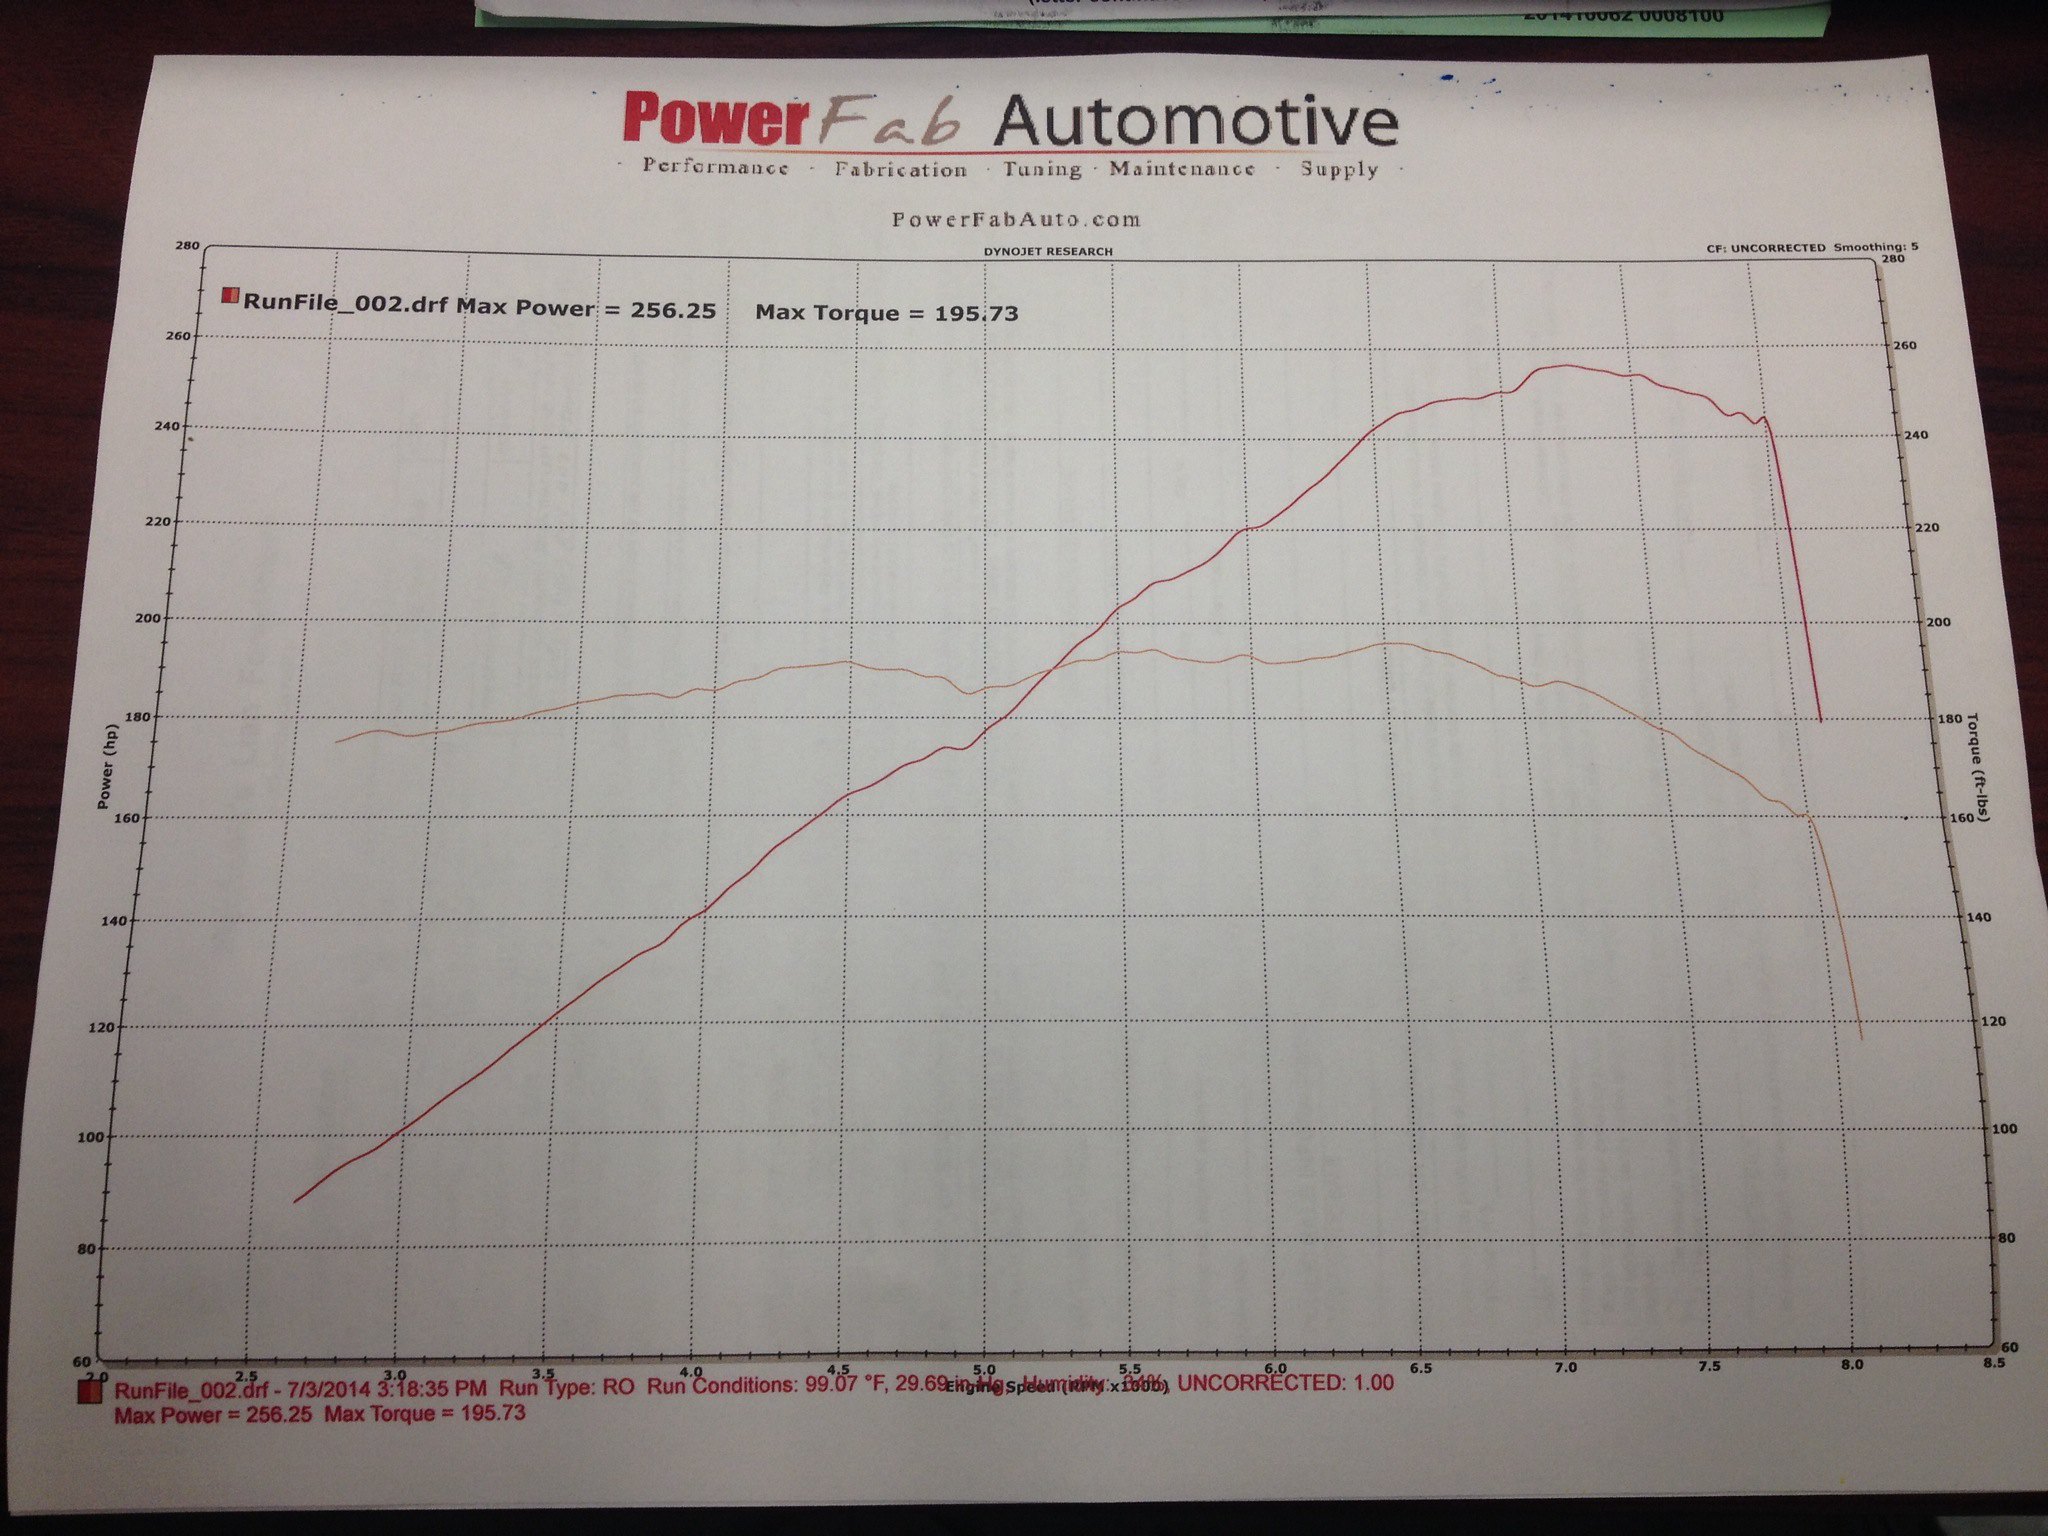
Once that was taken care I had the car sent off to the dyno to get a baseline done to it before the fun engine mods were on. This was the uncorrected dyno numbers in stock form on mustang dyno. Pretty typical of what you see in these cars.
 14381965939_c00c94856c_o by Jones
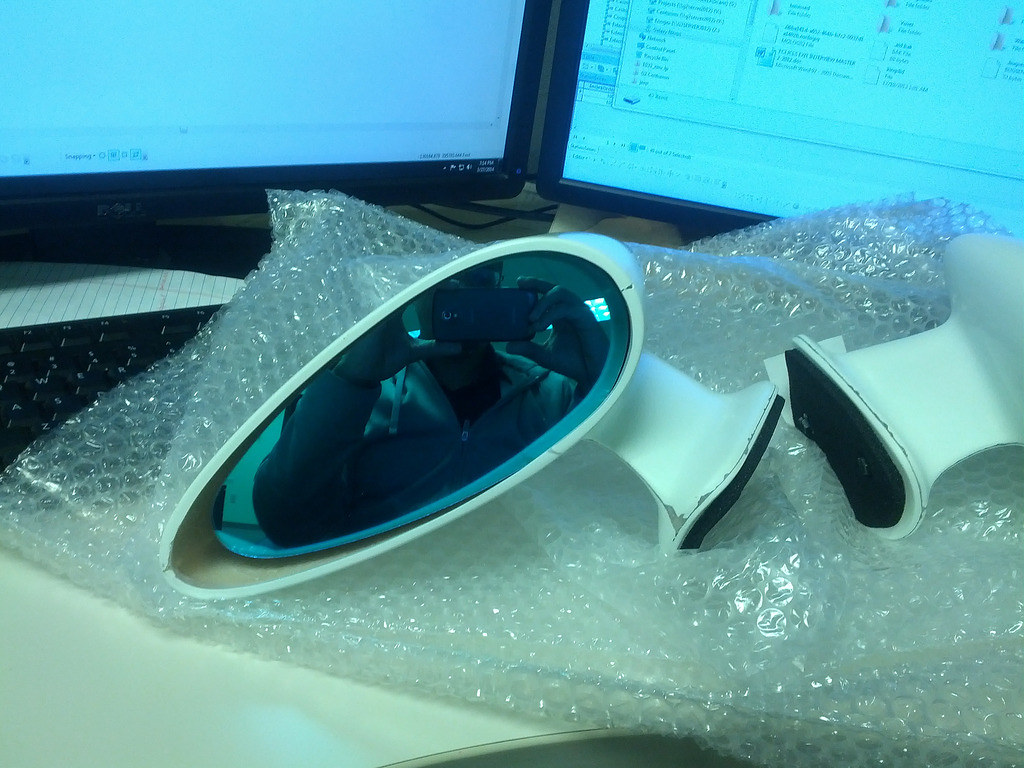
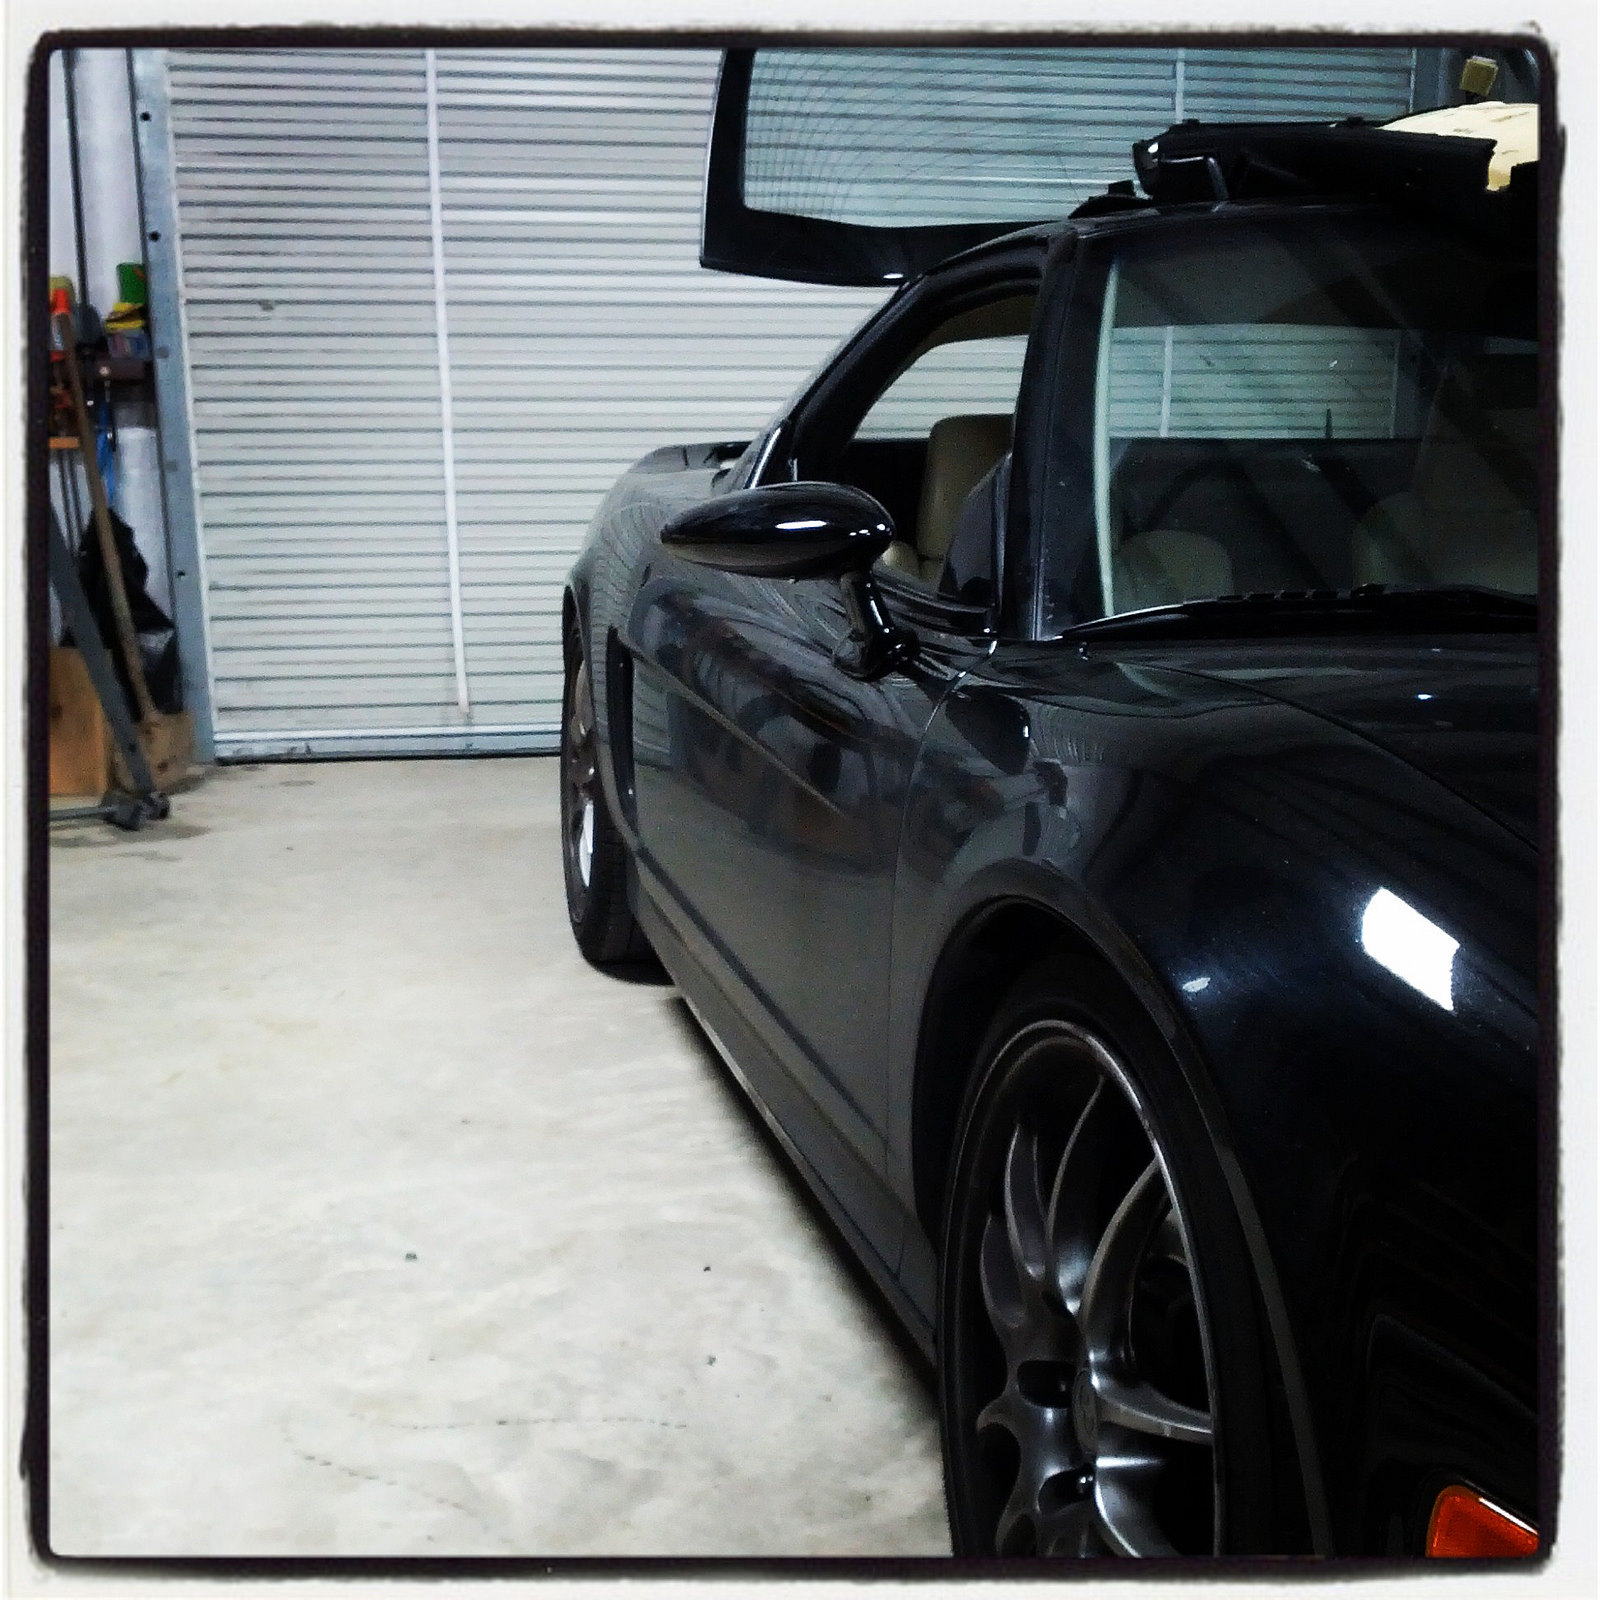
Right after this I had a someone back into the car’s mirror or bump into it with their body. I’m not sure either way but one of my mirrors was completely broken so I bought some new ones to fix the issue.
 Spoon Mirrors by Jones
Spoon Mirrors 2 by Jones
 Spoon Mirrors 3 by Jones
After the mirrors were done it was time to bring the car in to IDB Racing again and begin the build process. Full disclosure I was just going to do the ECU standalone and that was going to be that, but I don’t know how to leave well enough alone. Before I knew it was down a hell of a rabbit hole and really glad Wil was there to help me get it to where it is now.
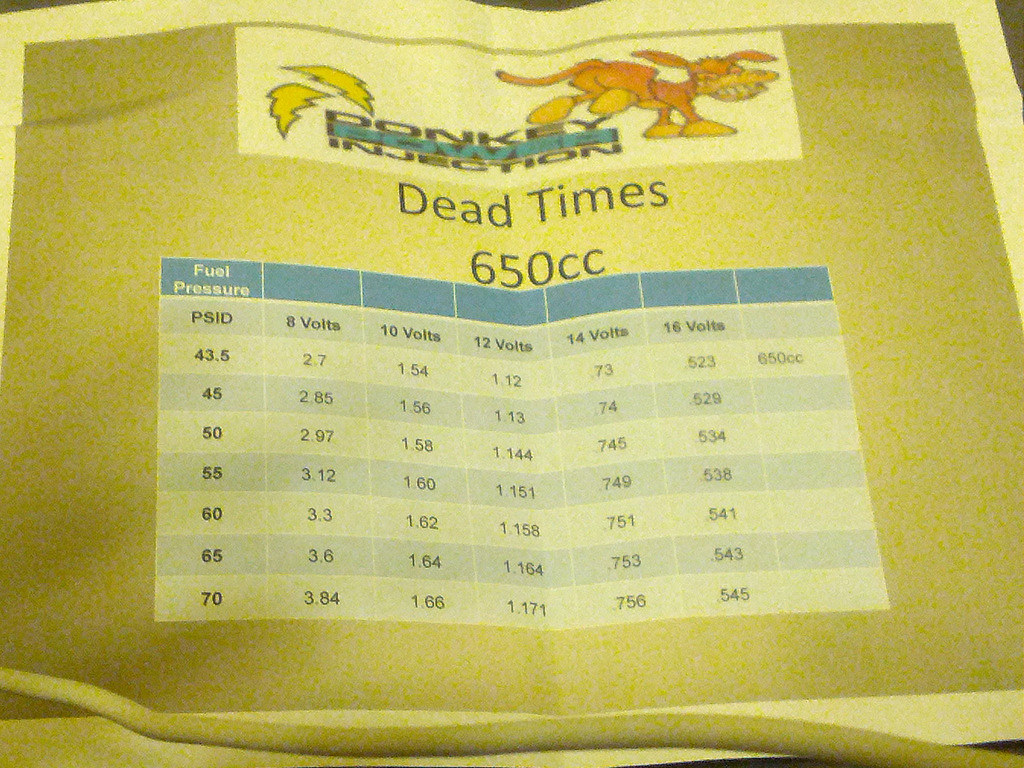
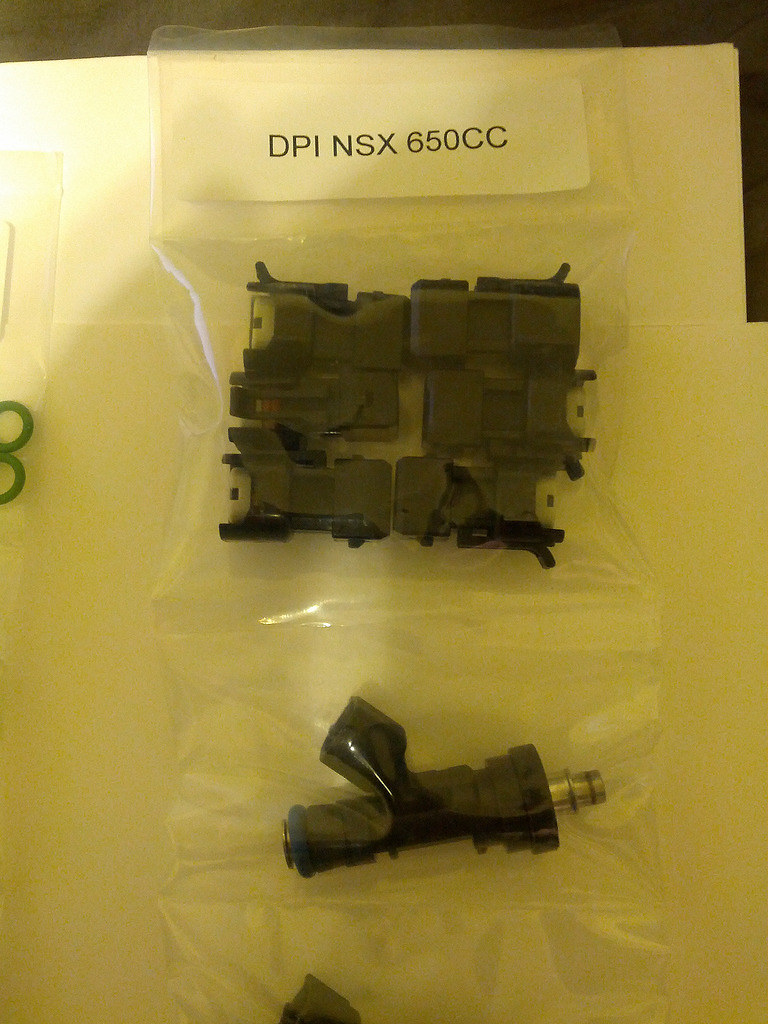
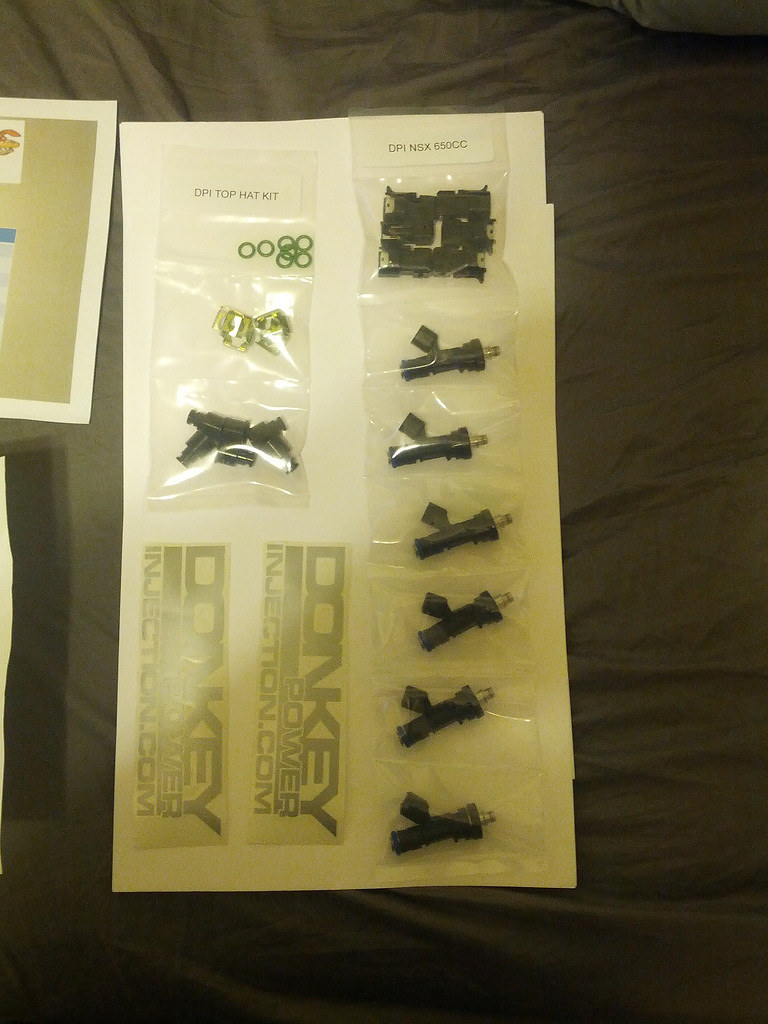
First thing I wanted to do was get the injectors ready for more power. Through working with a friend who owns an injector company I had a custom set of DPI Injectors(now called Evolved Injection) built for the NSX. I love the quality of these injectors and Wil loved them so much all the shop cars/custom builds run them as well.
 DPI Injectors by Jones
DPI Injectors 3 by Jones
 DPI Injectors 1 by Jones
 DPI Injectors 2 by Jones
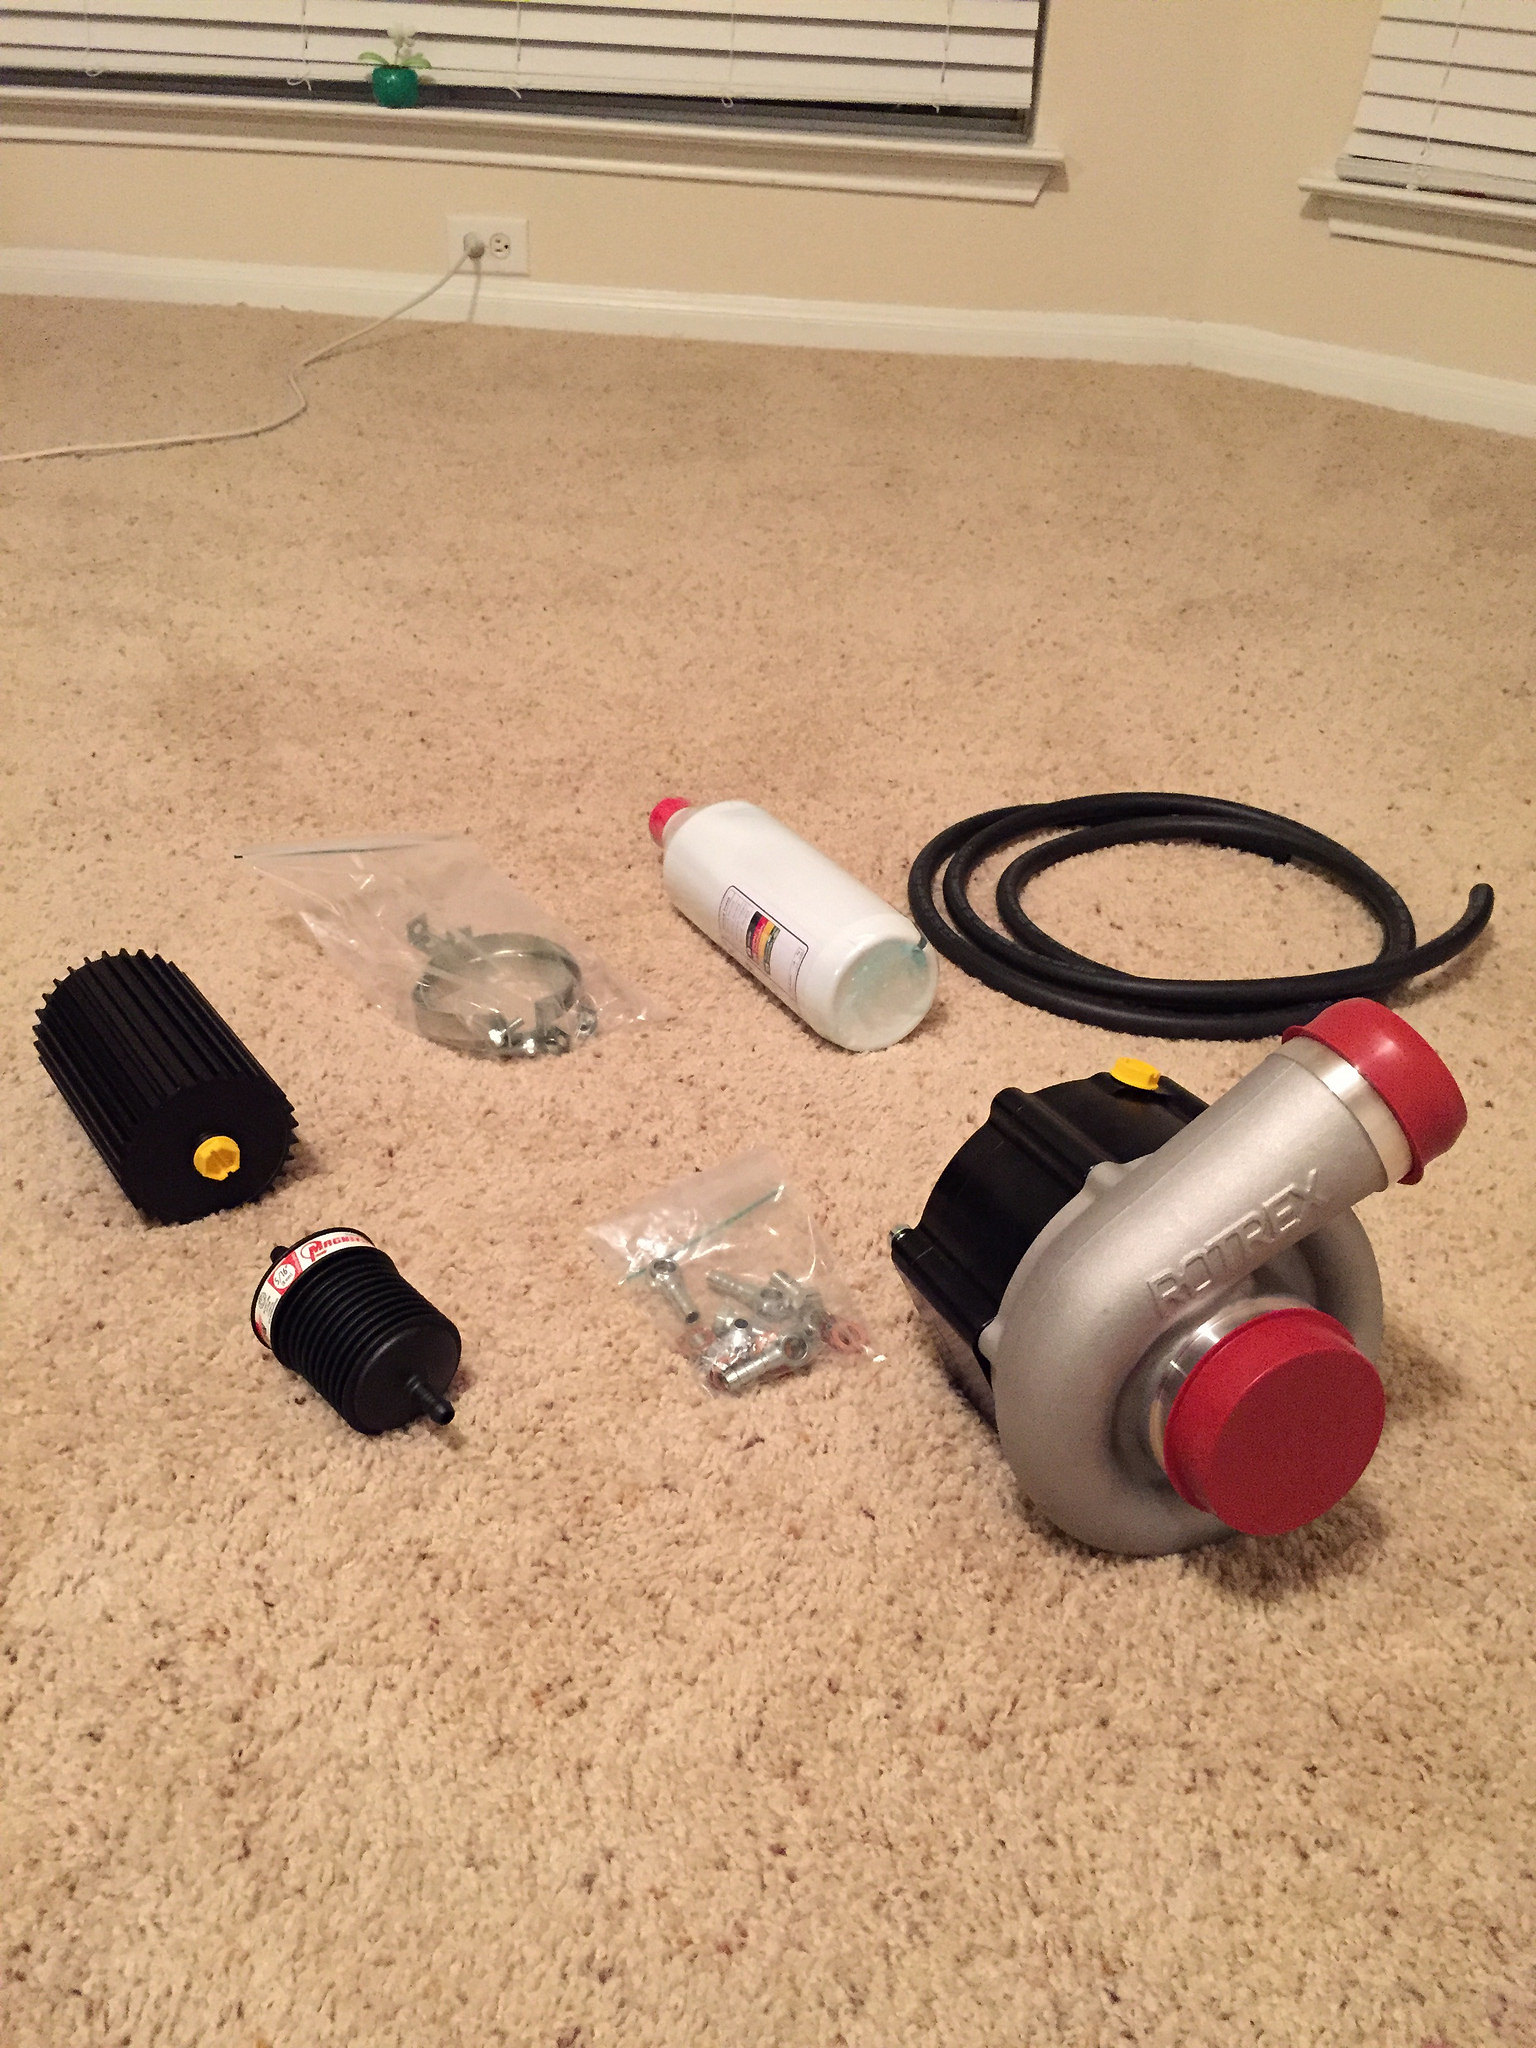
I also picked up a Rotrex kit from Ted at Grams for a good deal and decided that was the route I was looking to go down. I wanted the power to be consistent and linear. I feel this is one of the ways to get the v6 to feel like a v8 with any lag or whine. So in came the C38-91 rotrex kit with a 80mm(?) pulley? I forgot the size of the pulley off the top of my head, but there is a formula you fill out to get the proper pulley size and stay within the 5-10% overspin range you want to be. This pulley should do rather nicely and there are some tricks to tuning to help ensure the rotrex isn’t harmed when close to the rev limiter.
 Rotrex kit by Jones
After the rotrex came in I talked to [MENTION=4799]DDozier[/MENTION] on her about his intercooler setup and bought one back when he had his group buy run of them. There were some massaging issues with the welding of the plates that needed to happen but Wil got it squared away nicely.
Intercooler 1 by Jones
 Intercooler by Jones
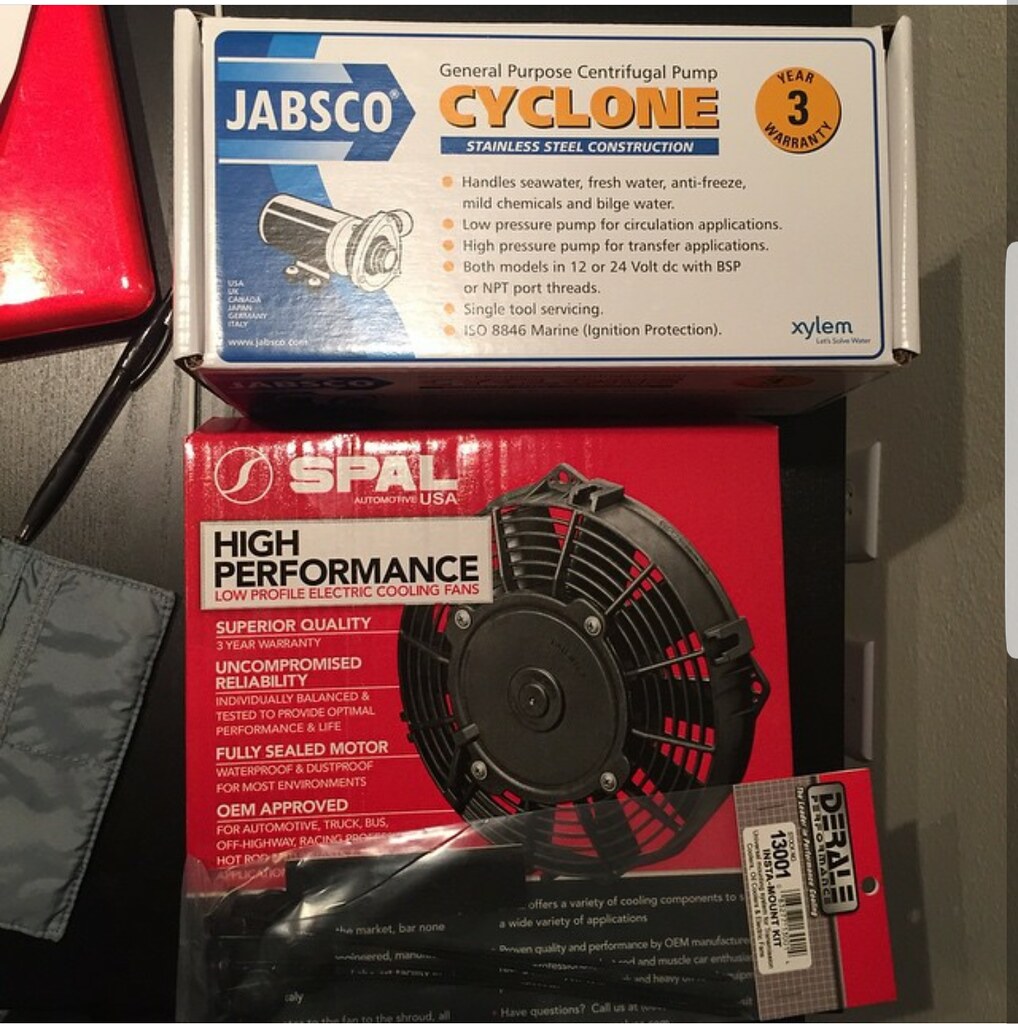
I lost some of my older pictures when I traded in my phone for a new one so no internal welded images, but it looked great and came out exactly how we wanted it to. After that was completed I ordered some parts for the front of the NSX to help with cooling. Heat exchanger, Jabsco water pump, fuel filter, SPAL fan for the rotrex oil cooler, tial recirc, ATI super damper, and some other odd parts to help complete the front cooling system.
 Jabsco pump by Jones
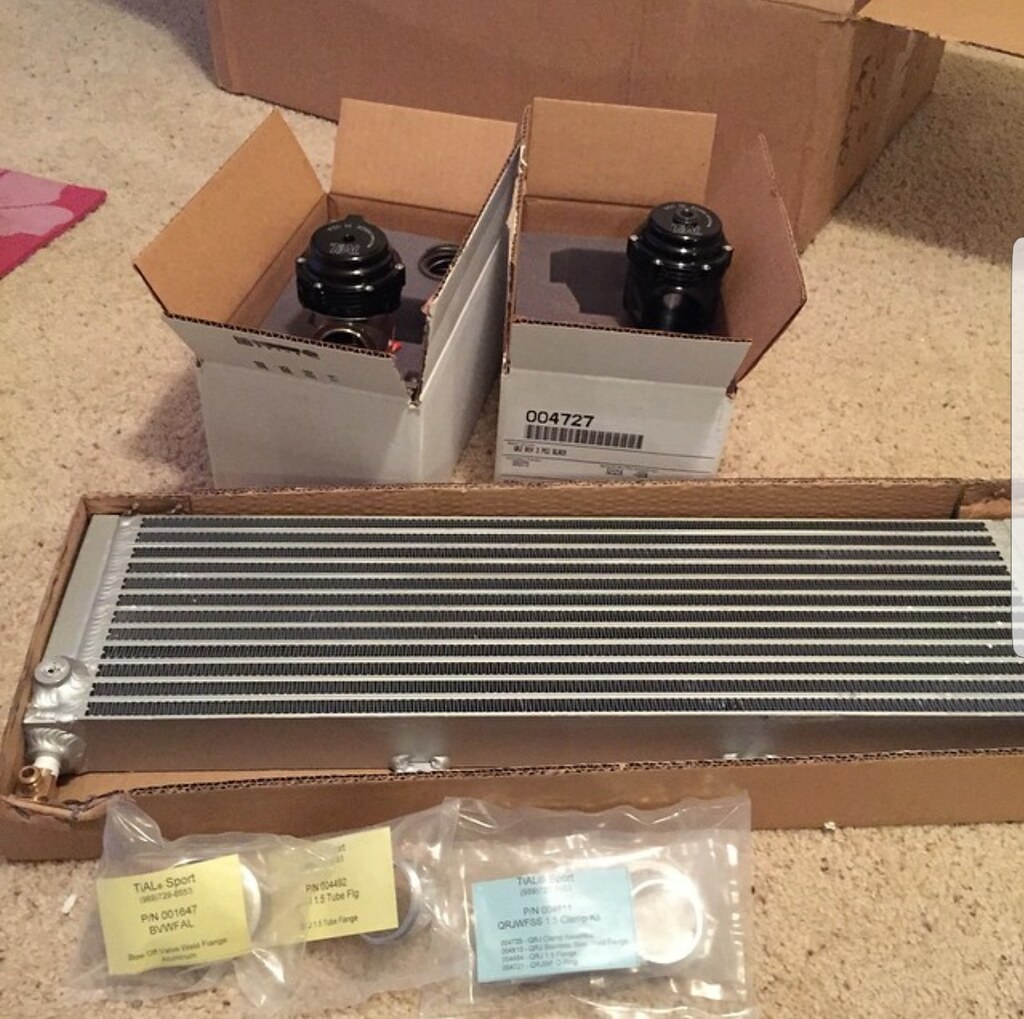 Heat exchanger and recirc by Jones
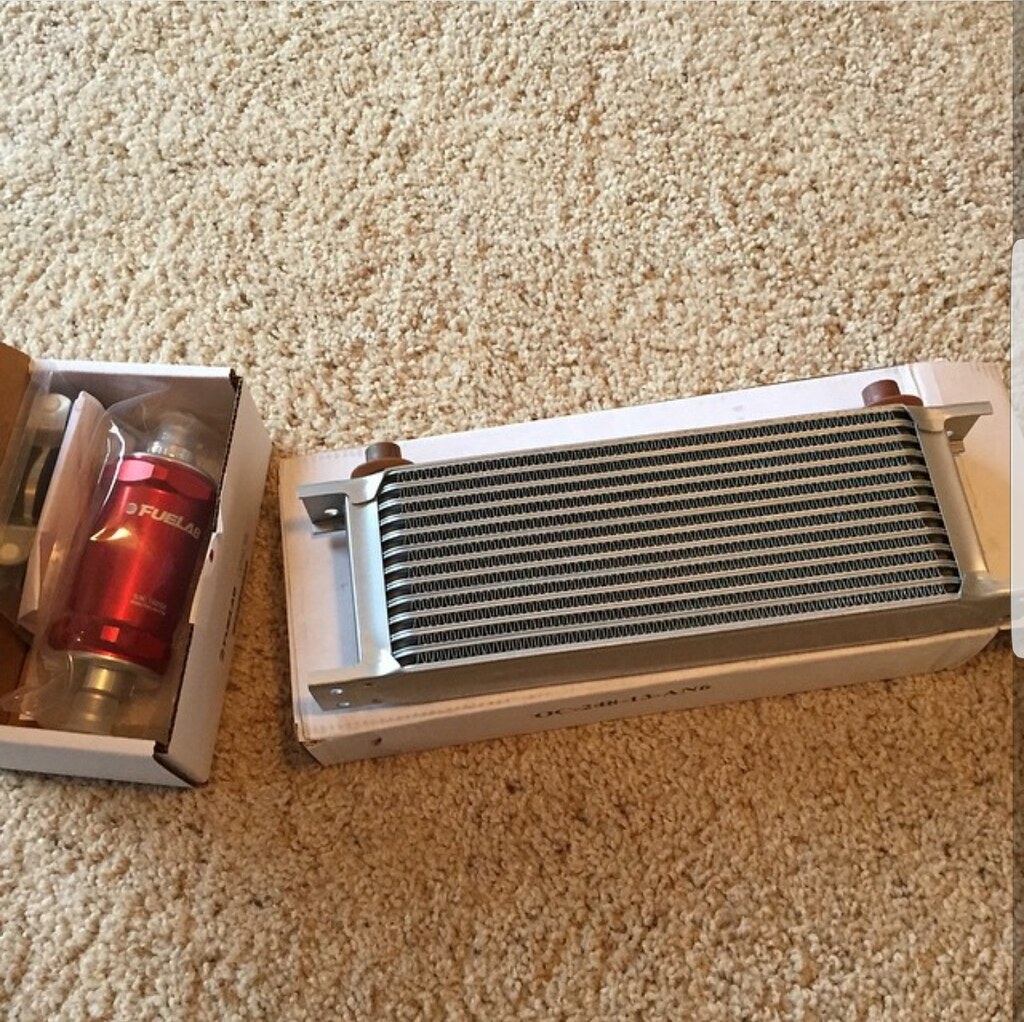 fuel filter and rotrex oil cooler by Jones
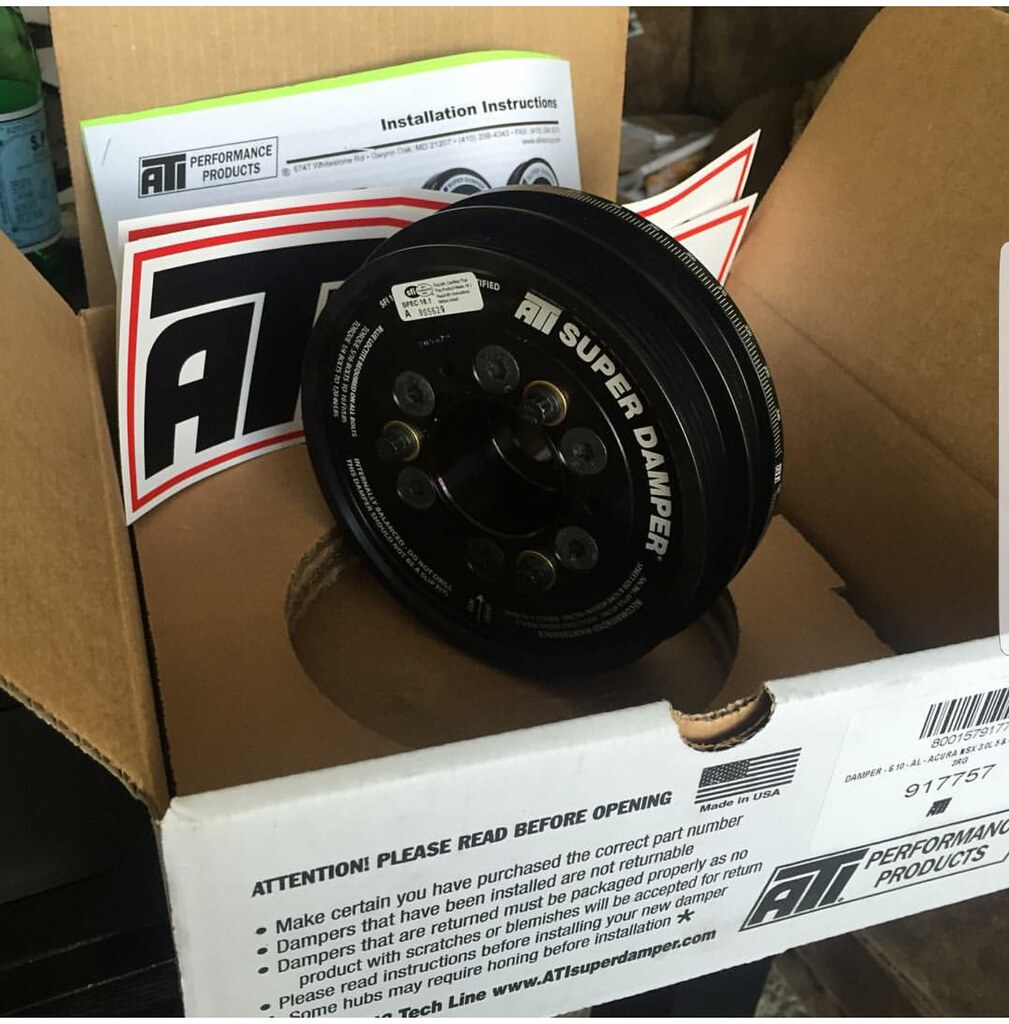 ati super damper by Jones
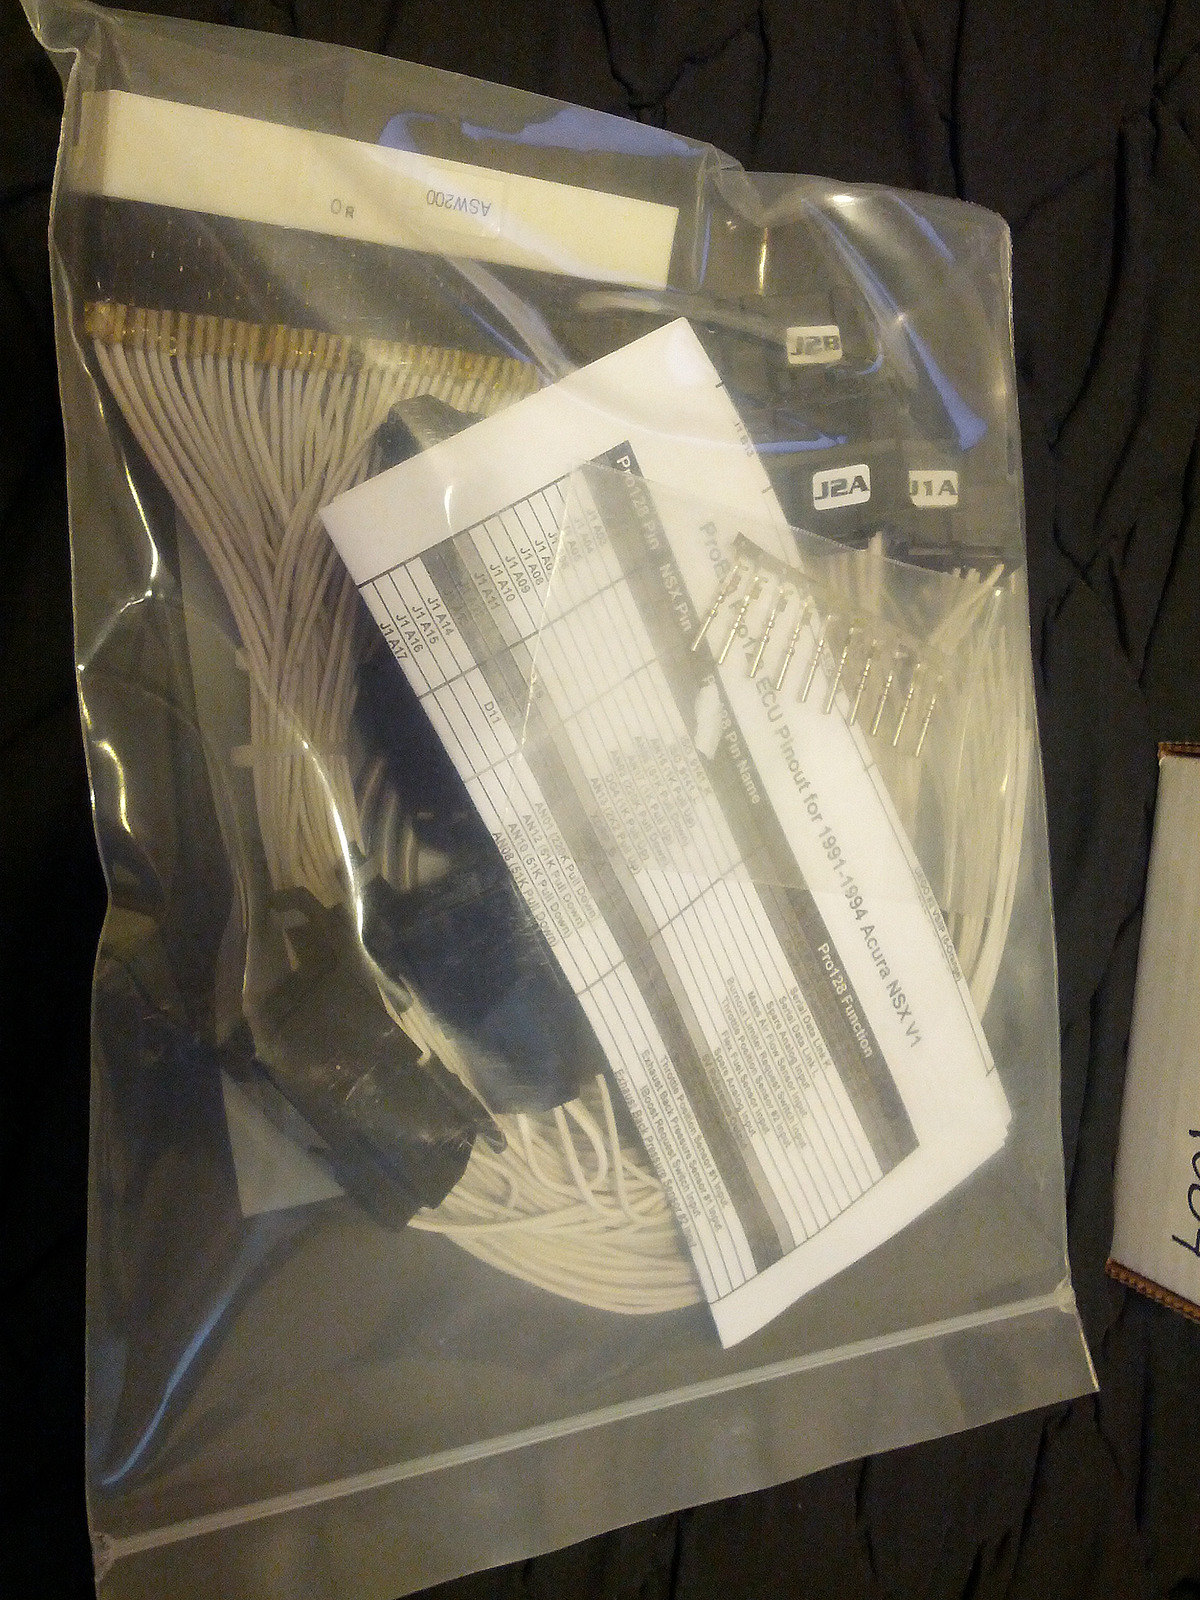
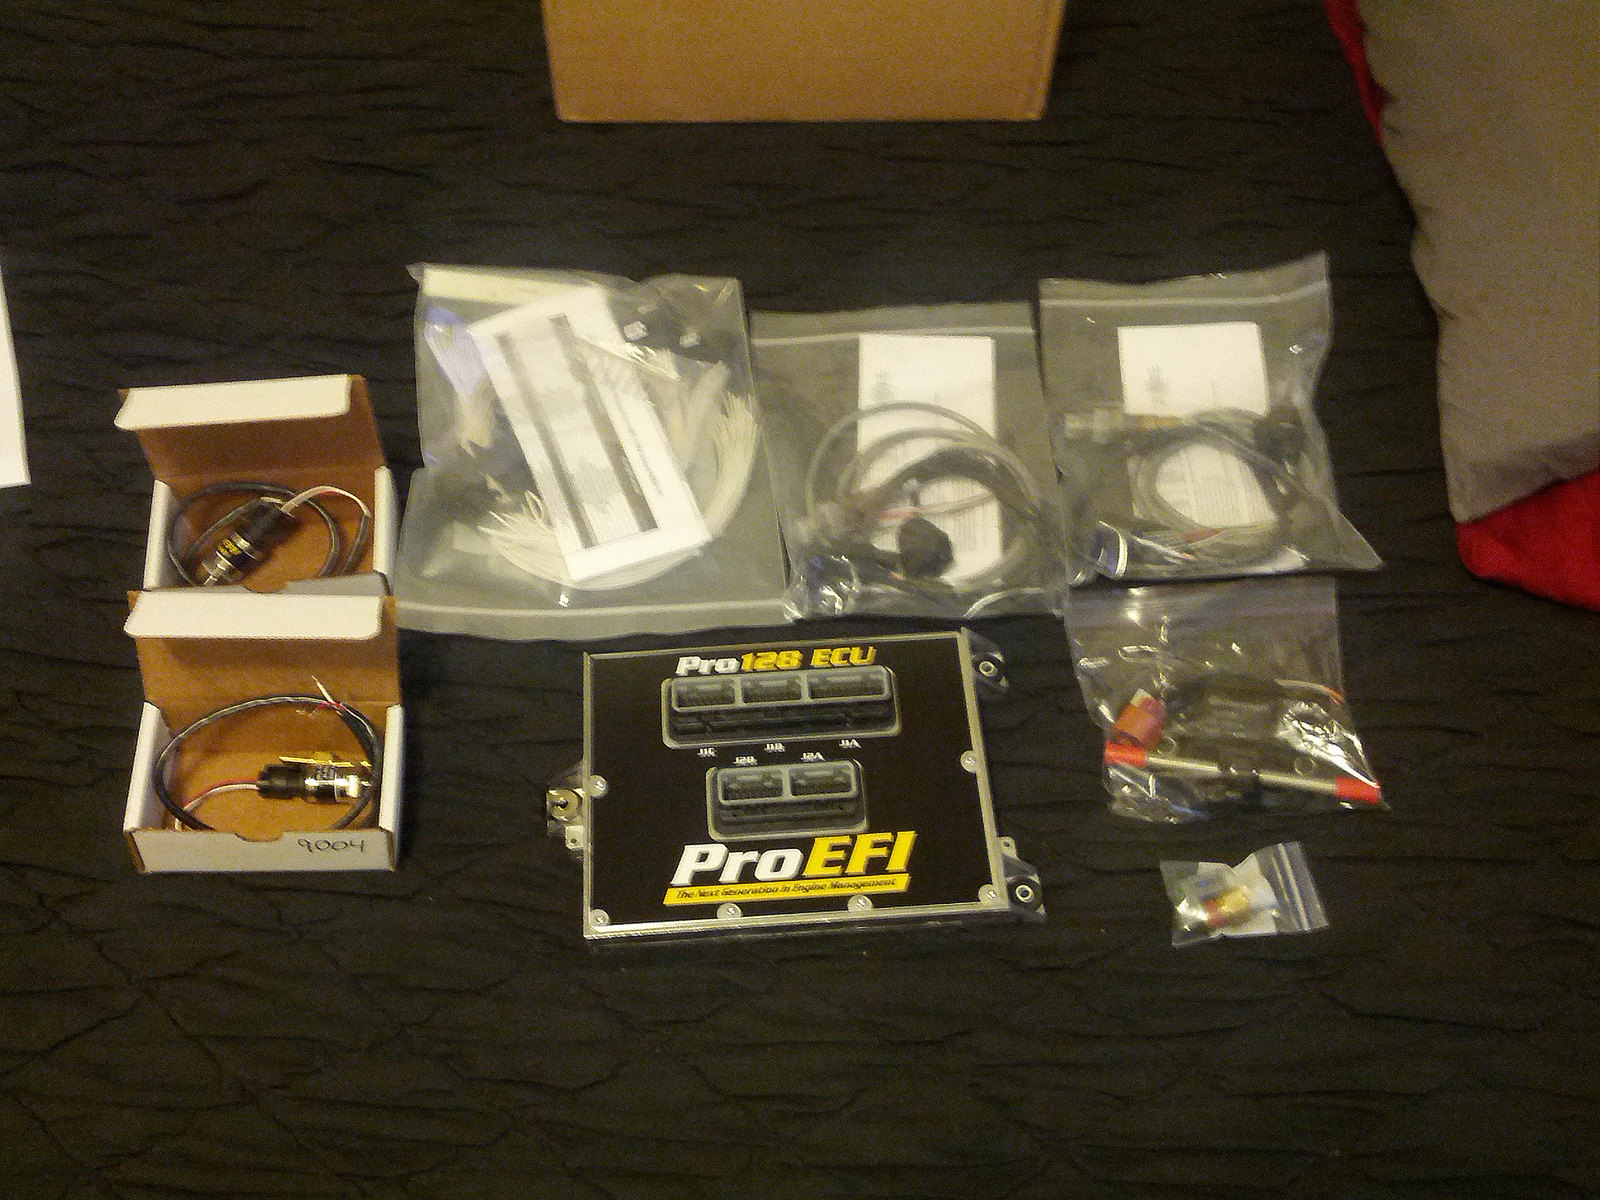
After this my standalone came in with a custom made wire harness.
 proefi 3 by Jones
proefi 2 by Jones
 proefi 1 by Jones
Once the parts were in the shop built a custom bracket for the rotrex and everything was mocked up for fitment clearances.
 Inkednsx rotrex shot_LI by Jones
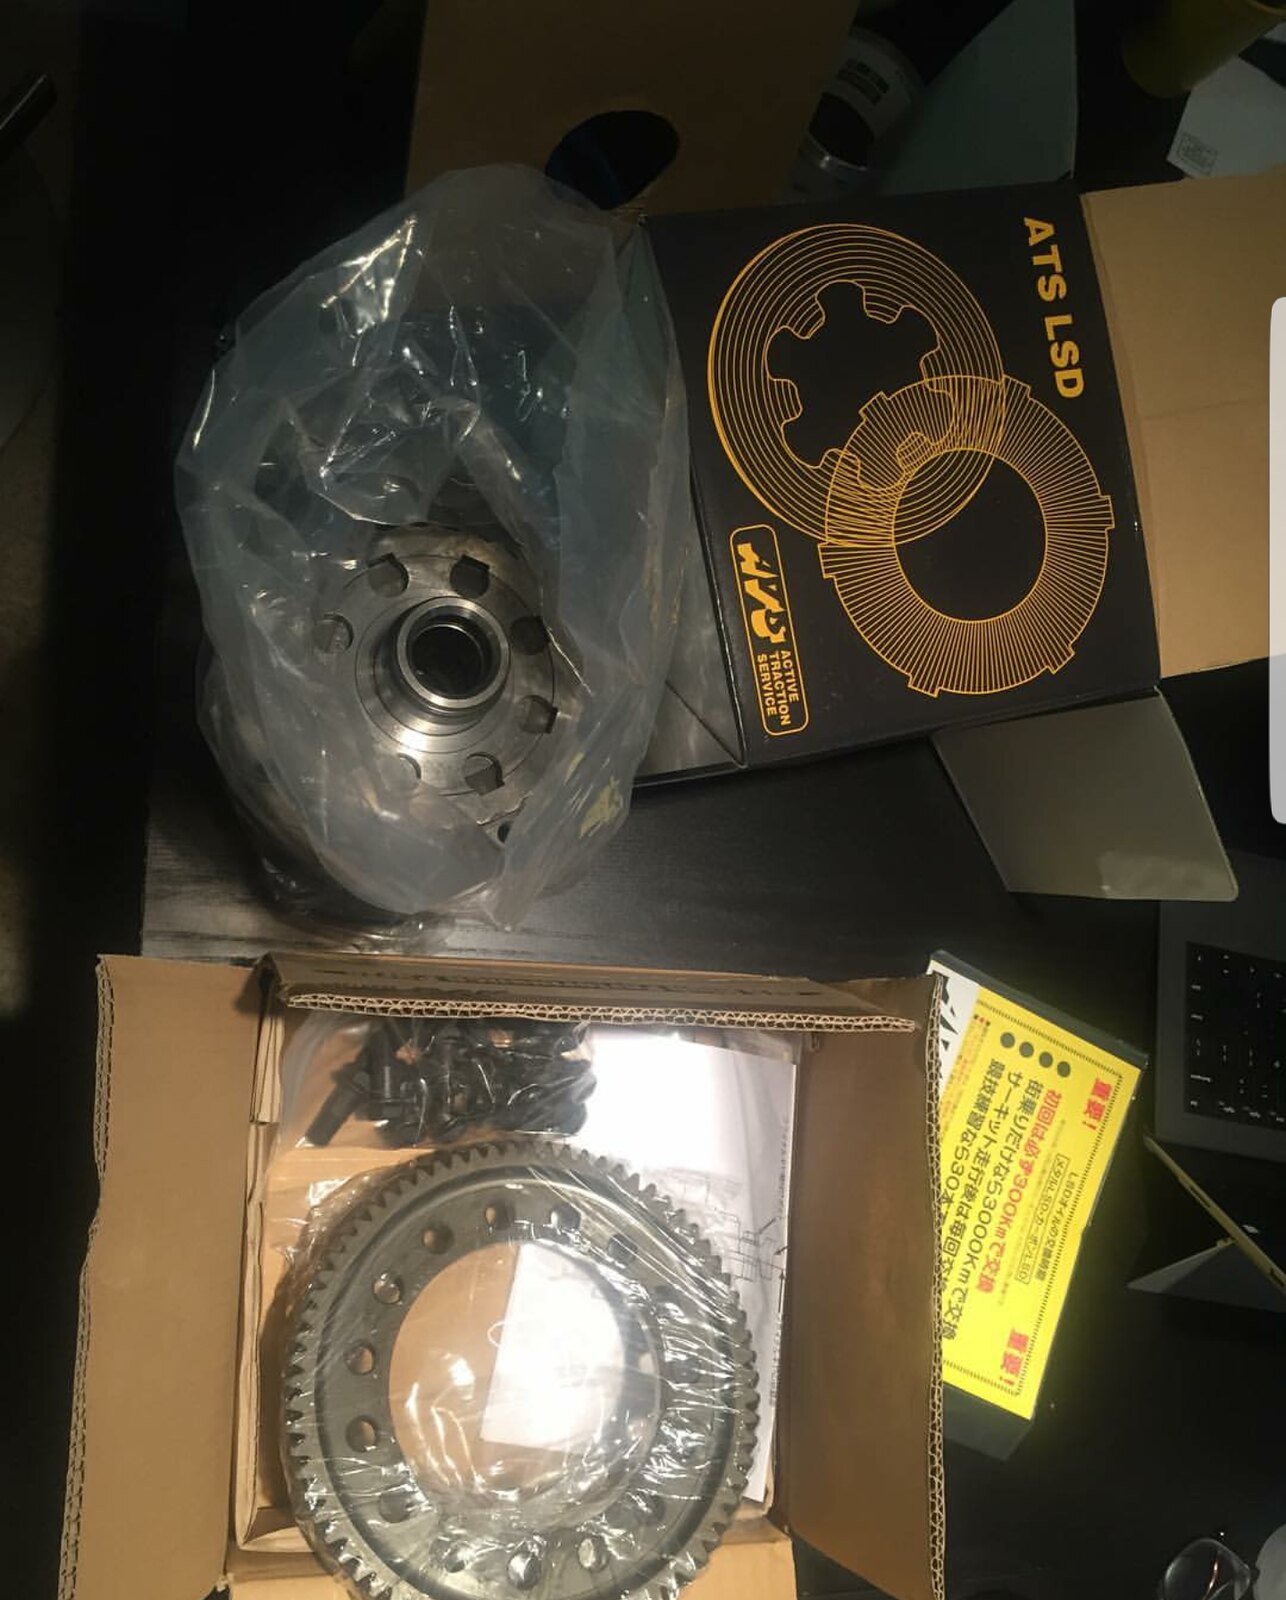
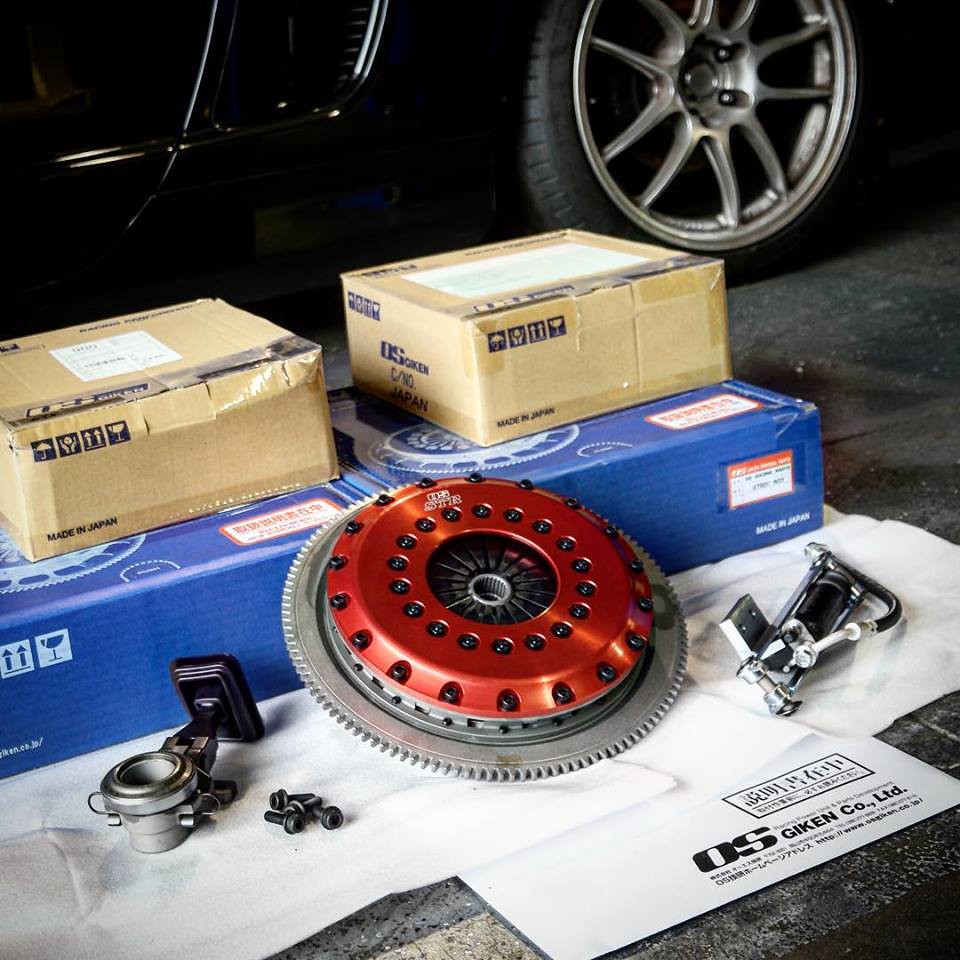
Everything on the engine side was mocked up and wired properly. Then I talked to Wil about thinking I needed to add some short gears into the transmission. One thing turned to another and before I knew it I bought short gears, an OS Giken twin plate, ATS LSD, ATS final gear, and miscellaneous parts to completely rebuild/replace every part in the 5 speed.
 ATS LSD by Jones
 dali billet oil pump gear and flat iron short gears by Jones
 11046783_10153446600133893_1205642787486848339_n by Jones
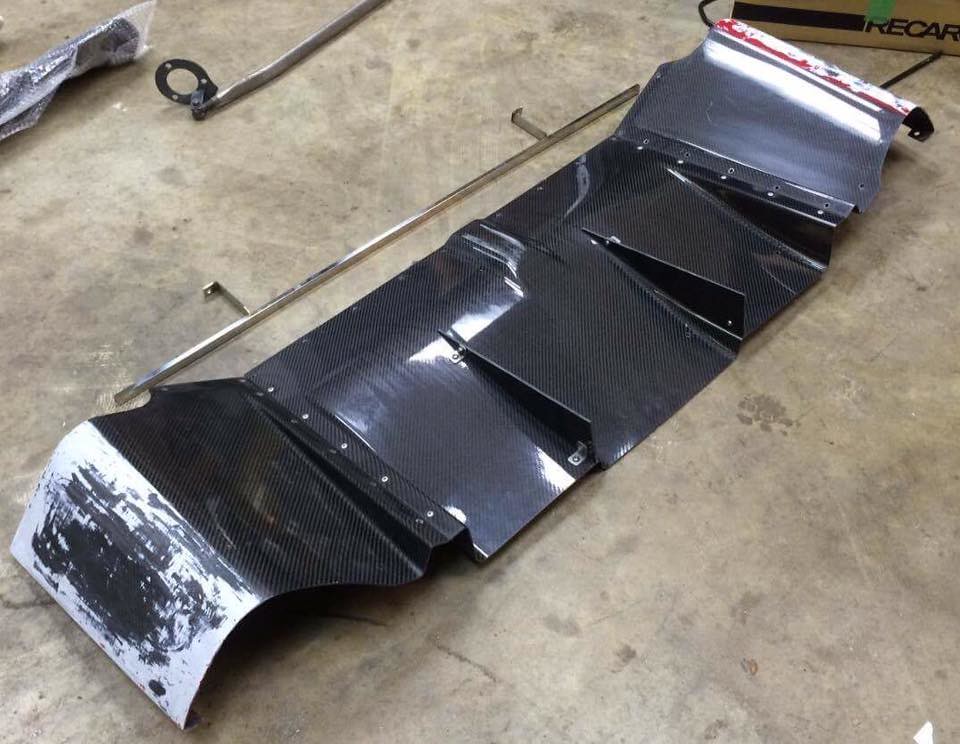
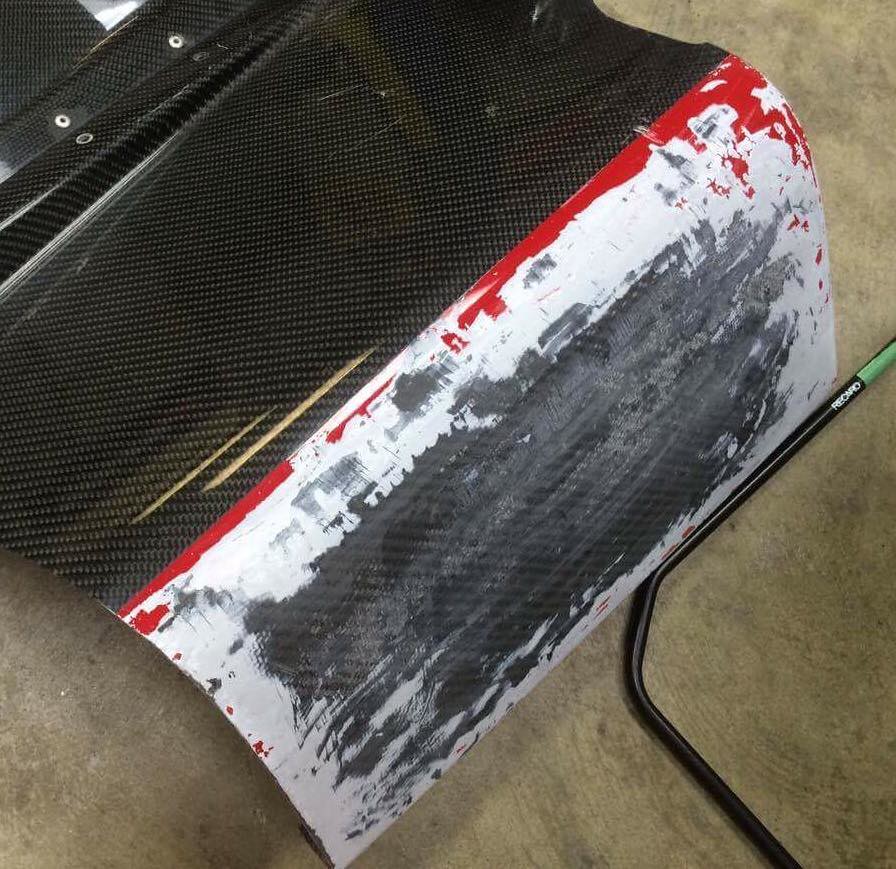
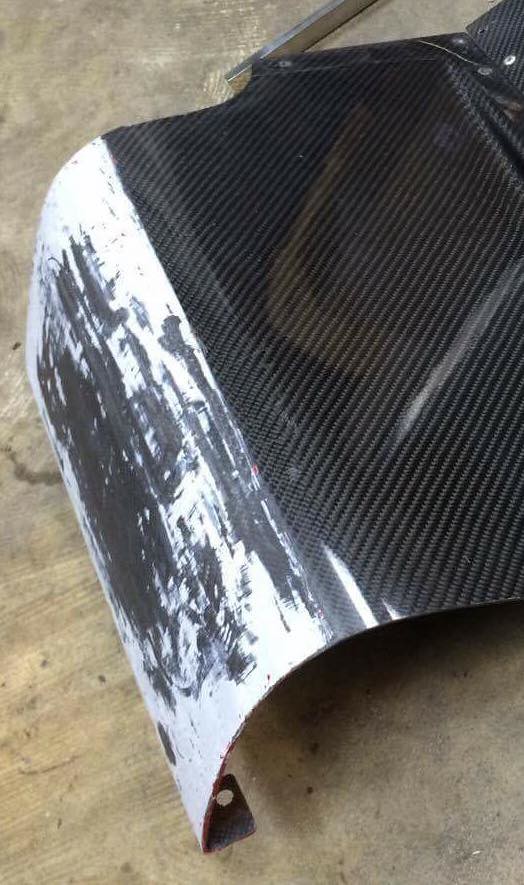
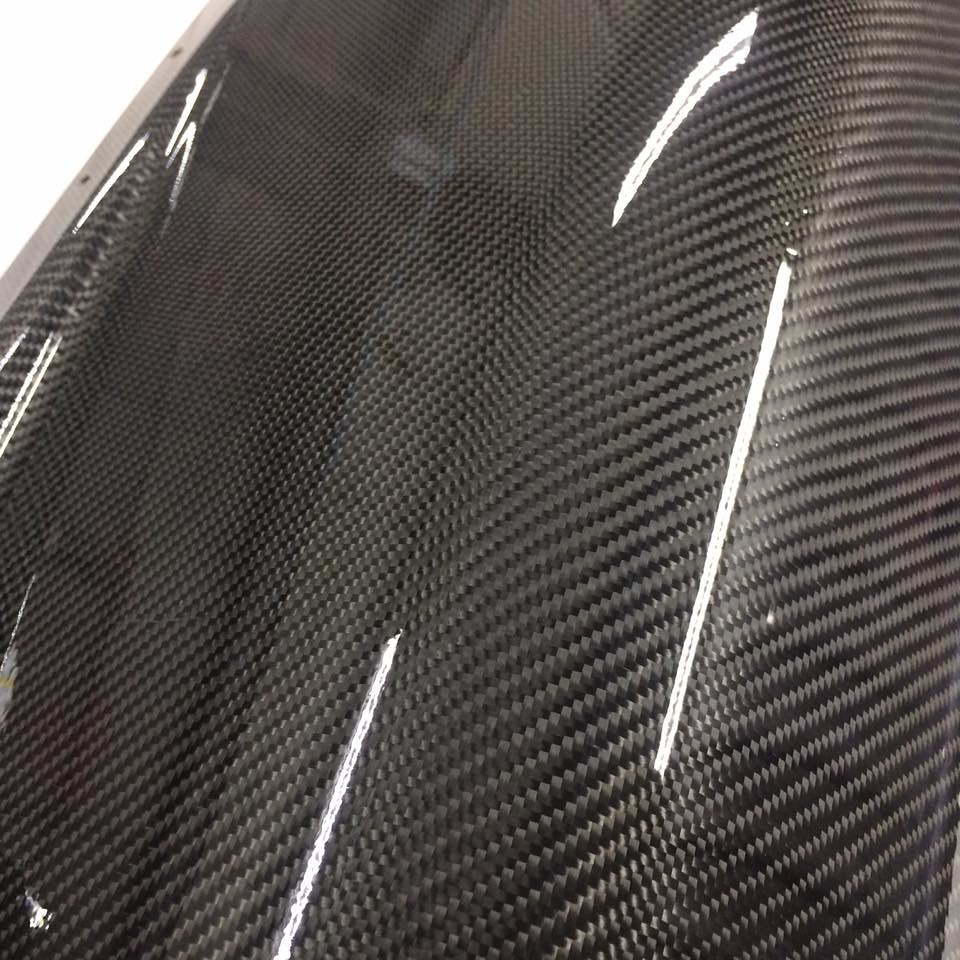
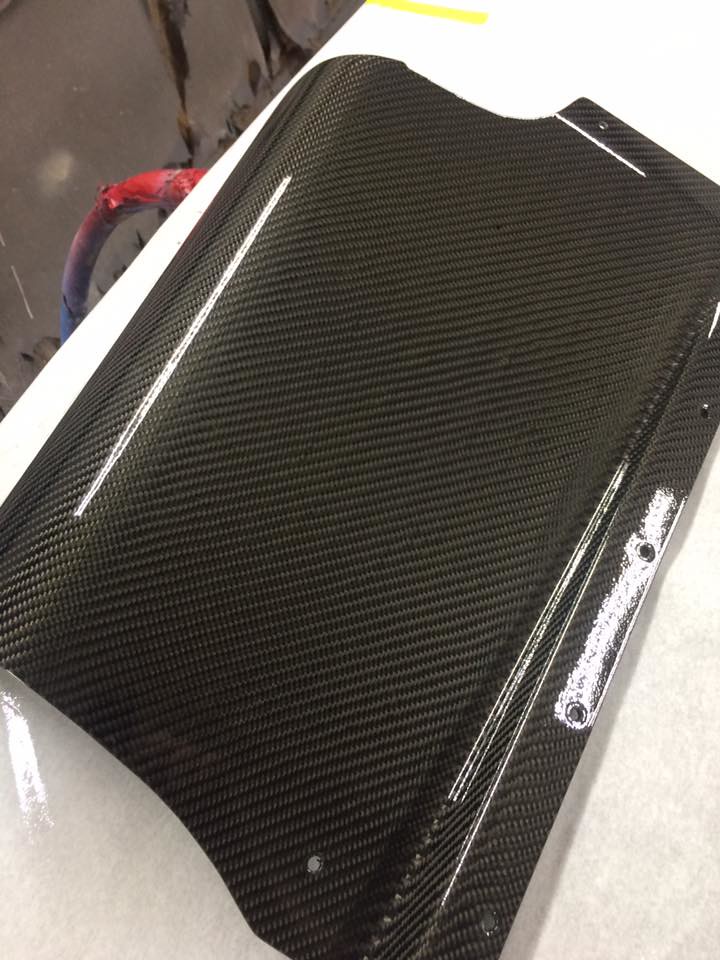
While the transmission was being built I picked up a diffuser that was physically in great condition, but superficially it was rough. Especially on the wings of the Taitec diffuser. Wil has a good relationship with a shop called Apex Auto Works and they took the multiple-layered painted diffuser and completely refreshed it back to new. They also added extra layers of clear in some specific locations that rocks are known to hit off of to help protect it. Notice how they didn’t remove the paint and add a black paint mixed clear coat to cover up the weave like other shops do.
 Taitec Diffuser by Jones
 Apex Auto Works Diffuser Before by Jones
 Apex Auto Works Diffuser Before 2 by Jones
 Apex Auto Works Diffuser Before 1 by Jones
 Apex Auto Works Diffuser After 1 by Jones
 Apex Auto Works Diffuser After 2 by Jones
 Apex Auto Works Diffuser After by Jones
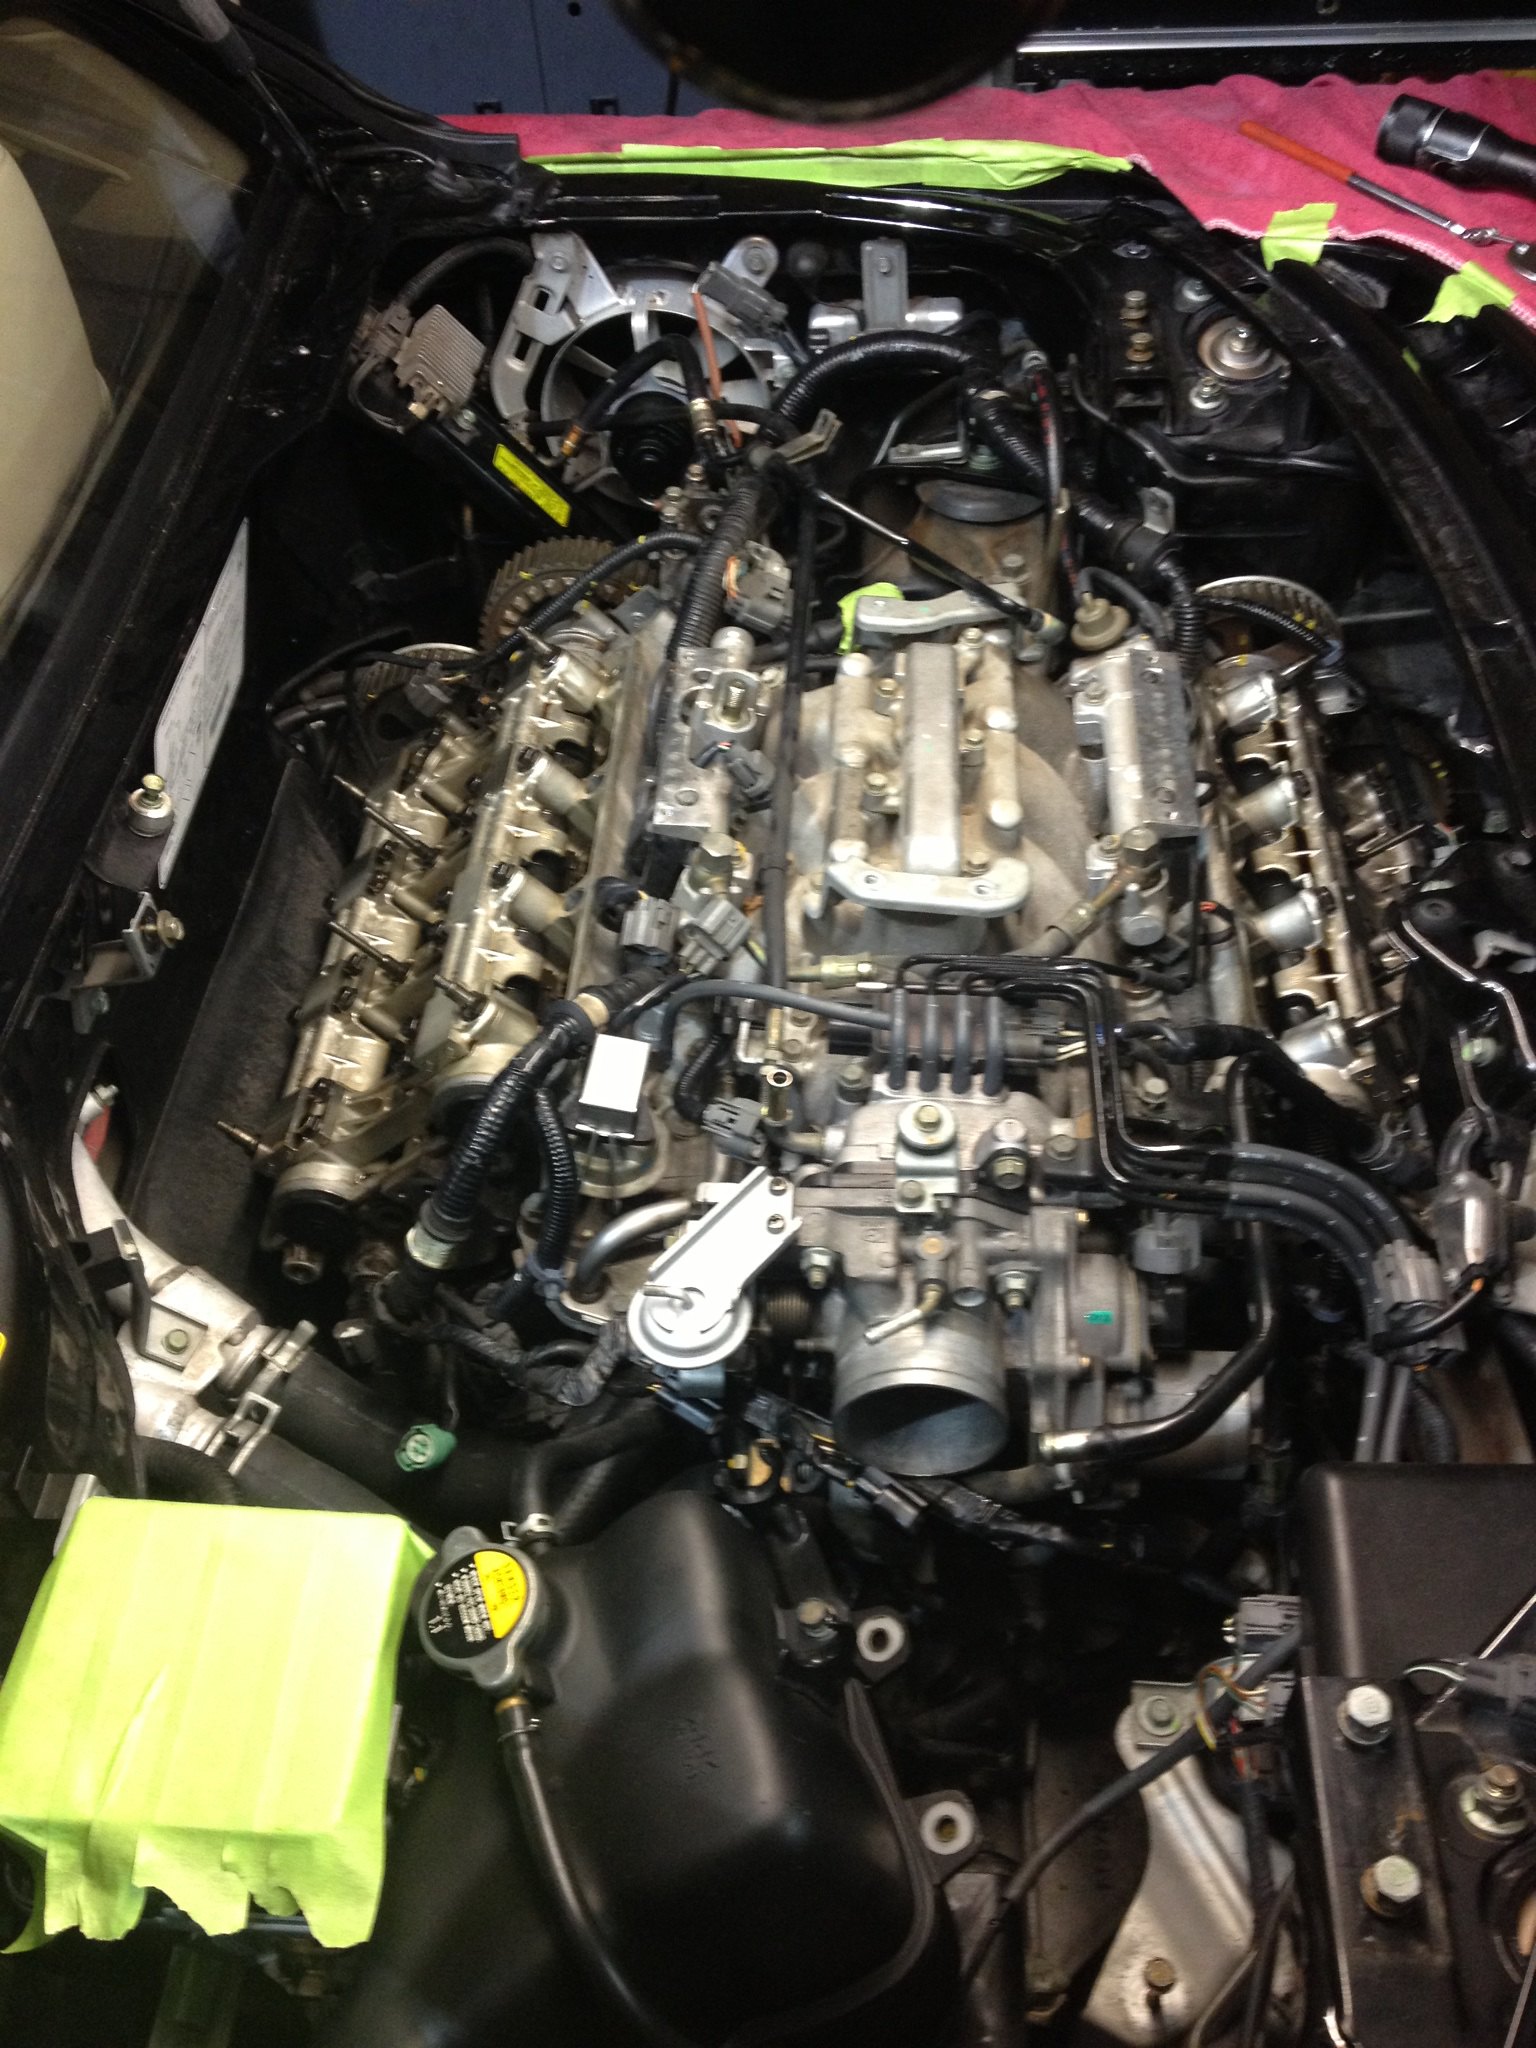
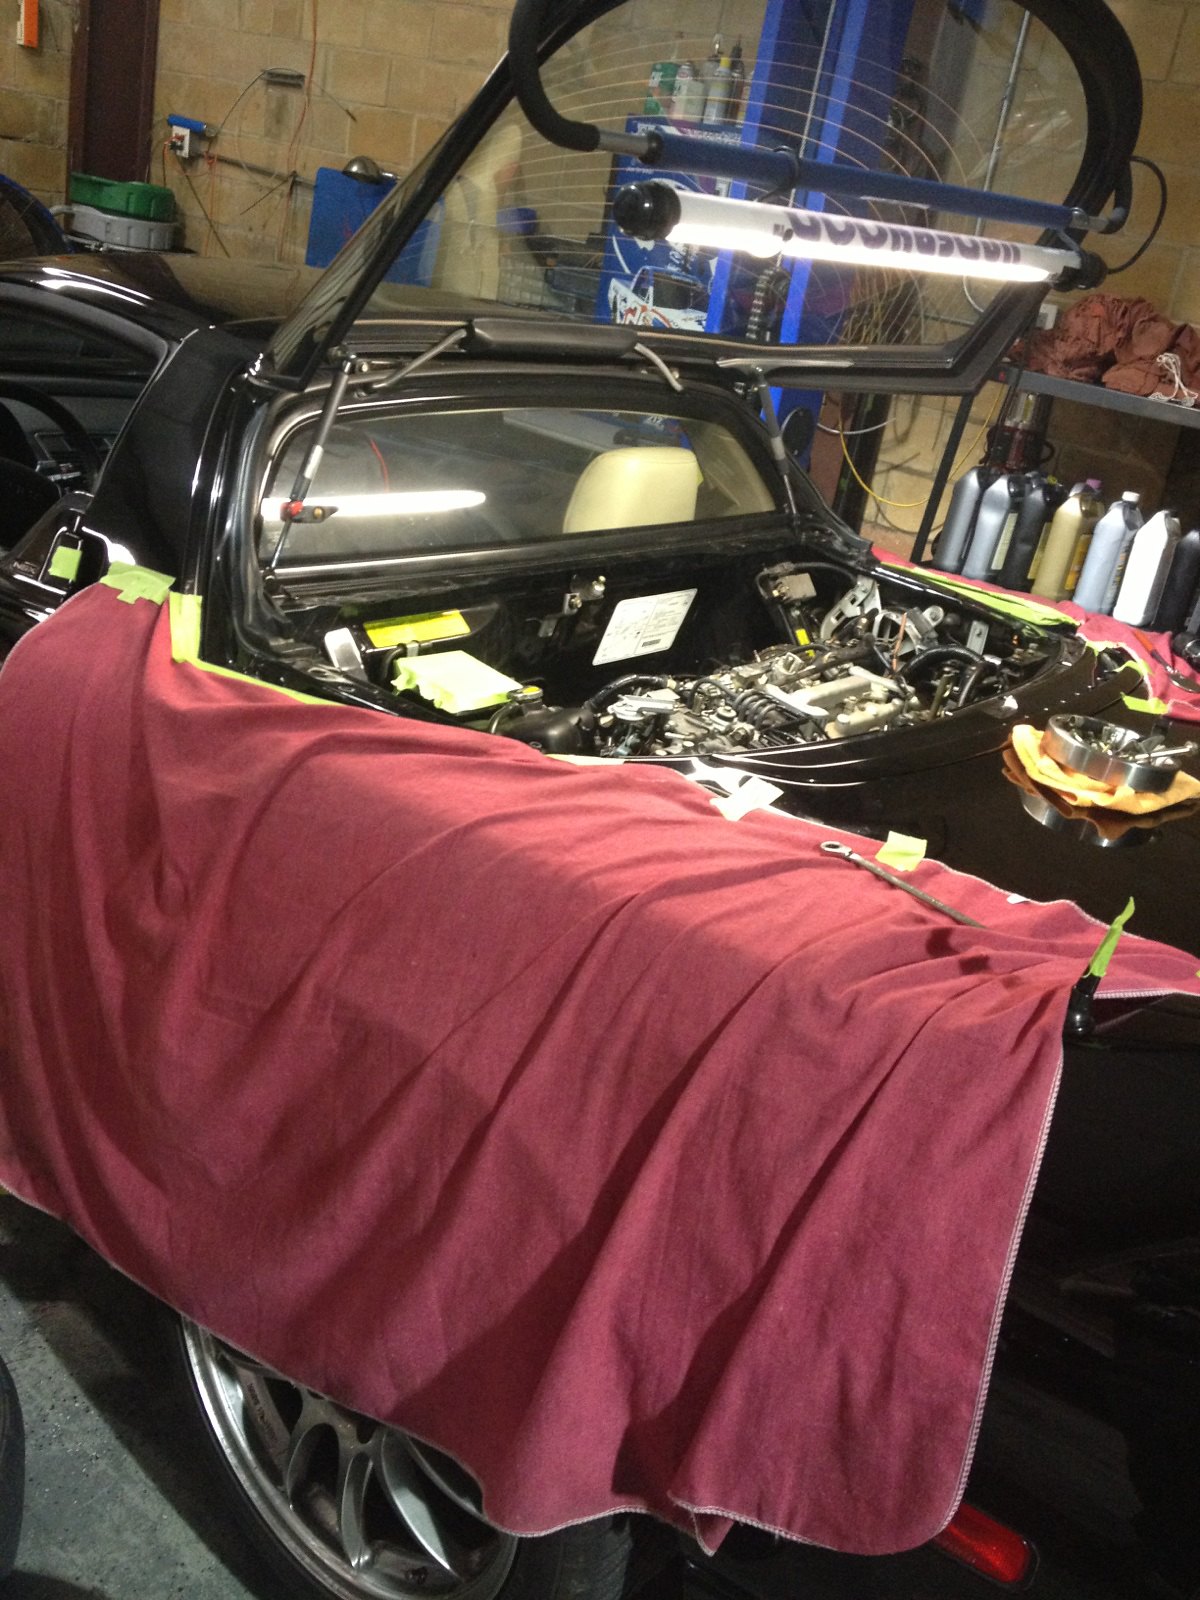
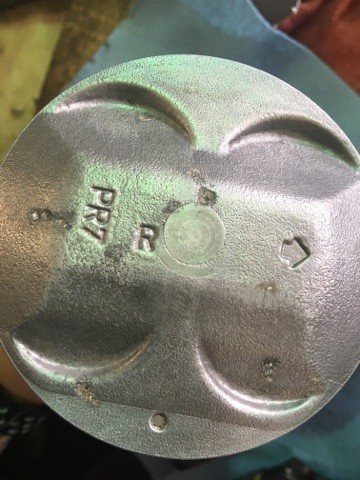
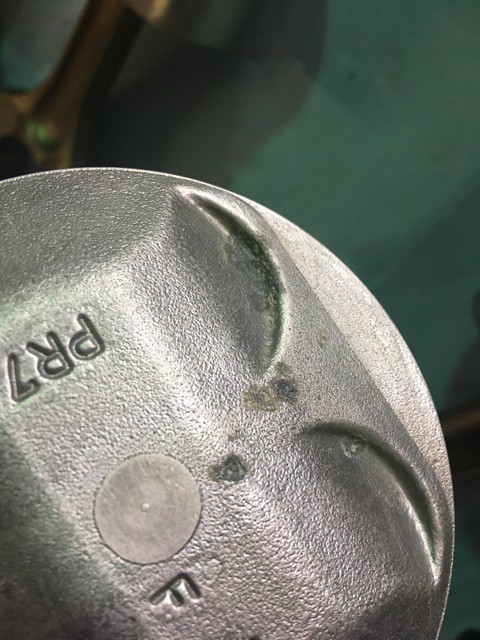
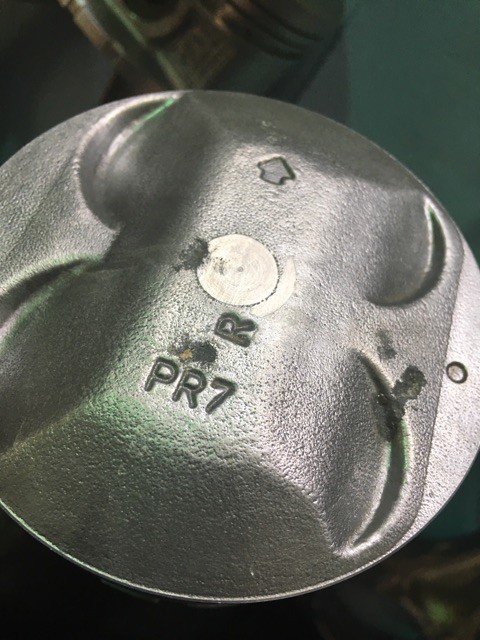
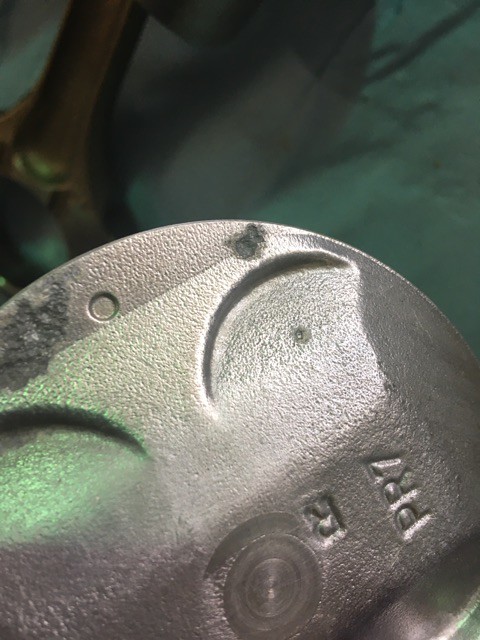
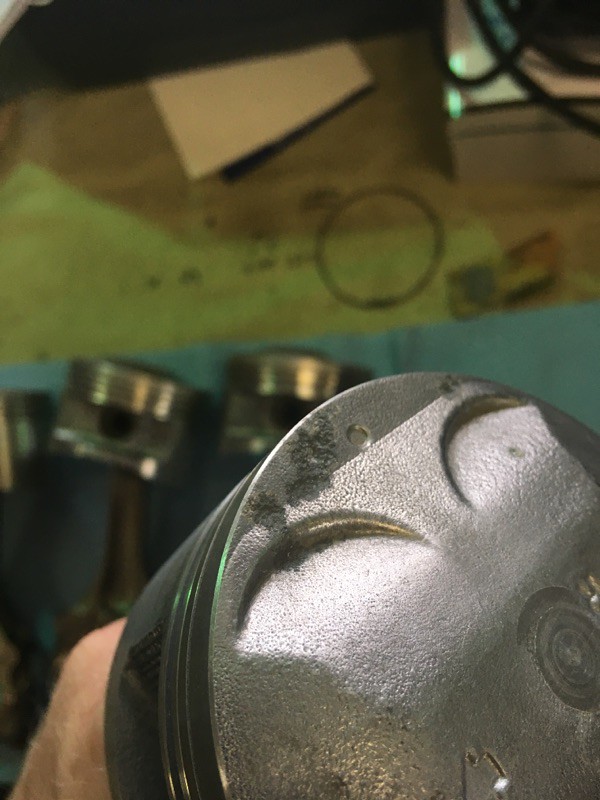
While the transmission was already out I figured why don’t we just refresh the engine some. A refresh of the engine turned into pulling the motor out and realizing that the oem pistons were not in good condition and it looked unsafe to boost on these original pistons.
 IMG_5637_1494947074360 by Jones
 IMG_5636_1494947074374 by Jones
IMG_5635_1494947074377 by Jones
 IMG_5634_1494947074387 by Jones
 IMG_5633_1494947074392 by Jones
 IMG_5632_1494947074396 by Jones
 IMG_5631_1494947074398 by Jones
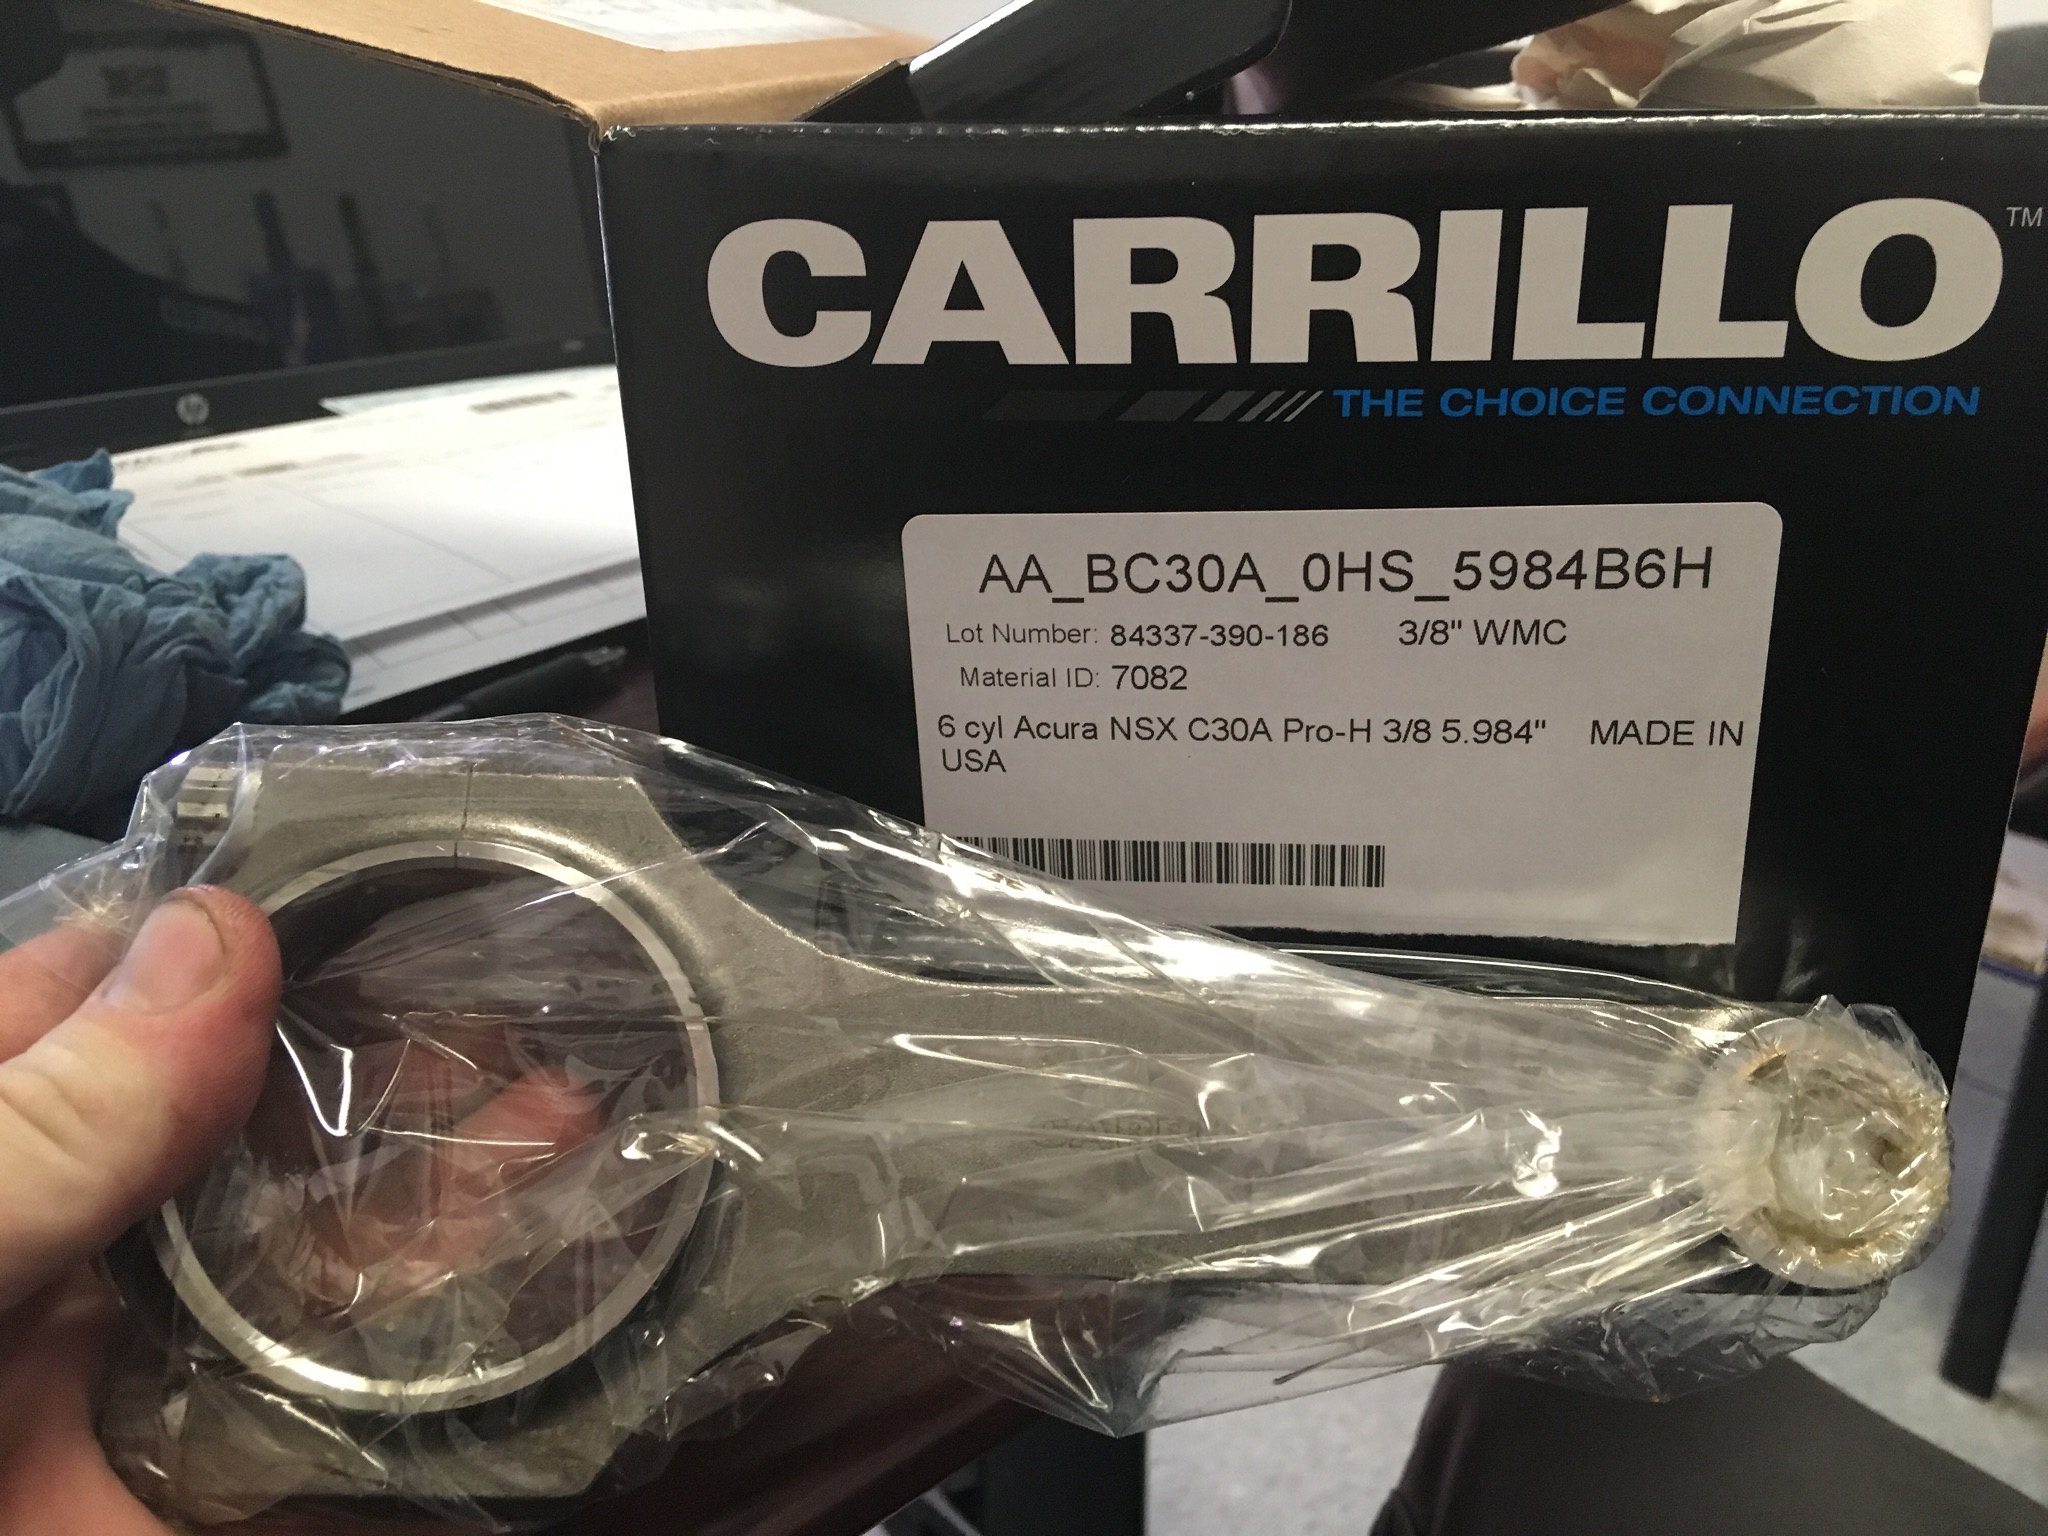
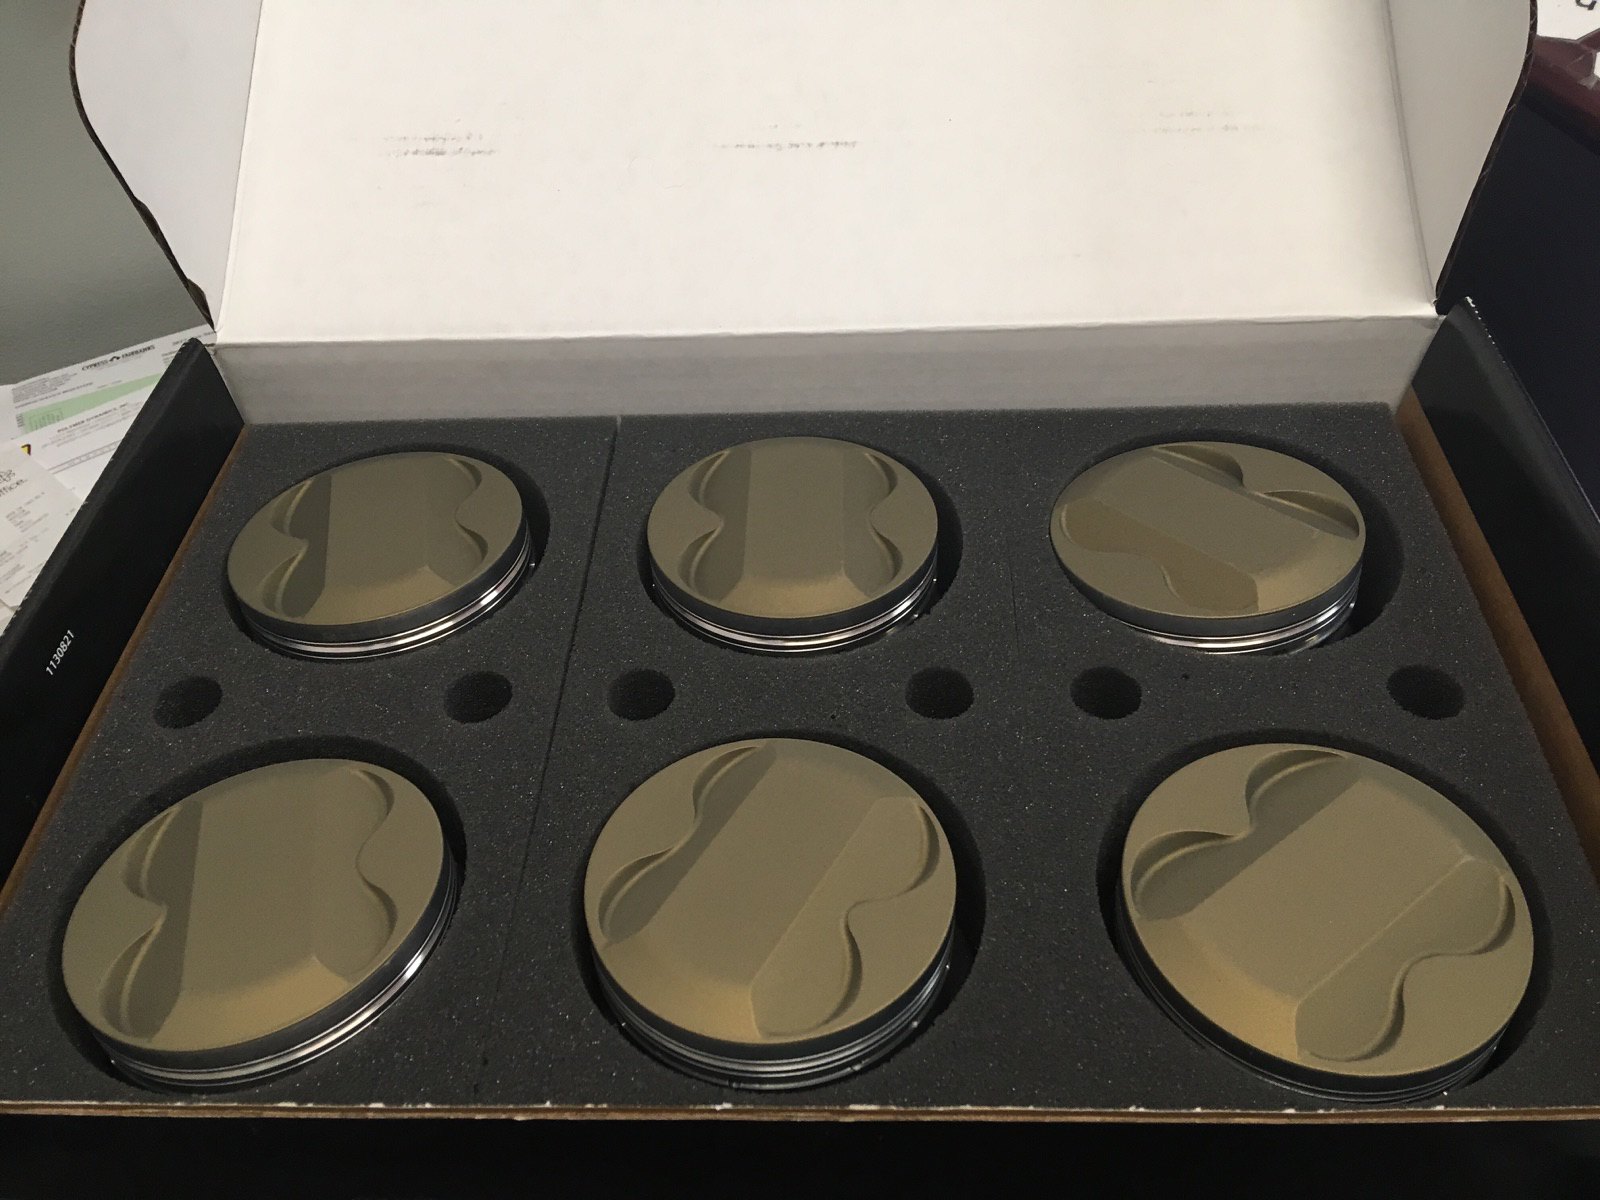
Sooooooo next the shop broke the engine completely down, pulled out the pistons, rods, etc and the heads went off to the local head shop to get refreshed and ported. While that was going on I ordered some new pistons and rods. Once they came back Wil sent the pistons off to get two different coatings on them which came out fantastic.
 Nsx parts by Jones
Nsx parts by Jones
 Nsx parts by Jones
Nsx parts by Jones
 Nsx parts by Jones
 Nsx parts by Jones
 Nsx parts by Jones
The heads came back from the machine shop cleaned up and refreshed with a PnP.
 Nsx parts by Jones
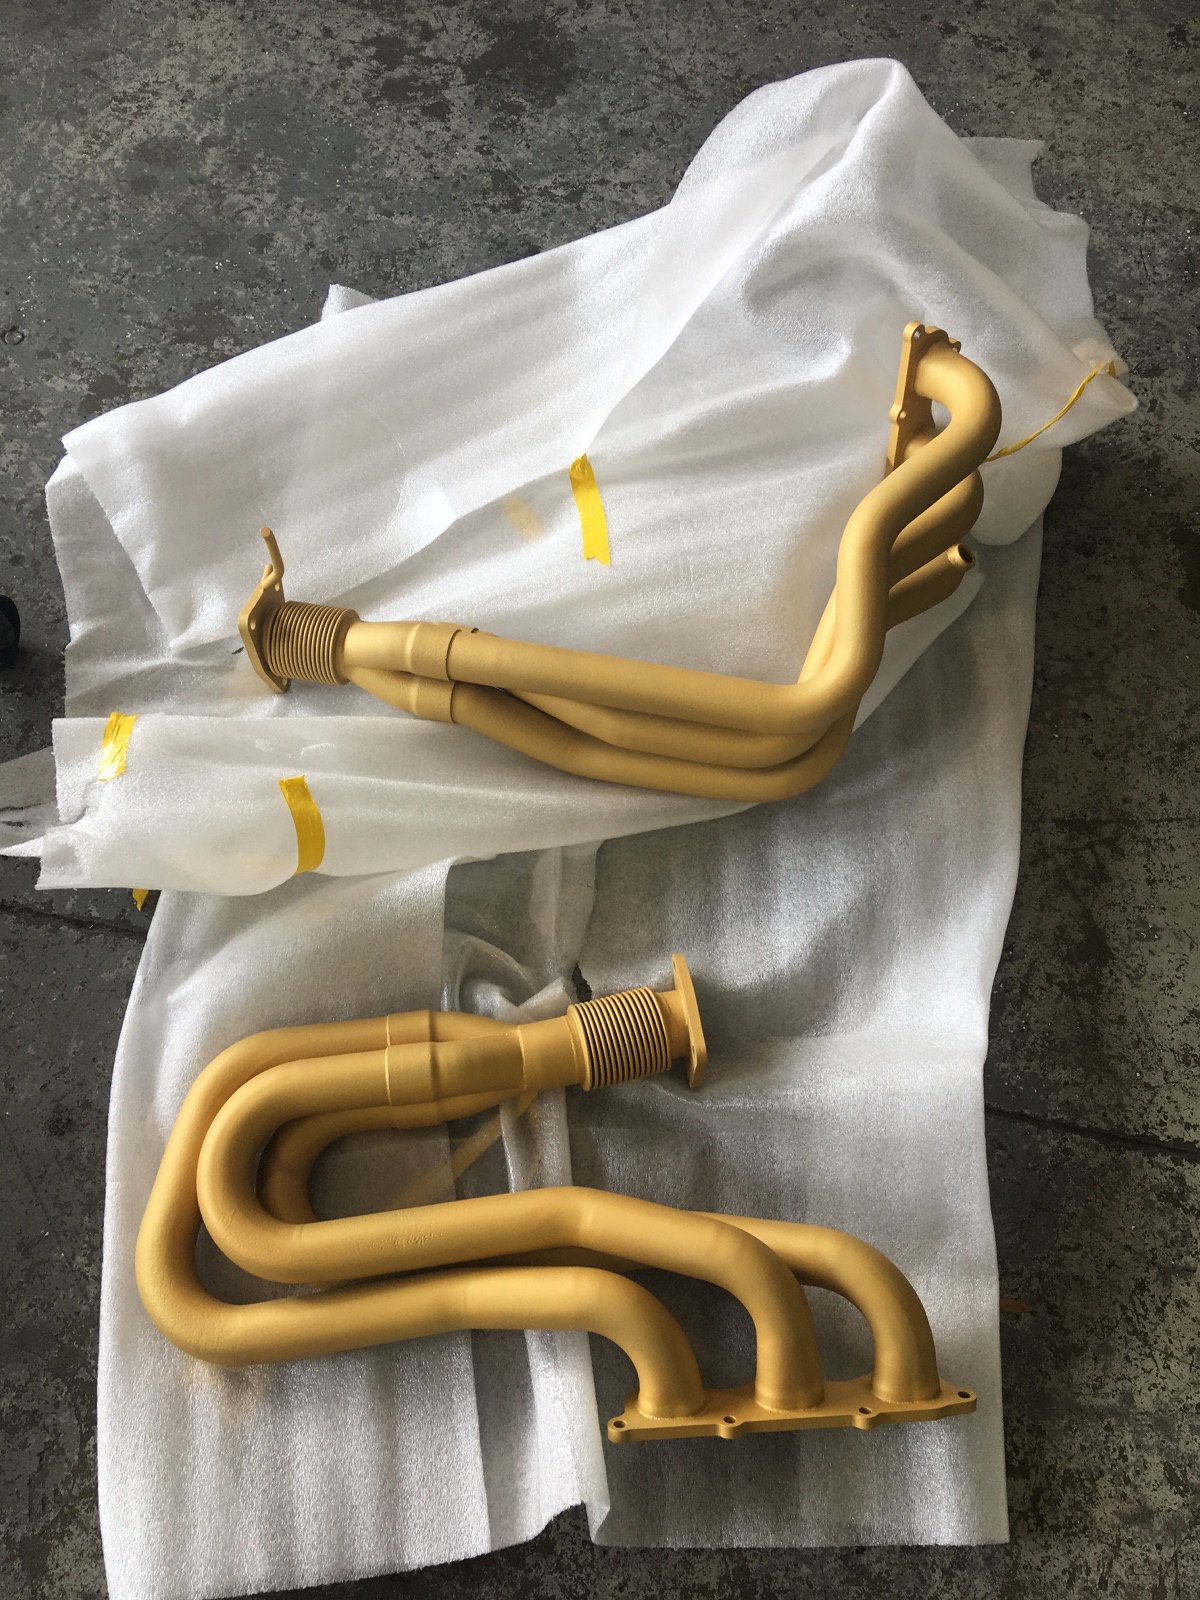
After that the comptech headers came back in from getting a cerakote coating applied to them adfter being cleaned up.
 Nsx parts by Jones
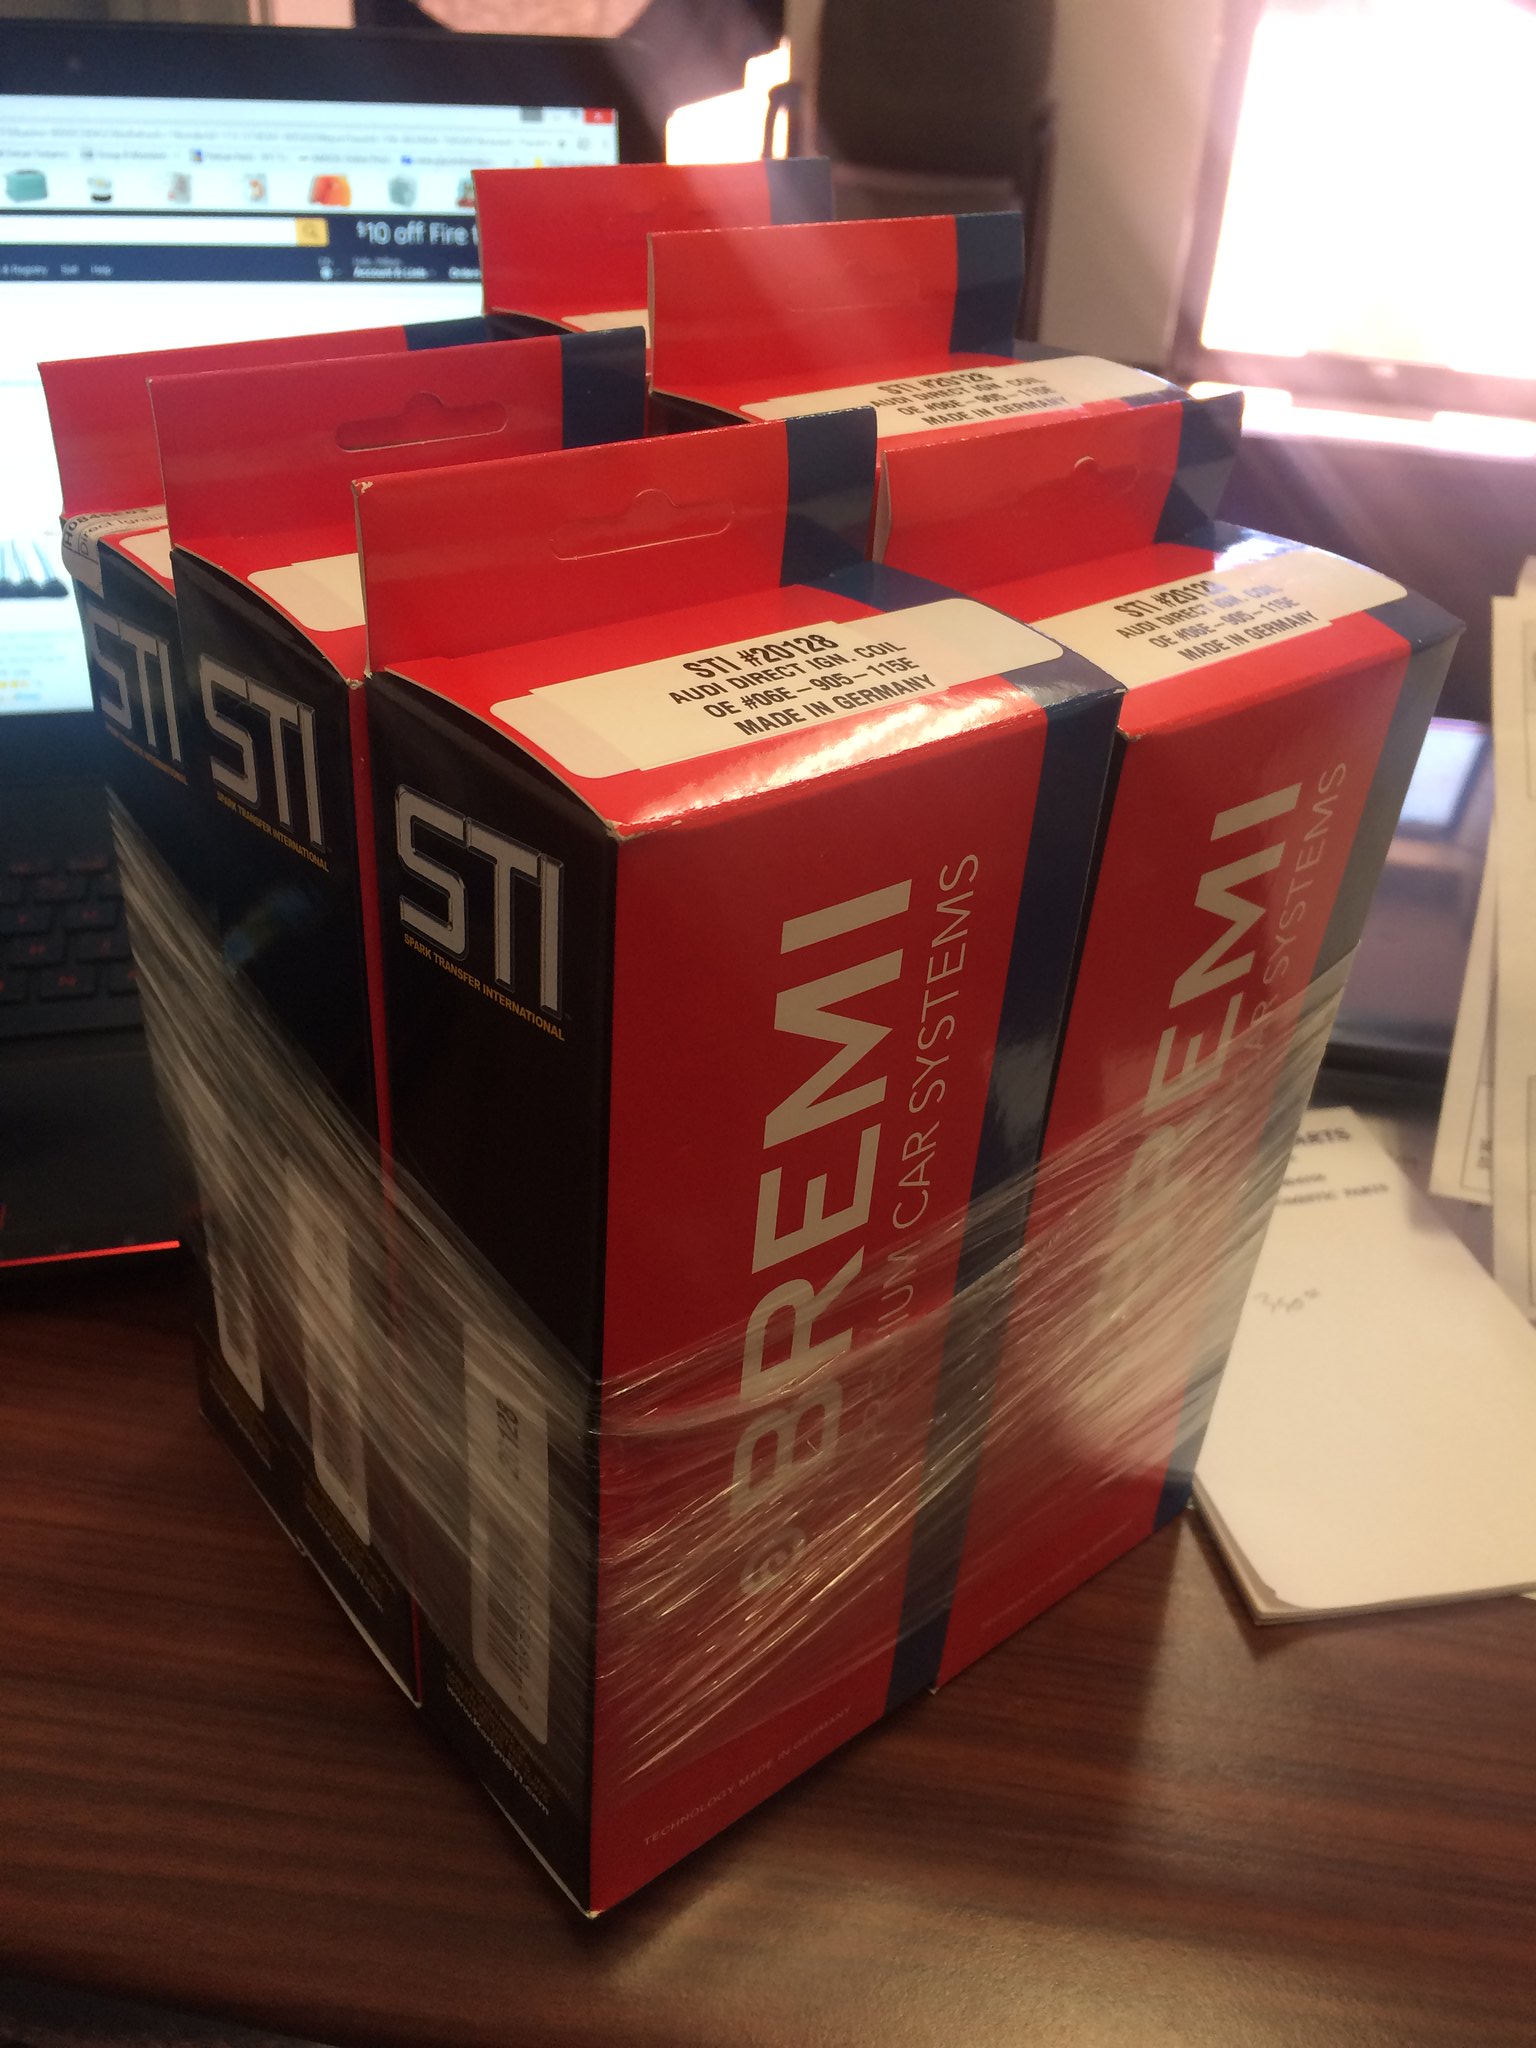
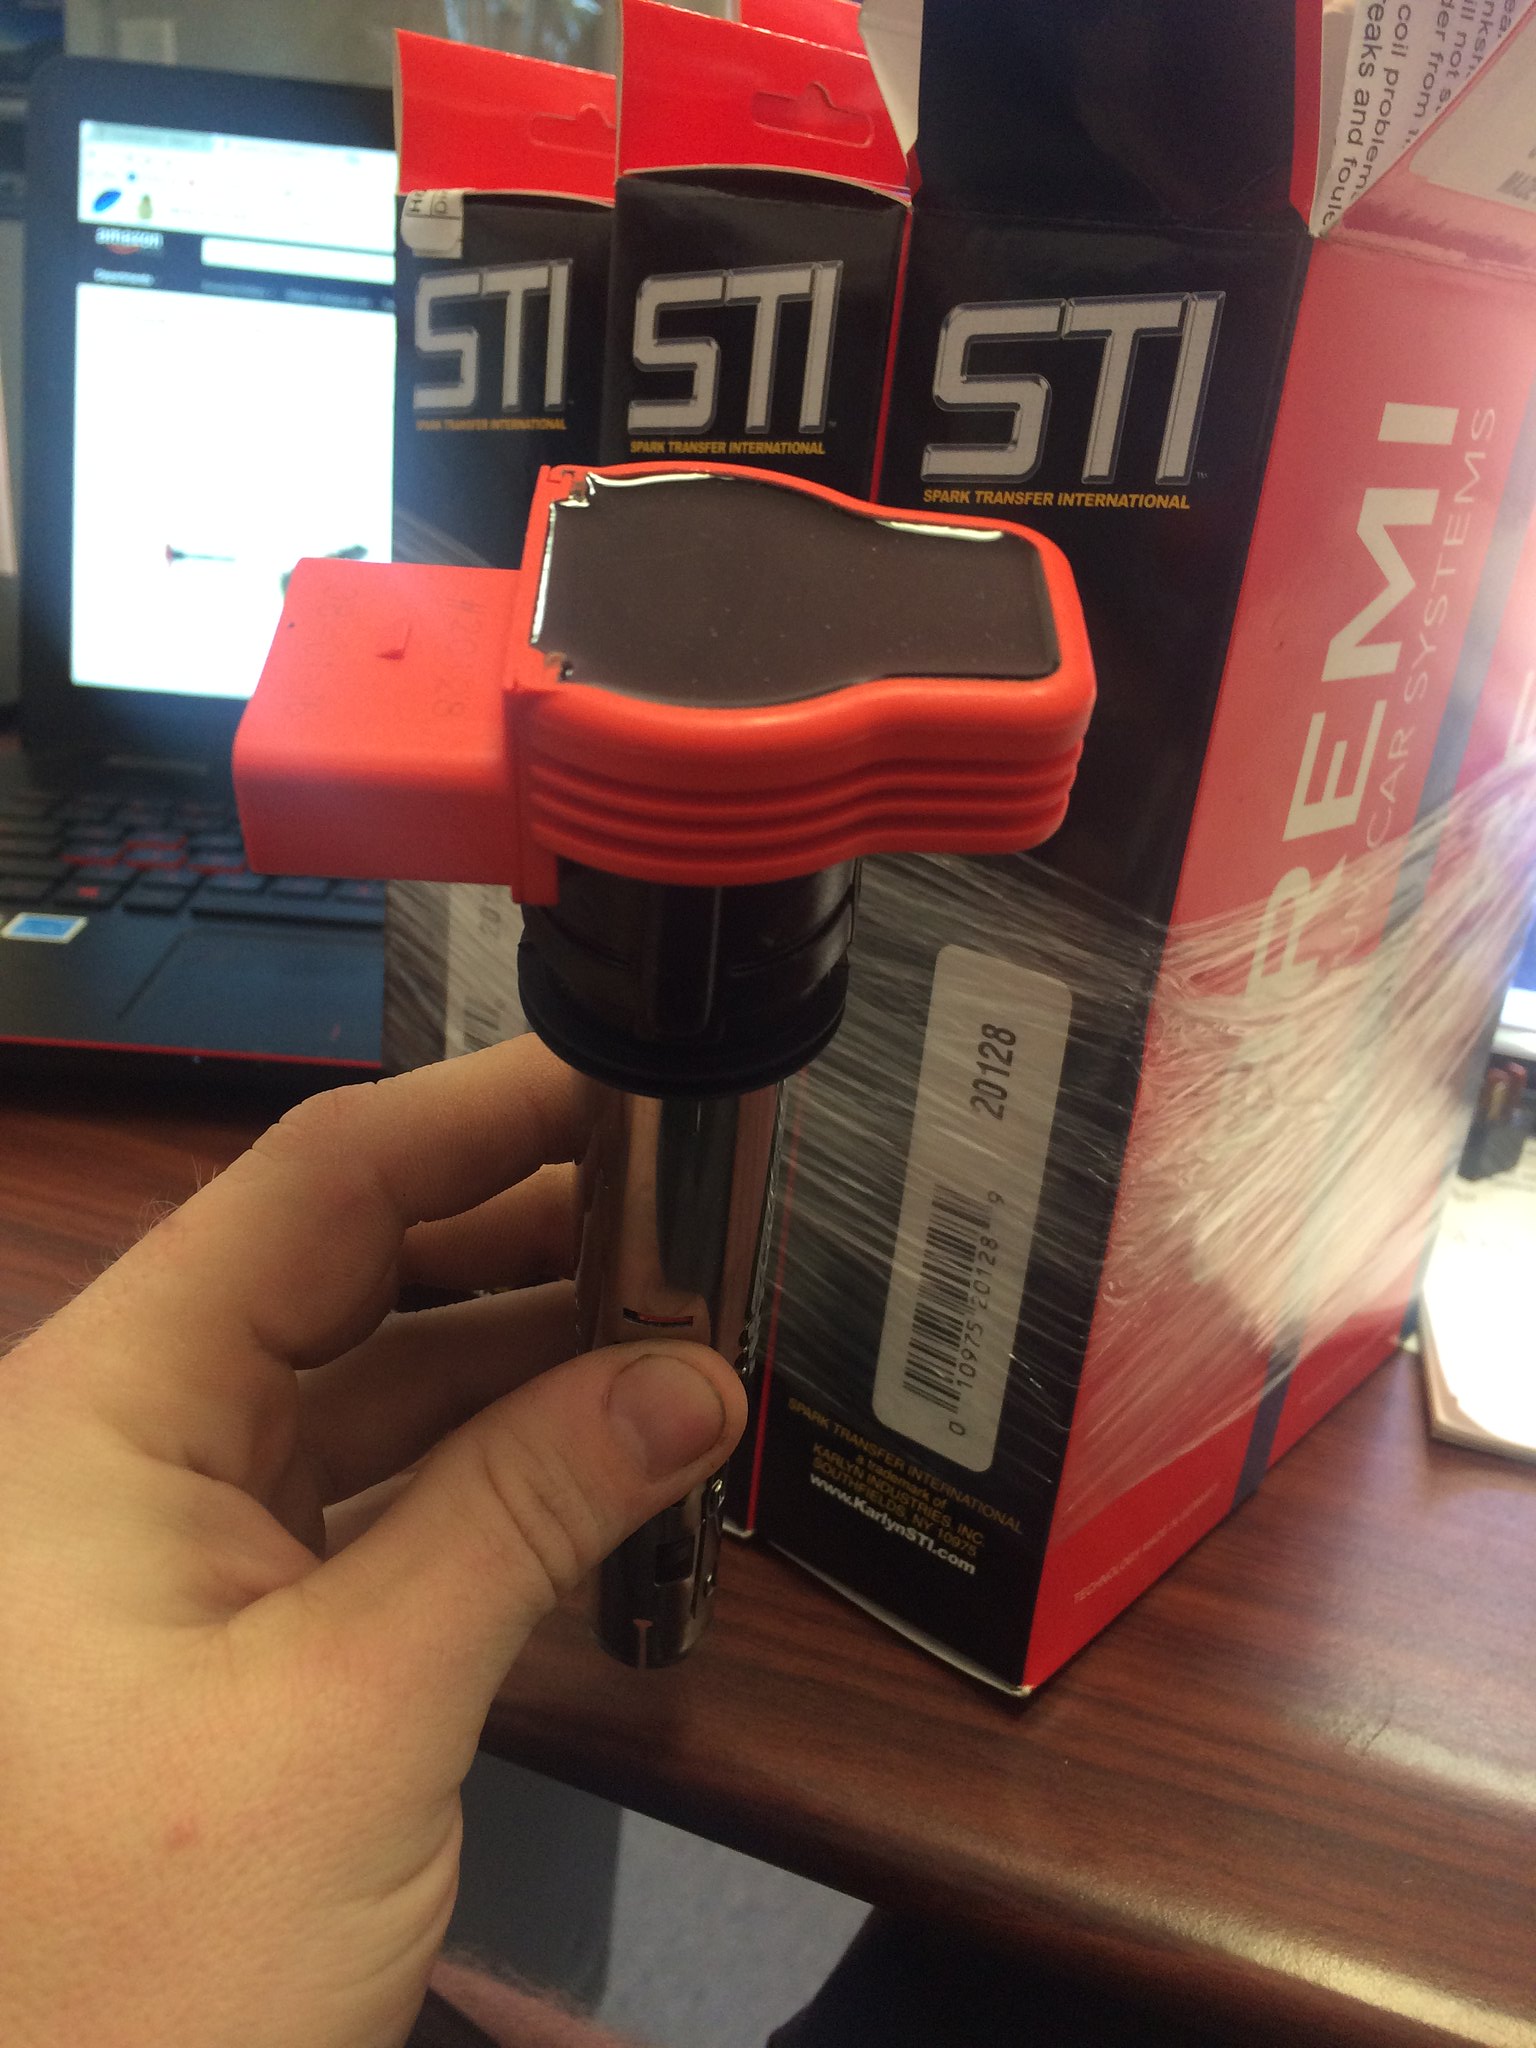
New coils were needed and Wil suggested Audi R8 GT coils. He has added these coils on a few 2JZs making well over 1000whp so they should be more than powerful enough for my car.
 Nsx parts by Jones
 Nsx parts by Jones
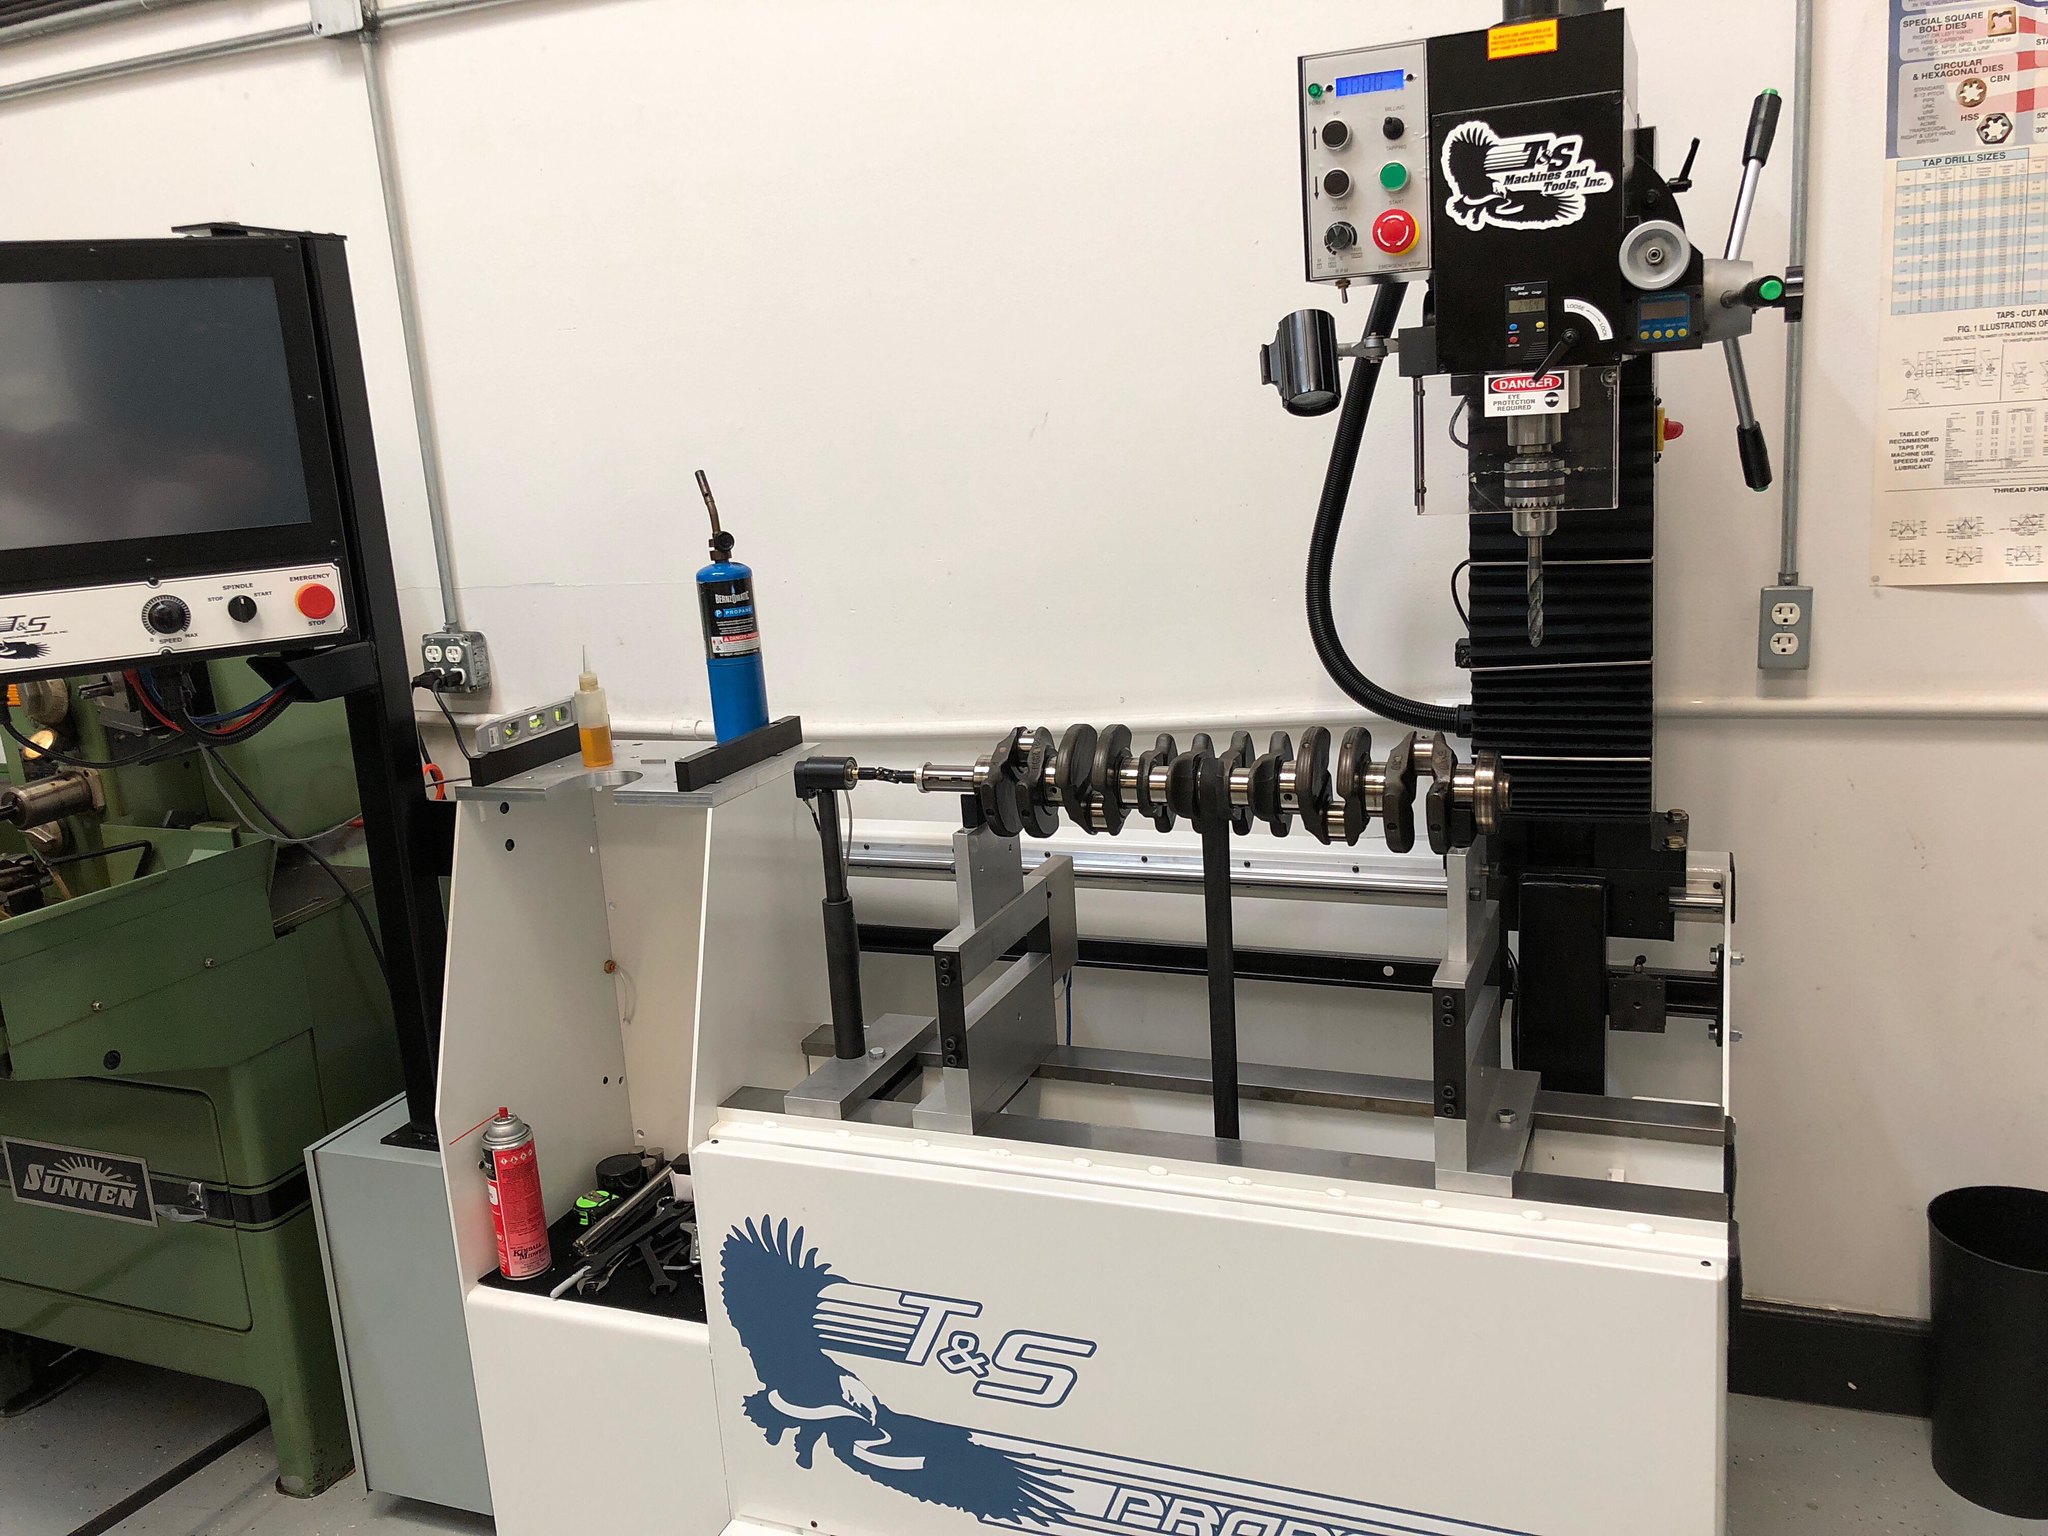
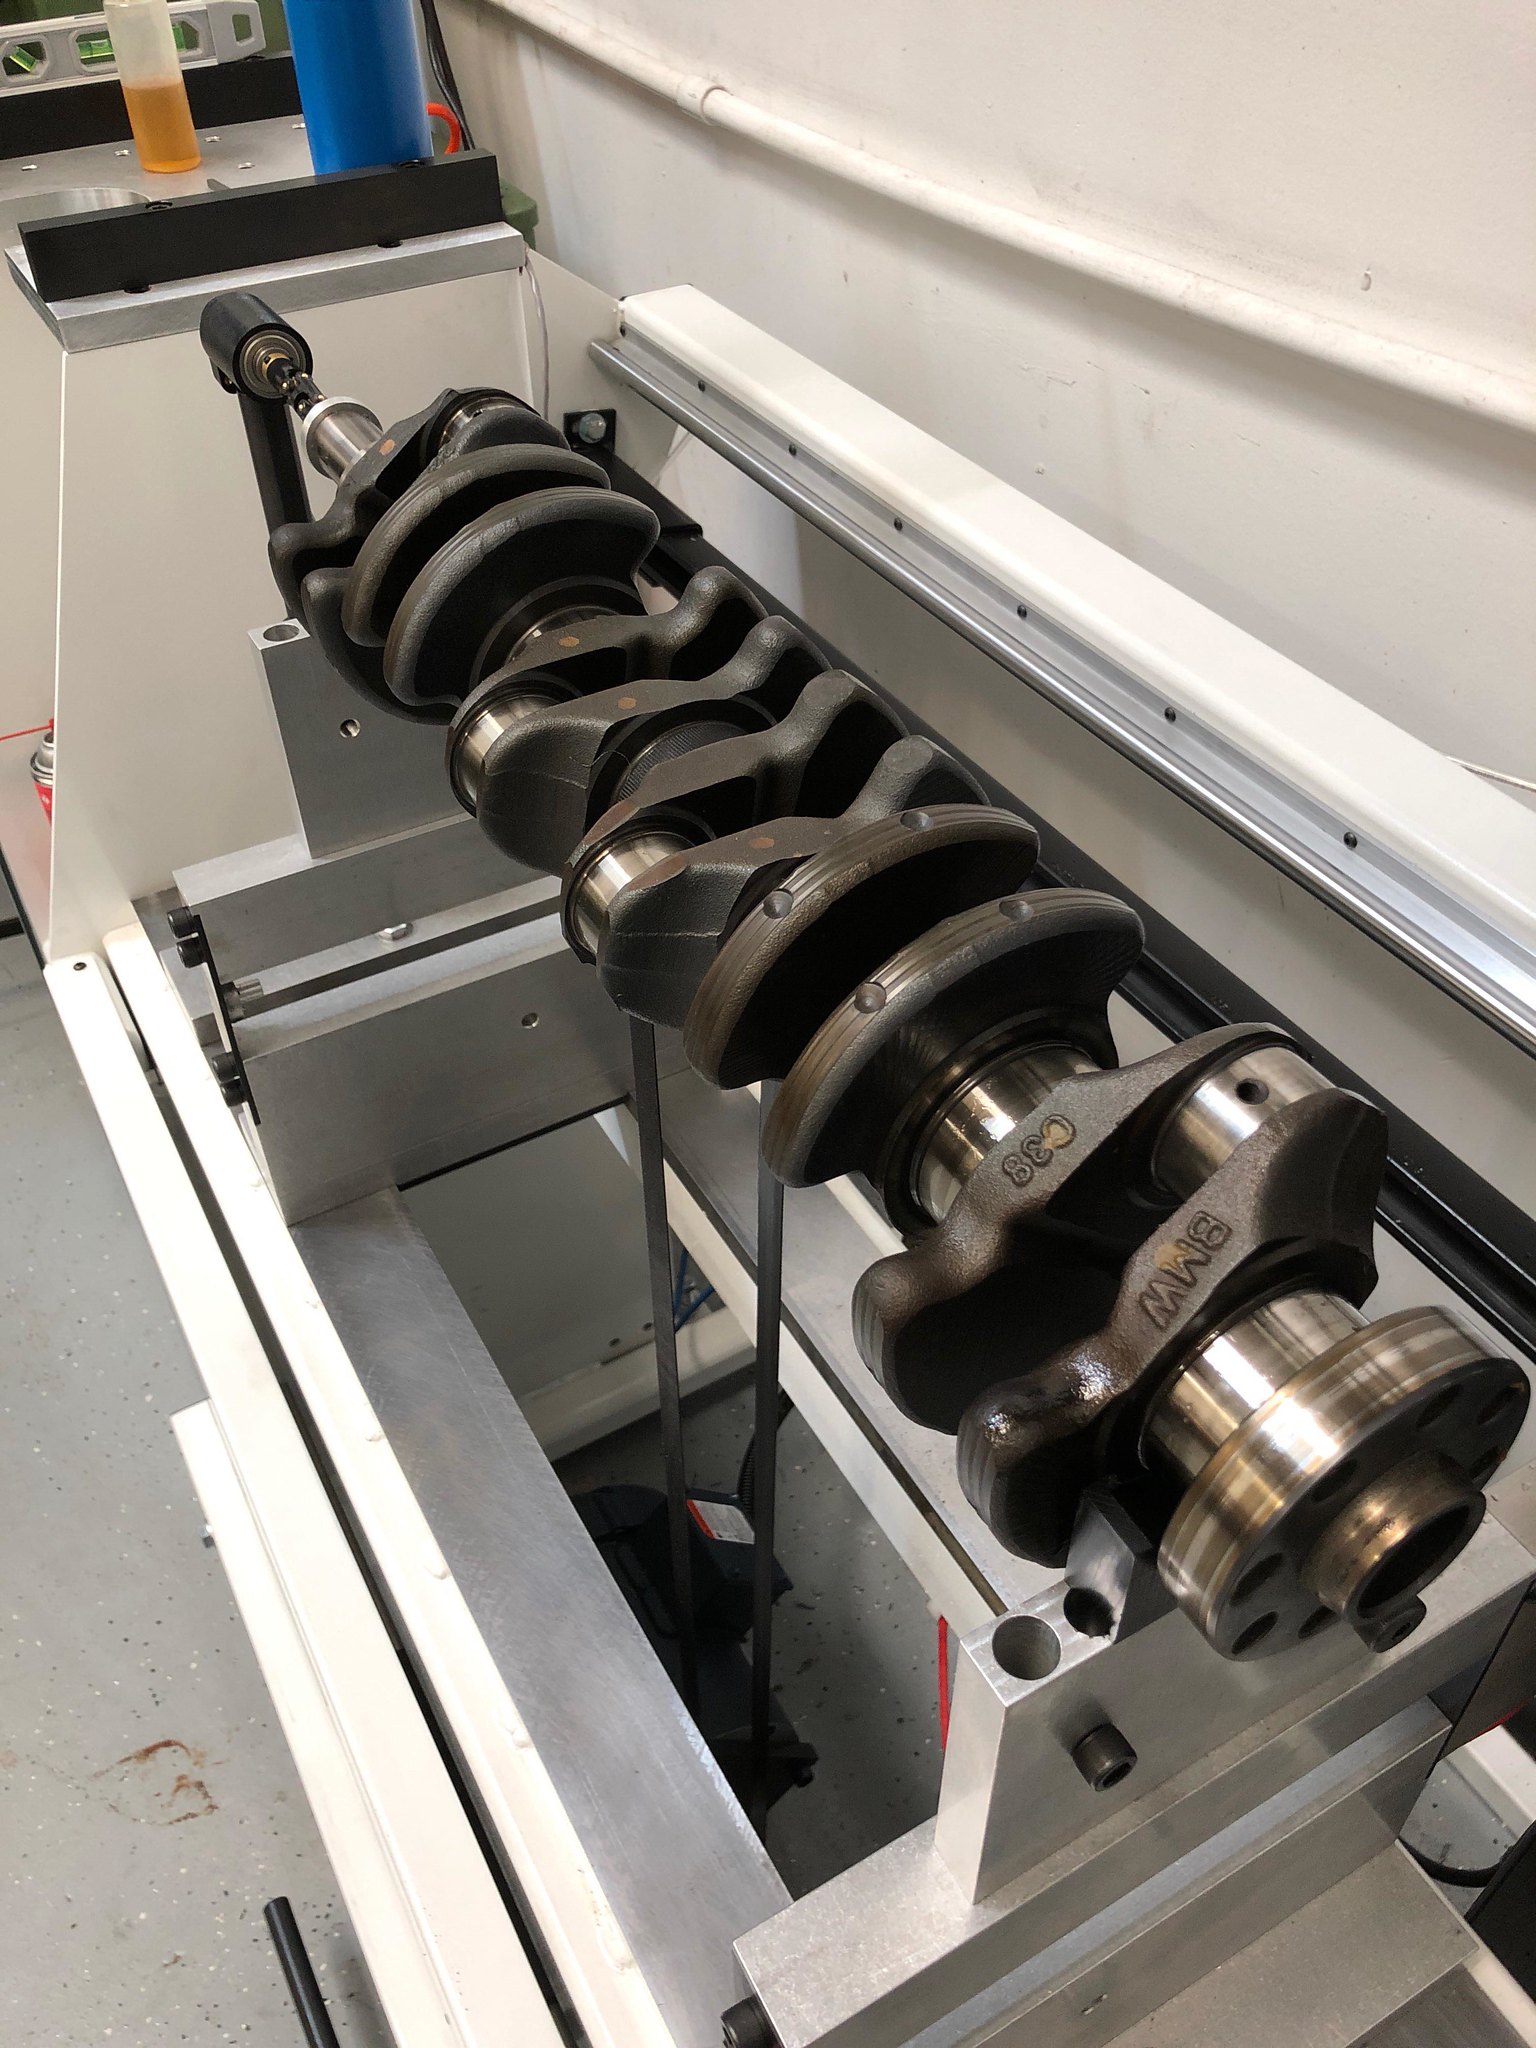
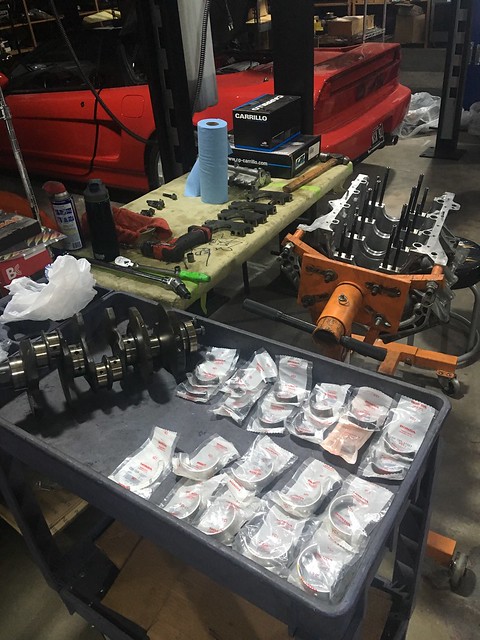
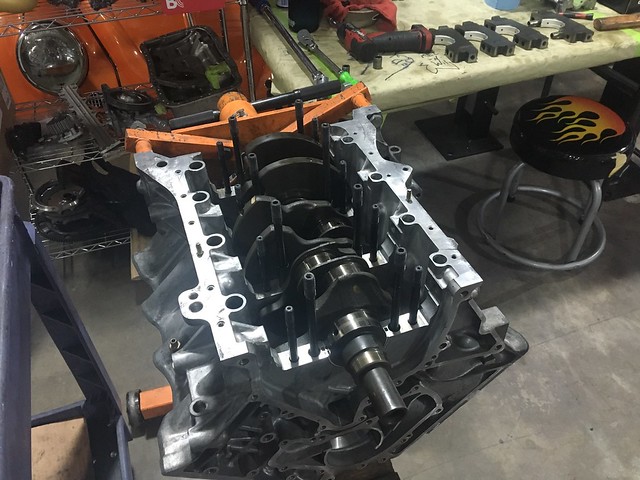
With the pistons back it was a few weeks before the block came back from the machine shop. We had the block bored out .5mm, resurfaced like the heads, cleaned up, and had the crank massaged. Also bought some new headgaskets and all new ARP everything. Just glad to see everything back again and have the assembly start to take form.
 Nsx parts by Jones
 Nsx parts by Jones
 Nsx parts by Jones
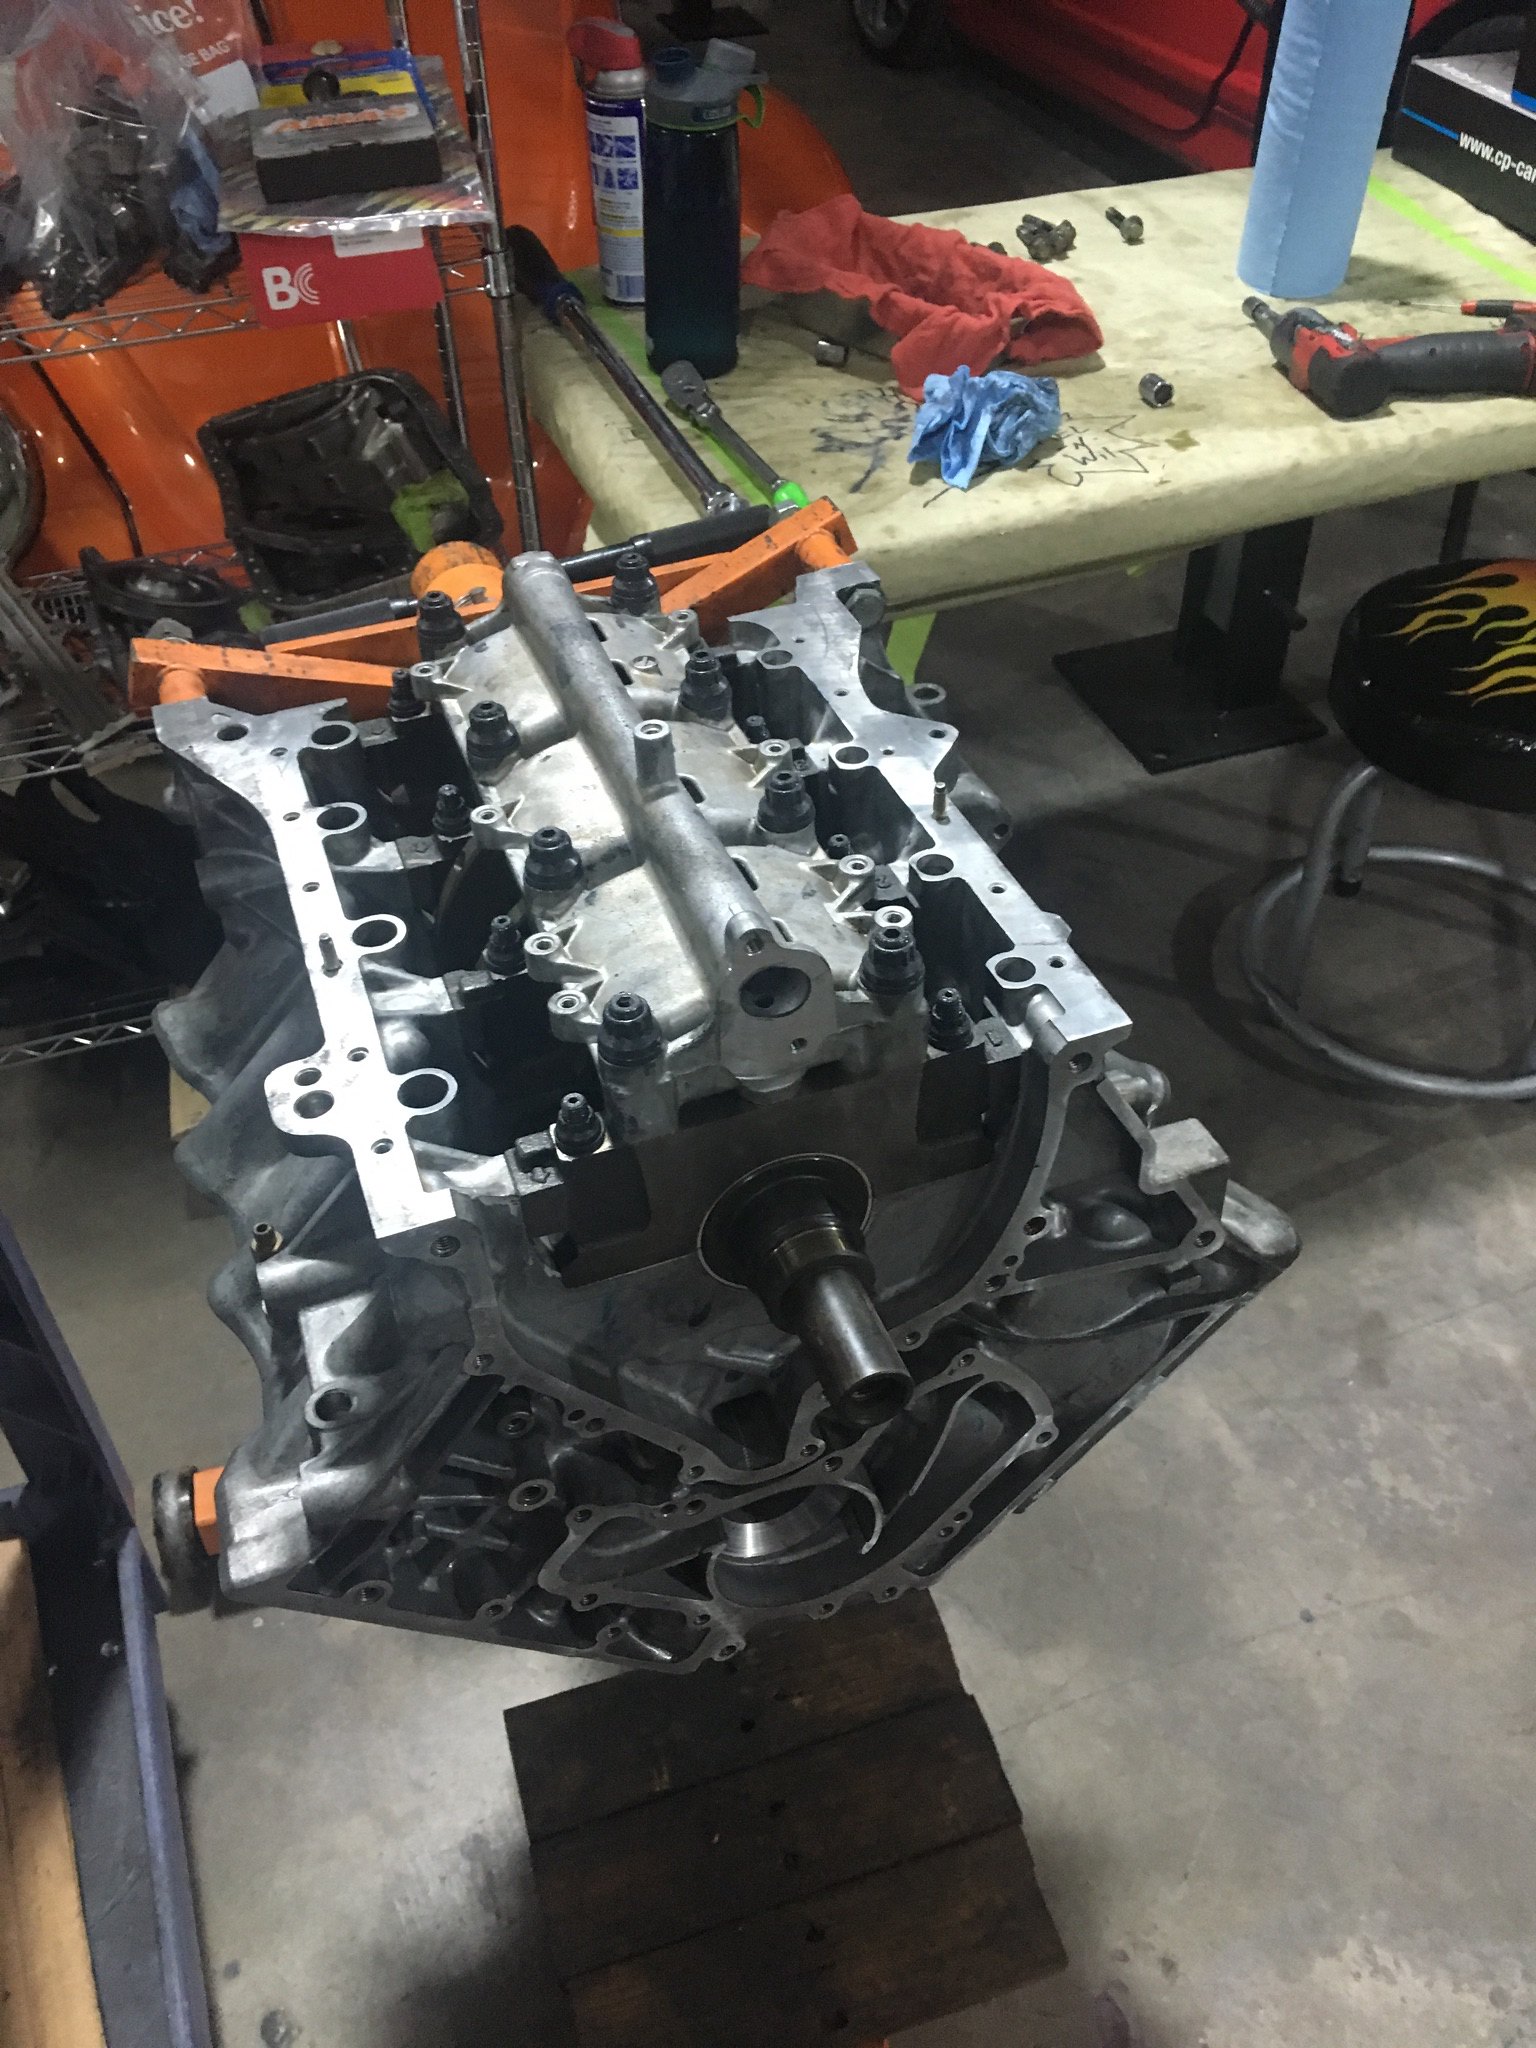
Currently the tolerances were checked one last time and Wil said he preferred for the crank to go back to the machine shop one last time to make everything perfect before final assembly. So I’m just waiting on the machine shop to drop the crank off and then it is time to reinstall everything.
I’ll keep better updates on the progress as they appear in this thread and for any pictures that were missed here is a running inventory of parts on the car currently.
[TABLE="width: 591"]
<tbody>[TR]
[TD]Interior[/TD]
[/TR]
[TR]
[TD]Cleaned and regreased the driver/passenger window rails[/TD]
[/TR]
[TR]
[TD]Jensen Double Din [/TD]
[/TR]
[TR]
[TD]Spoon Sports mirrors[/TD]
[/TR]
[TR]
[TD]OEM fender signal lights[/TD]
[/TR]
[TR]
[TD]02'+ rear taillights[/TD]
[/TR]
[TR]
[TD]SOS Zanardi short shifter stalk[/TD]
[/TR]
[TR]
[TD]Cedar Ridge short shifter [/TD]
[/TR]
[TR]
[TD]NSX-R shifter boot[/TD]
[/TR]
[TR]
[TD]LED Interior Bulbs[/TD]
[/TR]
[TR]
[TD]Feel's Titanium Shift Knob[/TD]
[/TR]
[TR]
[TD]OEM rubber door seals[/TD]
[/TR]
[TR]
[TD][/TD]
[/TR]
[TR]
[TD]Exterior[/TD]
[/TR]
[TR]
[TD]SmartTenna [/TD]
[/TR]
[TR]
[TD]Dali Racing Brake Deflectors[/TD]
[/TR]
[TR]
[TD]Taitec Rear Diffuser[/TD]
[/TR]
[TR]
[TD][/TD]
[/TR]
[TR]
[TD]Engine[/TD]
[/TR]
[TR]
[TD]Comptech Headers with ceramic cerakote gold coating[/TD]
[/TR]
[TR]
[TD]Pride V1 Exhaust[/TD]
[/TR]
[TR]
[TD]Ac pulley [/TD]
[/TR]
[TR]
[TD]Ac belt[/TD]
[/TR]
[TR]
[TD]Timing Belt[/TD]
[/TR]
[TR]
[TD]Timing Cover[/TD]
[/TR]
[TR]
[TD]Timing tensioner pulley[/TD]
[/TR]
[TR]
[TD]Water Pump[/TD]
[/TR]
[TR]
[TD]NGK plugs[/TD]
[/TR]
[TR]
[TD]cam seal[/TD]
[/TR]
[TR]
[TD]valve cover gasket set[/TD]
[/TR]
[TR]
[TD]upgraded LMAs to springs over piston[/TD]
[/TR]
[TR]
[TD]valve adjustment[/TD]
[/TR]
[TR]
[TD]ProEFI 128 ECU[/TD]
[/TR]
[TR]
[TD]ProEFI OBD1 Custom NSX hand-built Harness[/TD]
[/TR]
[TR]
[TD]ProEFI 5 bar map [/TD]
[/TR]
[TR]
[TD]ProEFI IAT[/TD]
[/TR]
[TR]
[TD]Fuel pressure sender[/TD]
[/TR]
[TR]
[TD]ProEFI Dual widebands [/TD]
[/TR]
[TR]
[TD]ProEFI Flex fuel sensor[/TD]
[/TR]
[TR]
[TD]Fuelab 10 micron fuel filter[/TD]
[/TR]
[TR]
[TD]Jabsco 29 gpm water pump[/TD]
[/TR]
[TR]
[TD]CXRacing 13 row oil cooler[/TD]
[/TR]
[TR]
[TD]FrozenBoost heat exchanger[/TD]
[/TR]
[TR]
[TD]Spal 4" fan for oil cooler[/TD]
[/TR]
[TR]
[TD]Gram's Rotrex C38-91 with black housing[/TD]
[/TR]
[TR]
[TD]95mm Rotrex pulley[/TD]
[/TR]
[TR]
[TD]Tial QRJ recirc 38mm[/TD]
[/TR]
[TR]
[TD]Cedar Ridge oil pan baffle[/TD]
[/TR]
[TR]
[TD]4 port Mac Solenoid[/TD]
[/TR]
[TR]
[TD]Bell Intercooler 'hidden' core (rated at 600 crank hp)[/TD]
[/TR]
[TR]
[TD]Magnuson Supercharger reservoir [/TD]
[/TR]
[TR]
[TD]OS Giken STR2C Clutch and Flywheel[/TD]
[/TR]
[TR]
[TD]ATS Carbon LSD[/TD]
[/TR]
[TR]
[TD]JDM NSX Type R 5 speed 2,3, and 4 short gears[/TD]
[/TR]
[TR]
[TD]ATS 4.235 Final drive[/TD]
[/TR]
[TR]
[TD]NSX Type R oil drive gear[/TD]
[/TR]
[TR]
[TD]NSX Type R countershaft[/TD]
[/TR]
[TR]
[TD]ARP Custom head studs[/TD]
[/TR]
[TR]
[TD]MLS metal head gaskets[/TD]
[/TR]
[TR]
[TD]Dali racing billet oil pump gear[/TD]
[/TR]
[TR]
[TD]Complete 5 speed transmission OEM rebuild[/TD]
[/TR]
[TR]
[TD]Audi R8 V10 GT coil packs and connectors[/TD]
[/TR]
[TR]
[TD]ARP Rod bolts[/TD]
[/TR]
[TR]
[TD]reconditioned OEM engine mounts with Devcon 'Flexane 94 [/TD]
[/TR]
[TR]
[TD]ATI Super Damper[/TD]
[/TR]
[TR]
[TD]Hot tanked and cleaned short block[/TD]
[/TR]
[TR]
[TD]CP Pistons 9.0:1 [/TD]
[/TR]
[TR]
[TD]Carillo rods[/TD]
[/TR]
[TR]
[TD]ARP main bolts[/TD]
[/TR]
[TR]
[TD]Heads (ported and polished, surfaced, valve job, new valve seals, new guides, gasket matched to 90.5mm)[/TD]
[/TR]
[TR]
[TD][/TD]
[/TR]
[TR]
[TD]Suspension[/TD]
[/TR]
[TR]
[TD]BC Coilovers - BR Type [/TD]
[/TR]
[TR]
[TD]NSX-R Front Sway Bar [/TD]
[/TR]
[TR]
[TD]Cedar Ridge compliance clamps[/TD]
[/TR]
[TR]
[TD][/TD]
[/TR]
[TR]
[TD]Wheels and Brakes[/TD]
[/TR]
[TR]
[TD]Earls Stainless Steel brake lines[/TD]
[/TR]
[TR]
[TD]Carbotech XP8 Brake Pads[/TD]
[/TR]
[TR]
[TD]ATE Super Blue Brake Fluid[/TD]
[/TR]
[TR]
[TD]Replacement of the two rear CV Boots[/TD]
[/TR]
</tbody>[/TABLE]
From the beginning I always knew I wanted a NSX as it was a car that I could grow with and not feel the need to replace again. So the quest was on and it eventually led me to Orlando one weekend to go pick her up.
1992 Berlina Black with white interior NSX. 84,000 on the tach and a serious ring binder of all maintenance since mile 1. The car has been pretty well kept over the years, and just to show how reliable it was I drove it back from Orlando. As soon as I got back to Houston I got the routine maintenance completed on it. So the timing belt, timing cover, water pump, cleaned and regreased the driver/passenger window rails, plugs, cam seals, valve cover gasket set, upgraded LMAs to springs over piston, valve adjustment, and cleared texas inspection.
Engine Maintenance 2 by JonesEngine Maintenance by JonesOnce that was taken care I had the car sent off to the dyno to get a baseline done to it before the fun engine mods were on. This was the uncorrected dyno numbers in stock form on mustang dyno. Pretty typical of what you see in these cars.
14381965939_c00c94856c_o by JonesRight after this I had a someone back into the car’s mirror or bump into it with their body. I’m not sure either way but one of my mirrors was completely broken so I bought some new ones to fix the issue.
Spoon Mirrors by JonesSpoon Mirrors 2 by Jones
Spoon Mirrors 3 by JonesAfter the mirrors were done it was time to bring the car in to IDB Racing again and begin the build process. Full disclosure I was just going to do the ECU standalone and that was going to be that, but I don’t know how to leave well enough alone. Before I knew it was down a hell of a rabbit hole and really glad Wil was there to help me get it to where it is now.
First thing I wanted to do was get the injectors ready for more power. Through working with a friend who owns an injector company I had a custom set of DPI Injectors(now called Evolved Injection) built for the NSX. I love the quality of these injectors and Wil loved them so much all the shop cars/custom builds run them as well.
DPI Injectors by JonesDPI Injectors 3 by Jones
DPI Injectors 1 by JonesDPI Injectors 2 by JonesI also picked up a Rotrex kit from Ted at Grams for a good deal and decided that was the route I was looking to go down. I wanted the power to be consistent and linear. I feel this is one of the ways to get the v6 to feel like a v8 with any lag or whine. So in came the C38-91 rotrex kit with a 80mm(?) pulley? I forgot the size of the pulley off the top of my head, but there is a formula you fill out to get the proper pulley size and stay within the 5-10% overspin range you want to be. This pulley should do rather nicely and there are some tricks to tuning to help ensure the rotrex isn’t harmed when close to the rev limiter.
Rotrex kit by JonesAfter the rotrex came in I talked to [MENTION=4799]DDozier[/MENTION] on her about his intercooler setup and bought one back when he had his group buy run of them. There were some massaging issues with the welding of the plates that needed to happen but Wil got it squared away nicely.
Intercooler 1 by Jones
Intercooler by JonesI lost some of my older pictures when I traded in my phone for a new one so no internal welded images, but it looked great and came out exactly how we wanted it to. After that was completed I ordered some parts for the front of the NSX to help with cooling. Heat exchanger, Jabsco water pump, fuel filter, SPAL fan for the rotrex oil cooler, tial recirc, ATI super damper, and some other odd parts to help complete the front cooling system.
Jabsco pump by JonesHeat exchanger and recirc by Jonesfuel filter and rotrex oil cooler by Jonesati super damper by JonesAfter this my standalone came in with a custom made wire harness.
proefi 3 by Jonesproefi 2 by Jones
proefi 1 by JonesOnce the parts were in the shop built a custom bracket for the rotrex and everything was mocked up for fitment clearances.
Inkednsx rotrex shot_LI by JonesEverything on the engine side was mocked up and wired properly. Then I talked to Wil about thinking I needed to add some short gears into the transmission. One thing turned to another and before I knew it I bought short gears, an OS Giken twin plate, ATS LSD, ATS final gear, and miscellaneous parts to completely rebuild/replace every part in the 5 speed.
ATS LSD by Jonesdali billet oil pump gear and flat iron short gears by Jones11046783_10153446600133893_1205642787486848339_n by JonesWhile the transmission was being built I picked up a diffuser that was physically in great condition, but superficially it was rough. Especially on the wings of the Taitec diffuser. Wil has a good relationship with a shop called Apex Auto Works and they took the multiple-layered painted diffuser and completely refreshed it back to new. They also added extra layers of clear in some specific locations that rocks are known to hit off of to help protect it. Notice how they didn’t remove the paint and add a black paint mixed clear coat to cover up the weave like other shops do.
Taitec Diffuser by JonesApex Auto Works Diffuser Before by JonesApex Auto Works Diffuser Before 2 by JonesApex Auto Works Diffuser Before 1 by JonesApex Auto Works Diffuser After 1 by JonesApex Auto Works Diffuser After 2 by JonesApex Auto Works Diffuser After by JonesWhile the transmission was already out I figured why don’t we just refresh the engine some. A refresh of the engine turned into pulling the motor out and realizing that the oem pistons were not in good condition and it looked unsafe to boost on these original pistons.
IMG_5637_1494947074360 by JonesIMG_5636_1494947074374 by JonesIMG_5635_1494947074377 by Jones
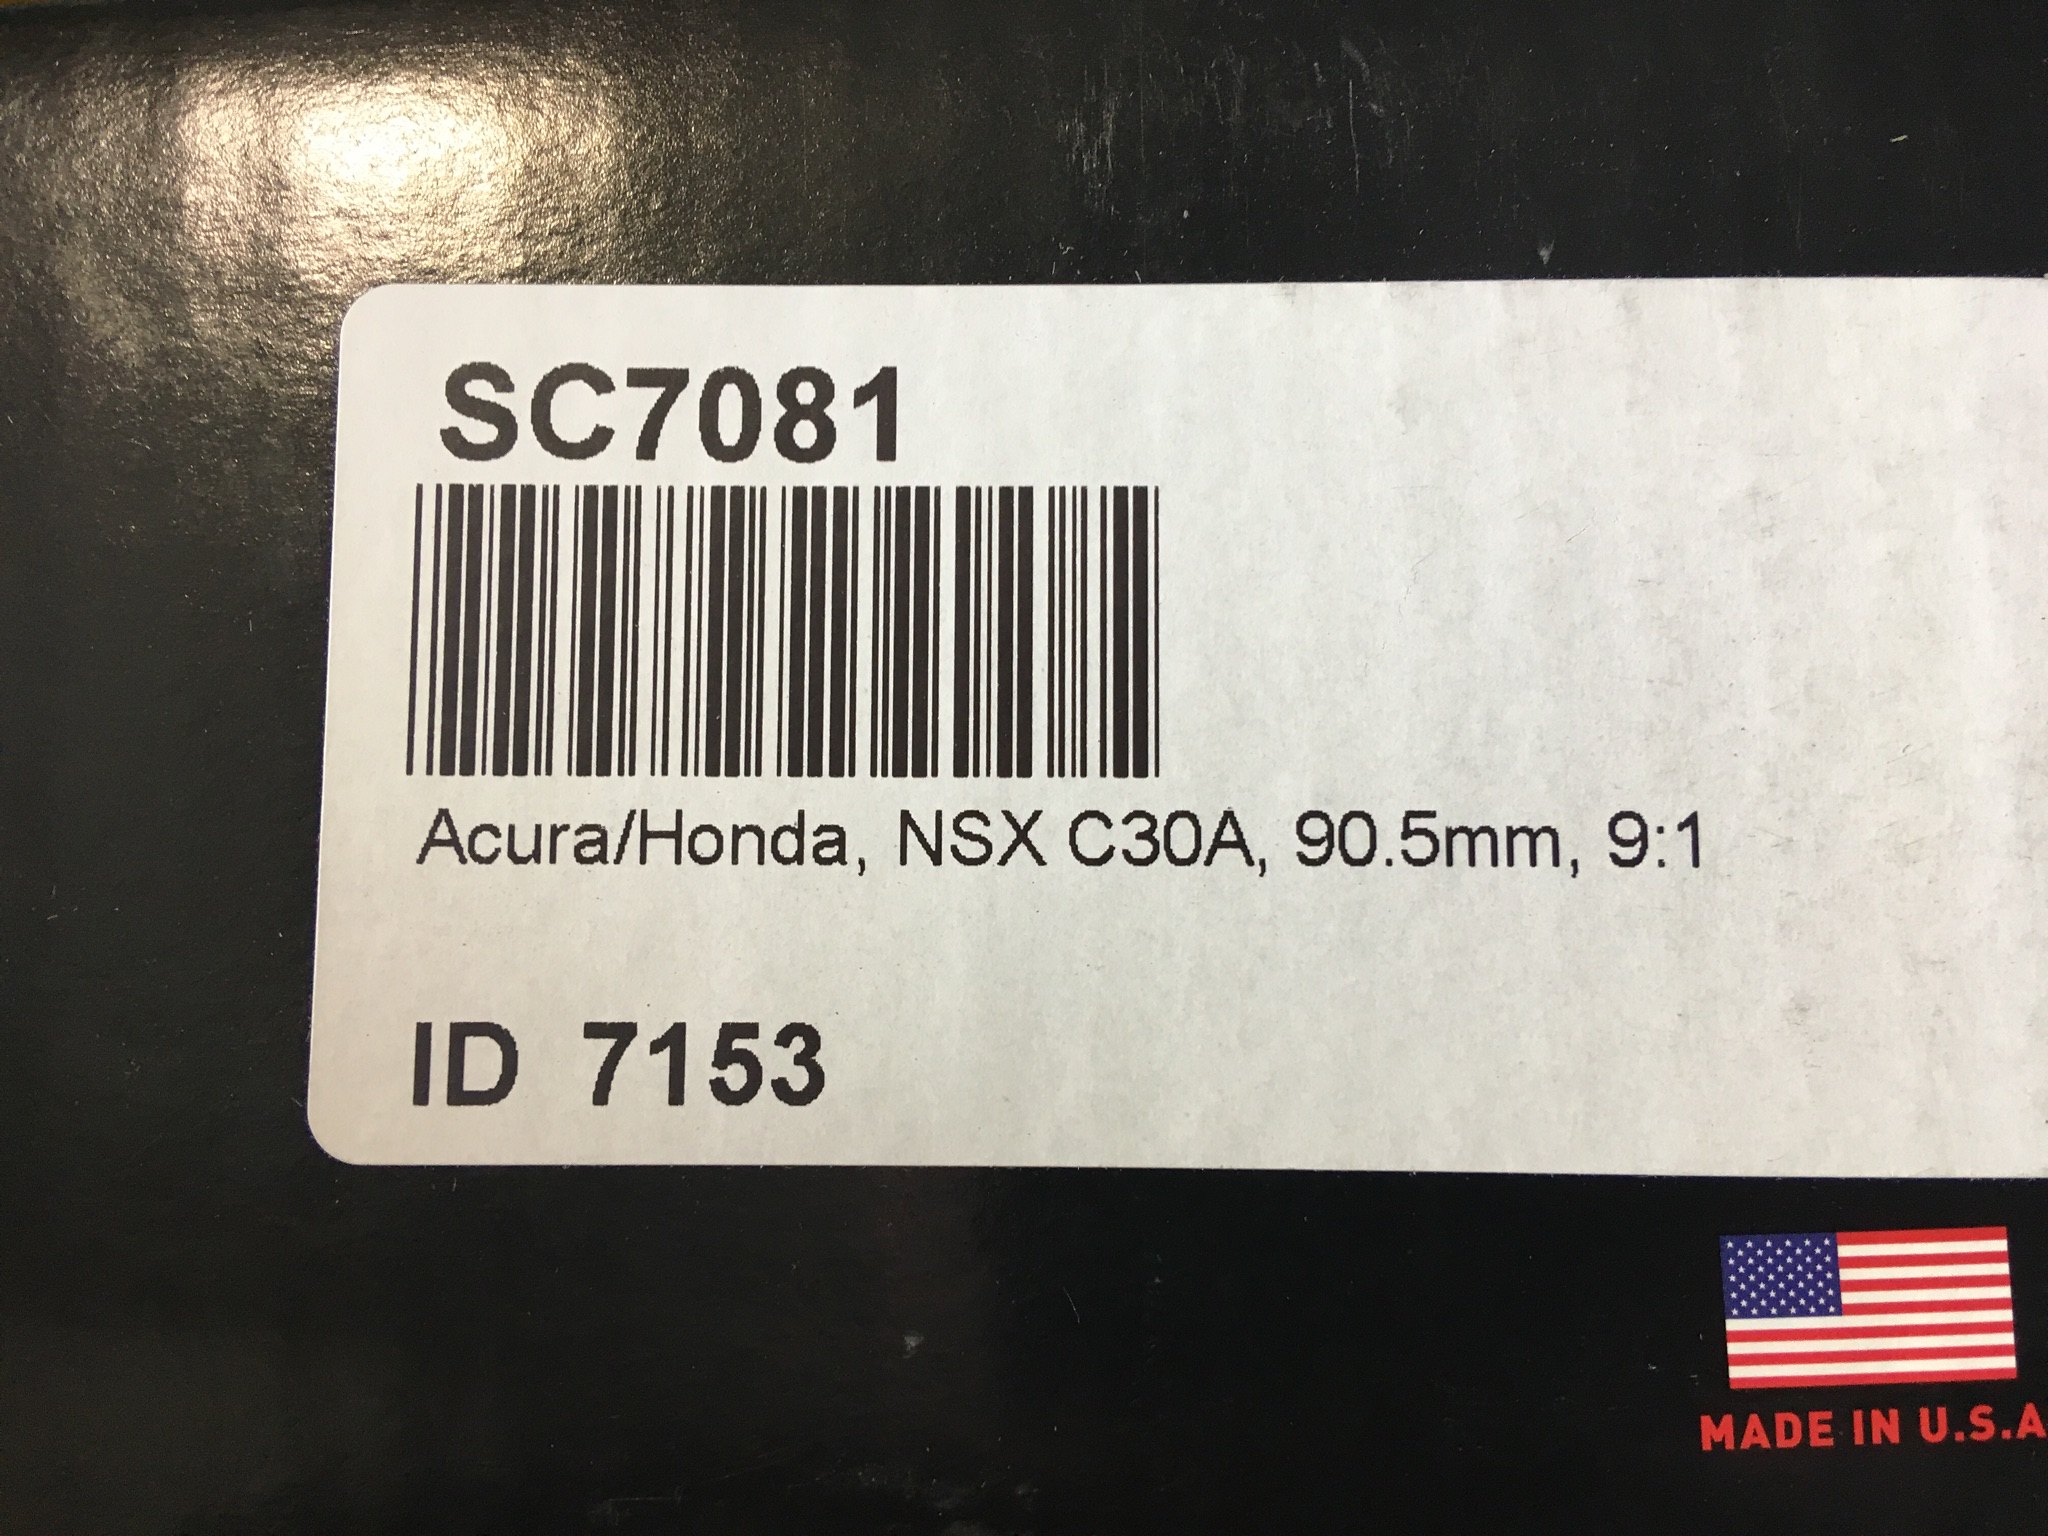
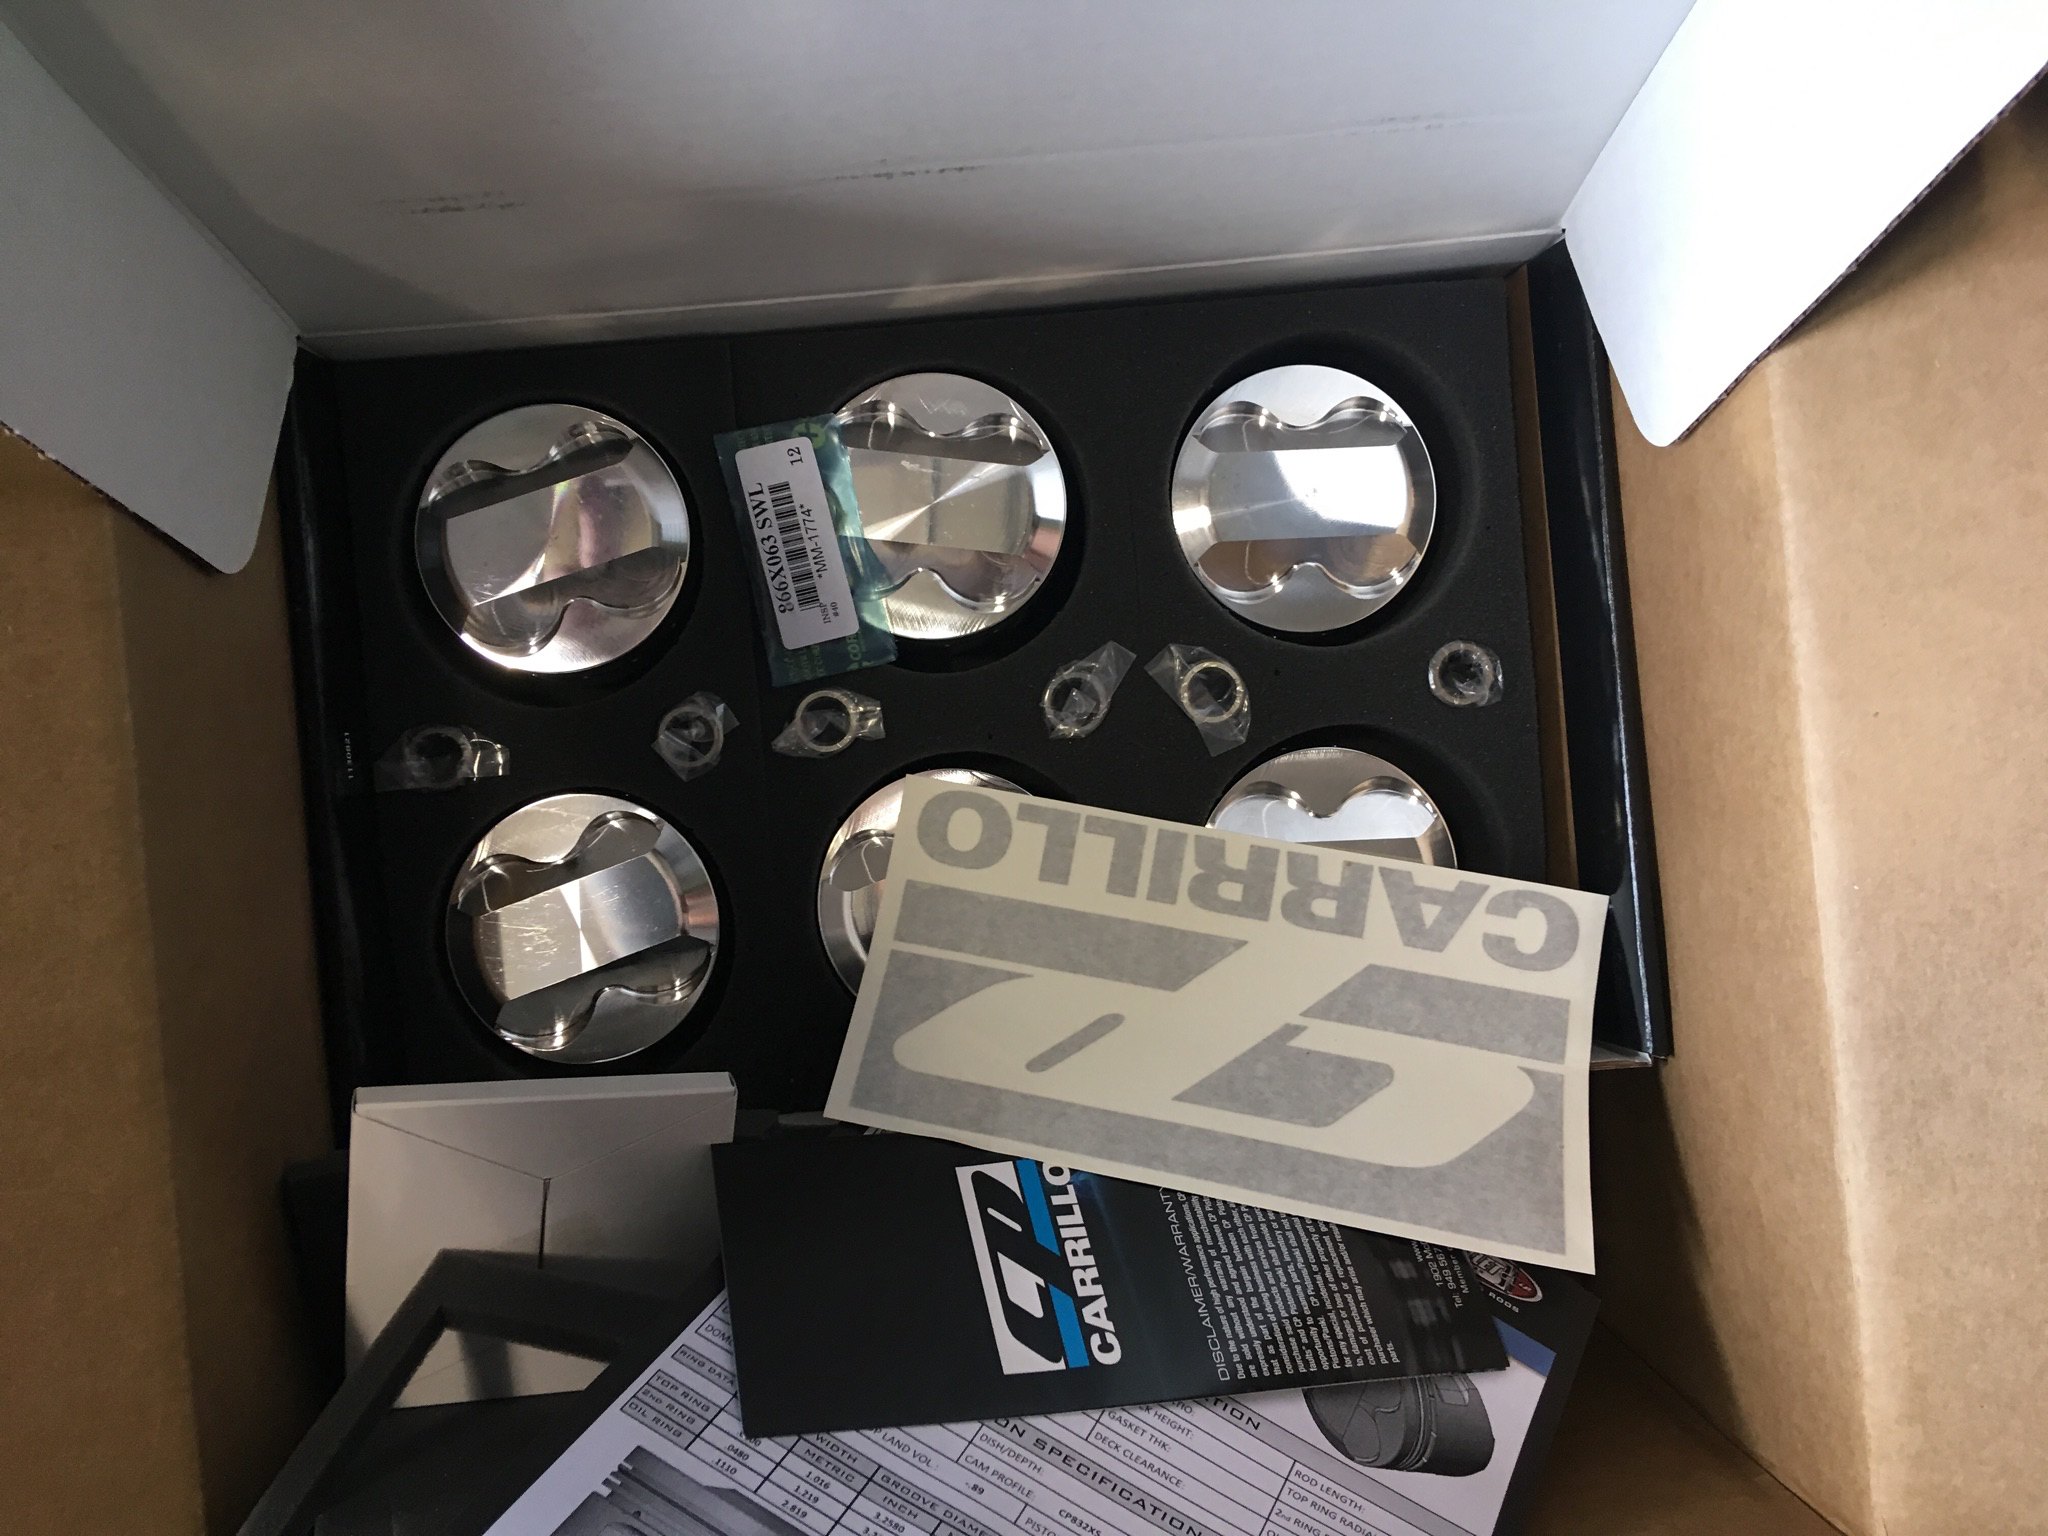
IMG_5634_1494947074387 by JonesIMG_5633_1494947074392 by JonesIMG_5632_1494947074396 by JonesIMG_5631_1494947074398 by JonesSooooooo next the shop broke the engine completely down, pulled out the pistons, rods, etc and the heads went off to the local head shop to get refreshed and ported. While that was going on I ordered some new pistons and rods. Once they came back Wil sent the pistons off to get two different coatings on them which came out fantastic.
Nsx parts by JonesNsx parts by Jones
Nsx parts by JonesNsx parts by Jones
Nsx parts by JonesNsx parts by JonesNsx parts by JonesThe heads came back from the machine shop cleaned up and refreshed with a PnP.
Nsx parts by JonesAfter that the comptech headers came back in from getting a cerakote coating applied to them adfter being cleaned up.
Nsx parts by JonesNew coils were needed and Wil suggested Audi R8 GT coils. He has added these coils on a few 2JZs making well over 1000whp so they should be more than powerful enough for my car.
Nsx parts by JonesNsx parts by JonesWith the pistons back it was a few weeks before the block came back from the machine shop. We had the block bored out .5mm, resurfaced like the heads, cleaned up, and had the crank massaged. Also bought some new headgaskets and all new ARP everything. Just glad to see everything back again and have the assembly start to take form.
Nsx parts by JonesNsx parts by JonesNsx parts by JonesCurrently the tolerances were checked one last time and Wil said he preferred for the crank to go back to the machine shop one last time to make everything perfect before final assembly. So I’m just waiting on the machine shop to drop the crank off and then it is time to reinstall everything.
I’ll keep better updates on the progress as they appear in this thread and for any pictures that were missed here is a running inventory of parts on the car currently.
[TABLE="width: 591"]
<tbody>[TR]
[TD]Interior[/TD]
[/TR]
[TR]
[TD]Cleaned and regreased the driver/passenger window rails[/TD]
[/TR]
[TR]
[TD]Jensen Double Din [/TD]
[/TR]
[TR]
[TD]Spoon Sports mirrors[/TD]
[/TR]
[TR]
[TD]OEM fender signal lights[/TD]
[/TR]
[TR]
[TD]02'+ rear taillights[/TD]
[/TR]
[TR]
[TD]SOS Zanardi short shifter stalk[/TD]
[/TR]
[TR]
[TD]Cedar Ridge short shifter [/TD]
[/TR]
[TR]
[TD]NSX-R shifter boot[/TD]
[/TR]
[TR]
[TD]LED Interior Bulbs[/TD]
[/TR]
[TR]
[TD]Feel's Titanium Shift Knob[/TD]
[/TR]
[TR]
[TD]OEM rubber door seals[/TD]
[/TR]
[TR]
[TD][/TD]
[/TR]
[TR]
[TD]Exterior[/TD]
[/TR]
[TR]
[TD]SmartTenna [/TD]
[/TR]
[TR]
[TD]Dali Racing Brake Deflectors[/TD]
[/TR]
[TR]
[TD]Taitec Rear Diffuser[/TD]
[/TR]
[TR]
[TD][/TD]
[/TR]
[TR]
[TD]Engine[/TD]
[/TR]
[TR]
[TD]Comptech Headers with ceramic cerakote gold coating[/TD]
[/TR]
[TR]
[TD]Pride V1 Exhaust[/TD]
[/TR]
[TR]
[TD]Ac pulley [/TD]
[/TR]
[TR]
[TD]Ac belt[/TD]
[/TR]
[TR]
[TD]Timing Belt[/TD]
[/TR]
[TR]
[TD]Timing Cover[/TD]
[/TR]
[TR]
[TD]Timing tensioner pulley[/TD]
[/TR]
[TR]
[TD]Water Pump[/TD]
[/TR]
[TR]
[TD]NGK plugs[/TD]
[/TR]
[TR]
[TD]cam seal[/TD]
[/TR]
[TR]
[TD]valve cover gasket set[/TD]
[/TR]
[TR]
[TD]upgraded LMAs to springs over piston[/TD]
[/TR]
[TR]
[TD]valve adjustment[/TD]
[/TR]
[TR]
[TD]ProEFI 128 ECU[/TD]
[/TR]
[TR]
[TD]ProEFI OBD1 Custom NSX hand-built Harness[/TD]
[/TR]
[TR]
[TD]ProEFI 5 bar map [/TD]
[/TR]
[TR]
[TD]ProEFI IAT[/TD]
[/TR]
[TR]
[TD]Fuel pressure sender[/TD]
[/TR]
[TR]
[TD]ProEFI Dual widebands [/TD]
[/TR]
[TR]
[TD]ProEFI Flex fuel sensor[/TD]
[/TR]
[TR]
[TD]Fuelab 10 micron fuel filter[/TD]
[/TR]
[TR]
[TD]Jabsco 29 gpm water pump[/TD]
[/TR]
[TR]
[TD]CXRacing 13 row oil cooler[/TD]
[/TR]
[TR]
[TD]FrozenBoost heat exchanger[/TD]
[/TR]
[TR]
[TD]Spal 4" fan for oil cooler[/TD]
[/TR]
[TR]
[TD]Gram's Rotrex C38-91 with black housing[/TD]
[/TR]
[TR]
[TD]95mm Rotrex pulley[/TD]
[/TR]
[TR]
[TD]Tial QRJ recirc 38mm[/TD]
[/TR]
[TR]
[TD]Cedar Ridge oil pan baffle[/TD]
[/TR]
[TR]
[TD]4 port Mac Solenoid[/TD]
[/TR]
[TR]
[TD]Bell Intercooler 'hidden' core (rated at 600 crank hp)[/TD]
[/TR]
[TR]
[TD]Magnuson Supercharger reservoir [/TD]
[/TR]
[TR]
[TD]OS Giken STR2C Clutch and Flywheel[/TD]
[/TR]
[TR]
[TD]ATS Carbon LSD[/TD]
[/TR]
[TR]
[TD]JDM NSX Type R 5 speed 2,3, and 4 short gears[/TD]
[/TR]
[TR]
[TD]ATS 4.235 Final drive[/TD]
[/TR]
[TR]
[TD]NSX Type R oil drive gear[/TD]
[/TR]
[TR]
[TD]NSX Type R countershaft[/TD]
[/TR]
[TR]
[TD]ARP Custom head studs[/TD]
[/TR]
[TR]
[TD]MLS metal head gaskets[/TD]
[/TR]
[TR]
[TD]Dali racing billet oil pump gear[/TD]
[/TR]
[TR]
[TD]Complete 5 speed transmission OEM rebuild[/TD]
[/TR]
[TR]
[TD]Audi R8 V10 GT coil packs and connectors[/TD]
[/TR]
[TR]
[TD]ARP Rod bolts[/TD]
[/TR]
[TR]
[TD]reconditioned OEM engine mounts with Devcon 'Flexane 94 [/TD]
[/TR]
[TR]
[TD]ATI Super Damper[/TD]
[/TR]
[TR]
[TD]Hot tanked and cleaned short block[/TD]
[/TR]
[TR]
[TD]CP Pistons 9.0:1 [/TD]
[/TR]
[TR]
[TD]Carillo rods[/TD]
[/TR]
[TR]
[TD]ARP main bolts[/TD]
[/TR]
[TR]
[TD]Heads (ported and polished, surfaced, valve job, new valve seals, new guides, gasket matched to 90.5mm)[/TD]
[/TR]
[TR]
[TD][/TD]
[/TR]
[TR]
[TD]Suspension[/TD]
[/TR]
[TR]
[TD]BC Coilovers - BR Type [/TD]
[/TR]
[TR]
[TD]NSX-R Front Sway Bar [/TD]
[/TR]
[TR]
[TD]Cedar Ridge compliance clamps[/TD]
[/TR]
[TR]
[TD][/TD]
[/TR]
[TR]
[TD]Wheels and Brakes[/TD]
[/TR]
[TR]
[TD]Earls Stainless Steel brake lines[/TD]
[/TR]
[TR]
[TD]Carbotech XP8 Brake Pads[/TD]
[/TR]
[TR]
[TD]ATE Super Blue Brake Fluid[/TD]
[/TR]
[TR]
[TD]Replacement of the two rear CV Boots[/TD]
[/TR]
</tbody>[/TABLE]