• Protip: Profile posts are public! Use Conversations to message other members privately. Everyone can see the content of a profile post.

SOS - Oil Pressure Sender Upgrade Kit

"almost zero" at idle is fine. According to the workshop manual oil pressure reading should be:

idle 0.7 kg/cm2 (10psi)
3000 rpm 3.5 kg/cm2 (50psi)

The dash gauge is graduated in kg/cm2 so 0.7 is quite close to zero. Then it depends how accurate the gauge is, especially in where it's zero point really is. For example if the gauge is slightly below zero when the engine is off, take that as the zero point, then it probably moves 0.7 from there.

Even if not I wouldnt worry, the gauge is not very accurate, I see it more as a guide than a gauge. The only way to be really sure is to measure the pressure with an accurate & calibrated oil pressure gauge connected at the oil filter.

All good points. I never paid attention to where my needle was before starting. It probably is below "0". So it being just above "0" at idle is probably correct.
 
Where did you move it? Mine is still sitting in the bag as I can't install mine. I can't even begin to get my hands remotely close to it.

To the top instead of the front. This isn't an earth shattering change - increases ease of installation by maybe 10%. You still need proper hand tools to install the adaptor block to the cylinder head (ie, with the proper tools - your hands don't need to get to the block - your tools do). Nothing too significant - a set of normal standard and deep sockets and a ratchet with a swivel head will suffice. Any mechanic will be able to easily install this if you do not have these.

cheers,
-- Chris
 
I installed the sensor upgrade when I did my BBSC install last spring. I was seeing basically a "0" reading on the gauge at idle when the car was warm. Never got the idiot warning light though, so I figured it was just the sensor.
I put in the SOS one.....no difference. Still seeing almost zero at idle and warm engine. I figure if my oil pressure was actually this low, my engine would be toast by now and I'd see the idiot light on, which does come on when I turn the car on before I start it, so I know the light isn't out. Yes, my oil level is fine.
Any ideas? Maybe a bad connection? What should the voltage be at the sensor at idle?

The sensor is very accurate to the factory sensor curve by around 1%. If the gauge is reading low at idle, it is probably because the gauge is going bad or the port to the sensor is blocked. You can verify this by placing a 50 ohm resistor between chassis ground and the 1 pin oil pressure sensor connector on the factory engine electrical harness (with the jumper harness we include removed). This will simulate the approximate resistance produced by the sensor with the engine fully warmed up - which should be approximately 100 kPa, or right around the first tick on the dash gauge. Should the gauge read below the first tick, the port for the sensor is probably plugged. Should it not, the gauge is going bad, which would not be unexpected for a 20+ year old electromechanical part.

-- Chris
 
Last edited:
The sensor is very accurate to the factory sensor curve by around 1%. If the gauge is reading low at idle, it is probably because the gauge is going bad or the port to the sensor is blocked. You can verify this by placing a 50 ohm resistor between chassis ground and the 1 pin oil pressure sensor connector on the factory engine electrical harness (with the jumper harness we include removed). This will simulate the approximate resistance produced by the sensor with the engine fully warmed up - which should be approximately 100 kPa, or right around the first tick on the dash gauge. Should the gauge read above the first tick, the port for the sensor is probably plugged. Should it not, the gauge is going bad, which would not be unexpected for a 20+ year old electromechanical part.

-- Chris

Excellent info. Thanks Chris! I'll give that all a whirl when I start digging into my motor a bit again here in a few weeks.
 
... You can verify this by placing a 50 ohm resistor between chassis ground and the 1 pin oil pressure sensor connector on the factory engine electrical harness (with the jumper harness we include removed). This will simulate the approximate resistance produced by the sensor with the engine fully warmed up - which should be approximately 100 kPa, or right around the first tick on the dash gauge. Should the gauge read above the first tick, the port for the sensor is probably plugged. Should it not, the gauge is going bad, which would not be unexpected for a 20+ year old electromechanical part.-- Chris

that's a great tip ... thanks Chris, I'll add that to my "NSX To Do" list :smile:
 
I'm curious what airframe mechanics are using.

We are using a braze paste with localized heat treating,but I don't recommend this on parts you plan on replacing within the next 10 years as it requires some bloody knuckles to remove
 
Excellent info. Thanks Chris! I'll give that all a whirl when I start digging into my motor a bit again here in a few weeks.

You're welcome. Keep in mind that this is based on factory "minimum" oil pressure specs. In actuality, the cars make more pressure at idle and 3000+ RPM. However, if you achieve these numbers or more, you know you're safe.

-- Chris
 
I have just installed the SOS kit on my 95 Targa. Straight forward install, easier with airbox out and 1/4" drive sockets. Only problem was when Targa brace replaced (last bit!) it fouled with the sender. I moved the sender to the rear surface of the coolant bracket then tilted it to gain clearance from the engine bay brace.

All works a treat with rock steady oil pressure.

Thanks Chris and the SOS team for another great product!

Scott
 

Attachments

  • Oil press.jpg
    Oil press.jpg
    60.2 KB · Views: 219
  • Oil press targa.jpg
    Oil press targa.jpg
    99.2 KB · Views: 221
I just installed this yesterday and overall I am very pleased. Some comments:

- All of the components are well-made and fit together without issues

- You should pre-assemble the adapter block and elbow fitting with hose. I can't imagine how to do that while attached to the engine.

- I used Hondabond HT on the pipe threads and let it sit overnight before starting the engine to allow the hondabond to cure

- I found you need to angle the elbow fitting slightly up to help keep the hose away from the main coolant line clamp, which is precariously close.

- The braided oil line is a little too long and results in some unnnecessary bends, which place the line close to the metal coolant hose clamp. Also, I think the right-angle AN fitting on one end of the hose is unnecessary for a coupe installation.

- For better access, you should unplug the green spool valve connector and remove the metal bracket screw (8mm socket) holding the wire harness to the front spool valve. This will allow you to push the entire wire harness up and to the right. I secured it with a zip tie to prevent it from slipping back down while I worked.

- The OEM bolts are M8, but they require a 12mm socket. Mine required more than 90 ft/lbs of torque to break loose. :eek: 
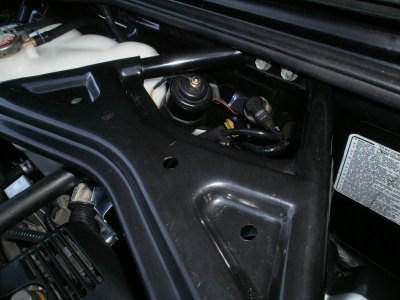
6-point sockets are a must.
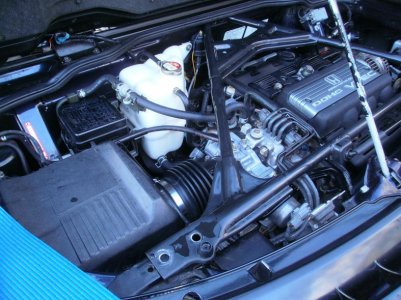
- To remove the bolts, I found a 12" socket extension and a 6-point 12mm deep socket to be the best way. I went under the 2 main coolant hoses from the airbox side and it gave me nearly straight on access to both bolts. Use caution when wrenching in this position, the clutch main lines are right by where the ratchet/breaker bar head sits.

- I used Dow Corning dielectric grease on the new o-ring to help hold it in the block. I put a dab of grease on my finger and rubbed the o-ring between my finger and thumb. No globs.

- I found removing the metal bracket (10mm socket) holding the sensor plug to be much easier than trying to unplug it in that awkward position. This way, I just lifted the whole assembly out and unplugged it on the bench.

- To reinstall, I put the top bolt through the adapter block and used my 12" extension slightly angled upwards to "hang" the block on the bolt and then guided the bolt to the hole with the extension and my right hand. I threaded both bolts loosely first and then torqued to 22 ft/lbs.
 
it's leaking!

I suggest you tighten it more, plus check the SoS instructions and you're using the right seal (if there's a separate seal)
 
Last edited:
it's leaking!

I suggest you tighten it more, plus check the SoS instructions and you're using the right seal (if there's a separate seal)

Yeah, but it's leaking from the back of the nut, plus shooting out of the tiny pinhole on the side of the nut??

It's as tight as I could get it with a pair of open ended (13mm and 15mm) wrenches. I guess I should remove the teflon tape (per a post I found from SoS saying to only use it on the block end) and break out the big nasty adjustable pipe wrench? Couldn't tell from the photos whether the nut is expected to completely cover the threads.

I would venture to say that you have either a bad line fitting or fitting on the sender. Or it's possible you didn't have the line mated squarely to the sender when you tightened it.
 
Having some trouble getting this one installed.

Anyone understand what's happening here?

https://youtu.be/iLwTdO0mjcA

The hose (a straight thread) is not installed to the oil pressure sensor (a pipe thread). Please refer to instructions for the fitting that should be installed to the pressure sensor. Installing it this way will cause the leak you're seeing and damage the threads on both fittings. Please contact us.
 
- For better access, you should unplug the green spool valve connector and remove the metal bracket screw (8mm socket) holding the wire harness to the front spool valve. This will allow you to push the entire wire harness up and to the right. I secured it with a zip tie to prevent it from slipping back down while I worked.

Thanks for your "guide"!!!

I did the install 2 days ago and it would have been a lot more complicated without reading your post before.

Bernhard
 
The hose (a straight thread) is not installed to the oil pressure sensor (a pipe thread). Please refer to instructions for the fitting that should be installed to the pressure sensor. Installing it this way will cause the leak you're seeing and damage the threads on both fittings. Please contact us.

Just to close the loop on this, I did indeed (in some sort of overconfident delirium) install absolutely everything on the kit backwards - from the fitting that goes into the aluminum block you mount on the engine to the one that delivers oil to the sensor. So I trashed 100% of the threads in the kit.

SoS is very kindly offering me a discount on a replacement kit even though it was destroyed by no fault of theirs - thanks so much guys!!!

Some wrenching days just don't go your way, even for simple stuff like this :frown:
 
Bought the upgrade kit last week and started install this week. Install seems fairly straightforward but like many in the thread have mentioned, it's a bit more tough in reality. Scratched the heck out of my right hand and I seemed to use every ¼ tool that I own. I choose to tuck it behind the coolant tank and like the OE location, you don't even know it's there. I had to remove some tape from the wiring harness to make more slack from the sensor plug. Overall, I was impressed with the quality of parts and the attention to detail that they seem to characterize.

No leaks, sensor seems responsive, car seems to idle better, and I left the area cleaner than when I found it. Highly recommended.
 
Last edited:
Bought the upgrade kit last week and started install this week. Install seems fairly straightforward but like many in the thread have mentioned, it's a bit more tough in reality. Scratched the heck out of my right hand and I seemed to use every ¼ tool that I own. I choose to tuck it behind the coolant tank and like the OE location, you don't even know it's there. I had to remove some tape from the wiring harness to make more slack from the sensor plug. Overall, I was impressed with the quality of parts and the attention to detail that they seem to characterize.

No leaks, sensor seems responsive, car seems to idle better, and I left the area cleaner than when I found it. Highly recommended.

pgauge works
 
Pressure gauge works sometimes

I purchased the SOS pressure sensor a few years back. once installed the gauge would word sometimes and then just stop working. I replaced the pressure gauge with a new OEM gauge and the issue is the same. Thinking of buying the OEM pressure send unit unless there could be a issue with the wiring from the sending unit to the gauge. The car has only 46K miles on it and is always garage stored. Any ideas?
 
SOS is substandard

Sorry, I don't know what this means. Can you elaborate?

I find SOS products sub standard. The pressure sensor does not work properly, I purchased one of their clutches and the flywheel was not machined to the correct specs, I believe the flex plate was incorrect. Cost me a lot of extra money to get it ti work. Bought the original SOS headers. total crap! They leaked and the welds were poor. Bought Fujitsubo headers, no comparison too their headers. No leaks and precision quality. I have purchased quite a bit of products from SOS and my opinion is they are substandard to Japanese products. The only good products I have purchase from SOS is OEM Honda.
 
I find SOS products sub standard. The pressure sensor does not work properly, I purchased one of their clutches and the flywheel was not machined to the correct specs, I believe the flex plate was incorrect. Cost me a lot of extra money to get it ti work. Bought the original SOS headers. total crap! They leaked and the welds were poor. Bought Fujitsubo headers, no comparison too their headers. No leaks and precision quality. I have purchased quite a bit of products from SOS and my opinion is they are substandard to Japanese products. The only good products I have purchase from SOS is OEM Honda.

Thanks. No idea how the above could be summarized by "pgauge works" but I appreciate your explanation.
 
Back
Top