• Protip: Profile posts are public! Use Conversations to message other members privately. Everyone can see the content of a profile post.

96cxt build

Joined
8 September 2007
Messages
1,053
Location
Houston, TX
Hello everyone. I have owned my 92 for about 12 years now and just decided to start my build thread.

Car's 1st year consisted of the following (sorry no pictures)

Stage 1

Volk GTV 18/19
D2 complete coilovers
GT Shrine front lip
DC sport exhaust
Top Speed Headers
Porting the intake manifold http://www.nsxprime.com/forum/showthread.php/118430-Porting-the-stock-Intake-manifold-(my-write-up)
Big bore TB
Removing the VVIS
Stock clutch

Car Dynoed at 270whp with no tuning.

Stage 2

BBSC Supercharger 8psi pulley
GTLW exhaust
Welding bigger collectors/flange on Top Speed headers
Test pipes
Replace clutch (stock OEM clutch again - Twin Disc)
AEM EMS series 1 (2nd gen)
Water to air cooler

Car Dyoned at 411whp

After having the Supercharger for almost 10 years, I decided to change things up.
So I sold the Supercharger kit and bought the Twin Turbo kit with the VATN turbos. If you are not familiar with this turbo kit you can search with lots of details available online.
20200309_171815_zps1ejdata8.jpg


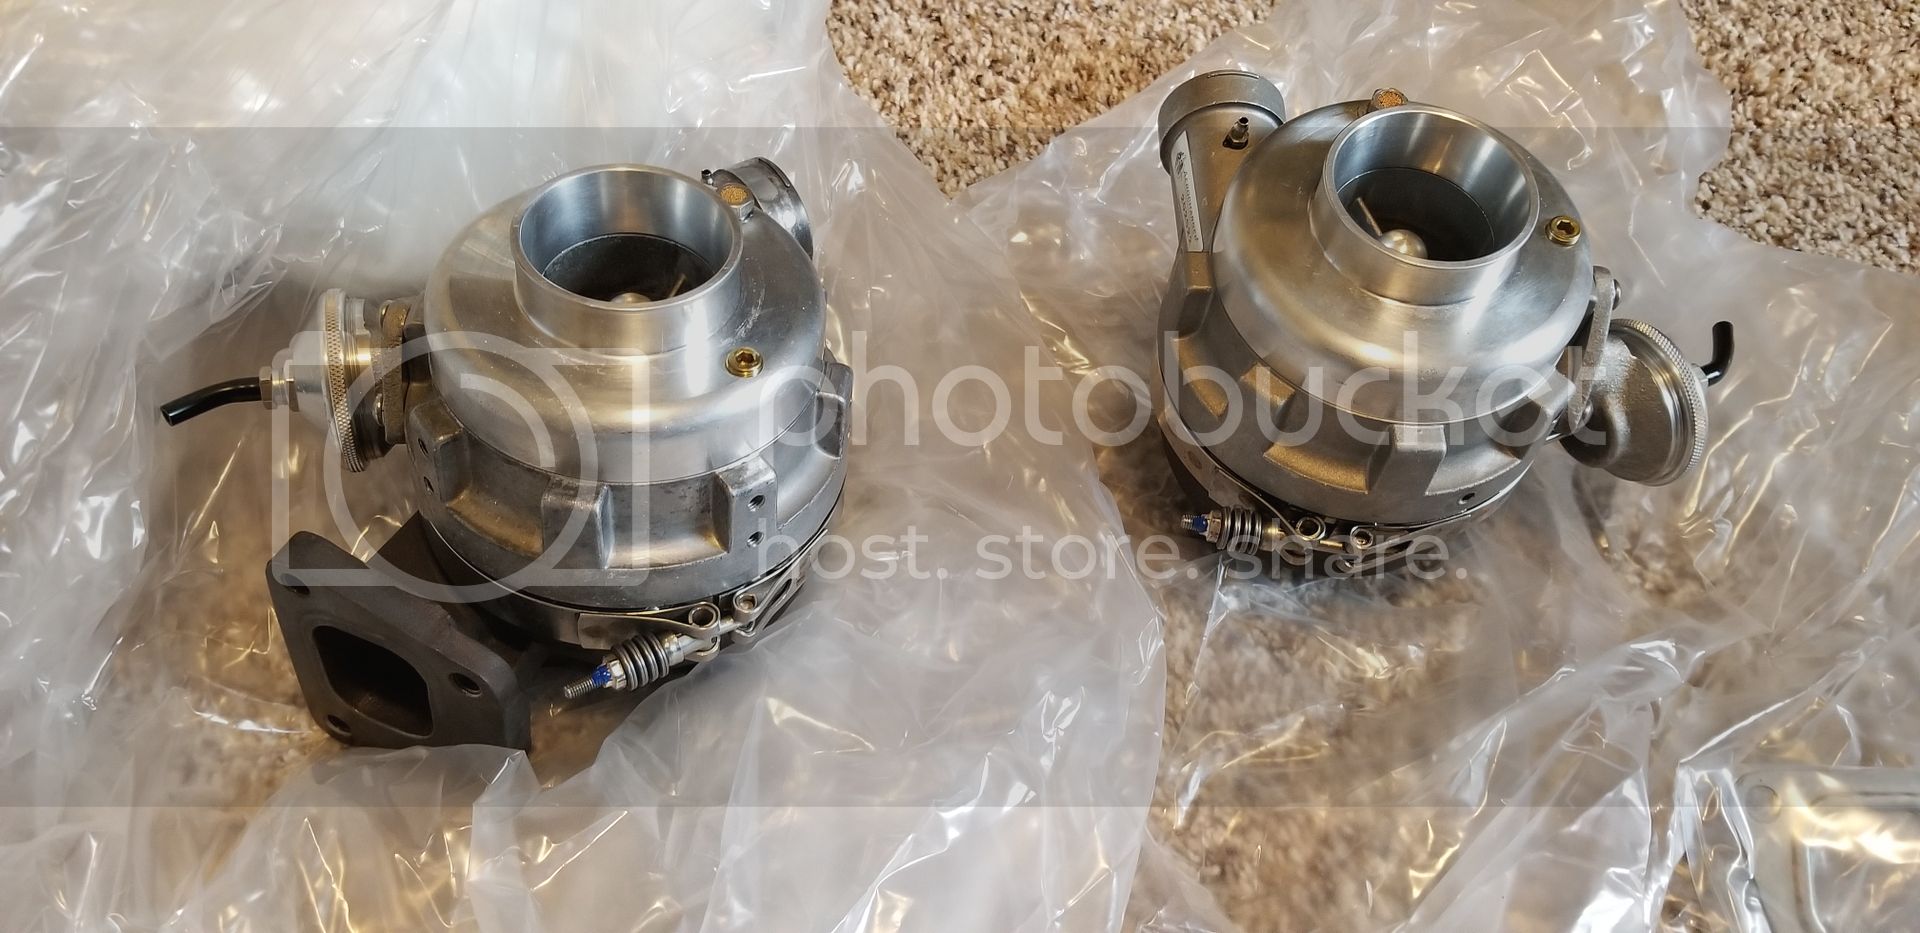
This thread starts from my stage 3 set up of the turbo kit. I decided to do a complete build with removing the engine and doing a clean up and all the services while I have the motor out of the car. Here are pictures from the pas week of me removing and cleaning up all the parts.

I pressure washed (electric one from Harbor Freight $70ish) the sub frame and the engine. I used simply Green solution only.

20200329_151827_zpsr6gkbo67.jpg.html


I will post pictures as i have updates.
 
Last edited:
Finally all the parts came in.

Replaced the following:

Timing belt - The old one has less than 10k miles but was replace about 7 years ago.
Cam seals (x4)
Crank seal (oil pump side)
Cam plugs

Here is a tip for anyone that is going to tackle the timing belt on their own.
Before removing the old timing belt, set it to TDC (piston #1 ) and mark cam pulleys and the belt.
Remove the belt and trace the marking onto the new belt at the same location so when you install the new belt you know exactly where the timing belt will sit. Factory has the markings for TDC but this takes the guess work out while installing the new belt.
Another tip - The cams oiling plates on top have holes and the cams are notched. You can put a long 10mm bolt through the oiling plate to keep the cams from moving when you are installing the new belt.

Here are pictures...
20200404_161701.jpg
20200404_161708.jpg
20200404_161713.jpg
20200404_161716.jpg
20200412_190344.jpg

With new belt
20200414_120552.jpg
20200414_120609.jpg
20200414_120646.jpg
20200414_120656.jpg

Here are pictures of the Top Speed headers. 7 years ago I had welded bigger collectors (2.5") and flex pipe since I was running the BASCH Supercharger kit. If you are running a supercharger or turbo, this will help with more exhaust flow.
Over the years I have had people ask me for pictures on these. Here you go!
20200404_134118.jpg
20200404_134140.jpg
20200404_134219.jpg

Next step is to do the valve adjustment and check the friction discs for wear. I am running a stock OEM twin clutch which was replaced 8 years ago but has less than 10K miles. It looks great but I will measure to ensure they are in spec according to the service manual.

Also gonna send my valve + manifold covers to get red powder coating done. Looking forward to getting everything done by next weekend.
 
The engine is back in the car, did a warm up cycle to ensure no oil or coolant leaks.

Did a compression test before installing the motor back into the car.
20200424_180111.jpg
20200424_180240.jpg
20200424_180524.jpg
20200424_180646.jpg
20200424_180758.jpg
20200424_180903.jpg

And a pic of the motor back in the car. Still have to flush and bleed the brake fluid, clutch line fluid, install the air box, and a few other misc things.
20200429_200241.jpg
 
Wow, congratulations. Looks like a huge project. Always nice to have things go back together.
Hope you didn't have any extra nuts and bolts after the install. :)
 
Update:

The car is back together and I've put on about 120 miles on it just to ensure there are no leaks or any other issues.
Here are pictures of the car after a wash and wax :)

20200501_174725.jpg
20200501_212534.jpg
20200501_212825.jpg
20200501_213408.jpg
20200501_212958.jpg
20200501_174755.jpg
20200501_174824.jpg
20200501_174857.jpg
20200501_183151.jpg
20200502_100224.jpg
20200502_095748.jpg
20200506_202049.jpg
 
Is it ok if I like the wheels on the little one more:wink:
 
Very cool :). How do you like the polycarbonate hatch & scoop? I've thought about something like this for my car if I had a FI setup with a top-mounted intercooler or something, but I think it's cool regardless.

I have had it for years now. I got it used from another member. It worked out great for the BBSC supercharger kit I had, it helped keep things cool under the hood. Living in Houston, we see +90* days and you could still touch and hold the intake manifold after coming back from a long drive.

Since I'm going twin turbo, I am trying to figure out if I should get the water to air intercooler with the cooler plate sandwitched inside the intake manifold or should I run an air to air intercooler under the hatch scoop.
 
So i finally finished up the turbo install and completed the intercooler.
Hoping to get the tuning completed in the coming weeks. Im not looking to make more than 380 ish whp. These are small turbos and should have good low end power.

Currently has a street tune before the intercooler was installed and i love the quick spool up and useable power at normal driving.
will post dyno sheet and video once completed.

20200613_115657.jpg
20200613_132623.jpg
20200630_114159.jpg
20200811_170948.jpg
20200811_171006.jpg
20200829_164338.jpg
20200819_154520.jpg
20200807_144101.jpg
20200717_213723.jpg
 
Back
Top