
I guess maybe the supercharger masked the lack of VTEC? I dunno. The afrs are still mid 11s in boost on the rear bank which is consistent with the front. I should go through the logs and look deeper at the differences between the banks before and after. In any case the car did feel a lot quicker after
-
Protip: Profile posts are public! Use Conversations to message other members privately. Everyone can see the content of a profile post.
You are using an out of date browser. It may not display this or other websites correctly.
You should upgrade or use an alternative browser.
You should upgrade or use an alternative browser.
bogle's 1991 mild build thread
- Thread starter bogle
- Start date
I got some things done last weekend that I've been wanting to do for a while.
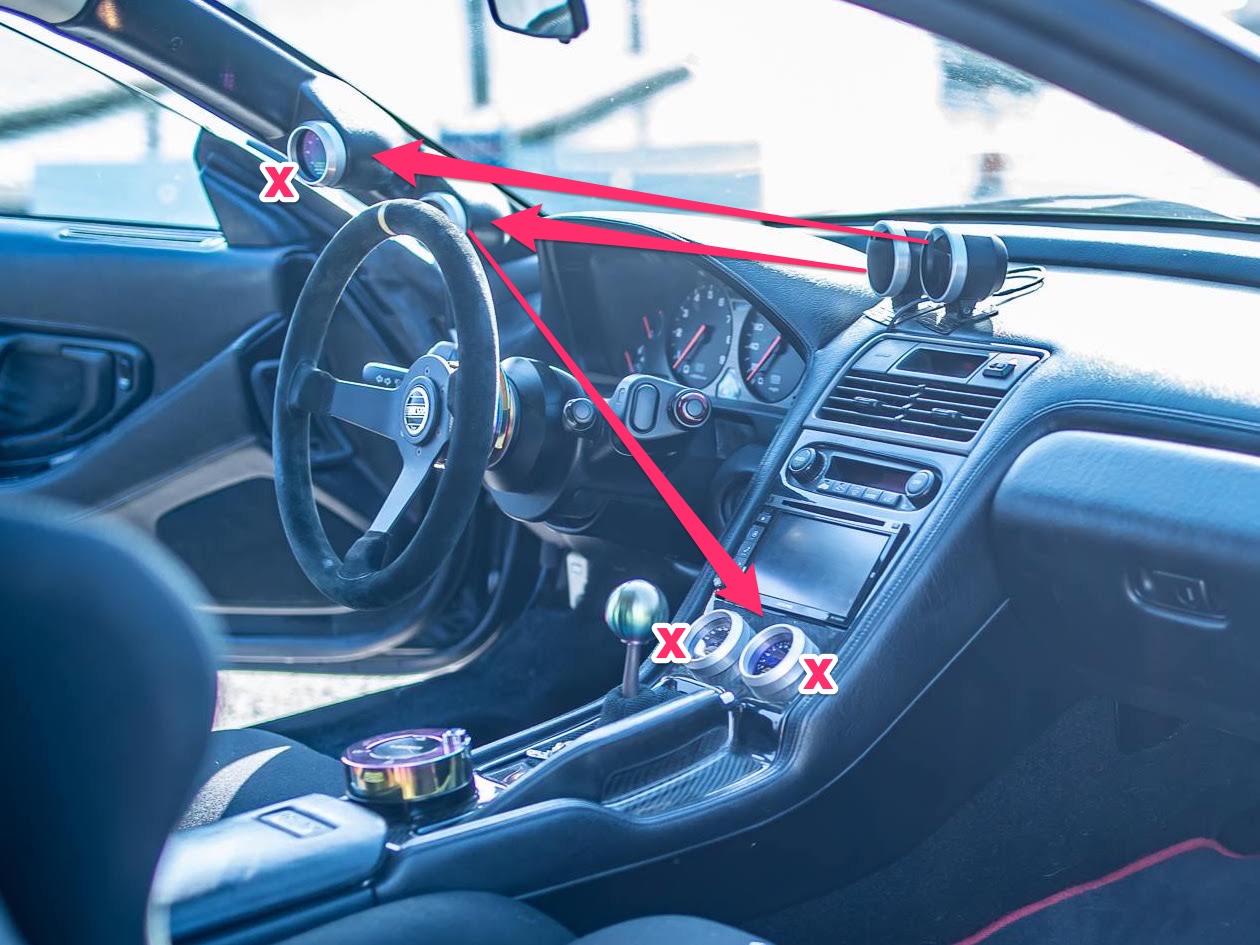
First up is the gauges. Before this work, it had 6 gauges in 3 locations. A-pillar: AFR & fuel pressure, top of the dash: oil pressure & MAP, then in the center console: CAN gauge & water temp.
The ultimate goal is no gauges. I still want to know all the things the gauges tell me, but everything should go through the ECU -> CAN, then show in RealDash in the navpod. I can't really get oil and fuel pressure through the CAN bus, so this world will have to wait until I upgrade the ECU.
Medium term, I just wanted to get a navpod setup going and get rid of some of the redundant gauges.
Gauge Migration
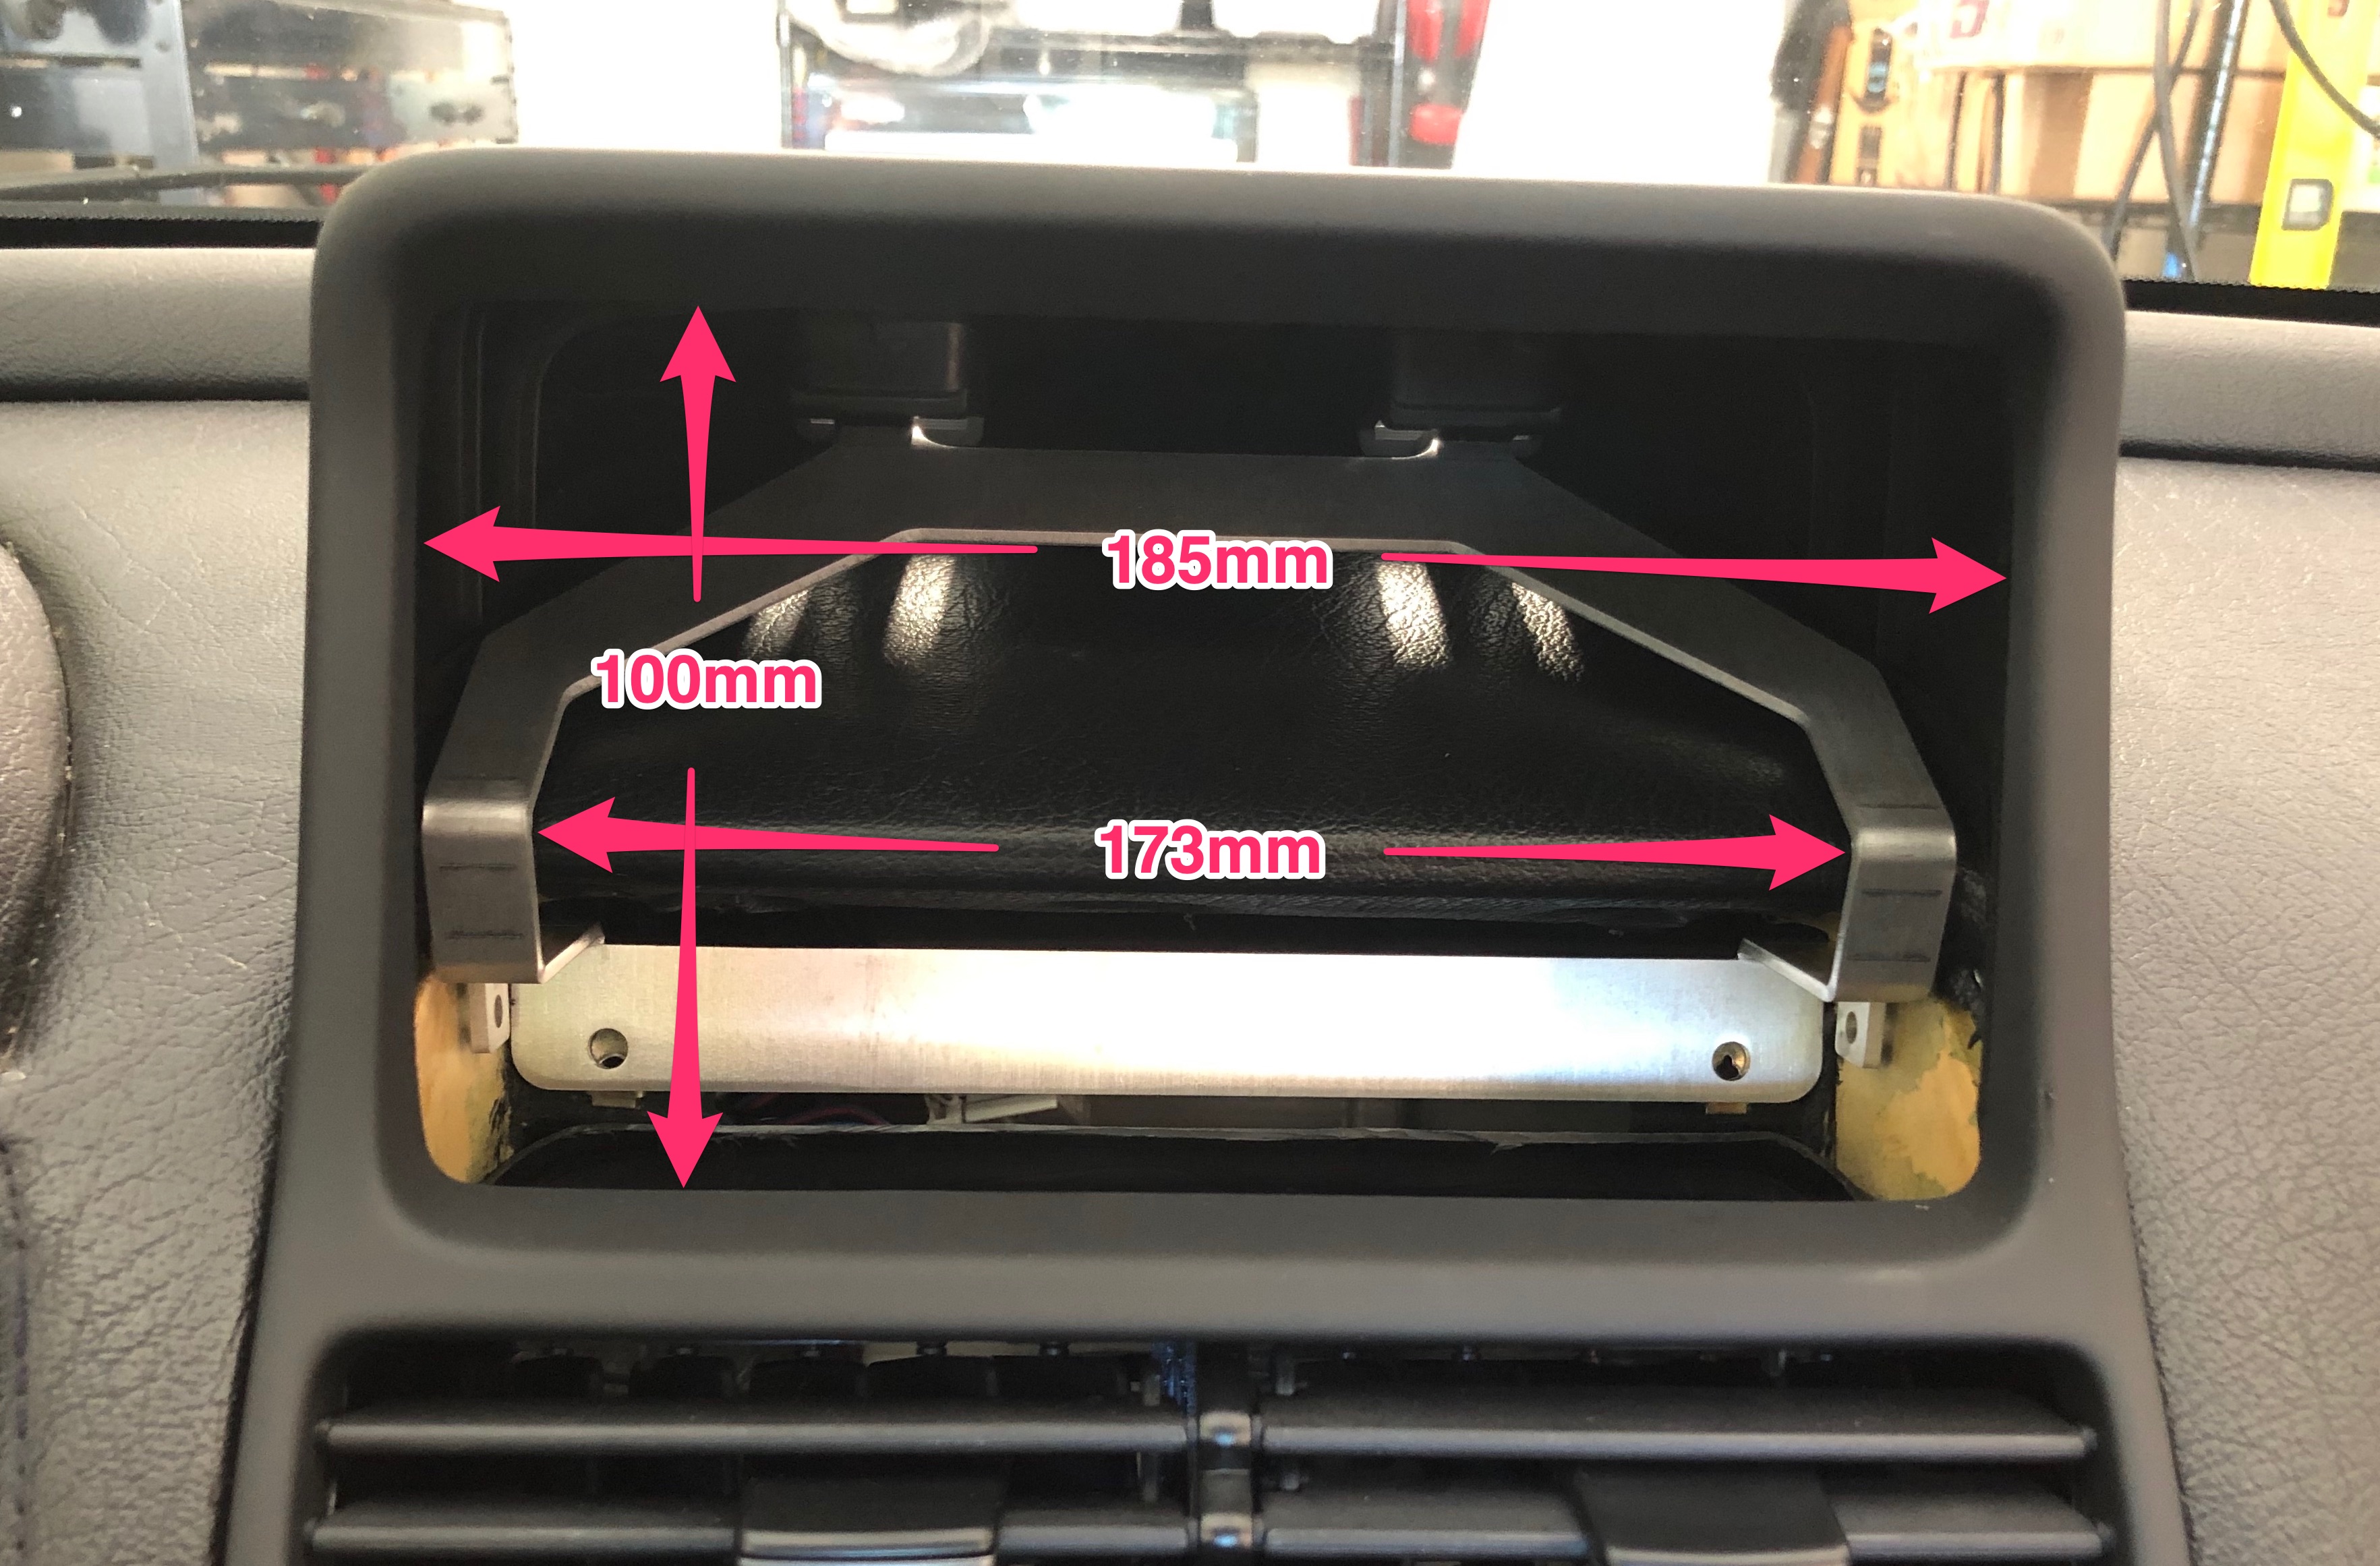
This is what it looked like when I got the car + the plan in pink. Basically, have no gauges on the dash, and keep the pillar and console gauges for now.
I started by tearing everything apart just to see WTF was going on:
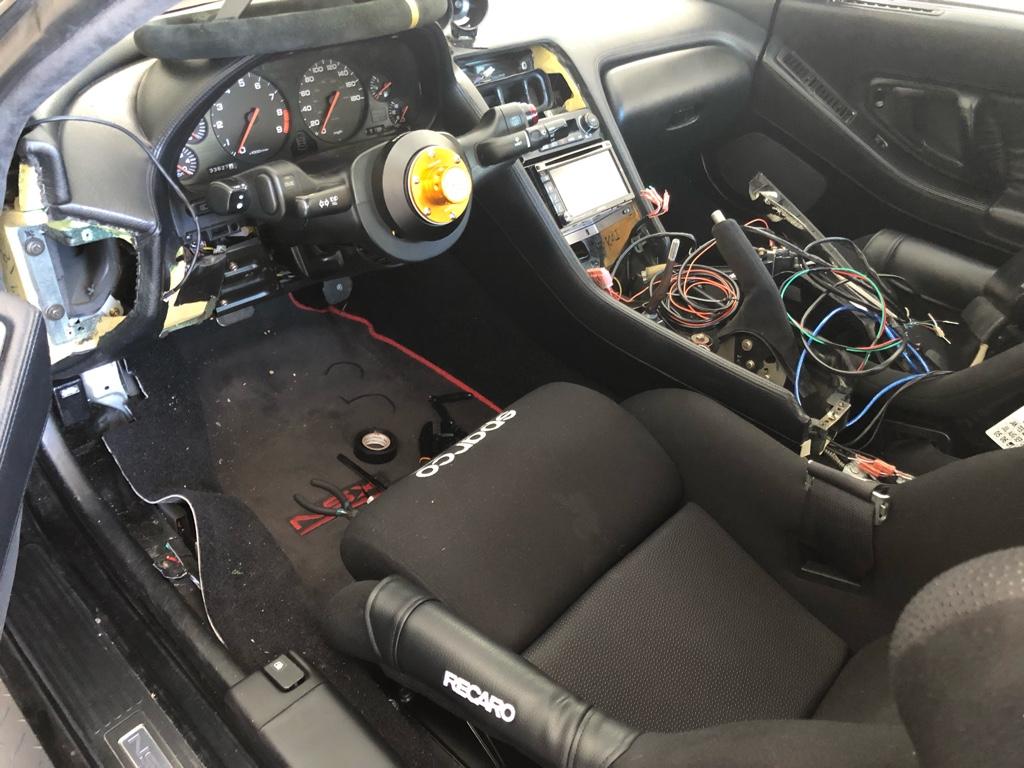
The AFR gauge hasn't been hooked up since the new widebands, and the water temp comes in through the CAN bus now (even though the gauge sensor is in a different location), so they were the natural gauges to go. And after working out where all the wiring went, it was going to be a lot easier to move the dash gauges to the A pillar.
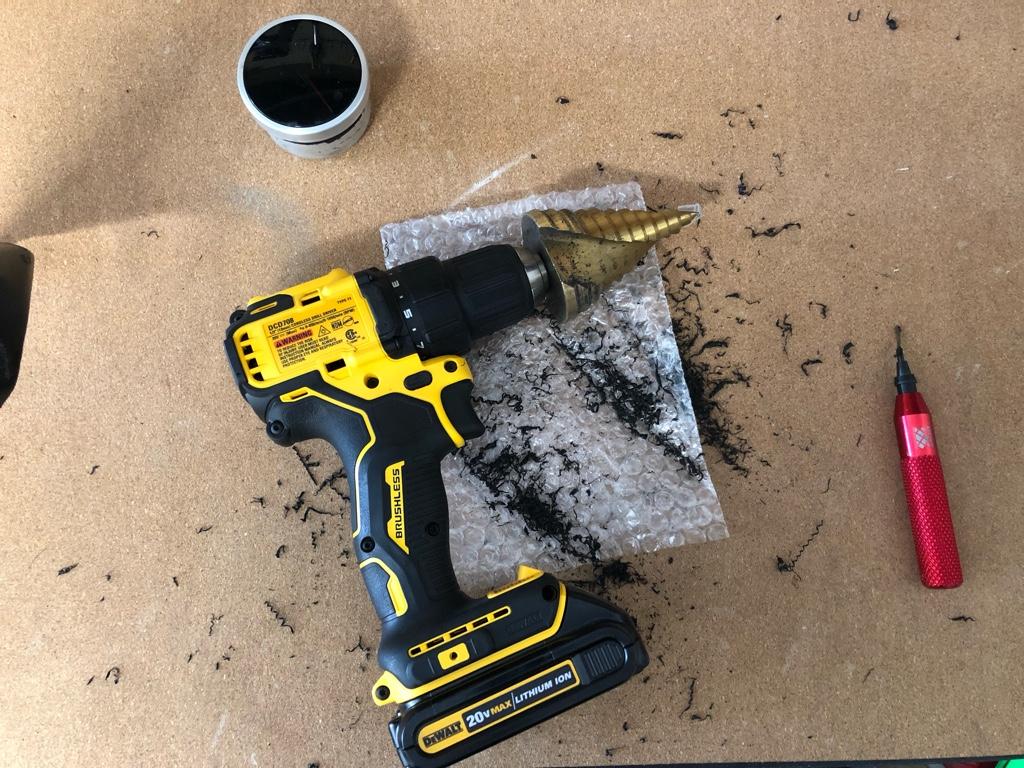
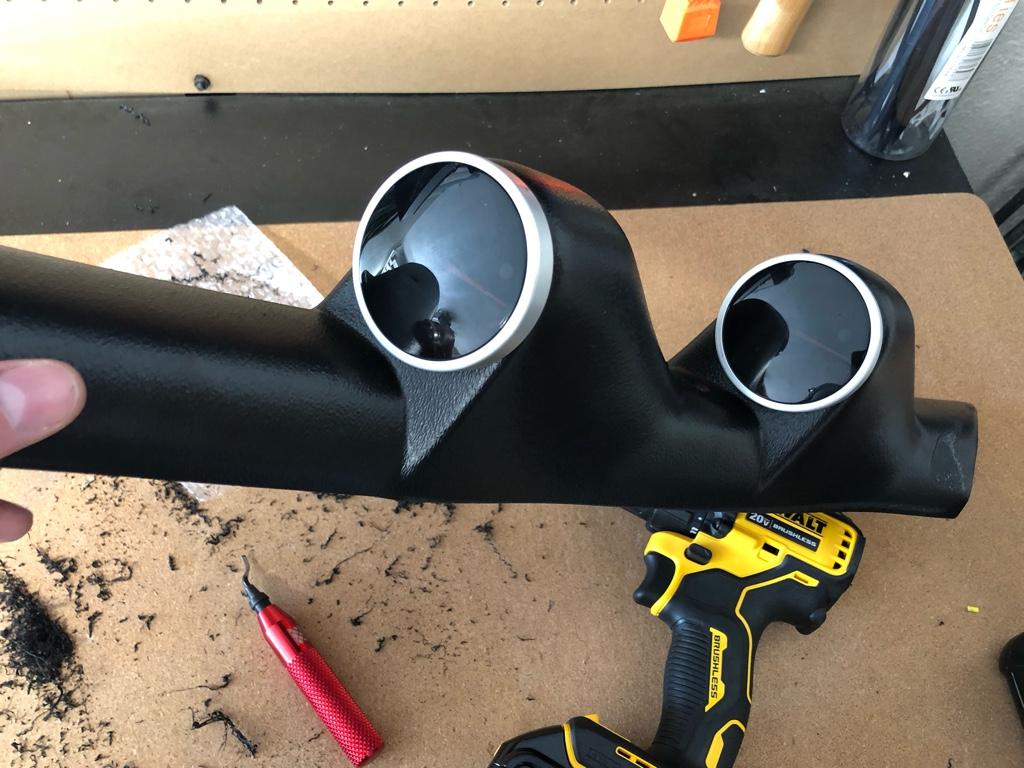
The biggest job in the gauge migration was moving and cleaning up after the dash gauges. They are 60mm and the old pillar gauges are 52mm, so this meant boring out the pillar to fit the bigger ones.
I got a hugeass step bit and went to town:
One of them bored out
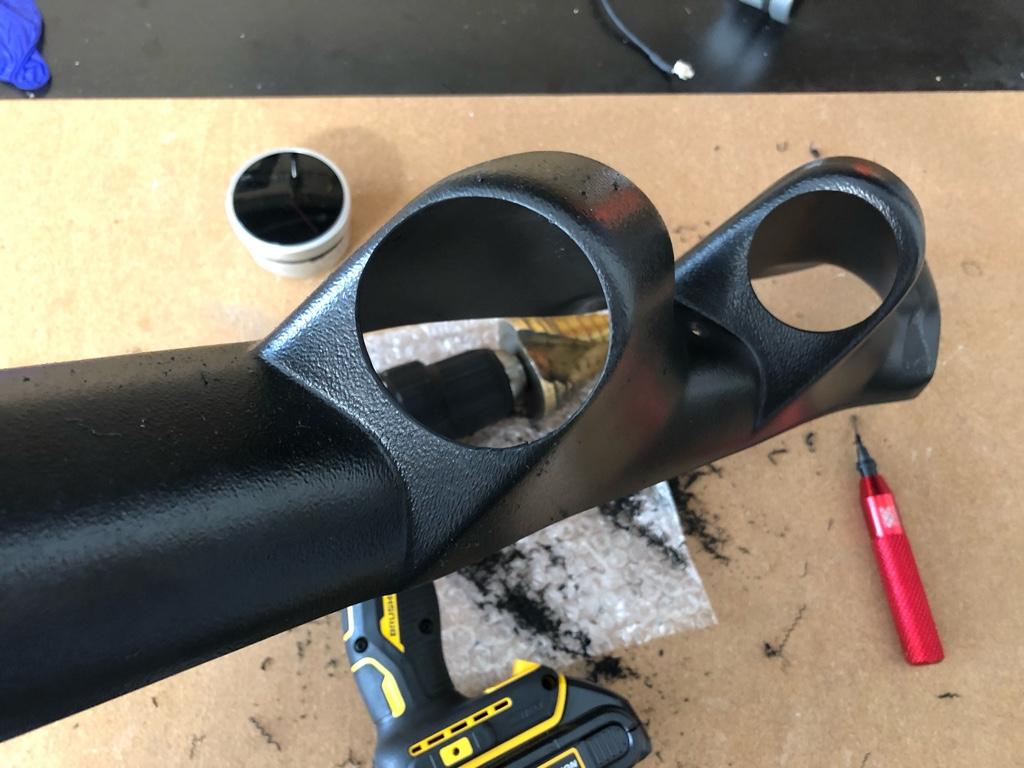
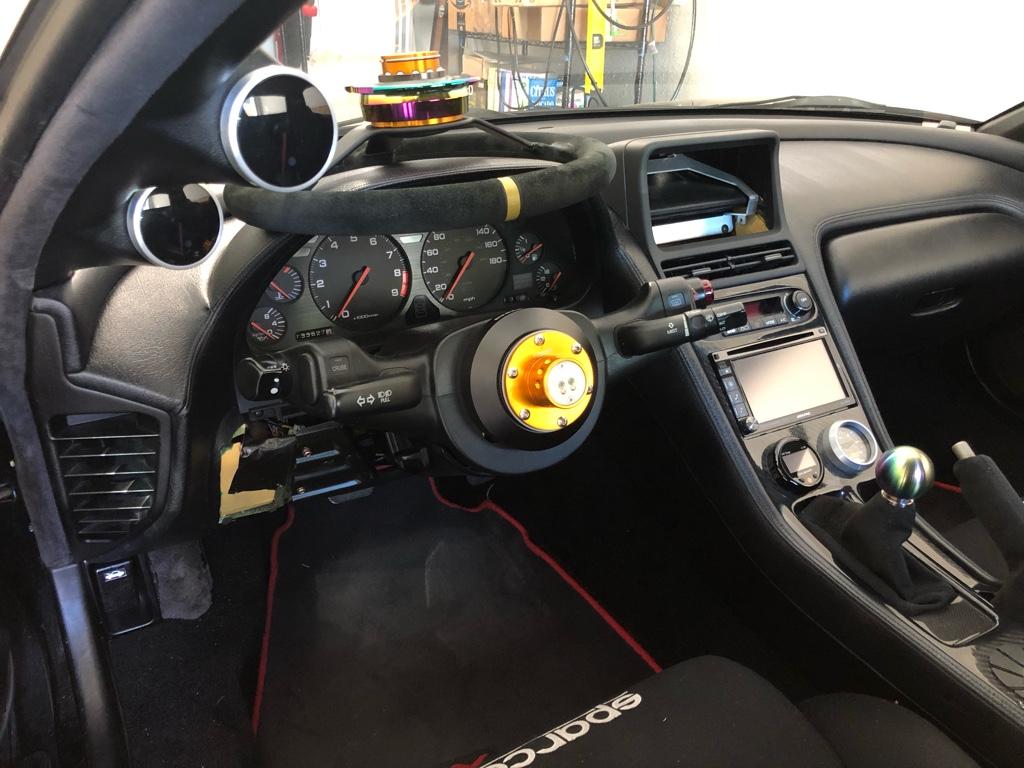
Then the gauges installed in the pillar. There's nothing really holding them in, but the holes are pretty snug, and each gauge has a sort of foam strip around the perimeter that seemed to provide enough friction.
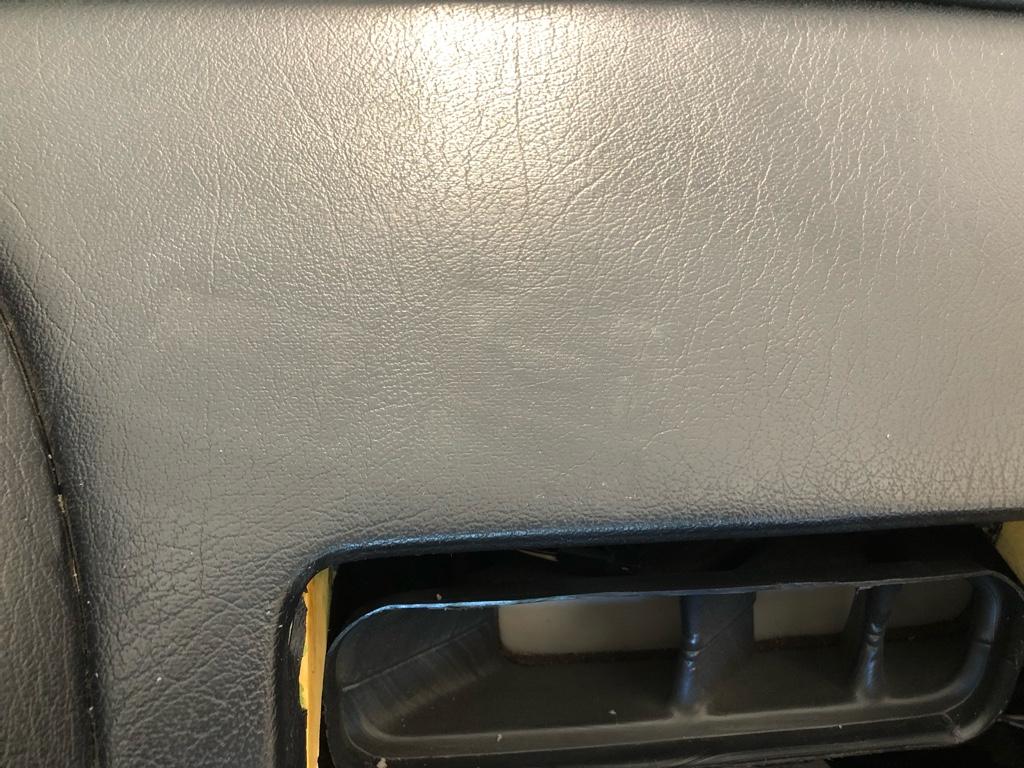
Then I had to get these things off the dash:
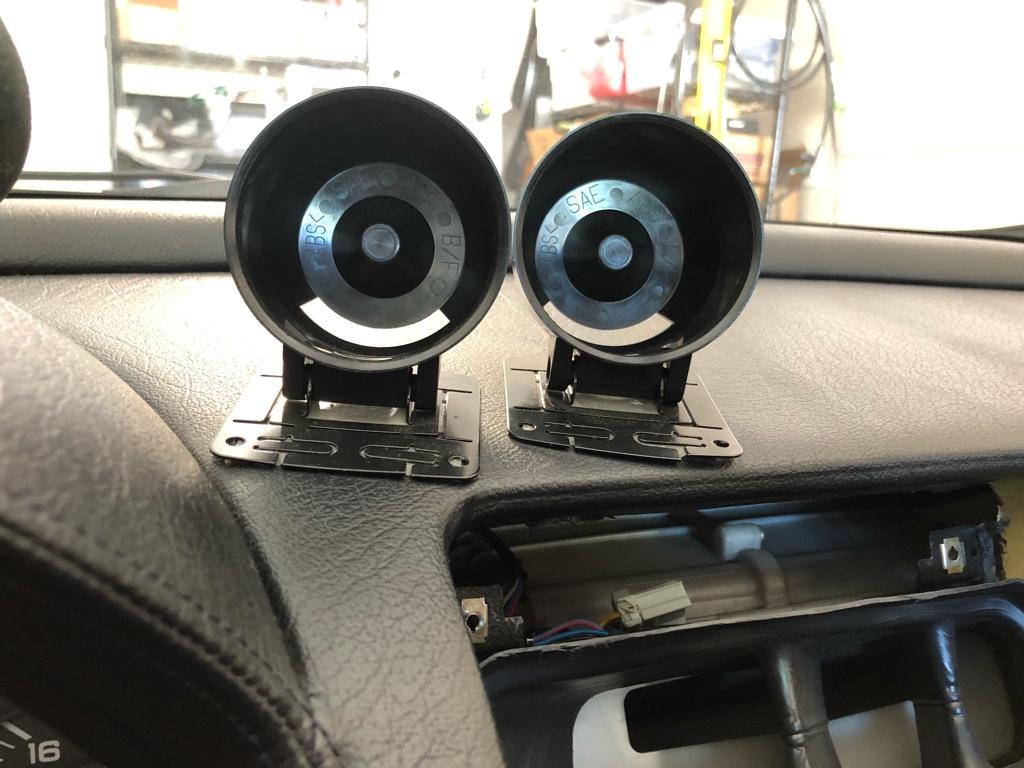
A hair dryer and a plastic putty knife worked a lot better than I was expecting. The result being:
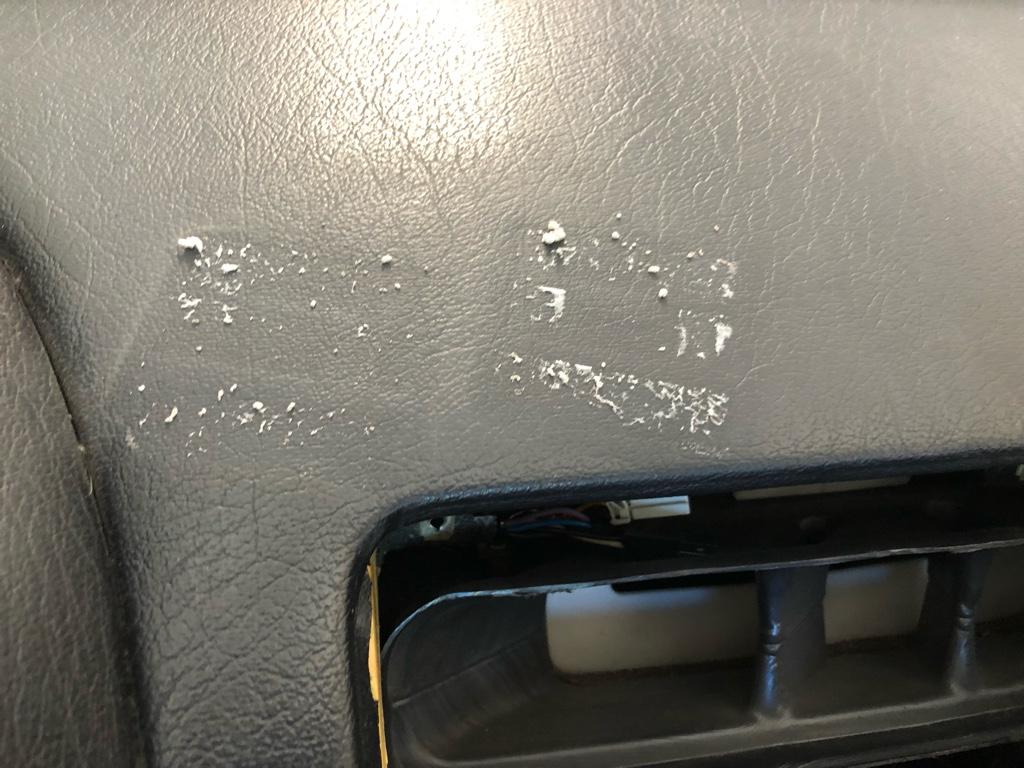
Then I got some of this stuff to remove the residue:
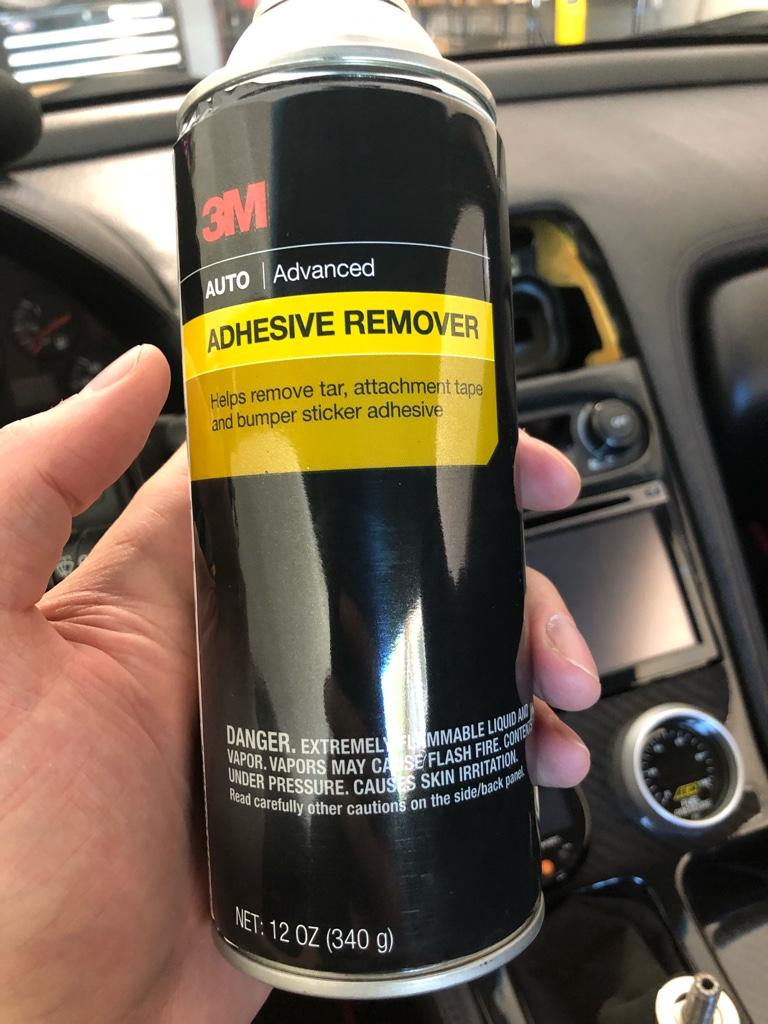
It only took 2 spray n wipes to get all that junk off. It was way easier than I thought it was going to be:
Win! My last giant Amayama order came with a navpod and all the bits, and I got the SoS bracket so no dash cutting. Navpod mocked up and fuel pressure gauge moved to the console:
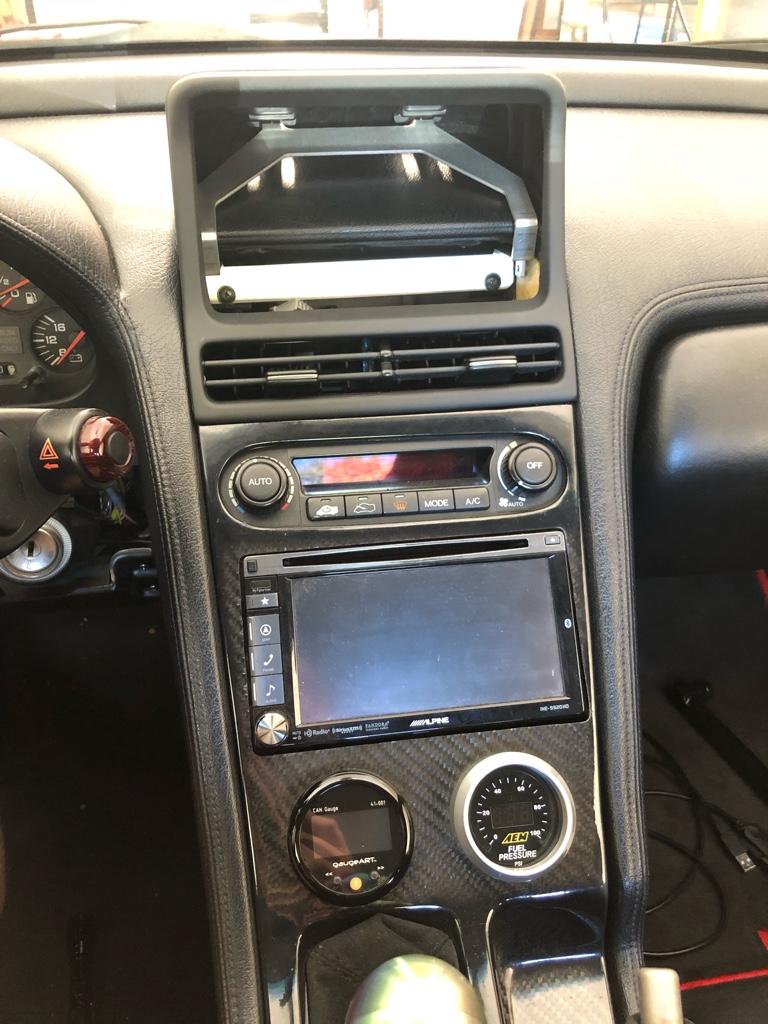
Then all done for now
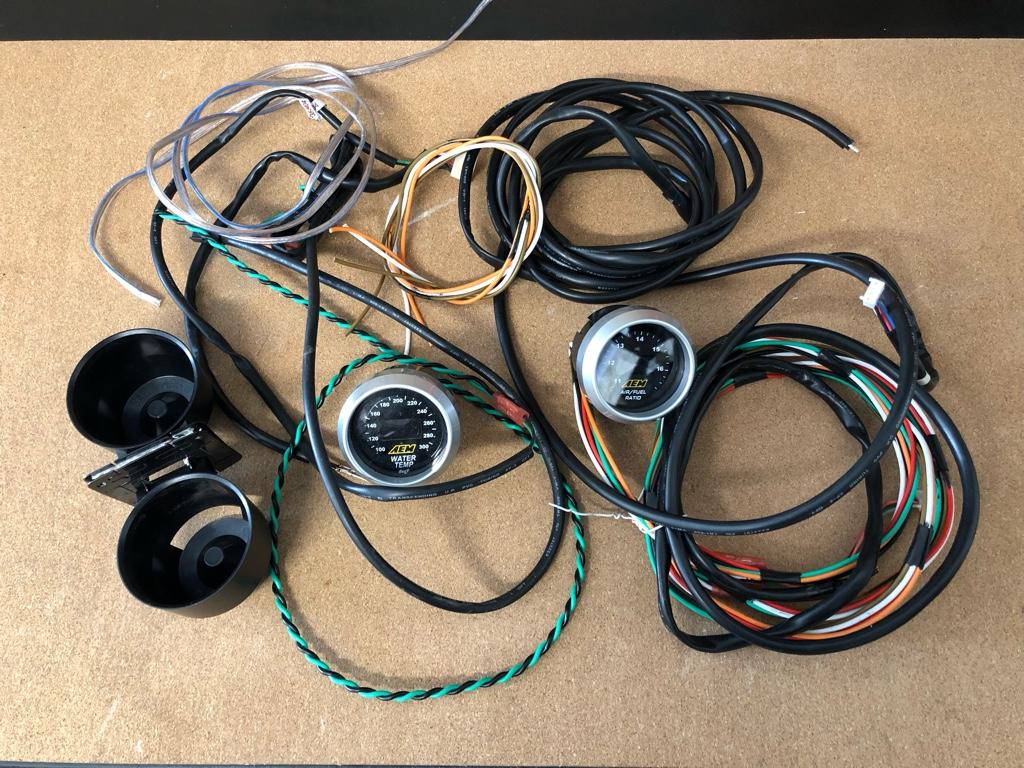
I managed to remove alll the wire for these two gauges. Feels good man:
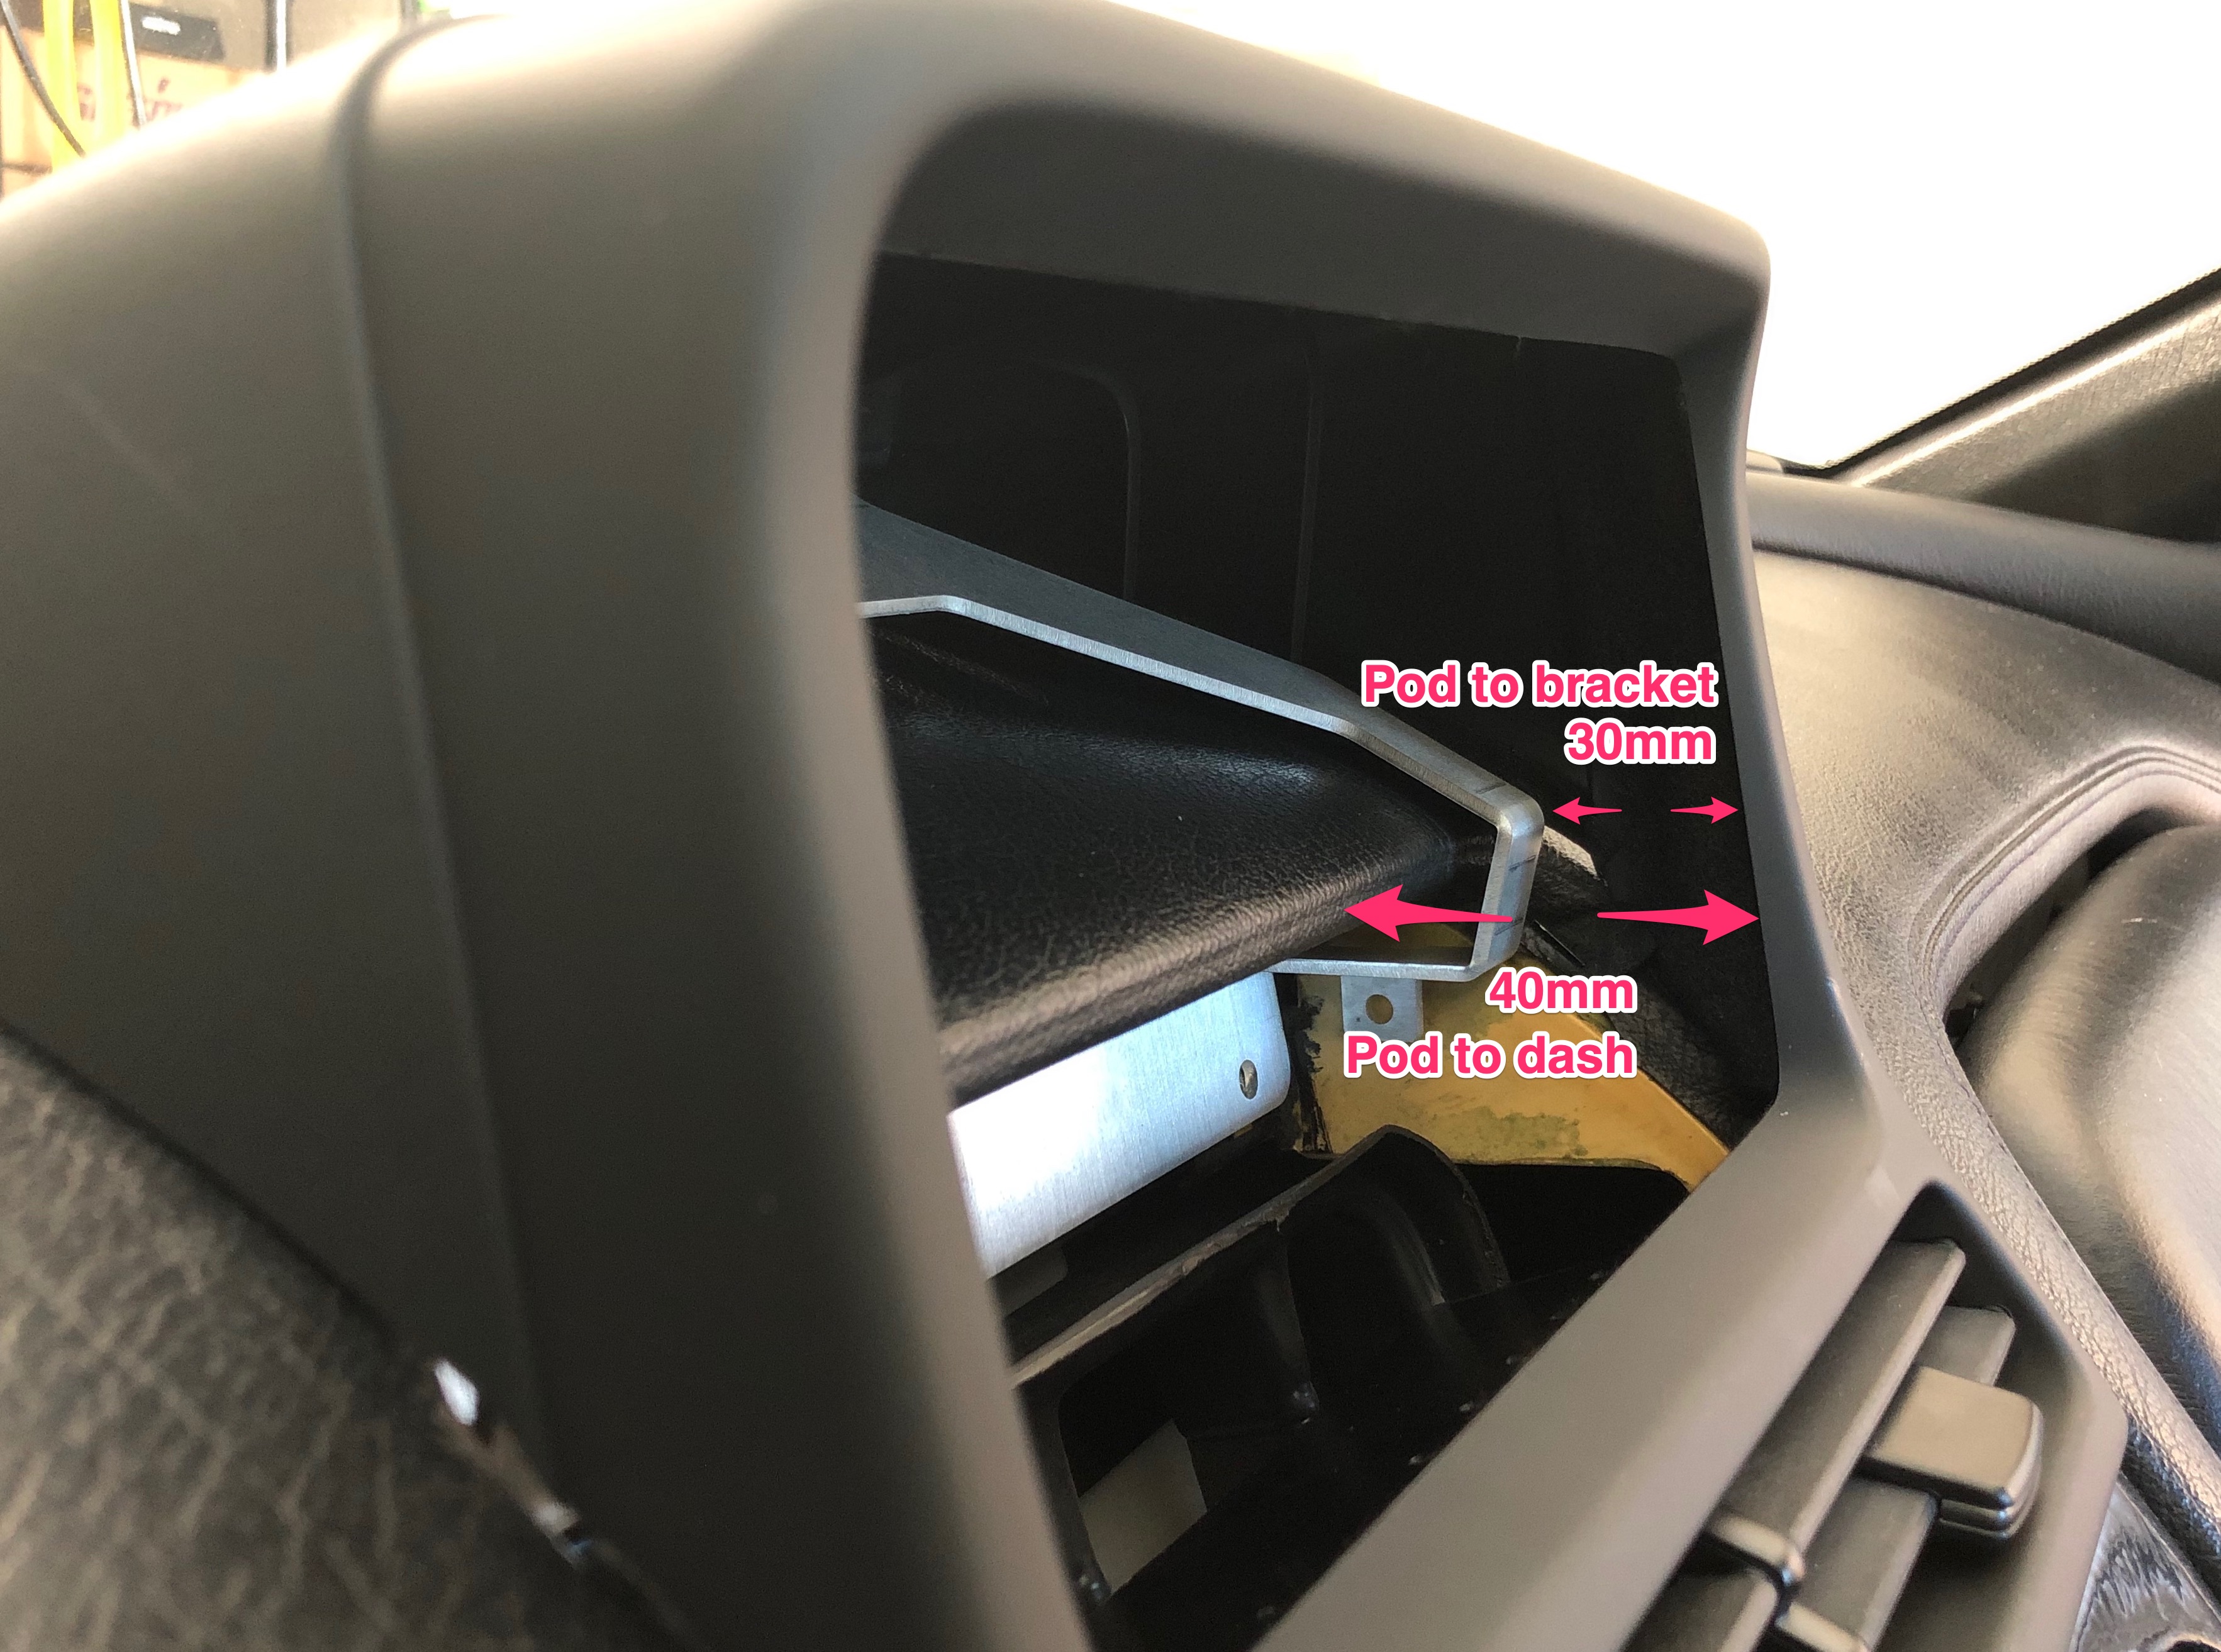
Nav pod measurements
There isn't much room in the navpod around the top of the dash. Basically, it can tolerate a screen that is about 40mm thick right there. It's also a little and wider than a normal double din hole. Fortunately, the SoS bracket is wide enough where any headunit will fit in between the sides.
I'll get into the headunit choice in the next post, but quick note: no car-specific double din android stereos are 40mm. Even the "ultra shallow" head units by like Alpine are 75mm+ thick. No name Chinese head units are around 50mm thick, but they interfere with the dash at at the RCA inputs. I did get a headunit and I have started modifying it. More details coming, but empty-hole pics now:
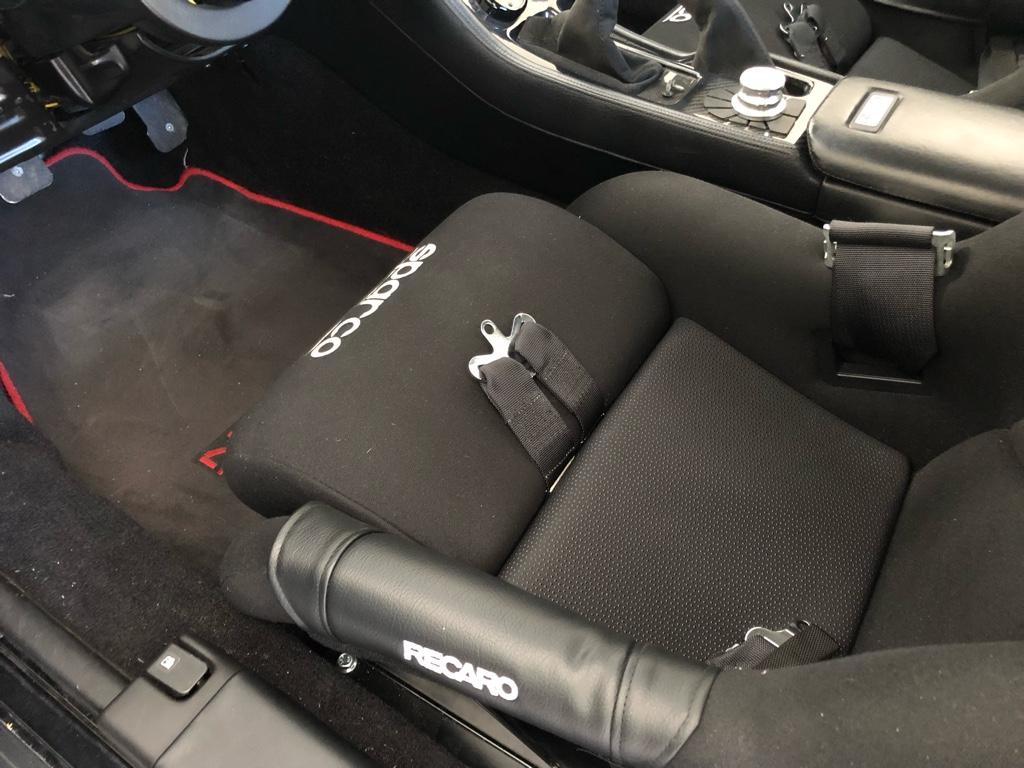
Harness Bar
The car came with 6pt harnesses, but the sub straps were not installed. This made me nervous cause to get the harness tight enough with 4 points, the lap belt is basically on my stomach. Not ideal in a crash scenario.
But installing the sub straps was hard. They are not long enough to go all the way back to the harness bar behind the seats, and I'm not about to drill into the floor.
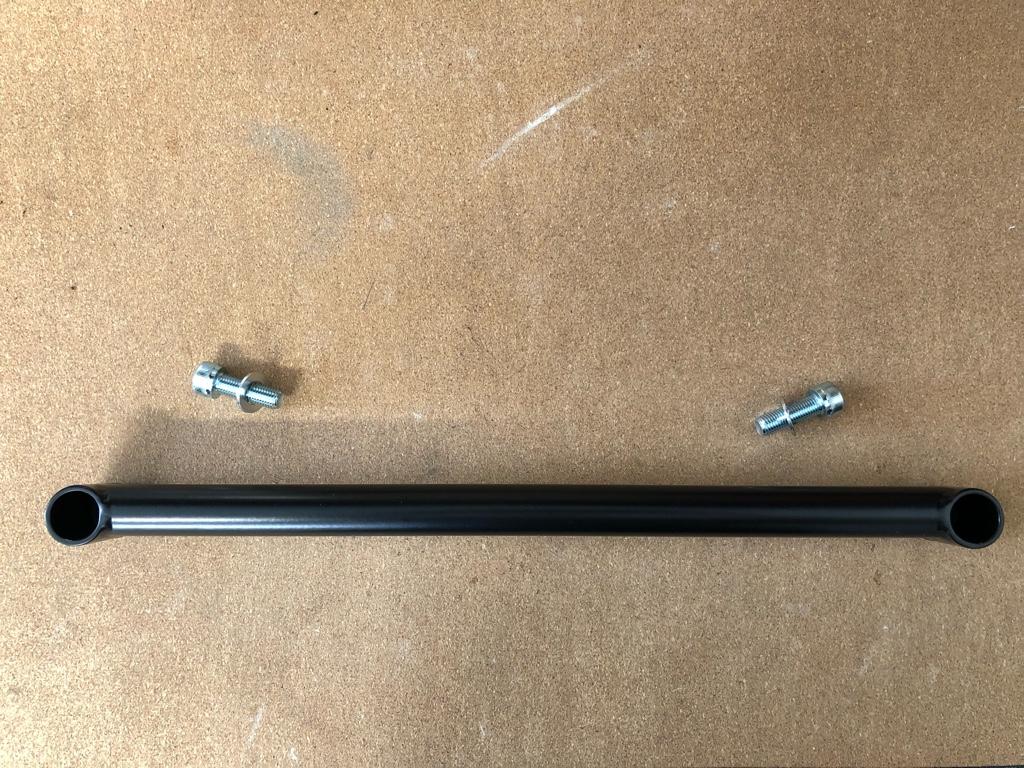
Cedar Ridge makes a front harness bar, but after measuring, my seats are low enough where his normal harness bar would interfere with the rails. I asked if he would make me a low-pro version, and he did!
You can see the bar is still offset a tiny bit to one side, so it's off the carpet but doesn't interfere with the rails.
Installed!
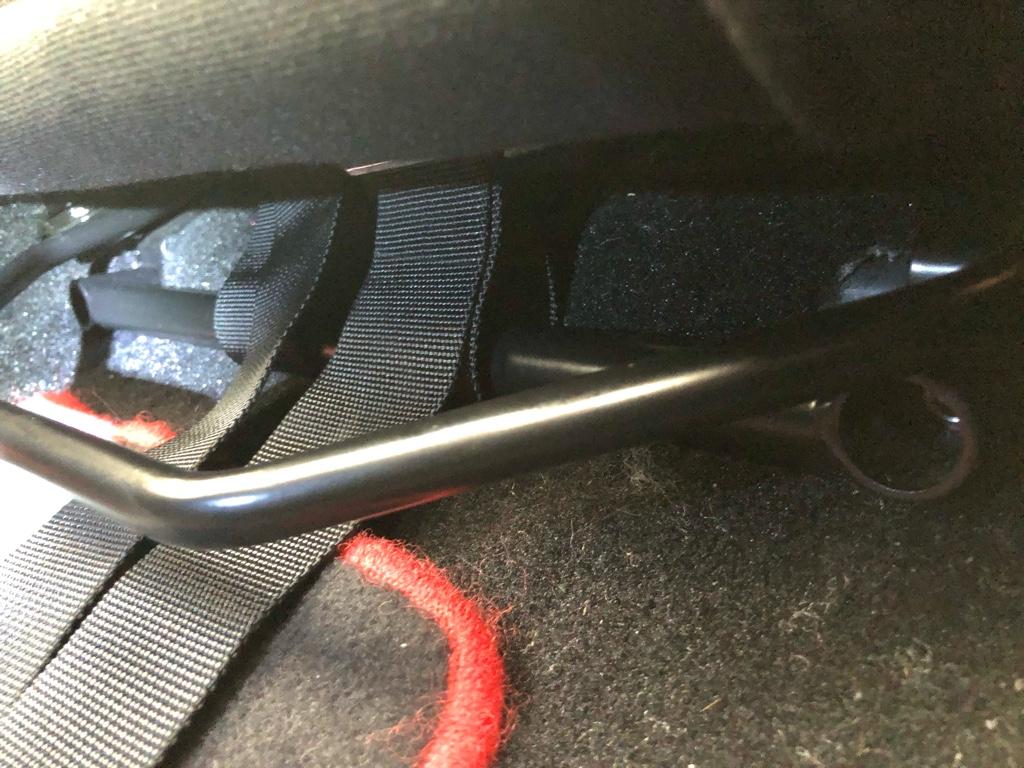
Yay, it took a while to get them adjusted, but feels so much more solid.
First up is the gauges. Before this work, it had 6 gauges in 3 locations. A-pillar: AFR & fuel pressure, top of the dash: oil pressure & MAP, then in the center console: CAN gauge & water temp.
The ultimate goal is no gauges. I still want to know all the things the gauges tell me, but everything should go through the ECU -> CAN, then show in RealDash in the navpod. I can't really get oil and fuel pressure through the CAN bus, so this world will have to wait until I upgrade the ECU.
Medium term, I just wanted to get a navpod setup going and get rid of some of the redundant gauges.
Gauge Migration
This is what it looked like when I got the car + the plan in pink. Basically, have no gauges on the dash, and keep the pillar and console gauges for now.
I started by tearing everything apart just to see WTF was going on:
The AFR gauge hasn't been hooked up since the new widebands, and the water temp comes in through the CAN bus now (even though the gauge sensor is in a different location), so they were the natural gauges to go. And after working out where all the wiring went, it was going to be a lot easier to move the dash gauges to the A pillar.
The biggest job in the gauge migration was moving and cleaning up after the dash gauges. They are 60mm and the old pillar gauges are 52mm, so this meant boring out the pillar to fit the bigger ones.
I got a hugeass step bit and went to town:
One of them bored out
Then the gauges installed in the pillar. There's nothing really holding them in, but the holes are pretty snug, and each gauge has a sort of foam strip around the perimeter that seemed to provide enough friction.
Then I had to get these things off the dash:
A hair dryer and a plastic putty knife worked a lot better than I was expecting. The result being:
Then I got some of this stuff to remove the residue:
It only took 2 spray n wipes to get all that junk off. It was way easier than I thought it was going to be:
Win! My last giant Amayama order came with a navpod and all the bits, and I got the SoS bracket so no dash cutting. Navpod mocked up and fuel pressure gauge moved to the console:
Then all done for now
I managed to remove alll the wire for these two gauges. Feels good man:
Nav pod measurements
There isn't much room in the navpod around the top of the dash. Basically, it can tolerate a screen that is about 40mm thick right there. It's also a little and wider than a normal double din hole. Fortunately, the SoS bracket is wide enough where any headunit will fit in between the sides.
I'll get into the headunit choice in the next post, but quick note: no car-specific double din android stereos are 40mm. Even the "ultra shallow" head units by like Alpine are 75mm+ thick. No name Chinese head units are around 50mm thick, but they interfere with the dash at at the RCA inputs. I did get a headunit and I have started modifying it. More details coming, but empty-hole pics now:
Harness Bar
The car came with 6pt harnesses, but the sub straps were not installed. This made me nervous cause to get the harness tight enough with 4 points, the lap belt is basically on my stomach. Not ideal in a crash scenario.
But installing the sub straps was hard. They are not long enough to go all the way back to the harness bar behind the seats, and I'm not about to drill into the floor.
Cedar Ridge makes a front harness bar, but after measuring, my seats are low enough where his normal harness bar would interfere with the rails. I asked if he would make me a low-pro version, and he did!
You can see the bar is still offset a tiny bit to one side, so it's off the carpet but doesn't interfere with the rails.
Installed!
Yay, it took a while to get them adjusted, but feels so much more solid.
Last edited:
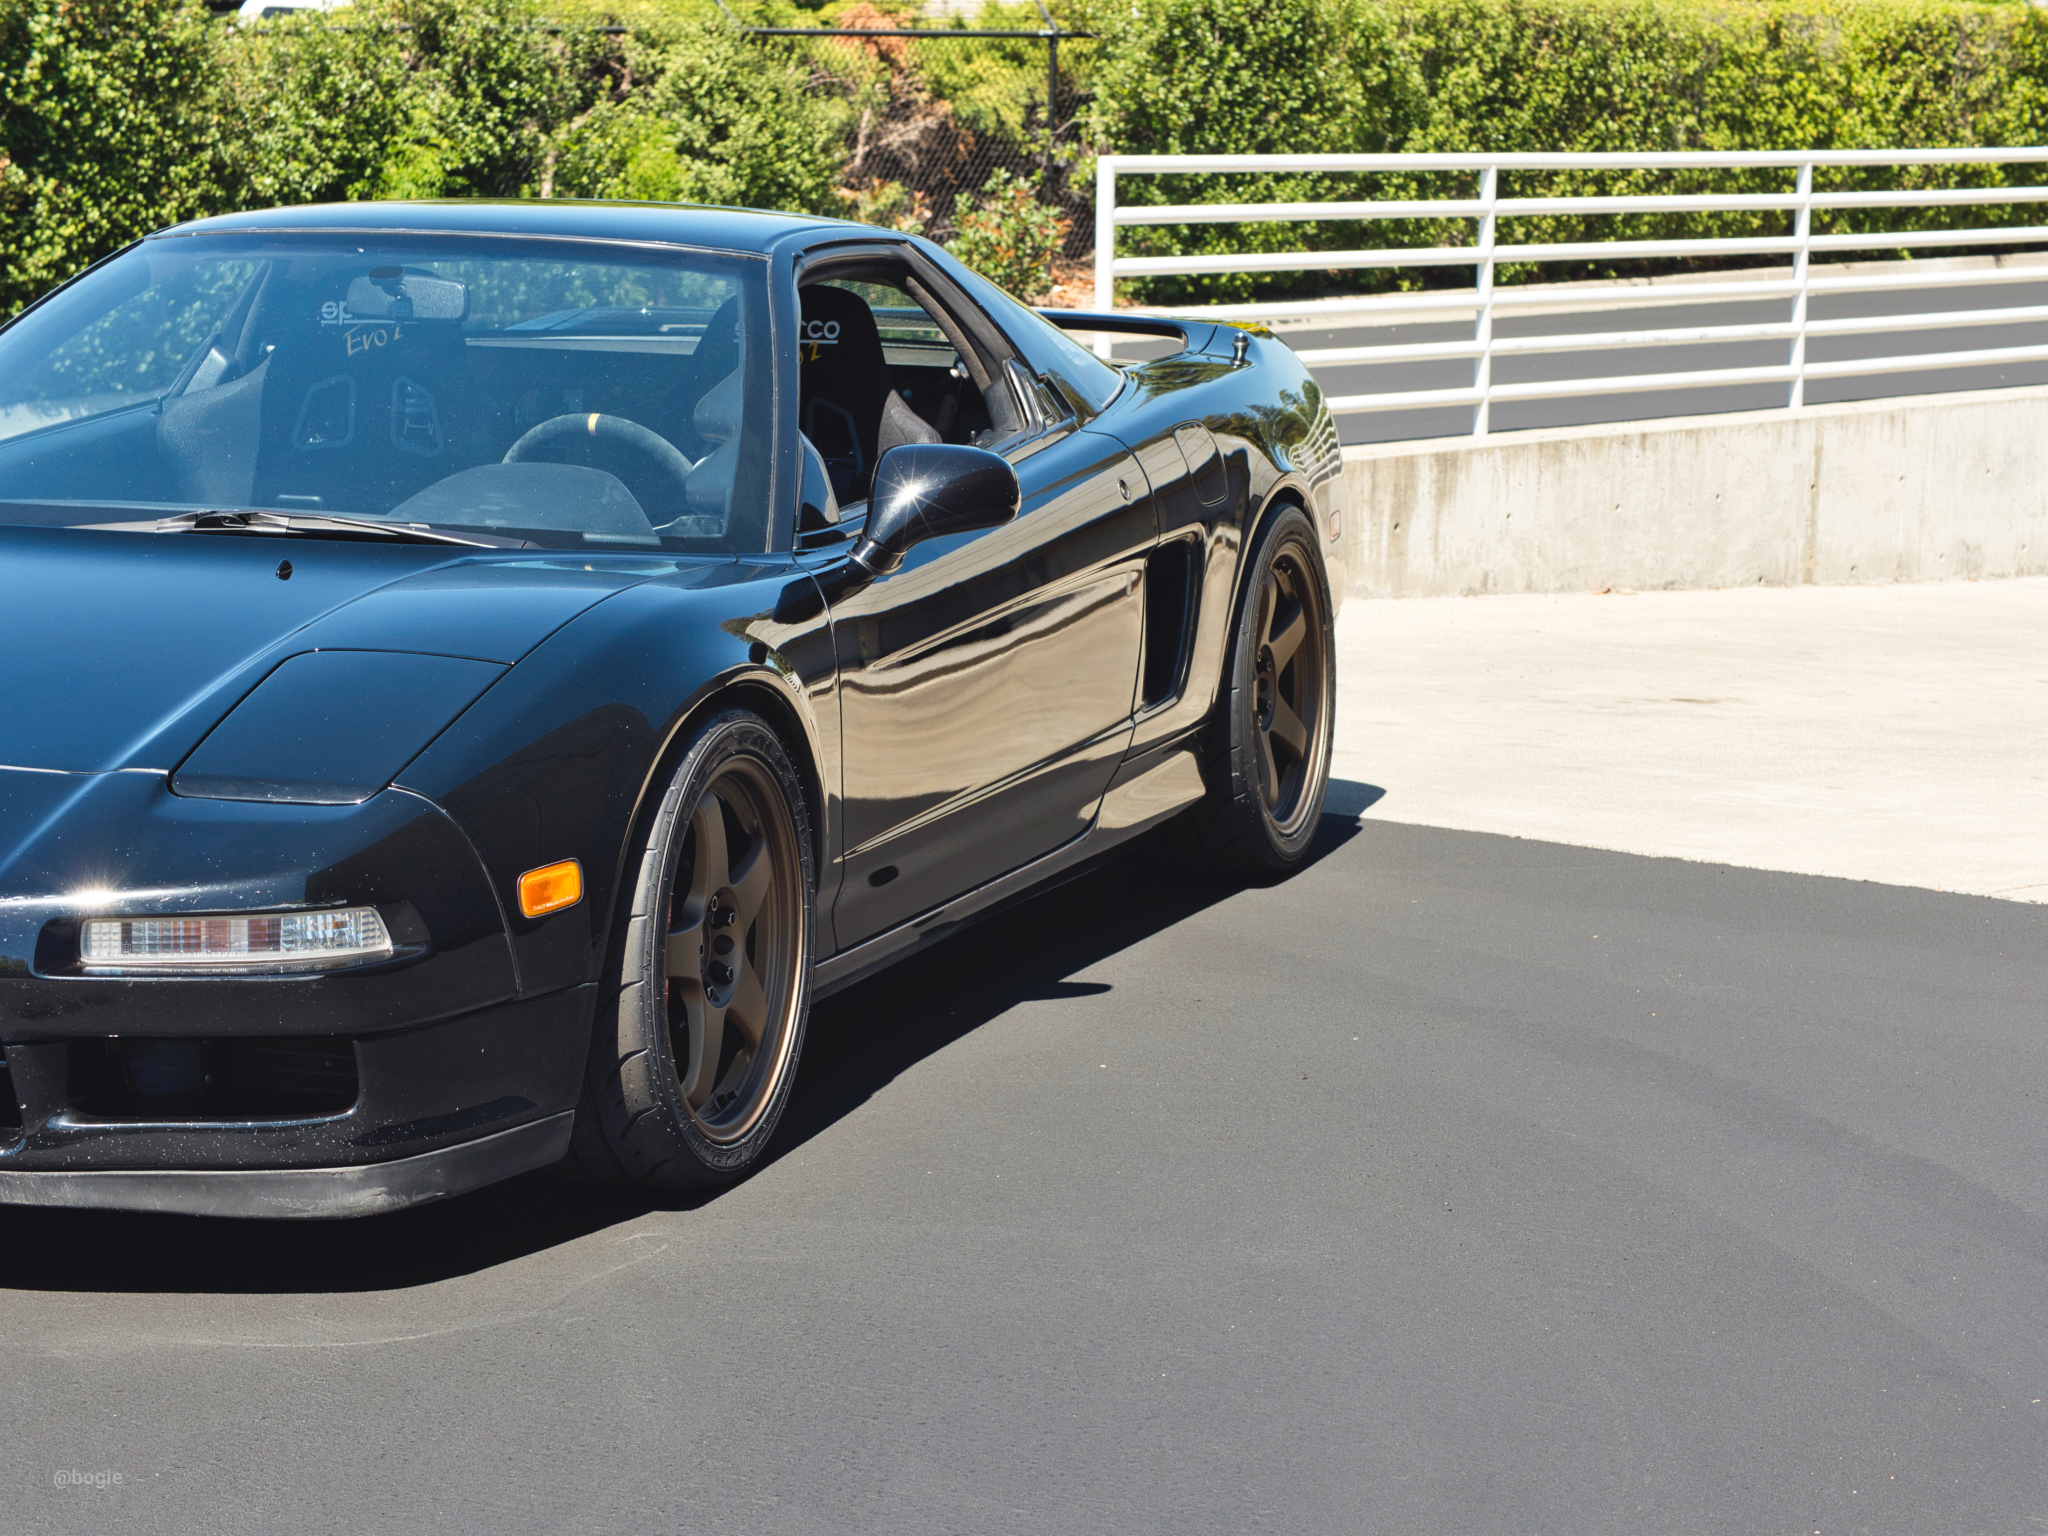
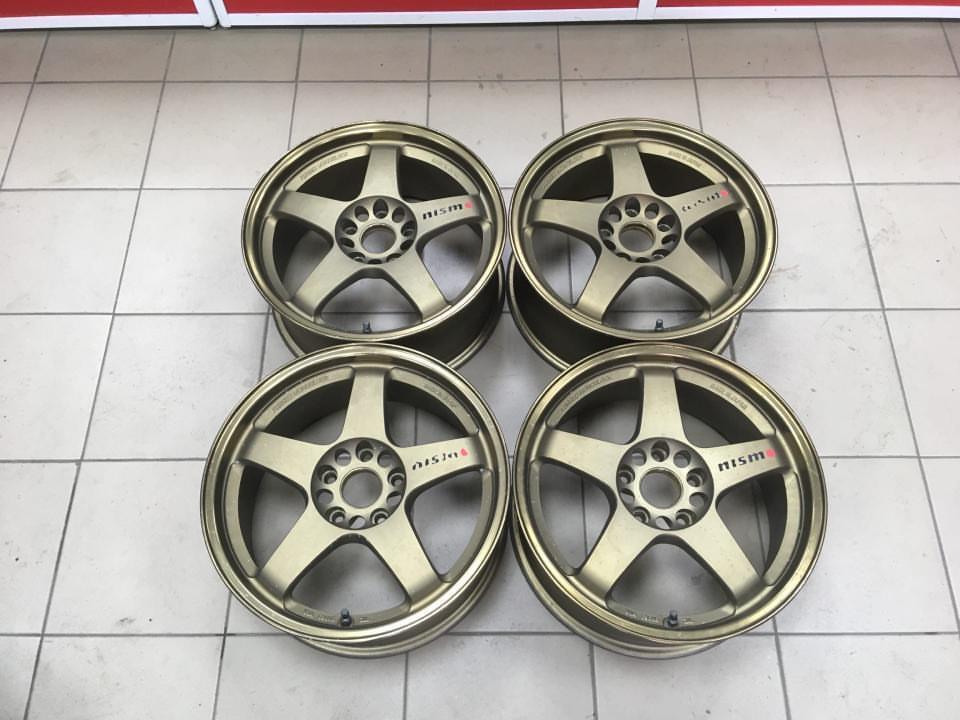
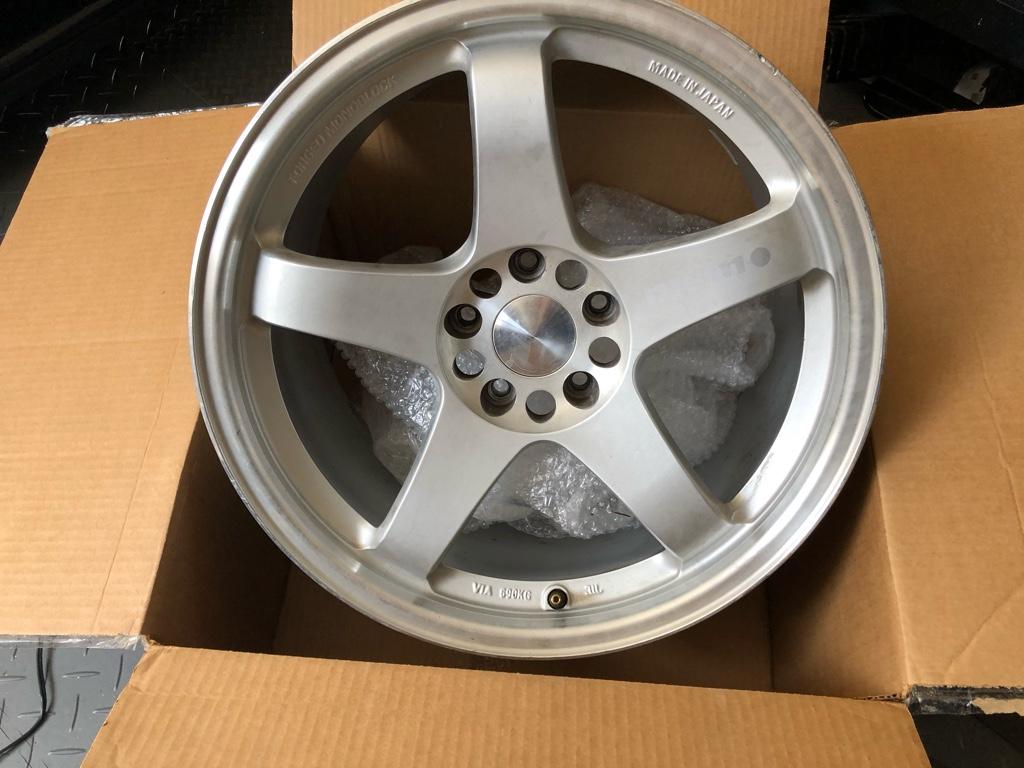
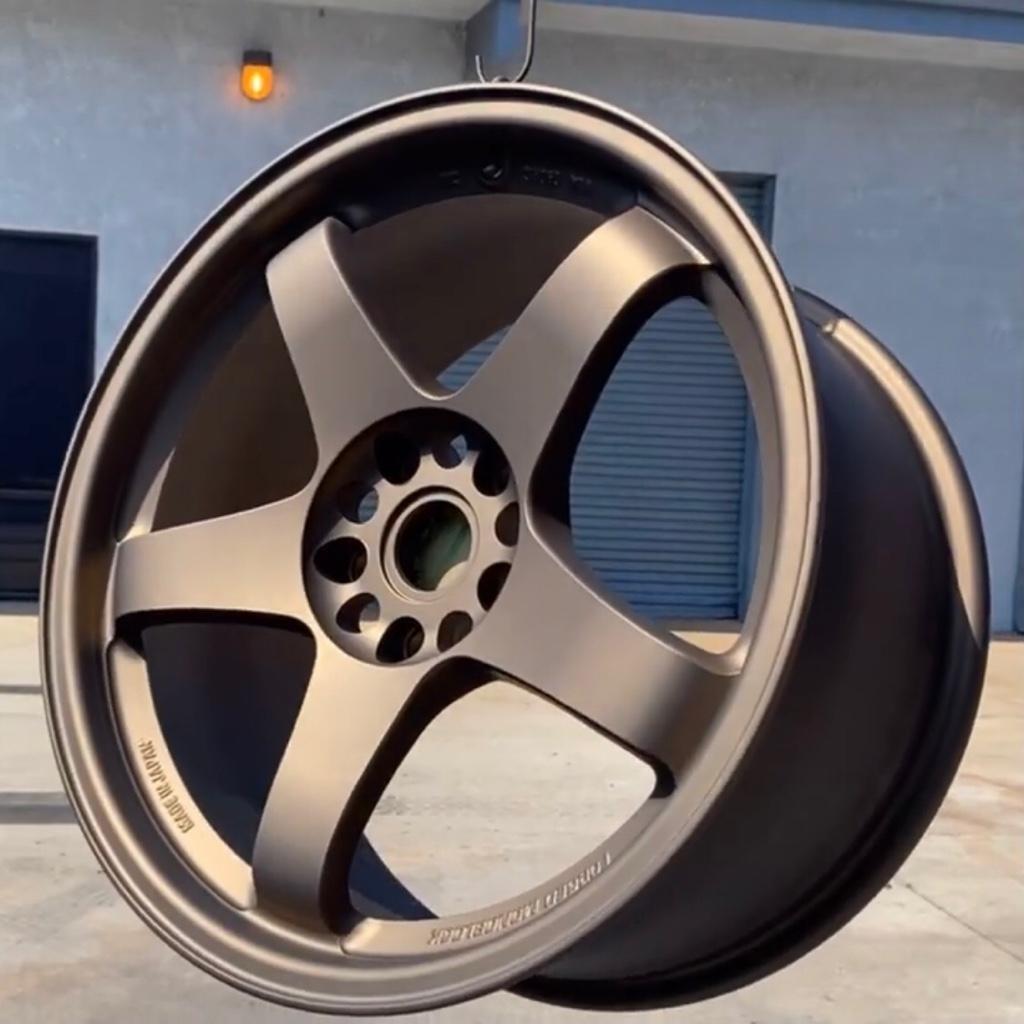
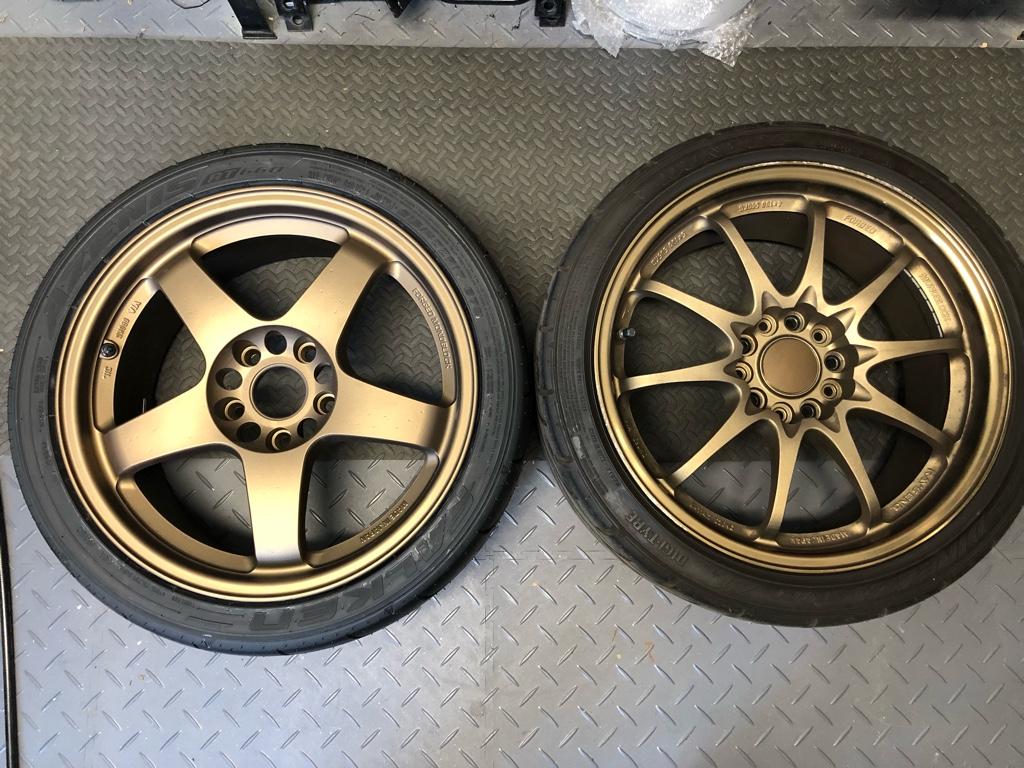
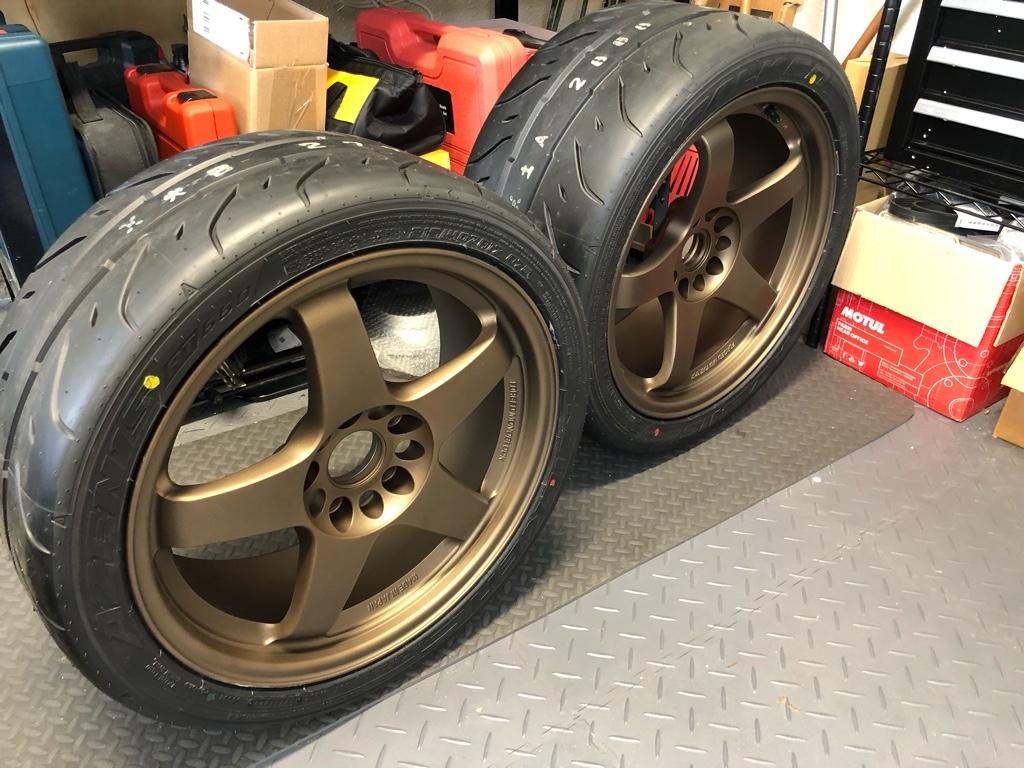
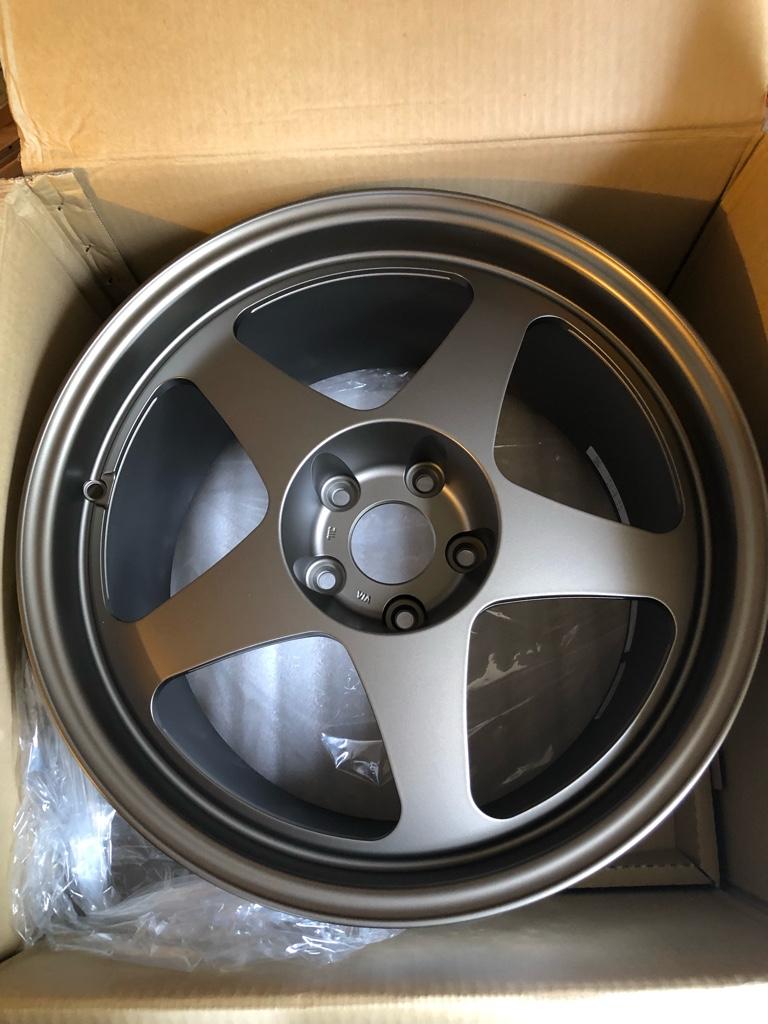
Finally got the new wheels done and mounted. So excited. I figured I’d do them some justice with the real camera and hipster lens rather than some garbage phone pics. Unfortunately the only time I could go out and take some pics was the middle of the day: sharp light and all the paint imperfections. I’ll do a golden hour thing soon, and a proper post with the million steps and decisions along the way. But I just wanted to share the pics.
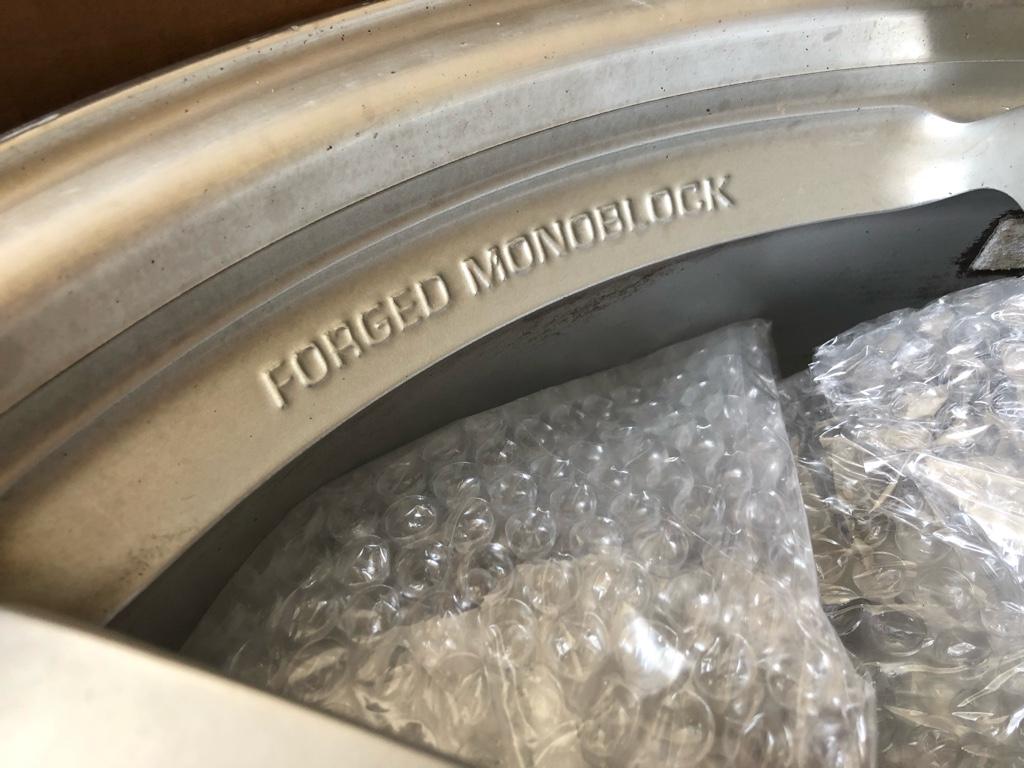
Can you guess what they are? Hint: forged rays. How do you feel about them? Cool or blasphemy?
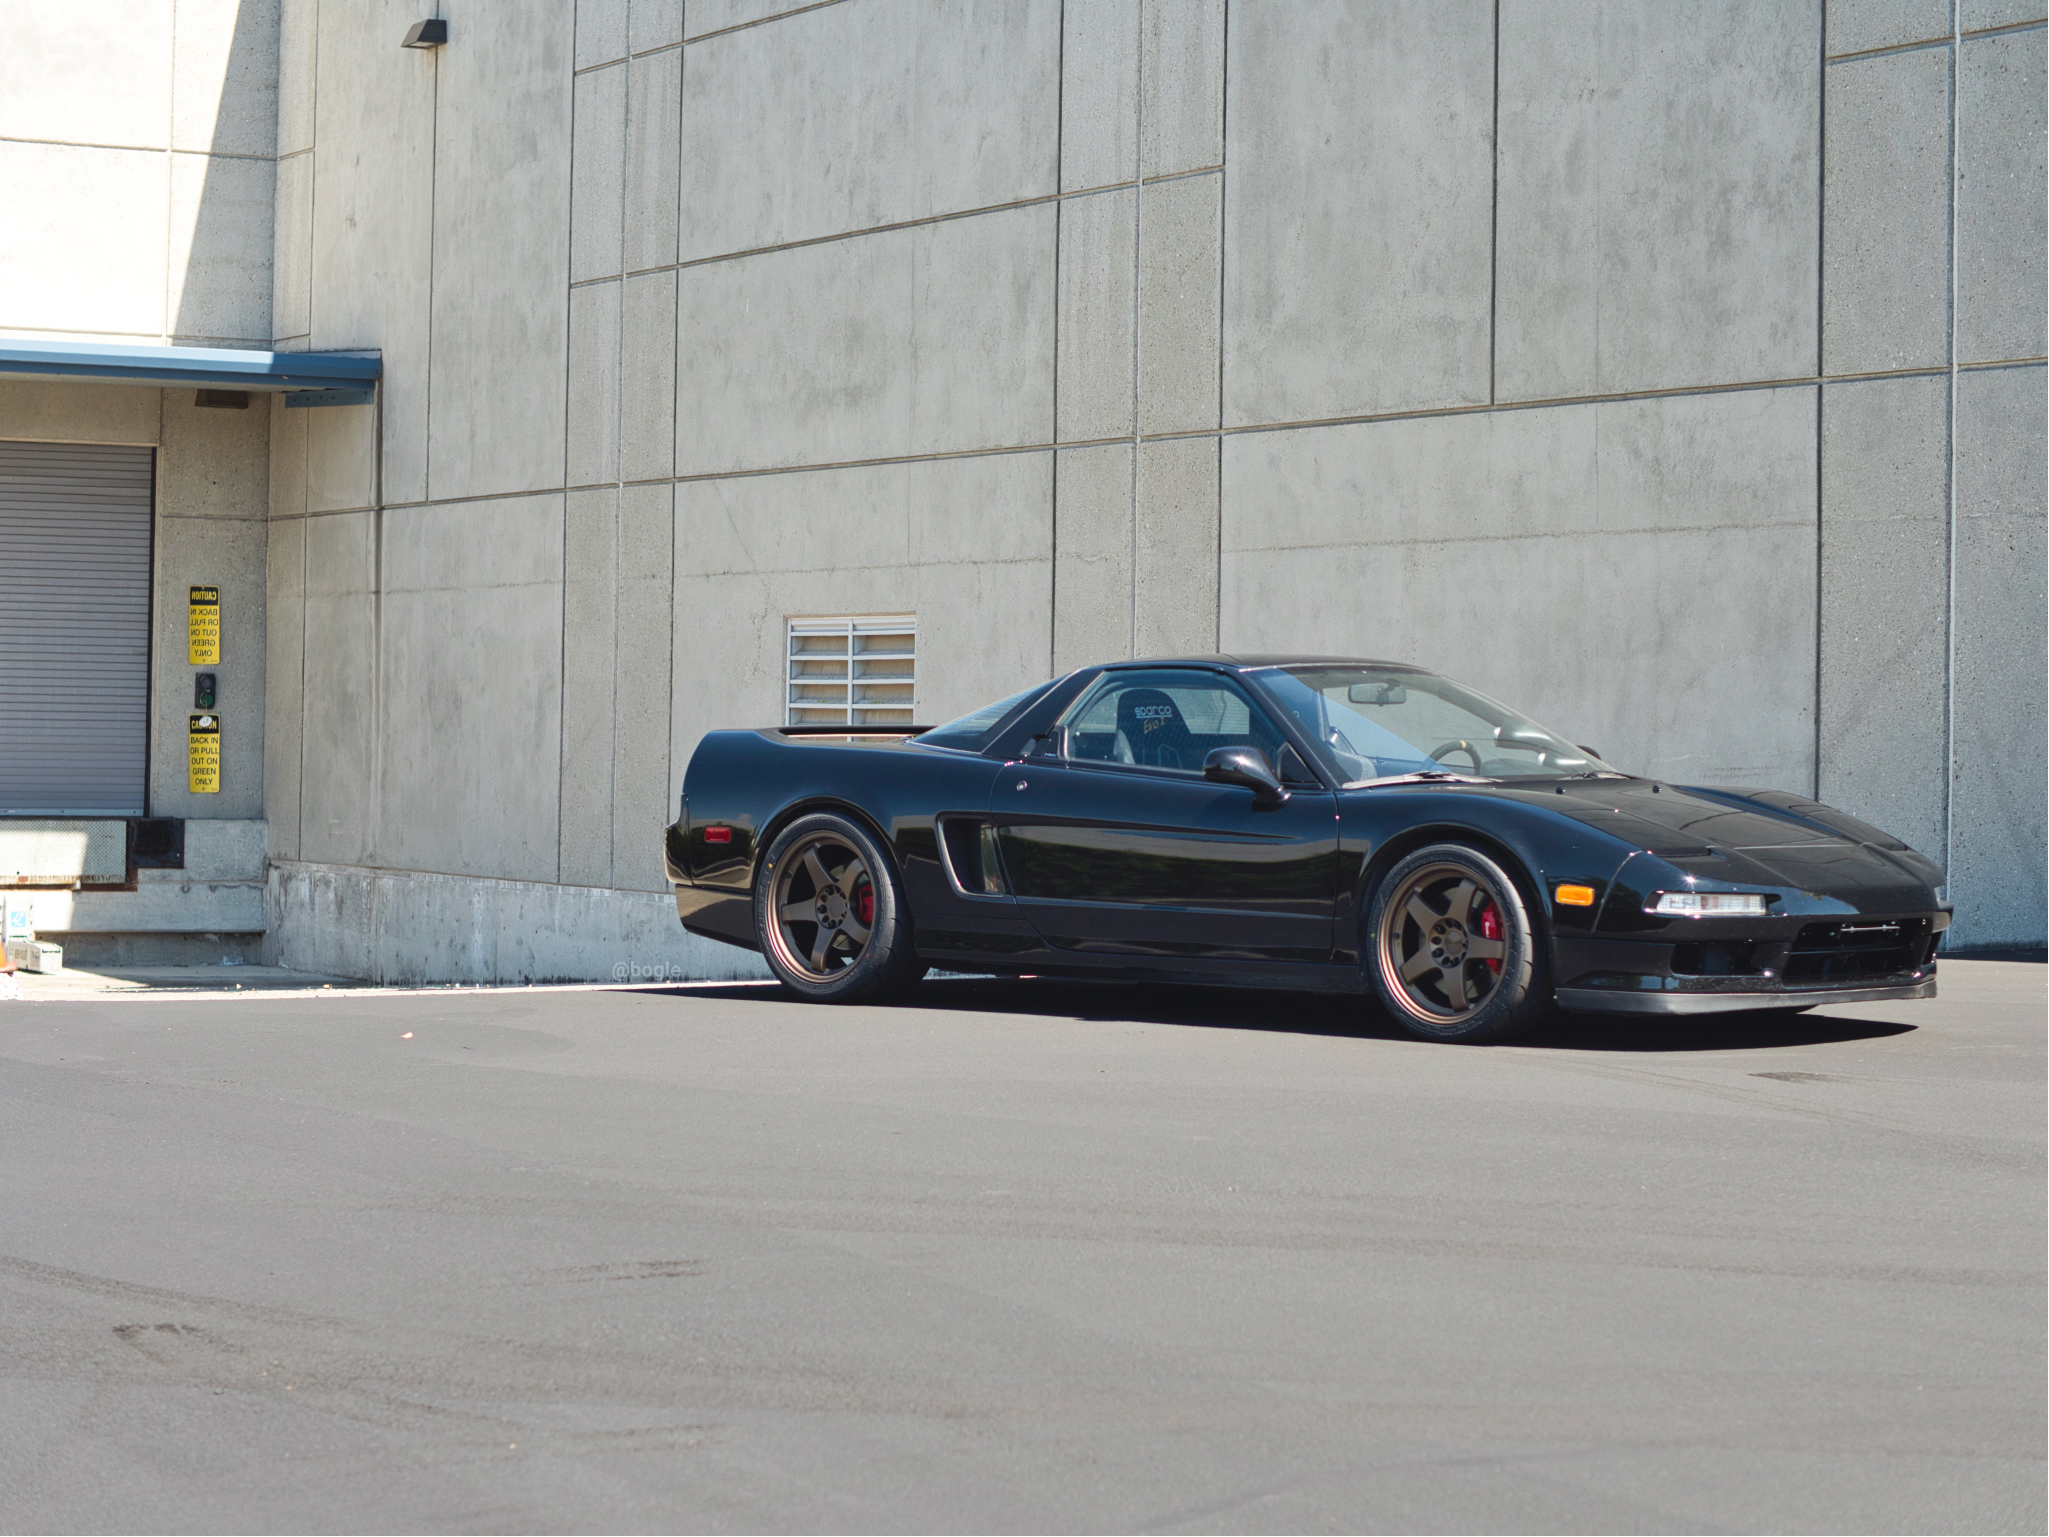
Can you guess what they are? Hint: forged rays. How do you feel about them? Cool or blasphemy?
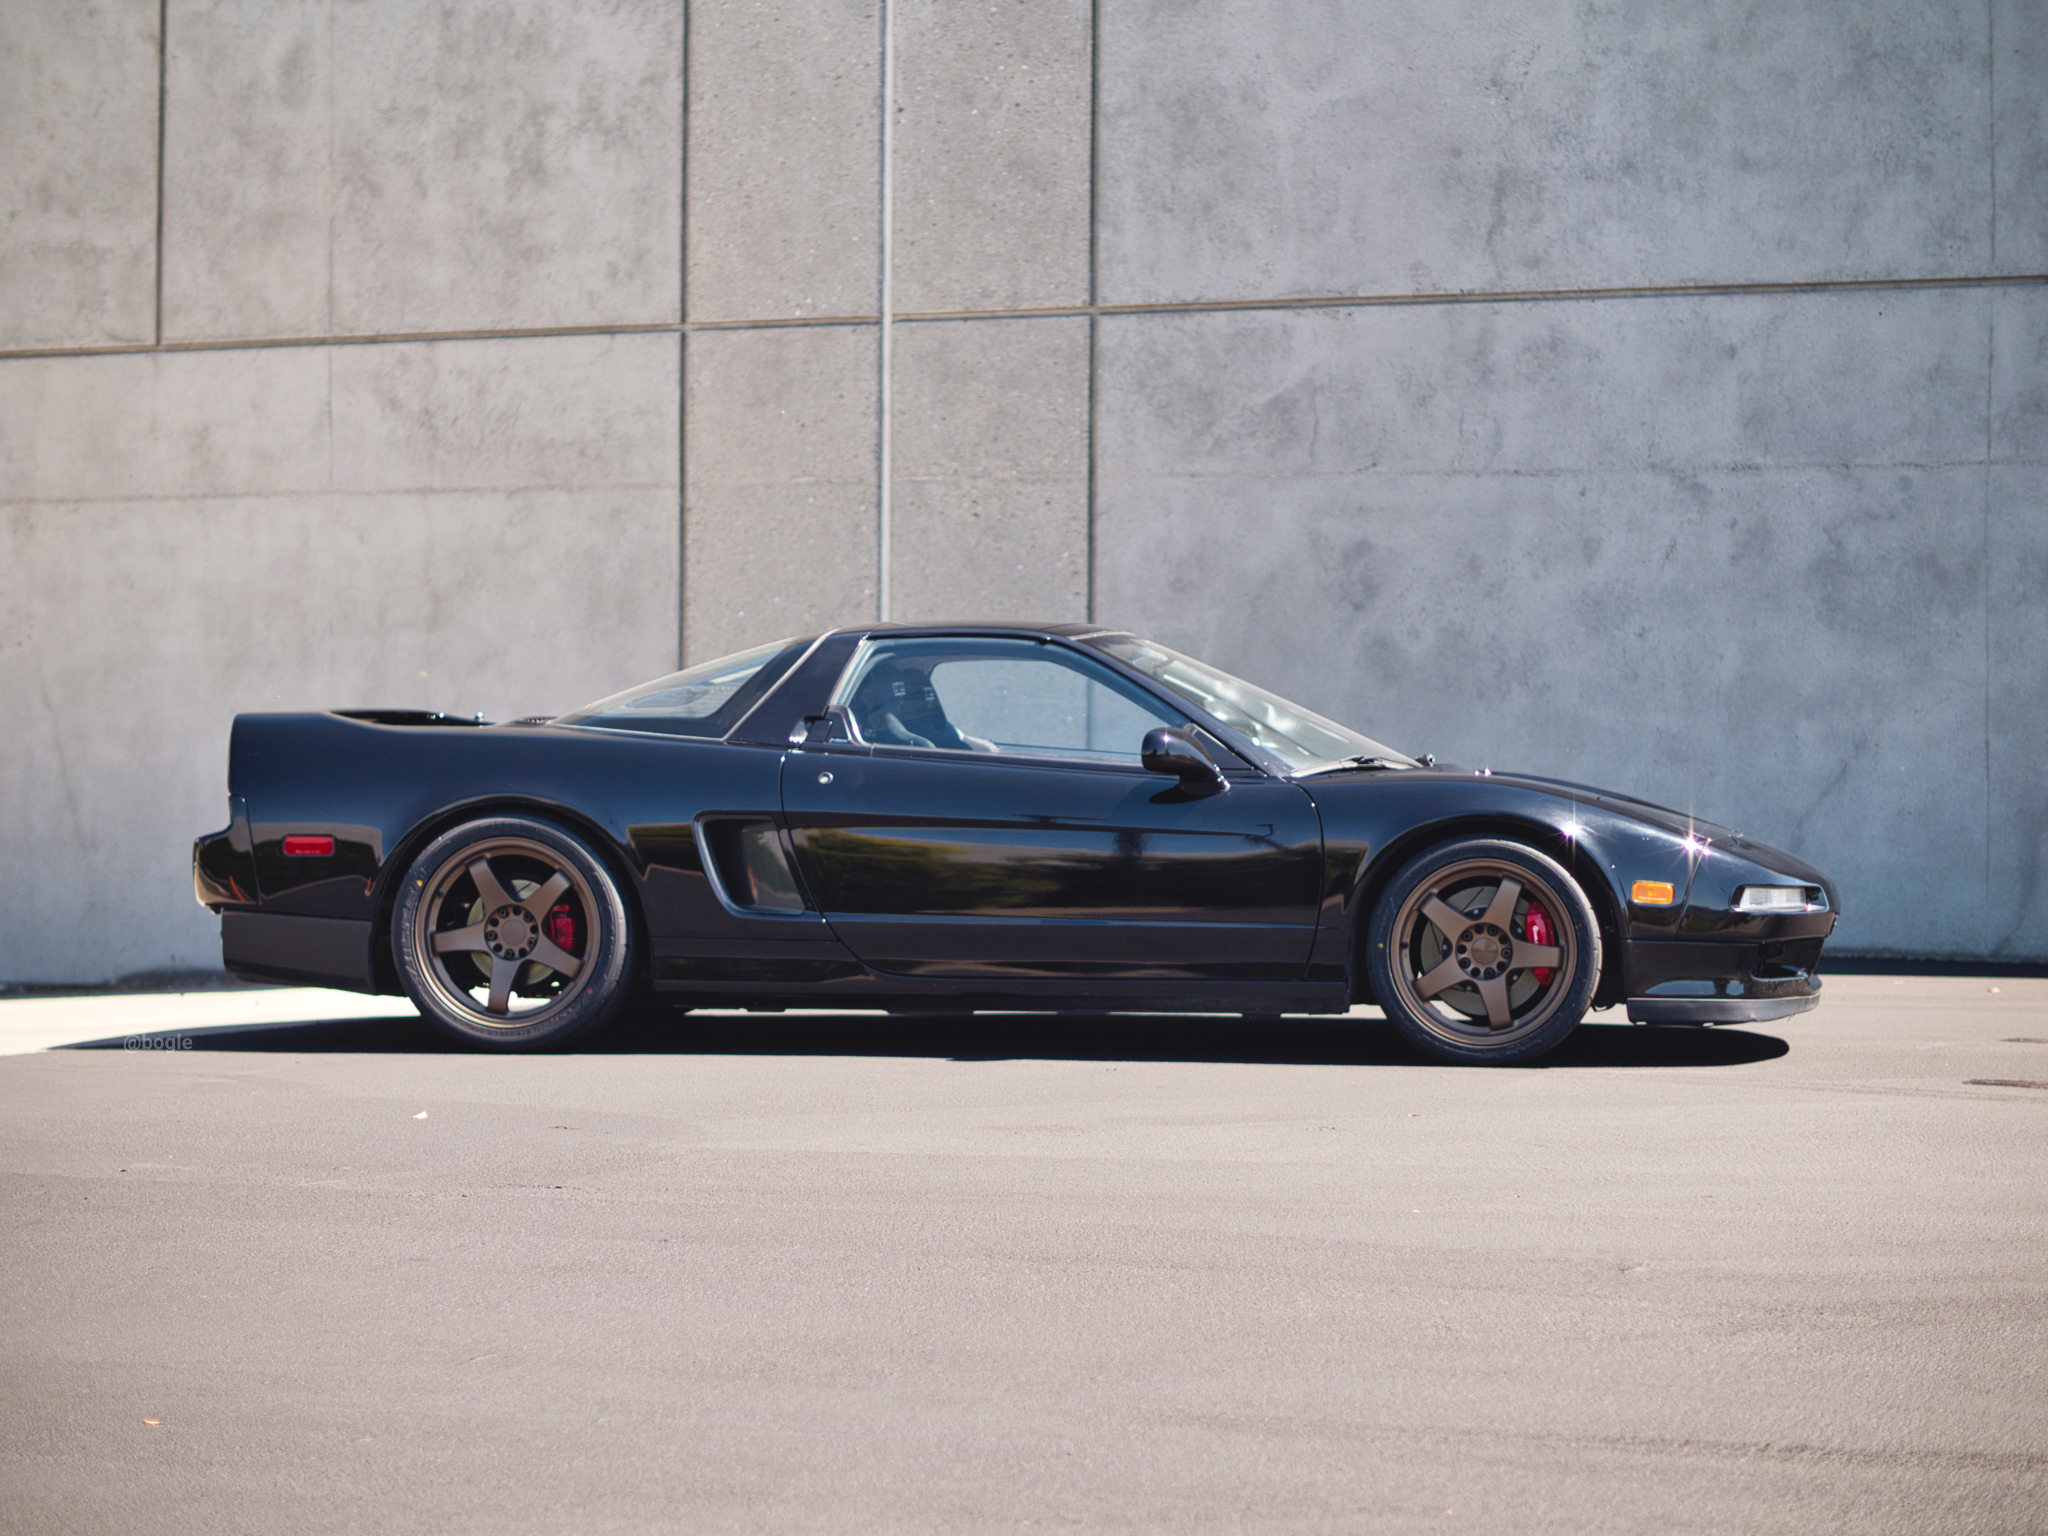
Thanks [MENTION=33142]aling289[/MENTION]! I’m honestly so in love with the wheels. So much effort to source, make sure they fit, and get them refinished, but really happy with the outcome.

Bronze on black always looks good. Nice choice, Bogle!
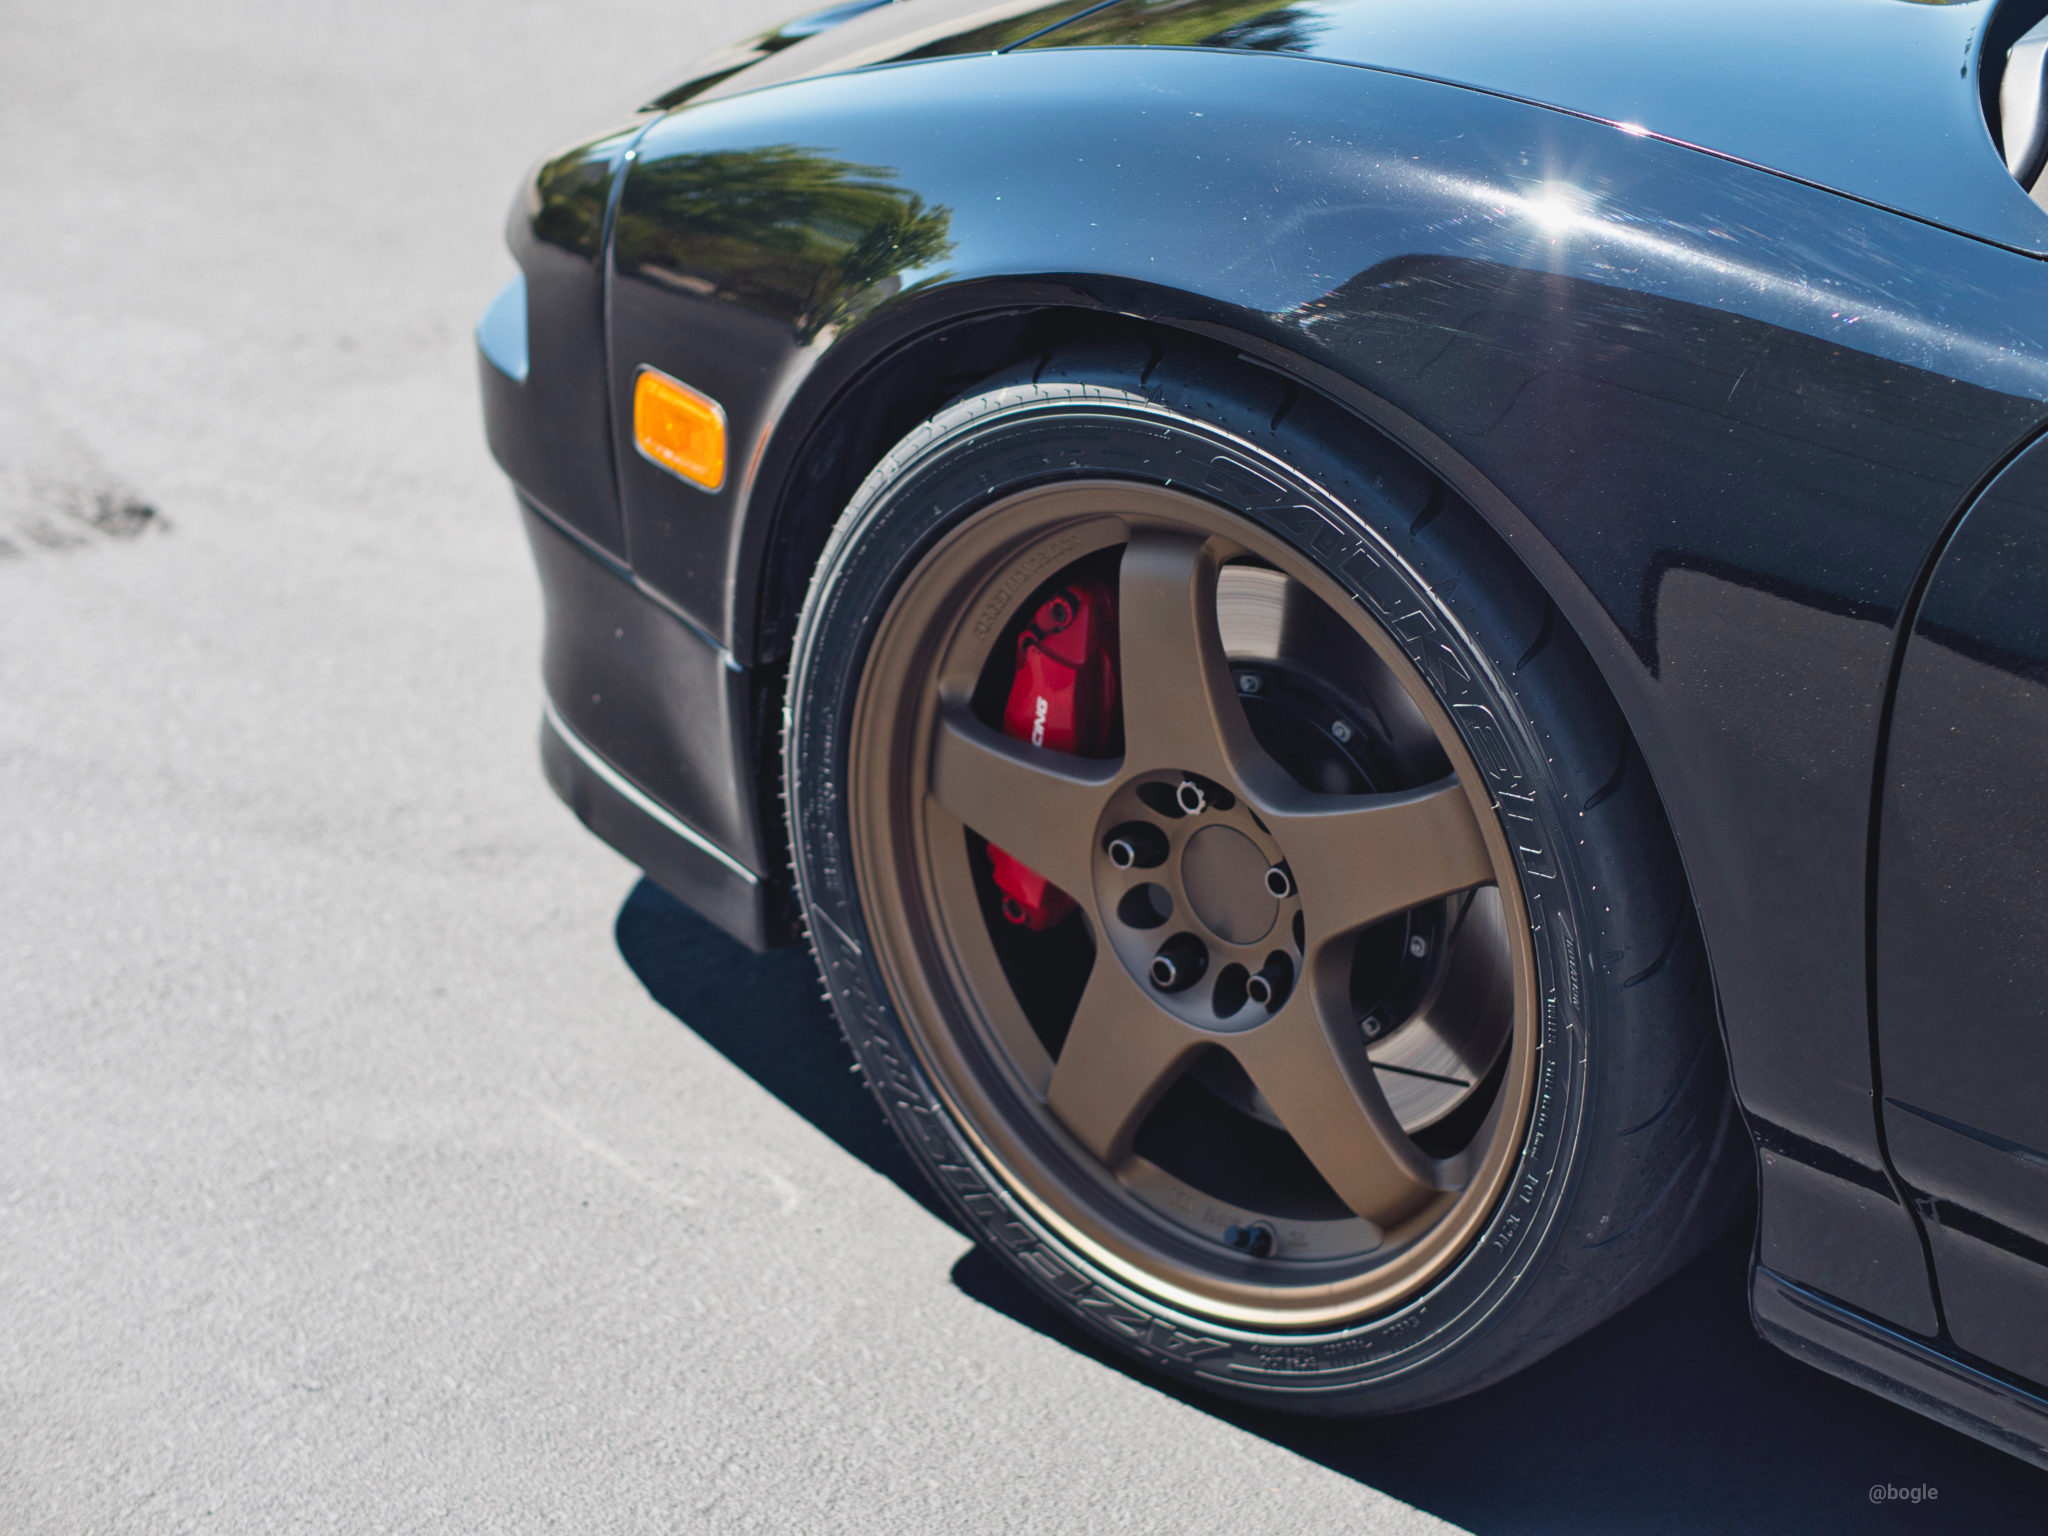
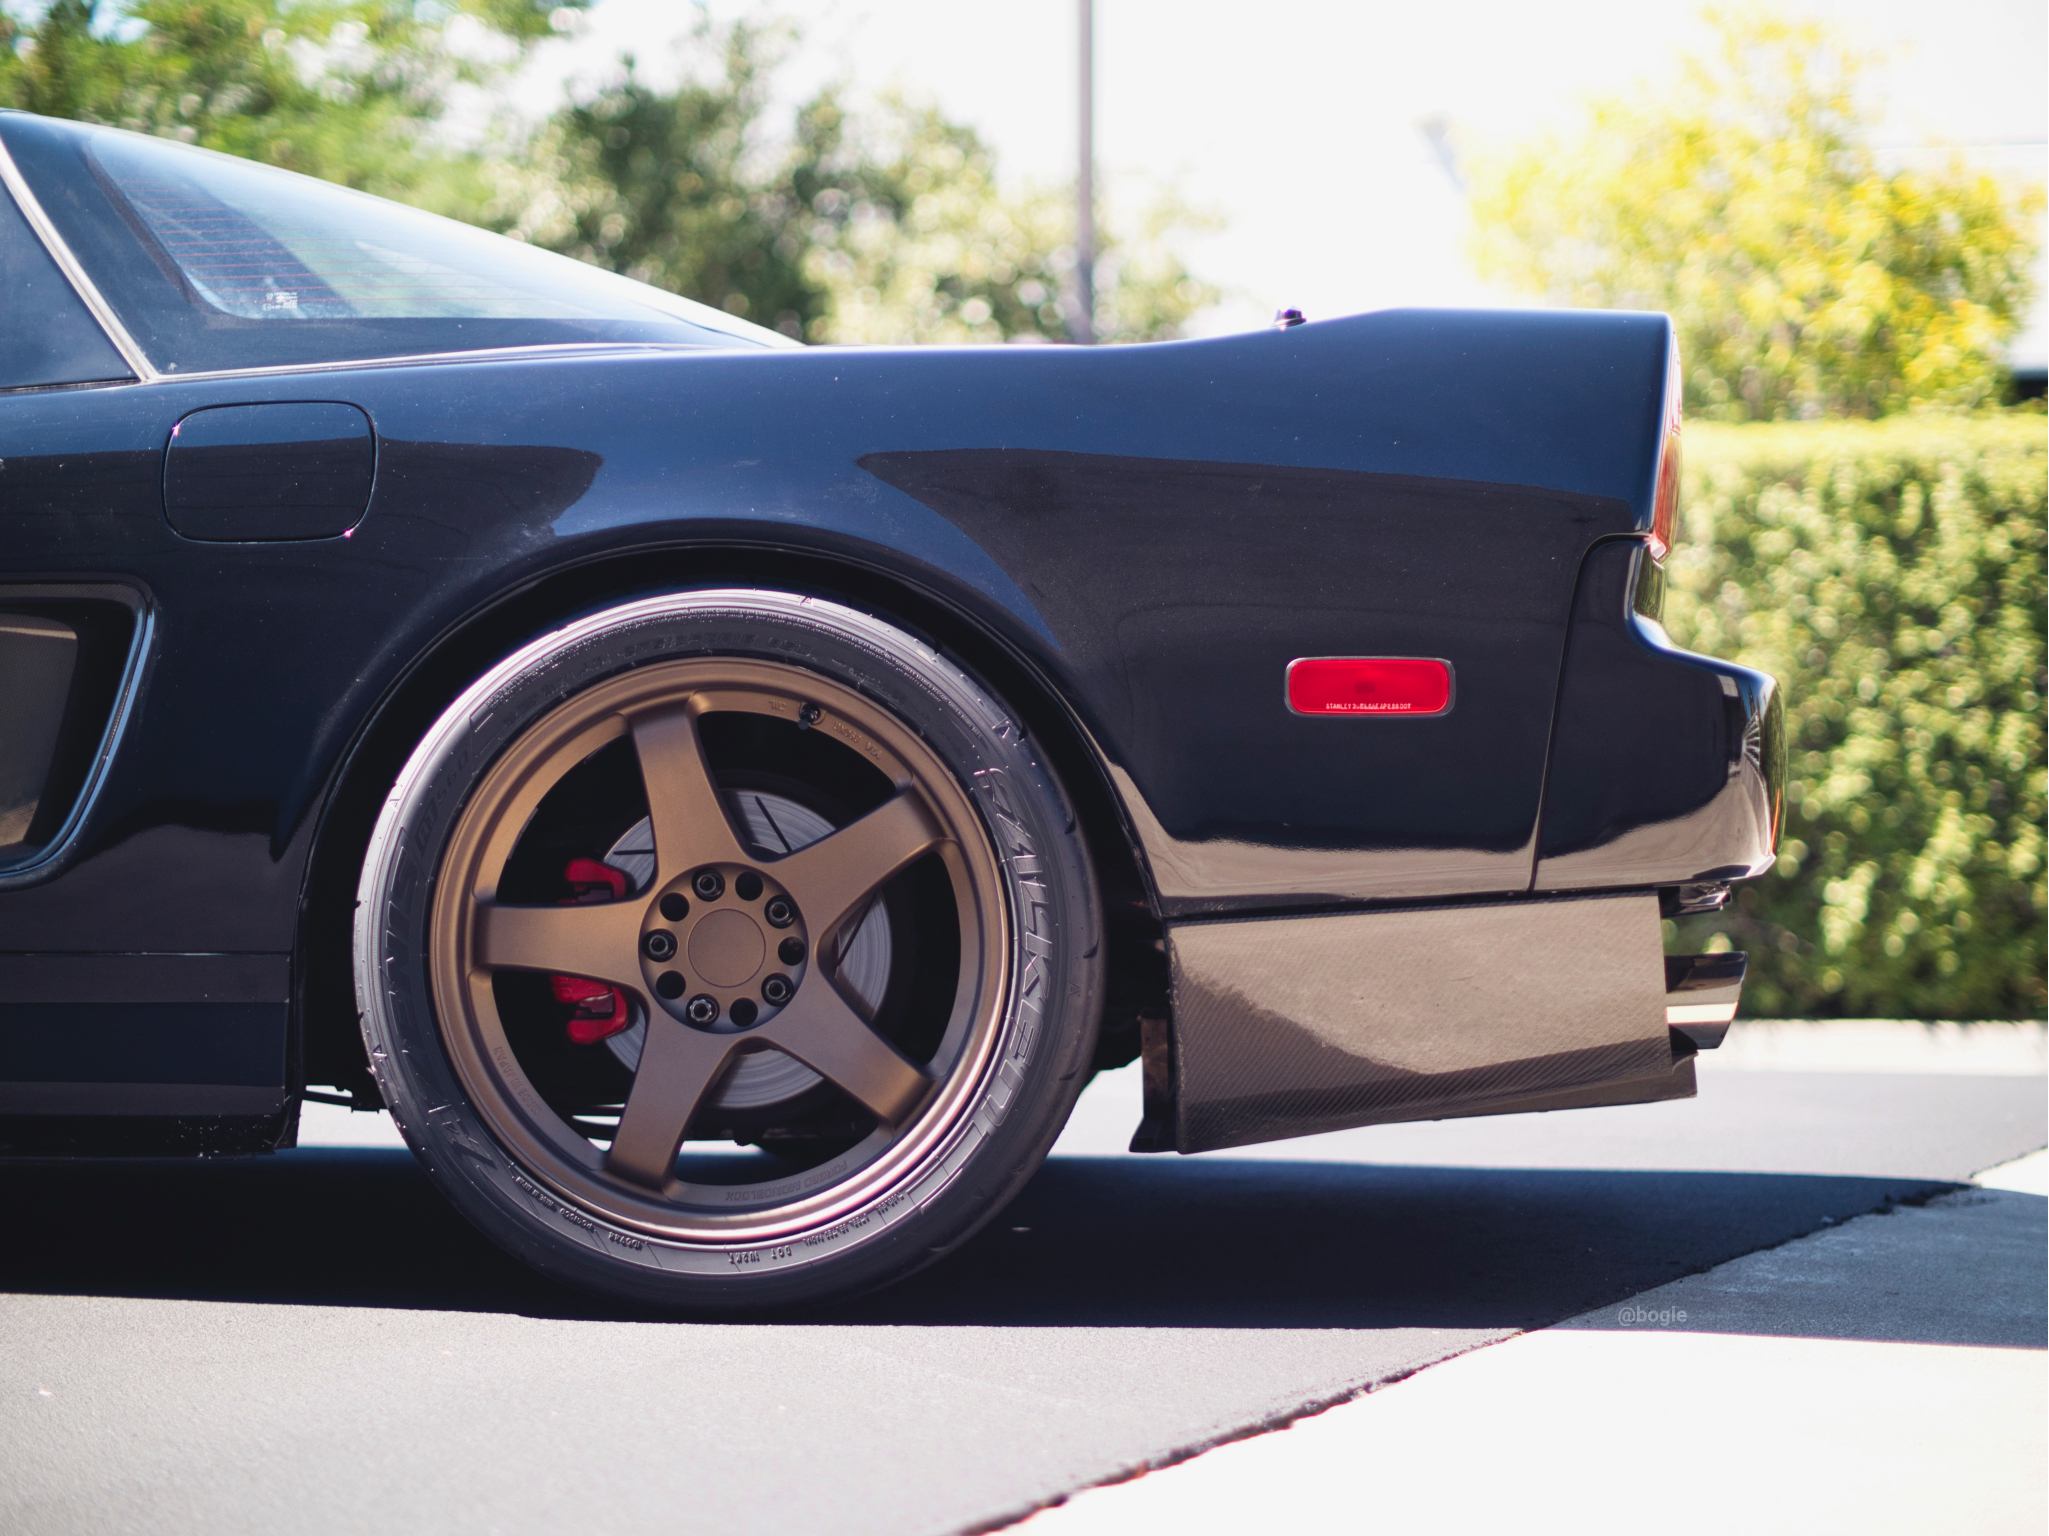
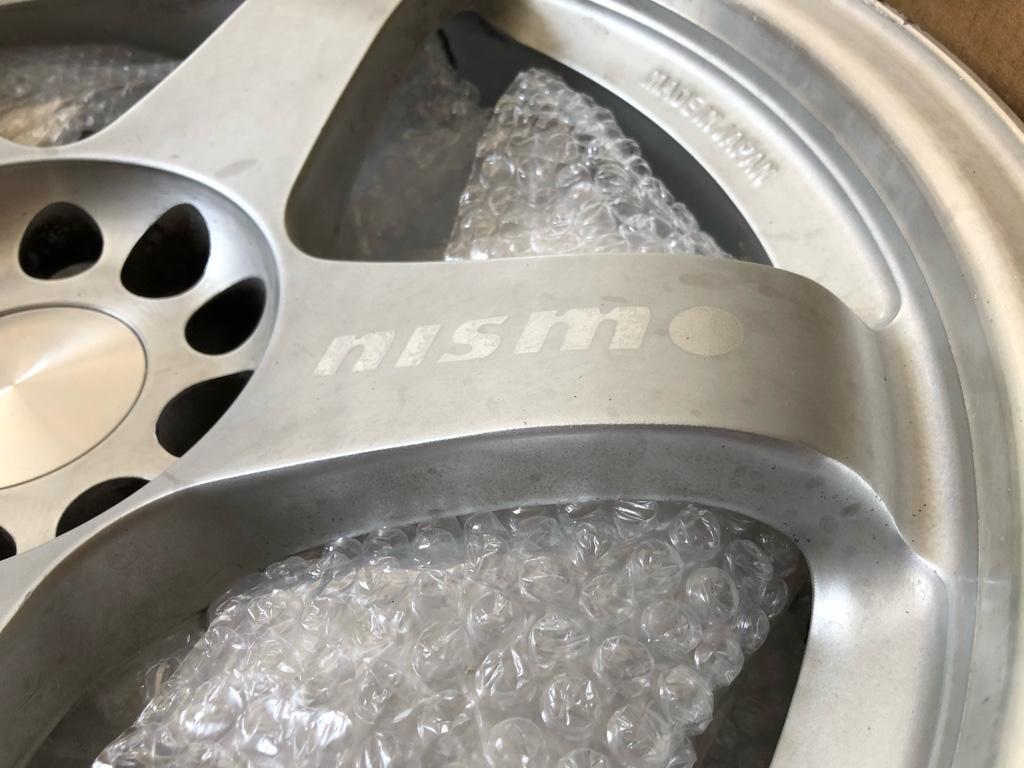
Ok wheel talk for a min. Imma go into some detail for posterity. tl;dr: The new wheels are Nismo LMGT4s and tires are Azenis RT660s.
* Front: 17x7.5 +30 215/40/17
* Rear: 18x9.5 +30 275/35/18
Probably my least favorite thing about the NSX in general is its supported front wheel sizes, pretty exclusively for visual and availability reasons. Visually, no concave faces come in 17x8 at any offset, and tons of wheels that are cool / light look pretty derpy in 17x8 sizing. There are many, but a good example example is my high-pad CE28s (+38, straight derp), or RPF1s with their spokes almost sticking out as far as the lip. If I were being practical, RPF1s would be the move, but the fronts kill it for me. Couple that with an often stretched tire--only 215/40/17s fit aaand most 215s are not 8" wide--and you get a pretty anemic vibe up front (IMO). I like me that Meaty Fitment.
Maybe 16s are an option? e.g. @MexiRicer's car looks incredible on both the CEs and TEs, and the setup is probably pretty light. There are many 16x8's that could work, but none of them that I had measured fit over the brakes (barrel too small).
Maybe wide fenders? I'd like to keep them OEM if I can.
The NSX is (kind of) a wedge design and IMO nothing looks better than 5 spokes on a wedge. Ferrari knew this and cars from this era had 5 spokes: Testarossa, 308, 348 ... think about the sexiest F40 you can: 5 spokes. I looove TEs, but in NSX sizing with flat fronts against concave rears the 6 spokes look a little too symmetrical IMO, which looks, to me, more buttoned up than the car deserves. Concave fronts change aggression, but anything 17" and concave is min 9" wide. Everyone here knows 9" wide on stock fenders is a no go, even if they did fit, which tires? (I mean Toyo makes a 245/35/17 R1R, which would technically be the right size, but AFAIK that's it)
Ok so 5 spokes, what are my options? My criteria is: I like them, they are pretty light, they fit well, they aren't 5k.
* Advan GTs. I realllllly wanted them, but no 17s, I'd have to be an 18/19 setup, nope
* Regas, yes ok, light, great looking, the fronts even look good at 17x8, all around win
* Gramlights 57c: no 17x8, heavy
* CCW Classic 5: $$$$$$$, too baller
* RP01: Good luck finding 18" pairs, even more rare in modern offsets
* ...
* Nismo LMGT4s. Wait those are cool. Literally every GT-R with them looks fantastic. Light, simple, factory bronze. Are there any that fit?
I bought a set of Regamasters but continued to be LMGT4-curious, thinking there would be something I'd discover that would make them unusable....
Offset Math
It seems the most acceptable "aggressive" setup on stock fenders is
* Front: 17x8 +35
* Rear: 18x10 +35
That was my target. Any higher offset numbers within reason are all good. Offset is a weird measure in that it's from the center of the wheel, so obviously offset numbers don't mean the same thing on wheels with different widths.
I wanted to compare them at different sizes, so what I cared about was _front spacing_: the max distance from the hub to the outside of the wheel.
Front Spacing = width * 25.4 / 2 - offset (25.4 converts inches into mm)
* Max front front spacing: 8 * 25.4 / 2 - 35 = 66.6mm
* Max rear front spacing: 10 * 25.4 / 2 - 35 = 92mm
Move some numbers around to impress your 8th grade teacher and you get
* Max front offset = width * 25.4 / 2 - 66.6
* Max rear offset = width * 25.4 / 2 - 92
Apply that ish to common widths, rounding down because racecar, and you get the max acceptable offsets (min in number) for a variety of wheel widths:
* Front width ffset 7.5":+28, 8":+35, 8.5":+41, 9":+47
* Rear widthffset 9":+22, 9.5":+28, 10":+35, 10.5":+40
I looked at every used wheel I could find in this size range on instagram, ebay, crooooober, yahoo auctions, facebook, etc., and the LMGT4s were actually pretty reasonable to find. Easier than OG TEs or CEs. I was also looking for CE28s in 18x9.5+28, but never found a pair / set for sale in any condition.
Turns out LMGT4s came in perfect sizing: 17x7.5+30 and 18x9.5+30. The fronts were often in S13 square sets, and rears came in 350z / 300zx sets, which means they were not so rare in the US. Cool.
The process
Piecing the set together took about 6 months from when I paid for the first set to mounting on the car. The process was:
* Buy 2 full sets of wheels cause pairs are impossible or $$$$
* Get the fronts bored out (66mm to 70.1mm)
* Buy center caps for the fronts
* New valve stems (rays black)
* Get them powder + ceramic coated
Seems pretty straight forward, but it was a fair amount of effort. Every little step in the process was extremely delayed, back ordered, fell through, cancelled, sent to the wrong place, etc. The only things that were easy were the valve stems and tire mounting. Also, throughout the process I was never 100% sure the fronts would fit due to the center bore differences. I didn't even get a proper chance to test fit them until the tires went on cause there was so much powder coat in the center bore area. I feel pretty lucky it all worked out.
Fronts
The biggest risk were the fronts: do they clear the brakes? Will boring them out be a big deal? I took a chance and bought the front set, thinking I'd sell them if they obviously didn't fit.

I found a nice scale drawing of my brakes, printed it out and glued it to cardboard.
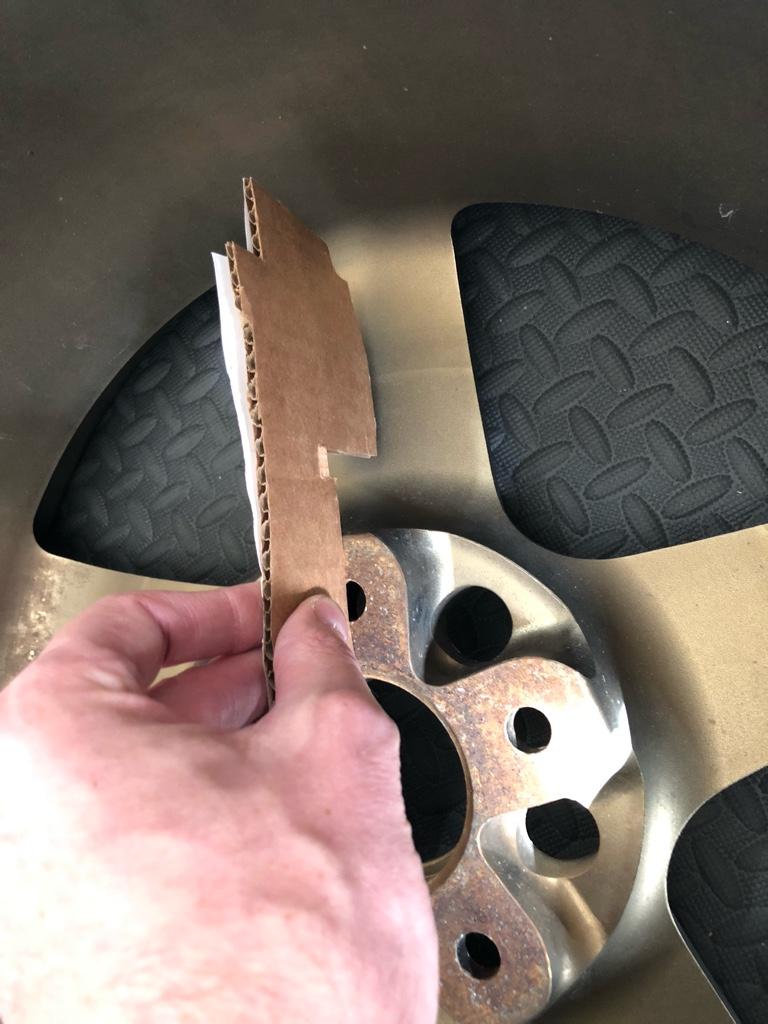

Seems like it'll fit, eh?
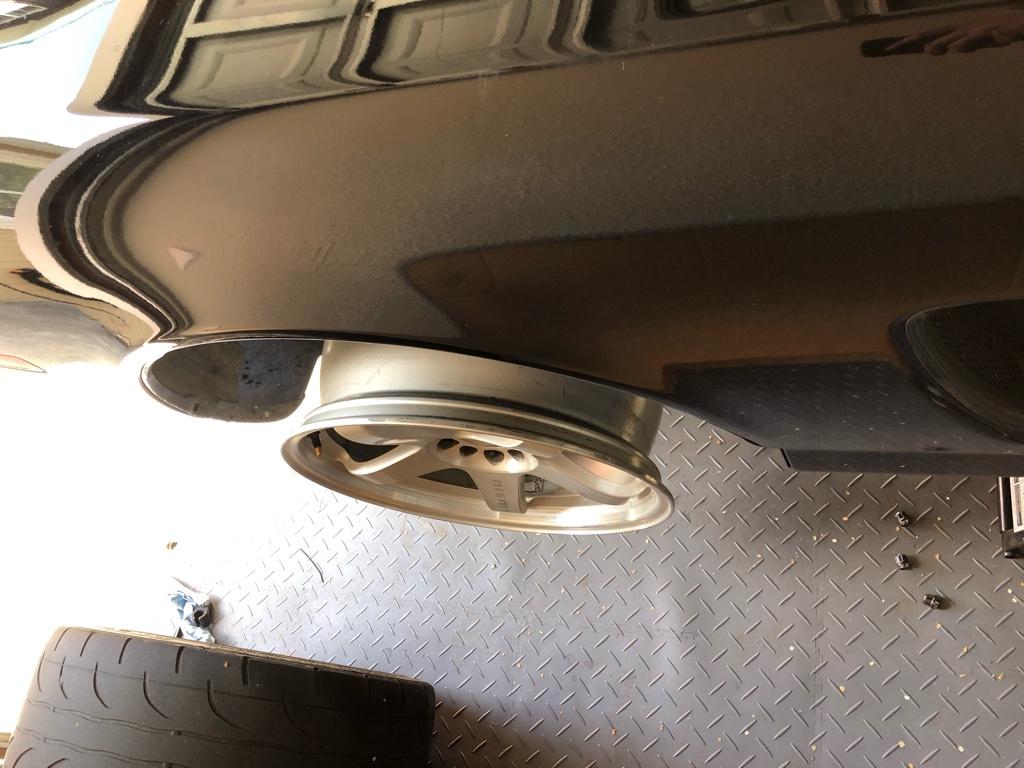
Then a quick check sorta mounted, and measuring the gap between the wheel and rotor, and caliper and spokes.
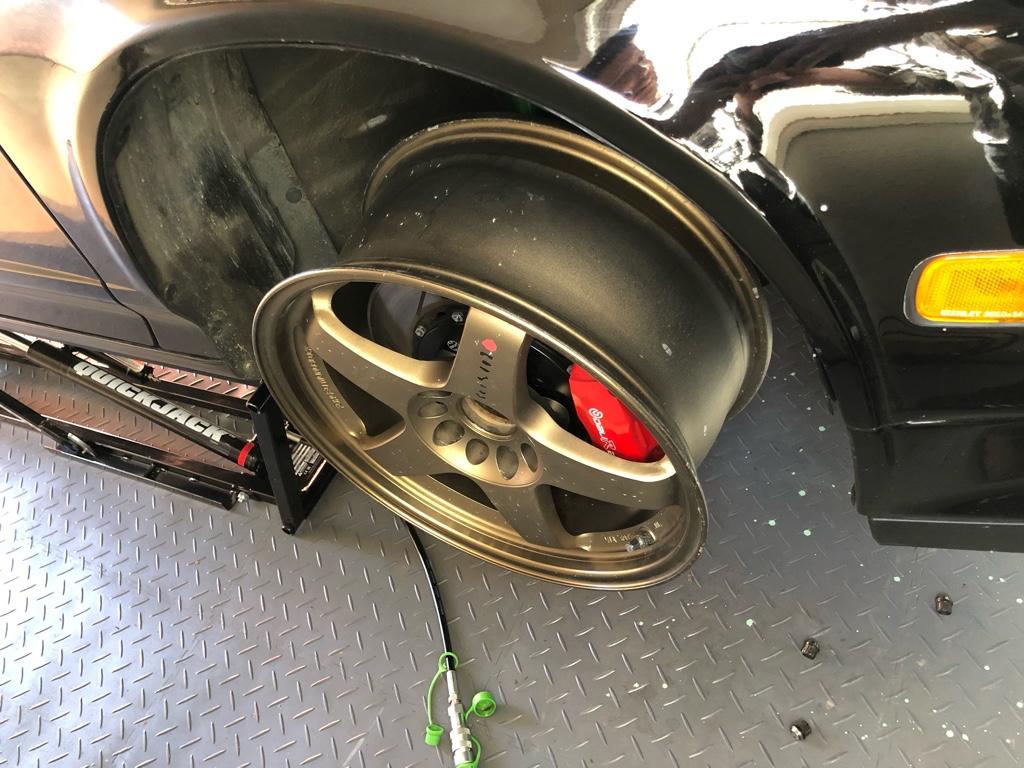
They say you need 3mm clearance between the spokes and calipers. I measured a bit more than 3mm. Win!
Boring them out was the next step. I called around and did a bunch of searching but couldn't find anyone in the bay area who could do it or had done it. Just machine shops who were like "yeah I could probably chuck it up". Not so confidence inspiring.
Bulletproof coating in San Bernardino said they could bore the centers out for $60 on top of powdercoat. Cool. The downside is that I couldn't actually check brake clearance before they were finished.
Rears
Other than having a couple sets fall through, and one dude stringing me along for a month before selling them locally, they were a lot easier than the fronts. The final set came up on ebay for a reasonable price, I bought them within an hour, and here they were.
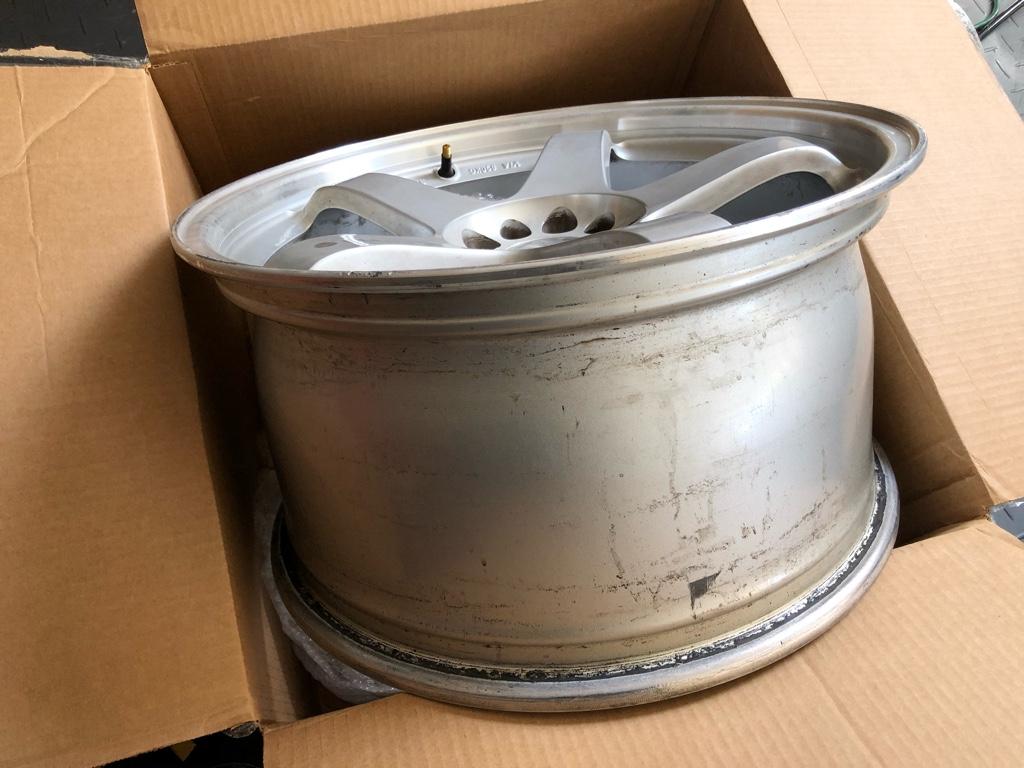
A quick fit on the rear, all good:
They even came with centercaps! All 4! Unfortunately, the center caps were a different style (clip type) than the fronts (o-ring type).
Ok, all ready to go!
Powdercoat
I got them done by Bulletproof coating in "Volk Bronze". I called around and there was a place in the bay area who finishes wheels, but I had to pick a color from the prisma powders catalog. I had no idea which one would be close to OG bronze, so I went with Bulletproof.
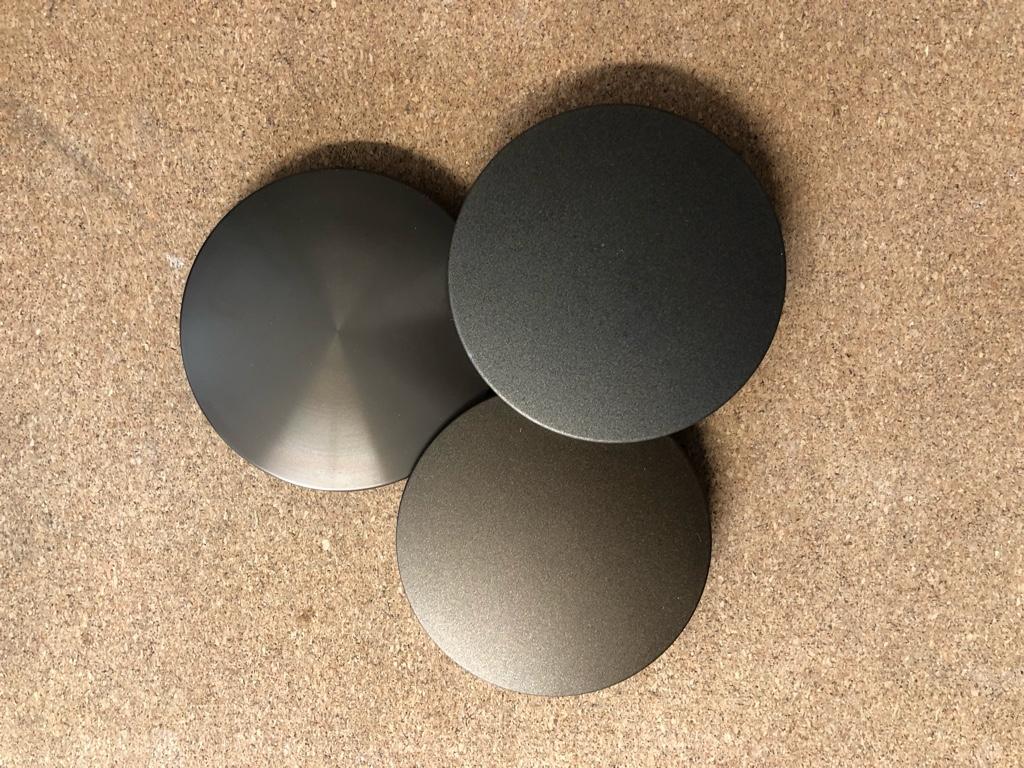
Here's a comparison of the color to real anodized Volk bronze. It's very close. The biggest difference is the texture. Top left: real volk anodized, right: fresh powder coat, bottom: eBay plastic caps
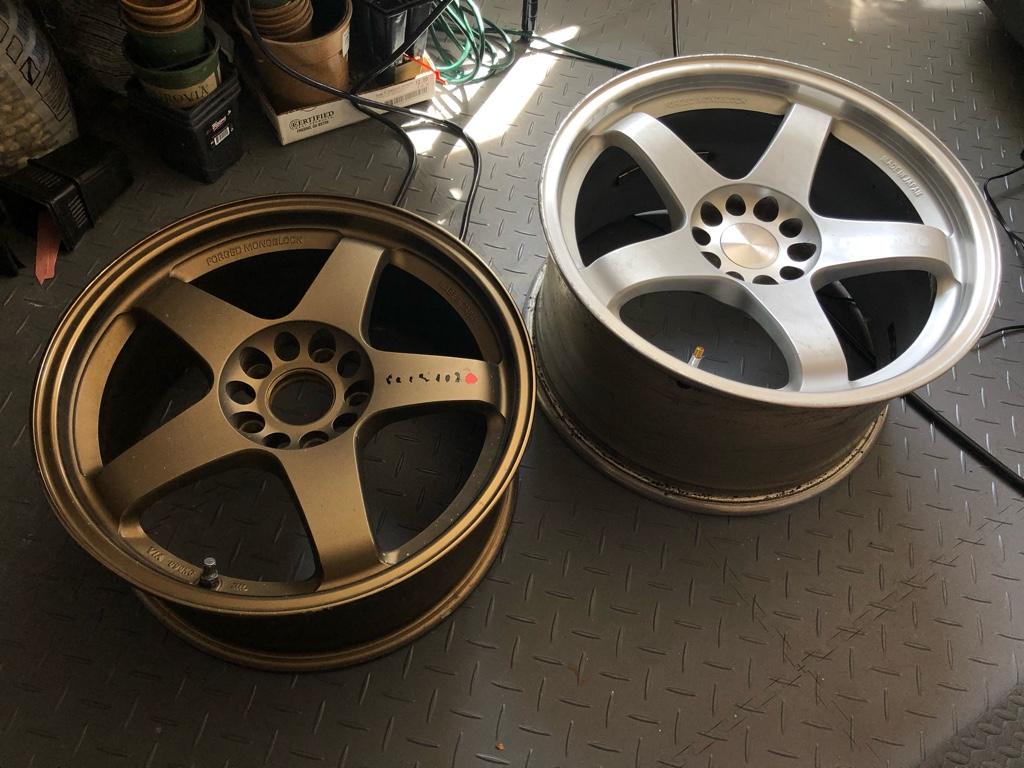
The old CEs seem a little more gold, but they look the same in this photo:
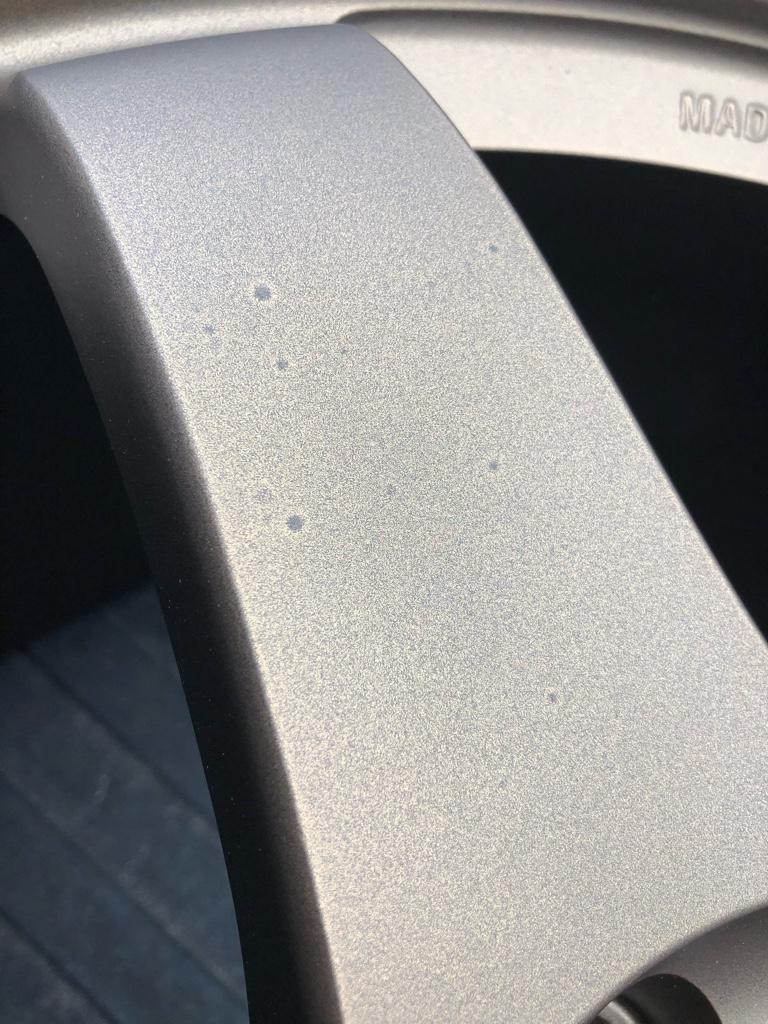
They quoted me a 3-4 day turnaround, but they ended up having the wheels for over 6 weeks, and weren't very communicative for most of it. Theeen they forgot the center caps, then they sent me the wrong center caps. Definitely not the most organized... But I got them, and they look good. I'm impressed with the curb rash fixes, like nothing was ever there. The finish is not perfect, but I'd def do it again.
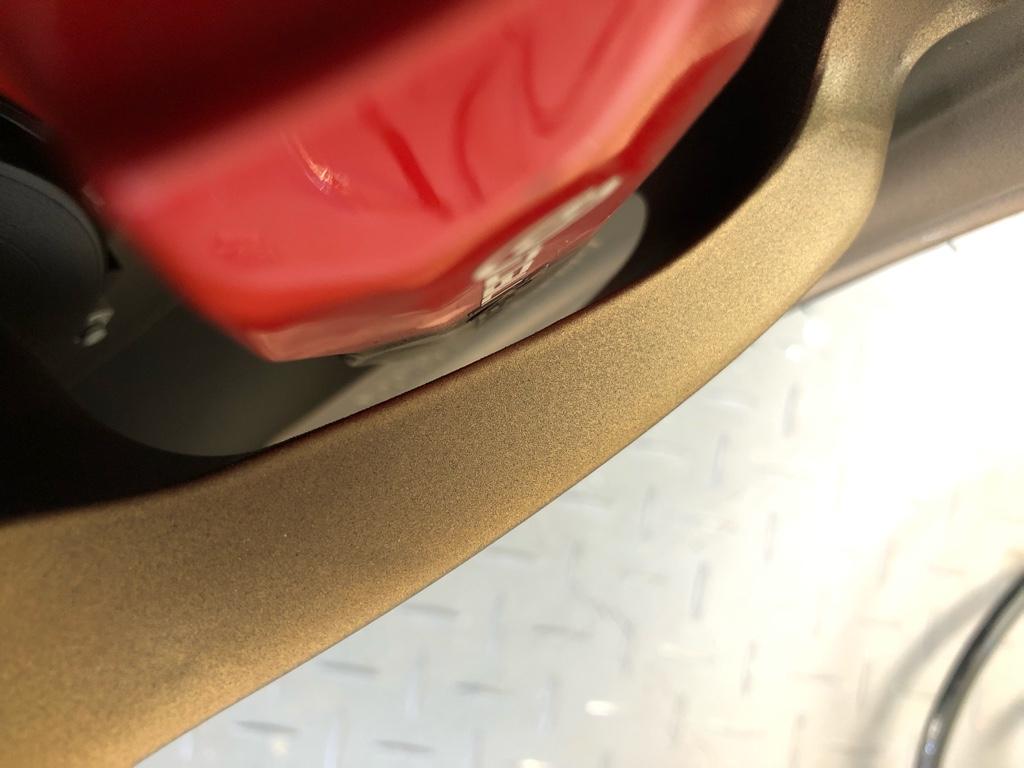
Here's a splatter, fortunately the only one, but it's on the spoke face. You can also see the color texture, volk bronze must be black powder mixed in with some bronze.
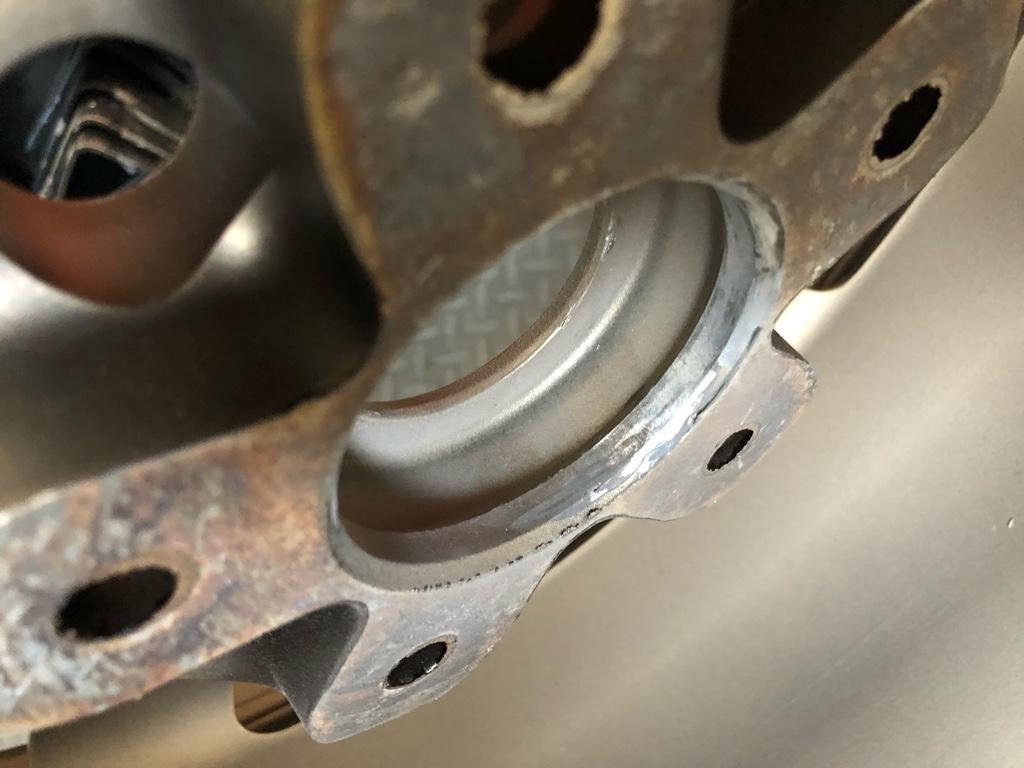
I had to wire wheel the centers so they'd fit the hub. I guess I could have just forced them on with the lugnuts, but that felt sketchy. I cleaned them up, and they slipped right on. This one is in progress:
Tires
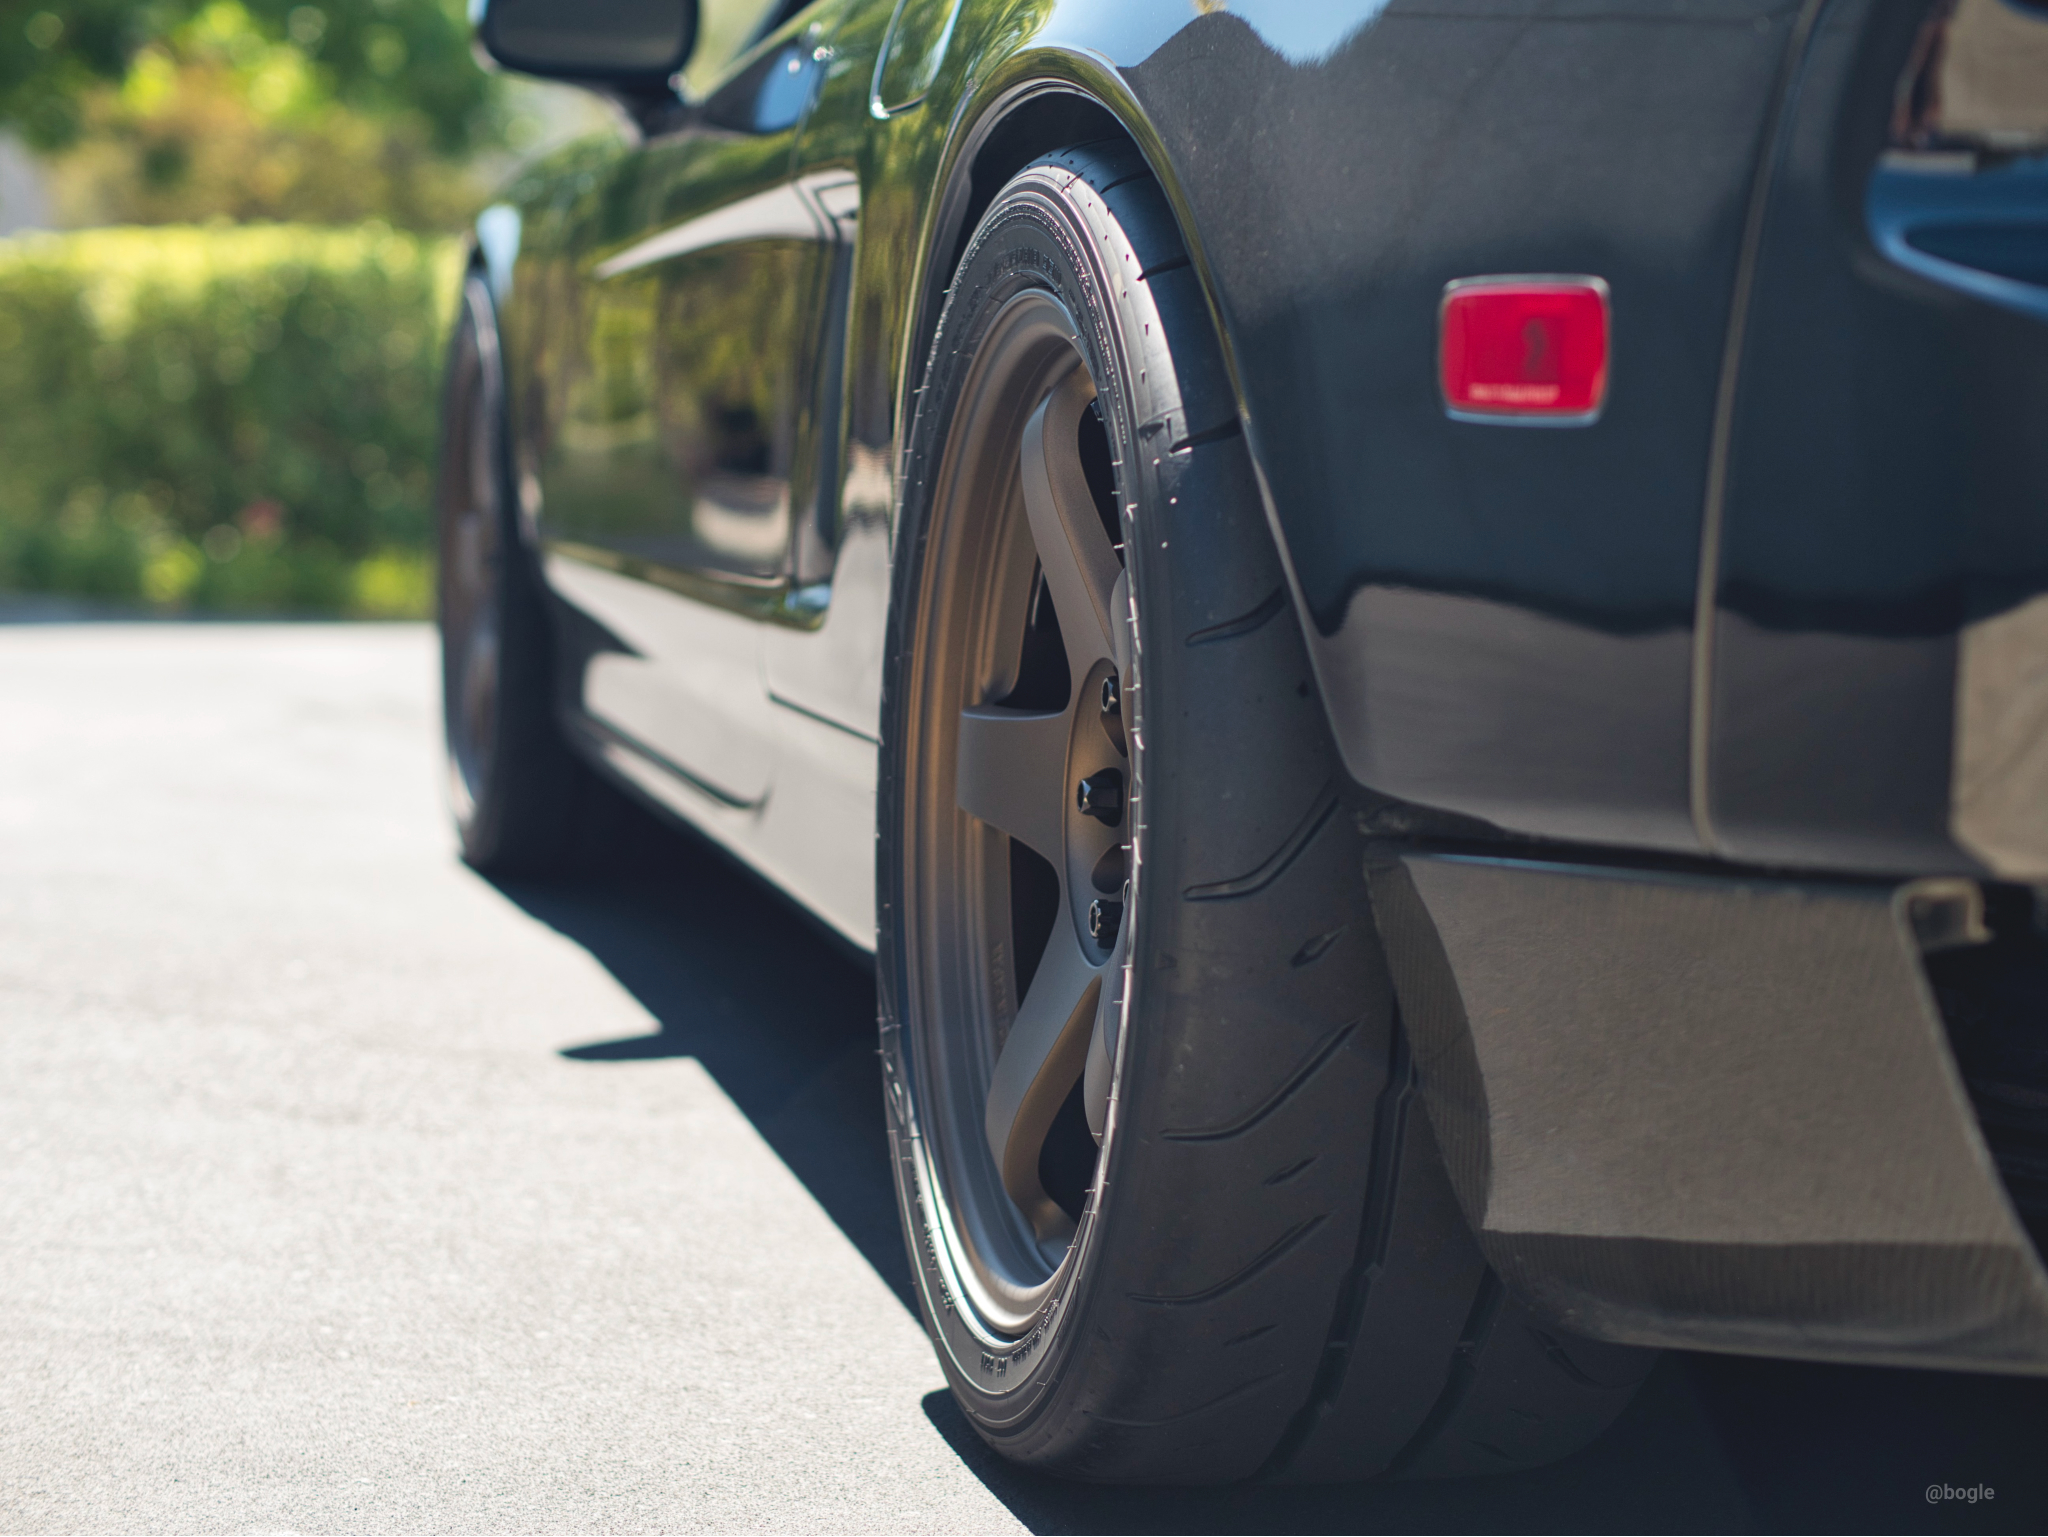
The goal was no visible stretch on the fronts. I really disliked they way the stretch looked with the CEs and Direzzas, so I hoped to eliminate it. I was looking at tires thinking of stuntman's rule of thumb: keep the treadwidth within 1/2" of the wheel width. Since the wheels are 1/2 skinnier than a "normal" NSX setup, this was a little easier than usual. Here were pretty much all my options (prices reflect 215/265 set in each model):
RT615k+ $540
* 215/40/17: Sec. 8.5", Tread. 7.2", Dia: 23.9", 20lbs
* 265/35/18: Sec. 10.7", Tread. 9.5", Dia: 25.4”, 27lbs
* 275/35/18: Sec. 10.8", Tread. 9.7", Dia: 25.6", 27lbs
RT660 $750
* 215/40/17: Sec. 8.7", Tread. 7.9", Dia: 23.8", 22lbs
* 265/35/18: Sec. 10.9", Tread. 9.8", Dia: 25.4”, 29lbs
* 275/35/18: Sec. 11.2", Tread. 10.1", Dia: 25.6", 29lbs
Direzza $887
* 215/40/17: Sec. 8.1", Tread. 7.8", Dia: 23.9", 20lbs
* 255/40/17: Sec. 9.7", Tread. 9", Dia: 25.1", 27lbs (my old rears)
* 265/35/18: Sec. 10.1", Tread. 9.5", Dia: 25.4”, 27lbs
* 275/35/18: Sec. 10.5", Tread. 9.8", Dia: 25.6”, 28lbs
Advan AD08r $1126 (!!!)
* 215/40/17: Sec. 8.6", Tread. 7.9", Dia: 23.7", 21lbs
* 265/35/18: Sec. 10.6", Tread. 10.1", Dia: 25.4”, 28lbs
Firehawk Indy 500 $710
* 205/40/17: Sec. 8.4", Tread. 7.3", Dia: 23.5", 19lbs
* 265/35/18: Sec. 10.7", Tread. 8.9", Dia: 25.3”, 25lbs
* 275/35/18: Sec. 10.9", Tread. 9.3", Dia: 25.6”, 26lbs
I was stuck on the RT615k+. They were cheap, light, have good reviews, and I figured the 7.2" on a 7.5" wheel would have next to no stretch with the desired preload. And the rears were exact. In stock, tirerack said, so I bought a set.
Then in the confirmation email: they were actually backordered until mid-July. A couple weeks later, another email said end of August. I'm taking the car to an event in mid August, and wanted to have the new wheels on for it, so end of Aug was a no go.
With the RT615k+s out of the picture. I really wanted to try the RT660s. My ultimate plan was to run them on the Regamasters at some point cause they are an 8/10" setup. But I guess now was the time. I attempted to change my order to RT660 in a 215/265 set. Rears were alllso backordered; 275s it was. The meatiest meats on that list.
I was a little worried they might be too wide for the wheels on both ends, but the fronts are perfectly square. The rears are probably a tad too wide, and taller than ideal (.2" taller than 265, .5" taller than old setup), but it's fine, and IMO looks great.
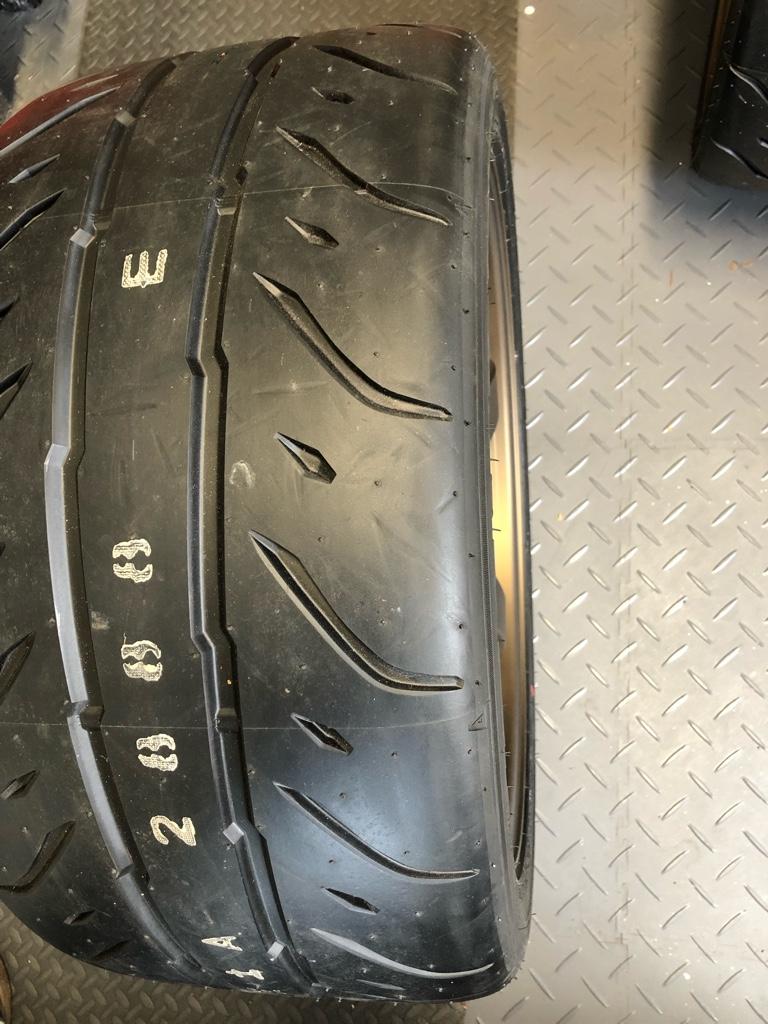
A comparison of the stretch between the new RT660s and 2008 Direzzas (215/40/17 on 8" wheel). Direzzas:
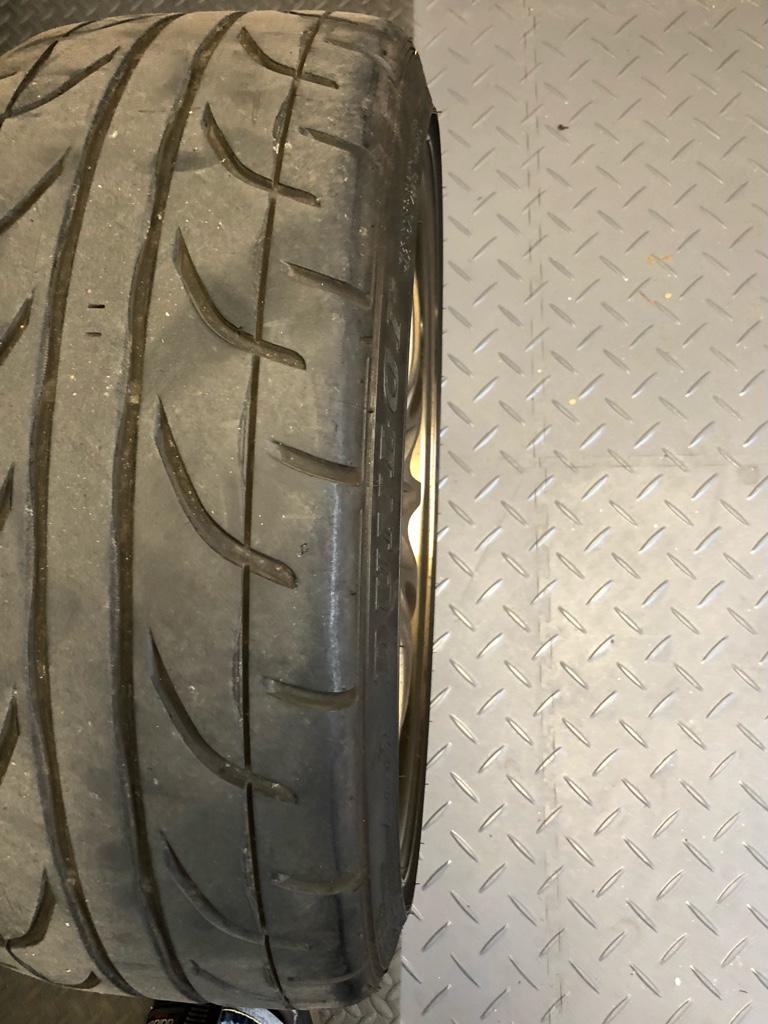
RT660
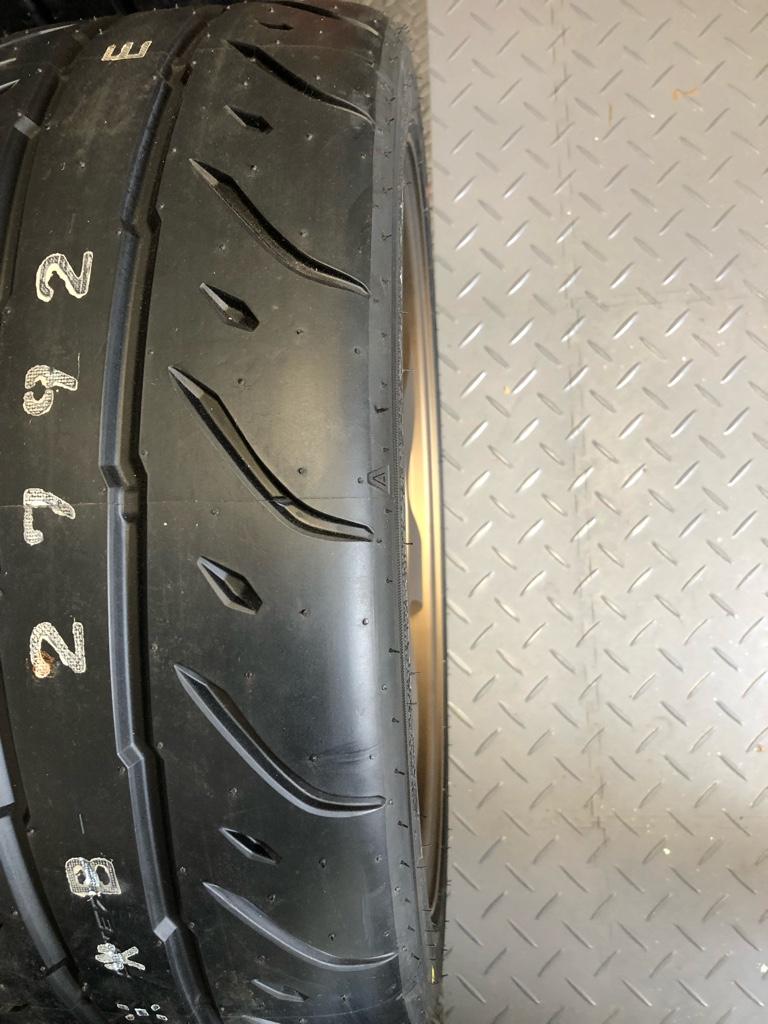
Here’s the rears for comparison
Ready to go on
Weight
The new setup is heavier than the old. The wheels are light for their size, but the tires are not. The rears are also larger than the old setup, so heavier.
Old, CE28n, 17x8+38 & 17x9+40. Weights are per wheel with tire
Front: 37lb
Rear: 40lb 6oz
New LMGT4 17x7.5+30 & 18x9.5+30
Front: 39lb (measured wheel 16lb 2oz)
Rear: 48lb 6oz (measured wheel 19lb 8oz)
Other stuff
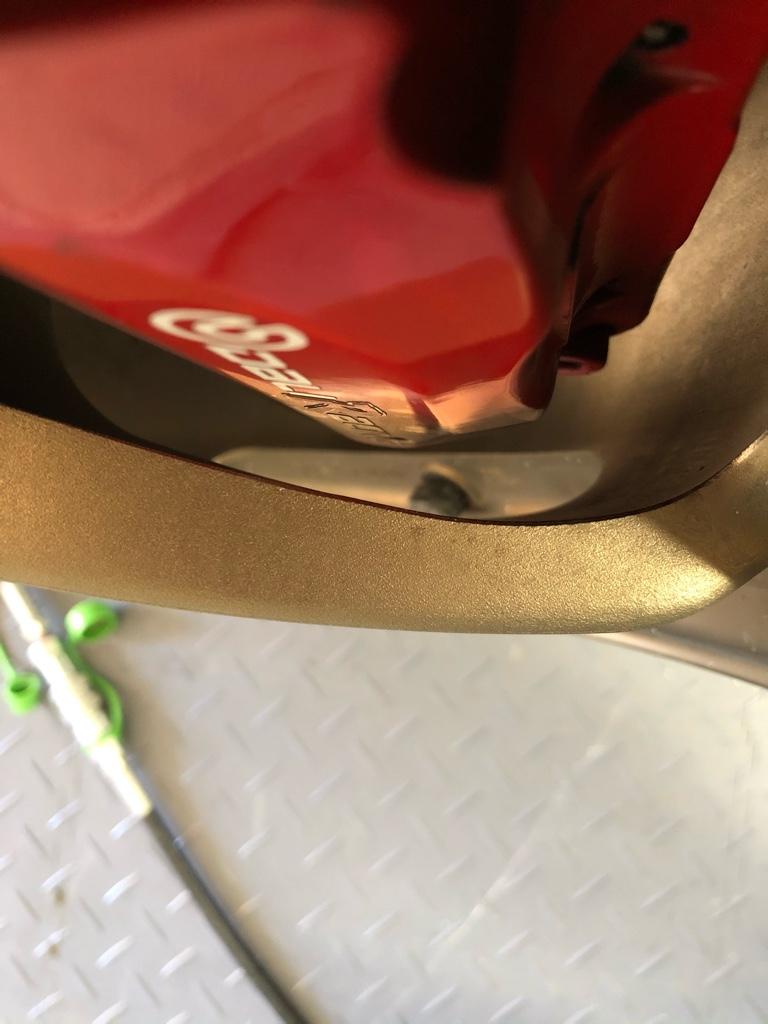
The brake clearance turned out to be [emoji108]
And I got new lugnuts. I went with the longer ones for eventual ARP extended lugs

I guess I’m a wheel hoarder. The regas came like 4 months later than they were supposed to. I was going to run these first as they should have come in March, but I got them after the LMGT4s came back from refinishing…
* Front: 17x7.5 +30 215/40/17
* Rear: 18x9.5 +30 275/35/18
Probably my least favorite thing about the NSX in general is its supported front wheel sizes, pretty exclusively for visual and availability reasons. Visually, no concave faces come in 17x8 at any offset, and tons of wheels that are cool / light look pretty derpy in 17x8 sizing. There are many, but a good example example is my high-pad CE28s (+38, straight derp), or RPF1s with their spokes almost sticking out as far as the lip. If I were being practical, RPF1s would be the move, but the fronts kill it for me. Couple that with an often stretched tire--only 215/40/17s fit aaand most 215s are not 8" wide--and you get a pretty anemic vibe up front (IMO). I like me that Meaty Fitment.
Maybe 16s are an option? e.g. @MexiRicer's car looks incredible on both the CEs and TEs, and the setup is probably pretty light. There are many 16x8's that could work, but none of them that I had measured fit over the brakes (barrel too small).
Maybe wide fenders? I'd like to keep them OEM if I can.
The NSX is (kind of) a wedge design and IMO nothing looks better than 5 spokes on a wedge. Ferrari knew this and cars from this era had 5 spokes: Testarossa, 308, 348 ... think about the sexiest F40 you can: 5 spokes. I looove TEs, but in NSX sizing with flat fronts against concave rears the 6 spokes look a little too symmetrical IMO, which looks, to me, more buttoned up than the car deserves. Concave fronts change aggression, but anything 17" and concave is min 9" wide. Everyone here knows 9" wide on stock fenders is a no go, even if they did fit, which tires? (I mean Toyo makes a 245/35/17 R1R, which would technically be the right size, but AFAIK that's it)
Ok so 5 spokes, what are my options? My criteria is: I like them, they are pretty light, they fit well, they aren't 5k.
* Advan GTs. I realllllly wanted them, but no 17s, I'd have to be an 18/19 setup, nope
* Regas, yes ok, light, great looking, the fronts even look good at 17x8, all around win
* Gramlights 57c: no 17x8, heavy
* CCW Classic 5: $$$$$$$, too baller
* RP01: Good luck finding 18" pairs, even more rare in modern offsets
* ...
* Nismo LMGT4s. Wait those are cool. Literally every GT-R with them looks fantastic. Light, simple, factory bronze. Are there any that fit?
I bought a set of Regamasters but continued to be LMGT4-curious, thinking there would be something I'd discover that would make them unusable....
Offset Math
It seems the most acceptable "aggressive" setup on stock fenders is
* Front: 17x8 +35
* Rear: 18x10 +35
That was my target. Any higher offset numbers within reason are all good. Offset is a weird measure in that it's from the center of the wheel, so obviously offset numbers don't mean the same thing on wheels with different widths.
I wanted to compare them at different sizes, so what I cared about was _front spacing_: the max distance from the hub to the outside of the wheel.
Front Spacing = width * 25.4 / 2 - offset (25.4 converts inches into mm)
* Max front front spacing: 8 * 25.4 / 2 - 35 = 66.6mm
* Max rear front spacing: 10 * 25.4 / 2 - 35 = 92mm
Move some numbers around to impress your 8th grade teacher and you get
* Max front offset = width * 25.4 / 2 - 66.6
* Max rear offset = width * 25.4 / 2 - 92
Apply that ish to common widths, rounding down because racecar, and you get the max acceptable offsets (min in number) for a variety of wheel widths:
* Front width
ffset 7.5":+28, 8":+35, 8.5":+41, 9":+47* Rear width
ffset 9":+22, 9.5":+28, 10":+35, 10.5":+40I looked at every used wheel I could find in this size range on instagram, ebay, crooooober, yahoo auctions, facebook, etc., and the LMGT4s were actually pretty reasonable to find. Easier than OG TEs or CEs. I was also looking for CE28s in 18x9.5+28, but never found a pair / set for sale in any condition.
Turns out LMGT4s came in perfect sizing: 17x7.5+30 and 18x9.5+30. The fronts were often in S13 square sets, and rears came in 350z / 300zx sets, which means they were not so rare in the US. Cool.
The process
Piecing the set together took about 6 months from when I paid for the first set to mounting on the car. The process was:
* Buy 2 full sets of wheels cause pairs are impossible or $$$$
* Get the fronts bored out (66mm to 70.1mm)
* Buy center caps for the fronts
* New valve stems (rays black)
* Get them powder + ceramic coated
Seems pretty straight forward, but it was a fair amount of effort. Every little step in the process was extremely delayed, back ordered, fell through, cancelled, sent to the wrong place, etc. The only things that were easy were the valve stems and tire mounting. Also, throughout the process I was never 100% sure the fronts would fit due to the center bore differences. I didn't even get a proper chance to test fit them until the tires went on cause there was so much powder coat in the center bore area. I feel pretty lucky it all worked out.
Fronts
The biggest risk were the fronts: do they clear the brakes? Will boring them out be a big deal? I took a chance and bought the front set, thinking I'd sell them if they obviously didn't fit.
I found a nice scale drawing of my brakes, printed it out and glued it to cardboard.
Seems like it'll fit, eh?
Then a quick check sorta mounted, and measuring the gap between the wheel and rotor, and caliper and spokes.
They say you need 3mm clearance between the spokes and calipers. I measured a bit more than 3mm. Win!
Boring them out was the next step. I called around and did a bunch of searching but couldn't find anyone in the bay area who could do it or had done it. Just machine shops who were like "yeah I could probably chuck it up". Not so confidence inspiring.
Bulletproof coating in San Bernardino said they could bore the centers out for $60 on top of powdercoat. Cool. The downside is that I couldn't actually check brake clearance before they were finished.
Rears
Other than having a couple sets fall through, and one dude stringing me along for a month before selling them locally, they were a lot easier than the fronts. The final set came up on ebay for a reasonable price, I bought them within an hour, and here they were.
A quick fit on the rear, all good:
They even came with centercaps! All 4! Unfortunately, the center caps were a different style (clip type) than the fronts (o-ring type).
Ok, all ready to go!
Powdercoat
I got them done by Bulletproof coating in "Volk Bronze". I called around and there was a place in the bay area who finishes wheels, but I had to pick a color from the prisma powders catalog. I had no idea which one would be close to OG bronze, so I went with Bulletproof.
Here's a comparison of the color to real anodized Volk bronze. It's very close. The biggest difference is the texture. Top left: real volk anodized, right: fresh powder coat, bottom: eBay plastic caps
The old CEs seem a little more gold, but they look the same in this photo:
They quoted me a 3-4 day turnaround, but they ended up having the wheels for over 6 weeks, and weren't very communicative for most of it. Theeen they forgot the center caps, then they sent me the wrong center caps. Definitely not the most organized... But I got them, and they look good. I'm impressed with the curb rash fixes, like nothing was ever there. The finish is not perfect, but I'd def do it again.
Here's a splatter, fortunately the only one, but it's on the spoke face. You can also see the color texture, volk bronze must be black powder mixed in with some bronze.
I had to wire wheel the centers so they'd fit the hub. I guess I could have just forced them on with the lugnuts, but that felt sketchy. I cleaned them up, and they slipped right on. This one is in progress:
Tires
The goal was no visible stretch on the fronts. I really disliked they way the stretch looked with the CEs and Direzzas, so I hoped to eliminate it. I was looking at tires thinking of stuntman's rule of thumb: keep the treadwidth within 1/2" of the wheel width. Since the wheels are 1/2 skinnier than a "normal" NSX setup, this was a little easier than usual. Here were pretty much all my options (prices reflect 215/265 set in each model):
RT615k+ $540
* 215/40/17: Sec. 8.5", Tread. 7.2", Dia: 23.9", 20lbs
* 265/35/18: Sec. 10.7", Tread. 9.5", Dia: 25.4”, 27lbs
* 275/35/18: Sec. 10.8", Tread. 9.7", Dia: 25.6", 27lbs
RT660 $750
* 215/40/17: Sec. 8.7", Tread. 7.9", Dia: 23.8", 22lbs
* 265/35/18: Sec. 10.9", Tread. 9.8", Dia: 25.4”, 29lbs
* 275/35/18: Sec. 11.2", Tread. 10.1", Dia: 25.6", 29lbs
Direzza $887
* 215/40/17: Sec. 8.1", Tread. 7.8", Dia: 23.9", 20lbs
* 255/40/17: Sec. 9.7", Tread. 9", Dia: 25.1", 27lbs (my old rears)
* 265/35/18: Sec. 10.1", Tread. 9.5", Dia: 25.4”, 27lbs
* 275/35/18: Sec. 10.5", Tread. 9.8", Dia: 25.6”, 28lbs
Advan AD08r $1126 (!!!)
* 215/40/17: Sec. 8.6", Tread. 7.9", Dia: 23.7", 21lbs
* 265/35/18: Sec. 10.6", Tread. 10.1", Dia: 25.4”, 28lbs
Firehawk Indy 500 $710
* 205/40/17: Sec. 8.4", Tread. 7.3", Dia: 23.5", 19lbs
* 265/35/18: Sec. 10.7", Tread. 8.9", Dia: 25.3”, 25lbs
* 275/35/18: Sec. 10.9", Tread. 9.3", Dia: 25.6”, 26lbs
I was stuck on the RT615k+. They were cheap, light, have good reviews, and I figured the 7.2" on a 7.5" wheel would have next to no stretch with the desired preload. And the rears were exact. In stock, tirerack said, so I bought a set.
Then in the confirmation email: they were actually backordered until mid-July. A couple weeks later, another email said end of August. I'm taking the car to an event in mid August, and wanted to have the new wheels on for it, so end of Aug was a no go.
With the RT615k+s out of the picture. I really wanted to try the RT660s. My ultimate plan was to run them on the Regamasters at some point cause they are an 8/10" setup. But I guess now was the time. I attempted to change my order to RT660 in a 215/265 set. Rears were alllso backordered; 275s it was. The meatiest meats on that list.
I was a little worried they might be too wide for the wheels on both ends, but the fronts are perfectly square. The rears are probably a tad too wide, and taller than ideal (.2" taller than 265, .5" taller than old setup), but it's fine, and IMO looks great.
A comparison of the stretch between the new RT660s and 2008 Direzzas (215/40/17 on 8" wheel). Direzzas:
RT660
Here’s the rears for comparison
Ready to go on
Weight
The new setup is heavier than the old. The wheels are light for their size, but the tires are not. The rears are also larger than the old setup, so heavier.
Old, CE28n, 17x8+38 & 17x9+40. Weights are per wheel with tire
Front: 37lb
Rear: 40lb 6oz
New LMGT4 17x7.5+30 & 18x9.5+30
Front: 39lb (measured wheel 16lb 2oz)
Rear: 48lb 6oz (measured wheel 19lb 8oz)
Other stuff
The brake clearance turned out to be [emoji108]
And I got new lugnuts. I went with the longer ones for eventual ARP extended lugs
I guess I’m a wheel hoarder. The regas came like 4 months later than they were supposed to. I was going to run these first as they should have come in March, but I got them after the LMGT4s came back from refinishing…
Last edited:
Awesome, thanks for reading, really glad it’s interesting!
Whoaaaa dude, great read on your wheel hunting and assembling process. As a fellow wheel whore, I can relate 100% to all those hurdles and hoops you had to scavenge through. Definitely a blessing in disguise that the 615k+ fell through. I can guarantee from experience that the 215/40/17 will stretch on a 17x7.5. Those tires are super narrow and they're very stiff, wouldn't run those personally but those rt660 look super promising. Also, fantastic choice on 17/18 lmgt4!!! I myself had considered piecing a set together since I too had seen many sets for sale over the years but I did not know about the front center bore issue. Great work and looking forward to your next updates. The wheels looks great and Bulletproof did a great job on the powder. Any plans on running the sticker on the spoke?
@MexiRicer thanks! means a lot coming from you. You’re totally right on the tires. With the fronts being so square now, I’m sure the 615s would stretch. I love the meatyness on the 660 setup. Im soooo happy with them. Part of me wants to run the Nismo stickers cause they look really good, but also probably blasphemy. What do you mean Nismo on that Honda?? Would you run the stickers?
MexiRicer thanks! means a lot coming from you. You’re totally right on the tires. With the fronts being so square now, I’m sure the 615s would stretch. I love the meatyness on the 660 setup. Im soooo happy with them. Part of me wants to run the Nismo stickers cause they look really good, but also probably blasphemy. What do you mean Nismo on that Honda?? Would you run the stickers?
I think I would, just to complete the look of the wheels. Embrace that you actually made it work and executed it flawlessly!
You talked me into it! I just bought some spoke decals. I’ll try one side and see if I like it.
We’ll see if they are the same size as the old, though. Turns out real Nismo replacement stickers available on the internet (https://www.nengun.com/nismo/lmgt4-spoke-stickers) are only in the new font. Trying to keep the OG circle O, so I went with reproductions
We’ll see if they are the same size as the old, though. Turns out real Nismo replacement stickers available on the internet (https://www.nengun.com/nismo/lmgt4-spoke-stickers) are only in the new font. Trying to keep the OG circle O, so I went with reproductions
Holy shit, it's Ben Ogle!
Seeing a OG Honda guy show up in NSX-land is a pretty great surprise...thanks for the great thread too.
Seeing a OG Honda guy show up in NSX-land is a pretty great surprise...thanks for the great thread too.
Yo! It me. Happy to be back in this world after over a decade hiatus. We’re you in the DA, EF or pgfmi world? I spent a lot of time on g2ic, ef-honda, and pgmfi.org many moons ago. I have a jonesing for a DA and still own the EF, but it’s in storage
Yo! It me. Happy to be back in this world after over a decade hiatus. We’re you in the DA, EF or pgfmi world? I spent a lot of time on g2ic, ef-honda, and pgmfi.org many moons ago. I have a jonesing for a DA and still own the EF, but it’s in storage
I have a 91 CRX w/d16a6 vitara t3/t4 build that I use to compete in the GRM $2000 challenge. When researching the build I ran into your name alot, both for the editor and general things like EF suspension setup.
You'll enjoy the NSX-it's the same design language as the EF/DA, only saying very different things. It also attracts a great group of people and the signal to noise ratio here on Prime is very good.
Last edited:
Amazing, the CRX looks incredible, even more so for a $2k build. Do you still compete? I always wanted to build a car for the 2k challenge. The competition was fierce. Back in the day, I watched a few builds and was super impressed with the cars people would build for the money: quick, well sorted, _and_ really nice looking. I didn't think I would be able to compete, you gotta find the deals and unload your stock parts for good money to make something competitive. My EF was this in spirit, but def exceeded the 2k budget.
Yeah, Prime has been a huge resource and an easy community to operate in. All the work on the car would be a lot harder without the old posts. And working on the NSX does feel pretty familiar. Driving the NSX reminds me of how I _imagined_ my EF to be when I was in it There is a fair amount of nostalgia with this car even though it's a totally different platform.
Yeah, Prime has been a huge resource and an easy community to operate in. All the work on the car would be a lot harder without the old posts. And working on the NSX does feel pretty familiar. Driving the NSX reminds me of how I _imagined_ my EF to be when I was in it
There is a fair amount of nostalgia with this car even though it's a totally different platform.Amazing, the CRX looks incredible, even more so for a $2k build. Do you still compete?
Thanks! The paint is Rustoleum that was put on with a roller and then buffed down. I've been working on it since 2018 and will be selling it after the race in October so I can concentrate more on the NSX. Full thread here.
I always wanted to build a car for the 2k challenge. The competition was fierce. Back in the day, I watched a few builds and was super impressed with the cars people would build for the money: quick, well sorted, _and_ really nice looking. I didn't think I would be able to compete, you gotta find the deals and unload your stock parts for good money to make something competitive. My EF was this in spirit, but def exceeded the 2k budget.
Competition is fierce but you have the right background to do very well. One or two cars go sub 10 secs each year in the 1/4, some of the college teams have thousands and thousands of man hours in their builds and lately people are just dropping lightweight production bodies over tube frame f440 cars. The EF chassis has a good history though-my build was really inspired by "Gutty" the CRX that won in 2010. The amount of detail in that build was crazy.
Ok, back to NSX stuff =)
Thanks! The paint is Rustoleum that was put on with a roller and then buffed down.
Whoa, I would not have guessed. Good thread!
Yes! Gutty was the main one I was thinking of. It was the ef-honda.com guys and they detailed it on the forum. Super impressive and glad to hear they won it eventually.
I've been working on getting a screen in the navpod. The goal is to display engine metrics with RealDash. I've been heavily inspired by this thread by I_M_Legend, you'll see that throughout the next few posts, but I broke with his approach on a few things.
First things first, what unit to get? Some need-to-have things:
* It needs to be pretty thin, there's only 40mm of space between the navpod and the dash
* Is android. RealDash has an android app
* Ability to auto-load whatever app I want on startup
* USB capability: the app needs to be able to read the CAN messages via USB
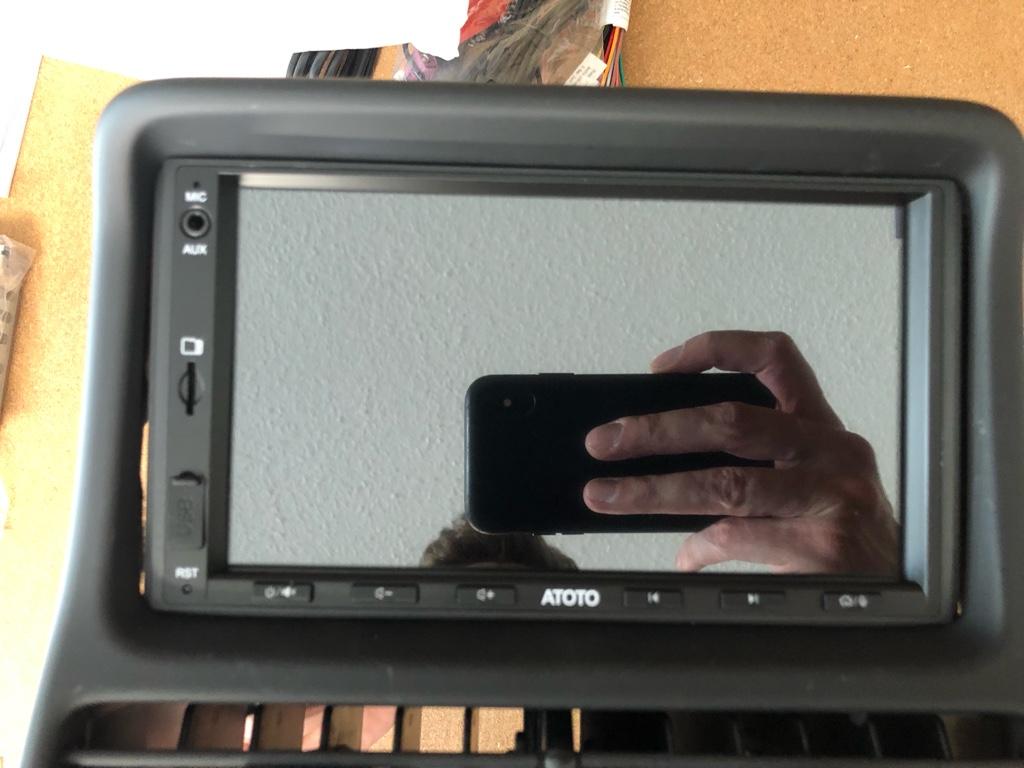
Also, I figured since I'd have the screen in the navpod, I might as well attempt to replace all the current head unit's functions with it, then eventually totally remove the head unit. Put some shelving in there or something, you know? The current head unit is super old, slow, the maps suck, and it's often unusable while driving because of a combination of the angle, screen material, and brightness.
So that means the new thing needed to have
* Backup camera input
* Maps
* 4 pre-outs for music. I almost never listen to music in the car, but obvs want the option. The current setup runs 4 pre-outs to an amp, so it needed to have those same 4 pre-outs
I couldn't find any name-brand double din stereos that had all these things. The main sicking points with everything I looked at were the depth and ability to install a 3rd party app. None were thinner than about 75mm, and it seems that none allowed random android app installation, though I couldn't confirm.
But there are a number of no-name stereos that seemed like they would work. A common format I saw this:
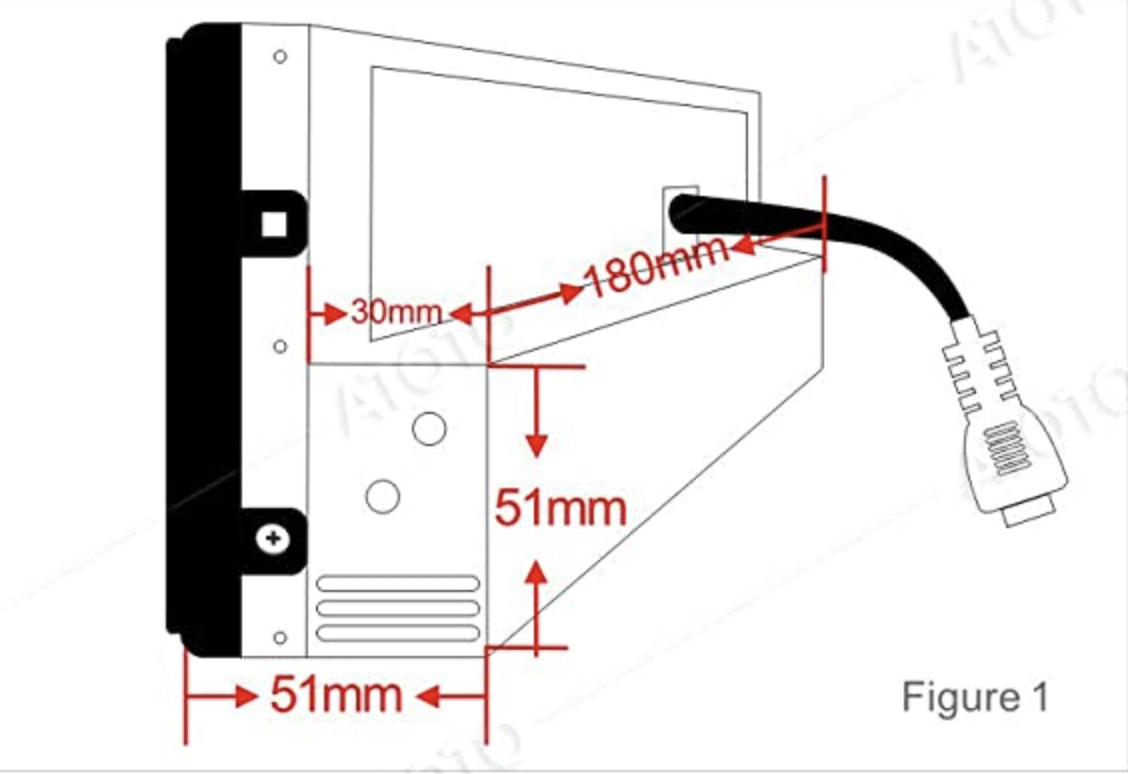
50mm deep on the bottom, then 20mm above that. It looks like they give the option mount in a single din area.
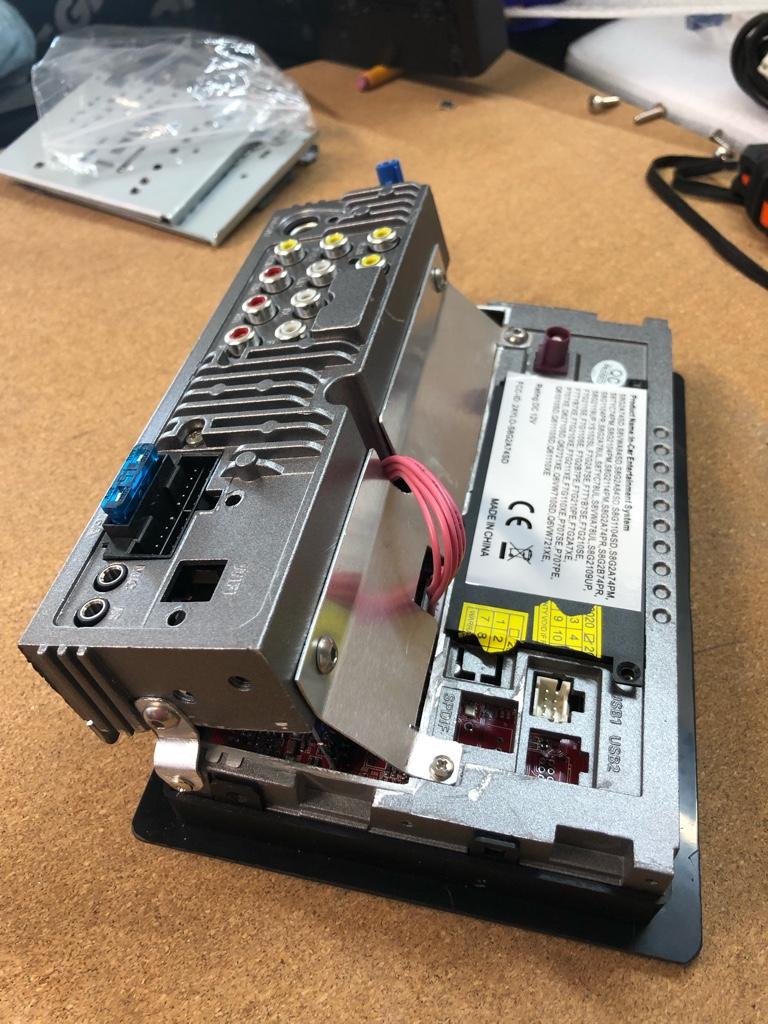
There are 100 of them on amazon and alibaba, but I ended up with the ATOTO S8 Standard. It had everything I wanted and seemed modern, had android v10.whatever and 3GB mem. A lot of others used old Android versions or didn't have the right pre-out config. I couldn't find any pics of the back of the ATOTO unit before I bought it, but I figured I could probably modify it to fit, so I pulled the trigger.
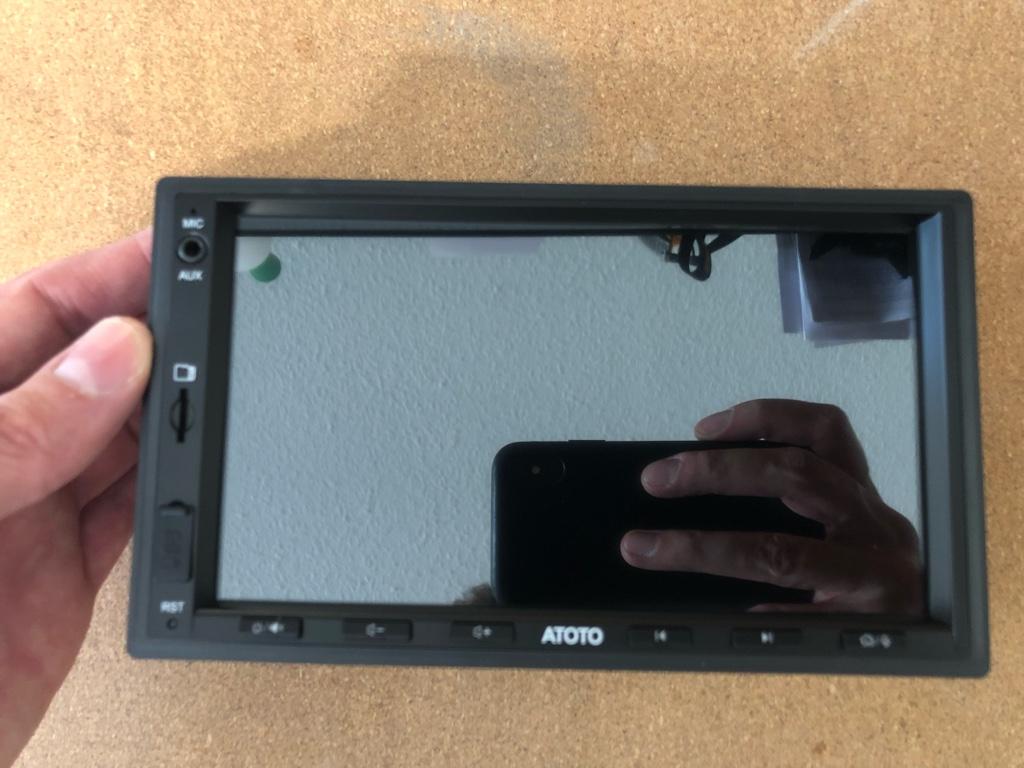
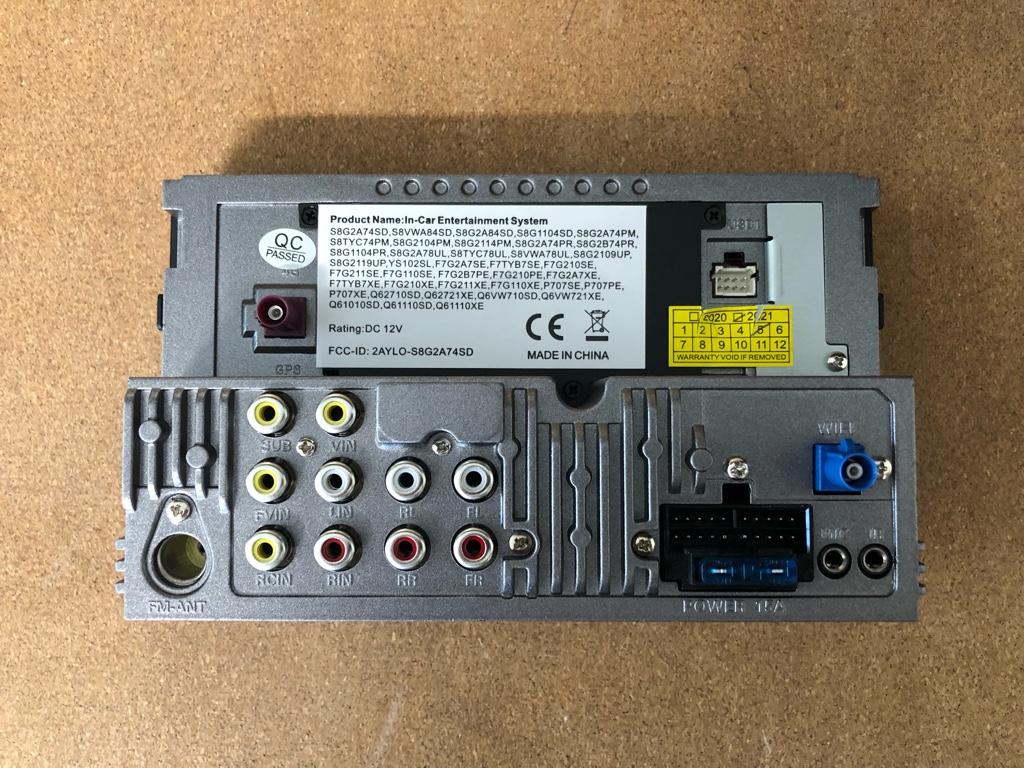
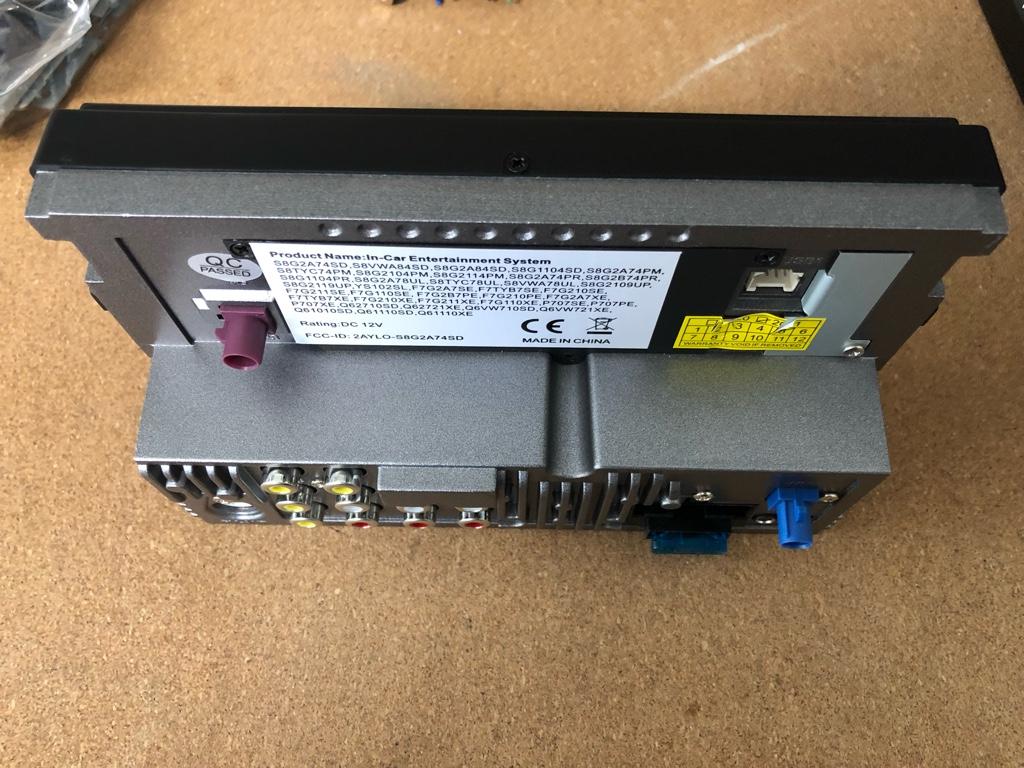

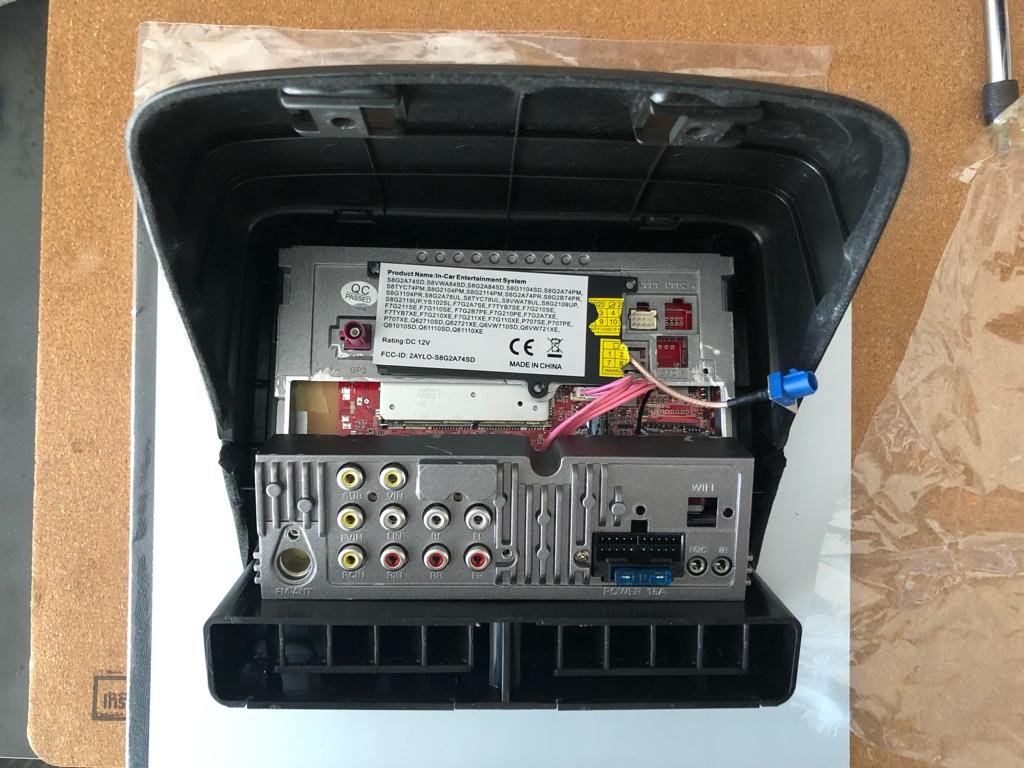
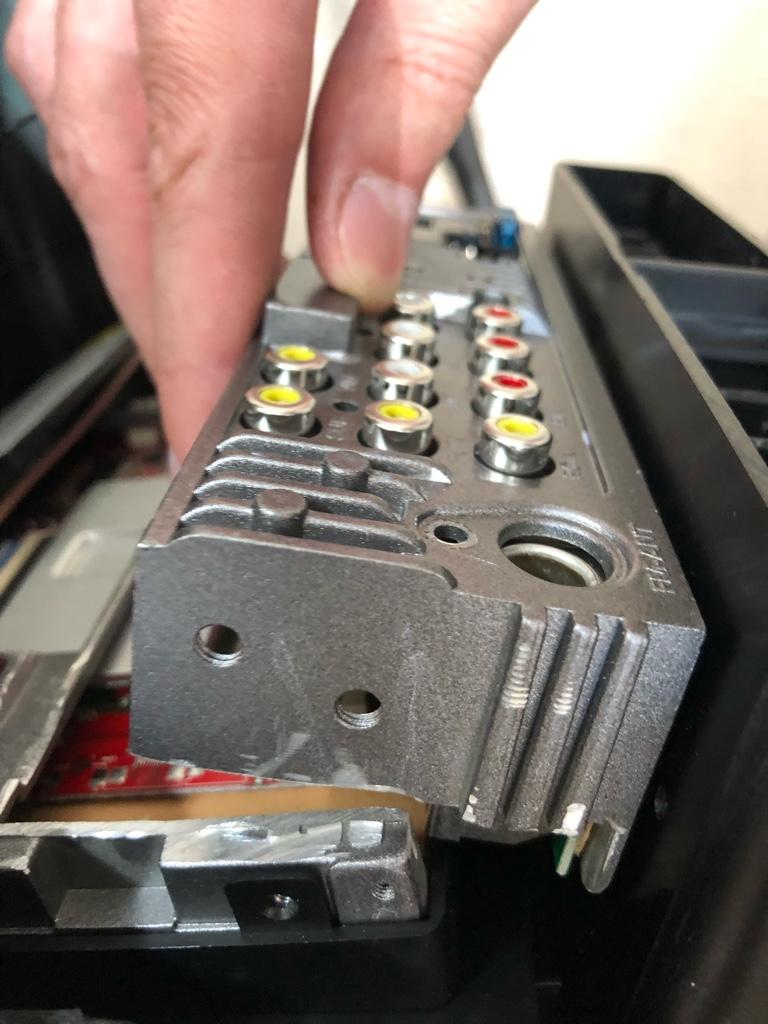
Well, does it fit? I thought it might fit out of the box, but that would be too easy. The top RCA connectors would interfere with the dash. You can see it here, the SoS bracket is made to wrap around the dash, but the unit is in the way:
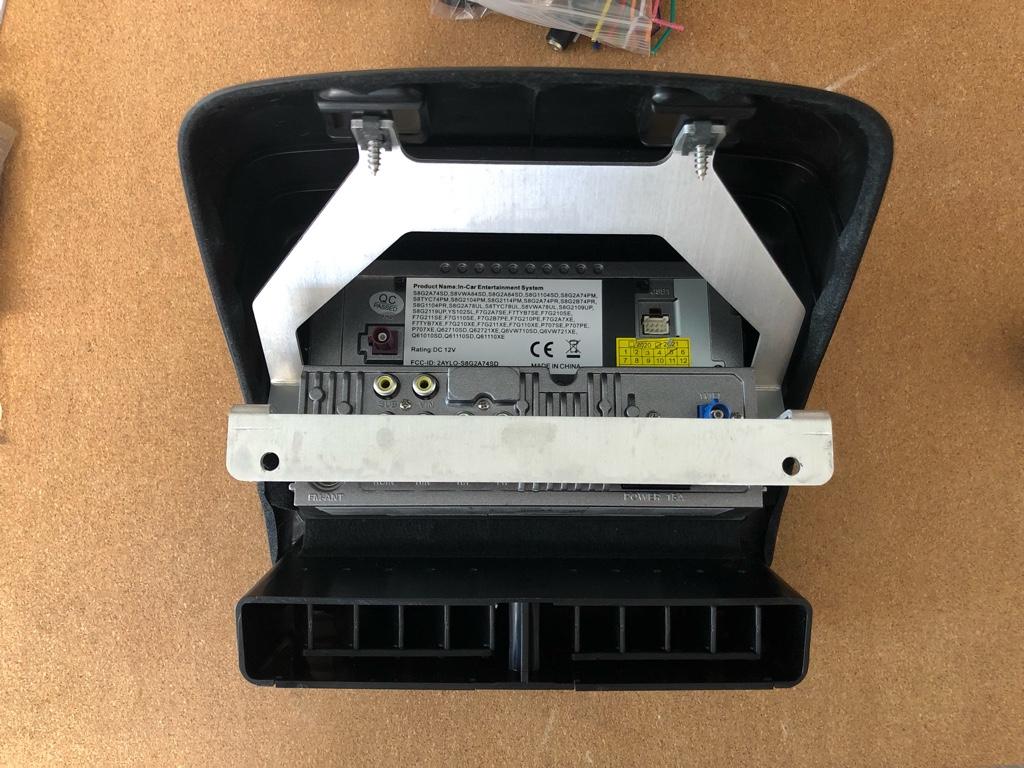

And on the front. The navpod is def not a standard double din space:
# Making it fit
10 minutes into owning this thing, I tore it apart. I needed to see if it was possible to move the single din RCA bits away from the dash.
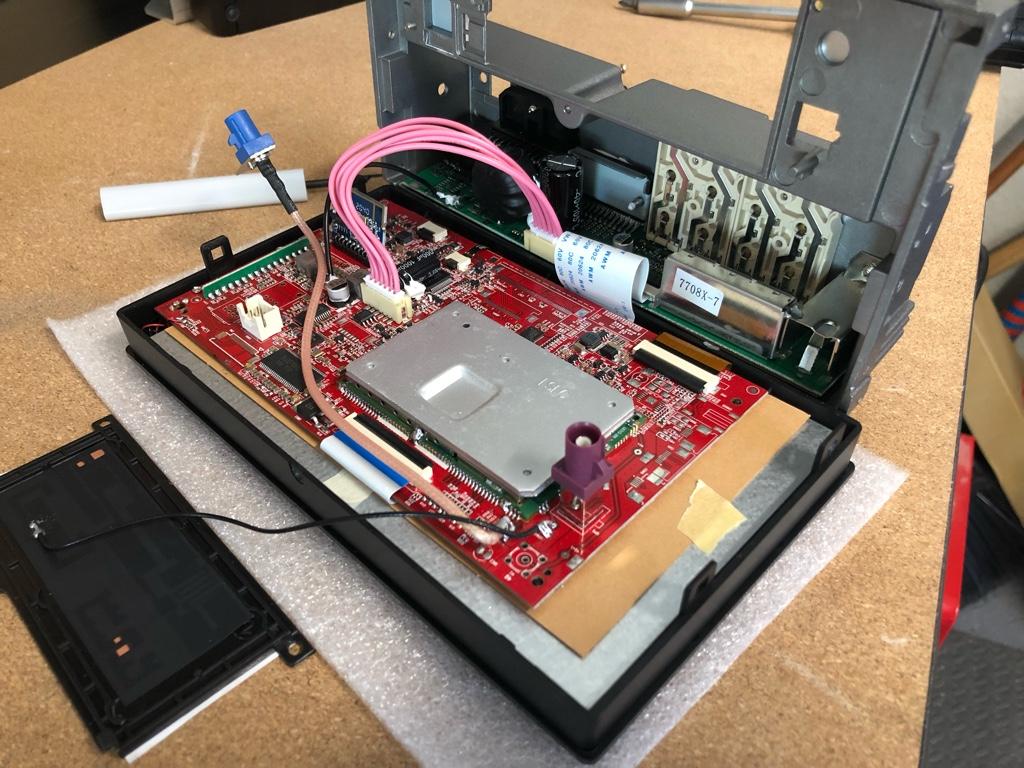
Fortunately, the plugs are all on a separate circuit board with a couple cables connecting it to the main board. At this point I was confident I could make it work.
Frame off:
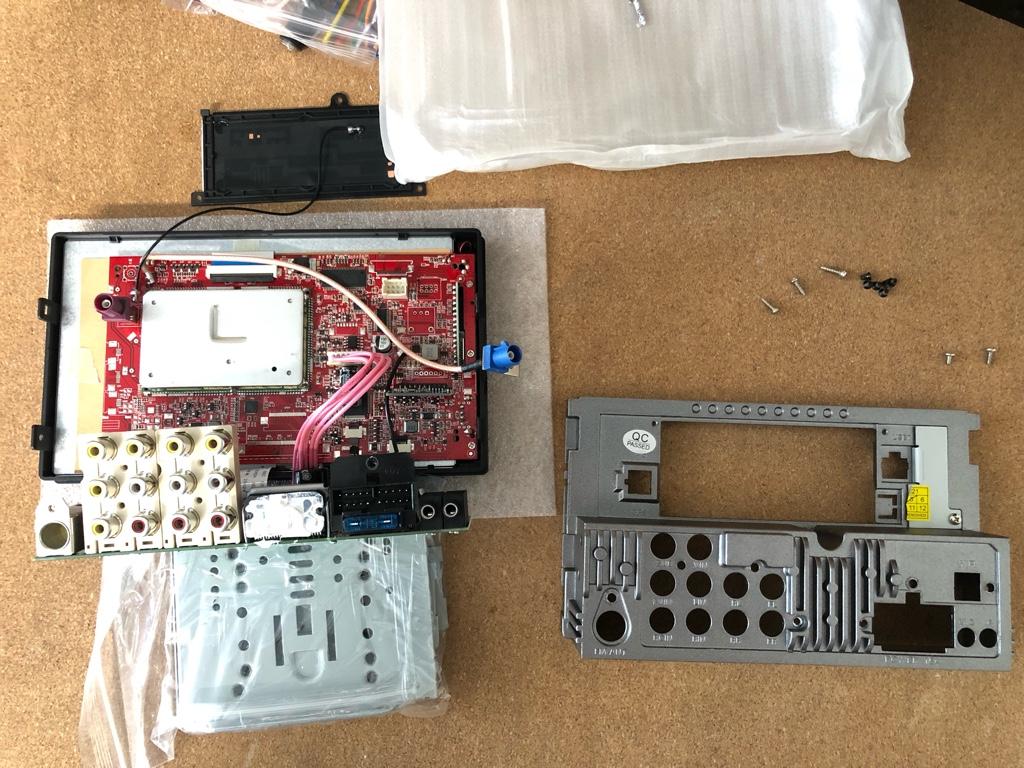
Then I cut the IO board's frame off the main frame with a friction disk. This is cast aluminum / pot metal, so it was pretty easy to work. Think they'll take it back as a return? I guess I should have tested it first.....
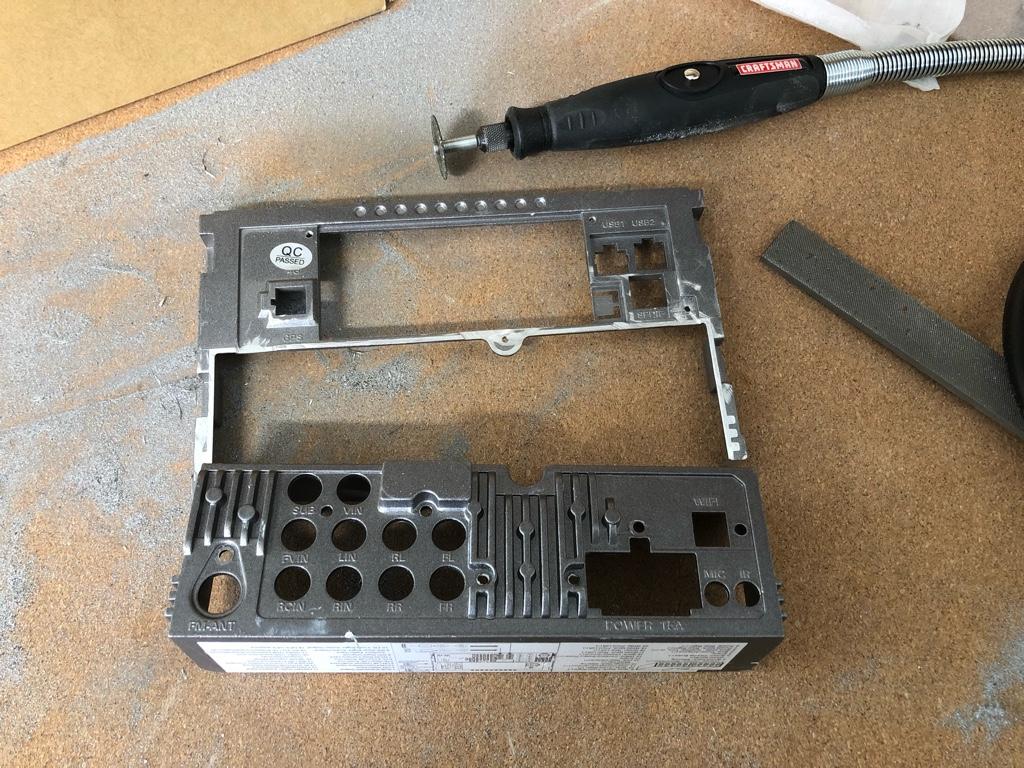
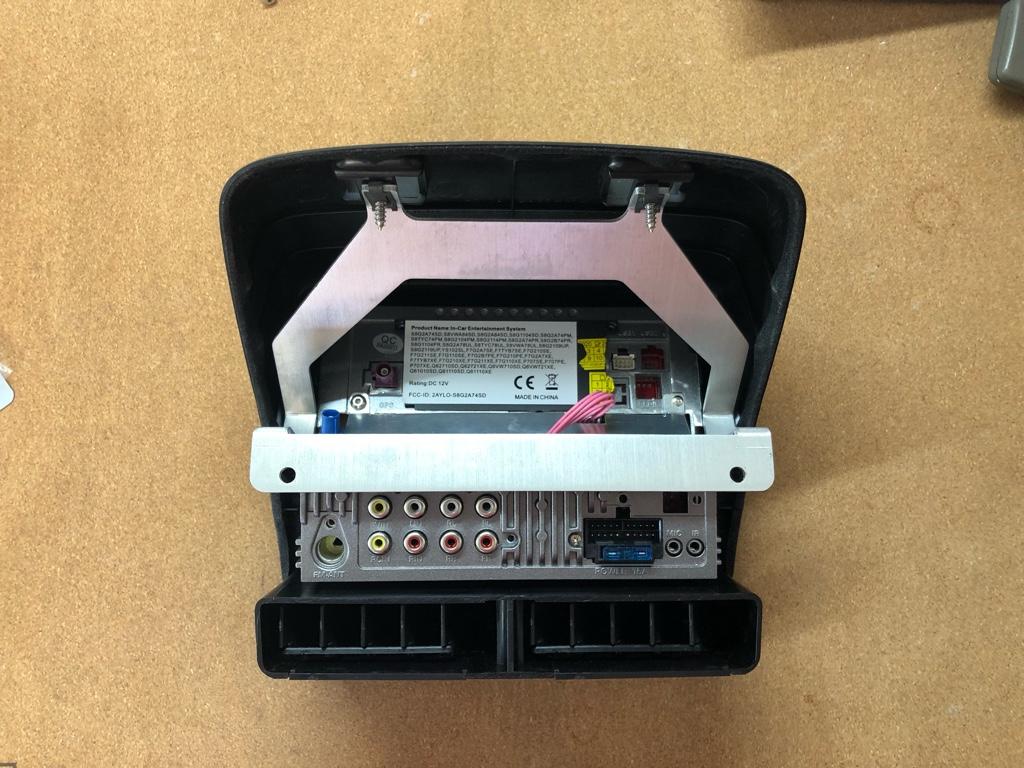
Next step was to put the frame back on and mock it up
And then I built a couple brackets to hold the IO board at the right angle. There were a lot of steps here, but I didn't take any pics. The key was that the IO board / frame needed to be parallel to the vent ducts.
I used 1/32" aluminum because it's easy to work with basic hand tools. You can score it with a utility knife and bend it back and forth at the score to make cuts. Definitely not my best work, but it all fits and is plenty sturdy.
And in the navpod. This sends all the wires down between the dash and the duct on the left side where there is plenty of room.
Bezel
The navpod isnt really a proper double din hole. It's bigger and kind of a weird shape. The stereo came with a bezel, but it didn't fit in the navpod, so I decided to make my own out of 1/16" ABS:
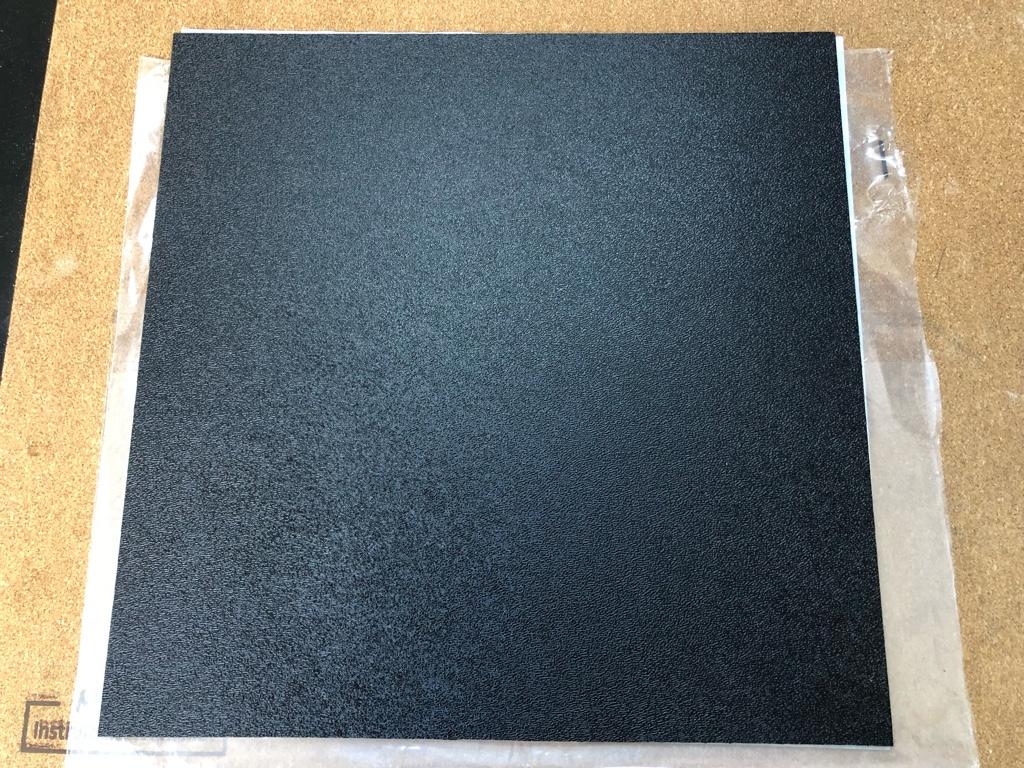
I took the factory felt tape off the inside of the pod and made a piece that fit snug against the little gusset tabs. The goal was to build it so it was self centering when was pushed up against the tabs

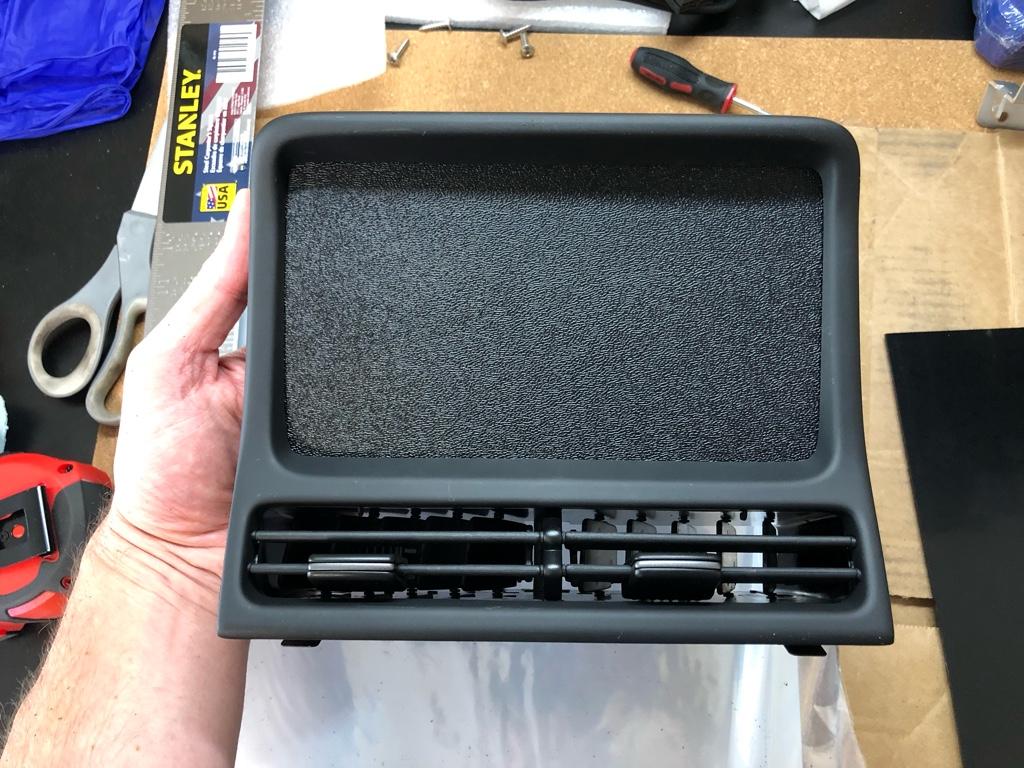
Then I used the stereo's bezel to position and cut the screen's hole. After a lot of filing, this was it:

Next up: mounting
I'll post about mounting it soon. It's been a total pain, definitely the hardest part, but I'm almost there. Just a matter of adjustment now and it will be all good.
First things first, what unit to get? Some need-to-have things:
* It needs to be pretty thin, there's only 40mm of space between the navpod and the dash
* Is android. RealDash has an android app
* Ability to auto-load whatever app I want on startup
* USB capability: the app needs to be able to read the CAN messages via USB
Also, I figured since I'd have the screen in the navpod, I might as well attempt to replace all the current head unit's functions with it, then eventually totally remove the head unit. Put some shelving in there or something, you know? The current head unit is super old, slow, the maps suck, and it's often unusable while driving because of a combination of the angle, screen material, and brightness.
So that means the new thing needed to have
* Backup camera input
* Maps
* 4 pre-outs for music. I almost never listen to music in the car, but obvs want the option. The current setup runs 4 pre-outs to an amp, so it needed to have those same 4 pre-outs
I couldn't find any name-brand double din stereos that had all these things. The main sicking points with everything I looked at were the depth and ability to install a 3rd party app. None were thinner than about 75mm, and it seems that none allowed random android app installation, though I couldn't confirm.
But there are a number of no-name stereos that seemed like they would work. A common format I saw this:
50mm deep on the bottom, then 20mm above that. It looks like they give the option mount in a single din area.
There are 100 of them on amazon and alibaba, but I ended up with the ATOTO S8 Standard. It had everything I wanted and seemed modern, had android v10.whatever and 3GB mem. A lot of others used old Android versions or didn't have the right pre-out config. I couldn't find any pics of the back of the ATOTO unit before I bought it, but I figured I could probably modify it to fit, so I pulled the trigger.
Well, does it fit? I thought it might fit out of the box, but that would be too easy. The top RCA connectors would interfere with the dash. You can see it here, the SoS bracket is made to wrap around the dash, but the unit is in the way:
And on the front. The navpod is def not a standard double din space:
# Making it fit
10 minutes into owning this thing, I tore it apart. I needed to see if it was possible to move the single din RCA bits away from the dash.
Fortunately, the plugs are all on a separate circuit board with a couple cables connecting it to the main board. At this point I was confident I could make it work.
Frame off:
Then I cut the IO board's frame off the main frame with a friction disk. This is cast aluminum / pot metal, so it was pretty easy to work. Think they'll take it back as a return? I guess I should have tested it first.....
Next step was to put the frame back on and mock it up
And then I built a couple brackets to hold the IO board at the right angle. There were a lot of steps here, but I didn't take any pics. The key was that the IO board / frame needed to be parallel to the vent ducts.
I used 1/32" aluminum because it's easy to work with basic hand tools. You can score it with a utility knife and bend it back and forth at the score to make cuts. Definitely not my best work, but it all fits and is plenty sturdy.
And in the navpod. This sends all the wires down between the dash and the duct on the left side where there is plenty of room.
Bezel
The navpod isnt really a proper double din hole. It's bigger and kind of a weird shape. The stereo came with a bezel, but it didn't fit in the navpod, so I decided to make my own out of 1/16" ABS:
I took the factory felt tape off the inside of the pod and made a piece that fit snug against the little gusset tabs. The goal was to build it so it was self centering when was pushed up against the tabs
Then I used the stereo's bezel to position and cut the screen's hole. After a lot of filing, this was it:
Next up: mounting
I'll post about mounting it soon. It's been a total pain, definitely the hardest part, but I'm almost there. Just a matter of adjustment now and it will be all good.
Last edited:
Wow, you make it look easy.
Maybe you already had this in mind, but don't forget to add some protection against the sharp edges of your new brackets. It doesn't look like the cables are touching, but you never know once you install it against the dashboard.
Can't wait to see the next steps and powered up.
By the way, I like how you picked a model with physical buttons.
Last edited:
Thanks! You’re totally right, I should add something there for the pink wires. I have tons of wire loom tube / sleeve which is probably the move
Yeah I just use a utility knife and a straightedge. For intricate bits, I make multiple passes with the knife until it’s all the way through. For big straight cuts I just score it pretty deep, then bend at the score and it’ll break where you want it. Then a normal metal file works well to clean up the sharp edges.
Similar threads
- Locked
- Replies
- 4
- Views
- 402