-
Protip: Profile posts are public! Use Conversations to message other members privately. Everyone can see the content of a profile post.
You are using an out of date browser. It may not display this or other websites correctly.
You should upgrade or use an alternative browser.
You should upgrade or use an alternative browser.
Honcho's Long Road to Imola Type-S Zero
- Thread starter Honcho
- Start date
I still think you will always gravitate twords performance. and driver engagement....
And that's why I'm very happy with my M3.


Engine Refresh 74
Oil Cooler, Pipe, Heatshield, etc.
Another evening, another set of issues. I had hoped to get the valve covers prepped and installed, but my "small tasks" turned big again.
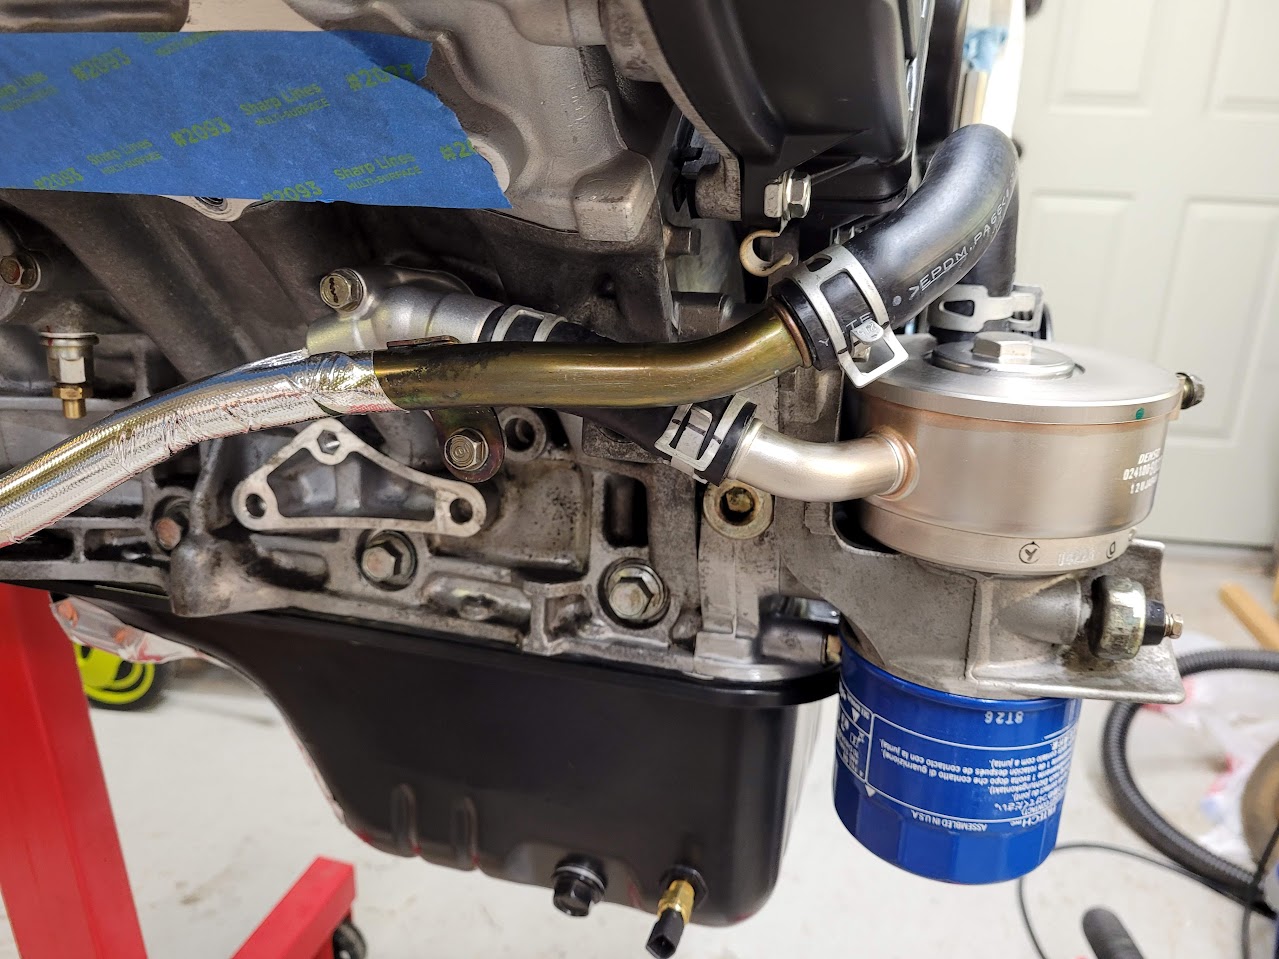
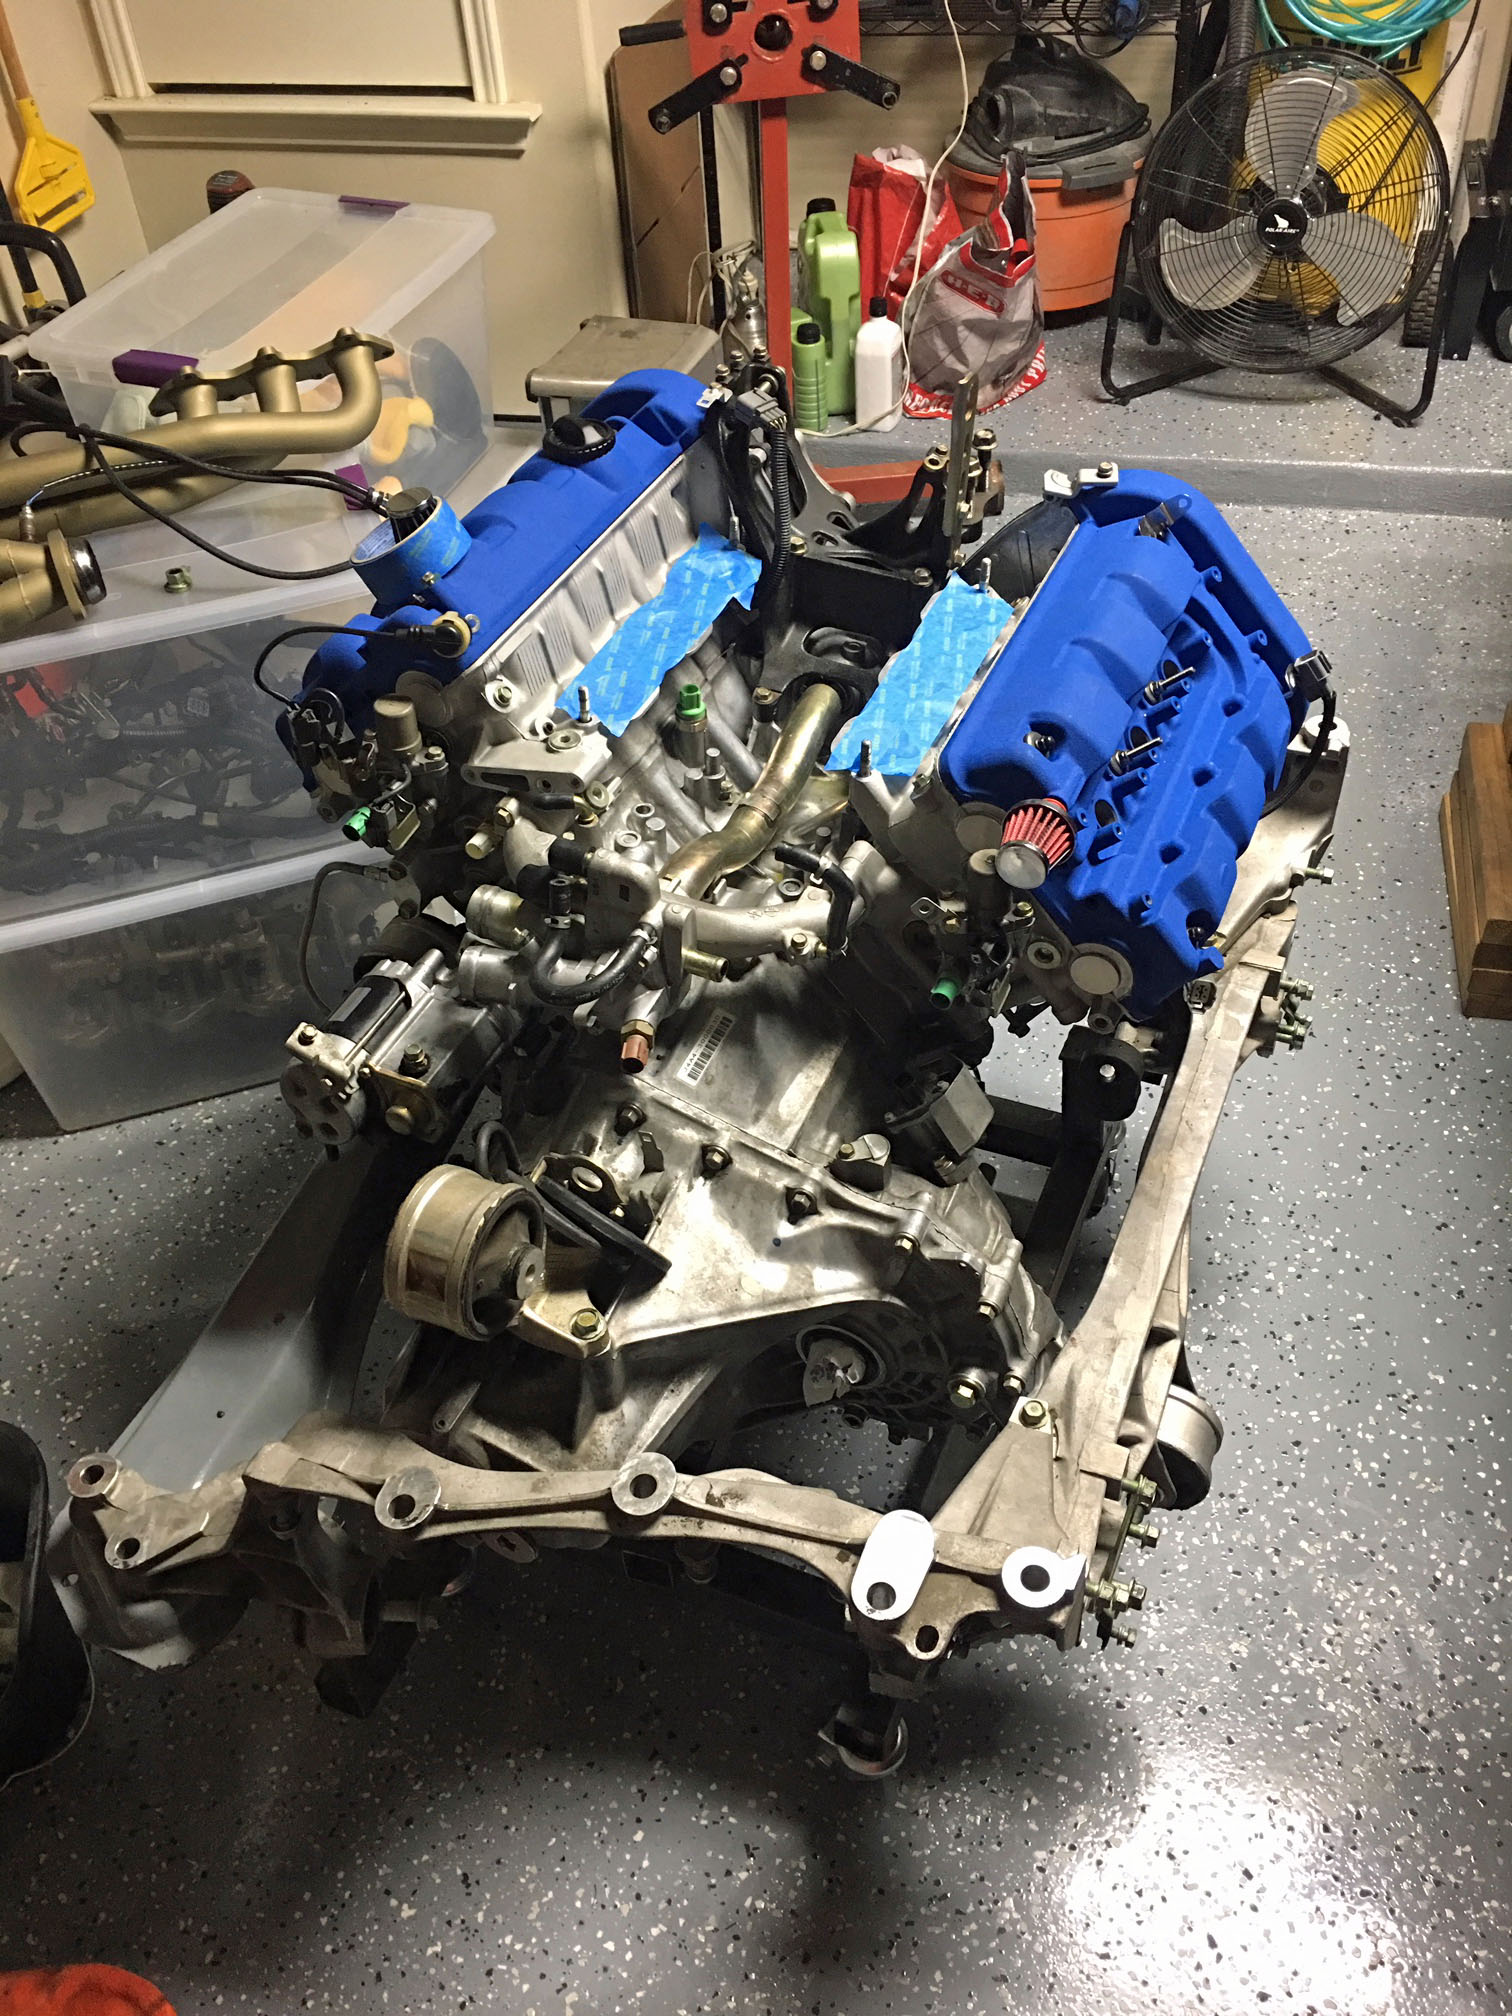
This time, it was the oil cooler coolant return pipe. In the OEM configuration, you can see that the rear manifold has a good amount of distance to the oil coolant return pipe (the big pipe of the two visible). There is also the factory heat shield in place.
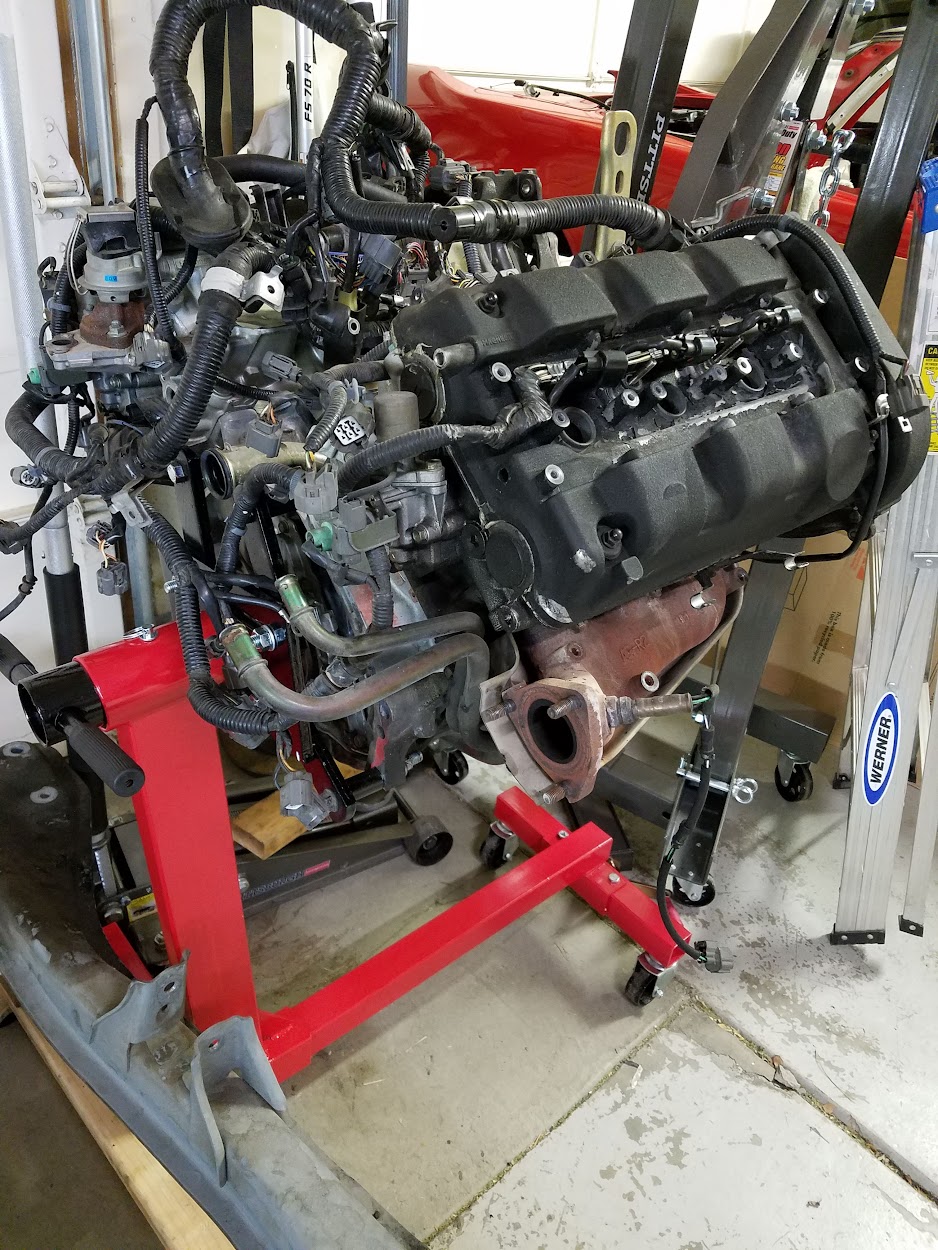
Using aftermarket headers, they almost touch the pipe!
[HOLD FOR PIC WHEN I FIND MY EXHAUST STUDS]
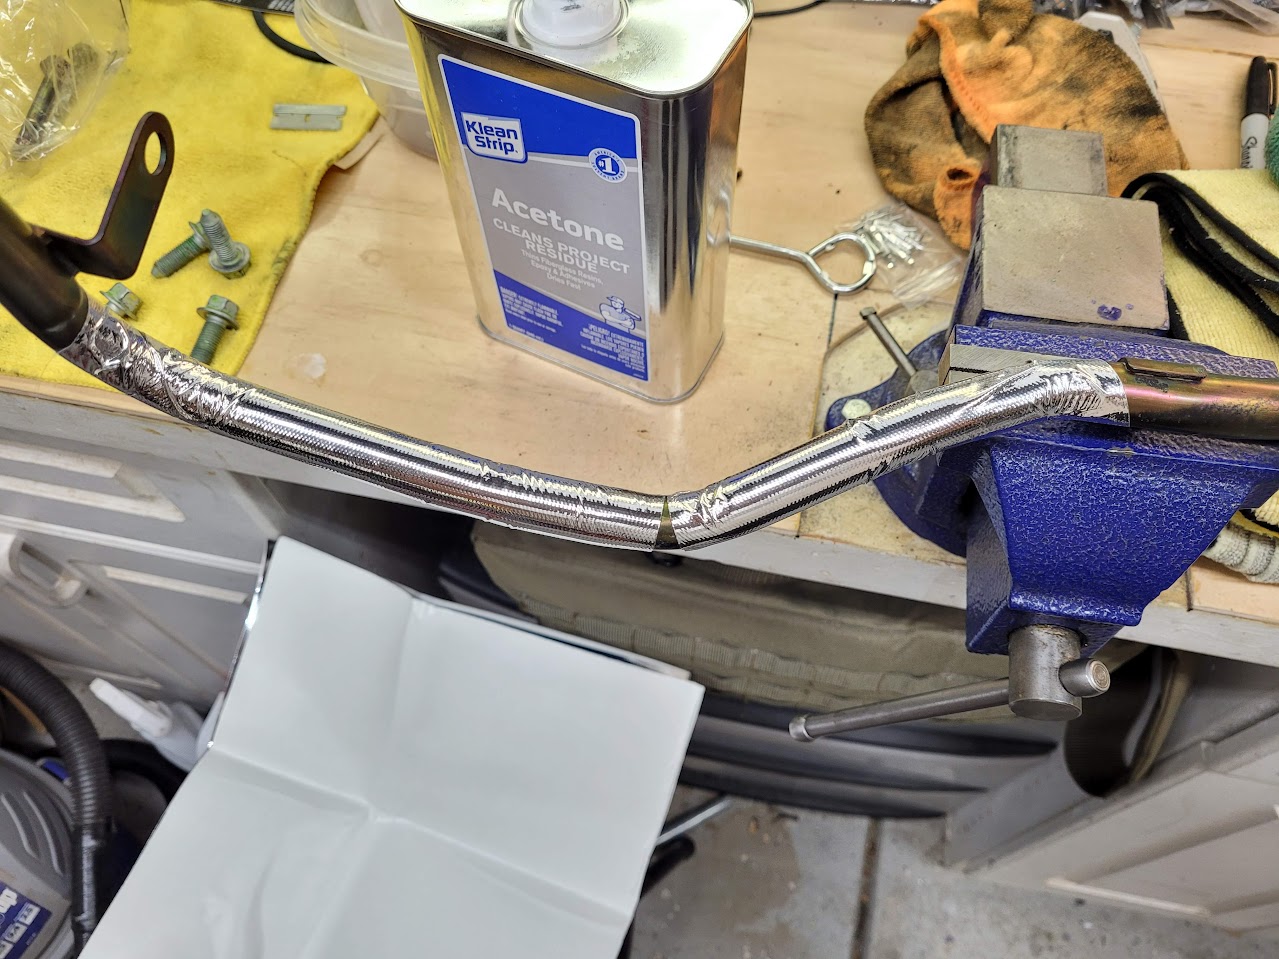
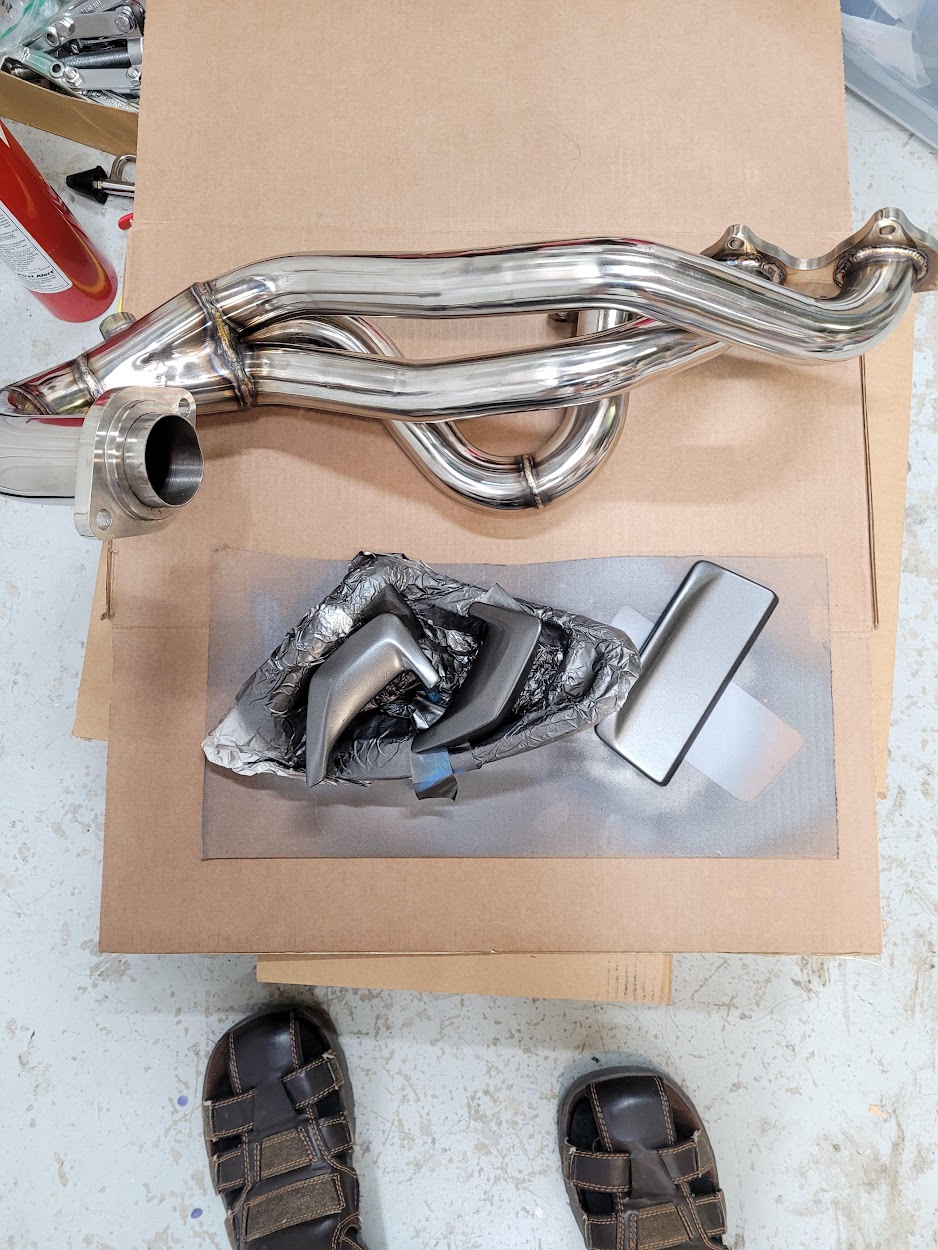
I did not like this at all for several reasons. So, I used some leftover DEI heatshield wrap to protect the pipe from the extreme radiant heat. The reflective tape material can reflect up to 2,000F off radiant heat, which is more than the headers will ever generate even under track conditions.
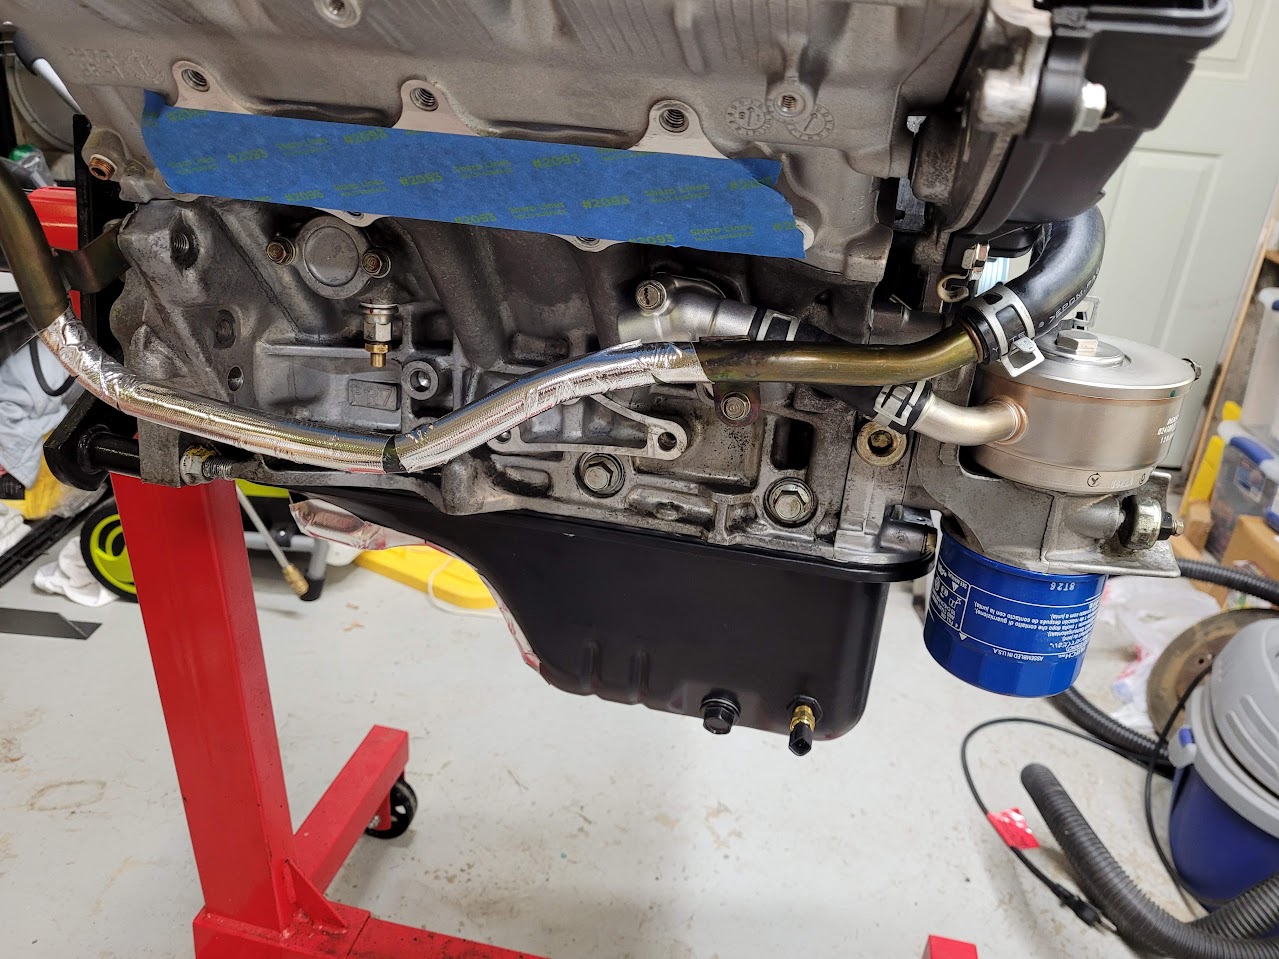
Mounted on the engine block.
This is where the problems started. Here is the culprit.
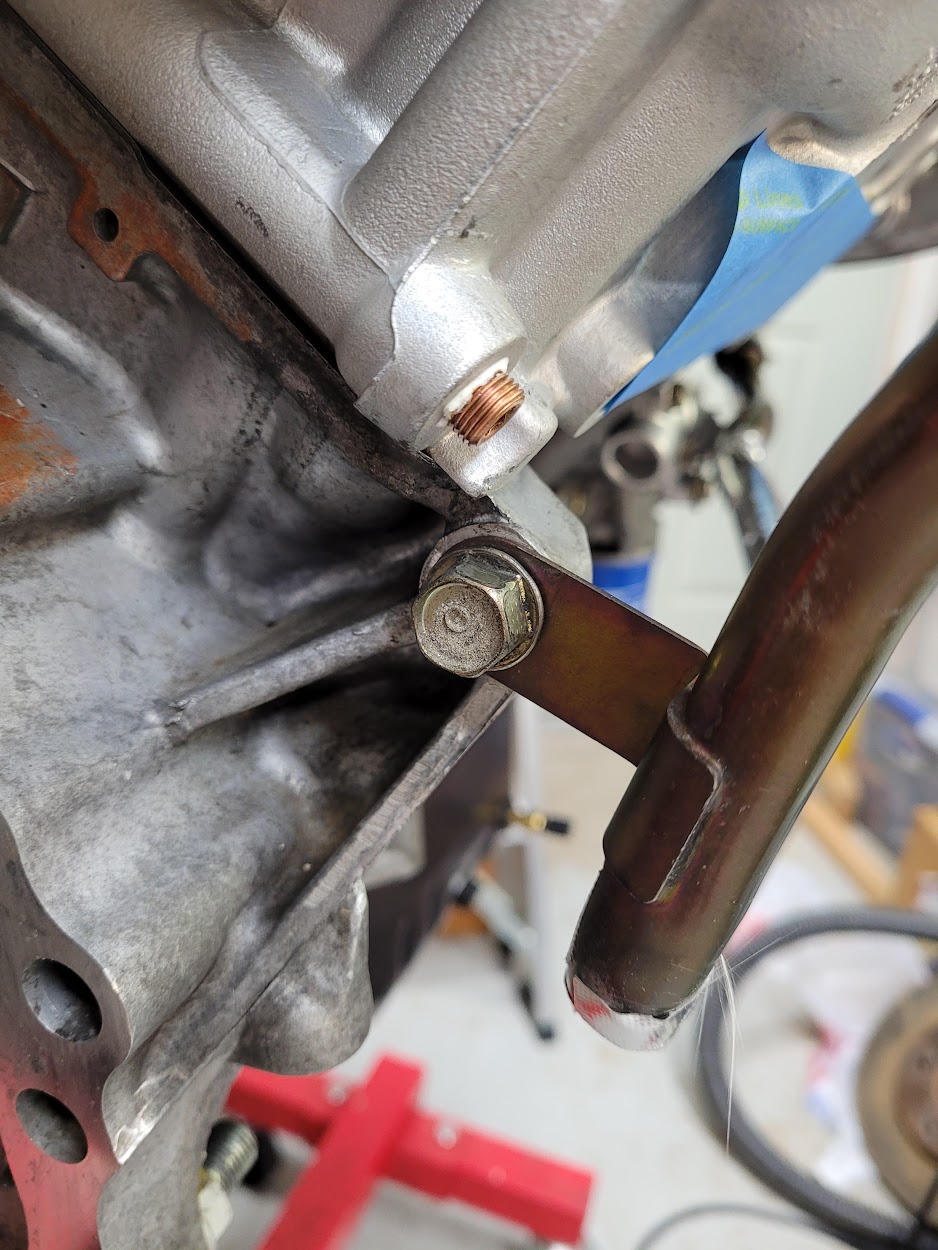
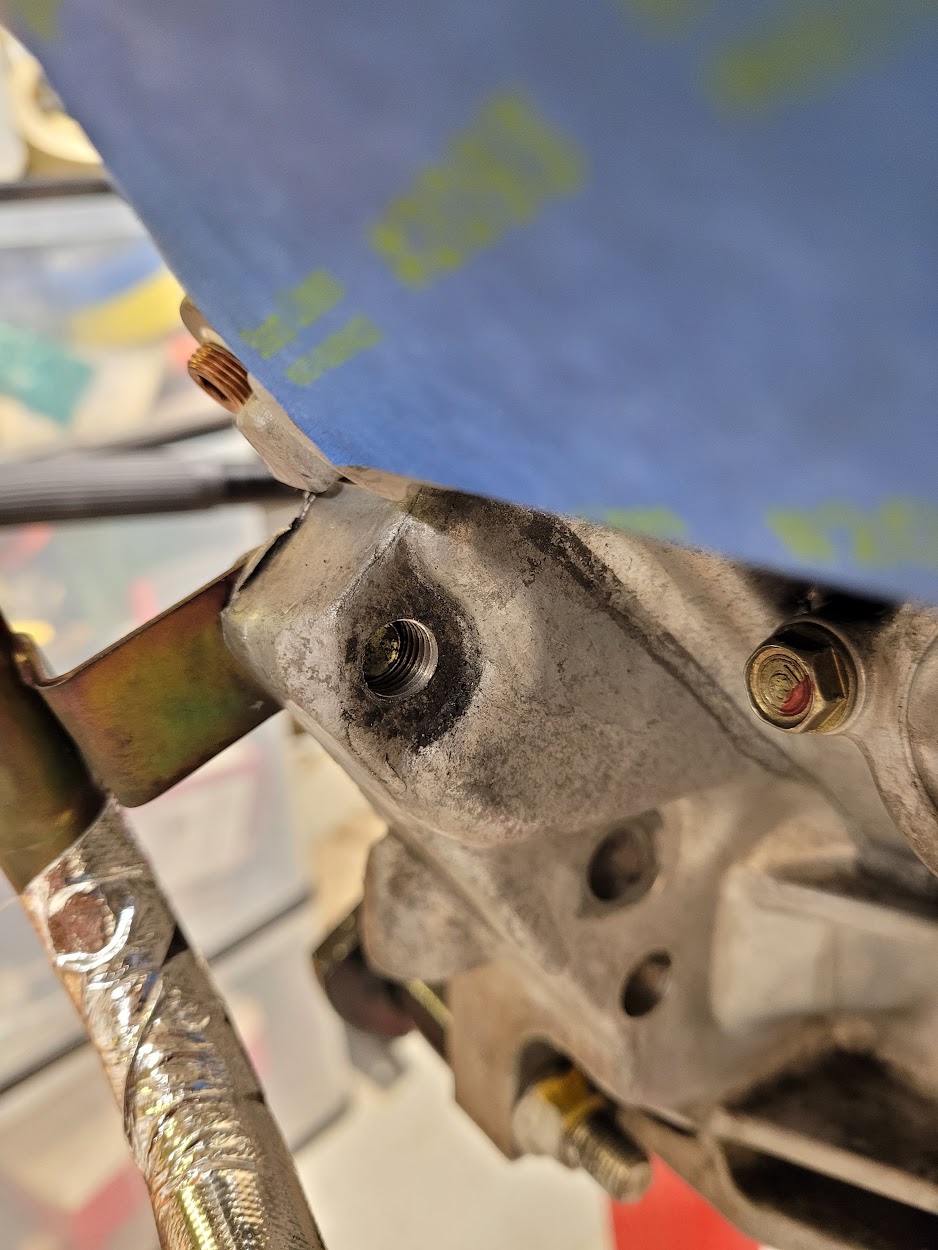
It has been almost 2 years since removal, so I don't remember if anything else attaches to this bolt. Or, is its only purpose to fix the coolant pipe? What is throwing me off is this is a 10mm x 1.25 bolt- massive torque capacity for such a flimsy part. Worse, it's partially stripped. I ran the tap through and it improved, but I'm not loving the fitment. Since this bolt likely has never been removed since assembly at the plant, I can only assume this is a factory error? Whoever installed it last clearly zipped it in cross-threaded. But, if all it does is hold the coolant pipe, I may just leave it as is, since it will tighten, just not to the about 50Nm this bolt can normally handle. Thoughts? I cannot find this bolt anywhere in the workshop manual, but it seems crazy to put ~50Nm on this little coolant pipe...
Header Pr0n from my test fitments.
Oil Cooler, Pipe, Heatshield, etc.
Another evening, another set of issues. I had hoped to get the valve covers prepped and installed, but my "small tasks" turned big again.
This time, it was the oil cooler coolant return pipe. In the OEM configuration, you can see that the rear manifold has a good amount of distance to the oil coolant return pipe (the big pipe of the two visible). There is also the factory heat shield in place.
Using aftermarket headers, they almost touch the pipe!
[HOLD FOR PIC WHEN I FIND MY EXHAUST STUDS]
I did not like this at all for several reasons. So, I used some leftover DEI heatshield wrap to protect the pipe from the extreme radiant heat. The reflective tape material can reflect up to 2,000F off radiant heat, which is more than the headers will ever generate even under track conditions.
Mounted on the engine block.
This is where the problems started. Here is the culprit.
It has been almost 2 years since removal, so I don't remember if anything else attaches to this bolt. Or, is its only purpose to fix the coolant pipe? What is throwing me off is this is a 10mm x 1.25 bolt- massive torque capacity for such a flimsy part. Worse, it's partially stripped. I ran the tap through and it improved, but I'm not loving the fitment. Since this bolt likely has never been removed since assembly at the plant, I can only assume this is a factory error? Whoever installed it last clearly zipped it in cross-threaded. But, if all it does is hold the coolant pipe, I may just leave it as is, since it will tighten, just not to the about 50Nm this bolt can normally handle. Thoughts? I cannot find this bolt anywhere in the workshop manual, but it seems crazy to put ~50Nm on this little coolant pipe...
Header Pr0n from my test fitments.

Yup, the only purpose for that bolt is the coolant pipe. It's hilariously oversized.
Engine Refresh 75
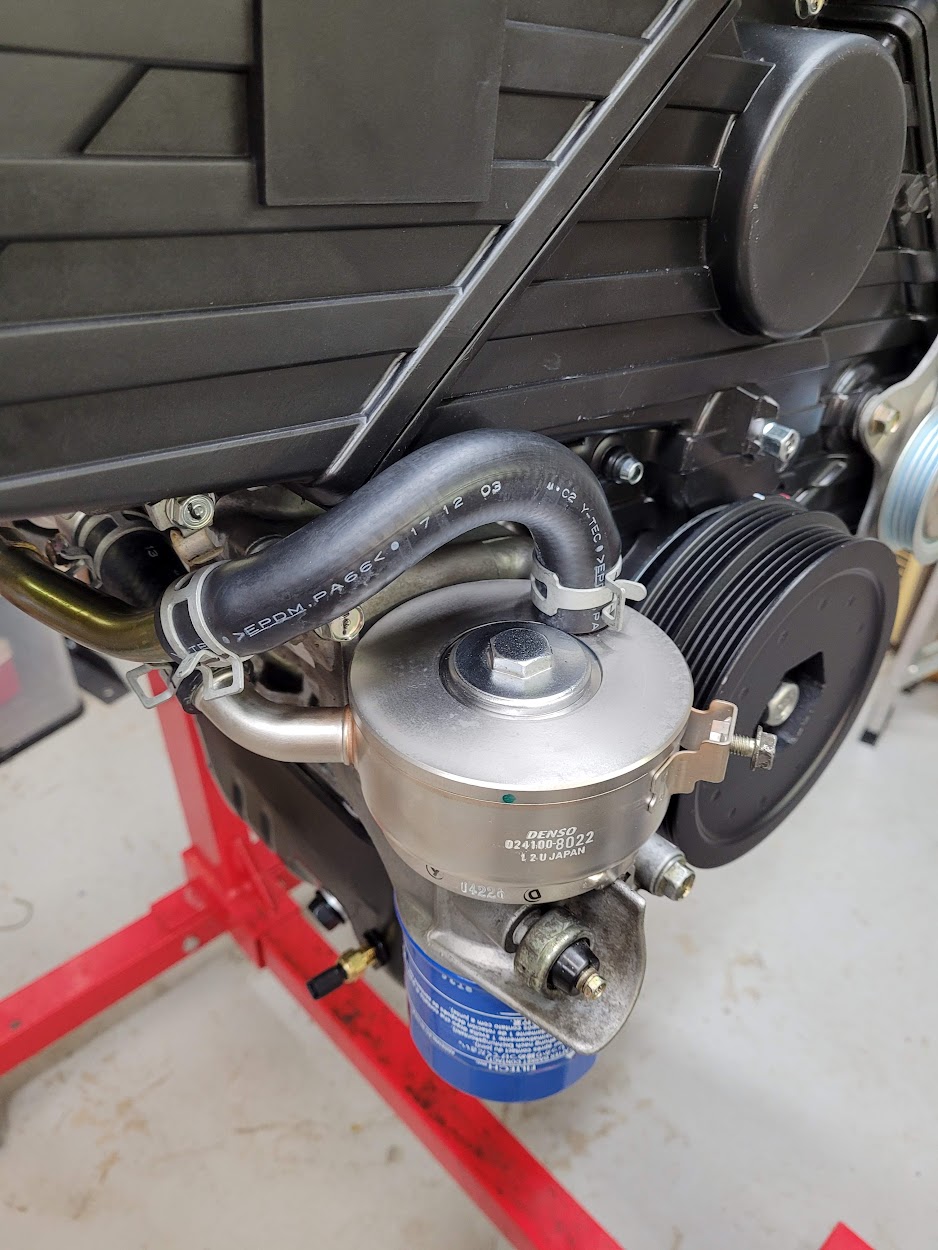
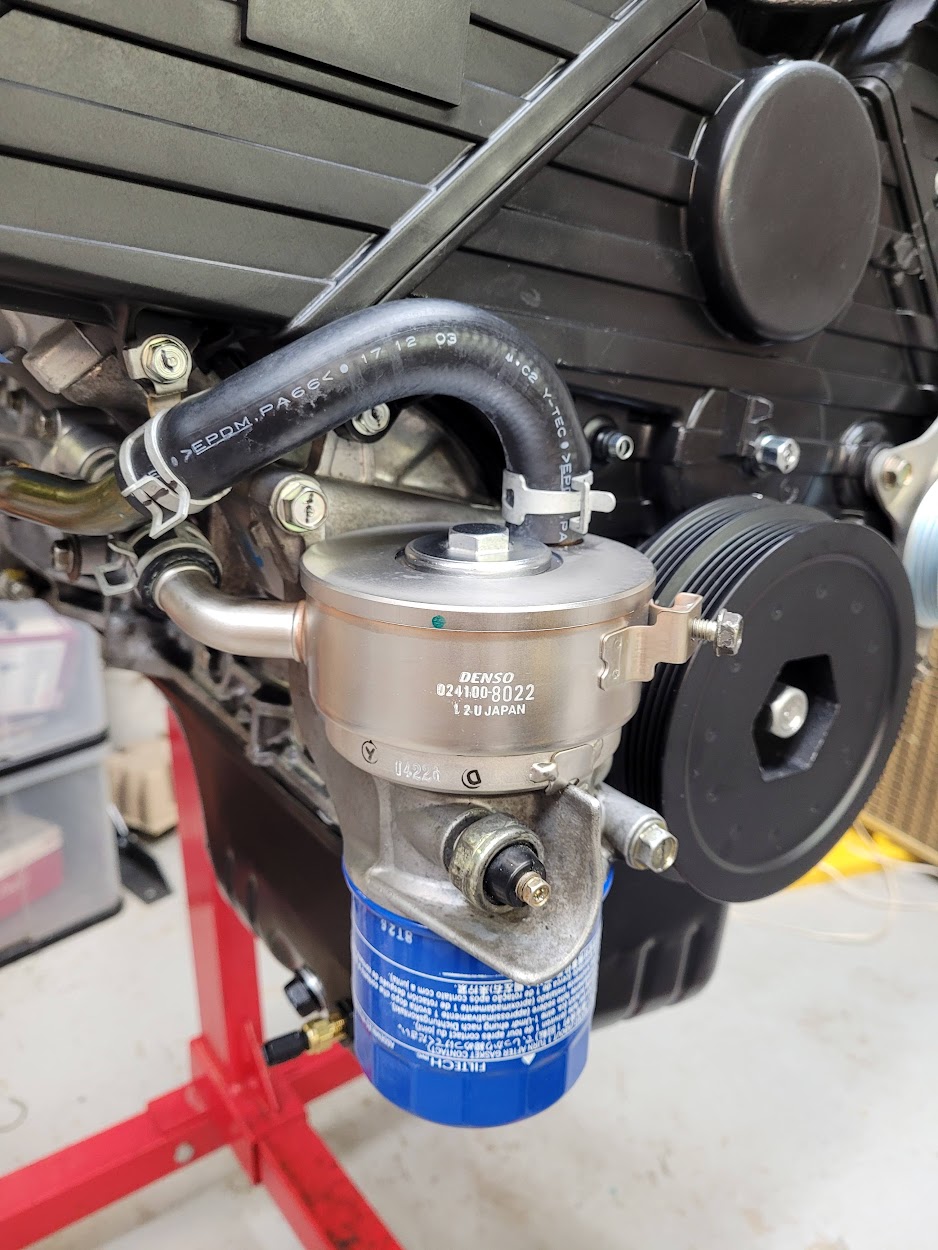
Oil Cooler, Oil Pressure Sender
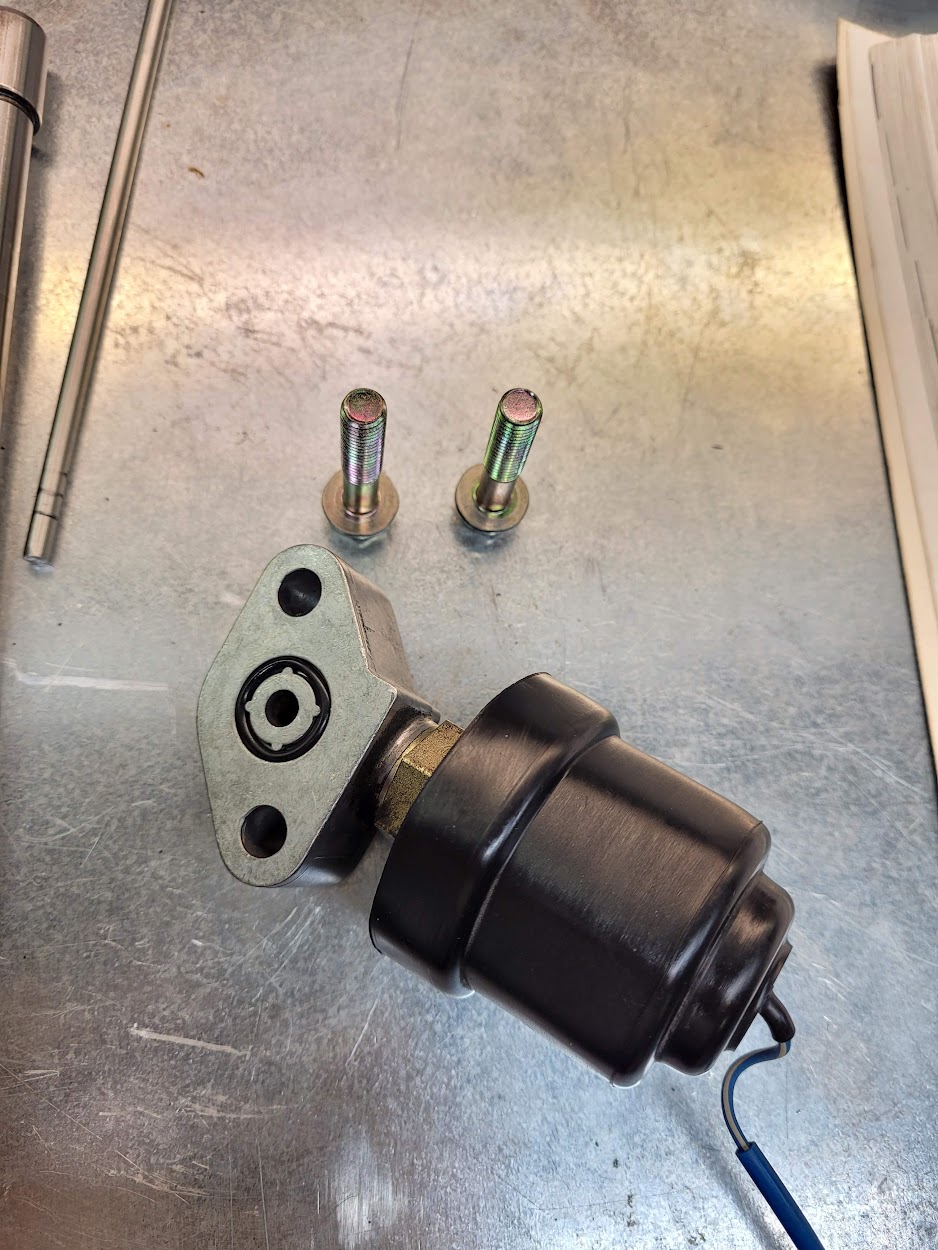
Got the oil pressure sender prepped and mounted. At least this "small task" went quickly.
Original bolts cleaned using the brass wire wheel. New O-ring with fresh Mobil 1.
Mounted.
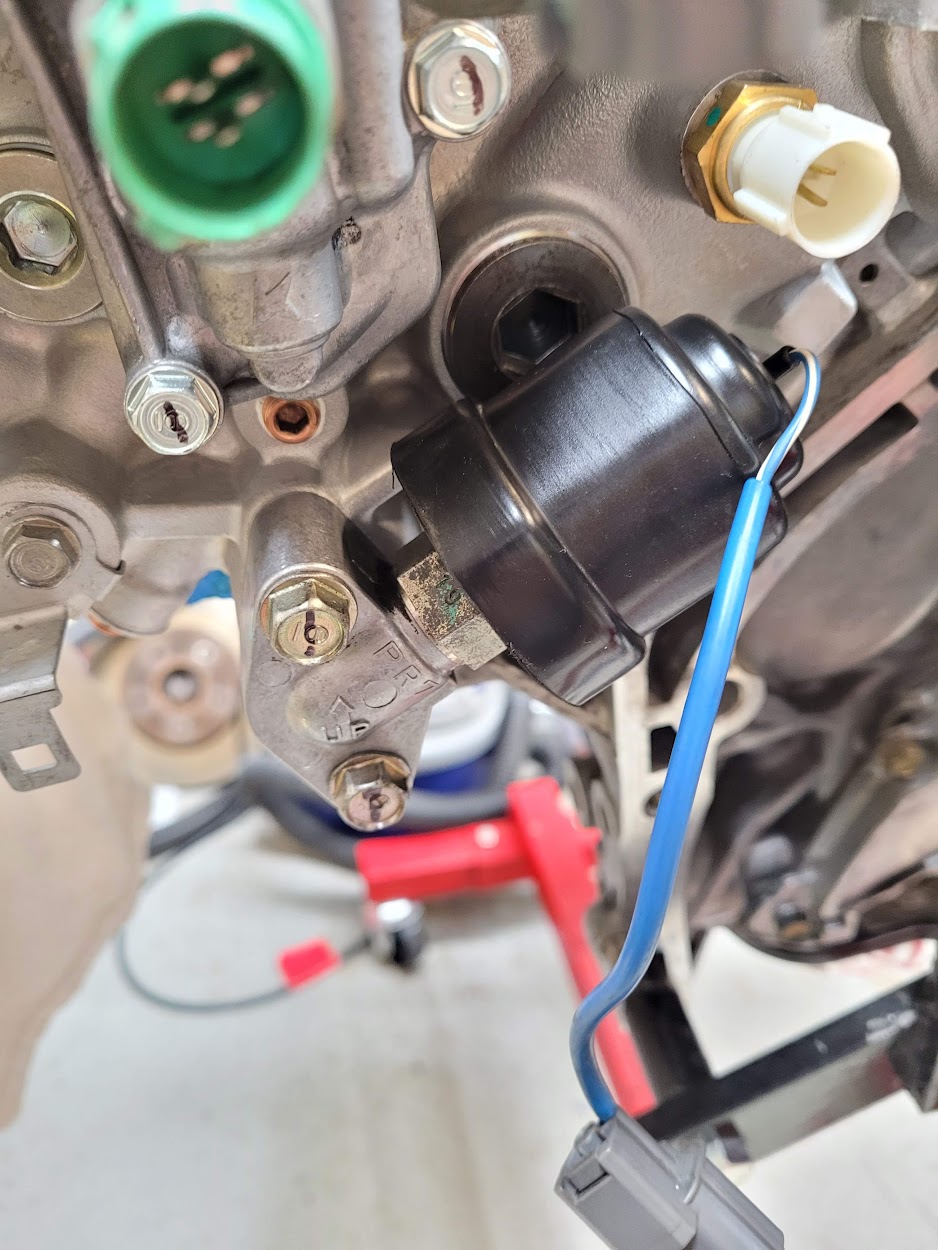
Oil cooler return coolant hose mounted.
Oil Cooler, Oil Pressure Sender
Got the oil pressure sender prepped and mounted. At least this "small task" went quickly.
Original bolts cleaned using the brass wire wheel. New O-ring with fresh Mobil 1.
Mounted.
Oil cooler return coolant hose mounted.
Finally got through the whole thing and I'm up to speed. What an amazing build thread. I loved every page. I'm jealous of the oil cooler. I had one on my RT and it was a rare item. How common are they for the NSX?
Finally got through the whole thing and I'm up to speed. What an amazing build thread. I loved every page. I'm jealous of the oil cooler. I had one on my RT and it was a rare item. How common are they for the NSX?
The thread will be even better once I get all the pictures back up LOL.
The oil cooler is standard on all NSX engines and is identical between the 3.0 and 3.2.
The thread will be even better once I get all the pictures back up LOL.
Agreed - I just read all 38 pages. PM me if you need help with hosting/bulk renaming/uploading to make your post editing job easier.
Auto Trans
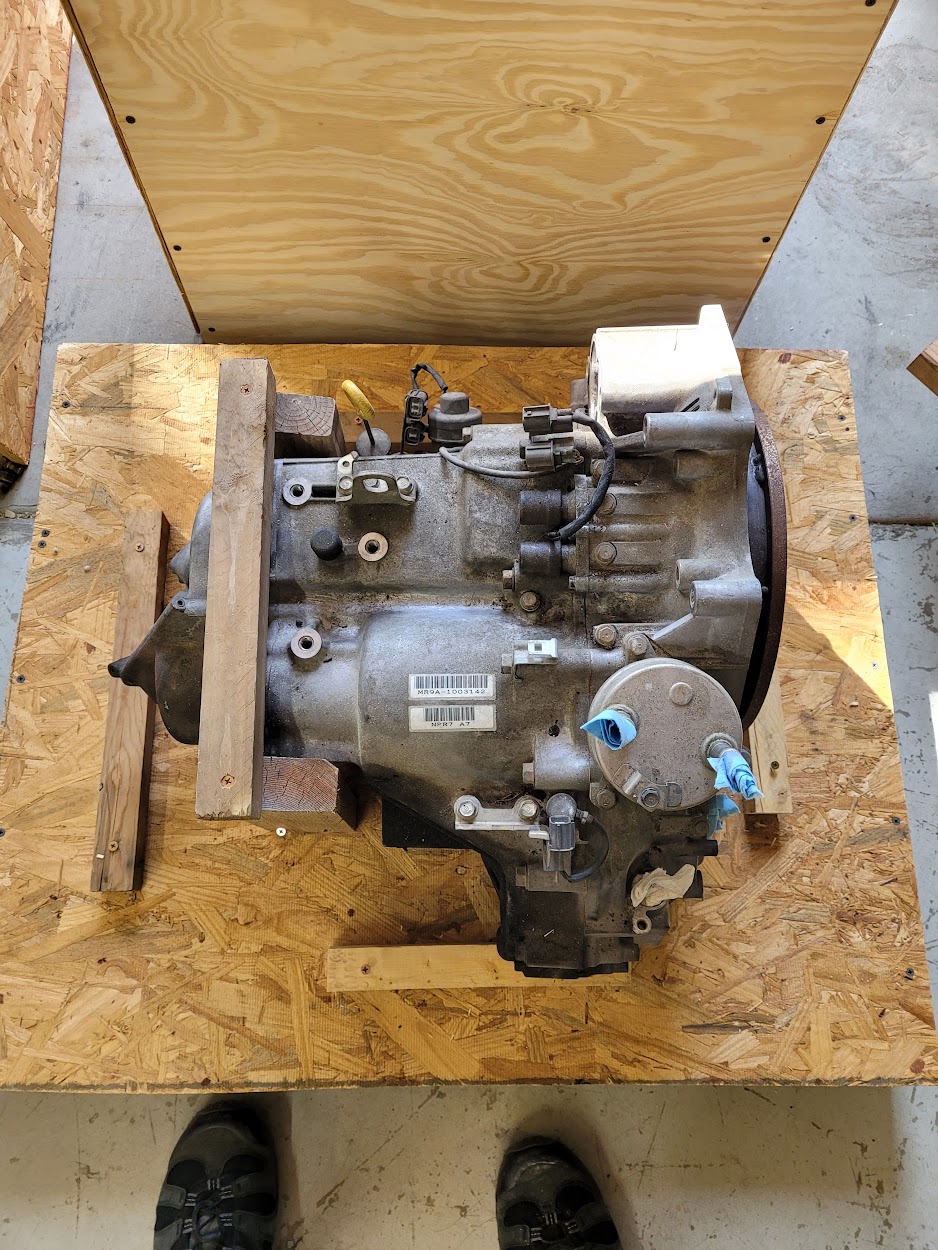
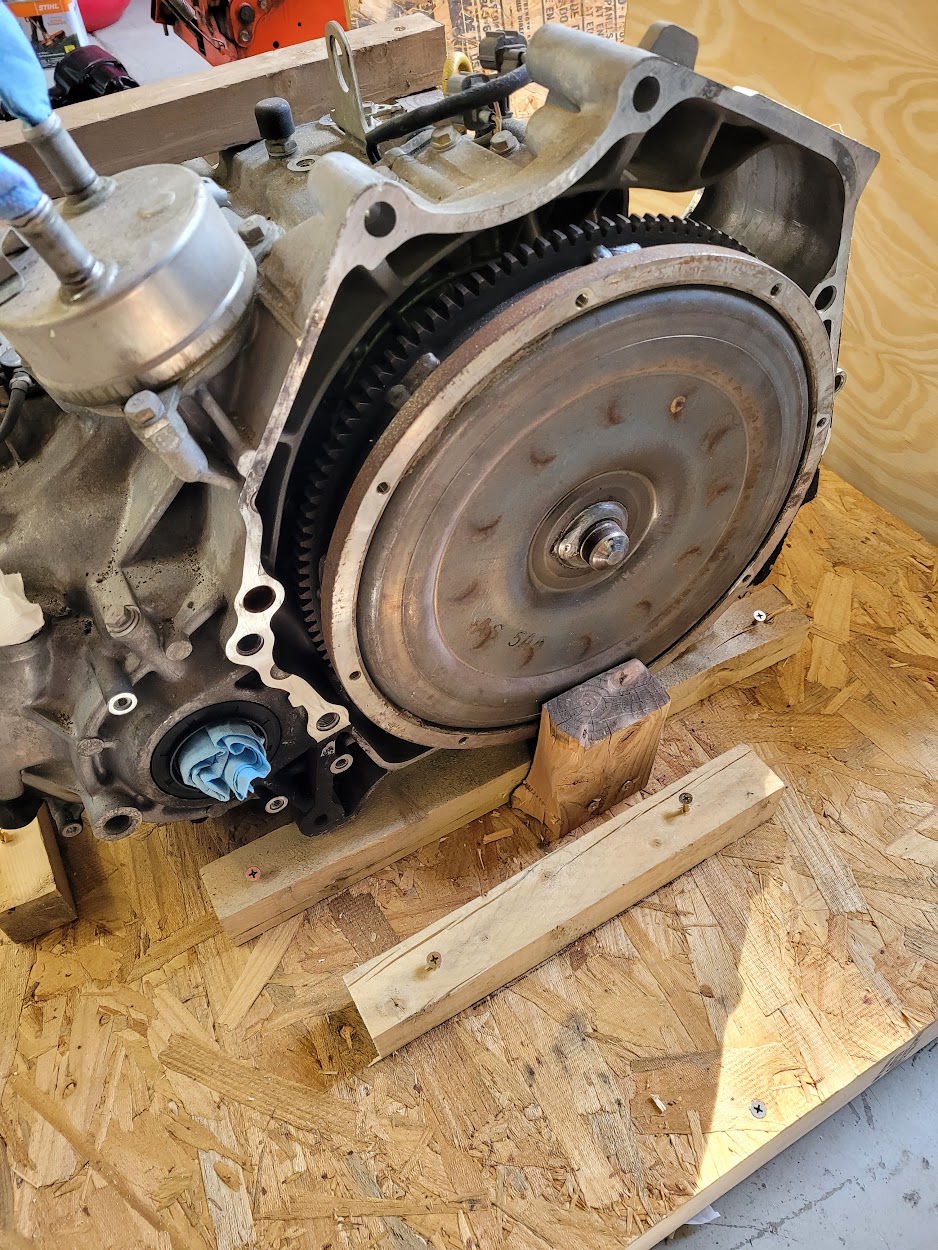
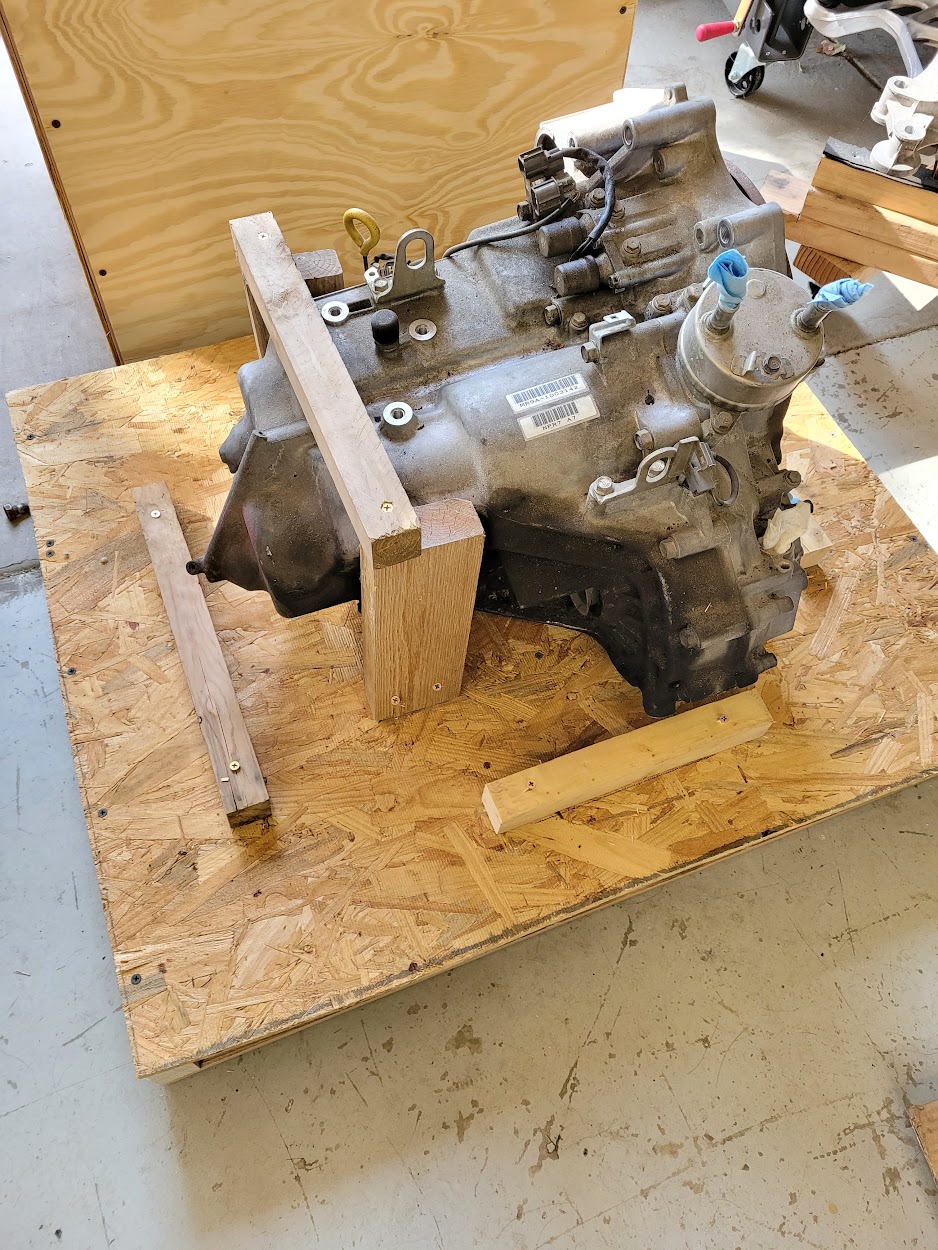
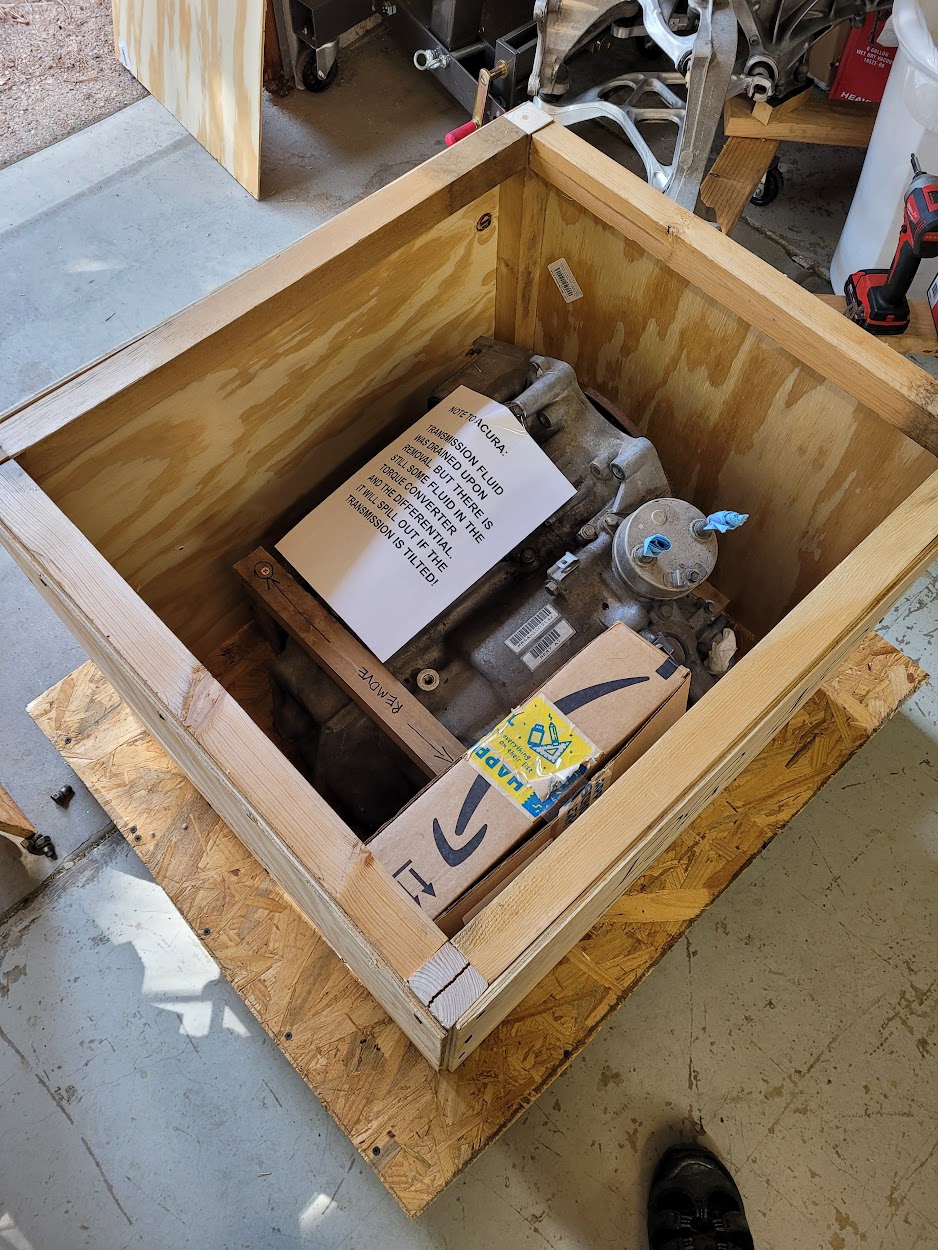
End of an era- my AT is sold. The buyer owns a 92 AT and his clutch packs shattered due to the buildup of debris in the internal filter and the resulting drop in fluid pressure. There was extensive damage to the gearbox and the Acura tech found metal bits in the fluid. My 92 AT will get him back on the road, so I am happy to help a fellow owner. I advised him to change the filter on the trans before install and he is wisely doing so- this should help extend the life of the box a little more. I also advised him to start collecting the clutch packs, seals and other parts for an eventual rebuild while they are still available from Honda. Hopefully, he can run with my AT until he gathers all of the parts. I also encouraged him to start a build thread on Prime documenting the AT filter change and replacement, as this has never been documented on Prime to my knowledge.
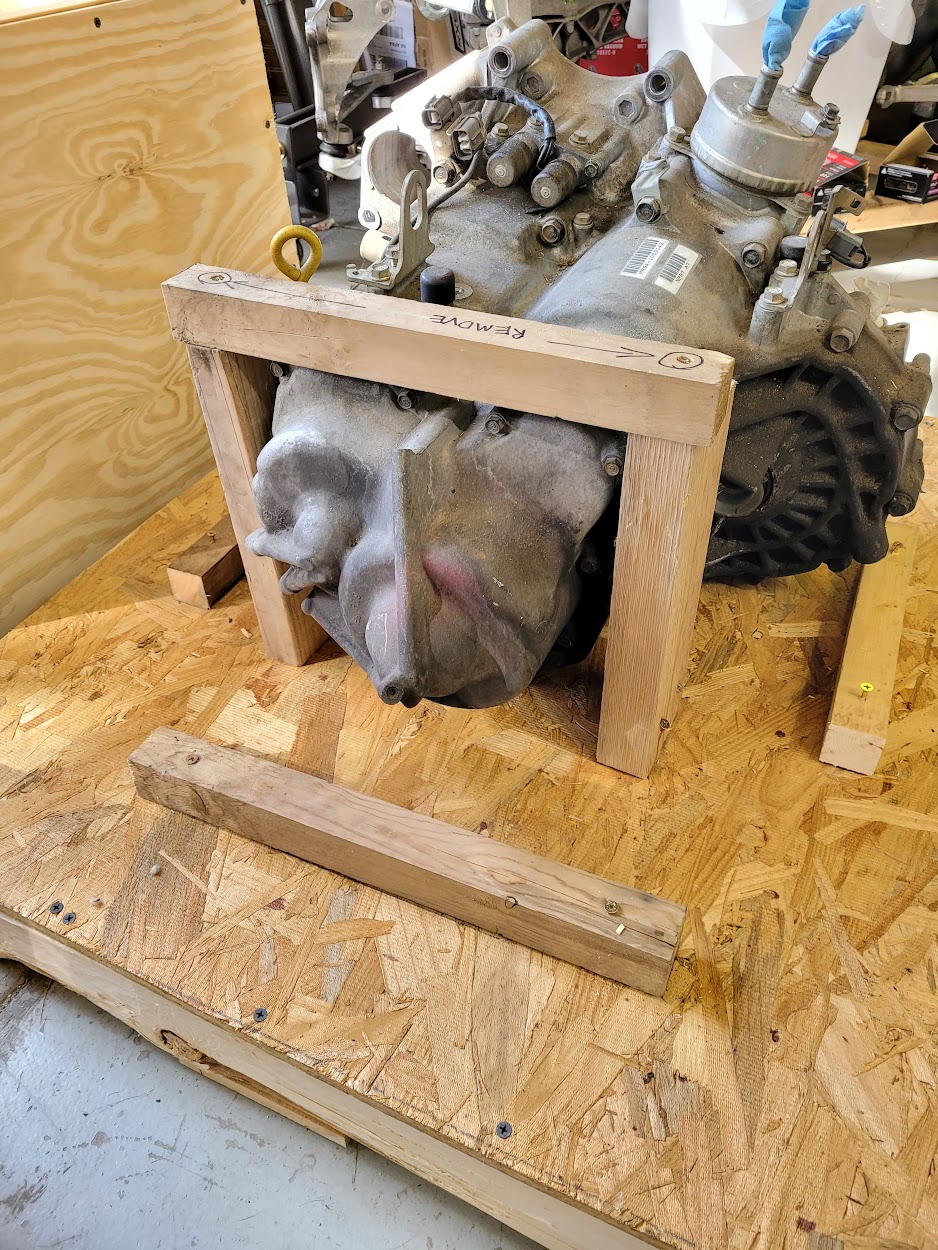
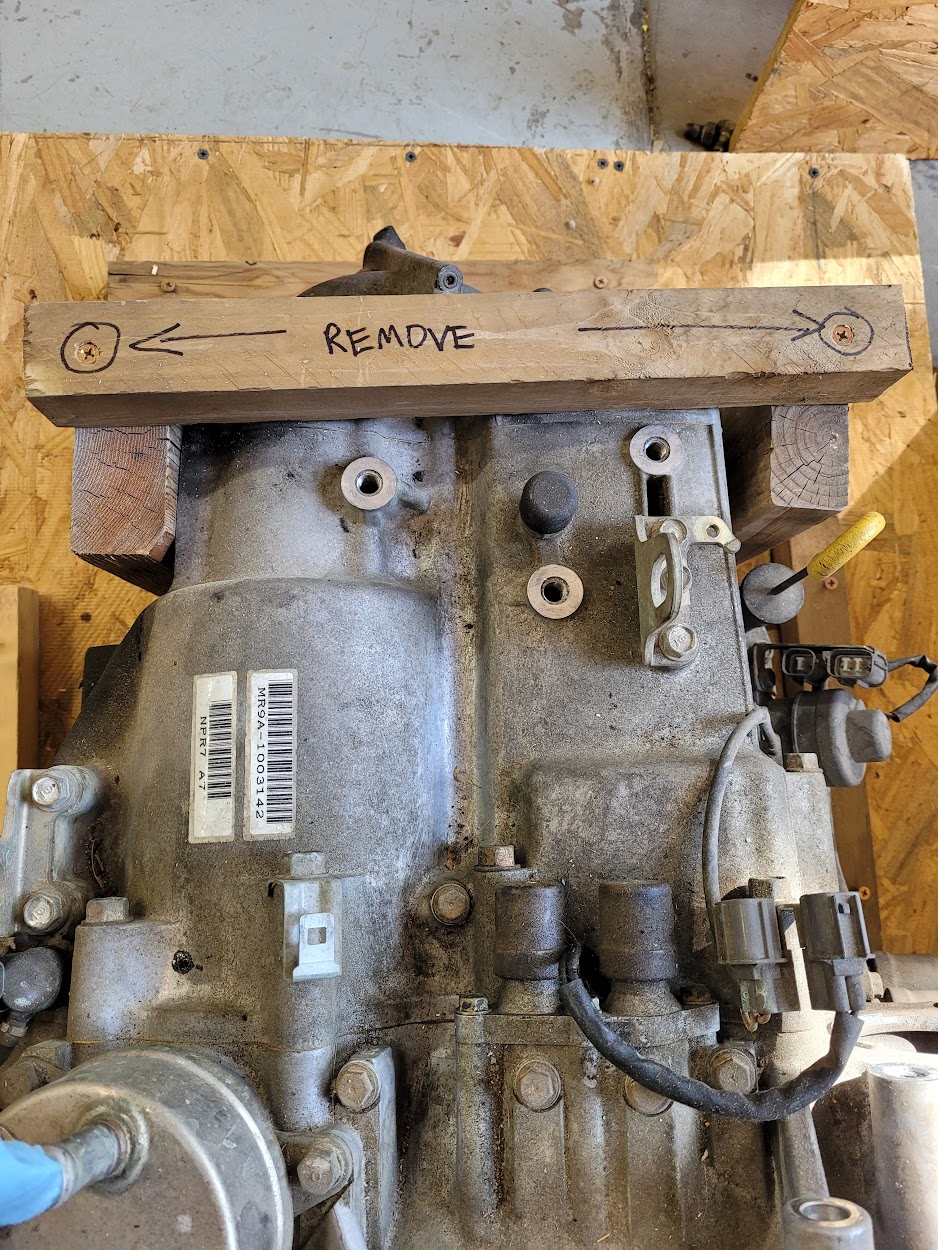
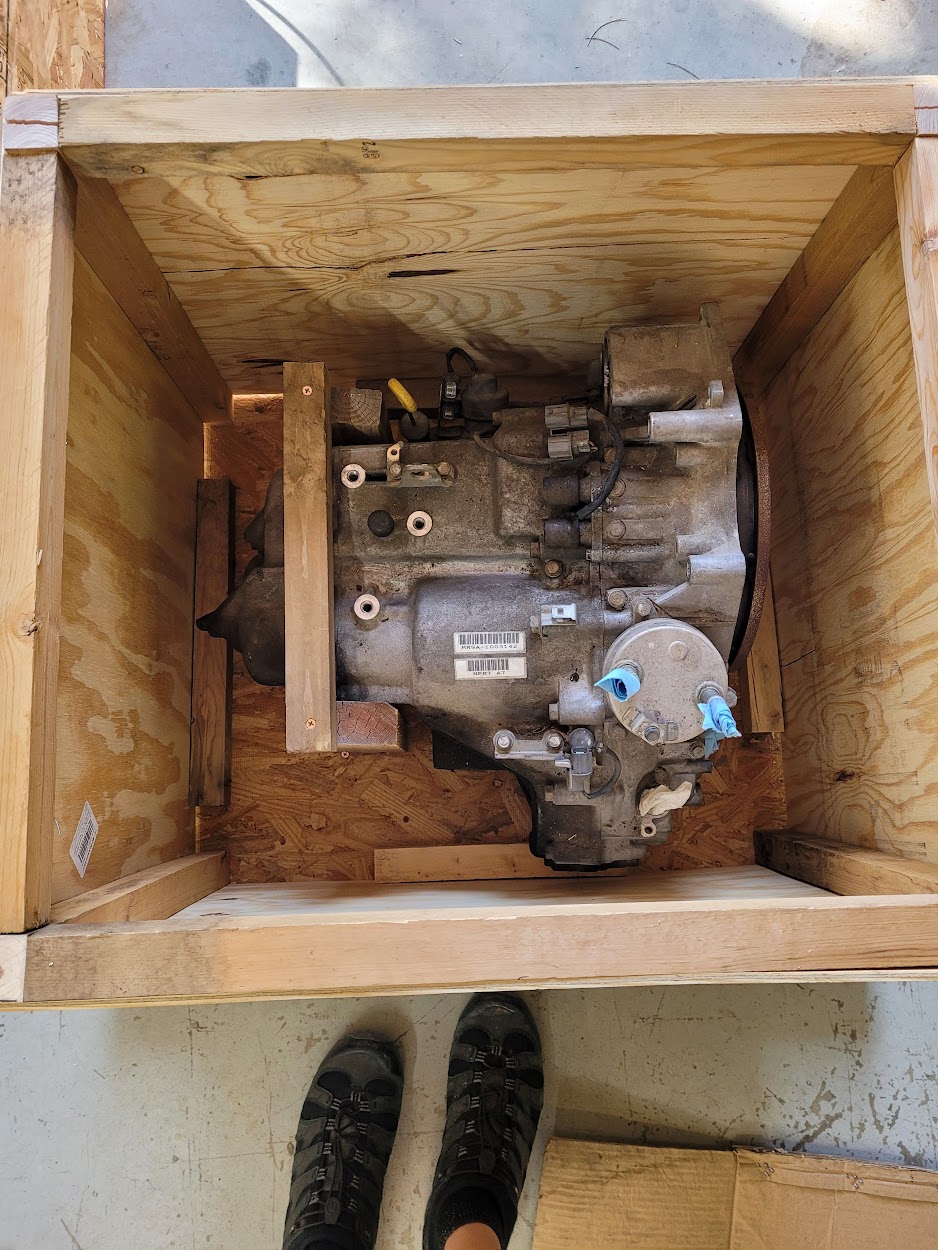
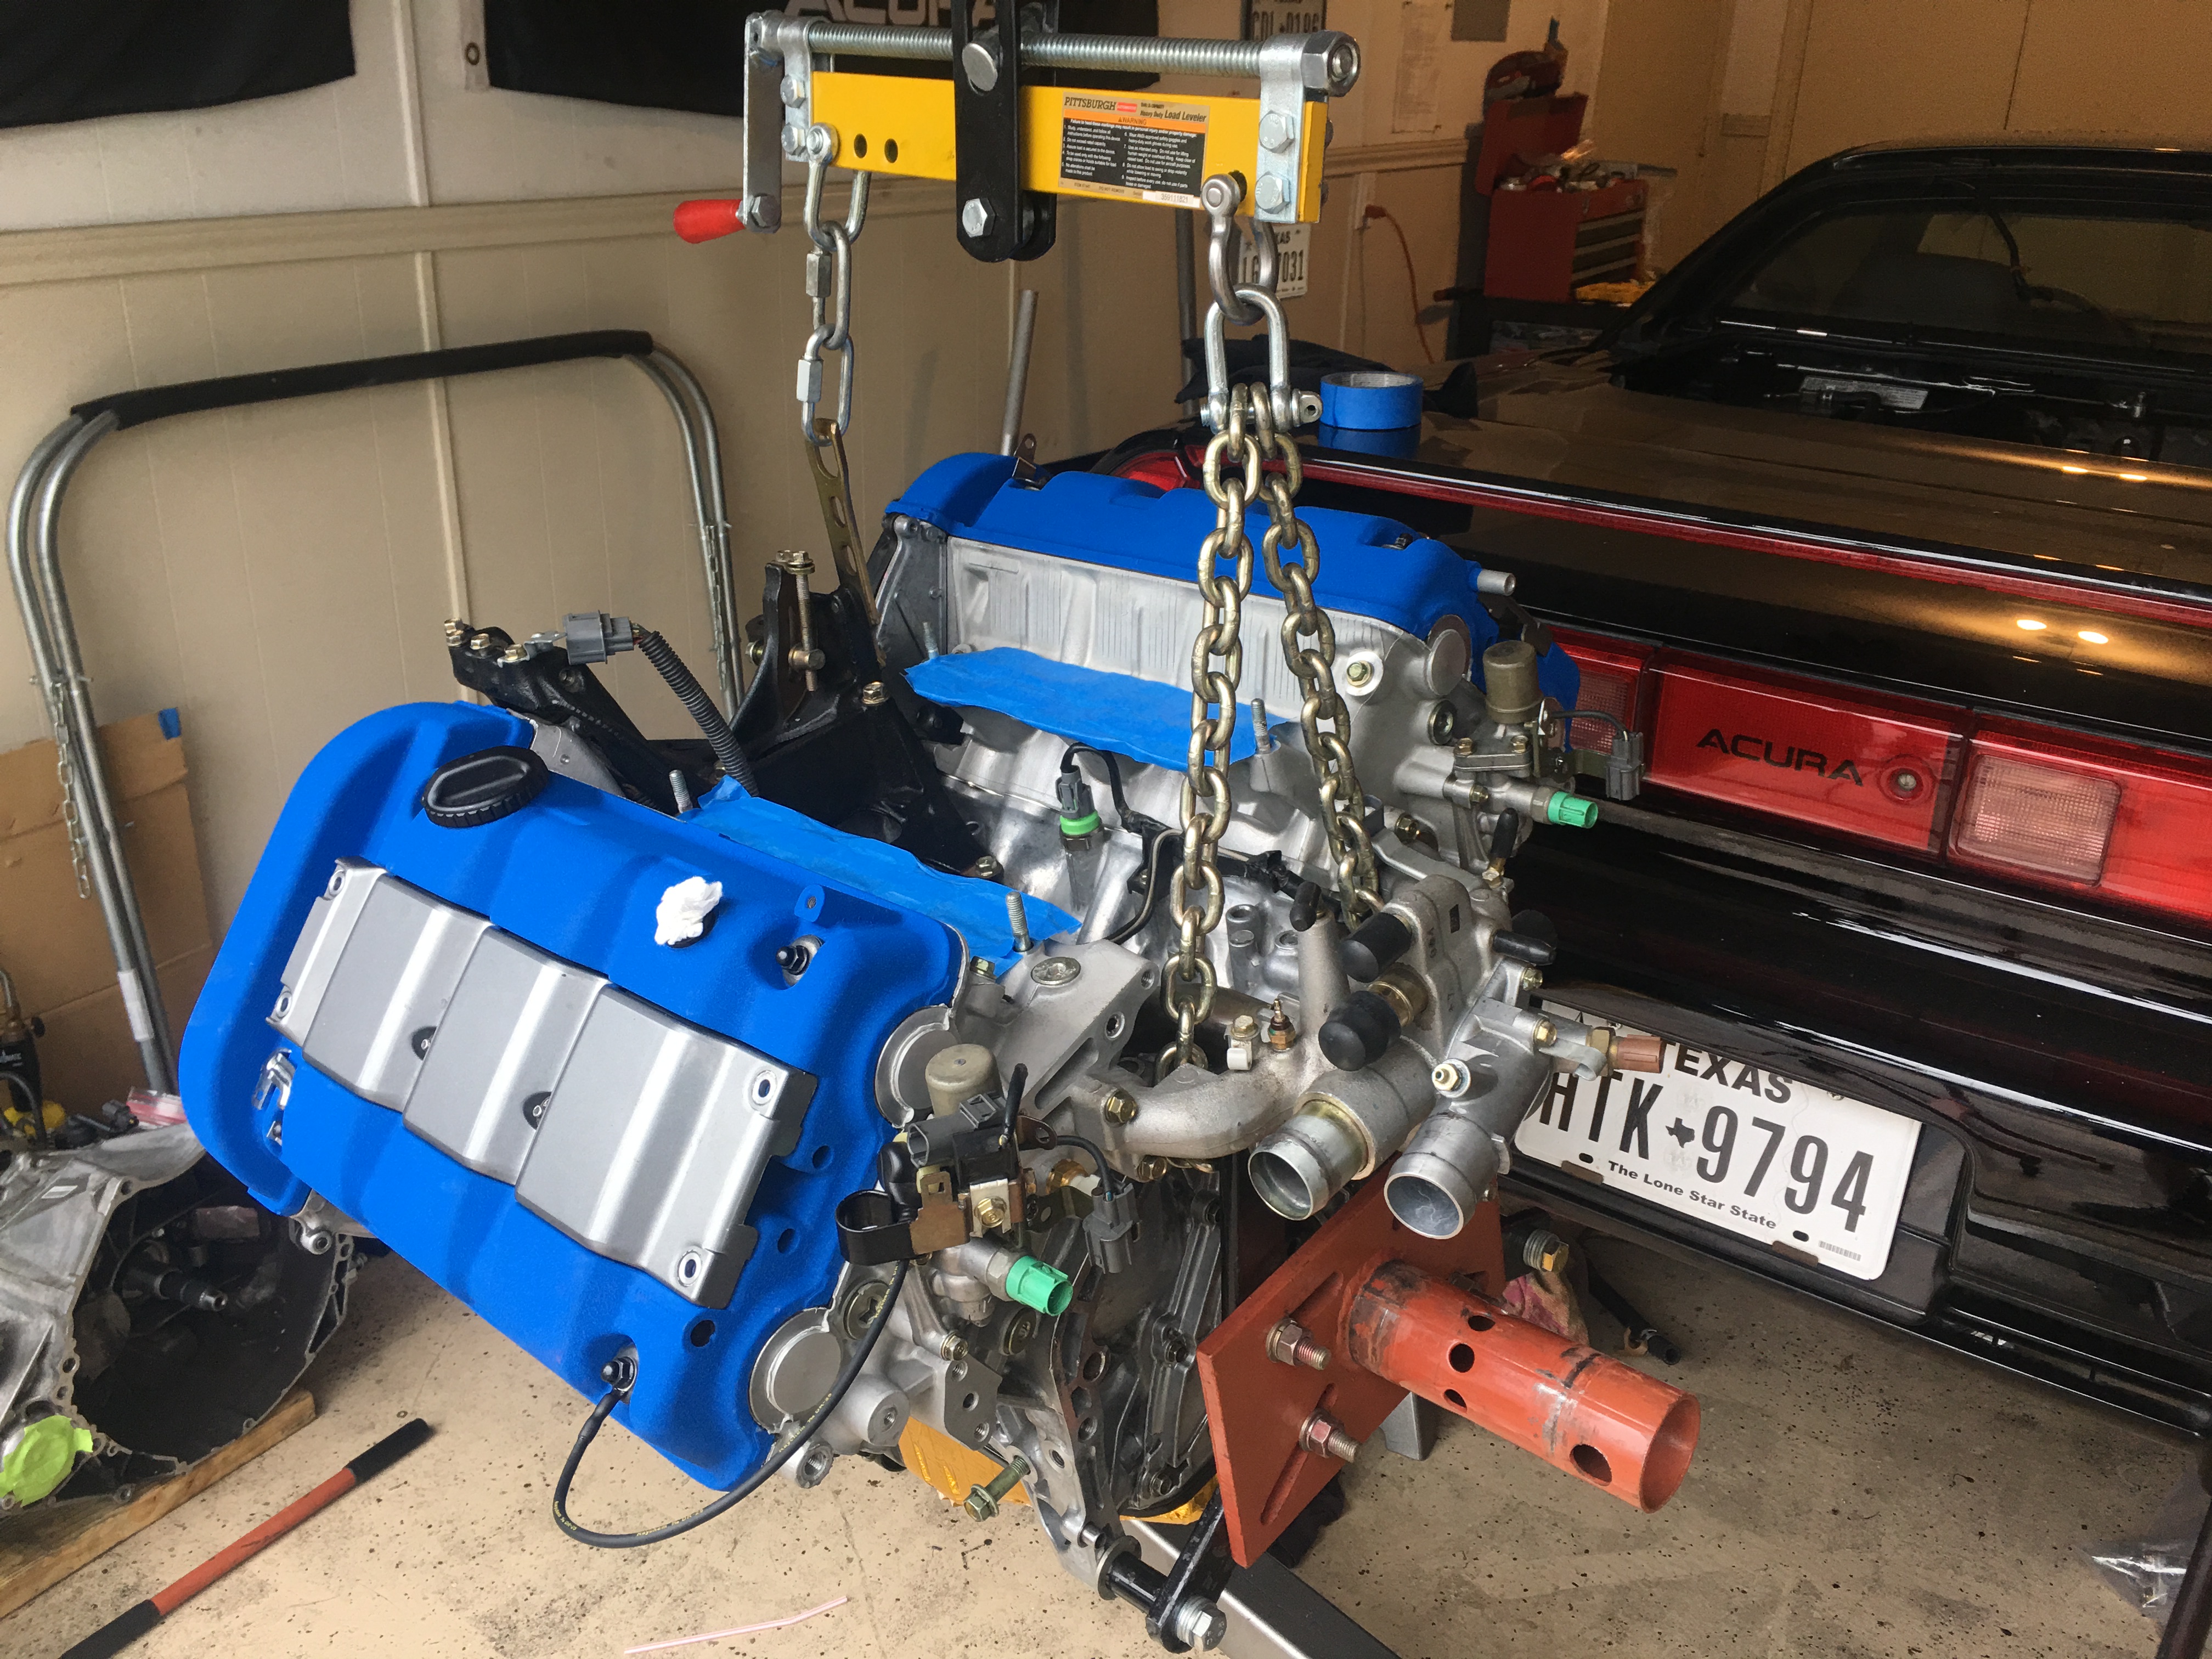
Due to the weight, I had to ship freight. Thanks to [MENTION=35590]Big McLargeHuge[/MENTION] for his help, as I have never used freight service before. For freight, you must use a shipping pallet. One option is to shrink wrap the transmission to the pallet, but I chose to build a crate to ensure it was not damaged during transit. FedEx freight ended up being the cheapest and it was only $50 extra to have liftgate pickup service at my house. It was really seamless.
Here are some pics for members who may need to ship a transmission or engine in the future.
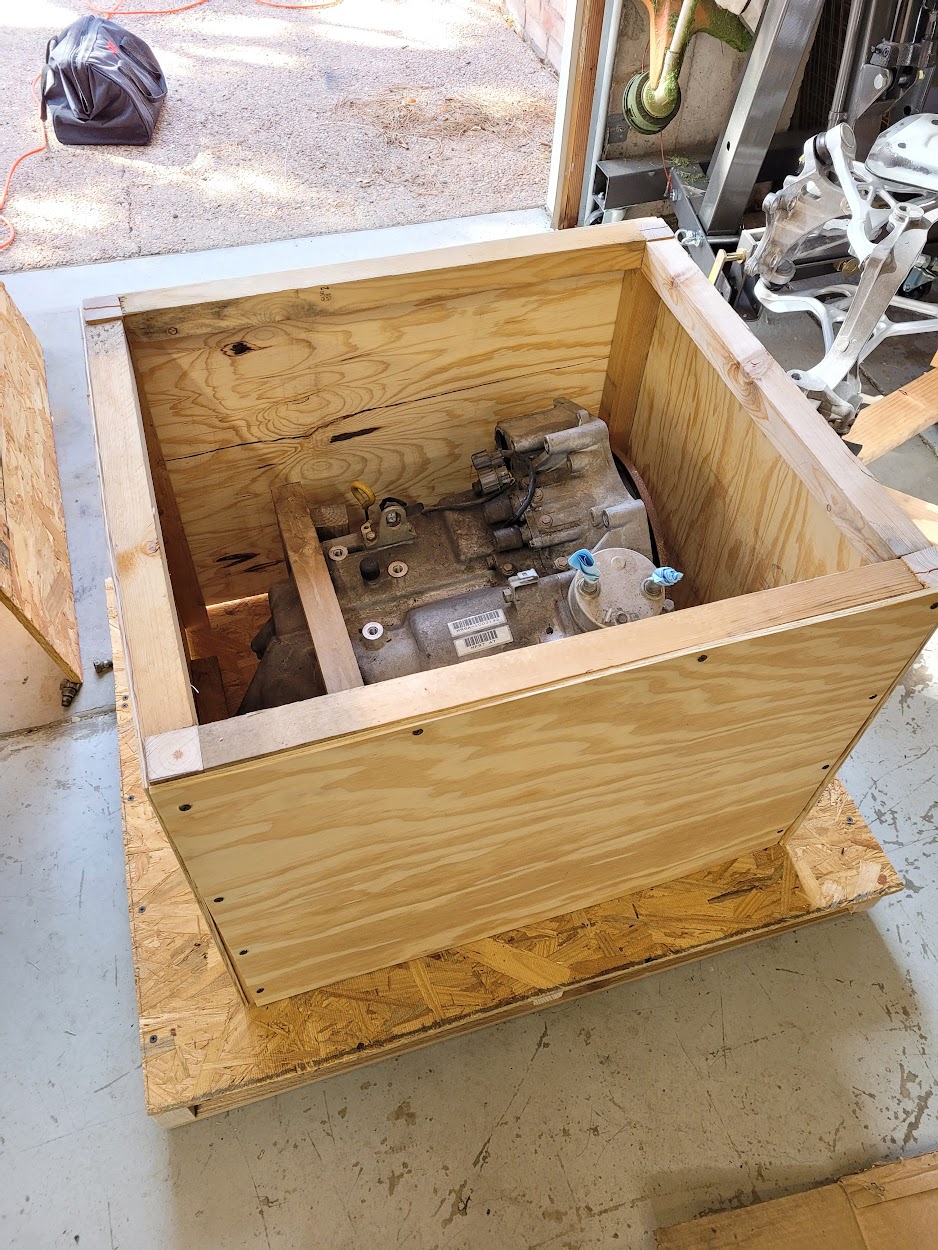

End of an era- my AT is sold. The buyer owns a 92 AT and his clutch packs shattered due to the buildup of debris in the internal filter and the resulting drop in fluid pressure. There was extensive damage to the gearbox and the Acura tech found metal bits in the fluid. My 92 AT will get him back on the road, so I am happy to help a fellow owner. I advised him to change the filter on the trans before install and he is wisely doing so- this should help extend the life of the box a little more. I also advised him to start collecting the clutch packs, seals and other parts for an eventual rebuild while they are still available from Honda. Hopefully, he can run with my AT until he gathers all of the parts. I also encouraged him to start a build thread on Prime documenting the AT filter change and replacement, as this has never been documented on Prime to my knowledge.
Due to the weight, I had to ship freight. Thanks to [MENTION=35590]Big McLargeHuge[/MENTION] for his help, as I have never used freight service before. For freight, you must use a shipping pallet. One option is to shrink wrap the transmission to the pallet, but I chose to build a crate to ensure it was not damaged during transit. FedEx freight ended up being the cheapest and it was only $50 extra to have liftgate pickup service at my house. It was really seamless.
Here are some pics for members who may need to ship a transmission or engine in the future.
Last edited:
Agreed - I just read all 38 pages. PM me if you need help with hosting/bulk renaming/uploading to make your post editing job easier.
I wish it were that easy. All the pics were stored in a Google Photos shared album. When I went to add a photo to the album, I must have inadvertently clicked the "select all" checkmark and then it removed all the photos from the album when I hit "upload"! I still have all the photos in my main Google account, it's just that they're not in the shared album anymore. I now have to add them back, post by post. It's gonna take a while...
Engine Refresh 76
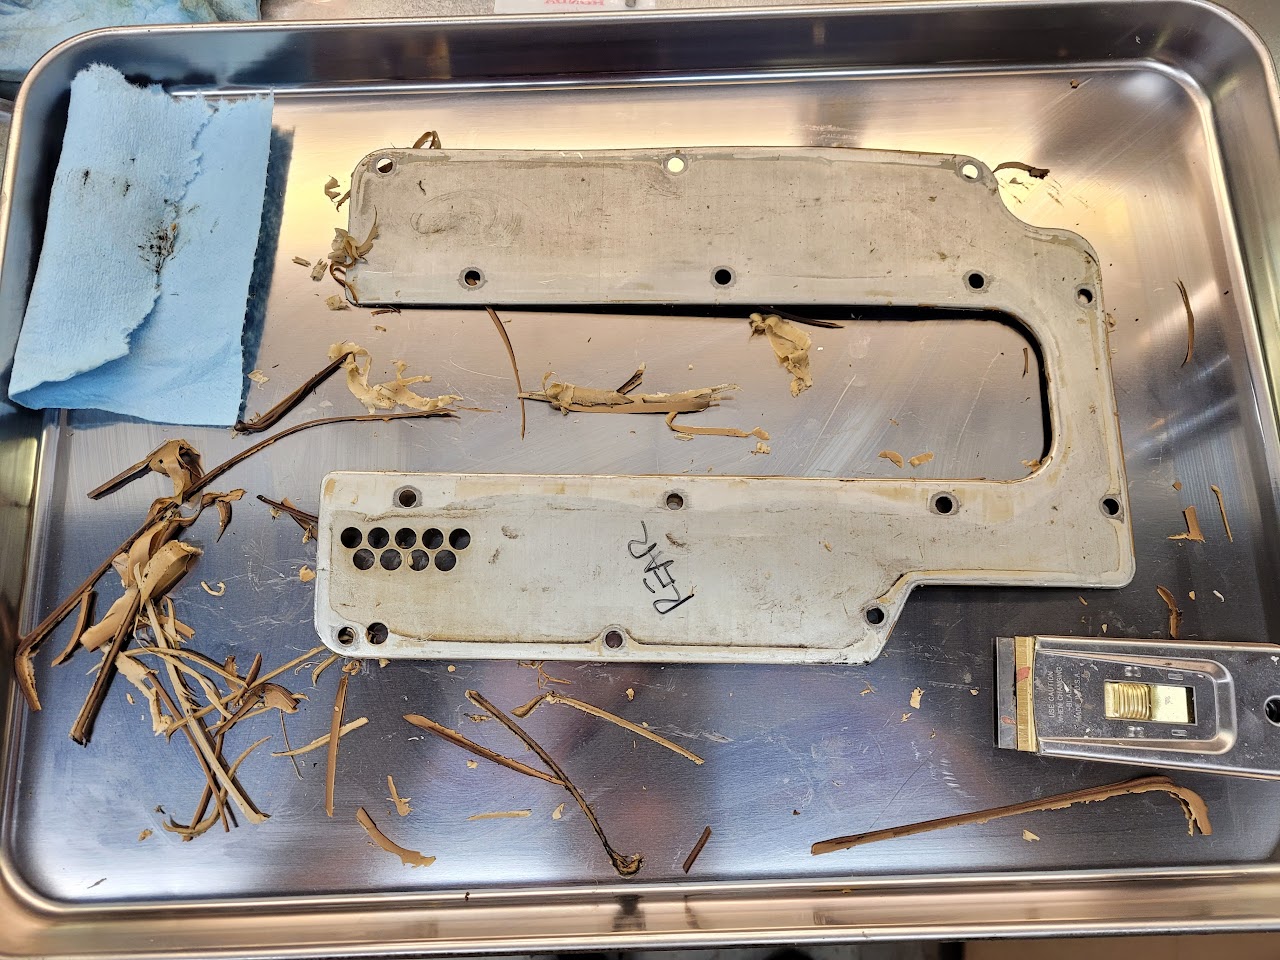
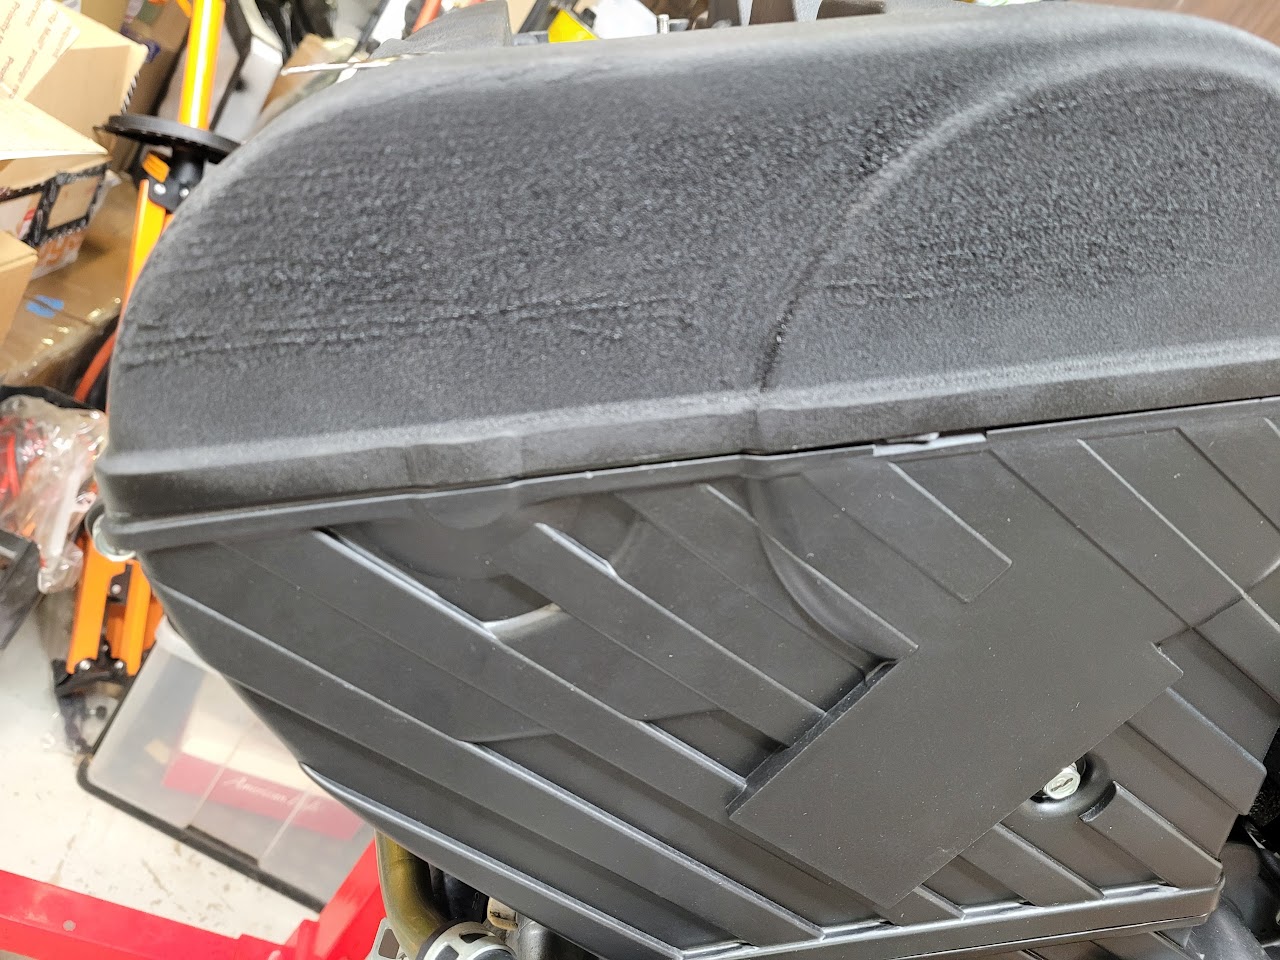
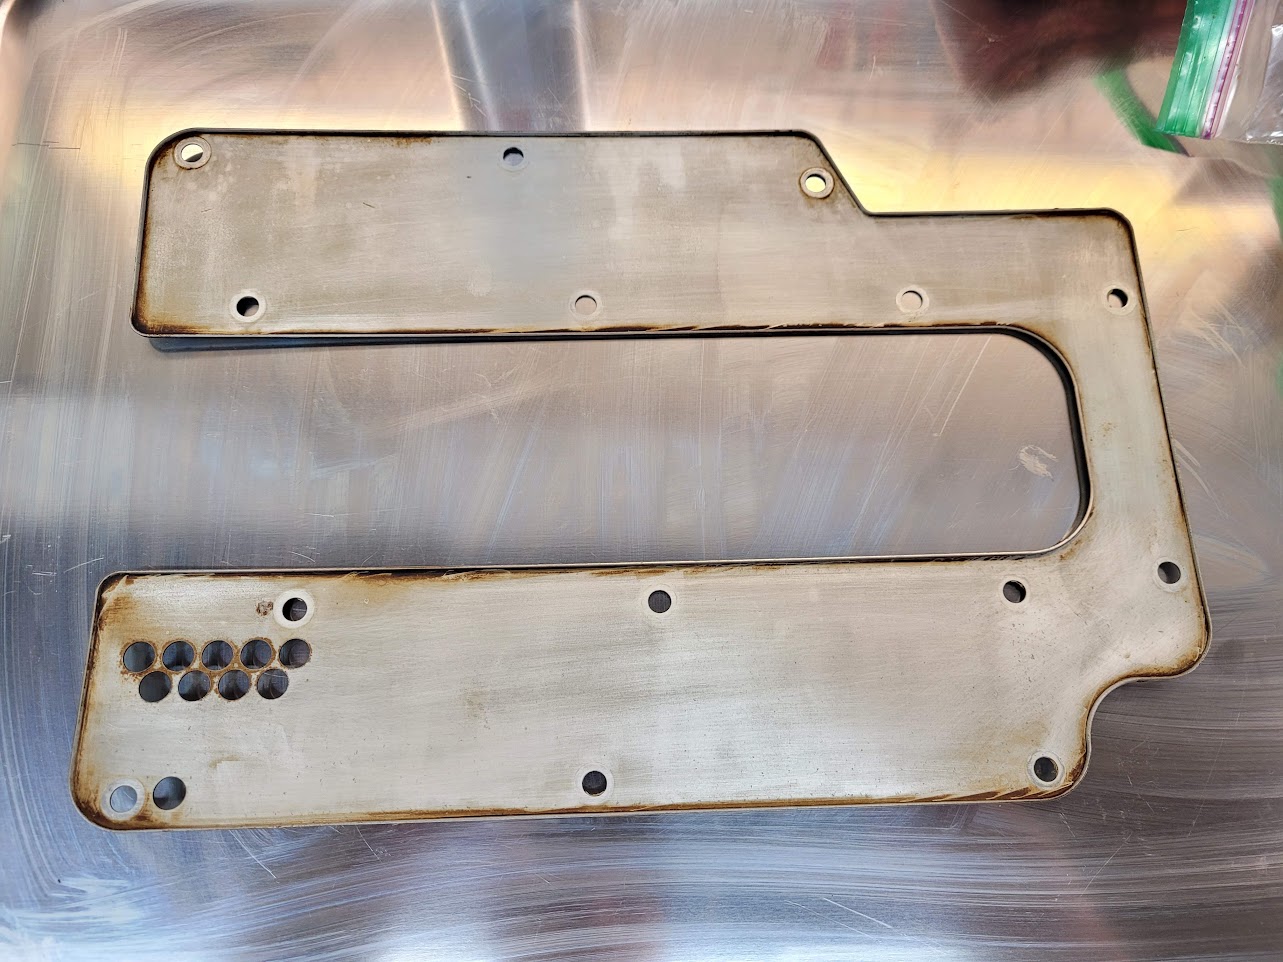
Rear Valve Cover, Baffle Plate, etc.
Back to our regularly scheduled programming.
Cleaned all the old Hondabond off the baffle plate.
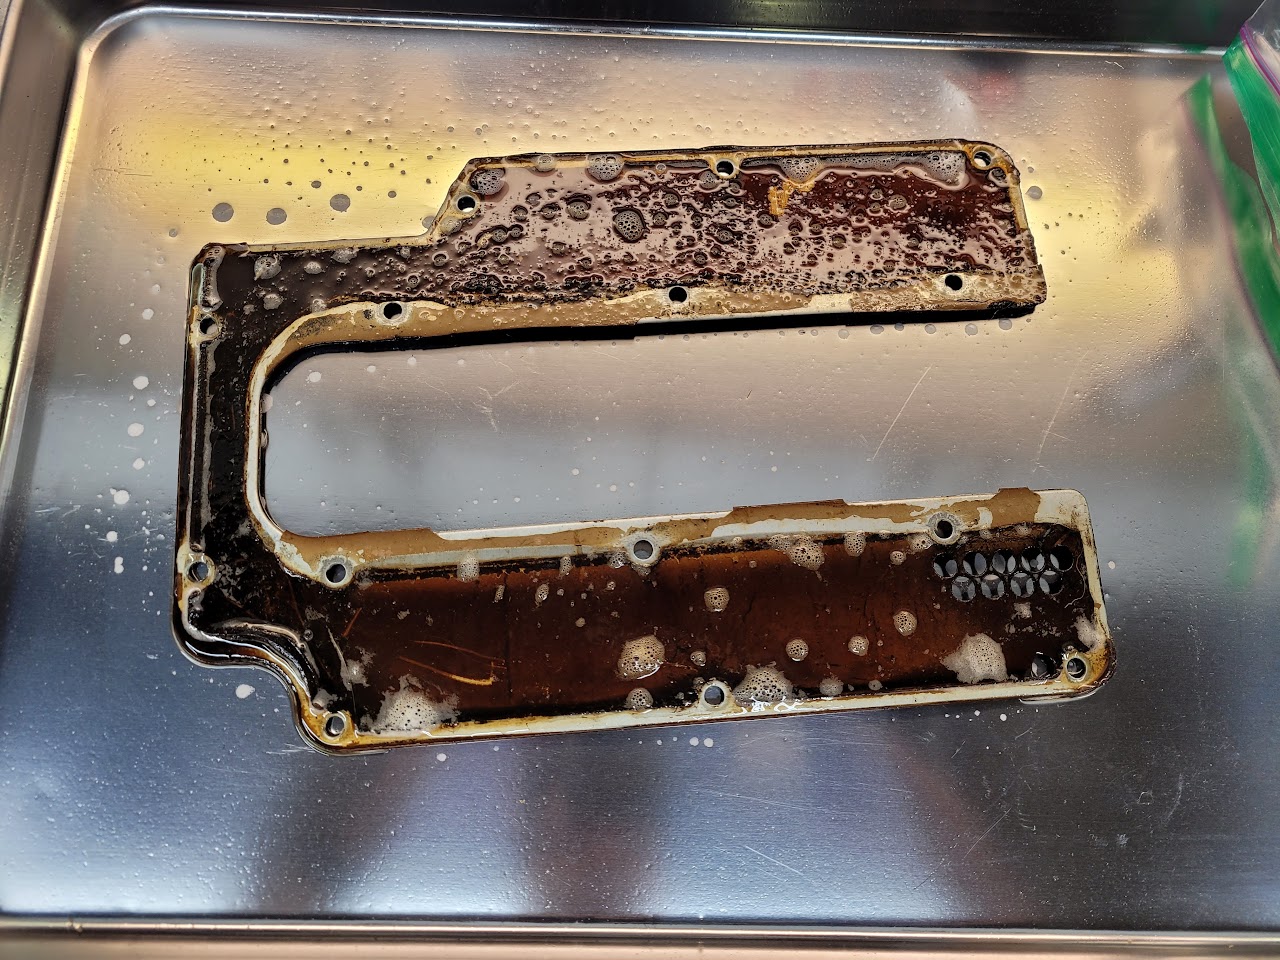
Next, tackled the smelly PCV blowby.
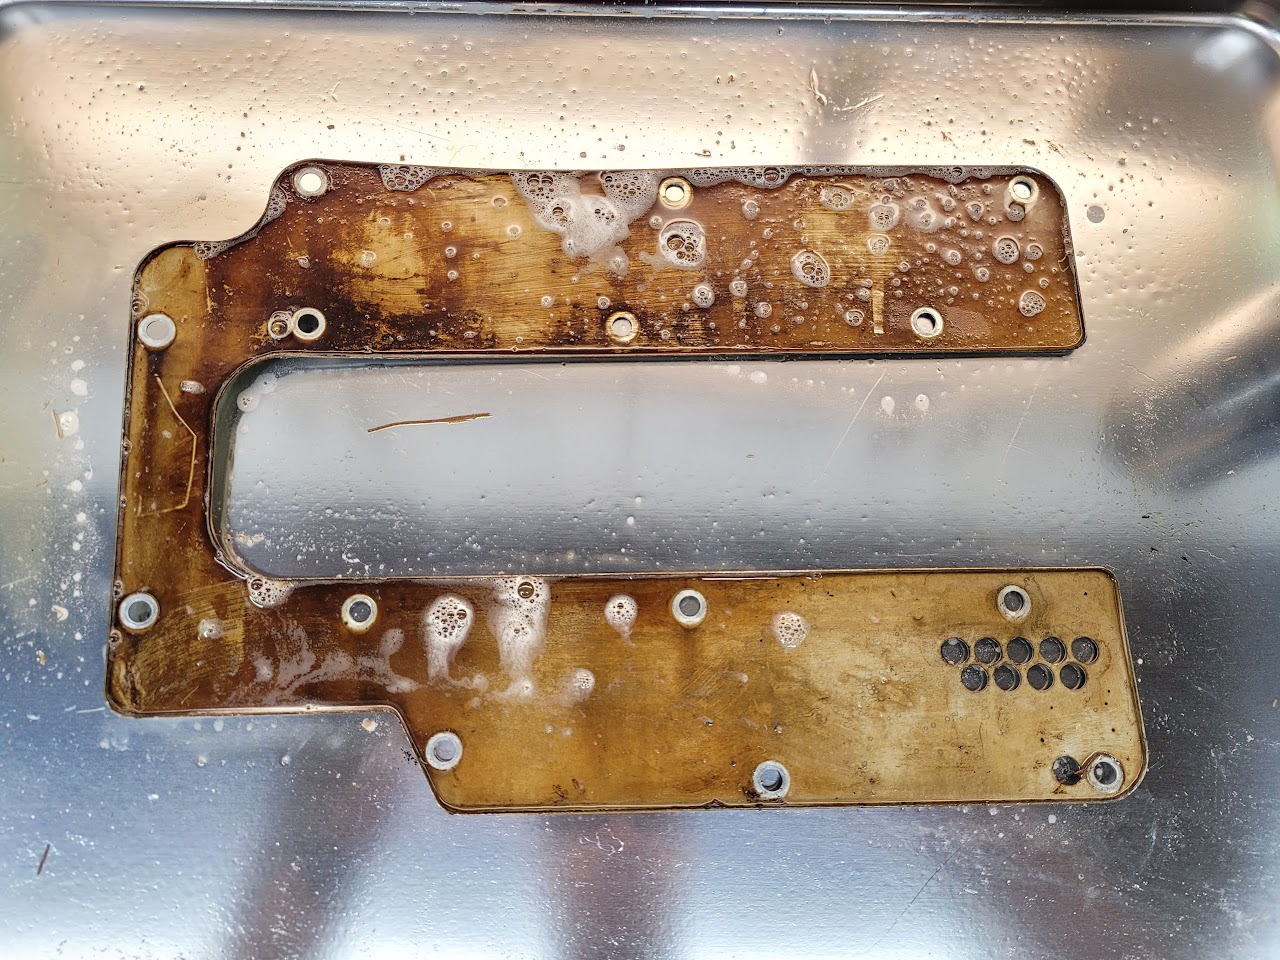
Much better, but still some staining. I'll let the hot Mobil 1 take care of the rest.
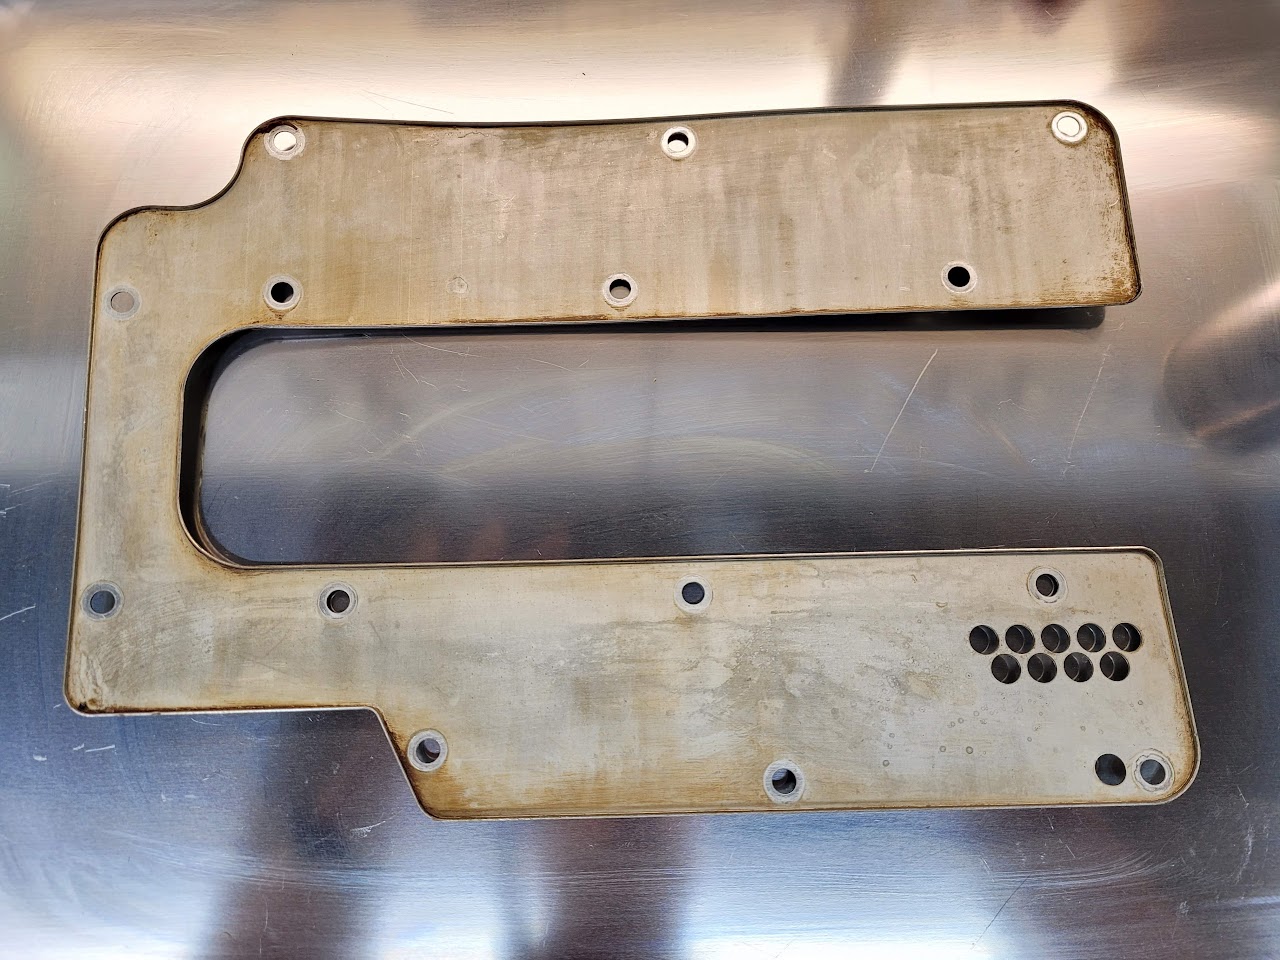
Big difference versus the nasty front head, which has way more PCV deposits.
Baffle plates installed with fresh Hondabond and bolts torqued to the spec. New gaskets fitted. Center plug gaskets fitted using a dab of Permatex Hi-Tack to keep them in place, as LarryB taught me a long time ago. My fingers hurt from squeezing out all the Hondabond- it's a lot!
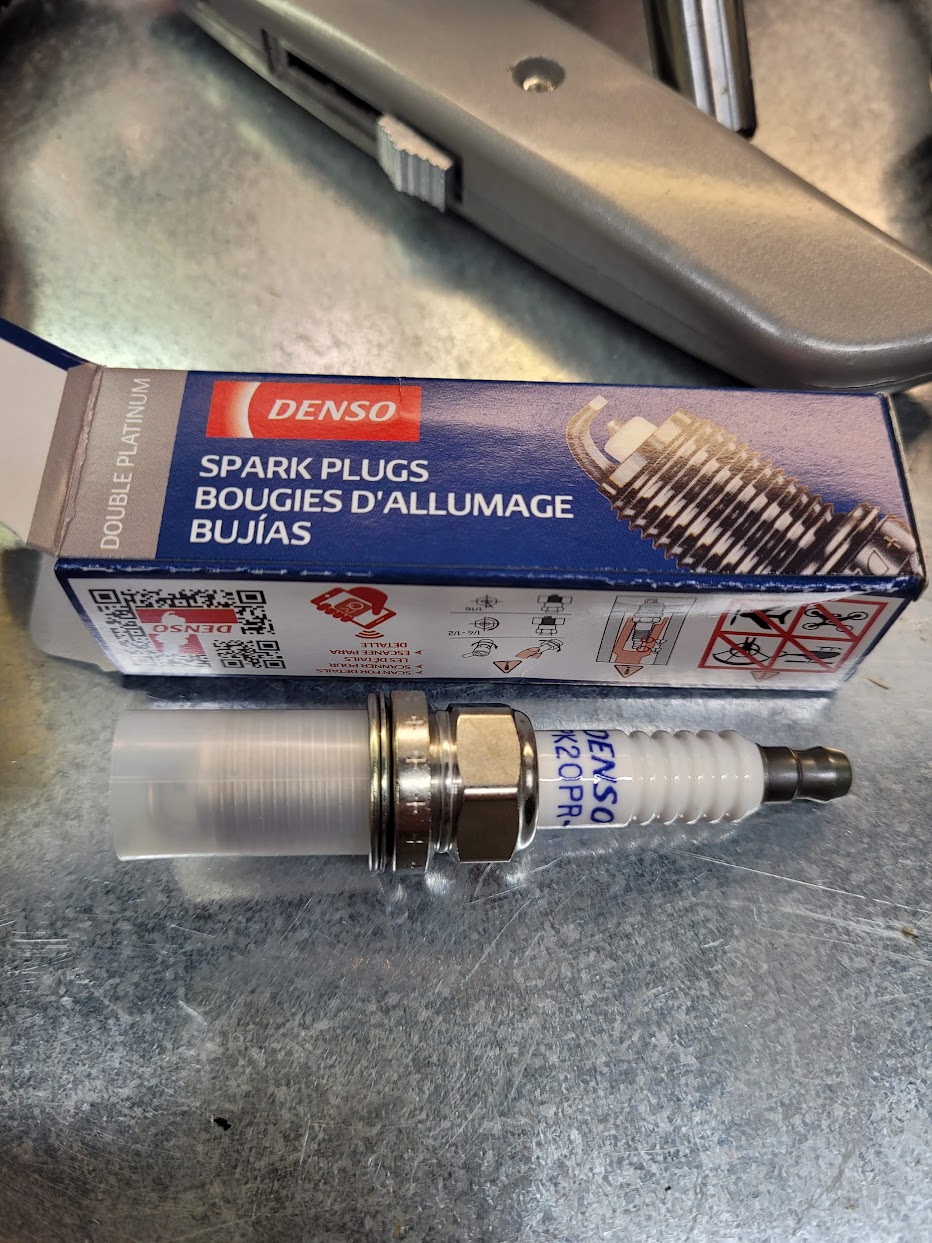
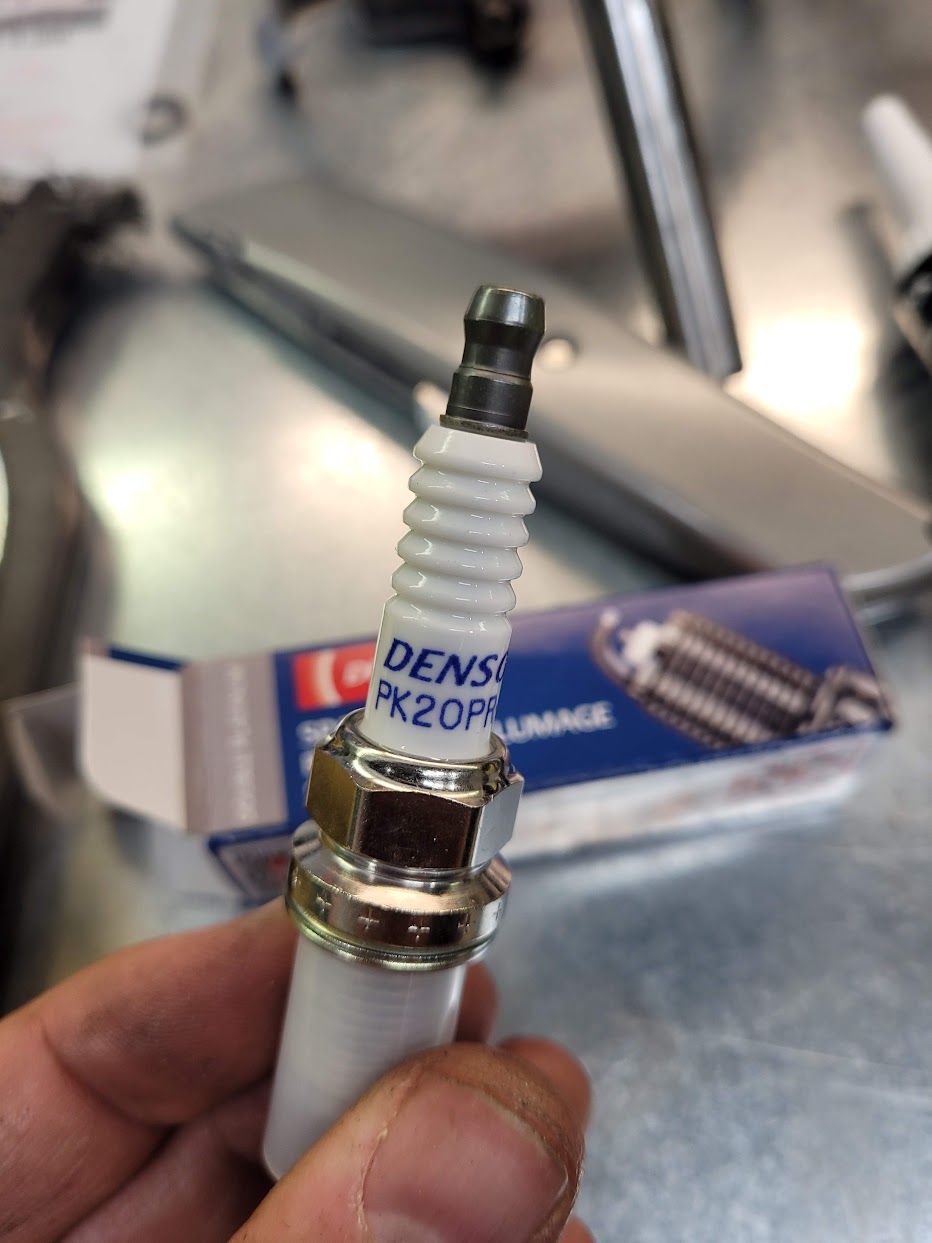
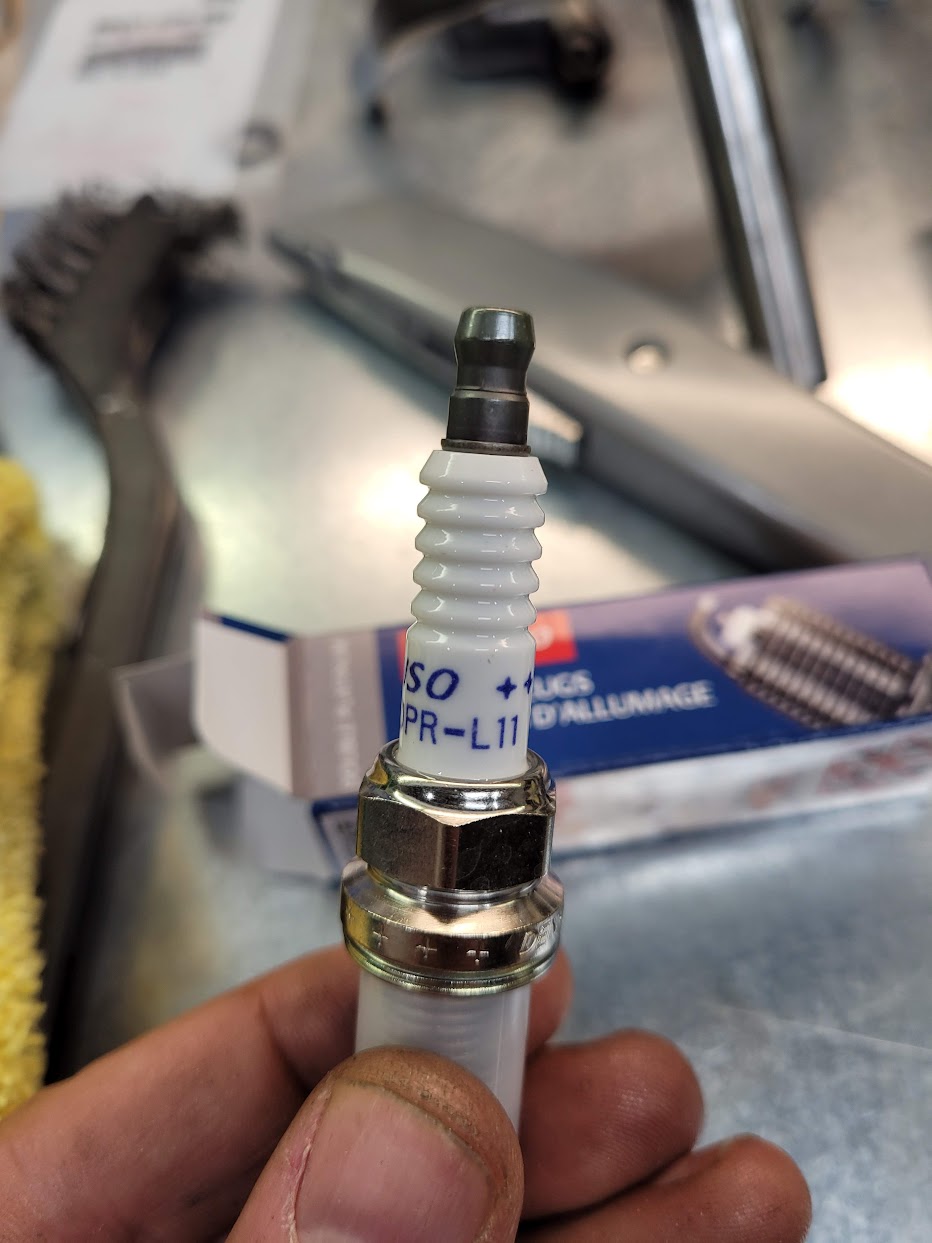
Before placing the valve cover, I loosely installed the spark plugs (to permit easier hand-cranking of the engine. This time, decided to go with Denso instead of NGK. These are the PK20PR-L11 double platinum, which are OEM plugs along with the NGK. I re-read the thread about whether to use anti-seize and am on the fence. I've always installed dry and have never had an issue. Also, the cylinder head threads are clean and oil-free. Decisions, decisions...
Loosely installed in the head.
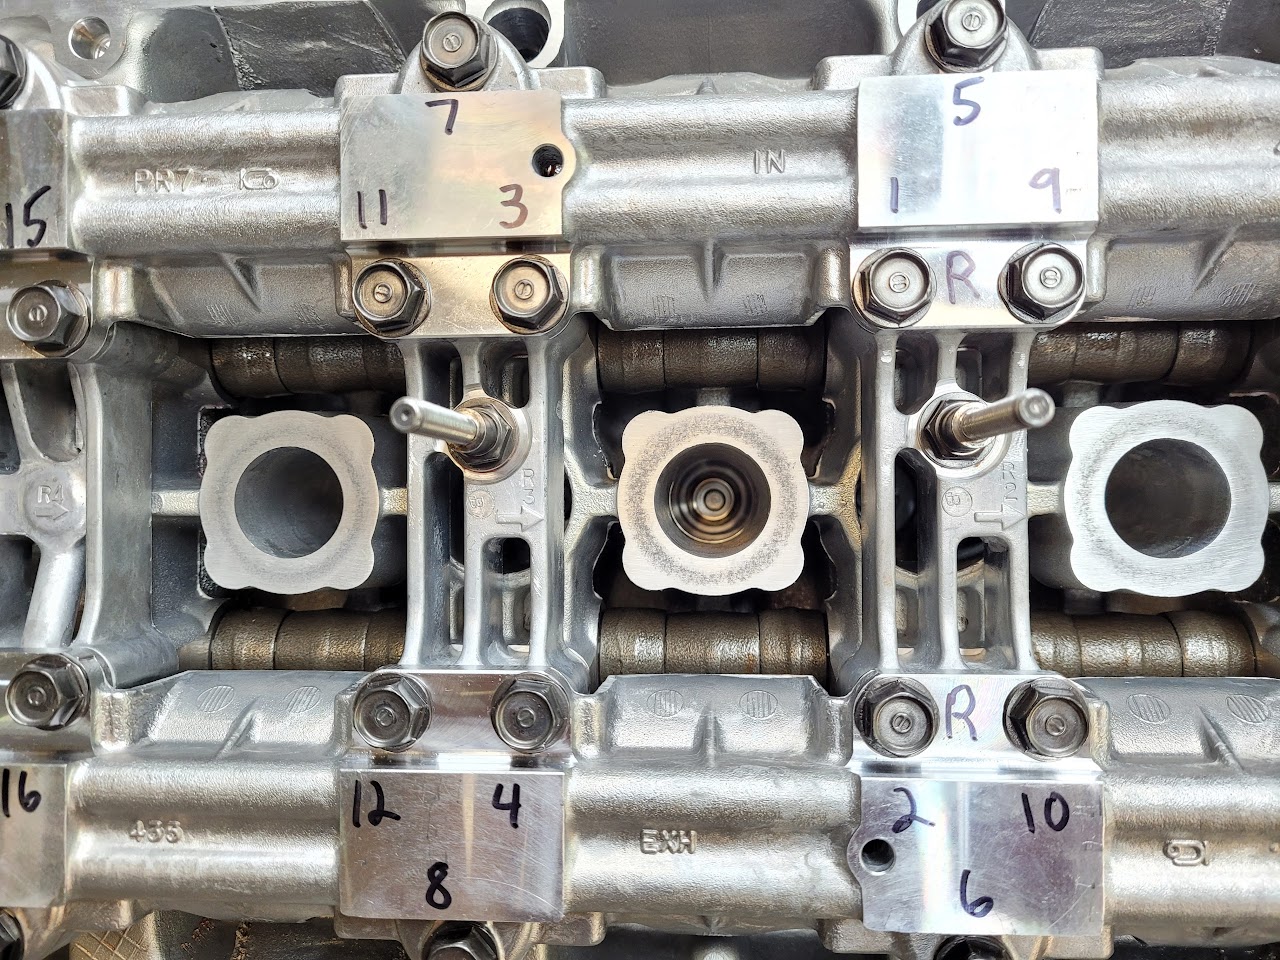
Just out of curiosity, I rotated the crank a few times. Even with the loose plugs, I was greeted by whistling and puffing as the pistons pulled and pushed air through the tape over the intake and exhaust ports. A good sign that everything is assembled correctly!
Ran out of time mostly because I cannot find a good picture of which wire harnesses go under the acorn nuts on the rear valve cover. Does anyone have a helpful picture? Hopefully will install the valve cover tonight and move on to the front one and the nasty, smelly PCV deposits.
Rear Valve Cover, Baffle Plate, etc.
Back to our regularly scheduled programming.
Cleaned all the old Hondabond off the baffle plate.
Next, tackled the smelly PCV blowby.
Much better, but still some staining. I'll let the hot Mobil 1 take care of the rest.
Big difference versus the nasty front head, which has way more PCV deposits.
Baffle plates installed with fresh Hondabond and bolts torqued to the spec. New gaskets fitted. Center plug gaskets fitted using a dab of Permatex Hi-Tack to keep them in place, as LarryB taught me a long time ago.
My fingers hurt from squeezing out all the Hondabond- it's a lot!
Before placing the valve cover, I loosely installed the spark plugs (to permit easier hand-cranking of the engine. This time, decided to go with Denso instead of NGK. These are the PK20PR-L11 double platinum, which are OEM plugs along with the NGK. I re-read the thread about whether to use anti-seize and am on the fence. I've always installed dry and have never had an issue. Also, the cylinder head threads are clean and oil-free. Decisions, decisions...
Loosely installed in the head.
Just out of curiosity, I rotated the crank a few times. Even with the loose plugs, I was greeted by whistling and puffing as the pistons pulled and pushed air through the tape over the intake and exhaust ports. A good sign that everything is assembled correctly!
Ran out of time mostly because I cannot find a good picture of which wire harnesses go under the acorn nuts on the rear valve cover. Does anyone have a helpful picture? Hopefully will install the valve cover tonight and move on to the front one and the nasty, smelly PCV deposits.
Rear valve cover, just the two harness brackets on the timing belt side.
Front valve cover, one bracket on the lower acorn on the timing belt side, ground strap on the driver side lower acorn.
Front valve cover, one bracket on the lower acorn on the timing belt side, ground strap on the driver side lower acorn.
Last edited:
Engine Refresh 77
Rear Valve Cover, Baffle Plate, etc.
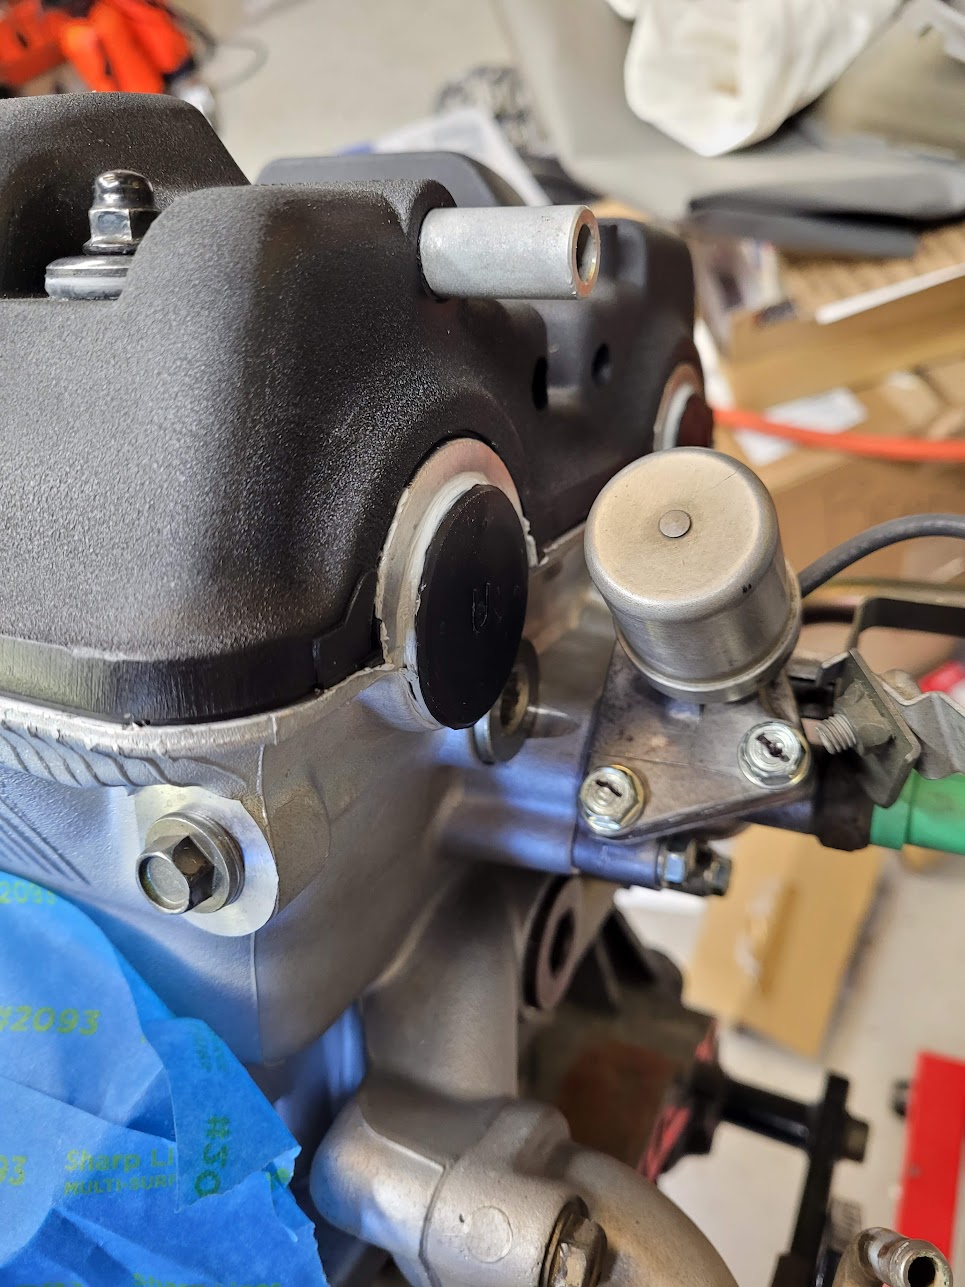
A frustrating evening. The rear cover is mounted.
It should be good news, but it's not. First, I spent 45 minutes digging through labeled bags looking for the two wire harness brackets needed for the cover (thanks [MENTION=33247]MotorMouth93[/MENTION]). I found one.
Second, I had the cover gasket on PERFECTLY and super-smooth. Hondabond expertly applied to a clean surface. Then, I noticed the cover did not fit over the lip of the rear timing mid-cover.
Even though an Acura dealer would call this A-OK, this just doesn't look right. This car will be on a 10-year service interval. So now, I have to wait until the Hondabond dries, remove the cover and start all over. I'm quite mad about it, since I like to have the fresh gasket squish down and take a set without any further removal during the service interval.
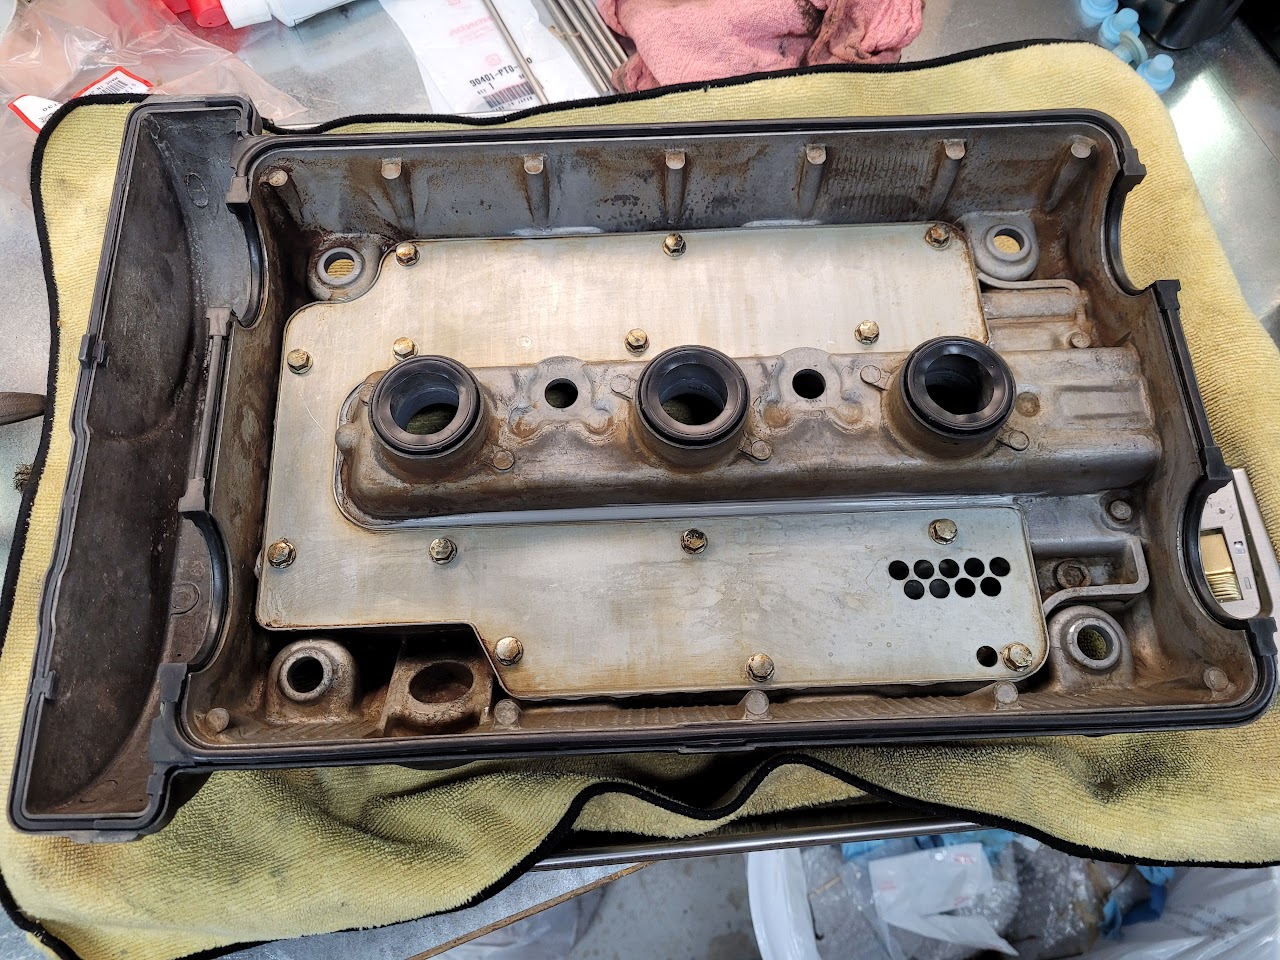
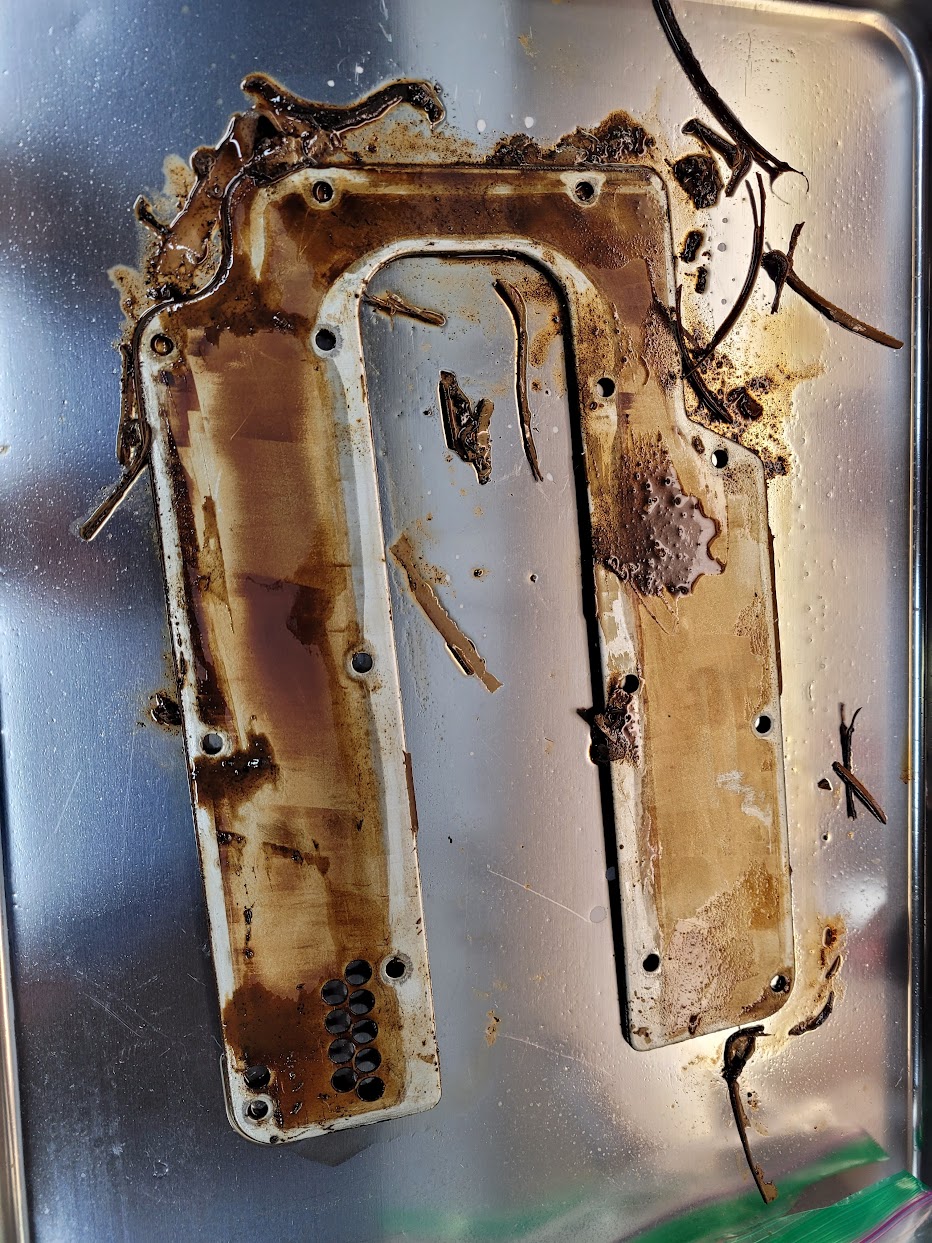
Anyway, I moved to the front cover baffle to not have to think about the rear one anymore. The front head on the C30A is the one that sucks up all the crankcase gas/vapor, so it's always more dirty. This is what happens if you don't drive your NSX for at least 1 hour on a highway cruise once per week. Normally, the hot engine oil will clean this residue and pass it through the oil filter. Sitting for long periods- or driving for short trips- causes the oil and vapor to dry and eventually congeal into this smelly varnish.
Rear Valve Cover, Baffle Plate, etc.
A frustrating evening. The rear cover is mounted.
It should be good news, but it's not. First, I spent 45 minutes digging through labeled bags looking for the two wire harness brackets needed for the cover (thanks [MENTION=33247]MotorMouth93[/MENTION]). I found one.
Second, I had the cover gasket on PERFECTLY and super-smooth. Hondabond expertly applied to a clean surface. Then, I noticed the cover did not fit over the lip of the rear timing mid-cover.
Even though an Acura dealer would call this A-OK, this just doesn't look right. This car will be on a 10-year service interval. So now, I have to wait until the Hondabond dries, remove the cover and start all over. I'm quite mad about it, since I like to have the fresh gasket squish down and take a set without any further removal during the service interval.
Anyway, I moved to the front cover baffle to not have to think about the rear one anymore. The front head on the C30A is the one that sucks up all the crankcase gas/vapor, so it's always more dirty. This is what happens if you don't drive your NSX for at least 1 hour on a highway cruise once per week. Normally, the hot engine oil will clean this residue and pass it through the oil filter. Sitting for long periods- or driving for short trips- causes the oil and vapor to dry and eventually congeal into this smelly varnish.
Engine Refresh 78
Front Valve Cover, Baffle
A frustrating weekend from a NSX standpoint. This was a rare weekend where we weren't travelling or doing social things, so I thought I could really make a dent in the final engine assembly, start the transmission refresh and even cast the motor mount rubber.
None of that happened.
I did go for a really long bike ride with my daughter, built a Lego house with my son and watched my son just crush it in a soccer game, so it was a good trade.
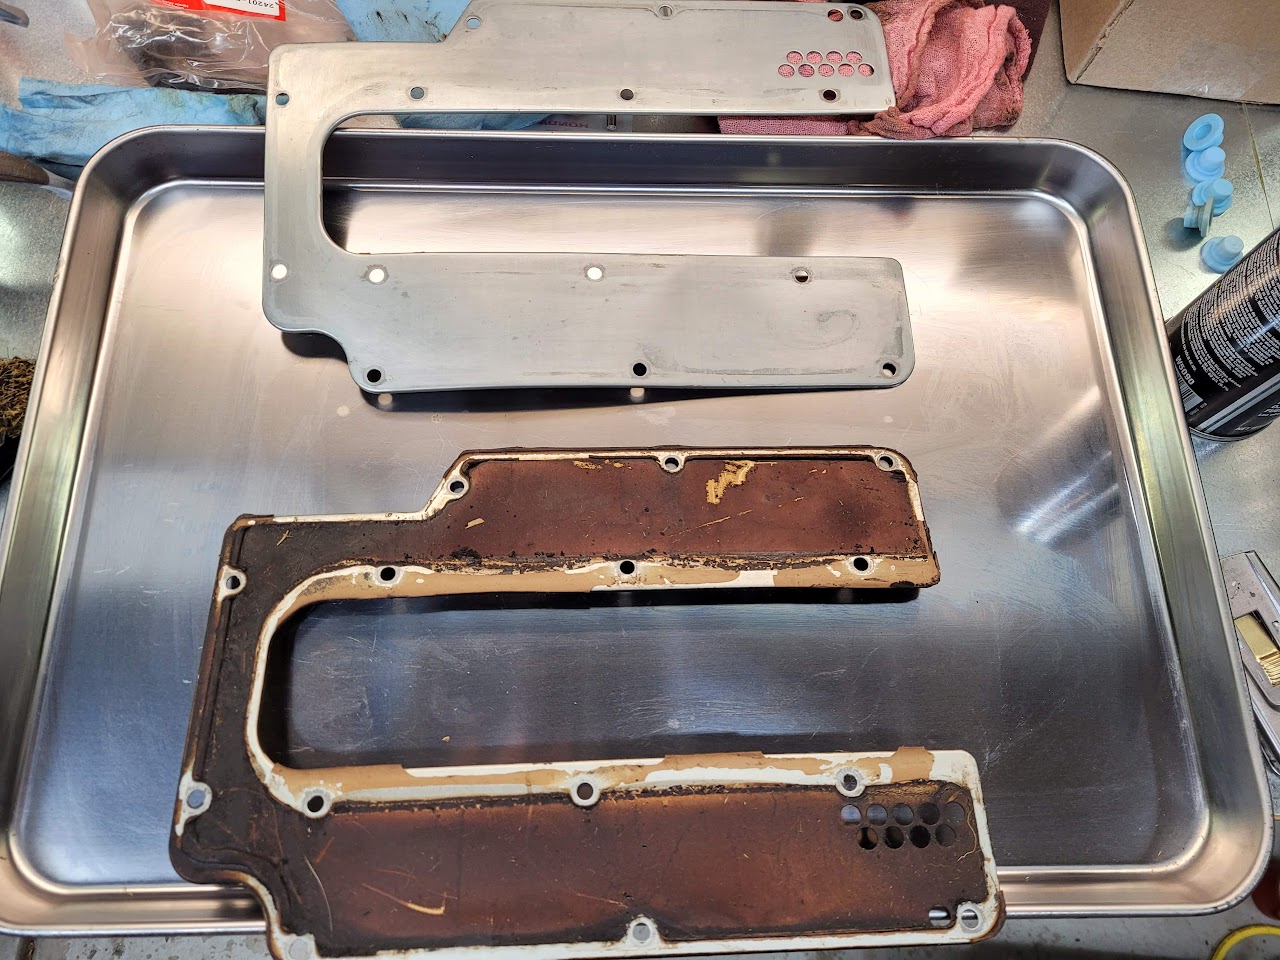
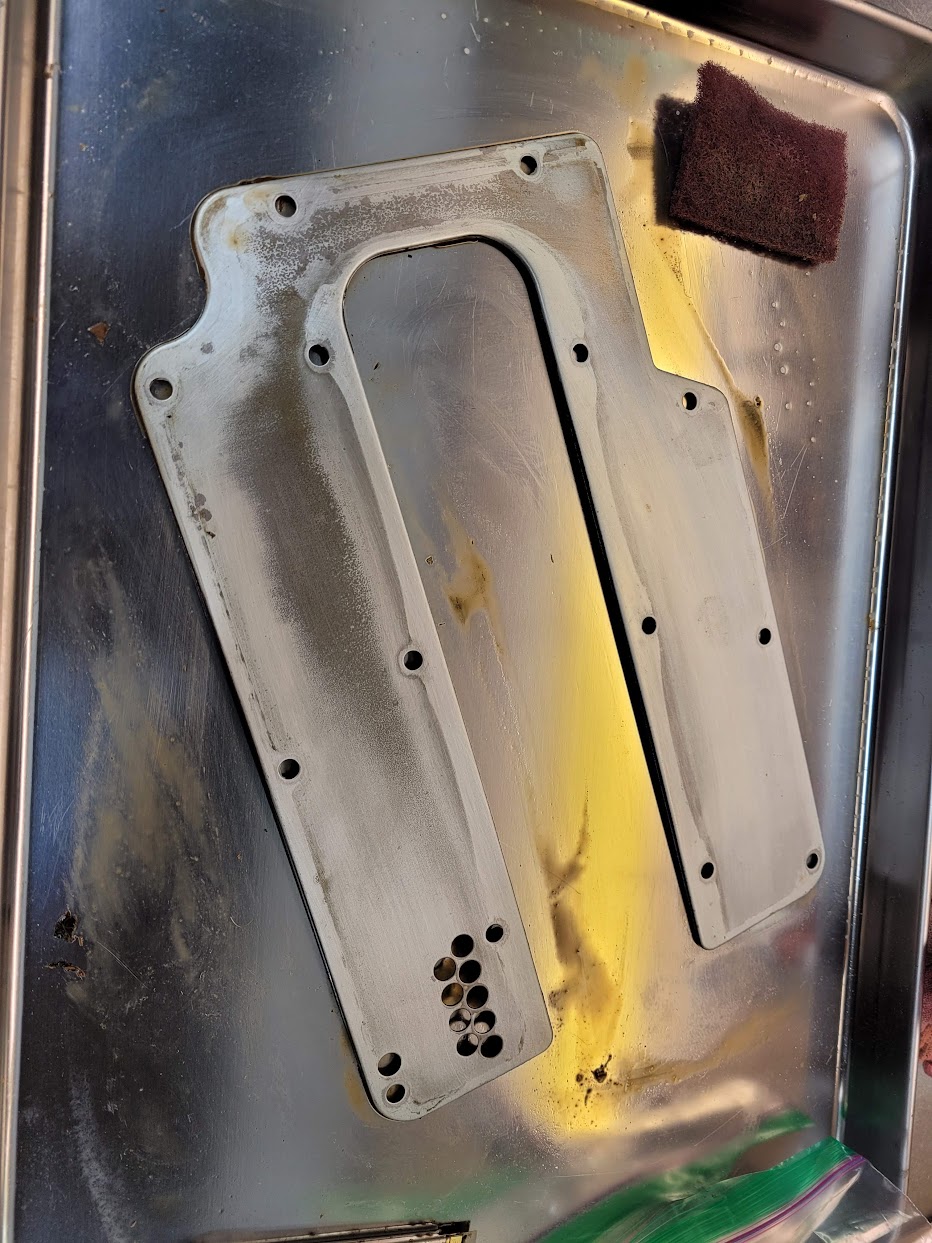
Anyway, I got the front baffle cleaned up and the valve cover prepped. That's it.
Not perfect, but the hot engine oil will clean the rest.
Front Valve Cover, Baffle
A frustrating weekend from a NSX standpoint. This was a rare weekend where we weren't travelling or doing social things, so I thought I could really make a dent in the final engine assembly, start the transmission refresh and even cast the motor mount rubber.
None of that happened.
I did go for a really long bike ride with my daughter, built a Lego house with my son and watched my son just crush it in a soccer game, so it was a good trade.
Anyway, I got the front baffle cleaned up and the valve cover prepped. That's it.
Not perfect, but the hot engine oil will clean the rest.


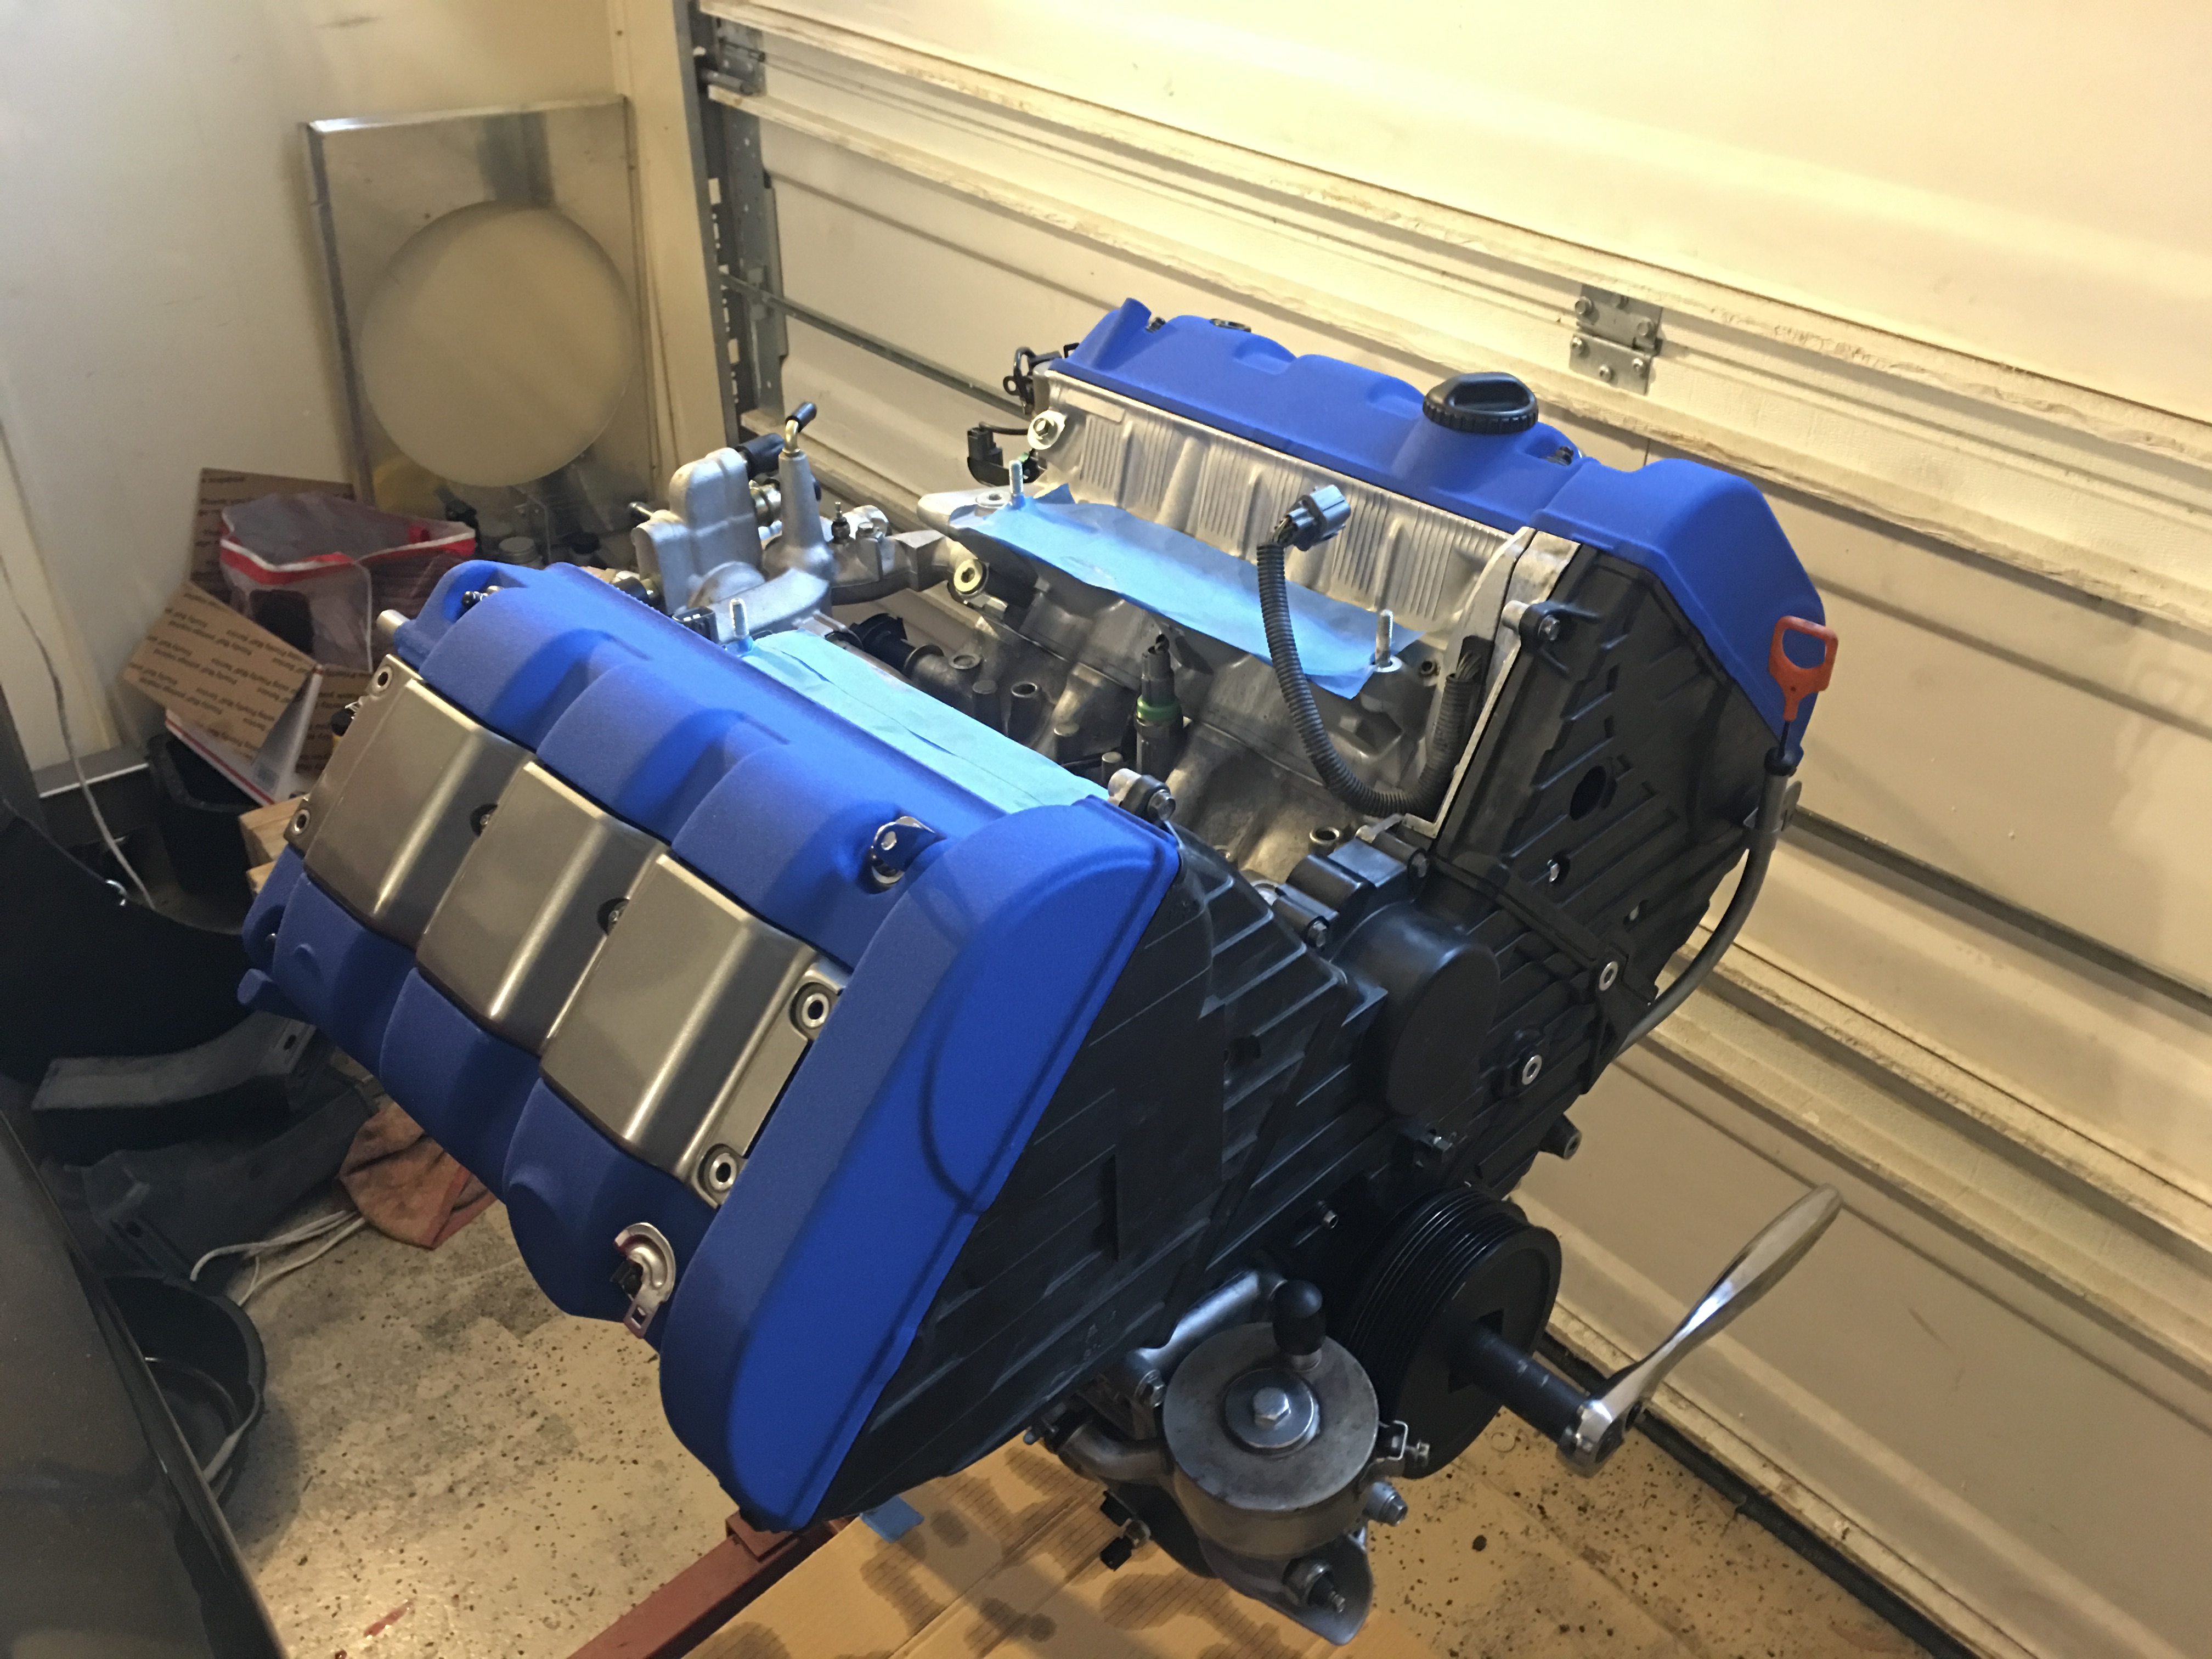
Those blue valve covers look pretty. Are you planning to keep the stock crank pulley?
The blue covers were on the engine I rebuilt 2 years ago that blew up. They are getting stripped and re-coated to orange to match my brakes.
Those blue valve covers look pretty. Are you planning to keep the stock crank pulley?
Imola + blue= interesting....
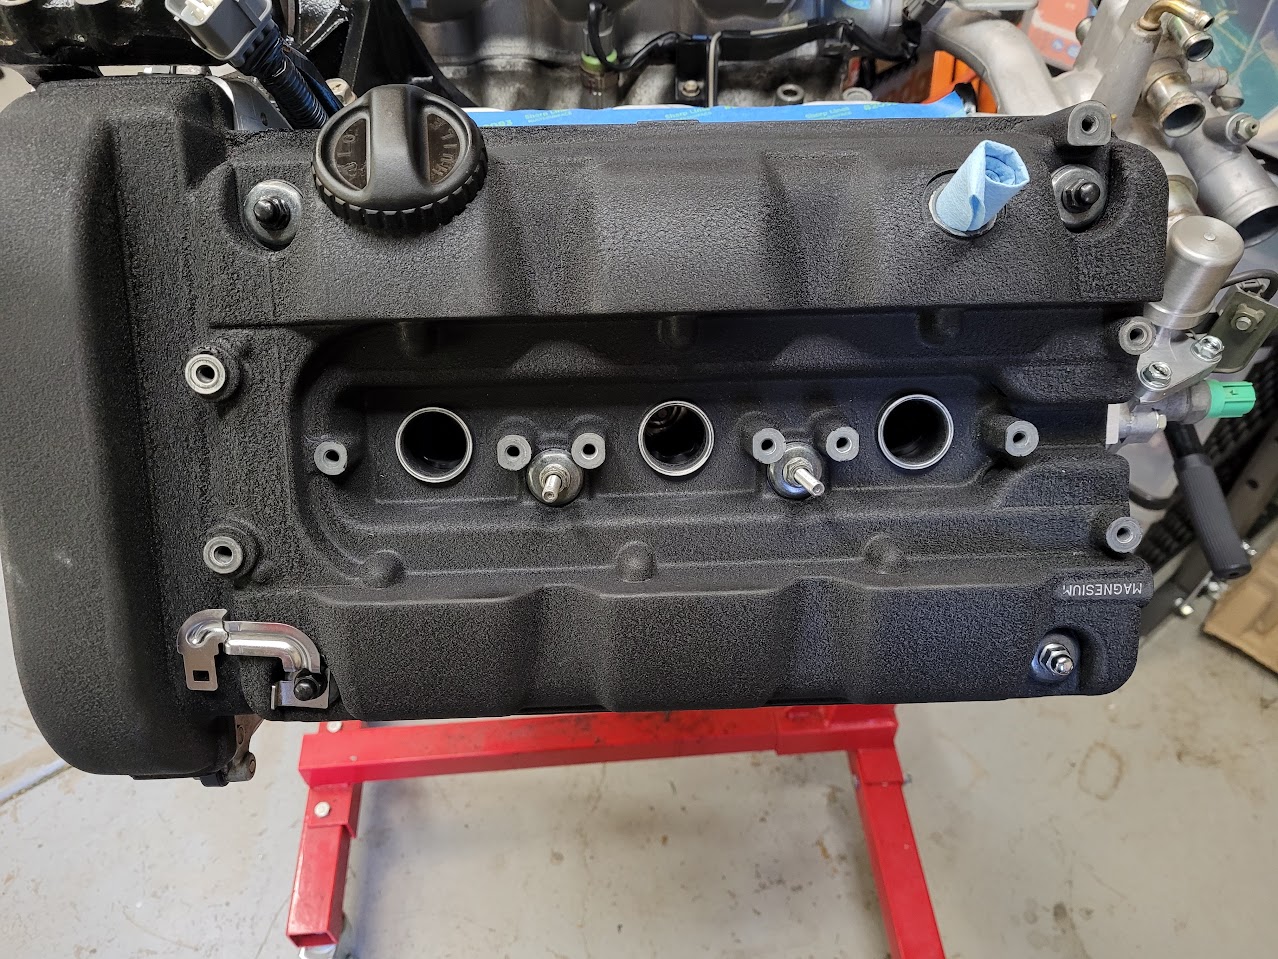
My valve covers are black.
Imola + Black = The BusinessJohn is going with Imola on his valve covers, plus an undecided exterior car color.
Engine Refresh 79
Valve Covers, Spark Plugs, etc.
Managed to sort out the valve cover fitting on both timing covers. Thankfully the re-fitting did not disturb the Hondabond seals, so fingers crossed that I am ok. If I see oil leaks, I'll know why. I also made a decision and went with anti-seize on the spark plugs. My method is to coat the threads
with anti-seize and then use a clean shop towel to remove the excess, leaving a thin coat on the threads. Torqued to 18Nm per the 97+ manual and Kaz. These will come back out for the compression test, but I wanted them seated for now.
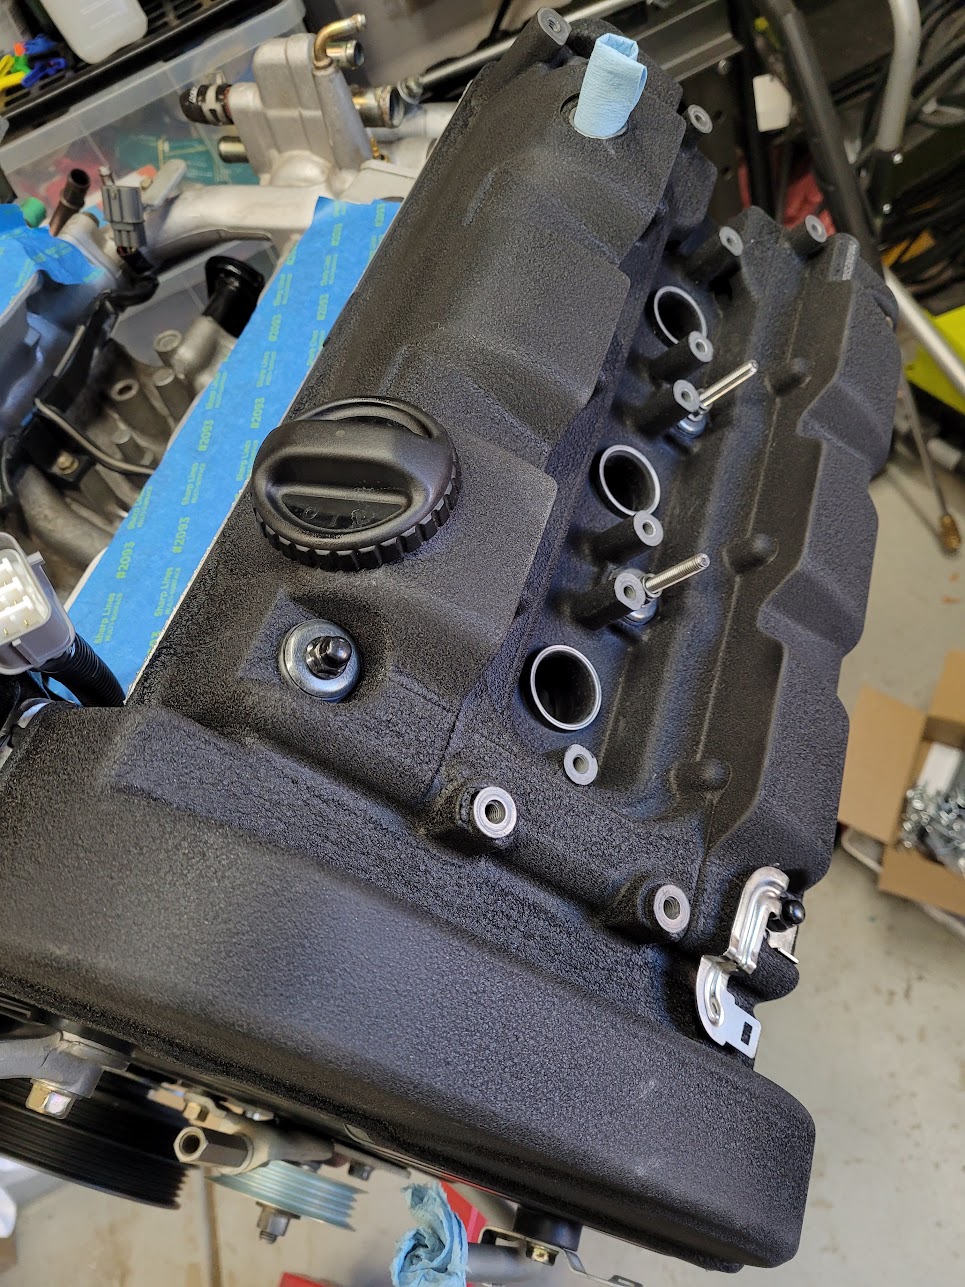
My cam cap "style" for lack of a better term. Hondabond around the plug seam but not globbed all over.
Valve Covers, Spark Plugs, etc.
Managed to sort out the valve cover fitting on both timing covers. Thankfully the re-fitting did not disturb the Hondabond seals, so fingers crossed that I am ok. If I see oil leaks, I'll know why.
I also made a decision and went with anti-seize on the spark plugs. My method is to coat the threads with anti-seize and then use a clean shop towel to remove the excess, leaving a thin coat on the threads. Torqued to 18Nm per the 97+ manual and Kaz. These will come back out for the compression test, but I wanted them seated for now.
My cam cap "style" for lack of a better term. Hondabond around the plug seam but not globbed all over.
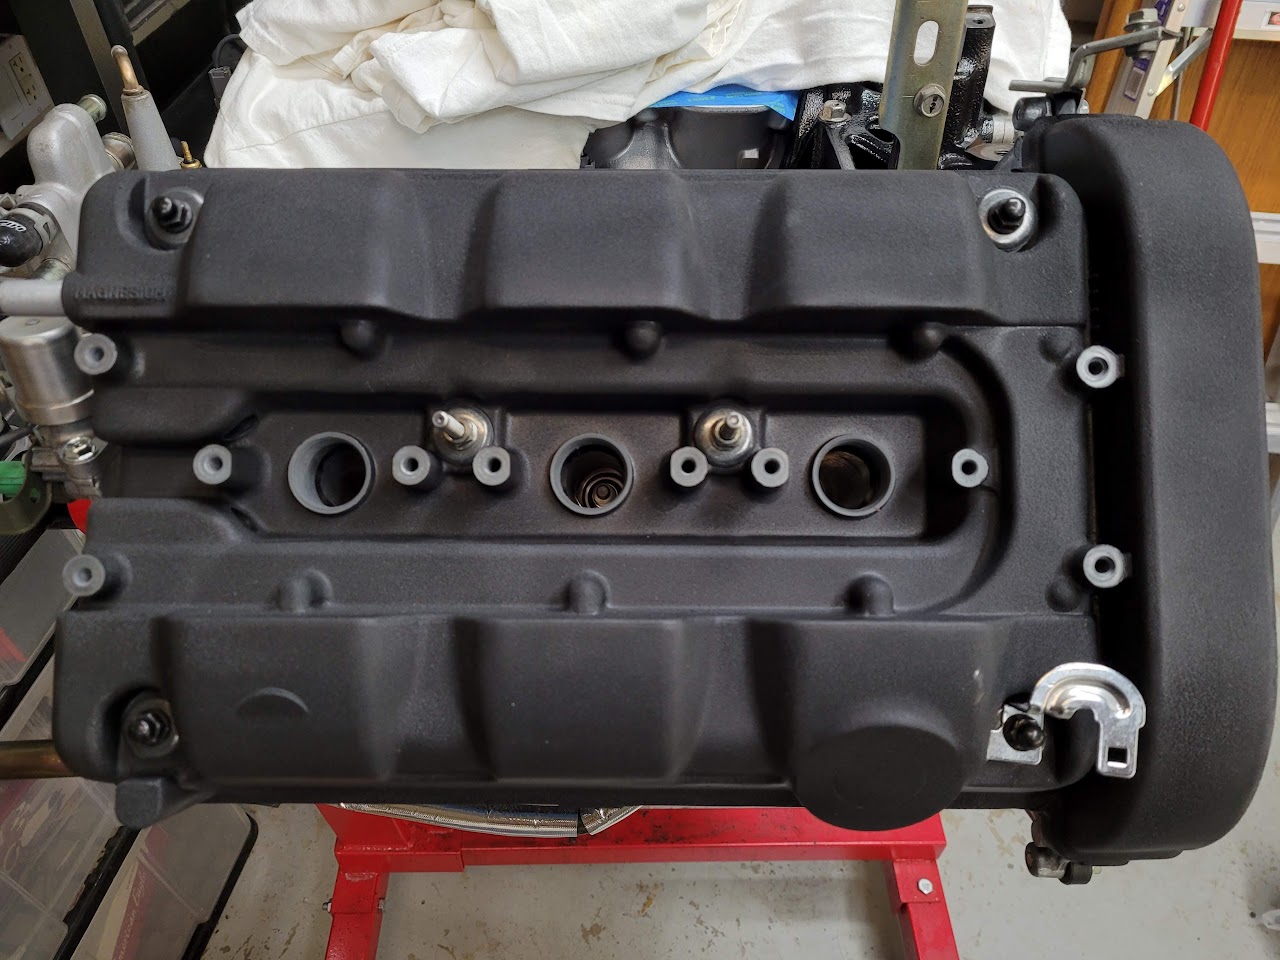
I never knew the valve covers had the word MAGNESIUM on it. Is that stock? I've never noticed it before.
Engine Refresh 80
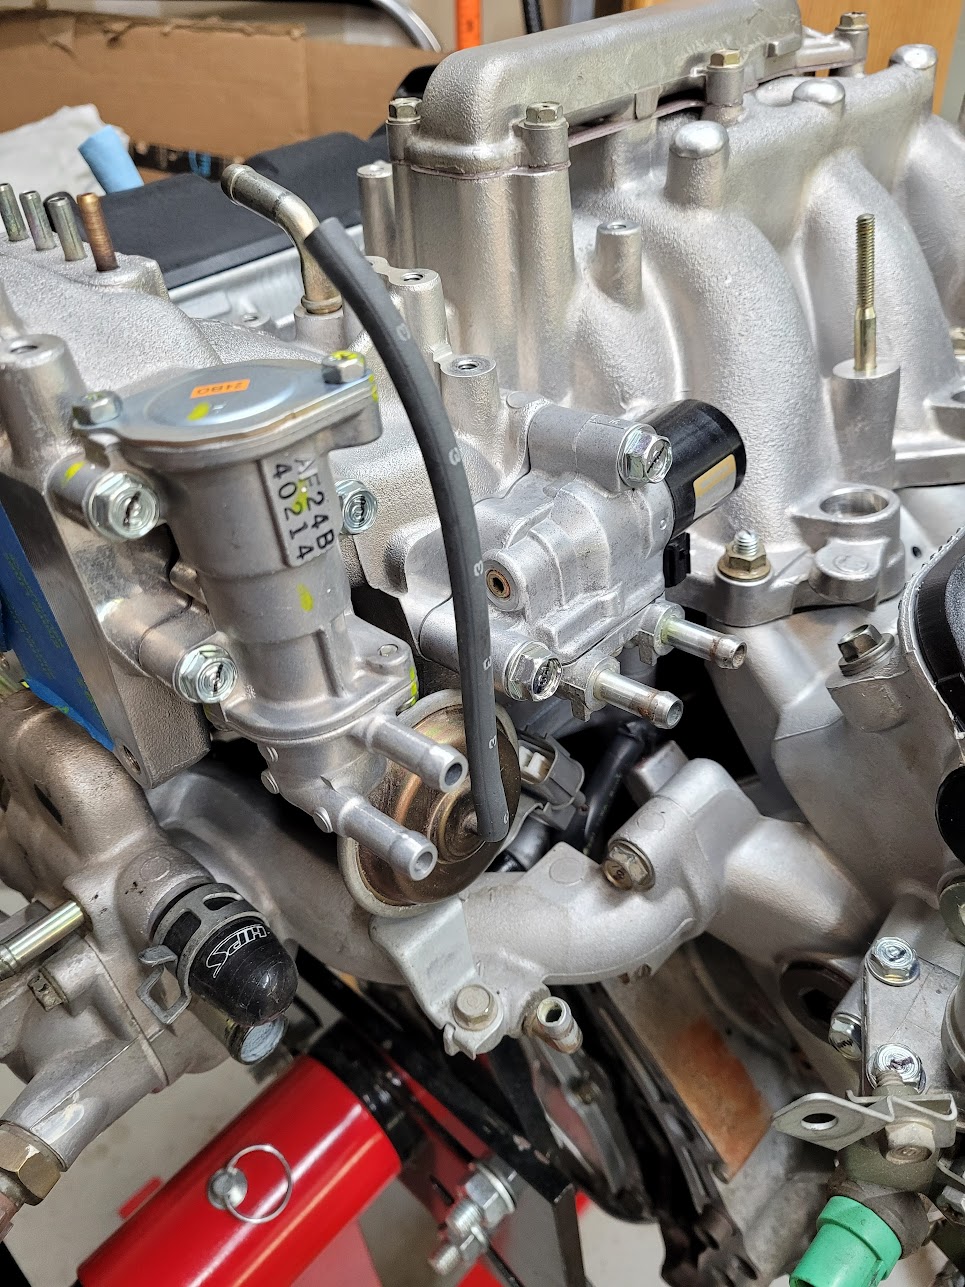
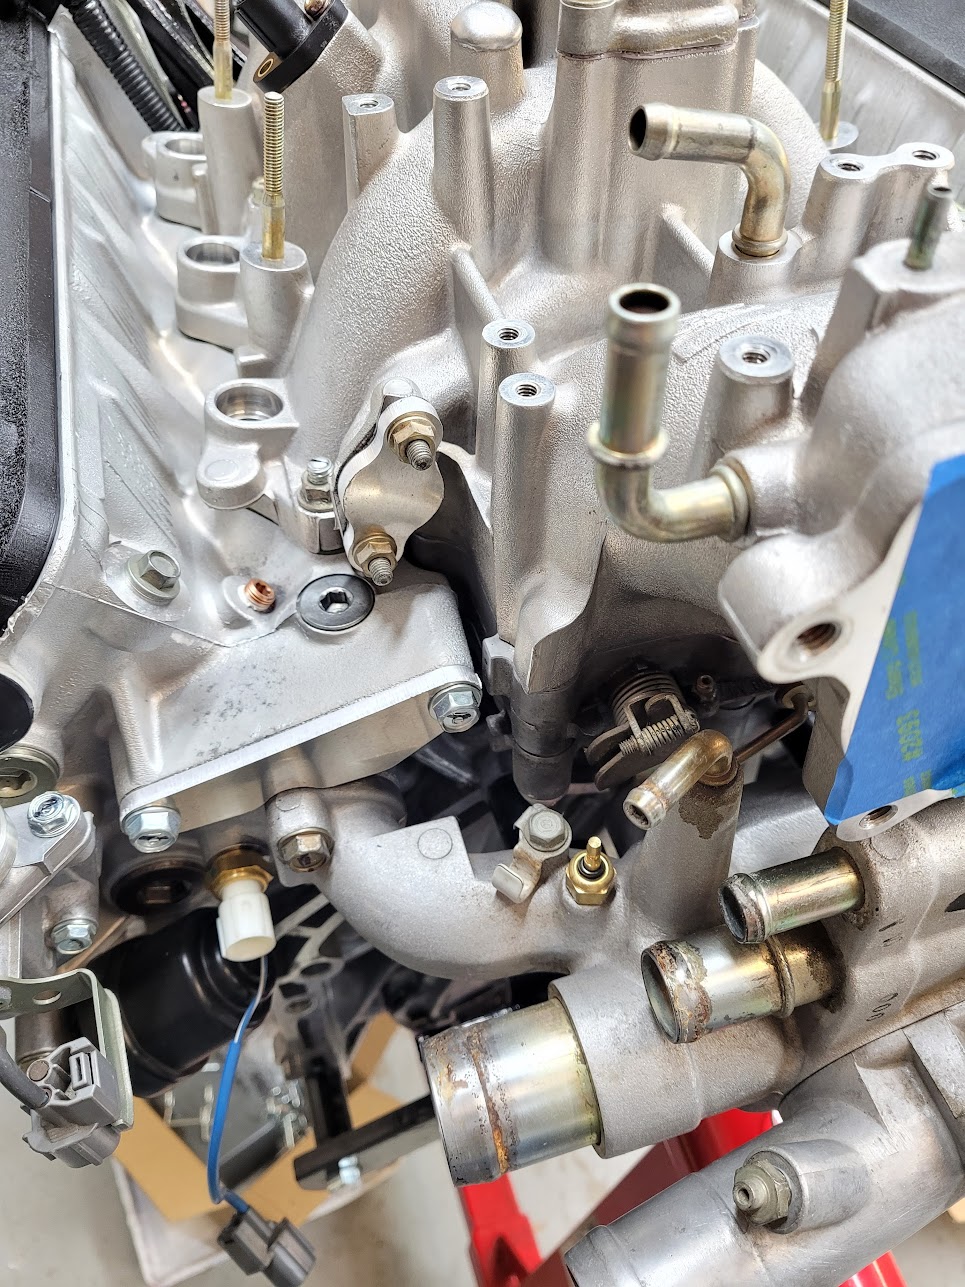
Intake Manifold
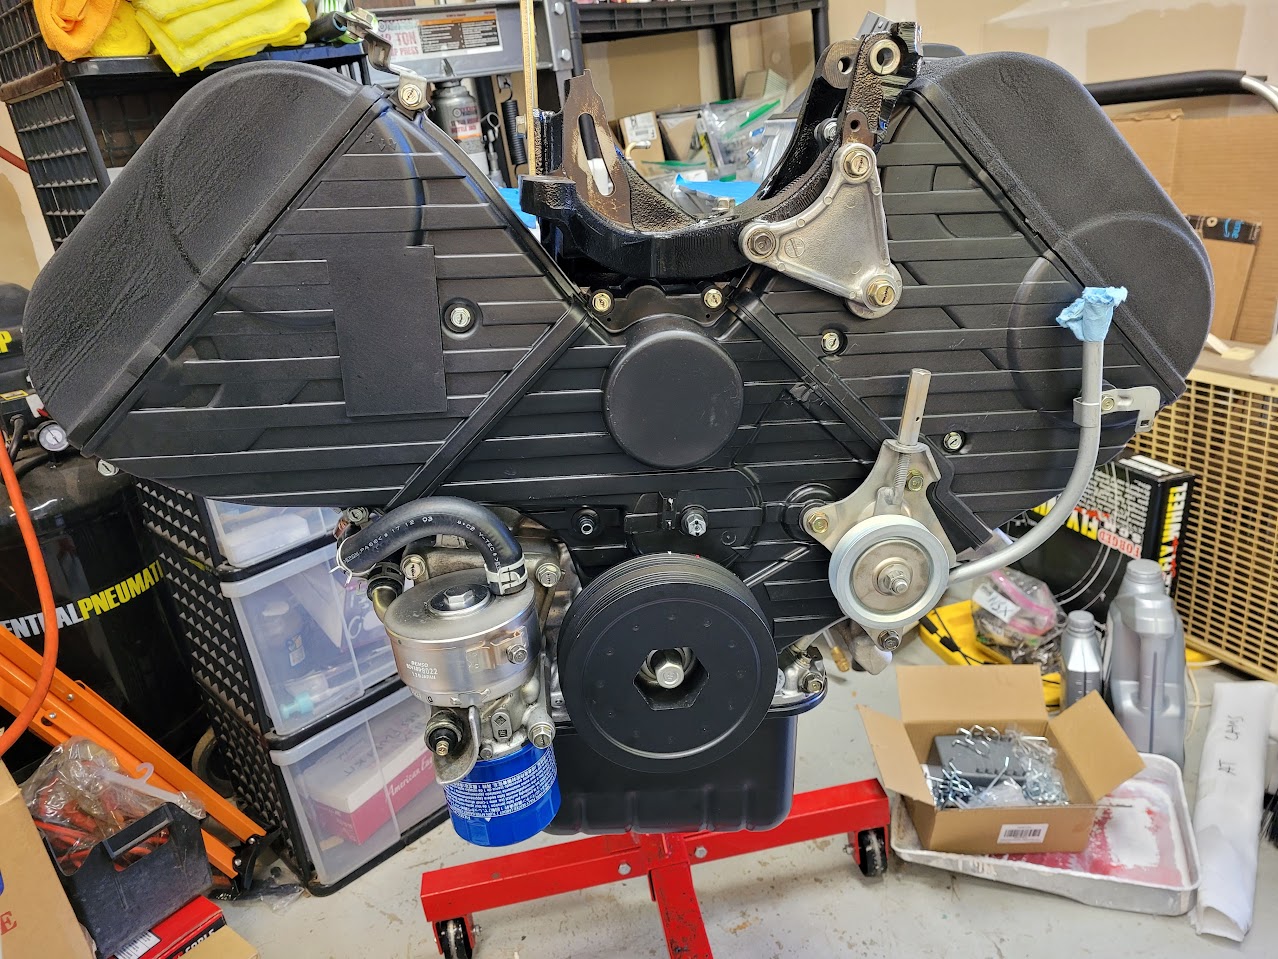
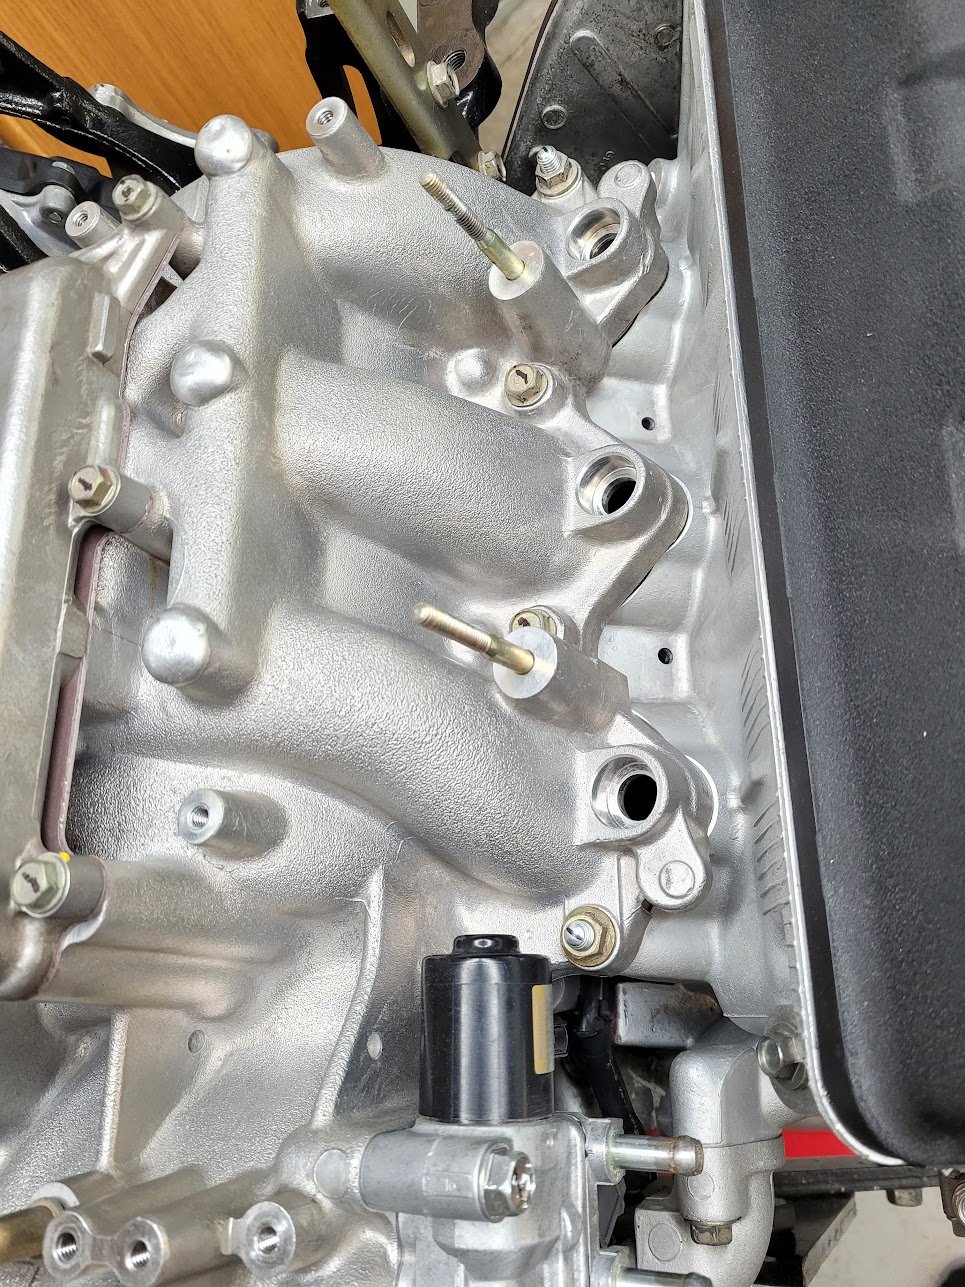
After a long slumber in a box, the refreshed intake manifold is back on the engine.
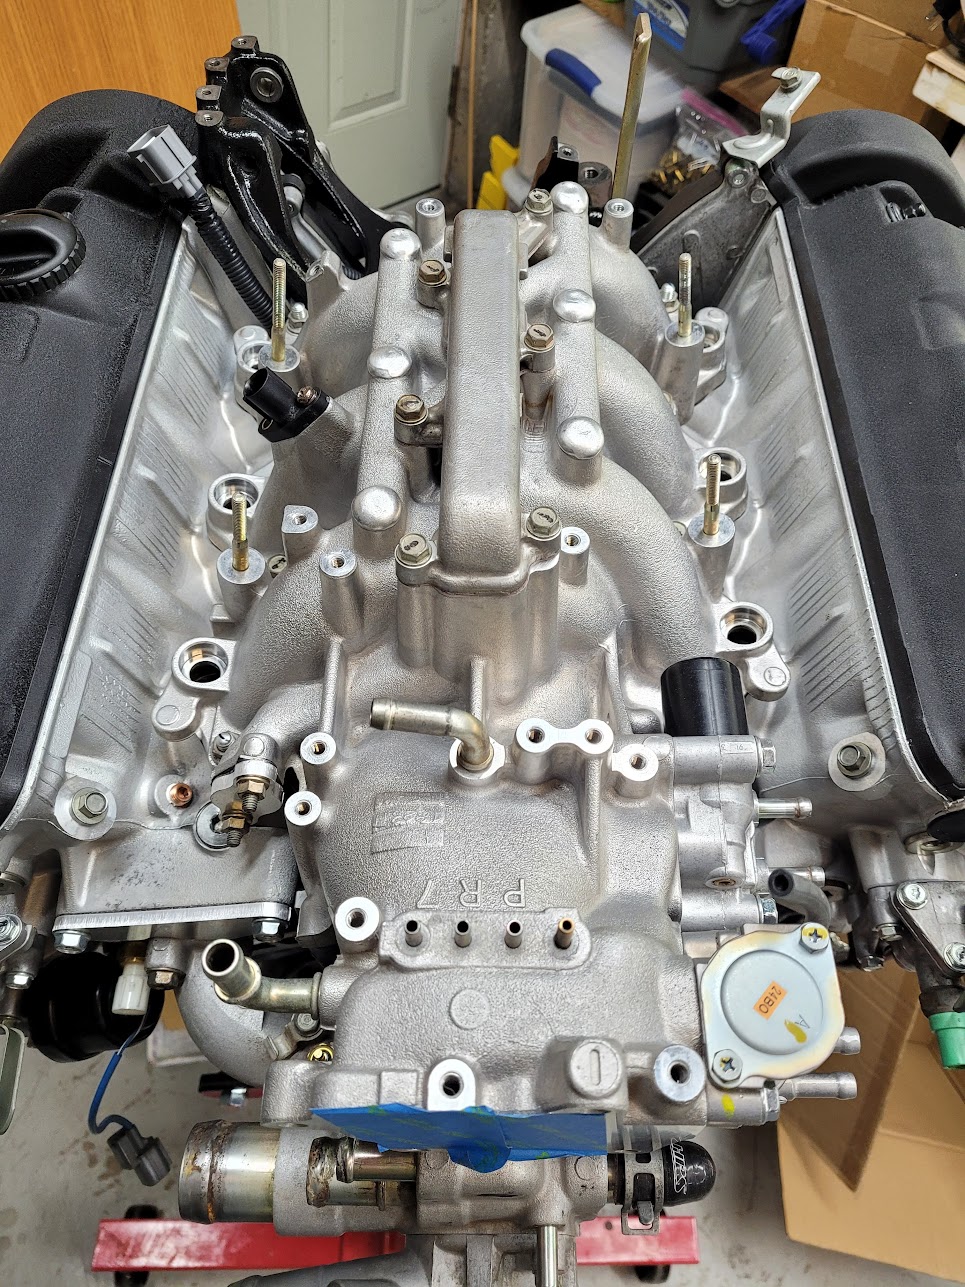
I used new studs, coated in anti-seize, since the old ones were badly oxidized.
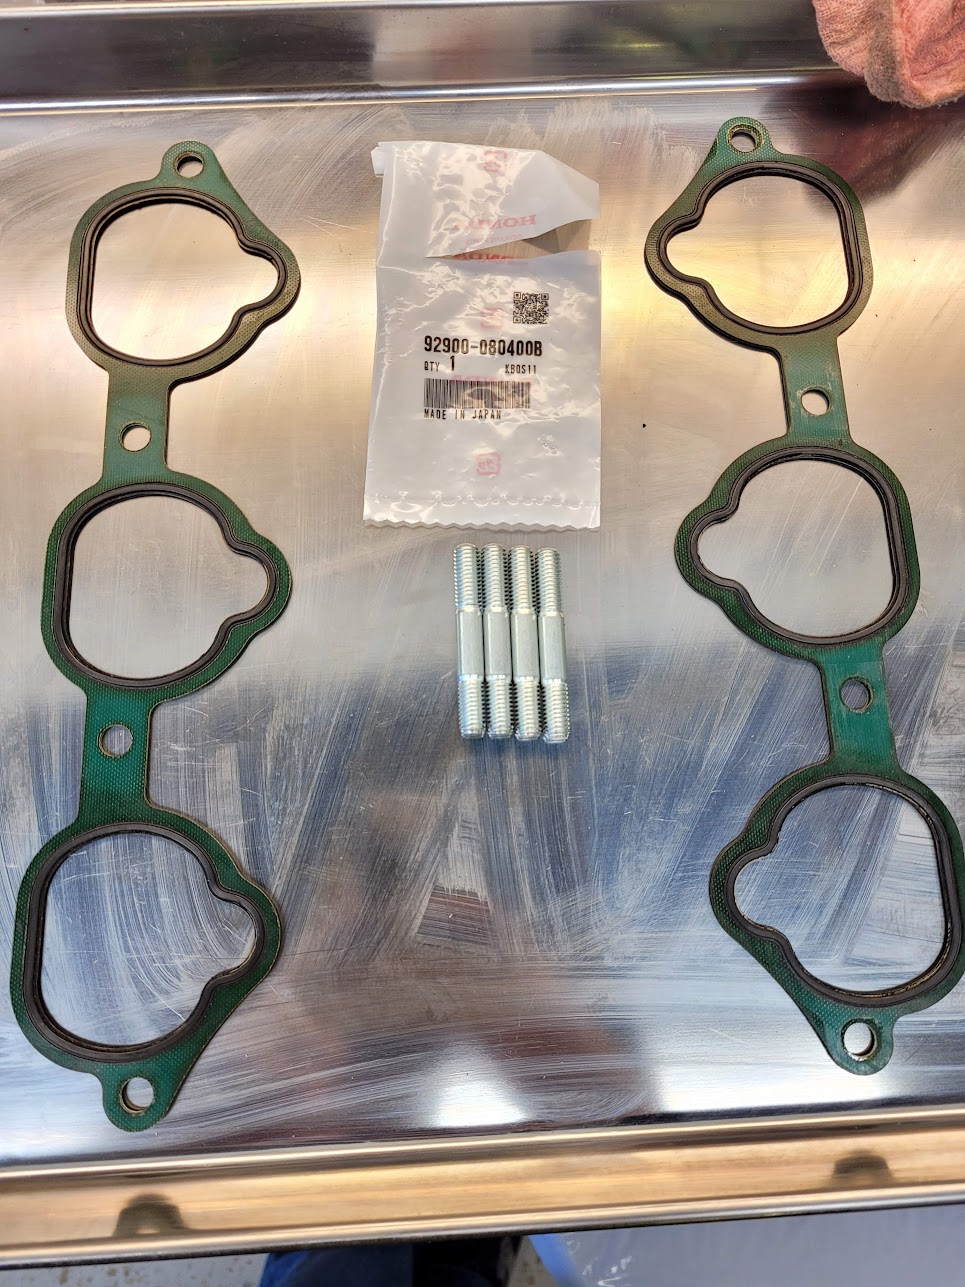

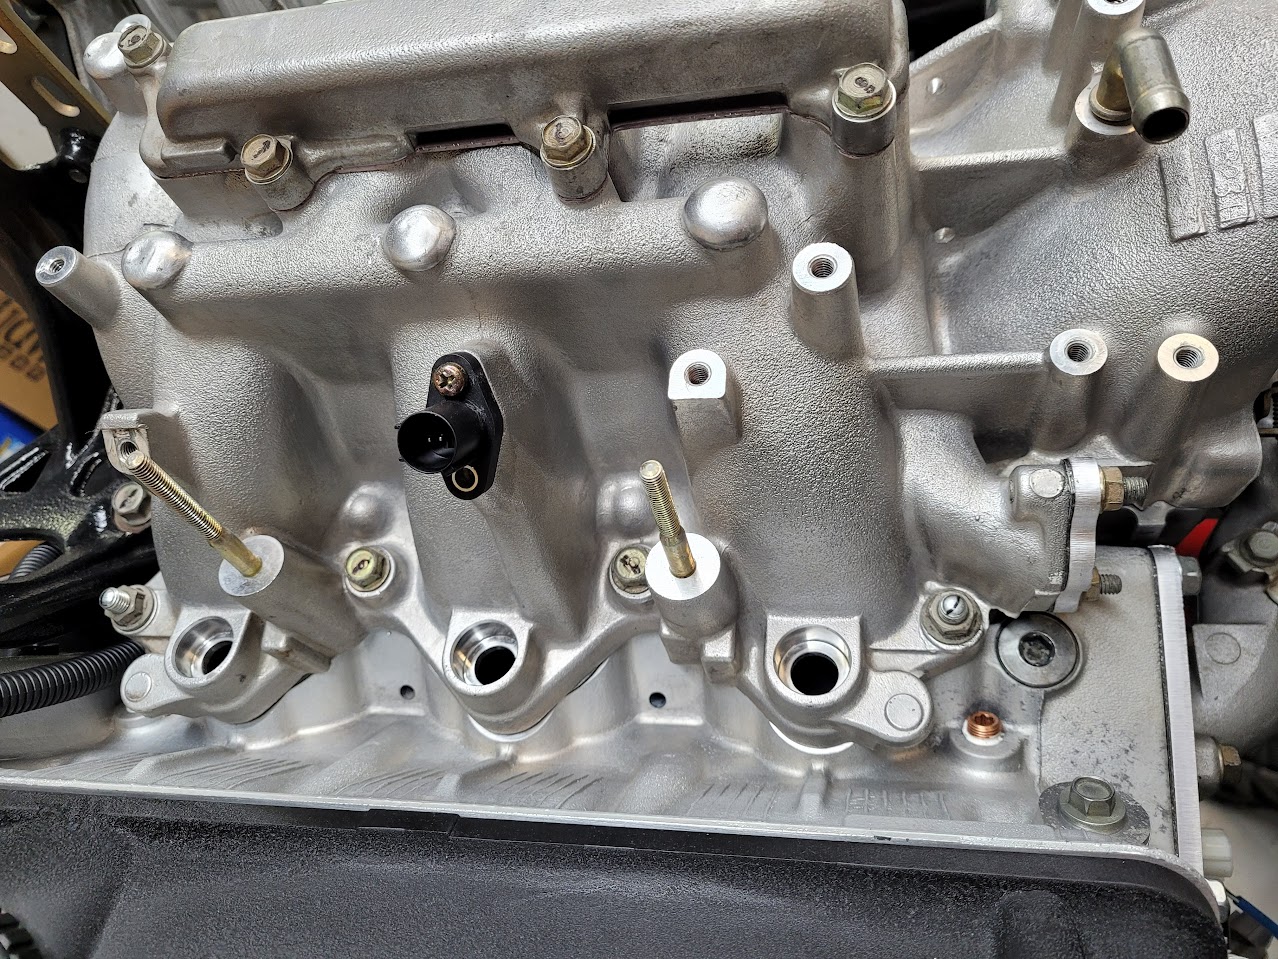
Gaskets in place.
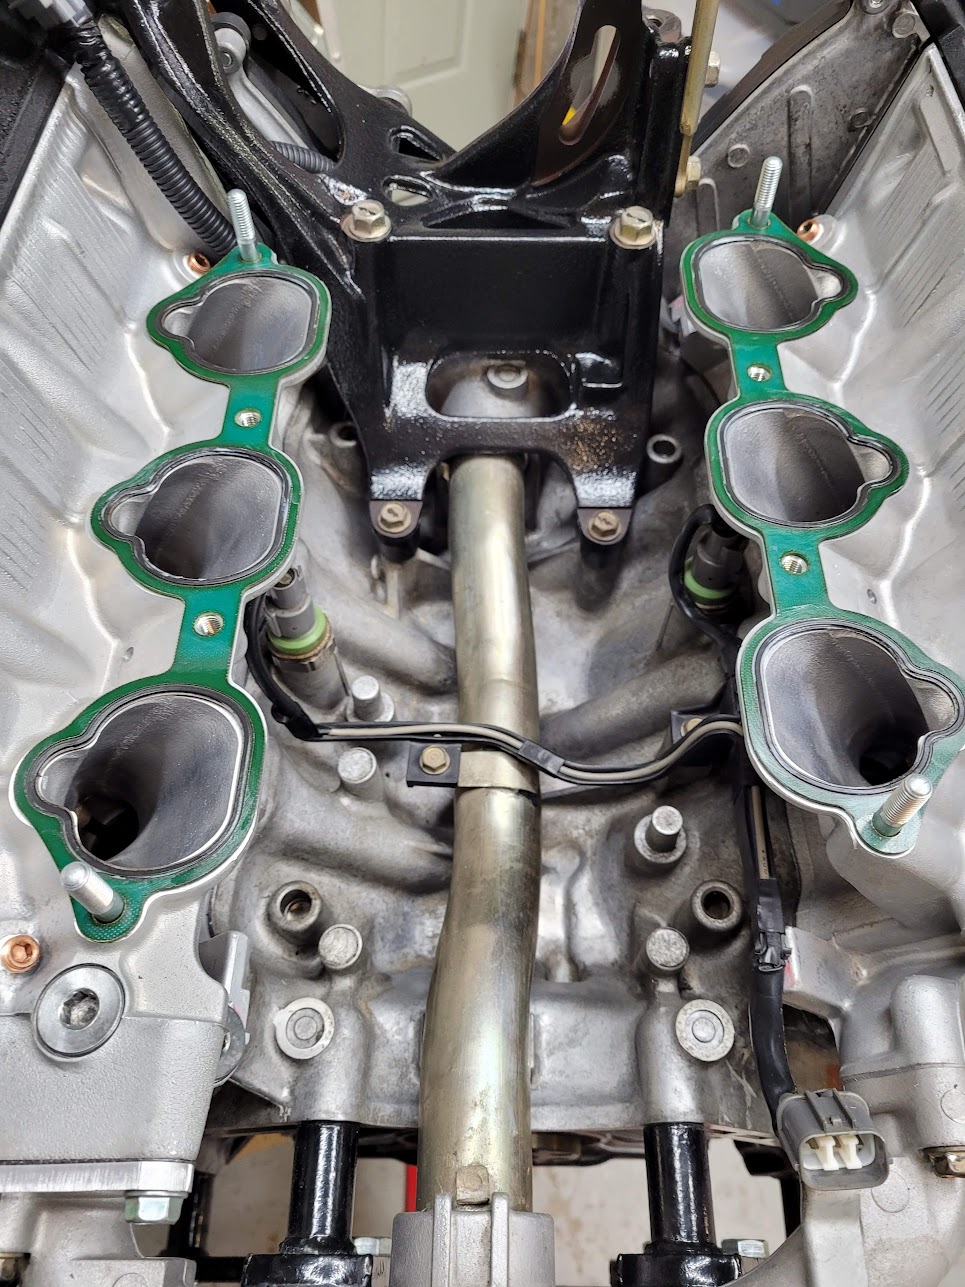
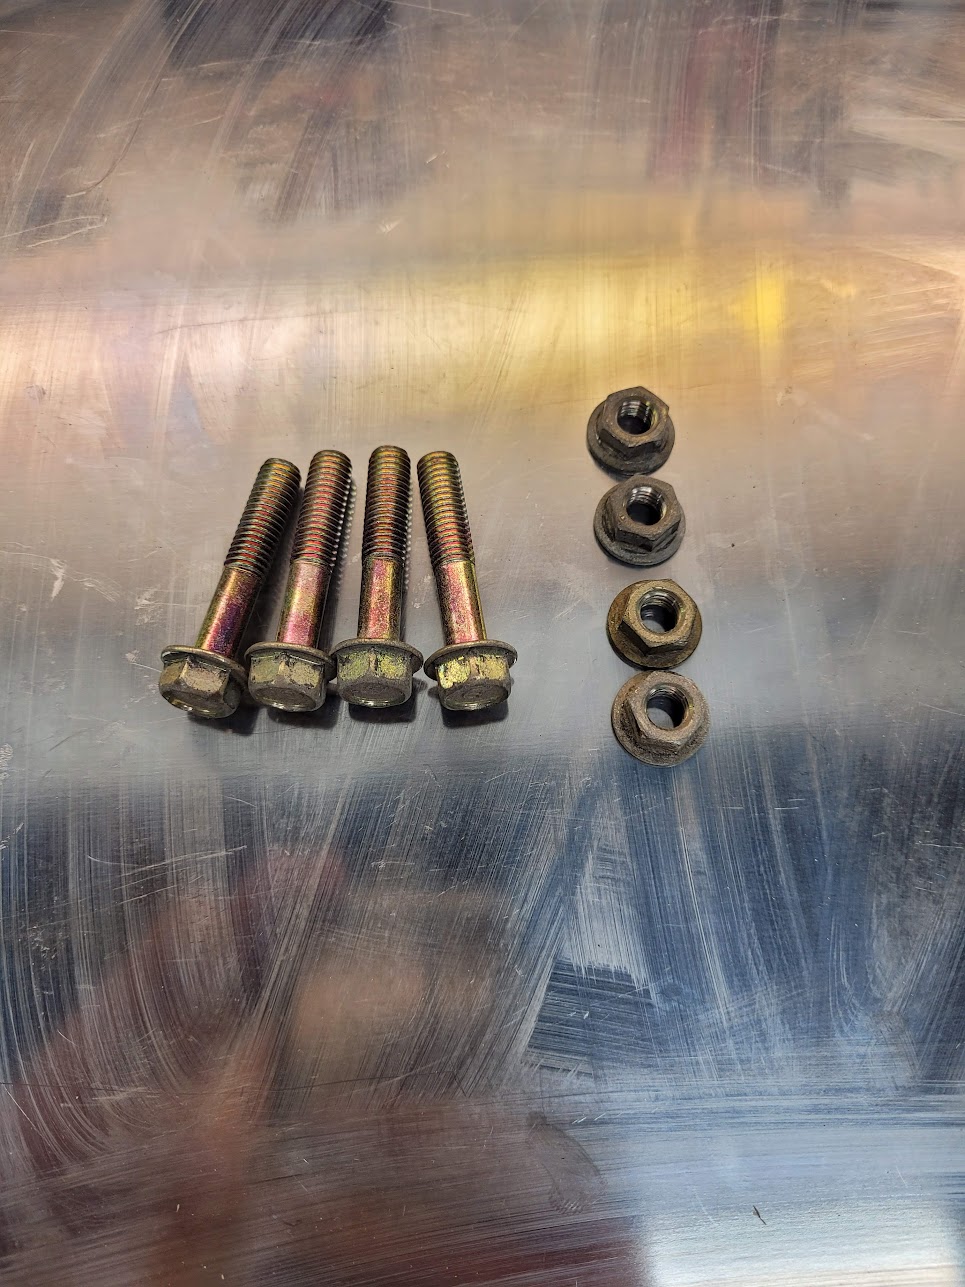
The manifold fixing bolts/nuts.
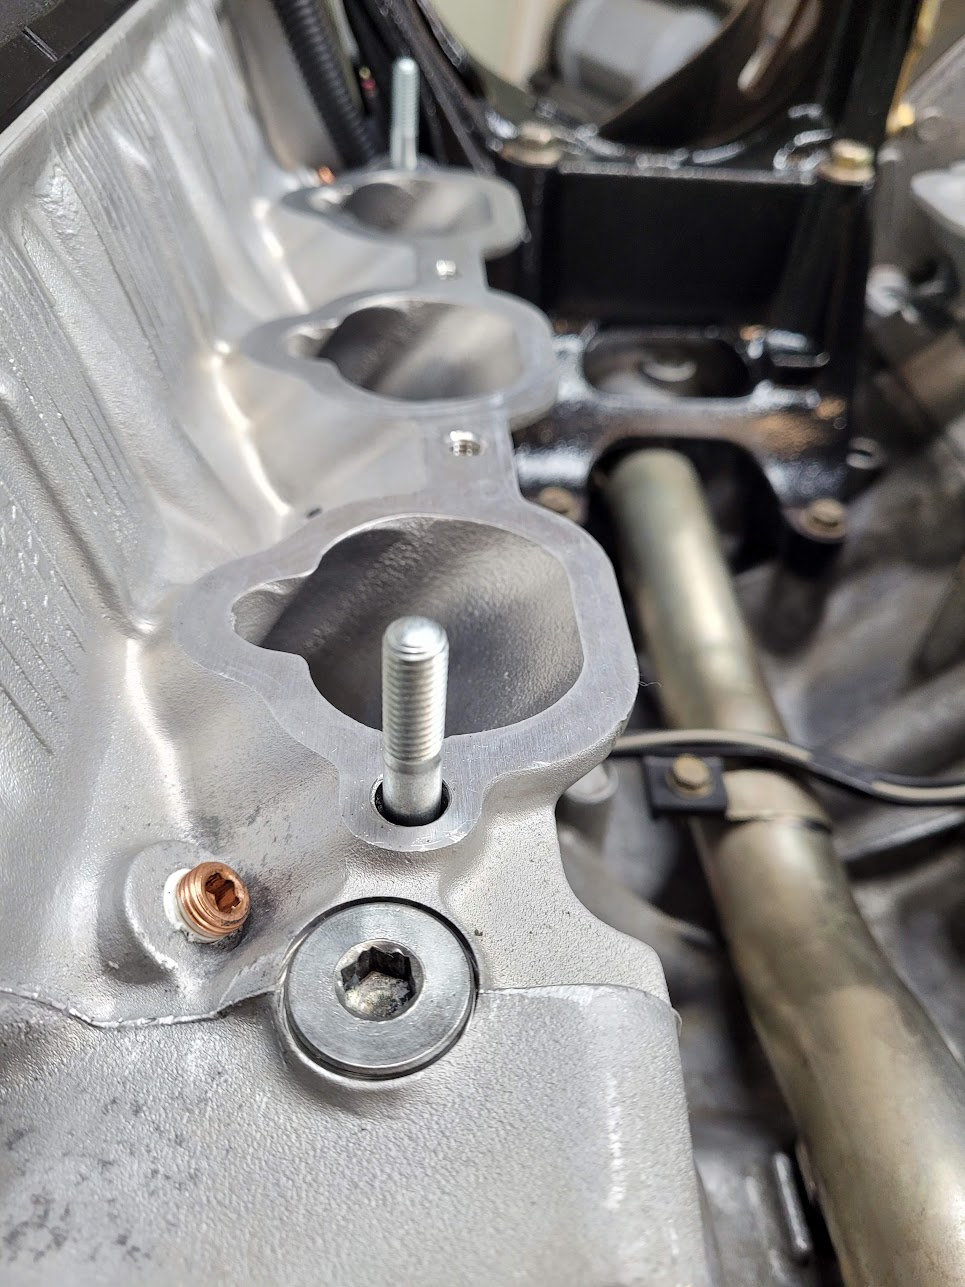
Mounted and torqued to the spec (22Nm).
Intake Manifold
After a long slumber in a box, the refreshed intake manifold is back on the engine.
I used new studs, coated in anti-seize, since the old ones were badly oxidized.
Gaskets in place.
The manifold fixing bolts/nuts.
Mounted and torqued to the spec (22Nm).
I never knew the valve covers had the word MAGNESIUM on it. Is that stock? I've never noticed it before.
Yep- it's cast into both covers. Just gotta sand off the paint.
Engine Refresh 81
Fuel Rails, Fuel Injectors
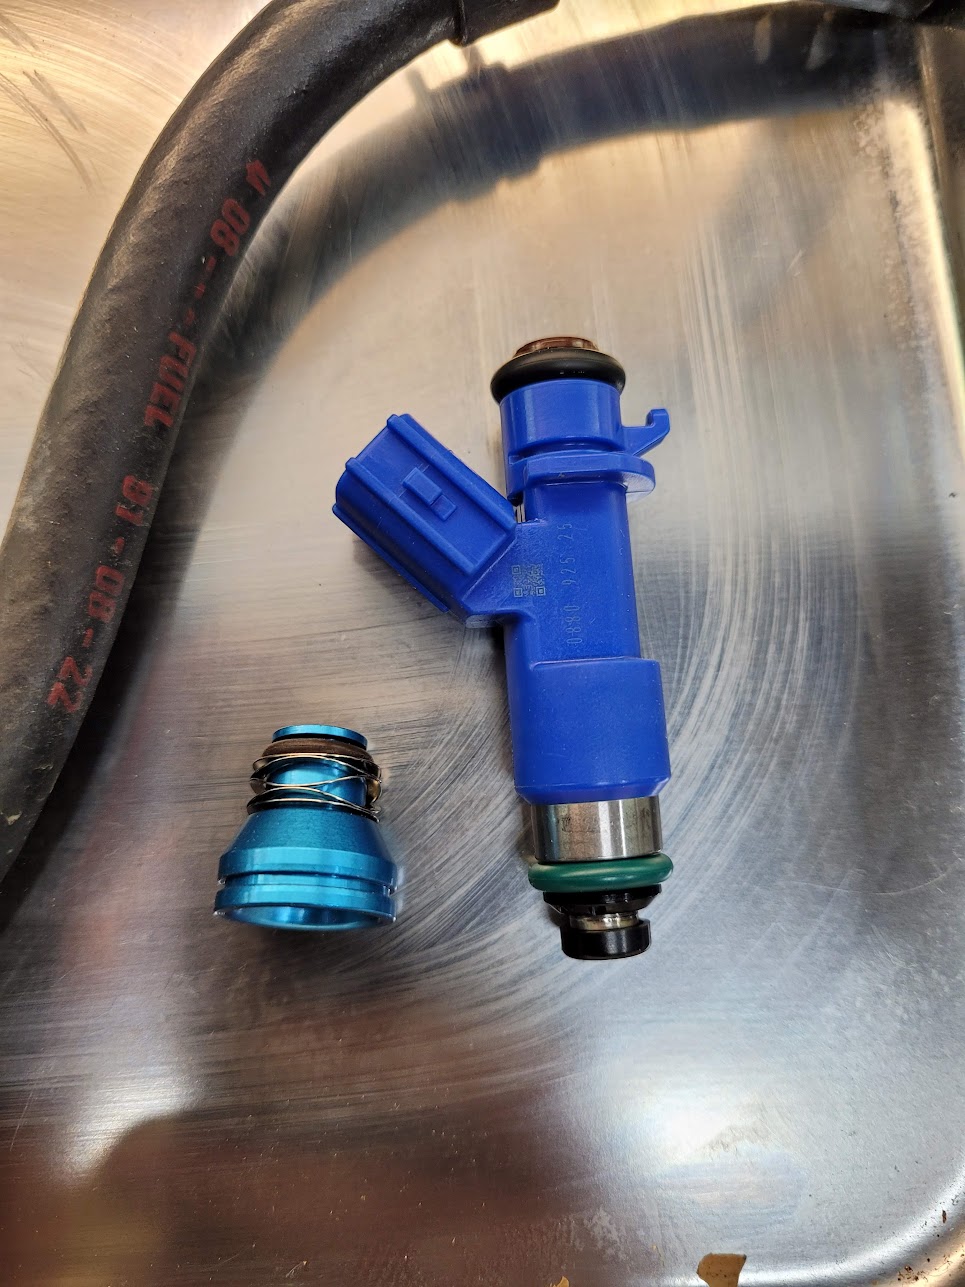
The relevant parts for the fuel rail and RDX injectors. I will replace the fuel pressure regulator too.
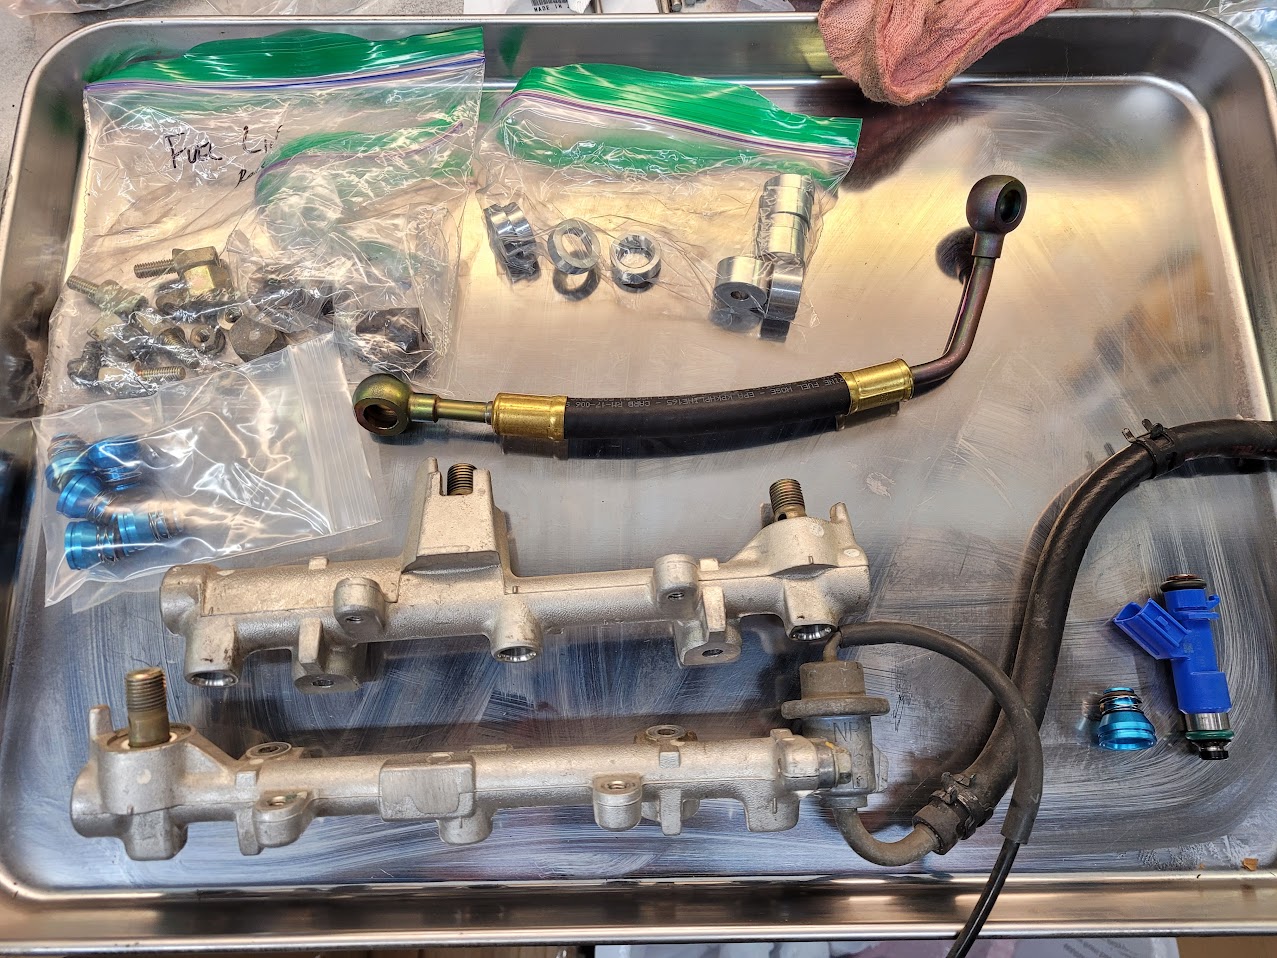
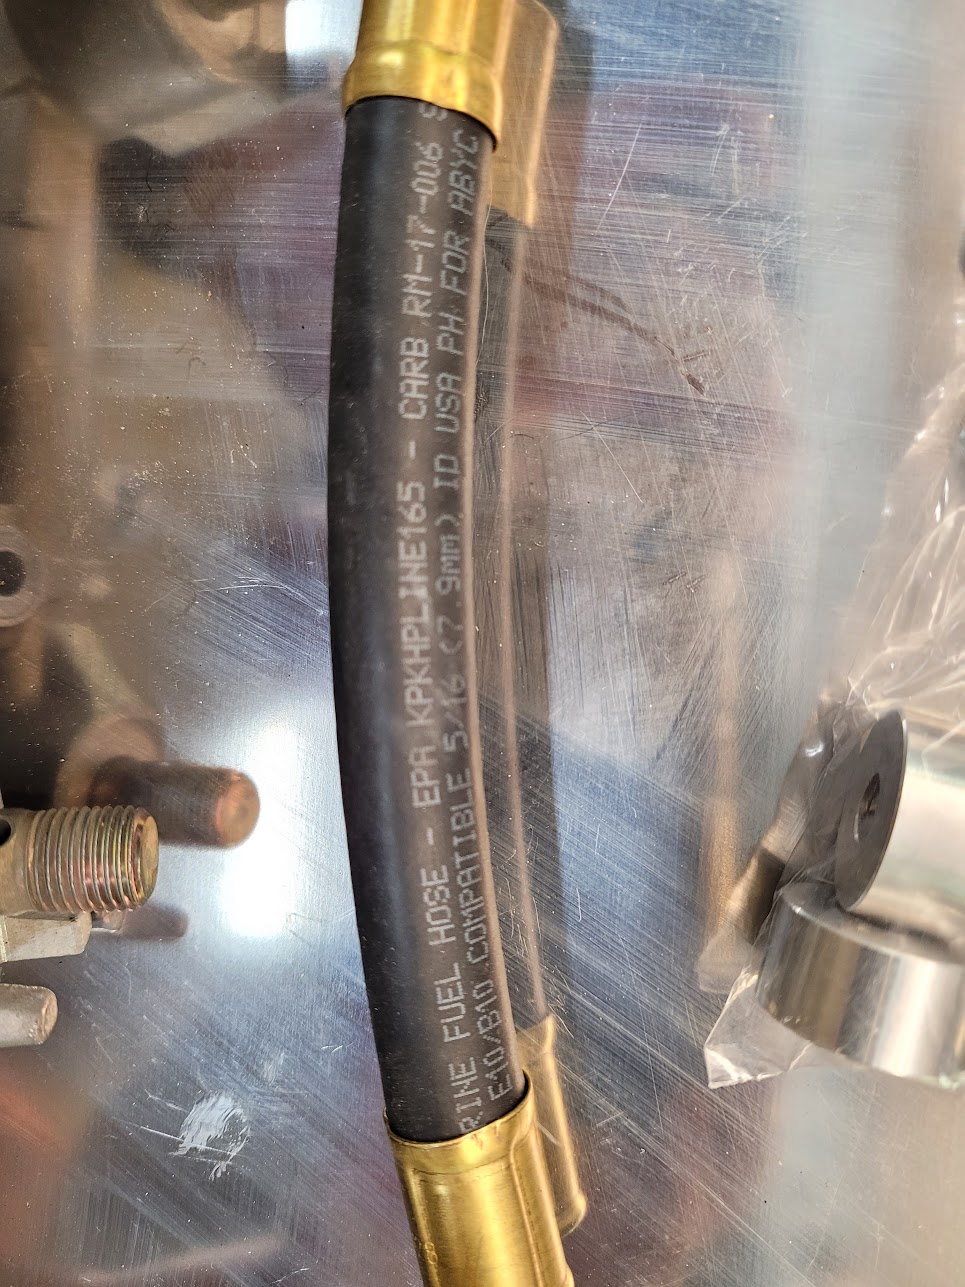
Special thanks to my father, who knows a shop in South Florida that services hydraulic and fuel lines. They were able to crimp new rubber hose onto my OEM fuel fittings. It's marine-grade E10 friendly hose that they use on cigarette racing boats, so I think I'm good for another 30 years.
RDX injector with the very nice top hat 14mm --> 11mm adapters from Xenocron Tuning. These adapters work with the stock tab on the injector, so you don't have to cut it off like other hats require.
Fuel Rails, Fuel Injectors
The relevant parts for the fuel rail and RDX injectors. I will replace the fuel pressure regulator too.
Special thanks to my father, who knows a shop in South Florida that services hydraulic and fuel lines. They were able to crimp new rubber hose onto my OEM fuel fittings. It's marine-grade E10 friendly hose that they use on cigarette racing boats, so I think I'm good for another 30 years.
RDX injector with the very nice top hat 14mm --> 11mm adapters from Xenocron Tuning. These adapters work with the stock tab on the injector, so you don't have to cut it off like other hats require.
That's very cool about the magnesium logo. Learn something new!
I might switch to the RDX injectors again some day. Very cool find on the top hat. IIRC my issue was the bottom o-ring seal. Did that fit correctly for you into the intake manifold?
I might switch to the RDX injectors again some day. Very cool find on the top hat. IIRC my issue was the bottom o-ring seal. Did that fit correctly for you into the intake manifold?
The RDX injectors seat perfectly into the AS motorsport ITB manifolds if you have the OLDMNSX adapter rings. (shown in the middle plastic bag in @Honcho photo)
In a stock intake manifold you have to drill the middle hole out to 14mm but the ITB manifolds come with a 14mm center hole already.
In a stock intake manifold you have to drill the middle hole out to 14mm but the ITB manifolds come with a 14mm center hole already.
Last edited:
Similar threads
- Replies
- 4
- Views
- 479
- Locked
- Replies
- 2
- Views
- 429