

With the thickest Honda rod bearings I'd still be well over 0.0040" oil clearance and there are no aftermarket or oversize bearings available. I've seen some people suggest resizing the crank and rods to fit bearings from another engine but I'm not willing to hack up my bottom end like that to fix the mistake of someone else, I'd rather just eat the $1500 it would take to get a set of used rods and have them set up the way I want them again. That's the price of a set of aftermarket steel rods, but then I'd have to pay another $500+ to have more heavy metal added to the crankshaft to account for increased weight in the rotating assembly and it would be complete overkill for my power goals.
-
Protip: Profile posts are public! Use Conversations to message other members privately. Everyone can see the content of a profile post.
You are using an out of date browser. It may not display this or other websites correctly.
You should upgrade or use an alternative browser.
You should upgrade or use an alternative browser.
MotorMouth93's 1994 Berlina Black NSX Thread
- Thread starter MotorMouth93
- Start date
Finally made some progress.
I got the original rods back from the shop, and as expected, they were out of round by 0.004". The machinist said I could run them and based on my research I probably could, but I don't want to do that so I just went ahead and used my replacement set.
I sized up the bearings and ended up with rod clearances of 0.0022±0.0001" which IMO is perfect, spec is 0.0016-0.0024" but I prefer to err on the side of too big rather than too small, as they say, too loose and only you know, too tight and everyone knows.
@Mac Attack let me borrow his tapered piston ring compressor and it made dropping the pistons in a breeze. After clocking the rings and oiling up the cylinders and pistons, gentle pressure with my thumbs was enough to slide the pistons into the bores.


Marked the rods before final +95 degree turn so I could tell which ones I'd already done.

Girdle and oil pump accessories installed. New oil pump, pan, and pickup since the old pickup was smashed.

Cedar Ridge baffle and 1/8 npt bung welded in for an oil sump temperature sensor. The welder "did me a solid" and hosed down the whole pan with black rattle can paint after he welded it, so I spent several hours with rags and a jug of mineral spirits cleaning all that shit off. Thanks man, real helpful when all that paint flakes off due to zero prep and crappy paint and clogs my oil filter.

Oil pan installed and heat reflective tape applied under the exhaust header.

Finally, I bolted up the heads.

After torquing them down to 80lbft in steps of 20lbft I decided to hook up my leakdown gauges as a sanity check before finishing assembly, and I'm glad I did. The front head had nice numbers even though the rings haven't seated yet, with 100psi input pressure, I was seeing a drop of 6-8psi which is great and really shows the important of honing with torque plates. With the heads off, the cylinders are out of round by as much as 0.0010", but once torqued down, they are all within 0.0001" of perfect.
On the rear head I found that the cylinders 2 and 3 were just like the front but cylinder #1 was losing a substantial amount of air out the intake valves, so back to the shop that head goes. Cometic MLS gaskets can be torqued down multiple times if the engine isn't started up, so fortunately I don't have to replace the gasket. I was planning on starting it up this weekend but that likely won't happen, I hope he can fix it quickly since I just bought a house and have to move out of my rental place by the end of March.
I got the original rods back from the shop, and as expected, they were out of round by 0.004". The machinist said I could run them and based on my research I probably could, but I don't want to do that so I just went ahead and used my replacement set.
I sized up the bearings and ended up with rod clearances of 0.0022±0.0001" which IMO is perfect, spec is 0.0016-0.0024" but I prefer to err on the side of too big rather than too small, as they say, too loose and only you know, too tight and everyone knows.
@Mac Attack let me borrow his tapered piston ring compressor and it made dropping the pistons in a breeze. After clocking the rings and oiling up the cylinders and pistons, gentle pressure with my thumbs was enough to slide the pistons into the bores.
Marked the rods before final +95 degree turn so I could tell which ones I'd already done.
Girdle and oil pump accessories installed. New oil pump, pan, and pickup since the old pickup was smashed.
Cedar Ridge baffle and 1/8 npt bung welded in for an oil sump temperature sensor. The welder "did me a solid" and hosed down the whole pan with black rattle can paint after he welded it, so I spent several hours with rags and a jug of mineral spirits cleaning all that shit off. Thanks man, real helpful when all that paint flakes off due to zero prep and crappy paint and clogs my oil filter.
Oil pan installed and heat reflective tape applied under the exhaust header.
Finally, I bolted up the heads.
After torquing them down to 80lbft in steps of 20lbft I decided to hook up my leakdown gauges as a sanity check before finishing assembly, and I'm glad I did. The front head had nice numbers even though the rings haven't seated yet, with 100psi input pressure, I was seeing a drop of 6-8psi which is great and really shows the important of honing with torque plates. With the heads off, the cylinders are out of round by as much as 0.0010", but once torqued down, they are all within 0.0001" of perfect.
On the rear head I found that the cylinders 2 and 3 were just like the front but cylinder #1 was losing a substantial amount of air out the intake valves, so back to the shop that head goes. Cometic MLS gaskets can be torqued down multiple times if the engine isn't started up, so fortunately I don't have to replace the gasket. I was planning on starting it up this weekend but that likely won't happen, I hope he can fix it quickly since I just bought a house and have to move out of my rental place by the end of March.
Last edited:
The machinist took a look at the head today and the valve issue turned out to be a bit of something stuck on the valve seat, it rubbed off easily and seals perfectly now.
The machinist took a look at the head today and the valve issue turned out to be a bit of something stuck on the valve seat, it rubbed off easily and seals perfectly now.
Great news, have been following this thread from the start. Best of luck on bringing her home to conclusion. Pulling for you.
That's really good news!
Both heads are back on the block and leakdown numbers are acceptable for a motor with unseated rings, going to do one final retorque of the head bolts this evening, do a final check by pressurizing the coolant passages in the motor to check for leaks, then full reassembly.
I spent pretty much all weekend working on the car only taking breaks to eat and sleep but I got quite a bit done. I'm hoping to be able to start it up by this weekend, I don't have that much left to do at this point so probably just a few more evenings worth of effort.

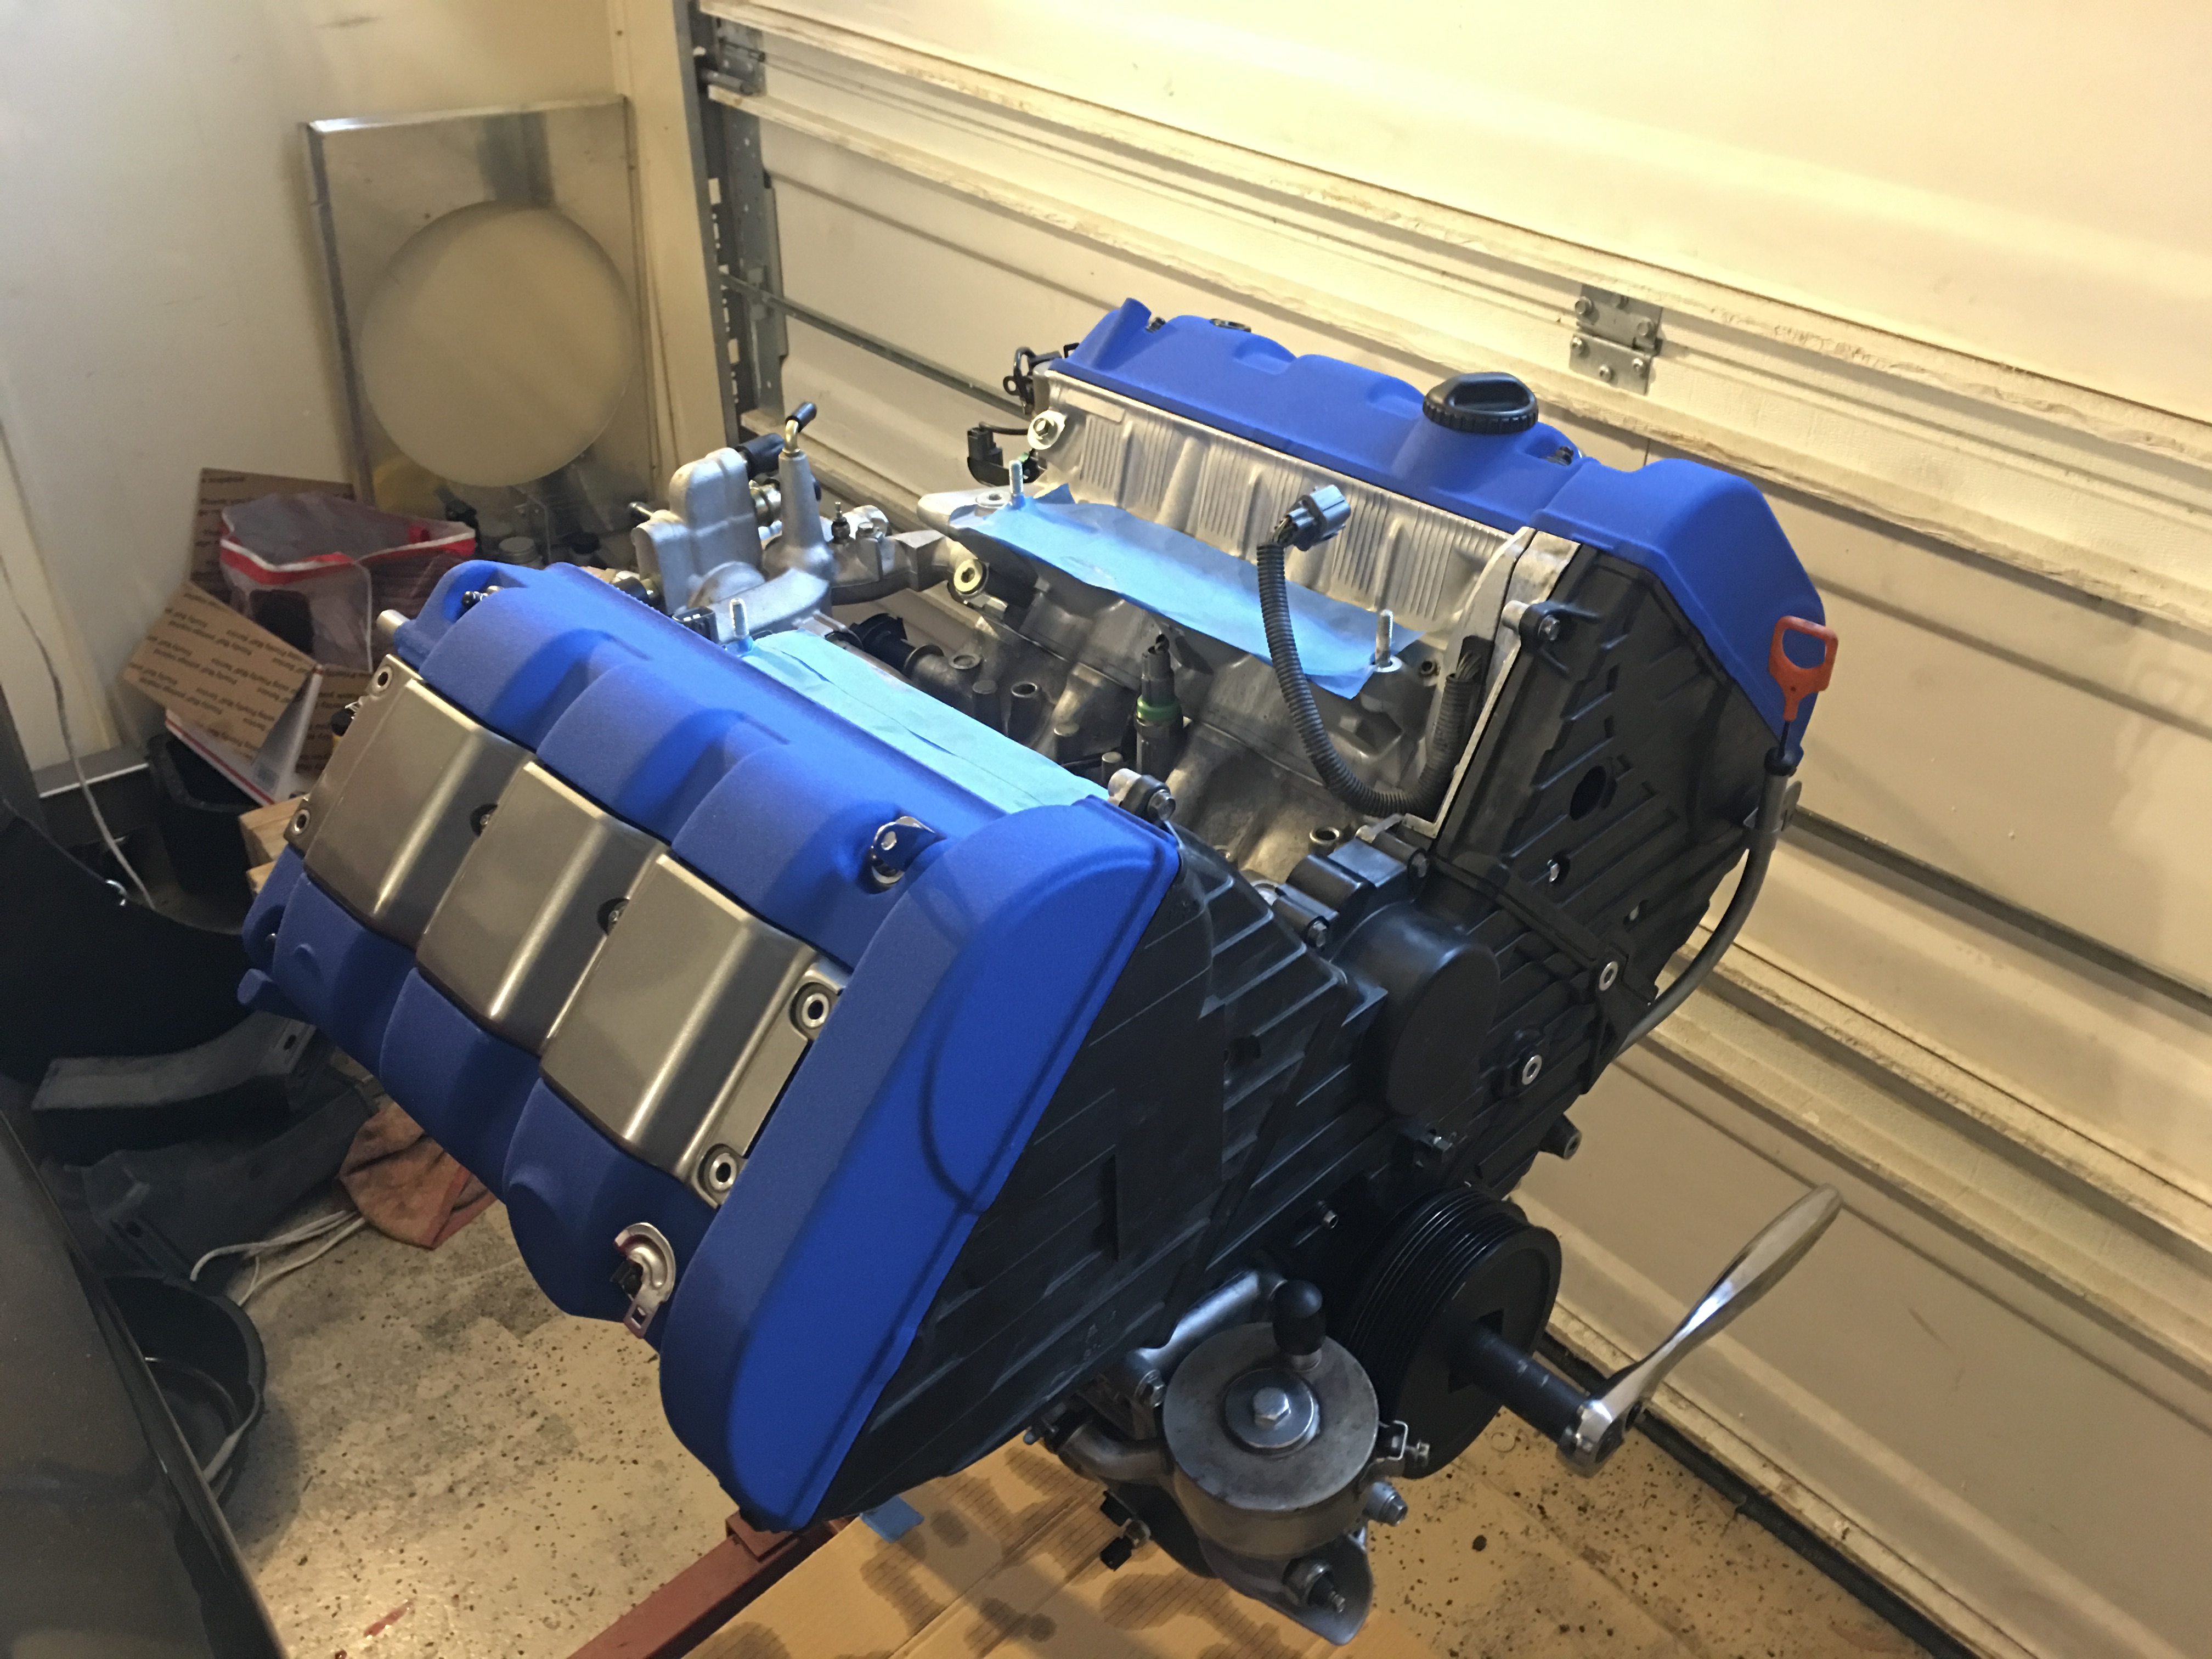
Without he heads back on, I moved the engine back into the garage to finish assembly, with everything bolted up it becomes prohibitively heavy to move around easily. Pressurizing the coolant passages to 20psi as a sanity check, I bought some coolant pipe caps and some random coolant hose from a parts store to block all the coolant ports. The pressure tester lost less than a single PSI over the course of a few hours so I think I'm good, I've never had one of these parts store rental testers not leak a tiny bit even on perfectly sealed engines.

Couldn't resist just setting the header and valve cover on, I like the color combo and the coating shop did an absolutely fantastic job. Too bad it can't be seen in the car.

Rocker shafts and arms going back in. I rubber-banded the rocker arm assemblies together so reassembly was a breeze.

Cams and caps installed. The factory plastic cam caps kinda suck so I bought SoS billet caps, but after reading their installation instructions that involved oiling up the O-rings I didn't want to do that either since oil and uncured Hondabond don't get along well, so I sold them and forked over the cash for set of RF Yamamoto billet cam plugs from Marc.

Cam gears bolted on.

Setting up the engine timing.


Last item before the covers go on, valve adjustment. So much easier with the engine out, it absolutely sucks to do valve adjustments in the car.

The block is off the stand for the first time in months.
JUN lightweight flywheel bolted up. I used the old input shaft as a clutch alignment tool instead of my plastic one and it worked very well, no issues at all getting the transmission back on.


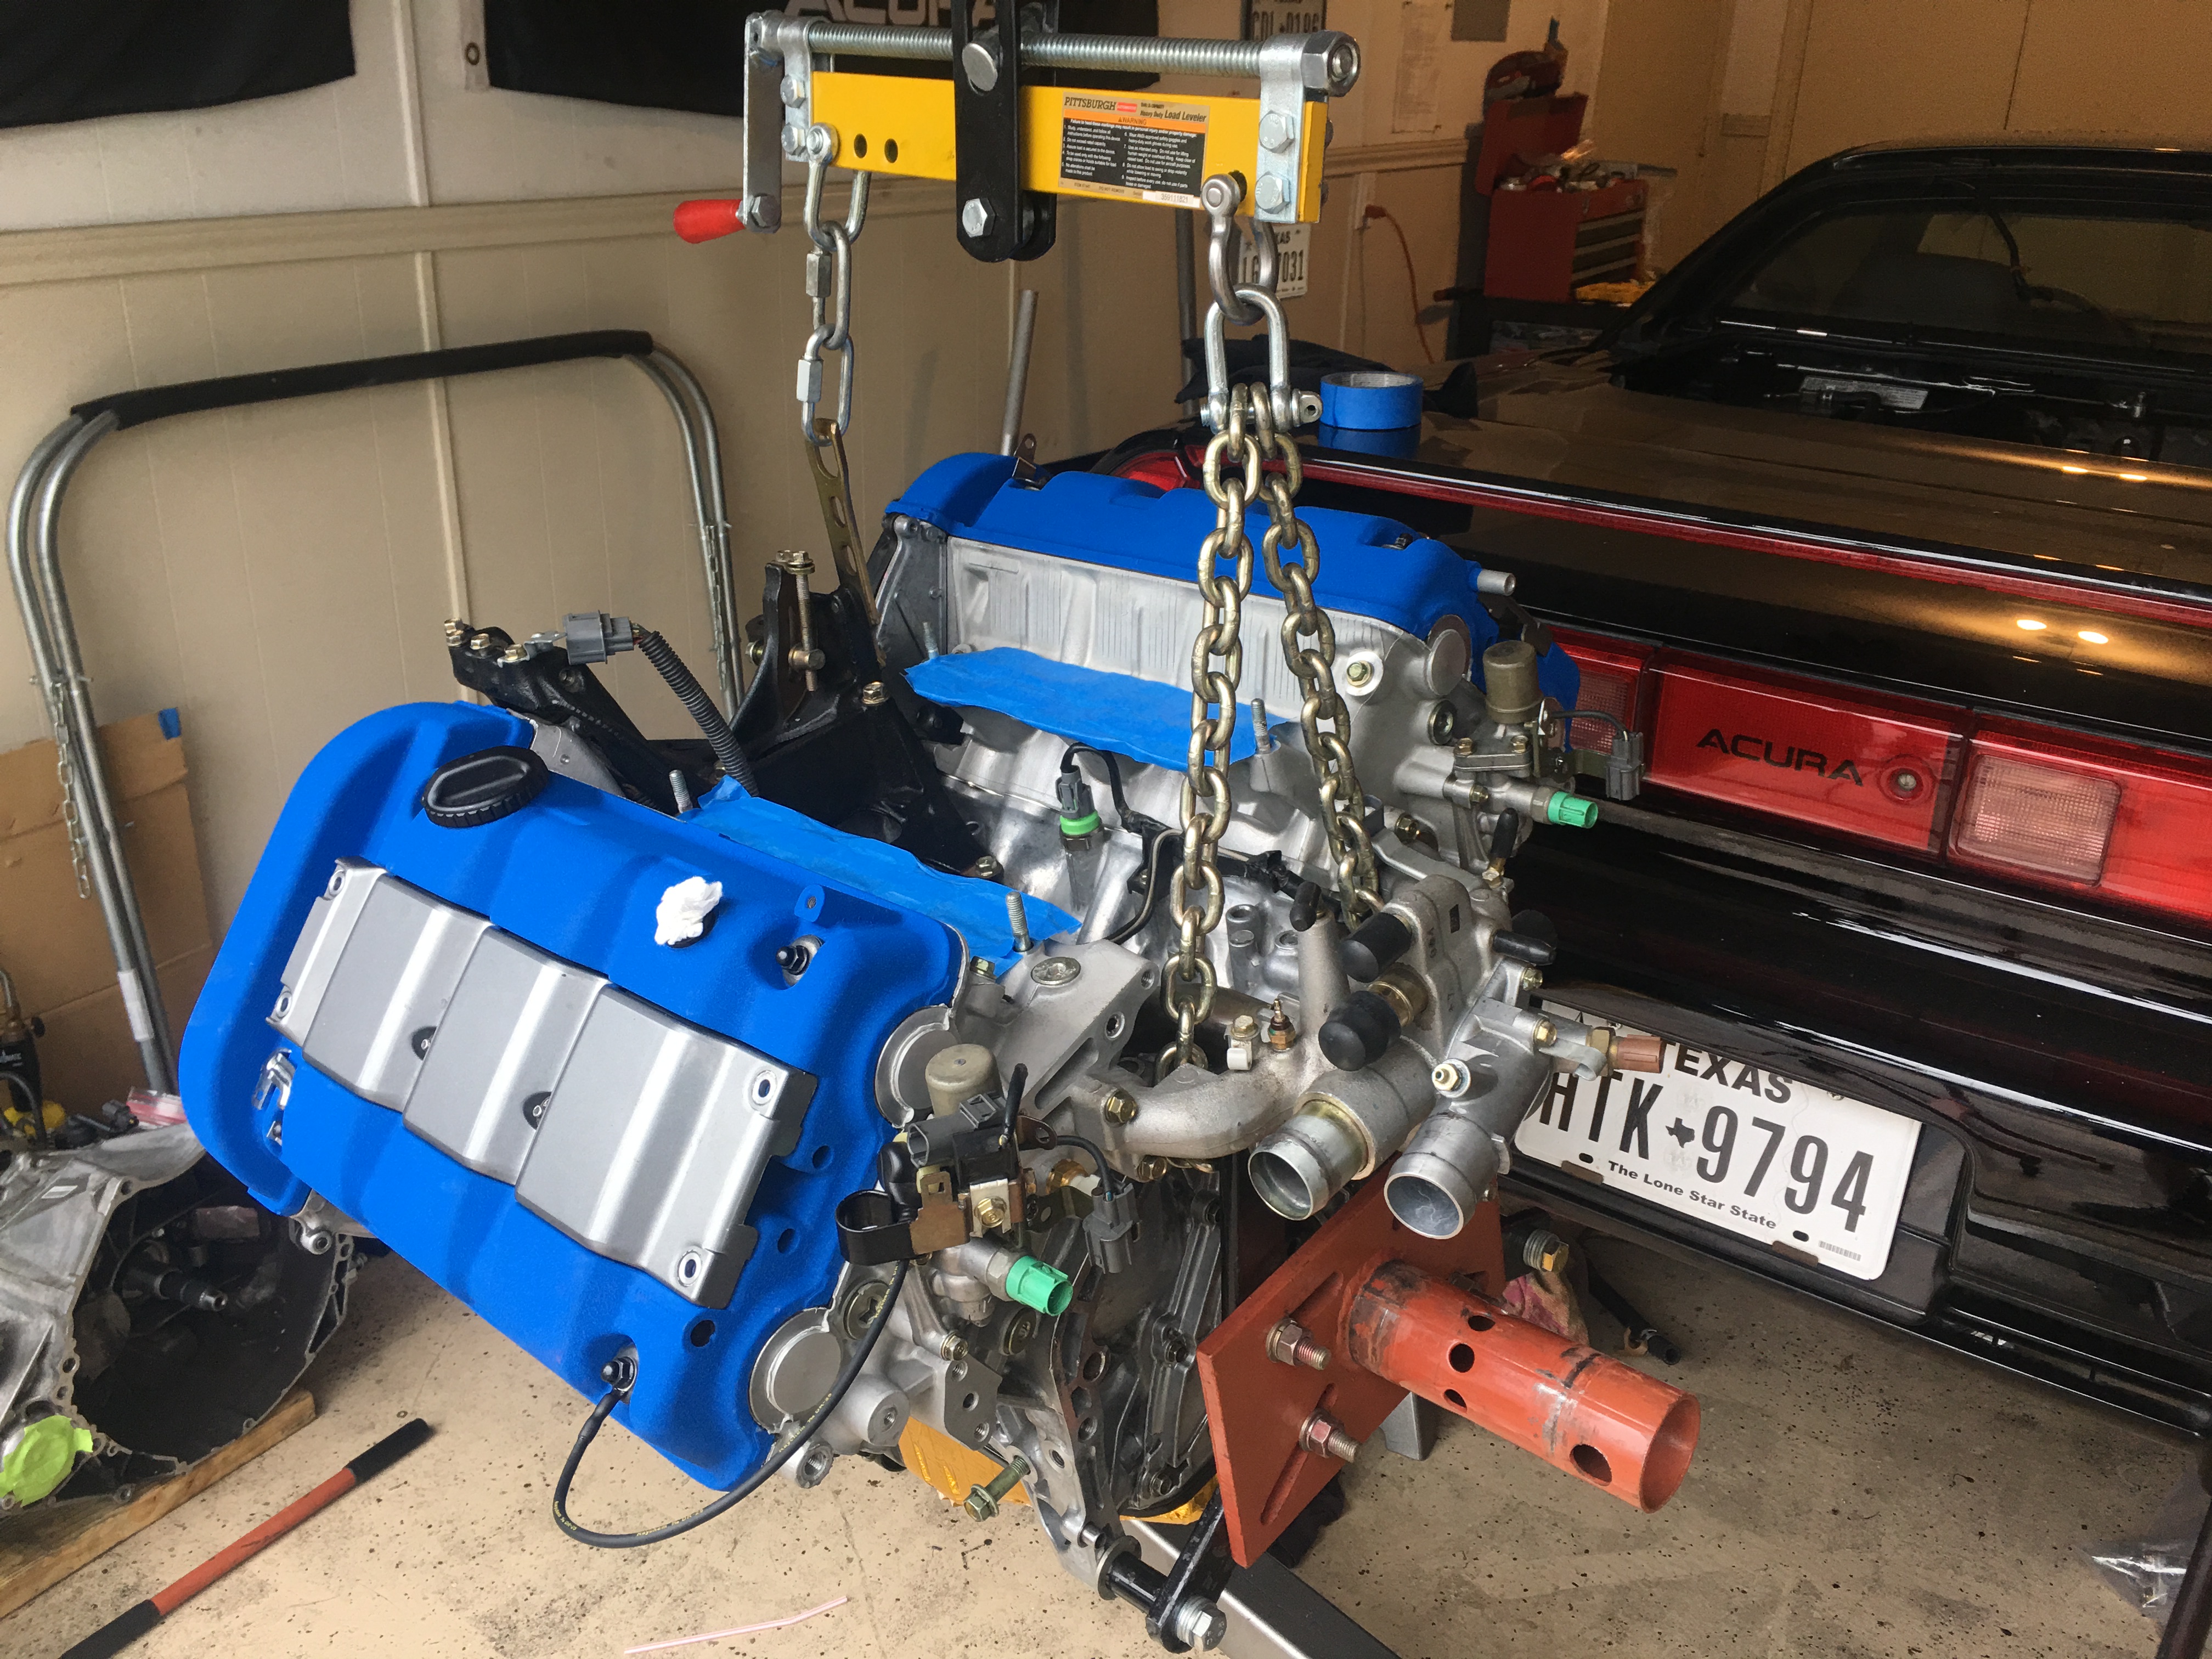
Drivetrain almost ready to go back in. The 2nd picture is dark but it has the engine harness installed. Took my friend and I a good half hour to figure out where everything went since I didn't label any connectors. The front/rear mounts are brand new NSX-R/Zanardi mounts, but I kept the side mounts since they were out of stock at the time I ordered and fairly easy to replace later, and also subject to less stress so not as worn.


It's a bit scary having the car this high up supported by a harbor freight cherry picker.


At this point I pretty much just need to install the intake manifold and rear suspension along with a few other odds and ends I'm probably forgetting, I want to get it on the road by this weekend.
Oddly enough, I've spent very little time looking for parts, I somehow managed to get everything labeled and organized in a way that I could easily find it all.
Also, in a tight garage like this, getting the engine back under is significantly easier with the rear suspension off, the whole thing is much more compact and easier to maneuver as well as much lighter with those parts removed. If you're doing this in a tight garage, save yourself the trouble and pull the suspension first. I just bought my first house though that actually has a two car garage so I'm never doing this crap again.
Without he heads back on, I moved the engine back into the garage to finish assembly, with everything bolted up it becomes prohibitively heavy to move around easily. Pressurizing the coolant passages to 20psi as a sanity check, I bought some coolant pipe caps and some random coolant hose from a parts store to block all the coolant ports. The pressure tester lost less than a single PSI over the course of a few hours so I think I'm good, I've never had one of these parts store rental testers not leak a tiny bit even on perfectly sealed engines.
Couldn't resist just setting the header and valve cover on, I like the color combo and the coating shop did an absolutely fantastic job. Too bad it can't be seen in the car.
Rocker shafts and arms going back in. I rubber-banded the rocker arm assemblies together so reassembly was a breeze.
Cams and caps installed. The factory plastic cam caps kinda suck so I bought SoS billet caps, but after reading their installation instructions that involved oiling up the O-rings I didn't want to do that either since oil and uncured Hondabond don't get along well, so I sold them and forked over the cash for set of RF Yamamoto billet cam plugs from Marc.
Cam gears bolted on.
Setting up the engine timing.
Last item before the covers go on, valve adjustment. So much easier with the engine out, it absolutely sucks to do valve adjustments in the car.
The block is off the stand for the first time in months.
JUN lightweight flywheel bolted up. I used the old input shaft as a clutch alignment tool instead of my plastic one and it worked very well, no issues at all getting the transmission back on.
Drivetrain almost ready to go back in. The 2nd picture is dark but it has the engine harness installed. Took my friend and I a good half hour to figure out where everything went since I didn't label any connectors. The front/rear mounts are brand new NSX-R/Zanardi mounts, but I kept the side mounts since they were out of stock at the time I ordered and fairly easy to replace later, and also subject to less stress so not as worn.
It's a bit scary having the car this high up supported by a harbor freight cherry picker.
At this point I pretty much just need to install the intake manifold and rear suspension along with a few other odds and ends I'm probably forgetting, I want to get it on the road by this weekend.
Oddly enough, I've spent very little time looking for parts, I somehow managed to get everything labeled and organized in a way that I could easily find it all.
Also, in a tight garage like this, getting the engine back under is significantly easier with the rear suspension off, the whole thing is much more compact and easier to maneuver as well as much lighter with those parts removed. If you're doing this in a tight garage, save yourself the trouble and pull the suspension first. I just bought my first house though that actually has a two car garage so I'm never doing this crap again.
Last edited:
I got the engine bay buttoned up last night (minus cover and rear glass), poured in 4 gallons of 93 to get me to the gas station since I drained the tank a few days ago, primed the oil system, and started it up. It seems to run fine and doesn't make any weird noises past the initial sputtering first start which is a bit of a relief.
I wasn't able to start the break in process though, I had a nasty fuel leak from the bottom fitting of the pressure regulator, not sure how since that fitting is pressed into the FPR and it didn't leak before but it is what it is, fortunately I had a spare FPR and new O-ring already so I swapped them on and the issue went away. It was actually the pressed in fitting and not the O-ring leaking, I tried just replacing the O-ring first.
I also can't get the car in gear with the engine running, I think the clutch isn't fully disengaging. It feels firm and seems to be properly bled so I think it might be the pedal adjustment, I installed a JUN aftermarket flywheel so if it positions the clutch slightly differently than the OEM flywheel it could cause it to not fully release without adjusting the pedal. It ALMOST releases, with the clutch in and the trans in gear I can push the car but there's more resistance than I'd expect.
All in all nothing too terrible yet, hopefully I can get the clutch issue taken care of this afternoon since I'm taking half a day off work.
I got the engine bay buttoned up last night (minus cover and rear glass), poured in 4 gallons of 93 to get me to the gas station since I drained the tank a few days ago, primed the oil system, and started it up. It seems to run fine and doesn't make any weird noises past the initial sputtering first start which is a bit of a relief.
I wasn't able to start the break in process though, I had a nasty fuel leak from the bottom fitting of the pressure regulator, not sure how since that fitting is pressed into the FPR and it didn't leak before but it is what it is, fortunately I had a spare FPR and new O-ring already so I swapped them on and the issue went away. It was actually the pressed in fitting and not the O-ring leaking, I tried just replacing the O-ring first.
I also can't get the car in gear with the engine running, I think the clutch isn't fully disengaging. It feels firm and seems to be properly bled so I think it might be the pedal adjustment, I installed a JUN aftermarket flywheel so if it positions the clutch slightly differently than the OEM flywheel it could cause it to not fully release without adjusting the pedal. It ALMOST releases, with the clutch in and the trans in gear I can push the car but there's more resistance than I'd expect.
All in all nothing too terrible yet, hopefully I can get the clutch issue taken care of this afternoon since I'm taking half a day off work.
This makes me glad I decided to order a replacement FPR from Honda. Also, might be an obvious question, but did you initialize the clutch?
I didn't know about the clutch initialization, 100% that's the problem here.
However, I am now seeing steam and coolant smell in the exhaust and trace evidence of coolant in the oil sump. Classic head gasket failure symptoms and the car has run for less than 3 minutes total. This is full on, "I drove my car without coolant until it started making funny noises and smells" failure. I don't see how it's even possible for this to happen with MLS gaskets on freshly machined surfaces. My torque wrenches are high quality and all calibrated within 1-2%, I torqued to 80lbft in steps of 20lbft in the factory sequence and went back and retorqued a day later, hell I even pressurized the coolant passages and found no leakage, yet here we are.
I don't like to point fingers at machinists, but given my experience with this shop and my rods, it's tempting.
With any luck the bottom end is fine and the issue will be apparent when I pull the heads. It will be a while though, I'm packing up my house to move and I'll need to get settled as well as knock out a few home improvement projects before I can mess with this any more.
Ugh.
Last edited:
My heart sank as I read your last post. I'm pulling for you but the dreaded head gasket is a nasty issue.
Turns out I'm just an overcautious dumbass. A friend mentioned that what I saw in the oil was most likely crankcase condensation, and the exhaust smoke didn't smell or look like normal oil smell so I jumped straight to coolant. Turns out the break in oil I used just smells really weird, and I oiled up the piston rings quite a bit before dropping them in so it took a while to all burn off.
I ran various leak tests and pressure tests and could find no evidence of issues.
After fixing the clutch initialization issue it released no problem, and I put 30 hard break in miles on it today with no hiccups. Leak test afterwards was 3-8% across the board, and it should improve a bit more over the next couple hundred miles. I drained the break in oil and it was very slightly glittery but that was expected for a new build. I drove around the neighborhood lightly to get the oil warmed up then started with 3rd and 4th gear pulls on the highway with maybe 30% throttle then slowly worked my way up to ~7800rpm at almost full throttle over the course of 30 miles.
The rebuilt transmission shifts perfectly and the JDM gearing is so much better on the 1-2 shift. I set one wheel on the ground and tested the differential breakaway torque with the Type R preload setup and found it to be at 125lbft or so which is pretty much perfect.
The only leak I've found so far is coming from a VTEC solenoid gasket, not sure why it's leaking since it's new but maybe a bit of dirt got stuck under the gasket or something, should be an easy fix.
Last edited:
Glad to see the oil situation figured out. How do you like the JUN LW flywheel? I stalled so much on mine when I had it. The revs jump up and down too quickly for me.
JDM gearing is definitely on my list but alas, needs lots of money.
JDM gearing is definitely on my list but alas, needs lots of money.
Turns out I'm just an overcautious dumbass. A friend mentioned that what I saw in the oil was most likely crankcase condensation, and the exhaust smoke didn't smell or look like normal oil smell so I jumped straight to coolant. Turns out the break in oil I used just smells really weird, and I oiled up the piston rings quite a bit before dropping them in so it took a while to all burn off.
I ran various leak tests and pressure tests and could find no evidence of issues.
After fixing the clutch initialization issue it released no problem, and I put 30 hard break in miles on it today with no hiccups. Leak test afterwards was 3-8% across the board, and it should improve a bit more over the next couple hundred miles. I drained the break in oil and it was very slightly glittery but that was expected for a new build. I drove around the neighborhood lightly to get the oil warmed up then started with 3rd and 4th gear pulls on the highway with maybe 30% throttle then slowly worked my way up to ~7800rpm at almost full throttle over the course of 30 miles.
The rebuilt transmission shifts perfectly and the JDM gearing is so much better on the 1-2 shift. I set one wheel on the ground and tested the differential breakaway torque with the Type R preload setup and found it to be at 125lbft or so which is pretty much perfect.
The only leak I've found so far is coming from a VTEC solenoid gasket, not sure why it's leaking since it's new but maybe a bit of dirt got stuck under the gasket or something, should be an easy fix.
So happy to hear this. Isn't the JDM gear stack just perfect?
Glad to see the oil situation figured out. How do you like the JUN LW flywheel? I stalled so much on mine when I had it. The revs jump up and down too quickly for me.
JDM gearing is definitely on my list but alas, needs lots of money.
JUN has two flywheels a "lightweight" model at 4.5kg/10lbs and an "ultra lightweight" model at 4.3kg/9.5lbs. (Stock is 7kg/15.4lbs IIRC) I got the lightweight model and while it takes a bit of adjustment to get used to the starts the gear changes and rev matching are better IMO. My experience isn't typical though as my pistons are a 4032 full round design and about 7% heavier than stock and my crankshaft needed heavy metal installed to properly balance them, I wasn't originally going to get a lightweight flywheel but since I added mass to the rotating assembly there I wanted to remove some elsewhere so the engine wouldn't feel sluggish compared to stock.
But yeah the JDM gear stack is very nice, the car no longer falls on it's face on the 1-2 shift.
Just drained out the Maxima 10w30 break in oil and replaced it with Pennzoil conventional 10w30 for the next 200 miles, and a tall Denso filter courtesy of [MENTION=12356]Mac Attack[/MENTION].
Last edited:
About 400 miles in I was having crazy oil consumption (about a quart in 150 miles) so started looking for causes. First I deleted the PCV/CCV system (capped the intake ports and put little filters over the breathers on the cylinder heads) to see if that was the culprit, and it was not. Then I did another leak test and got the same 3-6% which is fine. Then I did a compression test since leak tests only show ring seal at TDC, and numbers were 205-215psi which is fine but slightly lower than the ideal 230. So finally I got out my borescope and found the problem: both the minor and major thrust sides of the cylinders have severe wear presumably from the pistons skirts. The minor thrust side is much worse off, presumable because the major thrust side receives more lubrication. Since all 6 cylinders are more or less fucked to the same degree, I can only assume it's a piston to wall clearance issue rather than some sort of assembly issue. I called up Wiseco to confirm the clearance numbers SoS gave me and they were fine, so looks like my machinist screwed me over. I suppose it's partially my fault since I didn't measure the P2W clearance myself, but the block was torque plate honed so the numbers would be a bit screwy without the heads bolted down so I didn't bother.
I won't know for sure until I tear it back down, probably a few months from now. With any luck the bores are a bit too tight so the block can just be honed out a bit more instead of needing sleeves. I don't know, I might just buy a used engine and call it a day.
Excuse the potato pics, my borescope cost me $30. These two photos are from cylinder 1 but they all looked like this.


These three photos are from cylinder 4.


Also heres a photo of my car at Radwood Austin a few weeks ago, taken by Super Street.

I won't know for sure until I tear it back down, probably a few months from now. With any luck the bores are a bit too tight so the block can just be honed out a bit more instead of needing sleeves. I don't know, I might just buy a used engine and call it a day.
Excuse the potato pics, my borescope cost me $30. These two photos are from cylinder 1 but they all looked like this.
These three photos are from cylinder 4.
Also heres a photo of my car at Radwood Austin a few weeks ago, taken by Super Street.
Last edited:
Wish I could offer something more than a "that really sucks", but man...will you be mothballing the car until you get the time/energy to tear it apart again, or just drive sparingly with a quart jug in the back?
Wouldn't blame you in the slightest if you decided to K/J swap it at this point, or slap an electric motor on it :smile-freehand:. Rooting for you either way.
Wouldn't blame you in the slightest if you decided to K/J swap it at this point, or slap an electric motor on it :smile-freehand:. Rooting for you either way.
I say sleeve it and go 3.3L. You can tune it now, so might as well...
The cylinders getting chewed up means metal and fuel are going to end up in the oil, so I'm parking it until I can tear it back down. If I were to keep driving it I'd risk damage to other components in the rotating assembly so it's parked until I can tear it down again.
Since the end goal is forced induction going up to 3.3L doesn't make much sense IMO. I'm not sure if I'd sleeve the block or just find a used one, a used block would be cheaper and would avoid potential complications from the sleeving process but wouldn't be as resilient at higher power levels. I'm hoping my block was just honed undersize and a simple rehone is all that's needed to get the cylinders in spec, I'll probably go with Carrillo 2618 pistons this time around or maybe just the Wisecos SoS sells. Wiseco specs the same clearances for 4032 as 2618 pistons so there are no cold start benefits to running the 4032 pistons and quite a few drawbacks when FI is concerned.
I don't care for J/K motors, going to stick with the C.
Sorry to hear this man. Sucky timing too, right when driving season is hitting us. Although, being in TX you've probably had driving season all winter long.
The cylinders getting chewed up means metal and fuel are going to end up in the oil, so I'm parking it until I can tear it back down. If I were to keep driving it I'd risk damage to other components in the rotating assembly so it's parked until I can tear it down again.
Since the end goal is forced induction going up to 3.3L doesn't make much sense IMO. I'm not sure if I'd sleeve the block or just find a used one, a used block would be cheaper and would avoid potential complications from the sleeving process but wouldn't be as resilient at higher power levels. I'm hoping my block was just honed undersize and a simple rehone is all that's needed to get the cylinders in spec, I'll probably go with Carrillo 2618 pistons this time around or maybe just the Wisecos SoS sells. Wiseco specs the same clearances for 4032 as 2618 pistons so there are no cold start benefits to running the 4032 pistons and quite a few drawbacks when FI is concerned.
I don't care for J/K motors, going to stick with the C.
Oh yeah- forgot you want to go boosted. Agree on the 2618 if FI is the goal. I'd just sell your 4032 and buy the SOS Wisecos.
I'm really sorry to hear about this.
If your goals are modest FI, I would just give Wiseco a call and tell them what you have and what your goals are. 4032 is a good, tough, alloy. It's not like it's going to fracture when subjected to 500 crank HP in this application WITH A GOOD TUNE. That last part is key. Otherwise, if you want to resleeve and go with different pistons then it will cost you and take longer for the next rebuild than cleaning up, recoating, and reusing what you have now (assuming your bores are OK).
I've had good luck with over 600 crank HP on stock rods and mains, but that seems to buck the trend here. It's generally considered a good idea to replace those OEM components if you want to go there. That adds a lot of cost too, so you just need to ask yourself if 500 crank HP is OK? Good luck.
If my pistons aren't trashed I will definitely reuse them, my power goals are a modest 400whp which people have done on completely stock engines so 4032 should be great for that. I won't know if they're toast or not until I tear it down which probably won't be for another few weeks. Best case/ideal scenario the damage was limited to the cylinder walls and I get the pistons recoated like we discussed, the block honed out to spec, then reassemble. Worst case scenario the block gets sleeved and I have to buy new pistons.
Similar threads
- Replies
- 3
- Views
- 630