• Protip: Profile posts are public! Use Conversations to message other members privately. Everyone can see the content of a profile post.

bogle's 1991 mild build thread

sounds like you're on the right path. Good thing on the AEM - at least you have some options to optimze the tune better than the original Comptech stuff (though it was fairly bulletproof itself... more on that if you're interested)

The old whipple units (the one I believe you have) shipped with a 6psi pulley. However, because you have an AEM, I would not be surprised of someone upgraded it to a the "high boost" pulley which was 8 or 9 psi (I can't recall exactly). Yes, i'm fairly sure the loss of power is the engine pulling back timing. The additional data (IATs, etc) will help you drive it optimally. I I wouldn't do WOT pulls myself if I feel the timing retard kicking in.

Good luck! Post if you have Q's.
Thanks RYU! Glad you are enjoying it. I am getting a lot of value out of people chiming in with knowledge in this thread.

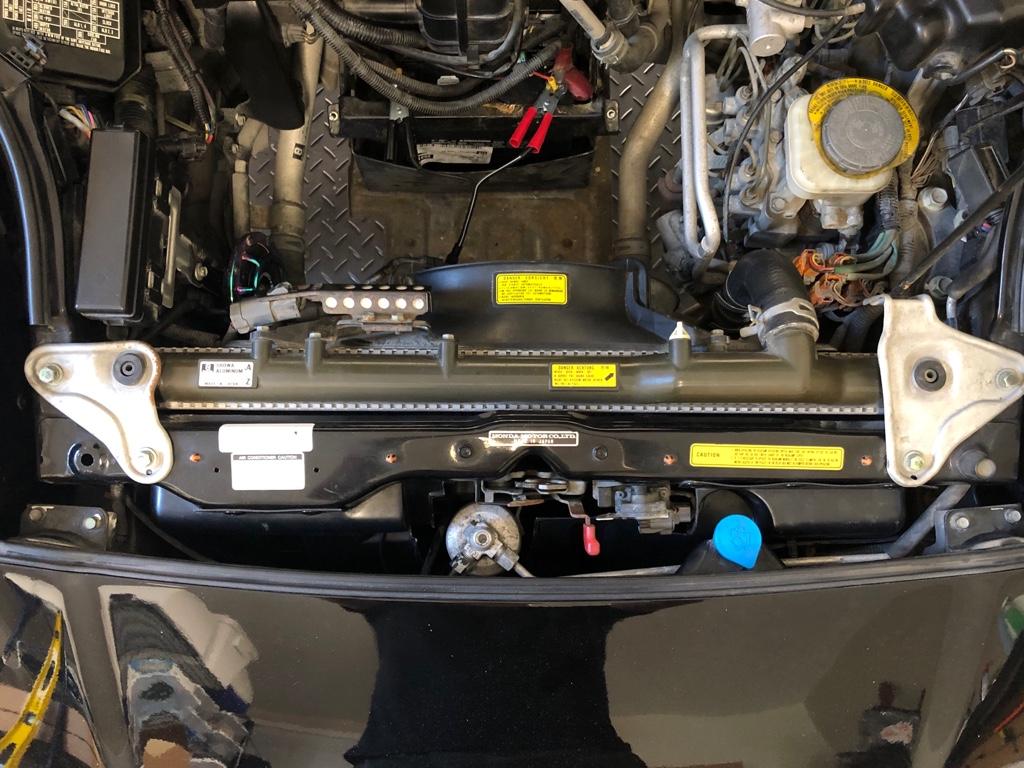
Noted on the schrader valve. Definitely an easy fix. Hopefully that + the compressor are the only leaks. Really crossing my fingers it's not the evap!

What do you mean the blower peaks at 6psi? Like it peaks in efficiency at 6psi?

I really need to do some proper datalogging to make sure things are ok or diagnose if they are not. The day I picked up the car from the TB/WP job it was literally over 100deg F out. It's very possible a combination of the heat + the SC whine being gone makes me feel like it's slower. The car is still fast and I've definitely done some pulls since then where I feel like it's fine.

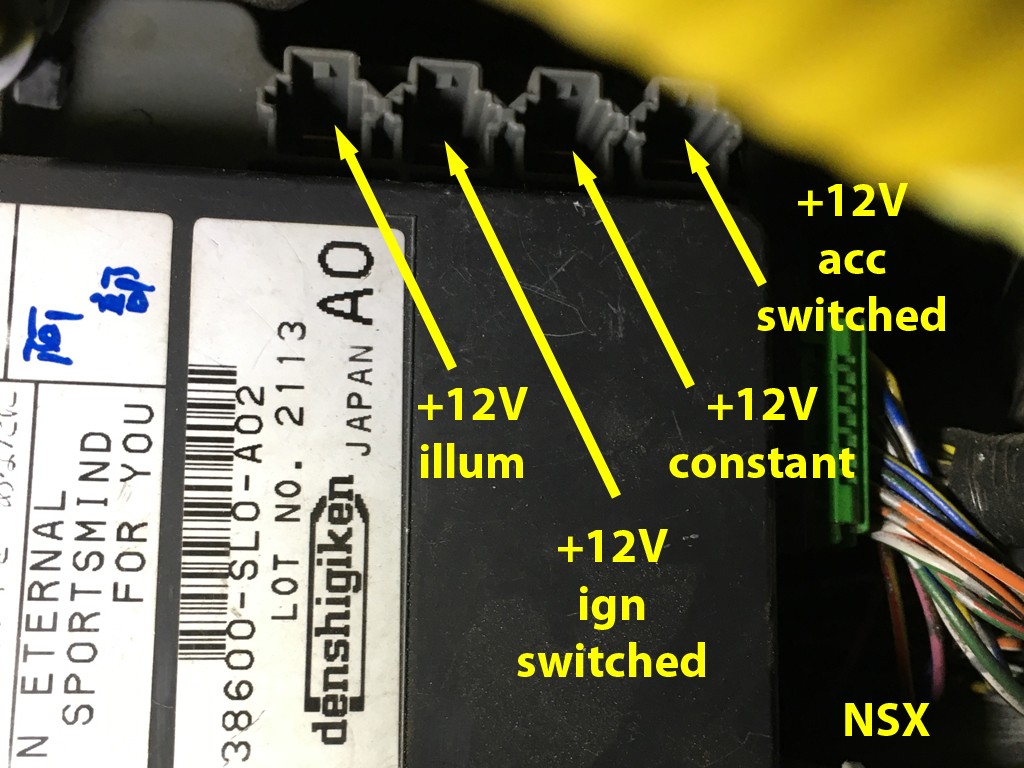
I'm on an AEM series 1 ECU, it might also be pulling timing based on AIT. I'm sure there is an AIT -> timing table in there. I should check...

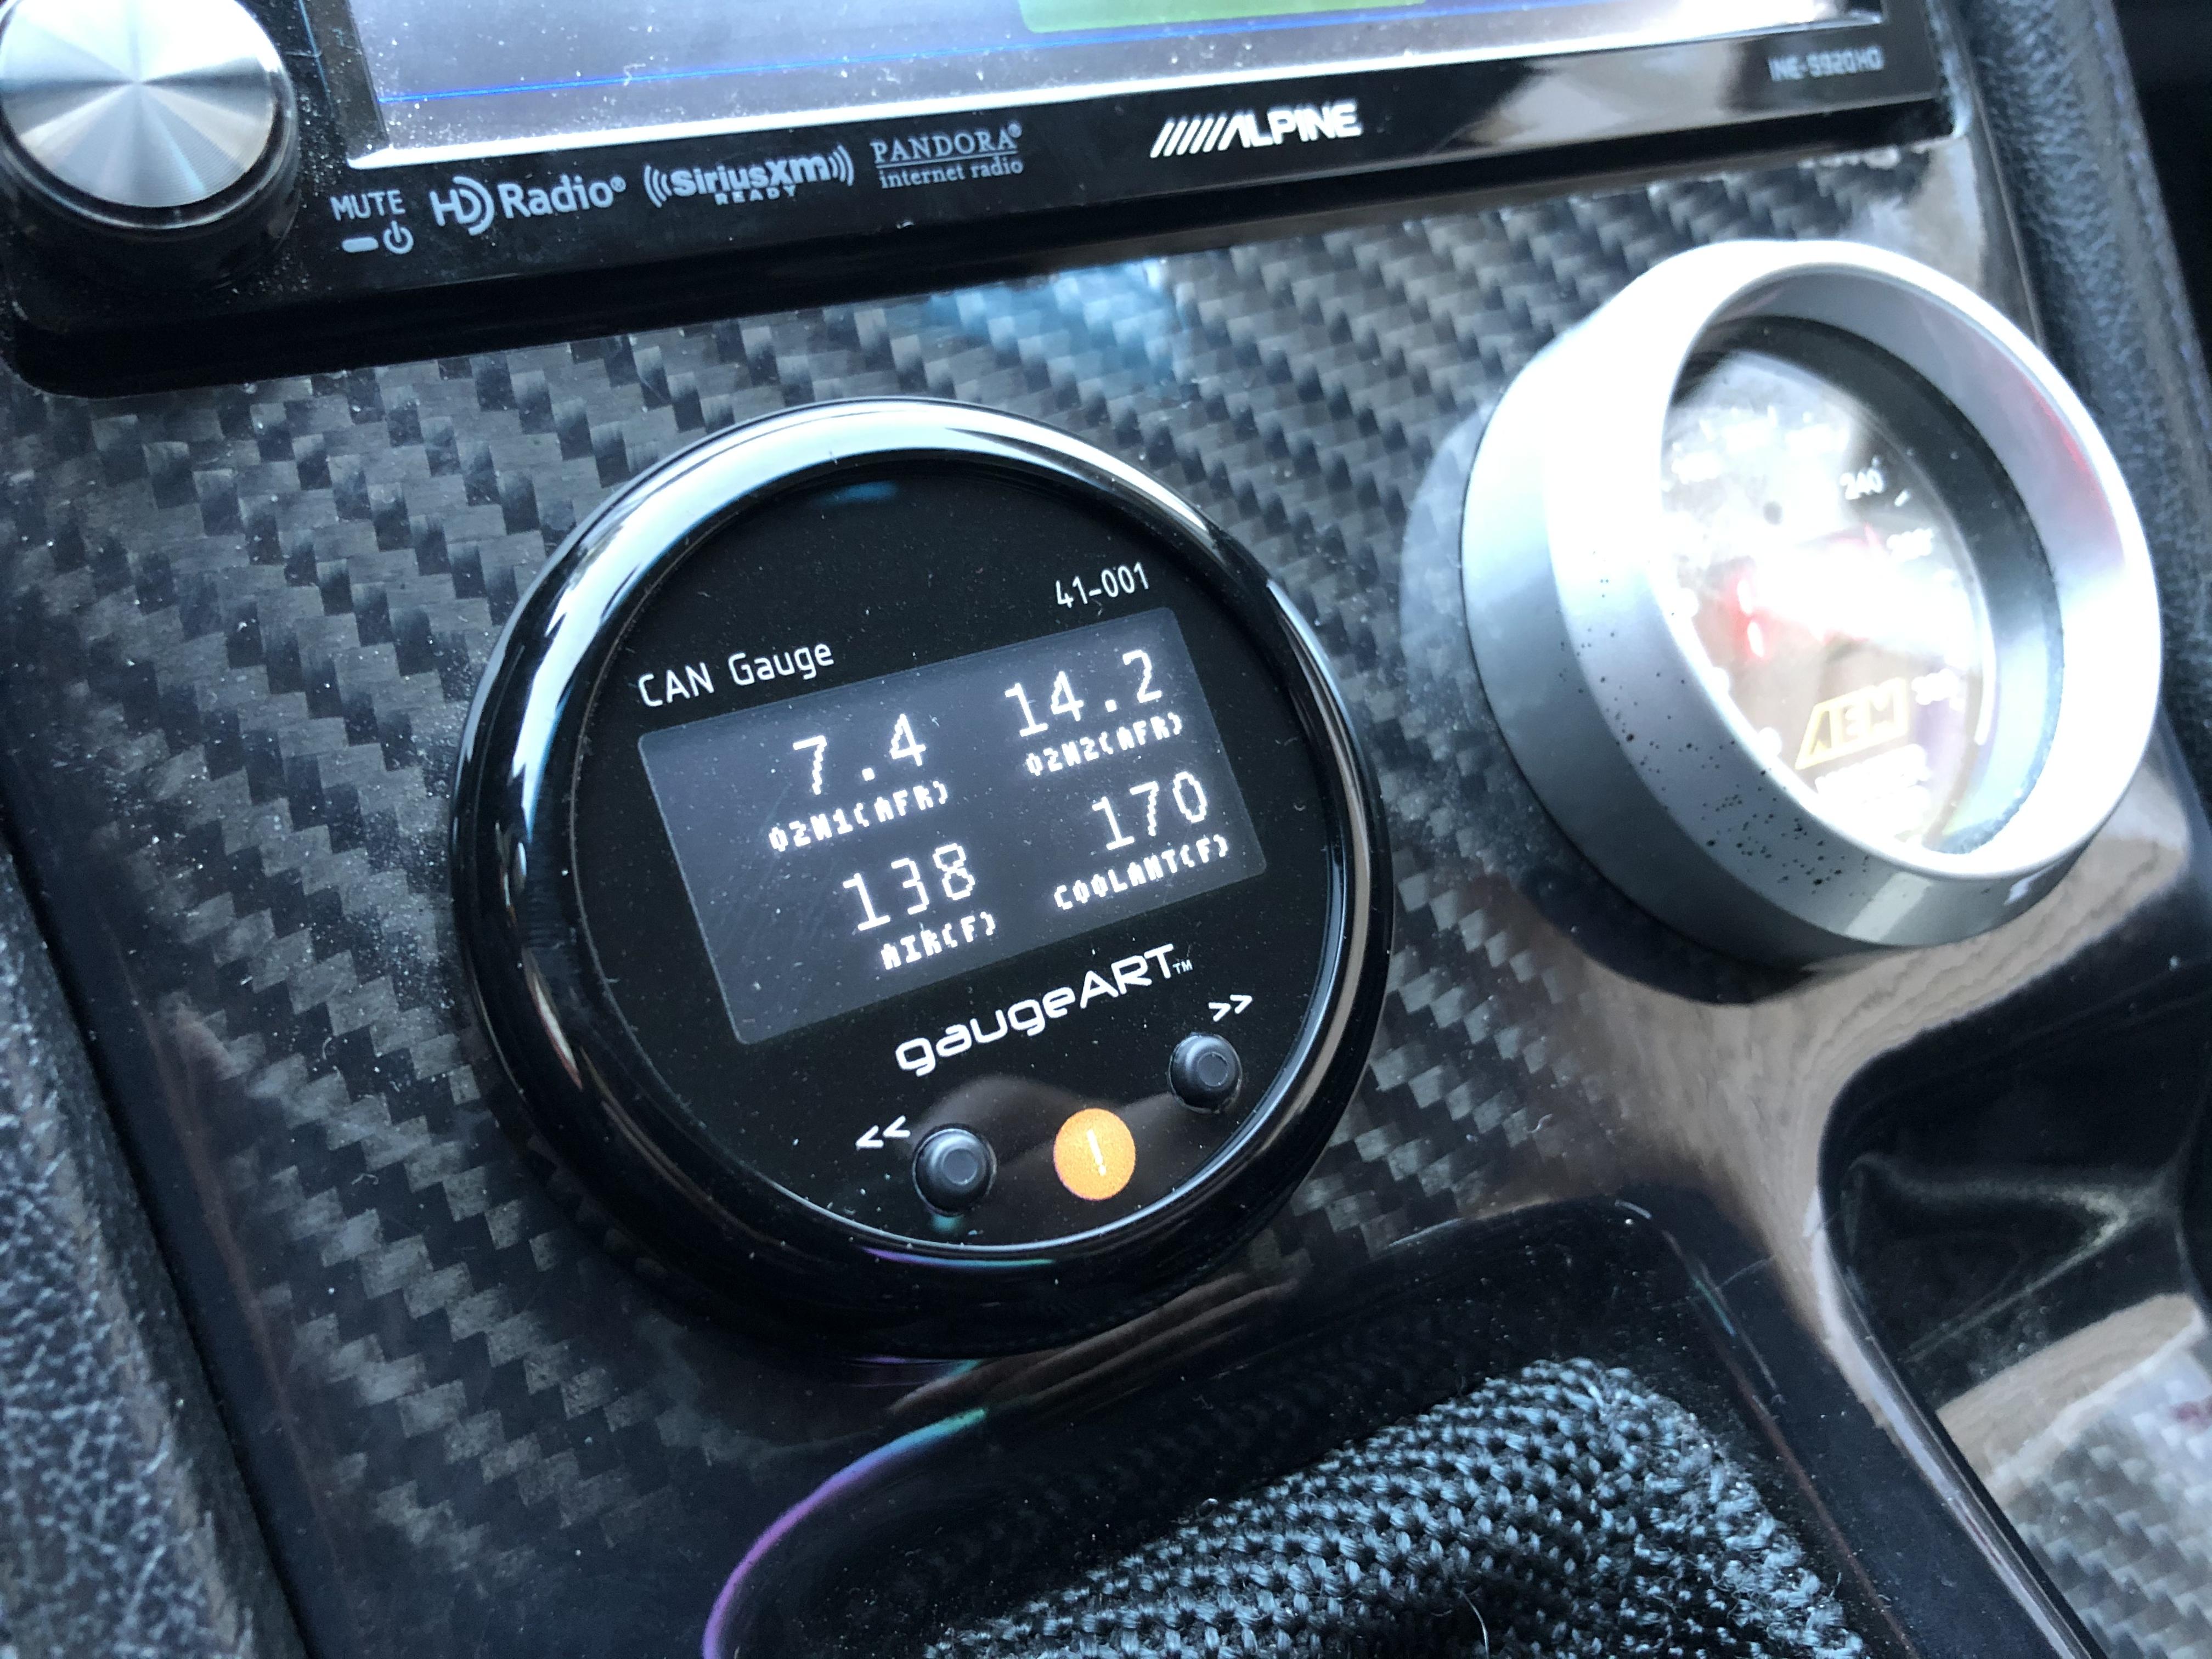
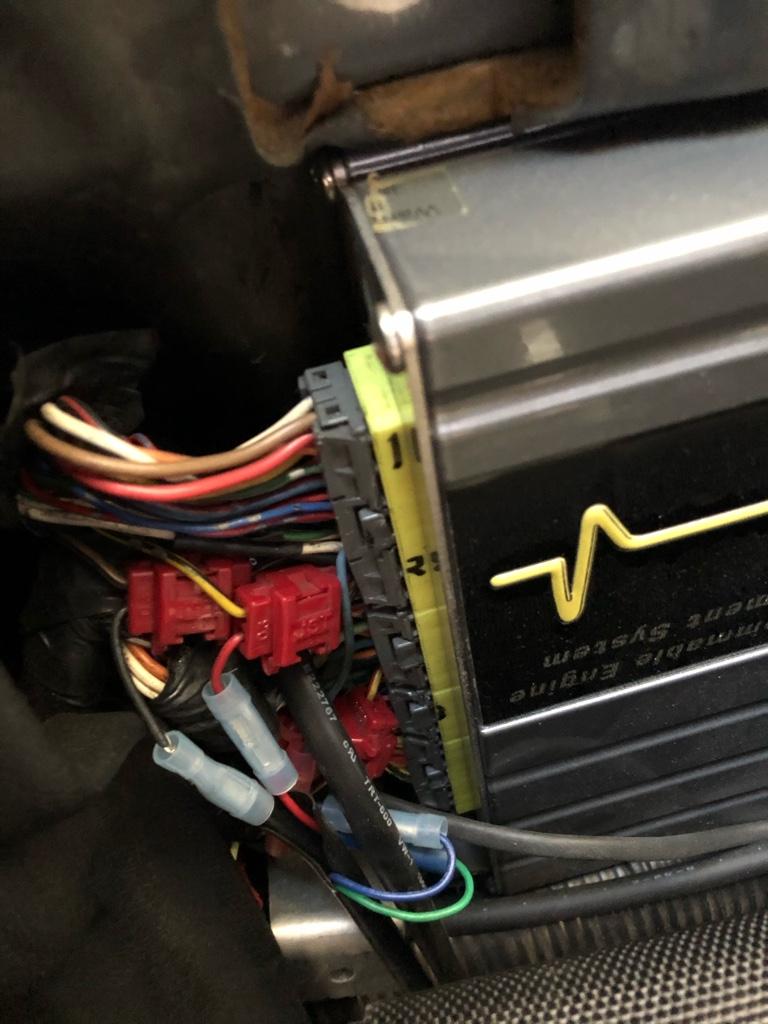
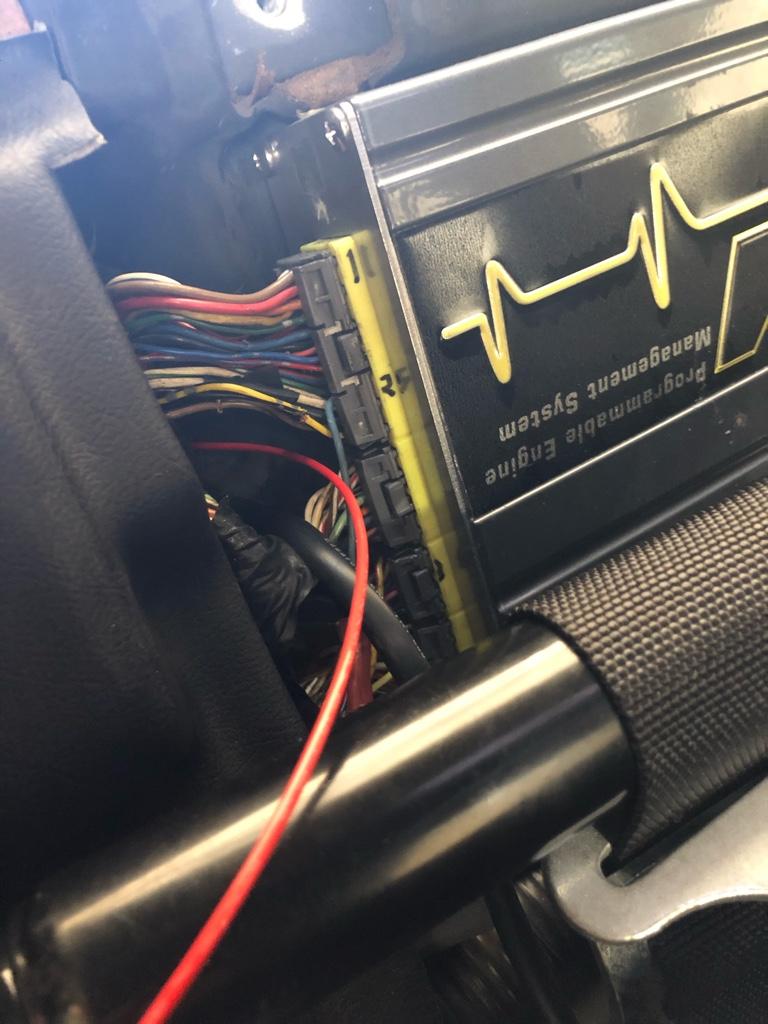
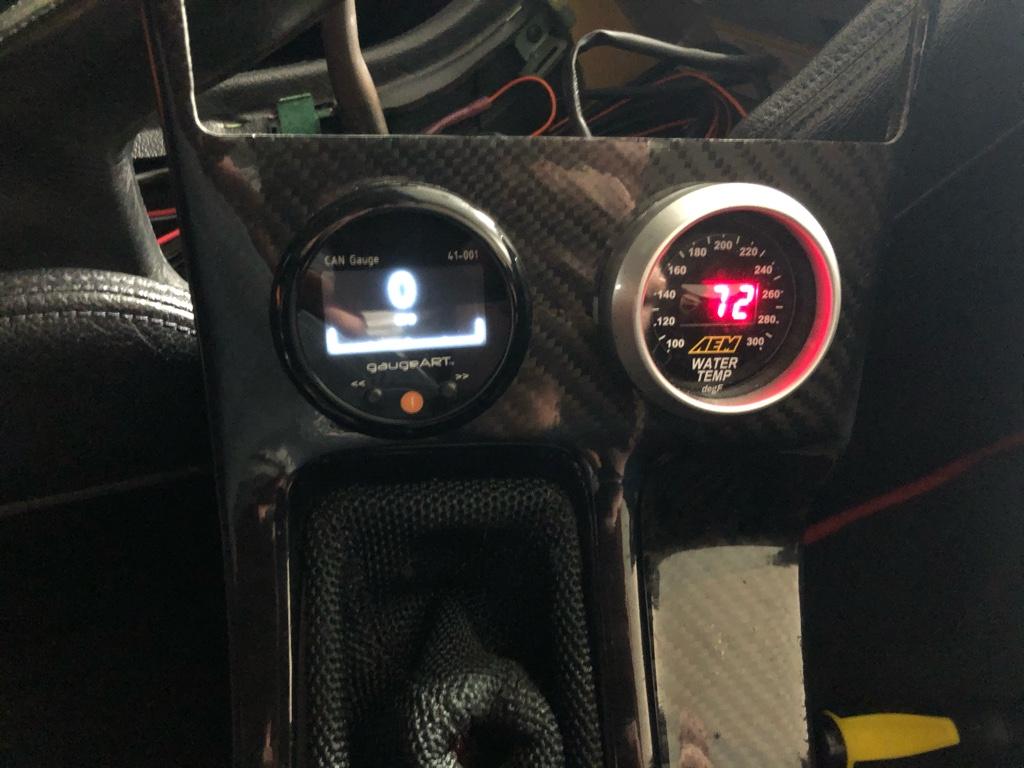
The ECU is pretty handy cause of the logging junk built in. It's totally yesterday's tech, but it logs and is configurable. After reading your thread, adding an AIT sensor was on my list of things todo. But it turns out the stock one is installed post blower, so I can just log with that one. Not sure if the stock AIT sensor is super inaccurate or something, but it reads up to 250deg so it can give me an idea. I have a gaugeart gauge coming where I can display params from the ECU as well.

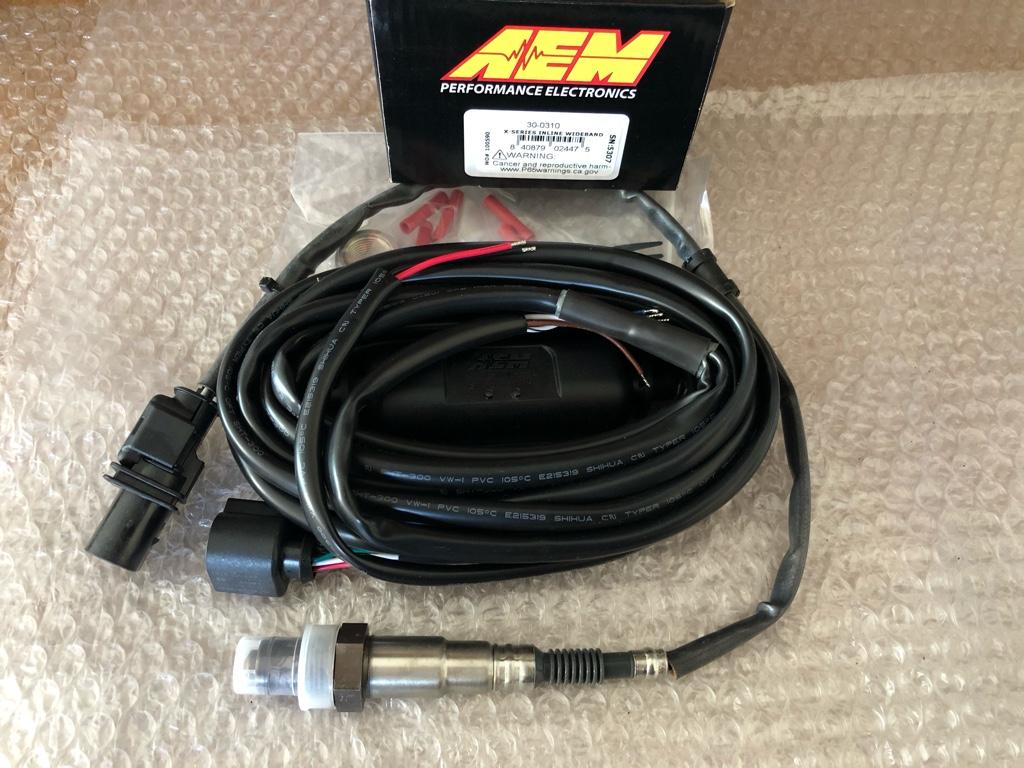
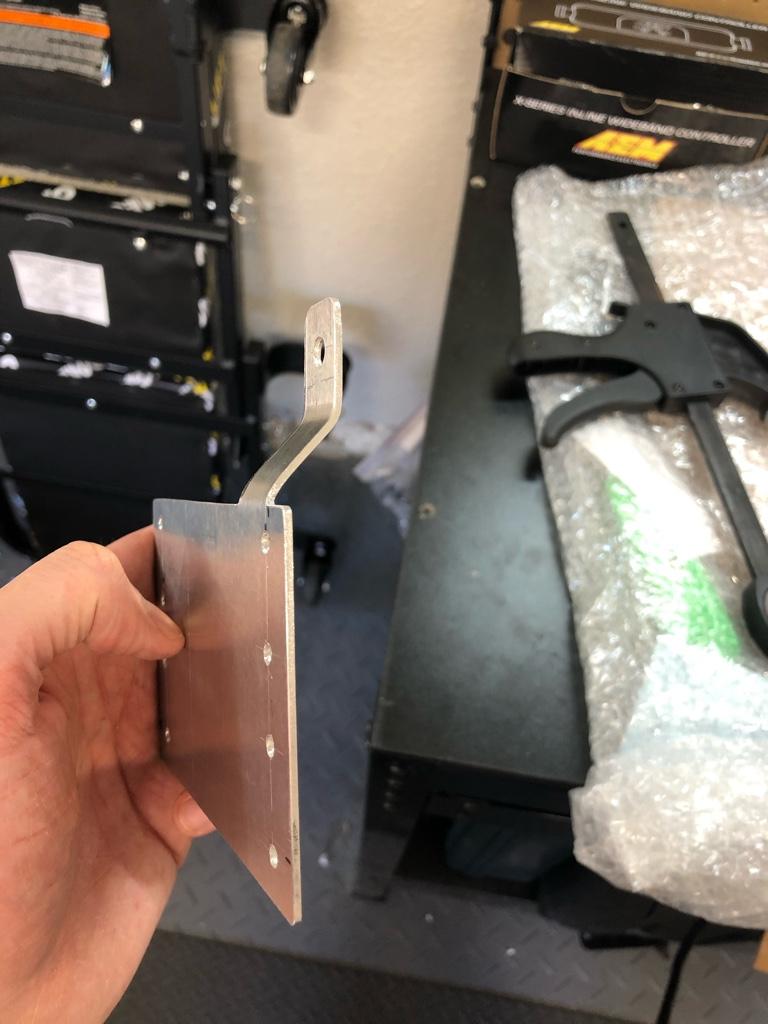
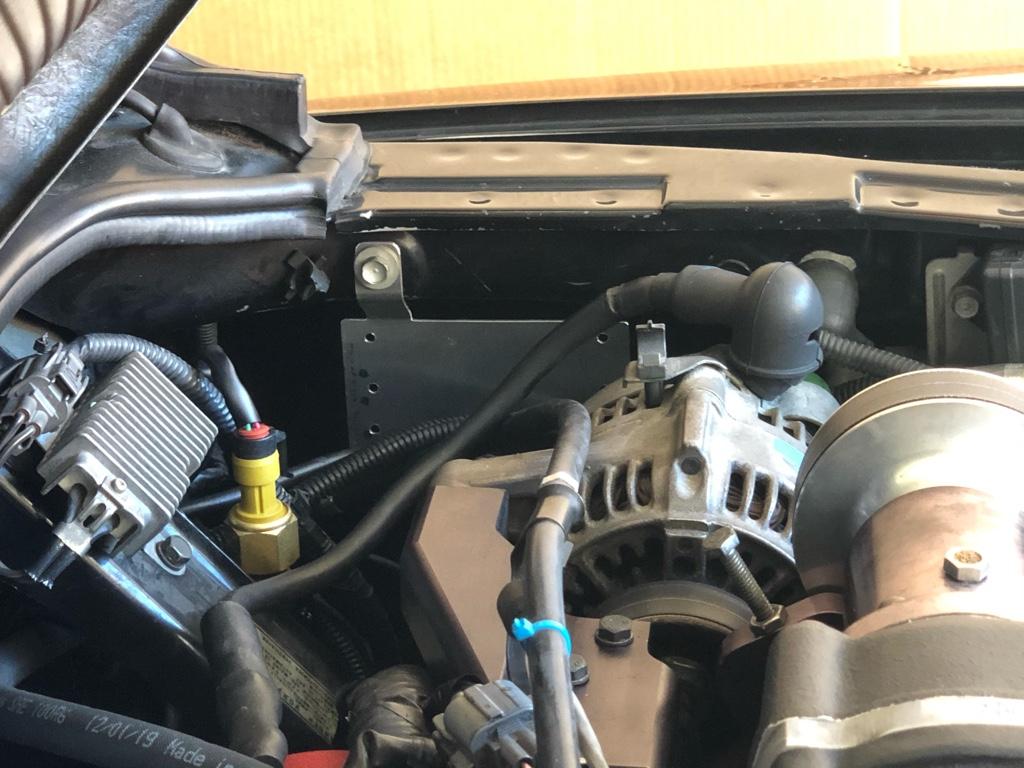
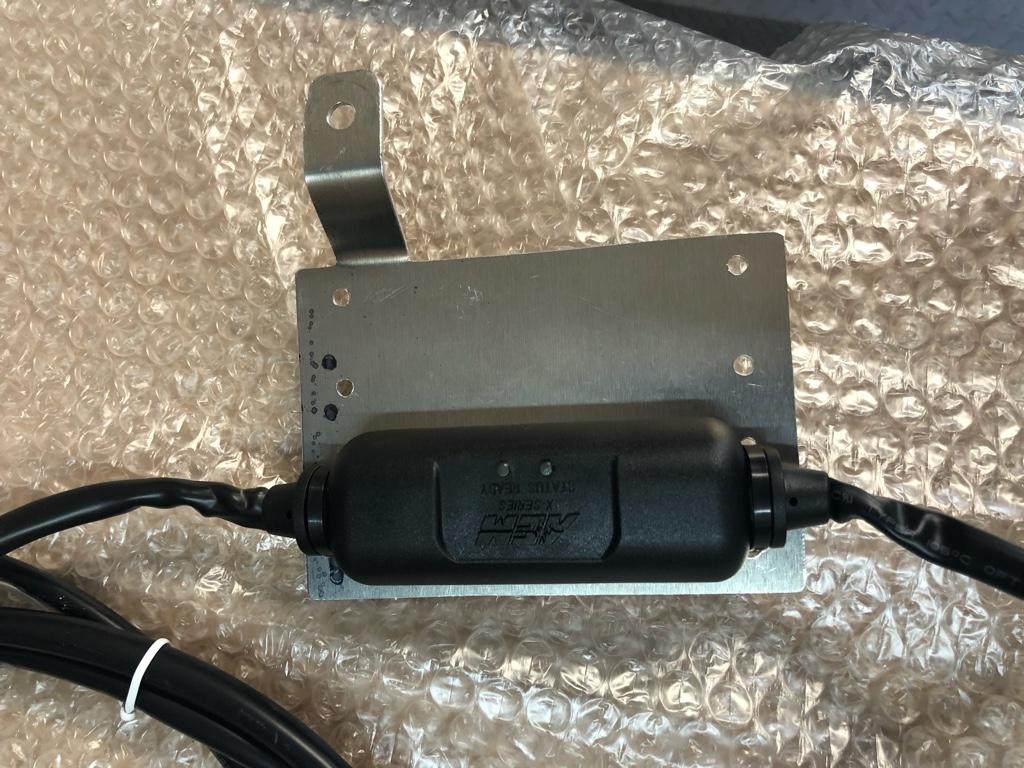
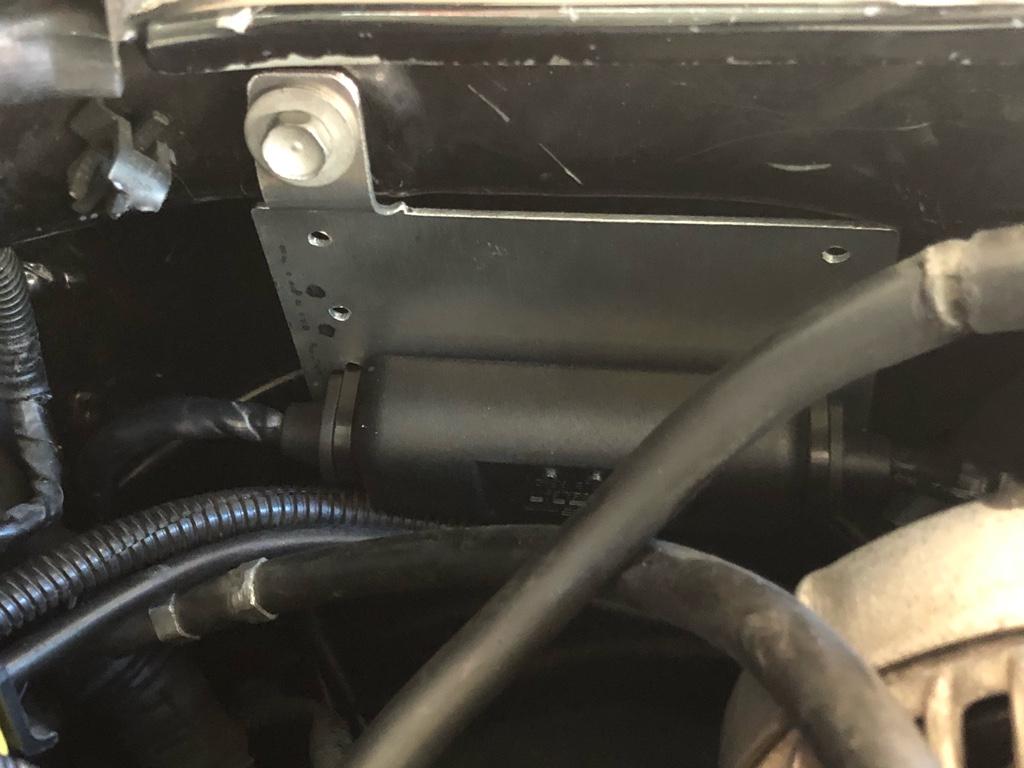
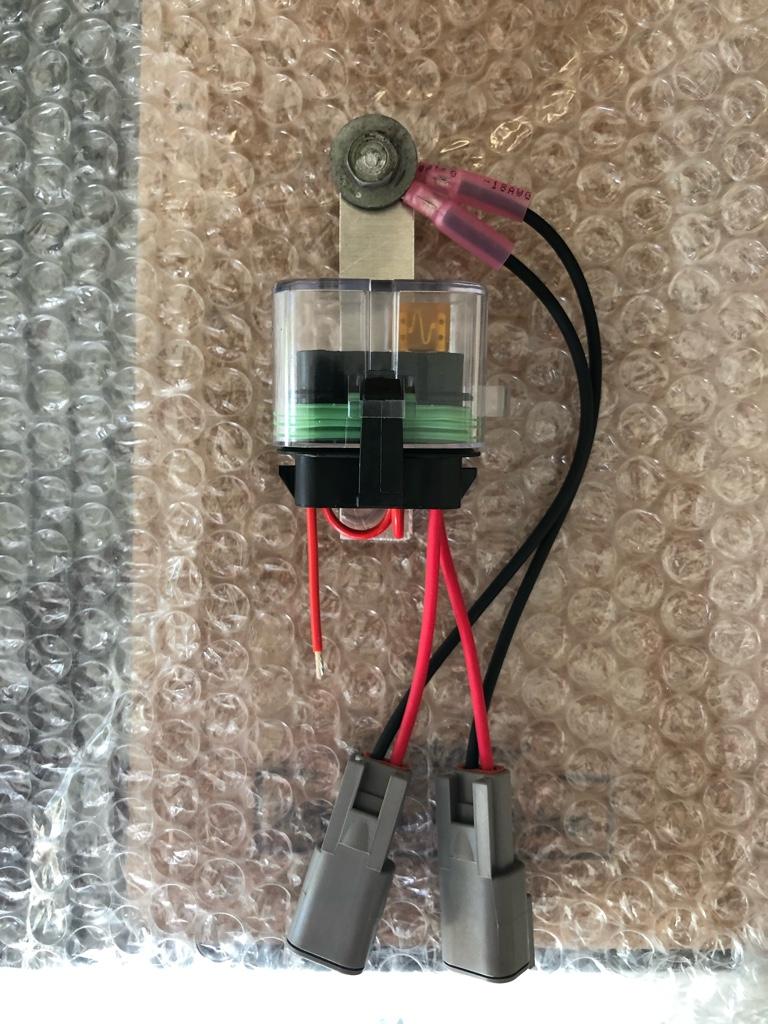
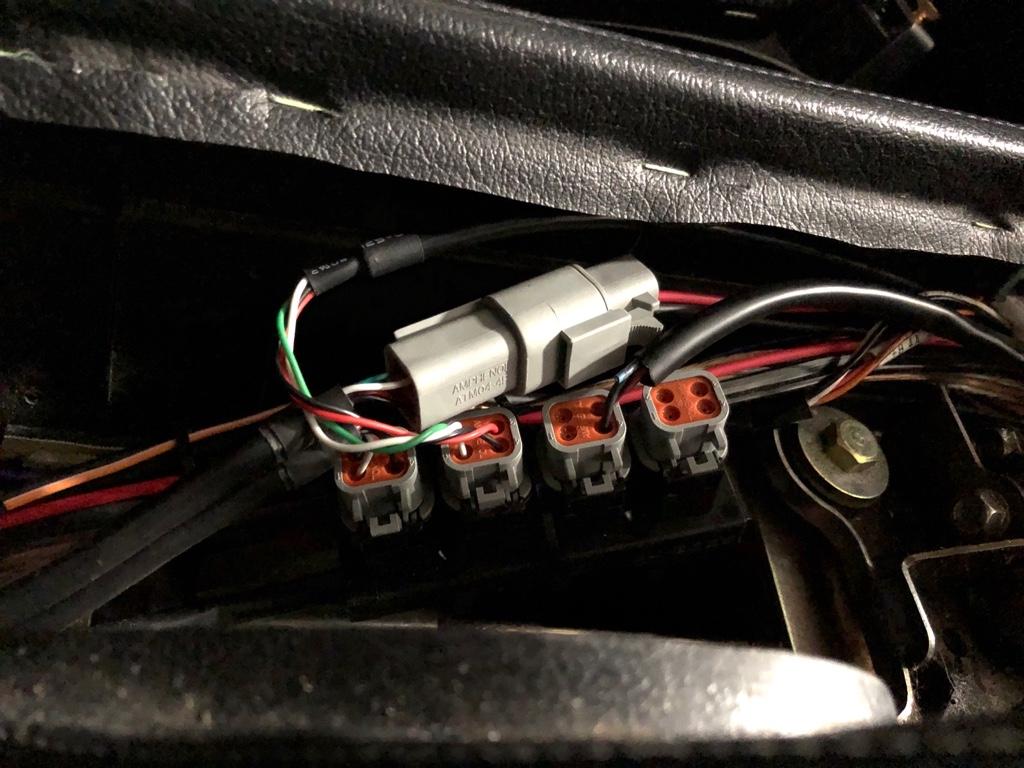
The missing piece for legit logging is that the wideband is not being run into the ECU. AEM gauges also act as a controller and have an output for the ECU, but it's not connected up. The medium term goal is to have 2 new LSU 4.9 wideband controllers, then remove the AEM gauge and replace it with the gaugeart gauge to display both widebands. I have one of the new controllers, so the next step is to install that one, run it in to the ECU, then do some proper logging. Once I get to that point, i'll post some graphs with map, afr, temp, knock, etc....
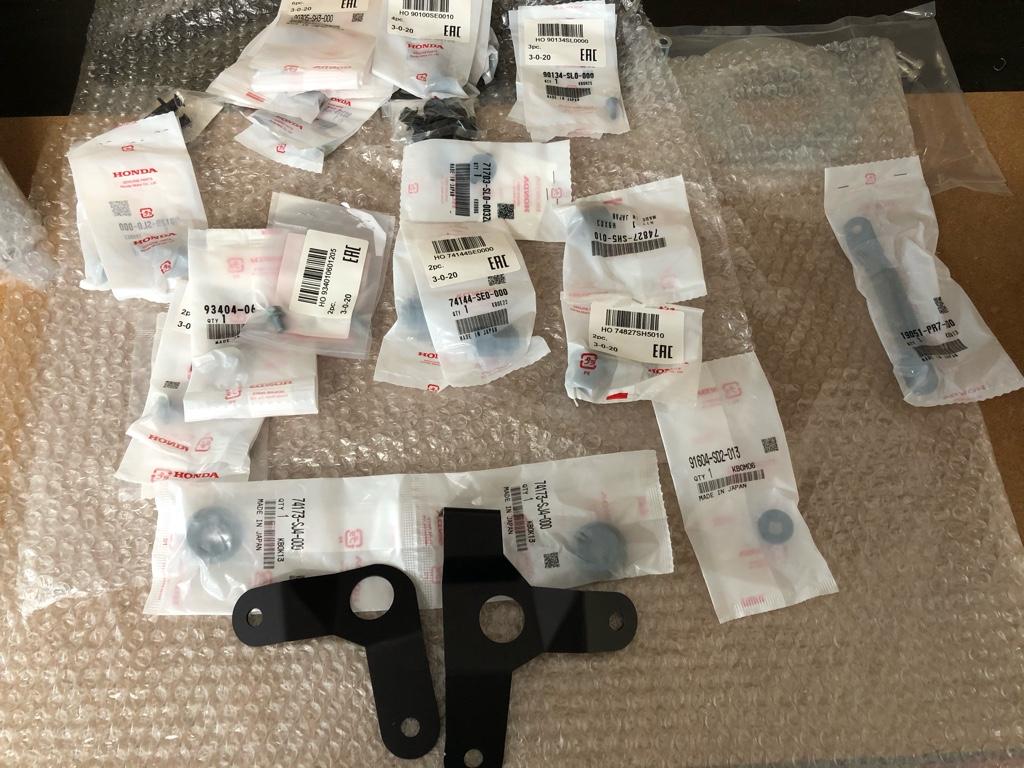
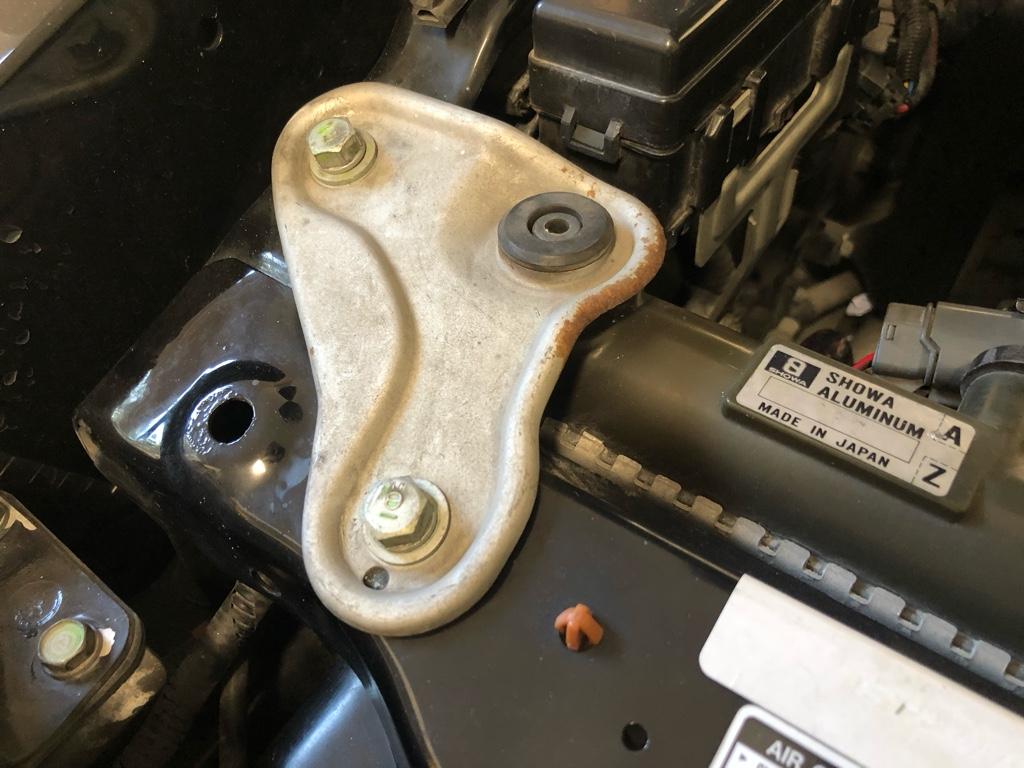
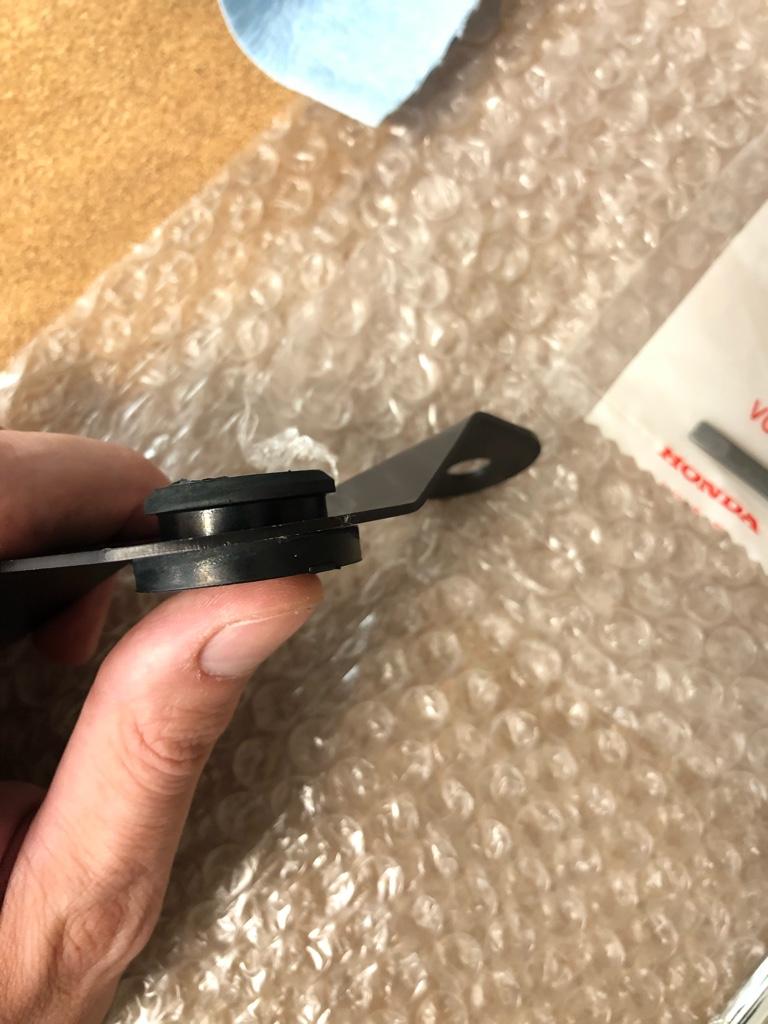
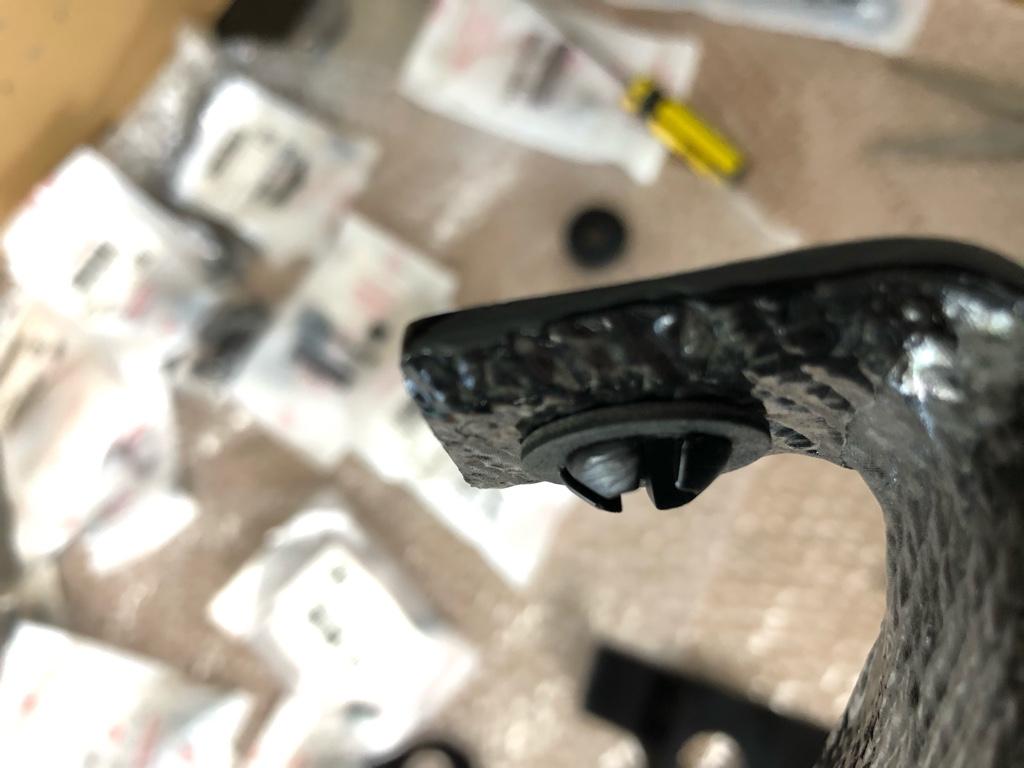
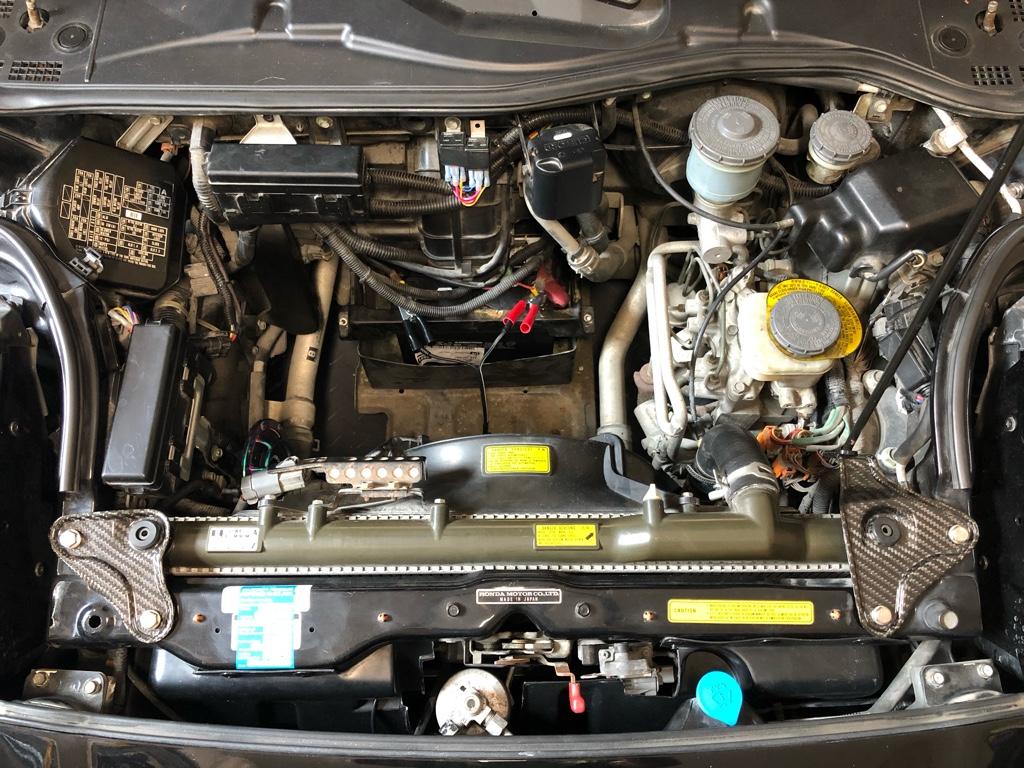
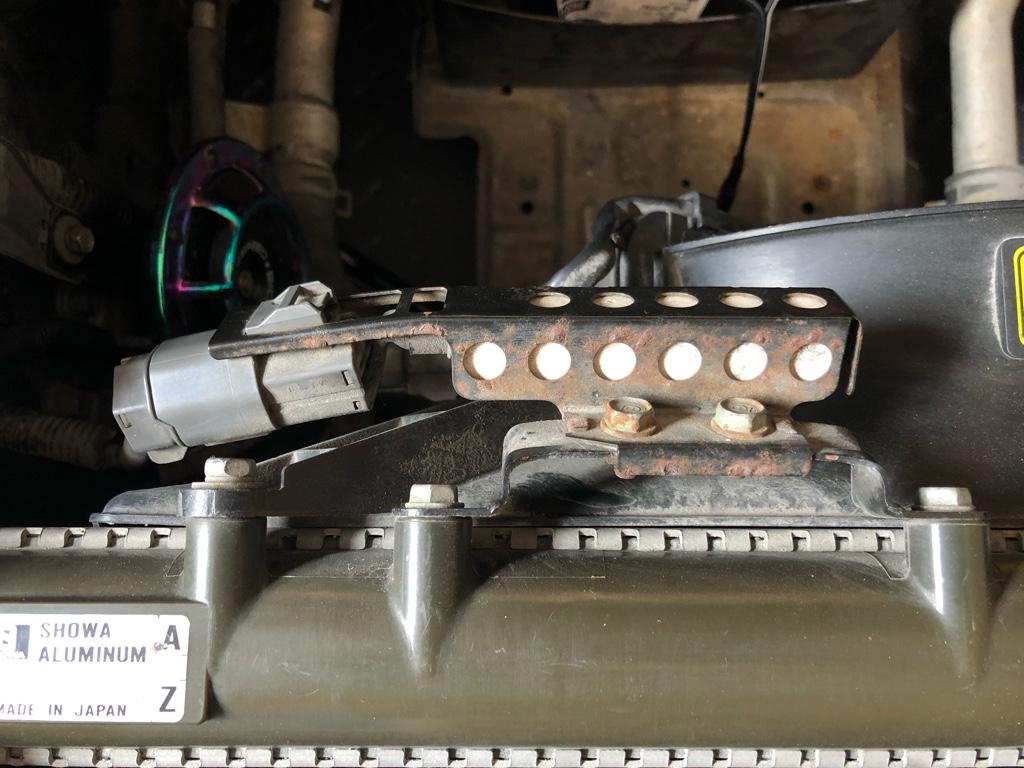
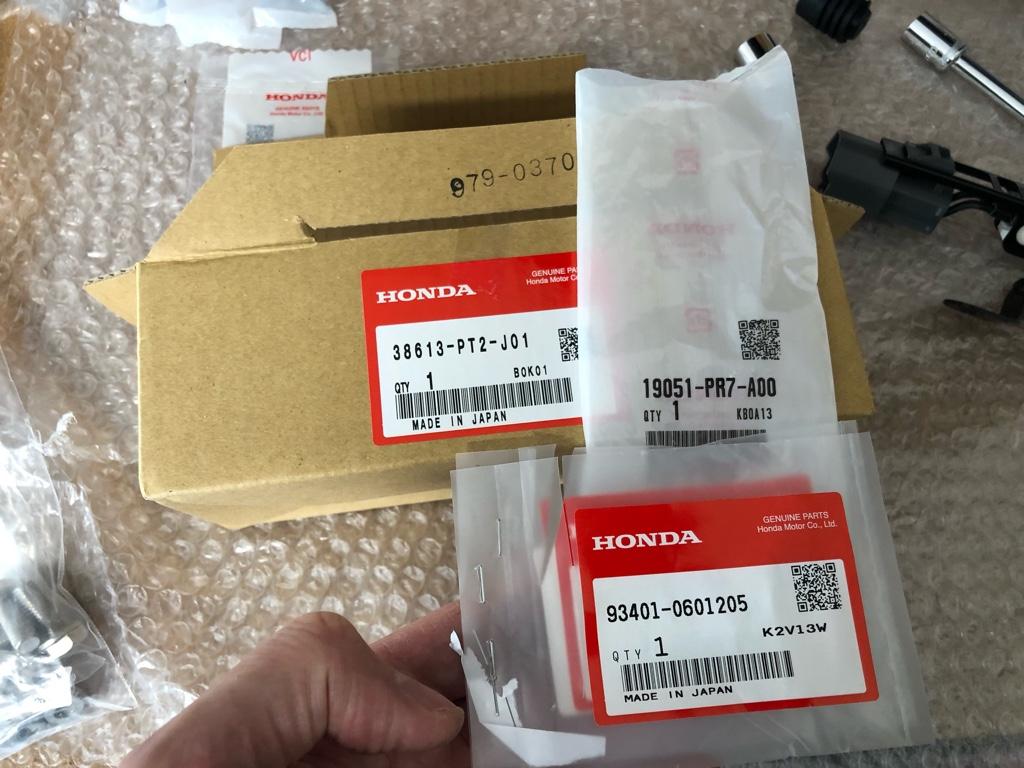
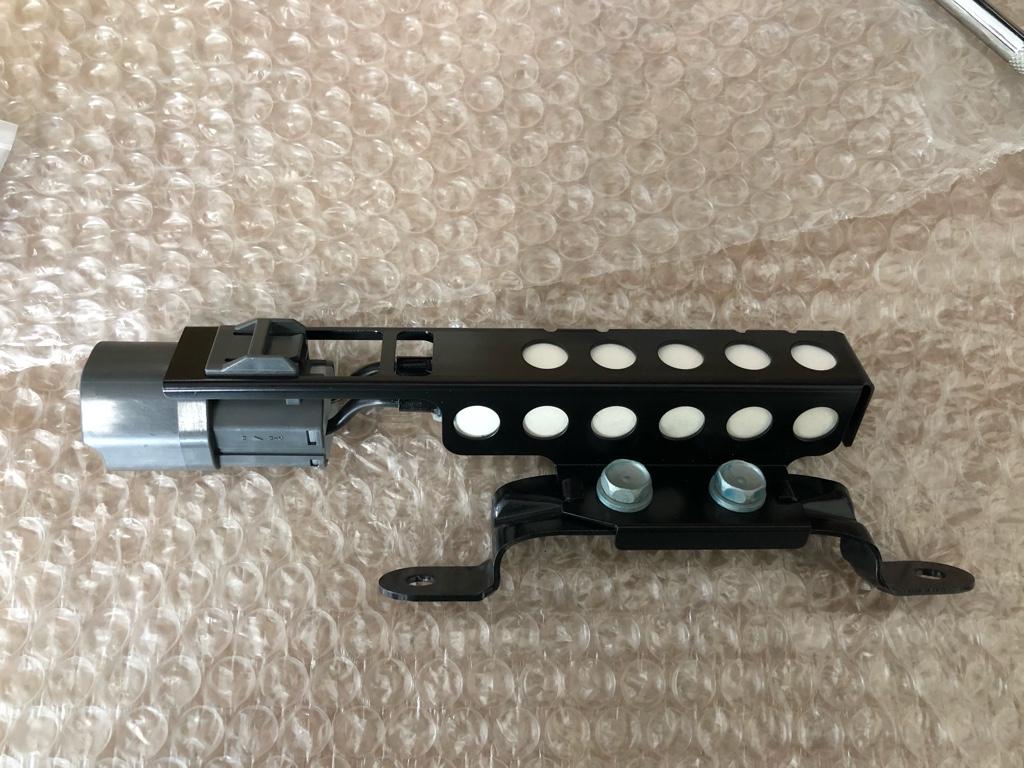
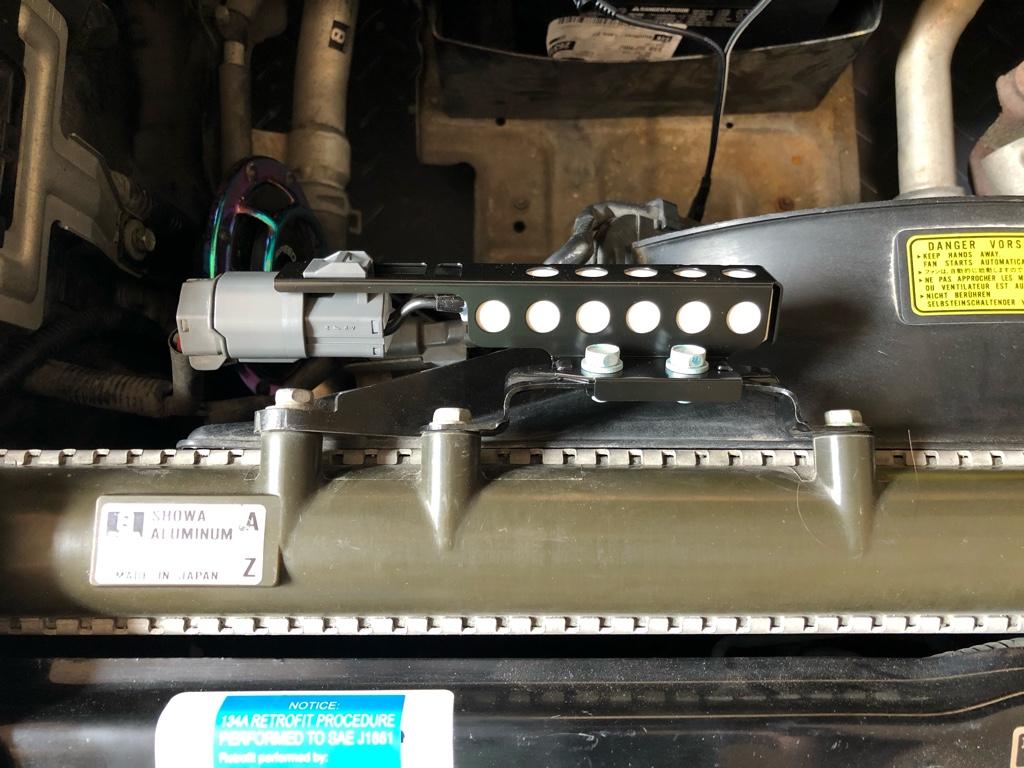
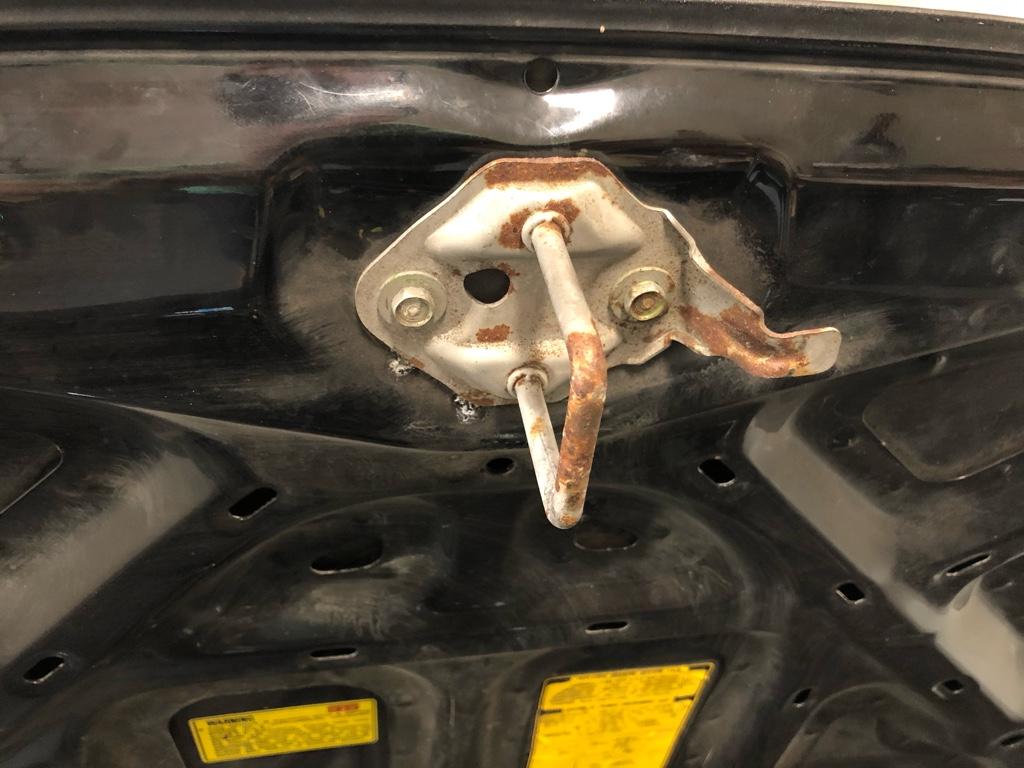
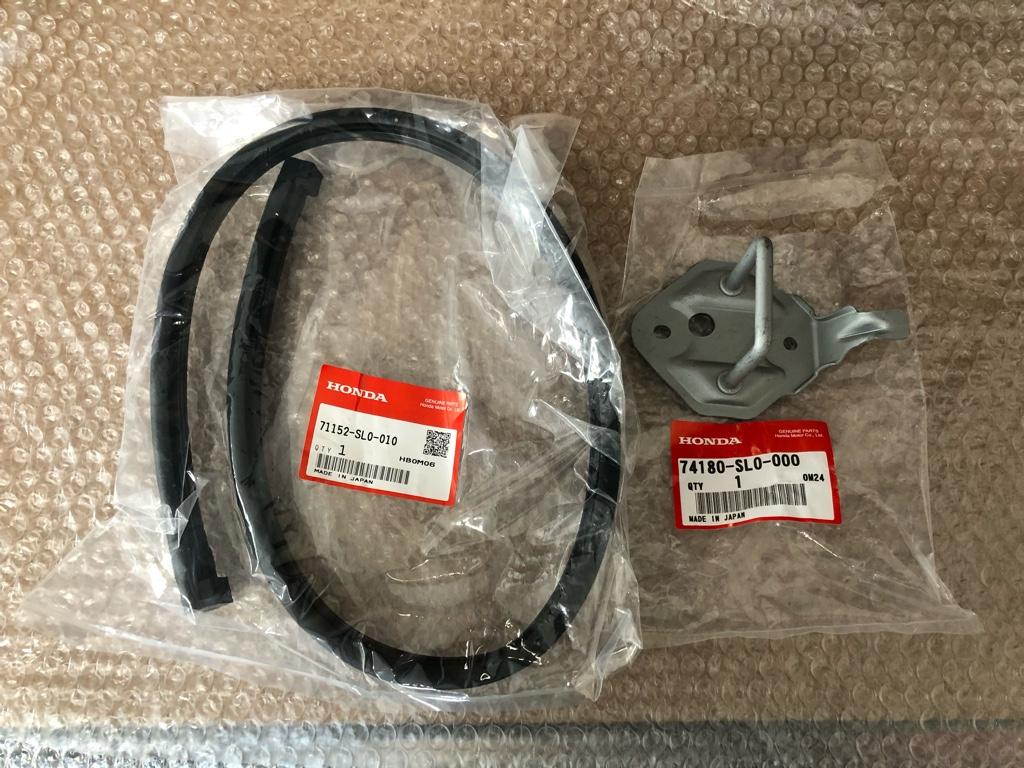
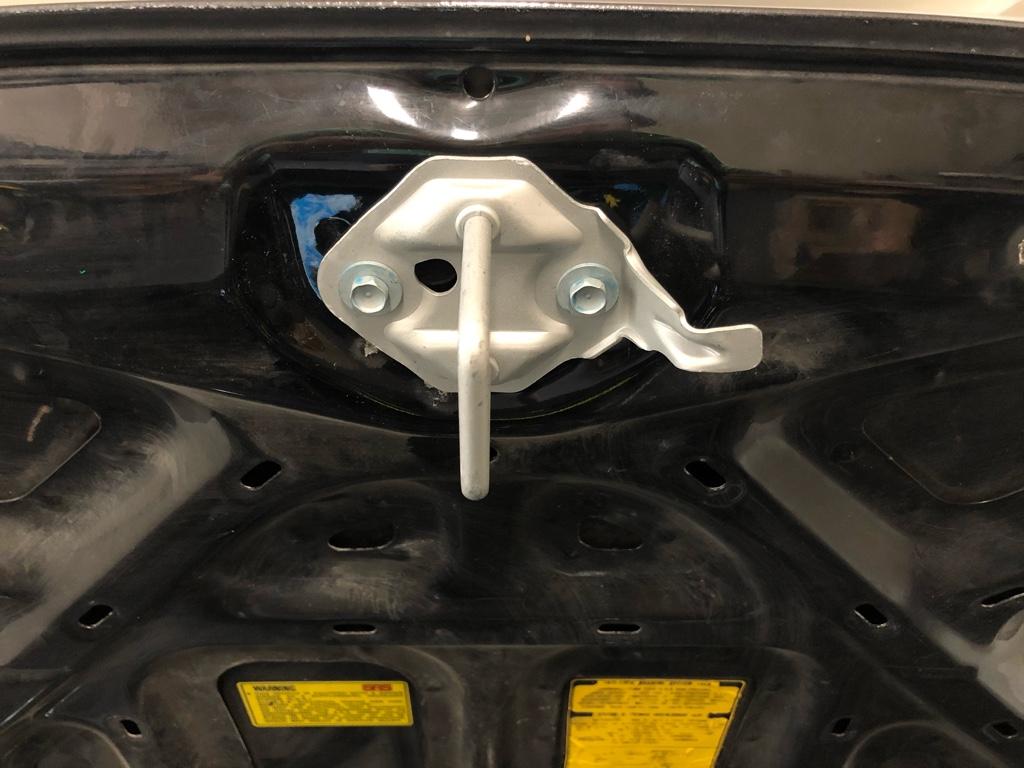
 
Thanks RYU, I’m sure I will reach out at some point. Seems like you have been down all these paths before.

I have a few projects in progress right now, AC junk, a couple wiring things, new passenger seat rails, and more. Before I show y’all how nesty the wiring is and how obscenely heavy the current rails are, I figured I’d first post about some small stuff that I actually finished.
​​
​​A little while ago I got a sizable Amayama order. It had some big goodies like a brand new crank pulley and LMAs, but also a ton of small things. Like any Honda I’ve owned, the car has a bunch of little missing clips & rubber bits, and a number of randomly rusty things. I spent a lot of time digging around in the engine bay and frunk and bought whatever I found missing or crappy. The engine bay was pretty ok, but I was able to find a number of bits on the frontend.

7ced82e59420e2acaba5711c98e6e630.jpg


​​I’ll start with the radiator brackets.

​​
ac683e8ada37e20e538d647d2d07cf01.jpg


​​IMO, the silver looks out of place on the black, and also mine were pretty rusty.

​​
5998a0c368c033ba0a21592cf601d074.jpg


93b1471b171849e3144684ef7faddda8.jpg


​​I ended up buying both S2 carbon works aluminum brackets and NC Auto’s carbon brackets. You can see the aluminum ones in the first pic. For some reason, I didnt get a pic of the carbon pieces before install.
​​
​​Spoiler alert, neither bracket fit very well :/. Maybe it’s the car, but the stock ones fit perfectly. Each bracket was off in slightly different ways.

​​
189c325adfa6ae5544db903beee11ad9.jpg

60a33ac1e2811150932d15fdfc6d1b12.jpg


​​I got all new grommets from Amayama and they fit like stock in the carbon brackets.

​​
0e092bee29494dc87f51570937e201ea.jpg


​​But in the aluminum brackets, they were all pretty loose, including the hood prop.
​​
​​
fe46d76f087d0a61d6ad14278c3e29ec.jpg

​​
​​The carbon brackets came with a fiber washer to take the slop out of the hood prop, which worked pretty well on the new bushing. I had to ream it out a bit, but it fit!

​​
a1b562a8bd8daab30cc2a4ef22498f7d.jpg


​​Because the grommets fit so much better, I decided to go with the carbon ones. I did kind of a lot of adjustment with a reamer on the mounting holes. But now they fit! Also new bolts, feels good.

​​
f4f187df2b897fd0864bb1fff2a6b226.jpg


​​Leaving the hood propped kinda makes me nervous as the bracket flexes a little; carbon isn’t known for gracefully failing. But so far so good.
​​
​​The fan resistor bracket was bent and rusty for no good reason.

​​
09ccfb93a0f89a5b718bb53d35e6b5d4.jpg


​​So I got all the bits to make it right

​​
b40aaf77b0bc41c256908884ddb6d5e4.jpg


b0c43f6f78b8fa9ac19dbd0fe25172cc.jpg


​​And better!

2f56412a02144ee365b03dd79f0d166c.jpg


​​The hood latch striker got the same treatment.

​​
fc28fd14d1c38bde98f8a5e046dd079e.jpg


​​Brand new! And a new hood-to-bumper seal, it was only $12 so I had no choice.

​​
14d3b0b48582c11e45908c7043cf48cb.jpg


​​All better, new bolts and everything!

​​
9f4eddb47285c9bebc3e8278ca1c8907.jpg


​​Tis a small update, but all of it needed to be done!

Not sure why there are these little rusty bits. It’s kind of random what is rusty. But fortunately it’s all on easily replaceable things. I’m super glad most of the car is aluminum.

My guess is the salty ocean air. The car was apparently stored in a warehouse out in the sunset neighborhood of San Francisco, pretty close to the ocean, for most of its life. My first apartment in SF was in the sunset, the bathroom faced the ocean and we kept the window open a fair amount. All the fixtures in the bathroom were rusty because of the salt...
 
Last edited:
Always good to see that kind of attention to detail :). All the same parts are rusty on my car too. Fan resistor, hood latch, bolt heads, battery bracket, parking brake cable brackets, etc. etc. Sometime soon I'd like to media blast the more expensive ones and get replacements for the cheaper ones just like you. Amayama's gonna have to dig through their dustiest shelves. You should see some of the cars Kaz services in the UK, those get real bad. Obviously all the Skylines from Japan too being steel & all coastline.
 
Good to know a little rust on these same parts isn't so uncommon. It seems like all the really rusty things have that silver finish, whatever it is.

Bead blasting is a great idea. After you strip them, what would you coat them with? Could send them in for some zinc plating or something...

I feel the same way about the obscure parts. I got an AC drier bracket in the last order. How many of those could they possibly sell a year? It's kind of an intricate part for the money (<$15). I'm grateful they sell it; mine's rusty and too big for the new drier. It cant be worth the effort of stamping out 3 different pieces, forming them, welding them together, finishing the piece, then having someone put a bolt in there.
 
For blasting, I haven't done more than play-sand on wheels but Honcho mentioned soda blasting which should be pretty safe, certainly what I would prefer over more abrasive media. For aluminum parts, my goal would be to strip off the old ugly black coating and make them at least satin again, they likely would need nothing but the naturally formed aluminum oxide layer on the outside or maybe a strong underbody clear if you really wanted. I'd have to do some more research on that.

For hardware & steel parts, I looked into zinc coating a bit but would be somewhat concerned about the longevity of electroplating. Factory Dacro is I believe a zinc-based proprietary coating that should be much more resilient than a DIY zinc electroplating, so if I was going through the trouble of restoring the hardware I'd want to make it last as long as possible which seems hard to achieve with DIY methods. Me personally, I'm just buying a bunch of new OEM bolts and will save some time for not too much more money. If you plan your projects well and make a detailed parts list, you can order all new bolts & brackets to replace the ones you remove as you go. Not fun to pay $7x4 for new camber bolts upfront but should last the life of the car.

I've gotten a few parts in the really old Honda parts bags, might be from the late 90's/early 2000's? Some random brackets and transmission shims. Parts availability in the US sucks ass but Japan seems to be hoarding everything ;).
 
Some new stuff. I'll start with the money shot.

96782e69c0eedb903a521e0919b36211.jpg


A new gauge!

It might seem small and basic, but it feels like big progress! It's a CAN bus gauge displaying data from my serial-only AEM ECU (Series 1). Most importantly, it's displaying AFR from a spankin new wideband controller. It works! Updates are not slow!

This is the culmination of several small projects over a number of weeks. I learned a lot about the wiring in this car, the manufacturer + model of a few OEM connectors, what even makes a MIL Spec, Deutsch "DTM" connectors, types of wire people generally use, proper crimping technique, and whole bunch about the CAN bus protocol.

The ultimate goal is 2 matching widebands sent into the ECU so it can run o2 feedback under cruising loads. Then no one-off gauges, instead only sensors that route into the ECU. That way I can log them, display them etc. Basically drag this thing into the present electronics-wise.

Long term that is probably some kind of display in a navpod--RealDash in an android tablet seems like The Move. But it's a big job in one go. So I'm going at this incrementally.

Right now I just wanted to see both AFRs, coolant temp, and air temp. For the medium term, the CAN gauge seemed like the best option.

The gauge displays all the things I want, including multiple things at once (though tiny and impossible to see in direct sunlight), is configurable, and it let me test out the CAN setup with low commitment. The only other option I could find displaying 2 widebands was the Innovate DLG-1, but it's not configurable, and no CAN bus. Nope.

Wideband

I'll start with the wideband install. I got an X-Series AEM wideband with an LSU 4.9 sensor. I ran the analog-out into the ECU, but as with a lot of this project, I'm prepping for the future. It has a CAN out that an AEM infinity can accept, which seems ideal. So hopefully CAN 2.0 sticks around at least until I am ready to upgrade the ECU...

491d5822a372acbe414cec137c4eb970.jpg


By far the most time consuming part of this was finding a not-terrible place to mount it, then actually mounting it in a minimally-sketchy way.

I really really wanted it to be in the cabin somewhere, but I couldn't find a reasonably accessible place for it. And wherever it went needed to have room for two. They're not big, but there wasn't space near the ECU under the top-rear interior piece.

The way the wires are coming out of the controller--3 separate groups of wires--it was going to be easier to route the power wires into the cabin from the engine bay, then plug the other two into the harness and o2 sensor.

Turns out there is a nice empty space on the passenger side near the alternator for the controller and the ~10 feet of wire that comes standard. "Don't cut the wires" they say. The Dude abides.

There are also 2 nice nutserts right there for I have no idea what. Whatever it was, it's gone. So I made a little bracket out of a piece of 1/16" aluminum.

I got a 1' square piece from Amazon, then laid it out with the caliper.

680245c5226d2a005a8dc4433fd006f8.jpg


I'm working with a rock and a stick here: a jig saw to cut it out, then a whole lot of filing.

cd1dbd9122365b8bd3ee61d343d632e5.jpg


I got no vice, so a clamp on the edge of the bench let me give it the bends.

d1a96874e87d7bcda3d42724729cd281.jpg


Cool ok, then mocked up in the location.

2ad3c33ca472655ffe79cae4f6089899.jpg


And the controller zip tied up. Note there is space for 2 controllers. This first one is going in the rear header and o2 #2 input.

e76bcd94aa32b69d9a09786407d26772.jpg


Aaaand mounted!

b0746439e0873051695ffc9d8db551f1.jpg


Another post coming up with the wiring changes!
 
Last edited:
Wiring! Long Post! Okay, first thing first: both the wideband and the new CAN gauge needed switched power. The inevitable 2nd wideband will also need power. Where to get it? How to distribute it? Can I make it nice and pluggable?

Some power source options

* Form the cigarette lighter circuit
* From one of the the accessory ports on the driver footwell fusebox (IGN)
* Maybe somewhere else in the console? Maybe something in the bulkhead? Maybe the unused phone plugs (C486 or C487) carry switched power? Seat plugs (unused)? Let me know if you got ideas.

I spent a lot of time looking for a nice source in the console, but never found one. The seat plugs carry constant 12v, and the phone plugs look like they only go to some other phone circuit.

The accessory port seemed like the best long term option, but it is far away from the console.

My cigarette lighter circuit was already all cut up and very close to the action, so I decided to use it for now. It's not ideal because it is ACC, not IGN, but it's fine. I never use the accessory spot anyway.

While I was in there, I wanted to clean up some of the current splices, using the cigarette lighter circuit let me kinda kill these 2 birds:

e5be0fec9337facbcc3e4a08c7fbb3b6.jpg


I wanted to make the setup pluggable so I could add more circuits without splicing another wire. I will be adding one more wideband controller, and who knows what else. Keep them options open, you know?

Finding a good power distribution solution was a little challenging. I needed fuses for the widebands (5a), but I wanted to physically mount it in between the main relay and the ECU, which is a small space. There are a bunch of big and/or crappy fuseboxes out there...

Turns out CycleTerminal sells a neat <a href="http://www.cycleterminal.com/mp280-fuse-box.html">little fuse/relay plug</a> for 4 circuits!

I bought one, tiny fuses, some hipster DTM connectors, too much 16awg GXL wire, and a couple crimpers cause one was delayed.

3e181dd613764b42a1d50b0b6d9befa1.jpg


I setup the tiny fusebox with switched power running to all 4 circuits--2 for the widebands, 2 for later. And I used those DTM 2 pin plugs for the wideband controller power. I probably should have gone with Sumitomo HD 090 2 pin plugs for the interior OE vibe, but the deed is done.

f151f5f9526c8ef92926d819fa60dbcb.jpg


I bought a mounting tab for the fuse plug from cycle terminal, but it was the wrong orientation, so I made a little tab out of aluminum, filed it down to fit nice and snug, then bent it a little so the plug doesn't slide off.

60c9f12a4b2cdbfde190ceca33cf7121.jpg


And mounted, yeah buddy.

5f0a1bb033655e7c56d2759064eb7e5a.jpg


Wideband Wiring

Wiring up the wideband controller was 2 parts

1. Send the power wire from the engine bay into the cabin
2. Get the controller's analog out into the ECU

I passed the controller's power wires through the firewall grommet on the passenger side. While in there, I spent a fair amount of time tracing aftermarket wires to work out what they did. I was able to clean up some dumb taps someone put on 4 ECU wires.

34967b00c706bf795b7cac81f5c10764.jpg


The taps were VSS, Tach, power & ground. There must have been a tach at some point? They went to a Defi controller, then nowhere. I was able to pull out the controller and all the wiring for it. Yay!

I bought some tefzel wire (MIL spec, brah) out of curiosity. It was really stiff, so I used it as a fish.

d89e4ed6a3db8a5fbe67e7c57b3c5b07.jpg


Then into the cabin.

54b35c6ca87ea4ce2f3ccd5094b8590b.jpg


On the other end, I sent the wideband controller's 5v out into the stock O2 connector (rear in this case). The stock O2 plug is a Sumitomo HW 090 4 pin FWIW, CycleTerminal sells them. It took me way too long to figure that out.

9d15b4988495c264deda25edc5b53252.jpg


Then installed from down under. It's plugged in to the rear o2 plug in the stock location on the valve cover (grey plug on the left of the pic).

3600ae3910b5294d260854a7e49b584e.jpg


Routing the wideband's 5v analog out into the stock connector is "clean" in that I don't need to mess with the stock harness. But it feels pretty roundabout: many feet of wire to the rear of the engine and back when the controller is 2 feet from the ECU. Whatev, it works and I didn't need to cut or mess with the harness.

Gauge Wiring / CAN

Last thing was wiring up the gauge. AEM makes a <a href="https://www.aemelectronics.com/products/cd-digital-dash-displays-adapter-harnesses/cd-7-plug-play-adapter-harnesses-3rd-party-devices/serial-to-can-cables">Series 1 Serial-to-CAN cable</a> that converts the Series 1 ECU's serial telemetry into AEMNet CAN messages. Turns out CAN bus wiring is simple, it's realllly only 2 wires: CAN low and CAN high. Whatever thing(s) emits messages on those two wires makes it the CAN bus (in this case, the ECU!).

30-2228-aem-series1-s2c-wrapped-web.jpg


AEM junk on the AEMNet CAN bus needs power, though, so the AEM CAN is 4 wire, adding switched 12v and ground. Since I was powering the bus to power the CAN gauge, I figured I could make the other gauge get its power from the bus as well. Confusing?

AEM sells a CAN bus hub that basically ties 4 connectors together. I guess it makes it more of a "bus" as I can put more inputs on there, or outputs to read the messages:

ccecabb2600226fd110d0f59caecf02c.jpg


Top grey plug is part of the serial to CAN cable. I'm feeding in power from the cigarette lighter which flows through the hub. Other plugs from left to right: ECU serial to CAN, new CAN gauge, the old gauge only pulling power from the bus, then an empty slot. I'll probably need to shuffle these around as I add more CAN inputs/outputs because the bus needs to be terminated by a 120ohm resistor on each physical end. For now we good: one input, one output.

Alive for the first time!

82cd227580d3cd7b8f067688ff461fa0.jpg


Some info in case anyone ends up using the serial-to-CAN cable with the GaugeART gauge: I used the infinity configuration in the GaugeART app. The serial-to-CAN cable's CAN messages are seemingly not configurable, and neither is the CAN gauge (other than picking an ECU config). The gauge's infinity config uses the vanilla AEMNet message protocol, which Just Works for most values. Initial setup was confusing because the cable docs said the cable made the ECU look like the series 2 ECU. However, the Series 2 config in the GaugeART requires configuation of the CAN messages. SOooo use the damn infinity config and give up on showing the Map value.

Ok, all wired. It's not pretty, but it will change a couple more times as I work toward a navpod setup showing all the things!

9a28d4913fe17927ee505d1f932edc2b.jpg
 
Last edited:
amazing from guy who just bought the car!...for a lay person like me how did you become so comfortable with all this electrical/mechanical stuff?
 
Thanks! I have a lot of experience with most of this, I guess. My dad has owned a fab/machine shop and built cars since I’ve been alive, so osmosis there. During high school and college I owned a bunch of Honda’s, had 0 money, tons of time, and access to the shop with all the tools and scrap metal I could handle. Most of that time was spent at the shop modifying one $800 civic for autocross duty (turbo b20z EF)

I ended up building the charge piping, the downpipe, some chassis bracing, rewiring parts of it, did reverse engineer work on the ecu, wrote a rom editor for it, tuned it, etc.


fee275a877a39298150fb9ef6a9cbd20.jpg


a63574fdb115785e95022dccd544fab3.jpg
 
wow awesome! Glad you decided to take on the nsx..not a great auto x stock ...but can be competitive with the right mods and skillzzzzz.
 
I definitely would love to take it some autox events. The nearest ones are like 2 hours away which is not ideal. But maybe I can make a few. It’s too time consuming to make a car competitive but would be awesome to understand the limits of the nsx like I understood the civic.

Tbh I’m a little nervous with the nsx on, say, a windy road. I don’t know where the limits are or how it behaves close to or at them. So I stay very very far away from them. Seems like they are high? But I have no idea really how to work this thing.

I had 6 or 7 years of learning, experimenting, and many spins in the civic to where I knew exactly how it would behave in some condition.
 
.well you have a strong nsx owners group in your region...they will help you get on it....:cool:
 
Yeah, Me and 916_NSX normally try to oraganize drives and meets around other larger ones, this upcoming 14th i along with 916_nsx have organized a cruise from Elderado Hills CA to a casino in Ione, if youd like some details feel free to message me on my instagram [MENTION=8372]yellow[/MENTION]_scoprion_nsx
 
On Saturday I got the car back with

* LMAs replaced
* Brand new crank pulley + shield
* New Gatorback / Continental Elite SC belt

I didn't want to do the LMAs myself. It seemed time consuming, cramped, and I've honestly never been fond of intricate engine work. I just wanted it done and done correctly. I took the car to TrackSpec in Fremont to do the work. They've replaced LMAs on many NSXs, so I was confident they would do a good job. At the same time they could inspect cam journals and make sure everything was good (it is!).

I also didn't really want to fight with the crank pulley bolt and it was cheap, so I had them install the crank pulley + shield too.

The car runs waaaay smoother. There was a fair amount of clatter before, and it's totally gone, I love it. Warming up at 8am:

a93b30fda101cf22733789f892f1309c.jpg


I bought the LMAs (14820-PCB-305 x12), crank pulley (13811-PR7-A02), and new crank pulley key (90704-PH7-000) from Amayama which were at least half price from anything in the US. LMAs were only $8 each!

b483382a45864e179d6d614a707f22af.jpg


f1e8cc1828abc2fb29c315573282154d.jpg


Here's the old stuff they replaced. There were a few stuck LMAs, so I'm glad I did it:

e23eb1f9d702e367a535241c5124837a.jpg


The old pulley didn’t seem so bad, but who knows. And now I have solid piece of mind with the new pulley and shield.

e086b952be72c71526d540eb9486c824.jpg


4246323b59df2b80eec9908f0f4ec34d.jpg


I had them install a new supercharger belt too because why not, they were in there replacing the pulley. The car came with a Gatorback belt, but when the timing belt was replaced, hilltop replaced the SC belt with a normal belt. I wanted to go use a Gatorback again to prevent slippage. I had heard some chirps with the smooth belt.....

2b78ea7fff367ecd85d5012fade9dc25.jpg


Gatorback belts are now called Continental Elite. The belt is a 5PK1765 or 4050695, 69.5 inch / 1765mm (I have the smaller SC pulley). I read a few threads on prime saying Continental didn't make an Elite 5 rib in this size so people were buying the 6 rib and cutting off a rib.

Well, maybe in the last couple years they started making them cause I was able to find one on ebay. It was a medium pain as the first one I bought came as a Continental OE replacement (smooth). I'm sure others on ebay are selling the OE series as the Elite... But I ultimately ended up with the correct one from a less shady seller.

b74935e53f70cea43f35efcf24dd7cd7.jpg


I definitely want to vouch for TrackSpec. My experience was super positive. They gave me a quote up front on a bunch of different jobs, I texted them a million questions which they promptly answered, the shop was super clean, they seemed really careful with the car, they were willing to let me pick the car up on a Saturday, and there were no surprises in the final price, or with the work they did.

I absolutely would take the car back to them. All around good experience!
 
You know a shop is a keeper when they save the old seals for you in a box :biggrin:. I'm still looking for somewhere local here that I feel confident taking mine to.

VTEC screens look real clean, did they do the top solenoid gaskets as well? I'm sure they're fine anyways.

Love the wiring and bracket fab work. You should watch Bad Obsession Motorsports on YT if you like brackets, racing, or big projects.
 
There aren’t many specialists around the country are there. I do feel fortunate that there are 3 or 4 driving distance from here. At this point you are the specialist in the area, certainly the transmission specialist. I guess it’s time to open a shop! SoS of the south, right?!

It’s nice they saved everything. I asked them to save the LMAs cause I was curious about the difference between a reasonable one vs a stuck one. A bunch of them take a long time to pop back, and a couple take a really long time. I also realized there are only 11 in the box... deduct points for that?

Not sure on the solenoid seals. Would it be something someone might do when changing the valve cover gaskets? Maybe hilltop did them? I dunno. I’m glad they did this tho, cause I would have missed the VTEC oil screens, I didn’t know they existed. And I would worry about getting the cam seals in there properly.

Noted on the YouTube channel. I’ll definitely give it a watch!
 
There's one specialist around here and last time I called they basically told me to do the work myself, haha. Thanks for the vote of confidence, not sure I'd go that far but maybe if/when I have a 1/3-life crisis.

The VTEC solenoids have the main gaskets & screens shown in the box that seal the surface between the solenoid body and engine, there's a smaller gasket & screen that separates the head of the solenoid from the body. Found a pic here. It would make sense for the shop to have done those at the same time, I just noticed the old ones weren't in the box. Not related to the valve covers. If they didn't it's very easy to do yourself.
up2rrCJ.jpg


The YT channel is best known for Project Binky which is probably one of the longest running series on the site. They've started uploading frequently again and all the videos are great watches.
 
Trackspec is a legit place. Last time I was there 3yrs ago I had to buy a shirt from Victoria. I was on my way to Laguna Seca and scheduled a last min alignment. I'm so glad the Gatorback double ribbed belt is being sold again!!! For a few years there I couldn't find them. The Continental name change makes sense now. I don't have the CTSC anymore but glad that option is there. It's the best belt especially for the skinny 5 rib design.

FWIW I get IGN signal from the ECU which I run to a relay that powers my auxiliary items in the engine bay. I believe you can also tap the main relay which is easier to get to.
 
The VTEC solenoids have the main gaskets & screens shown in the box that seal the surface between the solenoid body and engine, there's a smaller gasket & screen that separates the head of the solenoid from the body. Found a pic here. It would make sense for the shop to have done those at the same time, I just noticed the old ones weren't in the box. Not related to the valve covers. If they didn't it's very easy to do yourself.

The YT channel is best known for Project Binky which is probably one of the longest running series on the site. They've started uploading frequently again and all the videos are great watches.

Ok thanks for the heads up on that seal. I bet they didn't replace it. Maybe they needed to remove the VTEC solenoids then did that seal cause they were in there. I'll get it in the next giant amayama order. Need more stuff to justify that > $100 shipping...

Oh cool a 4wd mini! There was a long period of time where I was jonesing to get a mini and put a B-Series in it....


RYU said:
Trackspec is a legit place. Last time I was there 3yrs ago I had to buy a shirt from Victoria. I was on my way to Laguna Seca and scheduled a last min alignment. I'm so glad the Gatorback double ribbed belt is being sold again!!! For a few years there I couldn't find them. The Continental name change makes sense now. I don't have the CTSC anymore but glad that option is there. It's the best belt especially for the skinny 5 rib design.

FWIW I get IGN signal from the ECU which I run to a relay that powers my auxiliary items in the engine bay. I believe you can also tap the main relay which is easier to get to.

Yeah I really liked them. If it wasn't 2 hours away I would absolutely take it there for an alignment when I get to that point. The next big project I dont want to do definitely will be them.

I was realllllly hoping to find an empty plug carrying IGN power. My goal on the power front was to not cut or disrupt any of the stock harness (unless it was cut already). The DEFi controller was tapped into the ECU IGN power and it seemed sketchy running two wideband heaters off it... I think long term I'll run a wire from the footwell fusebox into the console for IGN, then run all the gauges and junk from that. At the same time really actually clean up all those butt connectors with a better power distribution method. I bought all the Sumitomo plugs CycleTerminal sells a busbar cap for, so one or more of those with some 2 pin plugs hanging off is probably going to be the long term solution.
 
Welllllll, I learned a lot about plugs, terminals, crimping tools, and wire doing the last couple projects. Maybe it's common knowledge, but I wanted to put this stuff here just in case helps someone in the future.

Interior plugs: Sumitomo HD 090 (non-sealed). e.g. cigarette lighter plug in the center console (3 pin), original seat plugs, phone option plugs behind the center speaker in the bulkhead, etc. These connectors are unsealed, so not for use in the engine bay.

Engine bay/Frunk connectors: Sumitomo HW 090. The key for me was o2 sensor connectors (4 pin), but also our TPS, knock, etc. connectors are this type. These plugs are sealed to keep your electrons cozy and out of the elements.

AEM AEMNet CAN connectors: Amphenol ATM series (ATM06-4S female, ATM04-4P male). Fortunately, they have the brand and part number on the plugs. Every automotive company ever should follow suit.

Driver footwell fuse box connector plugs: Sumitomo HD 250. The fuse box by your feet has some empty sockets you can use for constant 12v, ACC, IGN, etc. They are technically just standard male blade connectors, but the The Perfect Fit is a 1 pin female Sumitomo HD 250. Science of Speed sells these too (NSX and S2000 are the same), but they charge $9.50 each, while they are $2.50 at cycle terminal.

This picture is from Science of Speed:

99020738-18c3f080-2514-11eb-9fcc-705c42f8d27c.jpg


I bet Honda changed to later model Sumitomo connectors on the later model NSX, but I dunno if / when.

Crimp Tool

Hondas of this vintage use "open barrel" terminals/contacts (I've also seen them called "stamped and formed"). There are also "solid" terminals/contacts which seem like are used occasionally in the Deutsch connectors. You can get open barrel crimp tools for pretty cheap, while the solid contact crimp tools were hundreds of dollars.

I've never owned a ratcheting crimp tool like this, and all the options on cycle terminal + the internet were daunting. CycleTerminal alone sells at least a dozen different tools. I sorta guessed and I ended up with one from CycleTerminal and one from Amazon, both with replaceable dies. Even though they are different brands, they actually turned out to be exactly the same crimp tool with slightly different method of holding the dies.

99020860-401abd80-2514-11eb-90cf-f405ab757d13.jpg


The Amazon / Wireify one worked great for everything I did and was cheap. The crimp tool was $27, and the open barrel "C" die was $17. I got a couple other dies too for butt connectors & non insulated terminals.

Wire

I bought some new wire for these projects. I'm an adult now, which means I have graduated from using wire stolen out of junkyard wiring harnesses. It seems like people buy a couple different kinds of wire for automotive use:

* GXL - From here: "GXL wire is a thin wall, stranded, single-conductor automotive primary wire. The bare-copper wire conductor is wrapped with cross-linked polyethylene and allows for 50 volts, and operates best in a temperature range of -51°C to +125°C. It is used primarily in engine compartments where high heat resistance and operating at very low temperatures are required in accordance with SAE."
* TXL - This is GXL but with thinner insulation so it's lighter and more expensive
* SXL - GXL but Thiccc insulation
* Tefzel - tefzel is actually the name of the insulation surrounding the wire. Search for MIL spec wire and tefzel comes up. It's very thin and much more heat resistant (200°C) than the others. A lot of stuff I read swears by it. I bought some and it was crazy stiff like I was wiring up some giant machine's PLC panel or something. But I probably just bought the wrong stuff.

I ended up using GXL (see pic above). If the wire or cabin gets to almost 400°F, we got bigger problems than my damn wire.

CANCAN

When I get deeper into the CAN stuff, I'll post something about it. There were a lot of assumptions & initial confusion I had. It's actually not so complicated. Automotive tech is generally pretty terrible + proprietary, but the CAN bus is the best thing ever.
 
Last edited:
Yeah I really liked them. If it wasn't 2 hours away I would absolutely take it there for an alignment when I get to that point. The next big project I dont want to do definitely will be them.

I was realllllly hoping to find an empty plug carrying IGN power. My goal on the power front was to not cut or disrupt any of the stock harness (unless it was cut already). The DEFi controller was tapped into the ECU IGN power and it seemed sketchy running two wideband heaters off it... I think long term I'll run a wire from the footwell fusebox into the console for IGN, then run all the gauges and junk from that. At the same time really actually clean up all those butt connectors with a better power distribution method. I bought all the Sumitomo plugs CycleTerminal sells a busbar cap for, so one or more of those with some 2 pin plugs hanging off is probably going to be the long term solution.
I totally get not wanting to pierce a factory wire. I have a jumper harness between my ECU and factory harness. I tap into that. Not sure if you have something similar. I actually replaced my ignition switch harness because an alarm installer from the previous owner hacked it up.

Other cars have ignition and/or ACC open spade connectors in the fusebox. Perhaps you can tap into one under the hood or in the footwell.

Good luck!
 
Back
Top