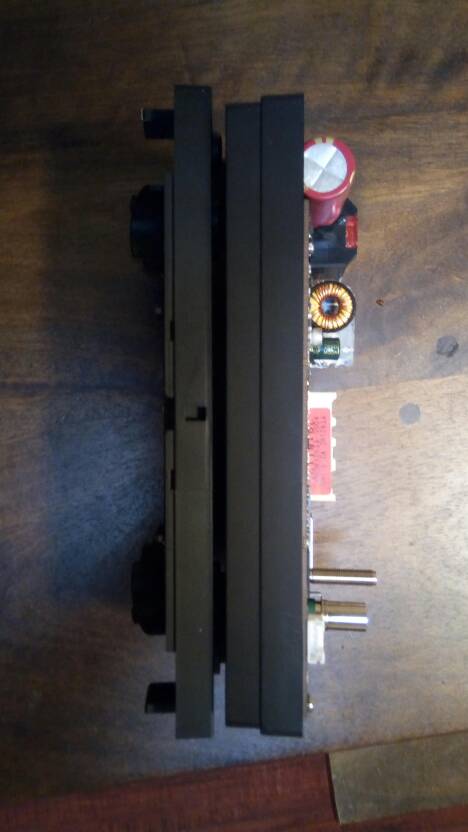
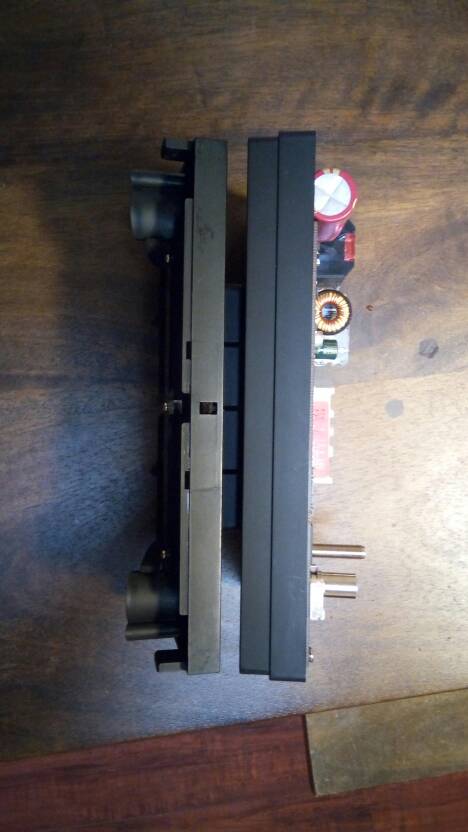
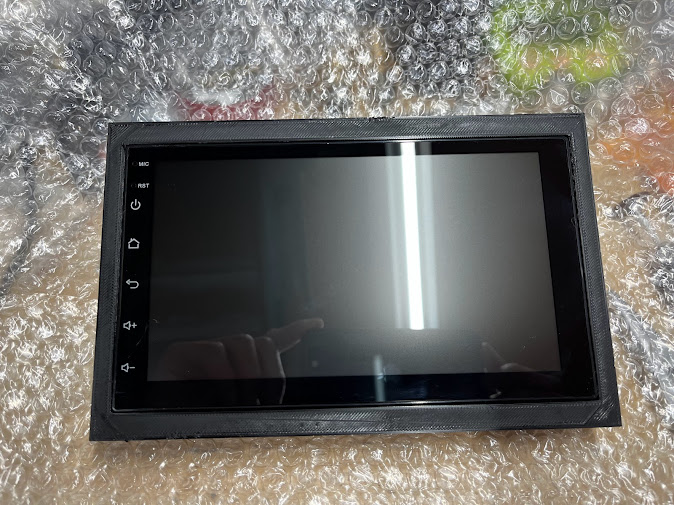
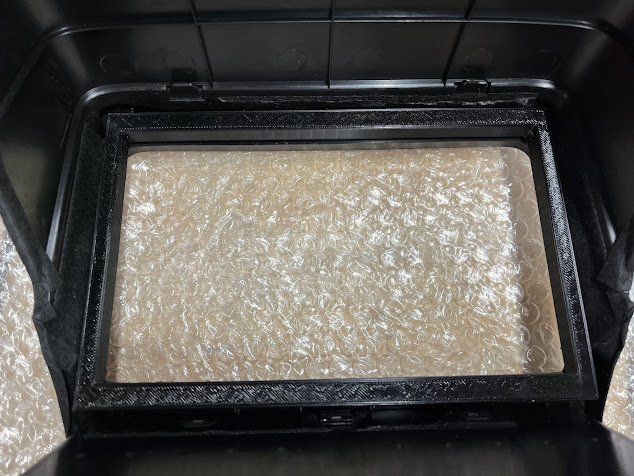
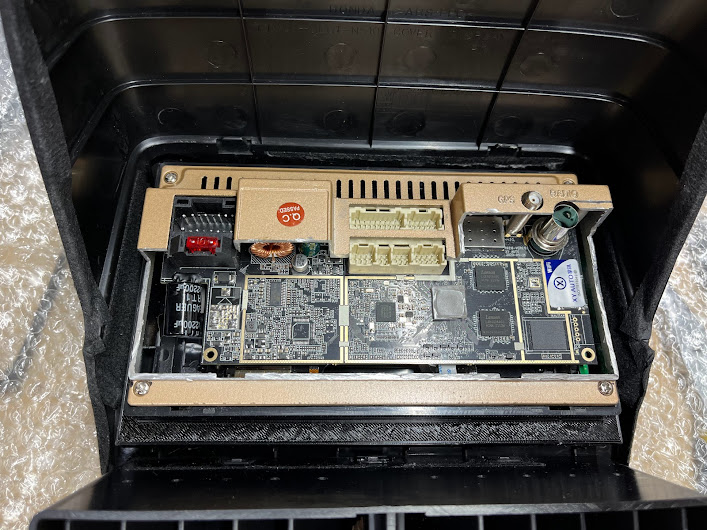
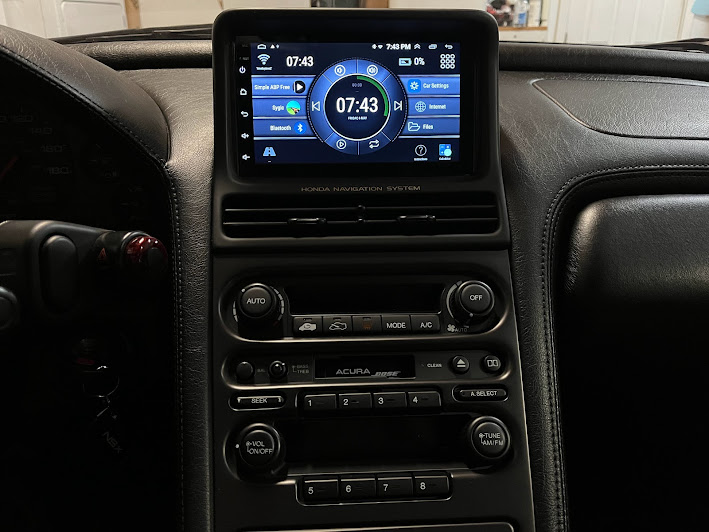
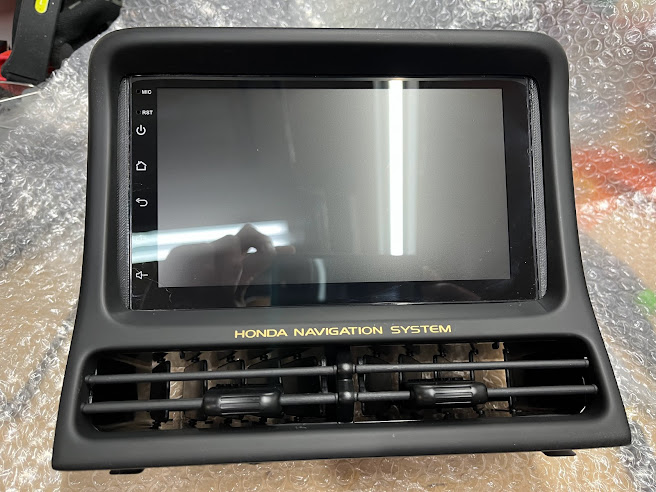
Update: I designed a 3D printed frame that will allow a cleaner install of the Android unit. With this frame you no longer need to use the Legos and glue. You do however need to cut the back of the Android unit to get enough clearance to fit. To install the frame remove the top and bottom felt tape from the NAVPOD then simply insert the frame. It's friction fit. If you want it to be more permanent you can add a few drops of super glue. I haven't had the need to and it's been fine.
The 3D file is free here:
https://www.thingiverse.com/thing:5379317
Original Post:
I've been wanting to get some more modern features in the NSX such has Navigation, Bluetooth, and Reverse Camera. I already have a GROM unit and I'm pretty happy with it in terms of function but I was still lacking Navigation and a Reverse Camera.
I was inspired by these two threads:
http://www.nsxprime.com/forum/showt...our-setup-as-well-as-why-you-chose-this-route
http://www.nsxprime.com/forum/showt...armin-GPS-with-Wireless-Backup-Camera-Project
I began searching for an Android Unit that would fit the Navpod but had a hard time finding anything that would fit other than either a tablet or a Garmin. Anything that would fit would have to be pretty shallow as there's not much room to play with. The Garmin (latest model) was actually a tad too small. It went through the Navpod opening so I ended up returning it. Eventually I stumbled upon some Android units like this:
https://www.aliexpress.com/item/LEH...666.html?spm=a2g0s.9042311.0.0.43b84c4dCMC7iI

At less than $70 I was willing to take a chance to see if I could get it to fit. You would also need to get something like this to make it fit the face of the Navpod. In hindsight it's possible this frame would've worked with the Garmin as well.
https://www.amazon.com/gp/product/B002LTB9Q2/ref=ox_sc_saved_title_7?smid=ATVPDKIKX0DER&psc=1
Alternatively just buy a similar unit that comes with the trim piece. There are multiple brands but from the pics on Aliexpress they look like the same basic design.
In order to get the unit to fit, you'll have to take it apart and remove the circuit board from the metal housing and attach it to the screen housing. I used one of the main screws and attached the other spot using a piece of "Lego" from the Dollar Tree (I bought 3 bags just to have extra) and used Plastic Surgery to glue it. This stuff is the best plastic glue I've ever used. Just drill a hole in the Lego.
https://www.amazon.com/Surehold-SH-...+surgery+glue&qid=1552884567&s=gateway&sr=8-2

This is what the circuit board looks like attached to the screen housing:

Here's a close up of the Lego:

To mount the unit onto the Navpod I used some more Legos and Plastic Surgery. I also used some 1/2" thick foam gasket I had laying around. I cut it to size and it provided very good spacing to center the unit against the face of the Navpod. The Legos also fit very well.

Legos:

Top:

Bottom:

Here's a side profile pic. I also mounted the GPS antenna to the Navpod because I wanted to be able to easily remove the entire unit as a whole. I kept the antenna facing up.

I referenced this for center console removal:
I got the SOS bracket and I had a hard time getting the Navpod to sit firmly. I did many tests with just the Navpod itself. Eventually I found that if you add some cushions to it, it will fit snugly. Here's what I used and how it looks during some test fitting.


I highly recommend test fitting the Navpod without the Android Unit installed as it will familiarize you with how everything goes together. With the cushions the top two screws are not too difficult to install. One thing I wasn't able to get to fit was the smaller vent tube. I just couldn't get the Navpod to sit flush with it so I just put the standard vent tube back and it works fine.
Thanks to @Old Guy for this wiring diagram. Remember the picture is of the Radio Unit and not the Plug. When you tap into the plug the order of PIN connectors is reversed but the wire coloring is the same.

For now I still intend to use the GROM for music because I like that the radio controls are closer. I intend to use the Android for Bluetooth Calls (Displays numbers, GROM doesn't), Navigation, and Back Up Camera. I like to use Posi-Taps because they're easy to use in tight spots, are very secure when used correctly, and can be removed and reused without damaging the wiring too much. I only needed to connect, constant power, switched power, illumination, and ground. For NAV voice, I connected the Android's Front Left speaker wires directly to the center mount speaker. With the center mount speaker disconnected I don't notice too much difference in overall sound quality so I was willing to sacrifice that for now.


I also like to use solder sleeves and shrink wrap. Butt connectors are fine too but when you're tight on space I find these work better

All shrink wrapped:

Wires routed behind the vent tube:

First in car test:

Everything back together:

Thanks to @nsxbuilder for this boot logo:

I haven't had time to install the Back up camera yet but the wiring to the head unit is already done so it's just a matter of running the connection to the trunk. Also, you can't change the boot logo on your own, at least I don't recommend it. It could crash your unit (ask me how I know). I ended up sending the pic to the vendor and asked them to install as the boot logo before sending me the replacement unit. I wanted to change the boot animation as well but was told it wasn't possible. I don't want to chance this unit crashing as well so I'm not going to bother with it.
EDIT: See post #12 for Back Up Camera install.
The 3D file is free here:
https://www.thingiverse.com/thing:5379317
Original Post:
I've been wanting to get some more modern features in the NSX such has Navigation, Bluetooth, and Reverse Camera. I already have a GROM unit and I'm pretty happy with it in terms of function but I was still lacking Navigation and a Reverse Camera.
I was inspired by these two threads:
http://www.nsxprime.com/forum/showt...our-setup-as-well-as-why-you-chose-this-route
http://www.nsxprime.com/forum/showt...armin-GPS-with-Wireless-Backup-Camera-Project
I began searching for an Android Unit that would fit the Navpod but had a hard time finding anything that would fit other than either a tablet or a Garmin. Anything that would fit would have to be pretty shallow as there's not much room to play with. The Garmin (latest model) was actually a tad too small. It went through the Navpod opening so I ended up returning it. Eventually I stumbled upon some Android units like this:
https://www.aliexpress.com/item/LEH...666.html?spm=a2g0s.9042311.0.0.43b84c4dCMC7iI

At less than $70 I was willing to take a chance to see if I could get it to fit. You would also need to get something like this to make it fit the face of the Navpod. In hindsight it's possible this frame would've worked with the Garmin as well.
https://www.amazon.com/gp/product/B002LTB9Q2/ref=ox_sc_saved_title_7?smid=ATVPDKIKX0DER&psc=1
Alternatively just buy a similar unit that comes with the trim piece. There are multiple brands but from the pics on Aliexpress they look like the same basic design.
In order to get the unit to fit, you'll have to take it apart and remove the circuit board from the metal housing and attach it to the screen housing. I used one of the main screws and attached the other spot using a piece of "Lego" from the Dollar Tree (I bought 3 bags just to have extra) and used Plastic Surgery to glue it. This stuff is the best plastic glue I've ever used. Just drill a hole in the Lego.
https://www.amazon.com/Surehold-SH-...+surgery+glue&qid=1552884567&s=gateway&sr=8-2

This is what the circuit board looks like attached to the screen housing:

Here's a close up of the Lego:

To mount the unit onto the Navpod I used some more Legos and Plastic Surgery. I also used some 1/2" thick foam gasket I had laying around. I cut it to size and it provided very good spacing to center the unit against the face of the Navpod. The Legos also fit very well.

Legos:

Top:

Bottom:

Here's a side profile pic. I also mounted the GPS antenna to the Navpod because I wanted to be able to easily remove the entire unit as a whole. I kept the antenna facing up.

I referenced this for center console removal:
I got the SOS bracket and I had a hard time getting the Navpod to sit firmly. I did many tests with just the Navpod itself. Eventually I found that if you add some cushions to it, it will fit snugly. Here's what I used and how it looks during some test fitting.


I highly recommend test fitting the Navpod without the Android Unit installed as it will familiarize you with how everything goes together. With the cushions the top two screws are not too difficult to install. One thing I wasn't able to get to fit was the smaller vent tube. I just couldn't get the Navpod to sit flush with it so I just put the standard vent tube back and it works fine.
Thanks to @Old Guy for this wiring diagram. Remember the picture is of the Radio Unit and not the Plug. When you tap into the plug the order of PIN connectors is reversed but the wire coloring is the same.

For now I still intend to use the GROM for music because I like that the radio controls are closer. I intend to use the Android for Bluetooth Calls (Displays numbers, GROM doesn't), Navigation, and Back Up Camera. I like to use Posi-Taps because they're easy to use in tight spots, are very secure when used correctly, and can be removed and reused without damaging the wiring too much. I only needed to connect, constant power, switched power, illumination, and ground. For NAV voice, I connected the Android's Front Left speaker wires directly to the center mount speaker. With the center mount speaker disconnected I don't notice too much difference in overall sound quality so I was willing to sacrifice that for now.


I also like to use solder sleeves and shrink wrap. Butt connectors are fine too but when you're tight on space I find these work better

All shrink wrapped:

Wires routed behind the vent tube:

First in car test:

Everything back together:

Thanks to @nsxbuilder for this boot logo:

I haven't had time to install the Back up camera yet but the wiring to the head unit is already done so it's just a matter of running the connection to the trunk. Also, you can't change the boot logo on your own, at least I don't recommend it. It could crash your unit (ask me how I know). I ended up sending the pic to the vendor and asked them to install as the boot logo before sending me the replacement unit. I wanted to change the boot animation as well but was told it wasn't possible. I don't want to chance this unit crashing as well so I'm not going to bother with it.
EDIT: See post #12 for Back Up Camera install.
Last edited:


