• Protip: Profile posts are public! Use Conversations to message other members privately. Everyone can see the content of a profile post.

Honcho's Long Road to Imola Type-S Zero

Engine Testing 2

Thanks to the timely intervention of @Kaz-kzukNA1 we are making progress. In order to "re-clock" the thermostat to 12:00, I drained about a gallon of coolant from the rear engine block drain. This minimized spillage when we removed the thermo cover, which was nice. However, it also re-introduced a lot of air into the system. This time, we re-filled the coolant using the funnel and bleeder method like in the workshop manual.

Upon removing the thermostat, I discovered that it had no float pin. :oops: Although this feature is not required on a thermostat for proper functioning, on a car like the NSX with its complex cooling system, having an air port helps. So, upon the suggestion of @Big McLargeHuge, I drilled a 1/16" hole in the top of the stat. This is an old hotrodders trick to help purge air from the system. While the tiny hole will allow a small amount of hot coolant to bypass the stat, it shouldn't really affect warmup time much at all and will greatly aid the air purging process. I installed the stat with a new gasket.

Next was the Kaz air purge process.

We first ran the car for 60 seconds to move the air pockets.

Armed with a jug marked off at 1L and 1.5L, we proceeded.

20221228_184624.jpg

Filled the coolant tank to the neck (actually a little above)

20221228_184613.jpg

A good amount of air came out of the thermo cover bleeder, but we soon had a steady stream. 1.5L collected.

20221228_185319.jpg
20221228_185334.jpg

Next up was the radiator, which let out a lot of air and then a steady "squirt" of coolant each time the plug was wiggled.

Then, the heater core, which funny enough had almost no air. It was pretty much a steady stream of 1.5L collected.

20221228_190534.jpg

20221228_190519.jpg

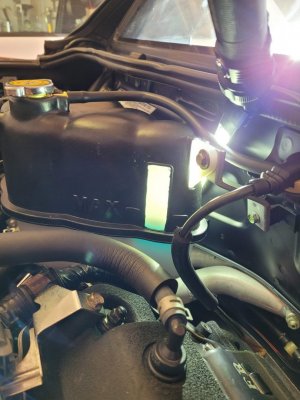
Next was the crazy part- the water pipe bleeder on the rear firewall. This thing was bubbling air out the entire 1.5L! Near the end, the stream got more solid, but it was MUCH more air than we expected.

One more time on the thermo cover (almost no air) and we were ready for the warmup. Here's where it got interesting. I connected the laptop to the ECU so we could monitor the temperature. As you can see in the video, the coolant temp was at 85C, but the thermo hose was still cold. :unsure: Finally, at 93C, the coolant started to bubble out of the bottle cap and we shut it down.

The rad fan never kicked on.


View attachment 20221228_195542.mp4

It was clear that the thermostat did not open, even though it should at this temperature (it's an 80C stat). @Big McLargeHuge, on a whim, started squeezing the thermo hose and we could hear the water sloshing in the pipe, even under the car. Then, the strangest thing happened. While continuing to squeeze, Tyler said "Ow!" and pulled his hand away from the thermo hose. It had suddenly gone from lukewarm to scalding hot. Clearly, the thermostat had popped open, allowing the hot 90C coolant to flow into the thermo hose. The best we can guess is that the brand new stat was "sticky" with the dry metal plunger "stuck" to the dry metal housing. The agitation/pressure of Tyler squeezing the water dislodged it and it opened correctly. It also explains why the rad fan never kicked on, since the sensor is on the thermo cover side of the stat, the water was not warm enough to trip the fan.

I let the car cool overnight and will warm it up again today. Now that the thermostat plunger is free, I think I will have a better result!
 
Quick update- it still didn't open, even at 93C. I think it's a bad unit and just ordered the OEM Honda part. I suppose I'll have to live with the mushrooming rubber seal...:cautious:
 
Re-Assembly 93

Seats, rails, etc.


My son asked to be the first one to sit in the refreshed NSX. Wish granted. :)

20221230_152606.jpg

A few notes on fitment. The Wedge brackets fit the car mount holes perfectly. I replaced the Wedge grade 5 mounting bolts with grade 8. I had to drill the bracket to fit the NRG seat rails and essentially eyeball it. My drilled mounting holes provide about 3" of forward/backward adjustment based on the seat rail slots. All of the mounting bracket and rails are 1/8" steel, per the latest FIA regs. It adds some weight, but, well safety. Another trick that made mounting easier is that I used OEM bolts that are 10mm longer than the original bolts. Much easier to get started in the jiggly nut-serts inside the body, especially in the awkward angles required for the rear bolt. The part number is 93405-10035-08.

There are some annoying issues though. First. the seat can't really recline past the "level" setting front to back because the thigh bolster will contact the center console. Second, and most critically, the shoulder "wing" does touch the door panel, even with the seat all the way toward the center of the cabin. It doesn't prevent the door from closing or anything, but it does press into the foam. I put some felt tape on the seat to protect the panel from rubbing, but I may take them back to my upholsterer and have him trim 1" from the wings. What's odd is that these bolsters are the excat same width as the Recaro ABE. The only thin I can think of is that the Recaro bolsters sit lower than the NRG? @MexiRicer any thoughts? Also, the seat belt brackets are way too far forward on the Wedge brackets. They really need to move toward the rear of the car by about 3". You can see the seat belt mount in this picture clocked almost back to 9:00.

Overall, these are small nits that can be overcome with time and the proper application of $$$$. LOL The seats look amazing and are quite comfortable. Also, if I lose 20 lbs, they will be even more comfortable!
 
Last edited:
Niggles aside that interior looks amazing!
 
Good on you for going Grade 8 on the seat bolts. That is all I use on all racing seat and safety gear installs. As to the seat hitting the center console and door, a couple of thoughts.

I'm not familiar with your side seat brackets, do they have additinal mouning holes so that you can adjust the seat back rake and height? If not, that is the first place i would look as you can easily mount the seat where you want it without it hitting anything. This would be my first choice.

If adjustable side seat brackets are not your choice, you could adjust the angle of the seat mounting bolts with a washer or spacer on the outside bolts and seat frame to rake it in a little. And you may want to do that on the forward mounting bolts anyway to get the seat in a more reclined position. just my $.02.
Thanks! Yes, I can adjust rake and height on the side rails. Honestly, the seat should be reclined back by one hole. But, as I noted, this means the front of the thigh bolster will tilt up and hit the center console. The solution would be to move the seat laterally toward the door to clear the center console (there's plenty of room for that), but this pushes the shoulder bolster further into the door panel. :mad:
I'll probably take it out again and play around with the fitting. Plus, doing the passenger side first was good practice for the driver's side, where it really matters LOL. On the regular NSX seat, I found a recline position that allowed me to fit in the car with a racing helmet and not touch the headliner (I'm 6'1"). My goal is to find that position with the racing seat and just lock it in. It's going to be some trial and error no doubt. And, ultimately, I think those shoulder bolsters are going to have to be trimmed by an inch...
 
Re-Assembly 94

Hood, washer nozzles, UCAs, etc.


While I wait for the Honda genuine thermostat to arrive, decided to move on to other tasks in the meantime. First up was the hood. The painting process gummed up the washer nozzle slots, so some careful precision fitting work was needed with the needle file. Took great care not to scratch the paint!

New old stock genuine YR-514P nozzles. Note the old-style Honda packaging.

20221231_120549.jpg
Hood in place with new bolts. Again, @Big McLargeHuge was a huge help- this was a two person job and a considerable amount of fitting was required to get the panel lines correct. However, with the hood in place, we realized that the headlight covers need adjustment, and the front bumper could use a couple washer shims to raise it up. The new bolts will be painted Imola orange when the NSX returns to the paint shop.
20230101_160848.jpg
20230101_160853.jpg
20230101_160908.jpg

Note the chips from our fitting exercise. This will be touched up at the paint shop.

20230101_161045.jpg

If you recall, the previous owner had some kind of "dazzler" flashing washer nozzles mounted on the car. Whoever installed them just butchered the factory mounting holes. I was able to use a 25mm Honda grommet to fill the space and create a presentable look for the factory hoses. It's not perfect, but it looks much better than the original state.

20180920_220215.jpg
20230101_161025.jpg

We next moved to the just-in-from-Japan NSX-R upper control arms. I gave up on the Prothane here. It was so much more satisfying to bolt the OEM piece into place with no fitting required at all!

20221231_151823.jpg


20221231_151901.jpg

While the lower rear ball joints are still good, the right side one is so mangled from removal, that I really need to replace them. I will drive the car as-is for now, but probably next Fall I will remove the rear hubs and send them out to Steve Ghent for replacement. For this reason, I put a small amount of anti-seize on the joint taper and sleeve to aid in removal. This will also give me the opportunity to change out the rear wheel bearings, which are nearing the end of their life. However, I am excited to move on to installing the rear brakes and bleeding the brake system! We are almost done!
 

Attachments

  • 20230101_161025.jpg
    20230101_161025.jpg
    235.4 KB · Views: 3
Last edited:
Re-Assembly 95

Rear brakes, brake lines, pads, etc.


Really moving now. Installed the rear brakes and brake lines. Now I can bench bleed the master cylinder and bleed the brakes.

Refinished caliper from 3 years ago with new OEM hardware.

20230101_161636.jpg
20230101_164937.jpg
New rotors cleaned with brake cleaner. Turns out I found these stuffed under a shelf in the garage. They were spares I bought in 2012 for my 91. I completely forgot they were in there!

20230101_202310.jpg

Rotor and bracket installed. Please remember to use anti-seize on the little phillips screws. Otherwise, you'll need a drill to remove them.

20230101_164724 (1).jpg
Setting up the rear pads. Use copper anti-seize between the shims and the pad to greatly reduce squeal/squeaks.
20230101_164943.jpg
20230101_203432.jpg

Note the peg on the inner brake pad. Make sure to line this up with the groove in the piston, or you will have uneven pad wear and reduced braking capacity.

20230101_191953.jpg

I used all new hardware. This is the old 30-year old banjo bolt and the new one. These are sensitive to torque and I have snapped a few over the years, even being careful with the wrench. Better to replace them-just a few dollars.
20230101_193519.jpg

And all together.

20230101_200000-jpg.176500

20230101_200038.jpg
 

Attachments

  • 20230101_200000.jpg
    20230101_200000.jpg
    117.9 KB · Views: 196
If you recall, the previous owner had some kind of "dazzler" flashing washer nozzles mounted on the car. Whoever installed them just butchered the factory mounting holes.
That's an amazing thing to do to an NSX. You really saved this one. :)

What brake hardware are you going with (91/97 rears, front years, etc?)
 
Brakes look too good to use...
 
That's an amazing thing to do to an NSX. You really saved this one. :)

What brake hardware are you going with (91/97 rears, front years, etc?)
It's all Honda genuine hardware, except for the pads and rotors. These are the original 1992 brakes, just re-finished and rebuilt with new seals. I've been fortunate to have driven many different brake setups on the NSX, including at the track. I believe the OEM brakes when fully rebuilt with fresh, quality pads and good fluid are fantastic, including on the track. It's a firm pedal with no fade and it modulates very well. The NSX is so light that you really don't need any more at stockish power levels and the BBK options are really just bling for me that adds unsprung weight. JMO.
 
I believe the OEM brakes when fully rebuilt with fresh, quality pads and good fluid are fantastic, including on the track. It's a firm pedal with no fade and it modulates very well.
That's all great to know. There was a brake question recently and I spent much longer than I planned on learning about the 91-96 vs 97-05 brakes and read a couple debates on if the NSX uses/needs more rear bias than a lot of other sports cars, so I was wondering if you did some fancy mixing/matching of OEM components by year.
 
That's all great to know. There was a brake question recently and I spent much longer than I planned on learning about the 91-96 vs 97-05 brakes and read a couple debates on if the NSX uses/needs more rear bias than a lot of other sports cars, so I was wondering if you did some fancy mixing/matching of OEM components by year.
I went down the brakes rabbit hole 10 years ago on my 91 and came out of the tunnel with the realization that there really isn't anything wrong with them. Instead, most of the complaints about the OEM brakes boil down to:

1. A new owner driving on tired, 30-year old calipers.
2. Poor pad choice. Most of the "low dust" pads a lot of people use have terrible initial grab, resulting in a less confident initial pedal feel. This makes the brakes feel inadequate to the novice driver.
3. Old/inadequate fluid. Many drivers take their NSX to the track for the first time and boil the fluid, which causes brake fade and a spongy pedal. Again, they walk away thinking "the NSX brakes suck" and spend $5k on a BBK.
4. Poor technique. In performance driving, you learn how to "threshold brake," which allows the rotors to cool for a longer period than a novice driver, who tend to ride the brakes too long out of caution and inexperience. That dumps a ton of heat into the rotors lap after lap until they fade.

The first 3 you can buy your way out of. The last one is just practice and a good HPDE or racing instructor. I did find that getting more air to the front brakes improved performance. I used the Dali Racing deflectors on my 91. I bought the Porsche 911 plastic ones this time and will adapt them to the NSX.

As for bias, it is true the 97+ brakes are more stable. The 91-96 brakes are over-biased to the front, which will cause oversteer under hard stopping. Honda realized this and corrected it for 1997+ Those brakes are more rear-biased and provide more rear traction under stopping load. However, if you know what you are doing, I think the 91-96 are fine. This brake bias was tuned to the preference of Honda's late-80's F1 and CART drivers (Nakajima, Senna, Rahal), which I can only assume was closer to the race cars they were used to. Most owners who experience the 97+ brakes think they are much stronger than the 91-96, but what they're really feeling is that more confident understeer feeling. The brakes themselves aren't really that much grippier than the 91-96.

For pads, if you don't track your NSX, the OEM are really quite good. My personal favorite is the Project Mu NS. It's a semi-metallic pad so it has a high initial bite and good modulation. Yet, it somehow dusts very little and is fairly easy on rotors. The best street/track pad I've ever used is the Project Mu HC+. It's awesome, but a little more dusty/squeaky. I really liked the Carbotech XP8 for pure circuit work, though I found that the incredible hot stopping force overwhelmed the grip capacity of my UHP tires. Thus, they're really more for R-comps and slicks. I'm hoping the Endless MX72+ will be like the HC+ but with less dust.
 
Thanks for the breakdown. I've got experience with Hawk and EBC lines but not so much with Endless or Project Mu. I'll have to dig into those a bit. The previous owner did a brake bleed and replaced with the same Motul 600 I use and Hawk HP+ pads which are ok, but I'm not a huge fan of. I don't plan on doing any track duty with the car yet, as I'm building a 98 hatch for that duty, but a solid street setup is more what I'm likely shooting for. Good to know the old brakes are up to that task, and I'll likely rebuild those when I'm doing the prothane work.
 
Whatever caliper size you use you might want to try the Performance friction PFC-1 pad I have been using them for years on the bee now all street but I did use them on track ..and very good do it all compound. Stuntman turned me on to them...
 
This looks great, Honcho. I just spent hours drilling out 4 screws on the brake rotors. My understanding is that those screws are for ease of installation at the factory. Any reason why you put those screws back on the rotors?
 
This looks great, Honcho. I just spent hours drilling out 4 screws on the brake rotors. My understanding is that those screws are for ease of installation at the factory. Any reason why you put those screws back on the rotors?
It does also align the rotor and hold it in place, which makes mounting the caliper and pads much easier. If you use anti-seize, they will not get stuck again.

*EDIT*

I suppose you could install the screws, mount the caliper and pads and then remove the screws...
 
It does also align the rotor and hold it in place, which makes mounting the caliper and pads much easier. If you use anti-seize, they will not get stuck again.

*EDIT*

I suppose you could install the screws, mount the caliper and pads and then remove the screws...
Yes, I definitely agree that the screw made putting the caliper and pads back on much easier. Your imola is looking really good.
 
Engine Testing 3

Coolant bleed, thermostat, etc.


The Honda genuine thermostat arrived today and I installed it. I must have done a much better job during the previous Kaz bleeding cycle because even after draining the engine block, an OCEAN of coolant spilled out of the thermo cover. Anyway, with the Honda stat in place, it was time to do the bleeding sequence all over again.

Here is the drain from the heater return pipe in the engine bay firewall. This stream of bubbles never stopped- I assumed it was just air being pulled past the bleeder threads, but not sure. This is the high point in the bleeder system, so maybe there is still air in there.


View attachment 20230106_151919.mp4

Next was the fireup and warmup. Good news- the thermostat opened at 80C no problem. However, there still must be too much air in the system because the coolant level went to the top of the bottle again.

Here is a screen grab from the video. You can see the coolant nearly at the top of the bottle. This was after the thermostat opened.

coolant bottle level.png

It was burping tons of air, as I could see the water sloshing in the tank as the bubbles came up. I will let the car cool overnight and perform the air purge sequence one more time. I bet that will do it.
 
Engine Testing 4

Coolant...again.


After the car cooled off overnight, I performed the complete bleed sequence again.

The initial level of the coolant at the start. This is about an inch lower than the starting level at the warmup.
20230107_140451.jpg
Thermo cover. No air came out. Solid stream.
20230107_151005.jpg
Radiator. Steady stream of coolant- no bubbles.
20230107_151557.jpg
Heater pipe. No air came out. At this point, I am confident the front of the car is relatively air free.
20230107_151657.jpg
20230107_151706.jpg
Heater return pipe at the firewall. Lots and lots of air removed. Look at all the bubbles. The noise is not the NSX running- it's the front loader removing snow in front of my house LOL.

View attachment 20230107_152351.mp4
Fired up again and no big issue with anything- the car runs beautifully. (You can hear the car running :D )

View attachment 20230107_154623.mp4
The thermostat opened and the radiator got hot. But, as the coolant temp hit 90C, the bottle expanded the coolant to this level before the rad fan kicked on.
20230107_160323.jpg

Since I have purged all the air I can out of the bleeders, I can only assume there are voids in the engine block/heads that still have to work their way out. I did, after all, drain the engine block twice to deal with the thermostats. Last time, the car drew in about an inch of coolant as it cooled down, meaning it expelled some air. I'm going to let it do the same thing tonight and see how much more it takes. I bet the next warmup will go fine.
 

Attachments

  • 20230107_140451.jpg
    20230107_140451.jpg
    146.3 KB · Views: 2
If you did the coolant all over again would you do something differently?
I would fill via the workshop manual method instead of the vacuum tool, which Kaz mentioned is too weak to draw all of the air out of the system.
 
Engine Testing 5

Coolant...yet again.


Some of the old-time Primates know the NSX coolant and I have a long and complicated relationship. :D Thus, I'm not surprised here LOL.

Here is the state of the coolant bottle this morning- it dropped by about 10 cm. So, some air definitely got purged. I'm about to run out to the garage and do another warmup cycle. I feel like last time I was juuust about to hear the rad fan kick on before the coolant got too high.

20230108_110902.jpg

*EDIT*

Here is the coolant after the warmup cycle. Again, it got to 90C and I had to shut it down. I feel like it was right before the rad fan was going to kick on. I will bleed the thermo cover and return pipe one more time after the car cools down.

20230108_131912.jpg
 
Last edited:
what a process...:oops:
 
Back
Top