• Protip: Profile posts are public! Use Conversations to message other members privately. Everyone can see the content of a profile post.

Honcho's Long Road to Imola Type-S Zero

Re-Assembly 5

DAY 3 - ABS Upgrade, Brake Lines, A/C Lines, Etc.

The detour on Day 2 left me slightly discouraged. So, we resolved to build out the entire front by by the end of Day 3. We nearly accomplished our goal.

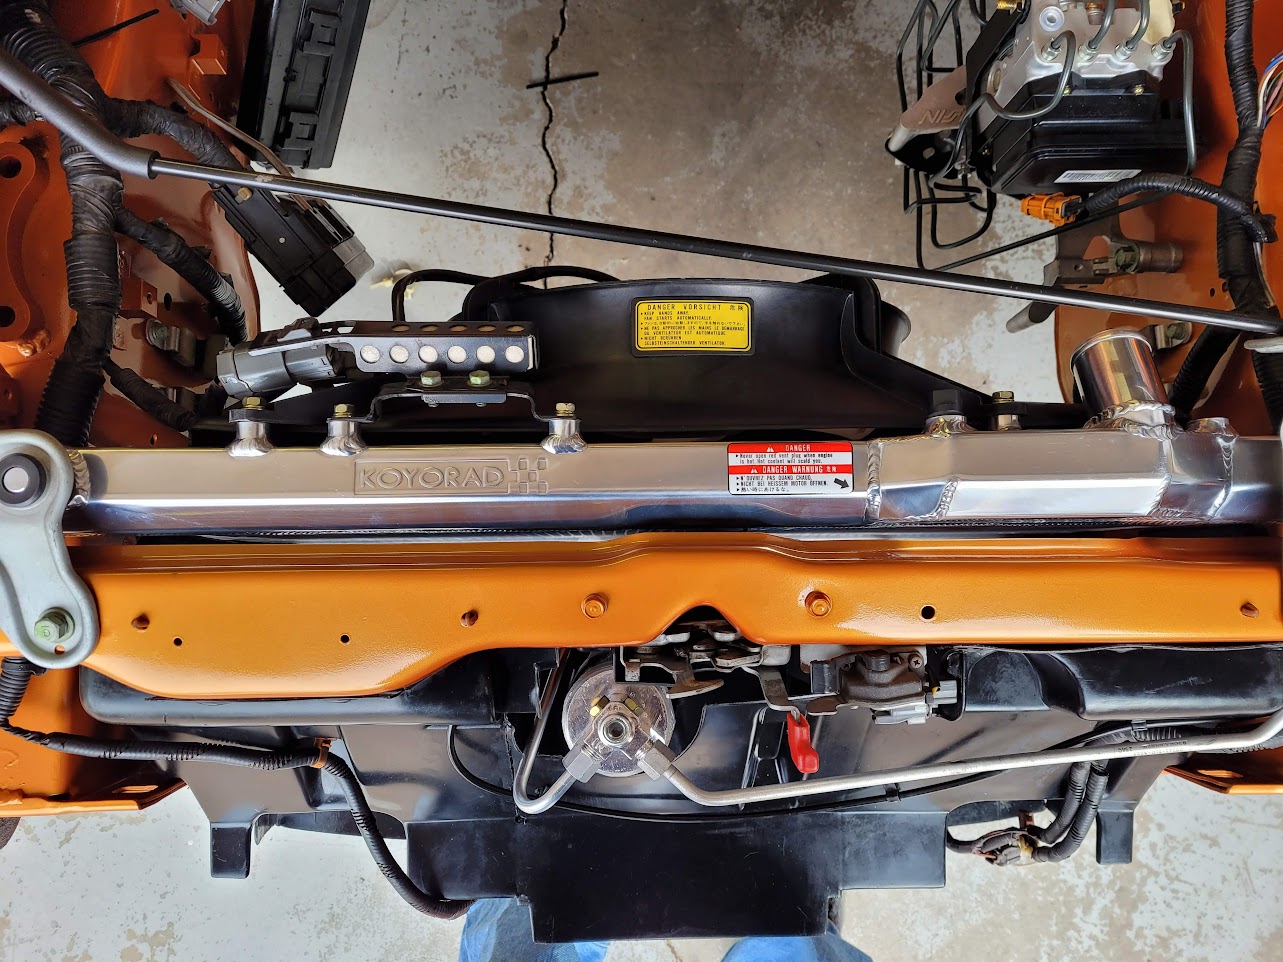
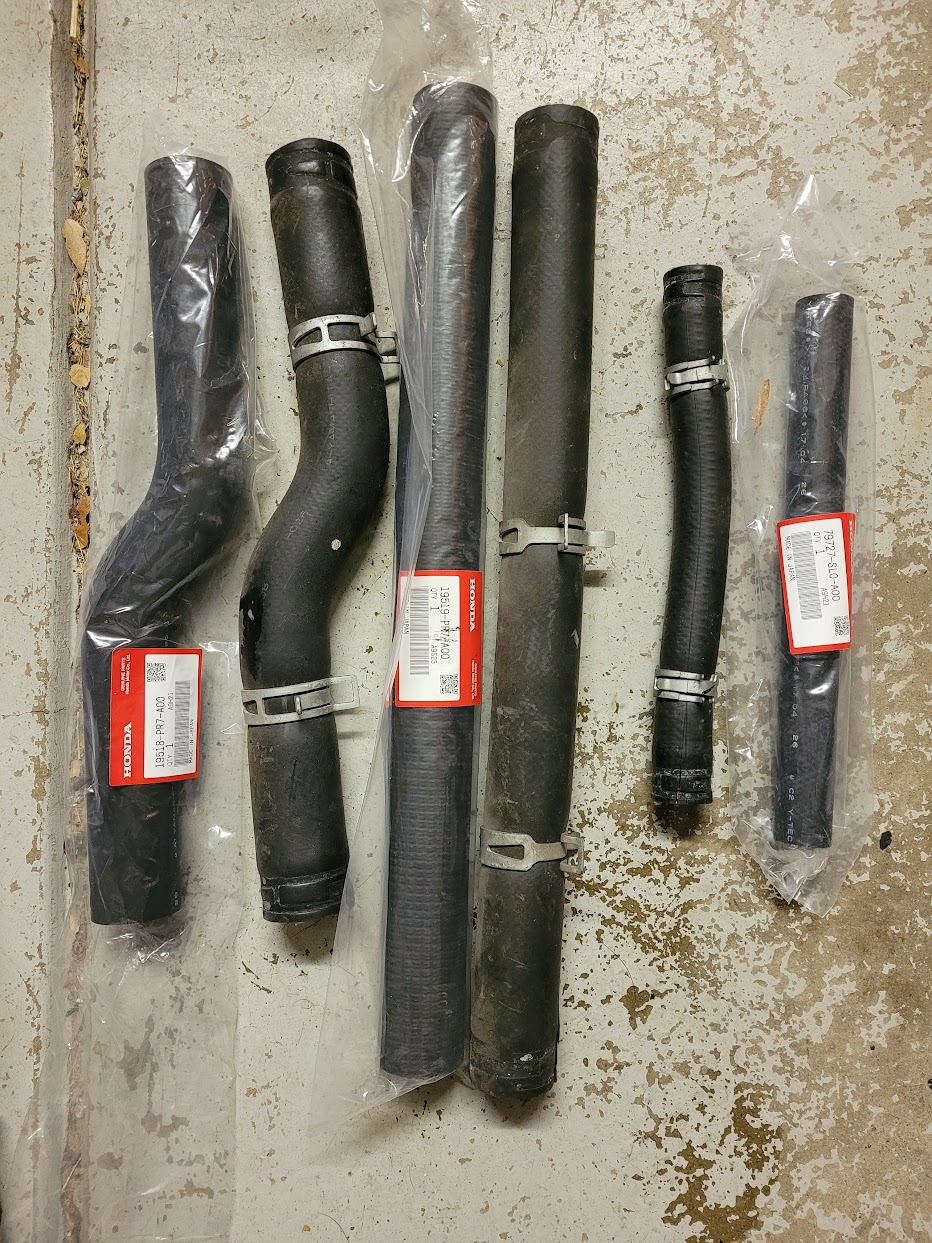
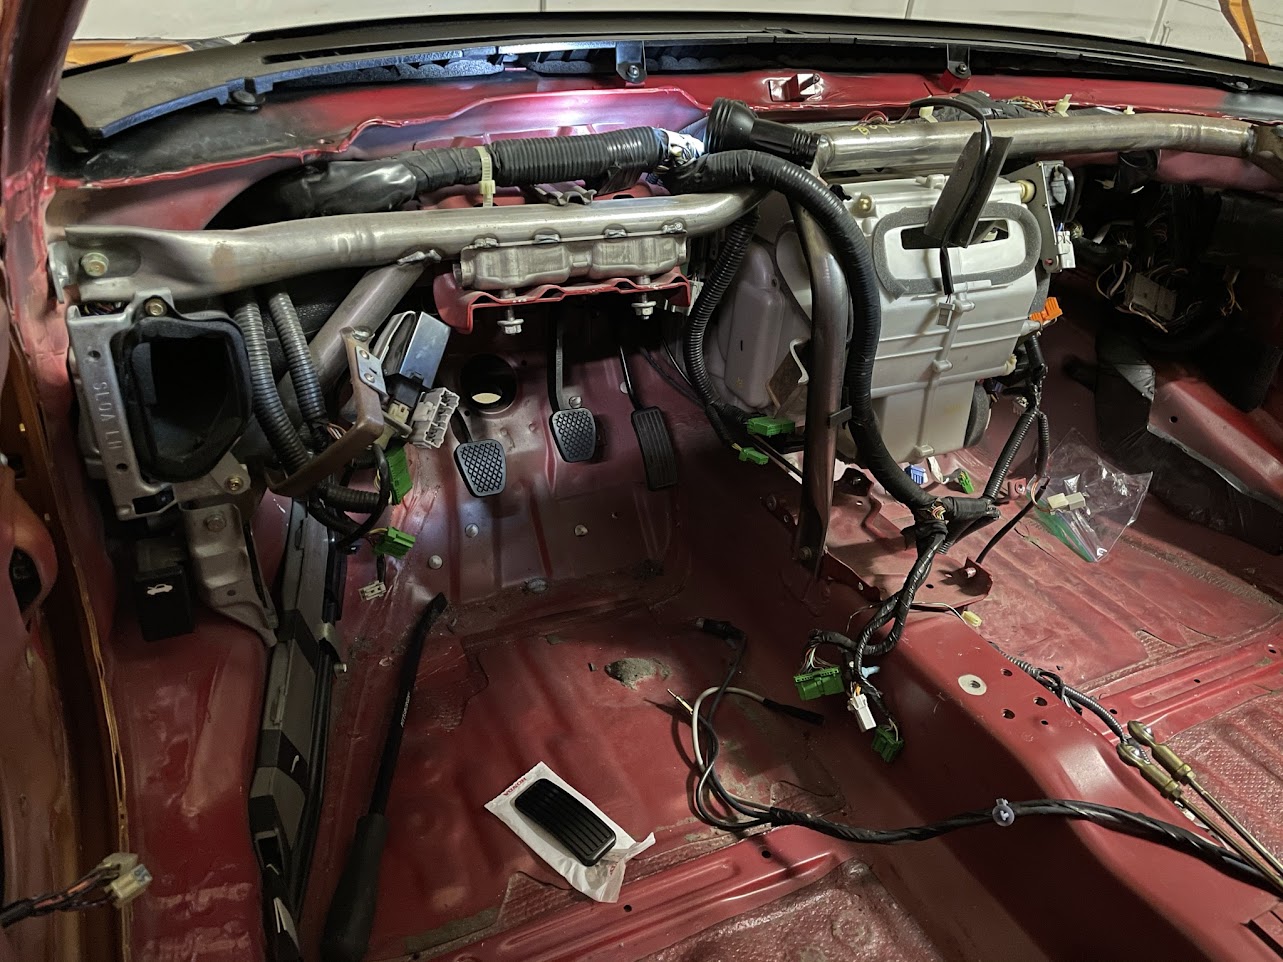
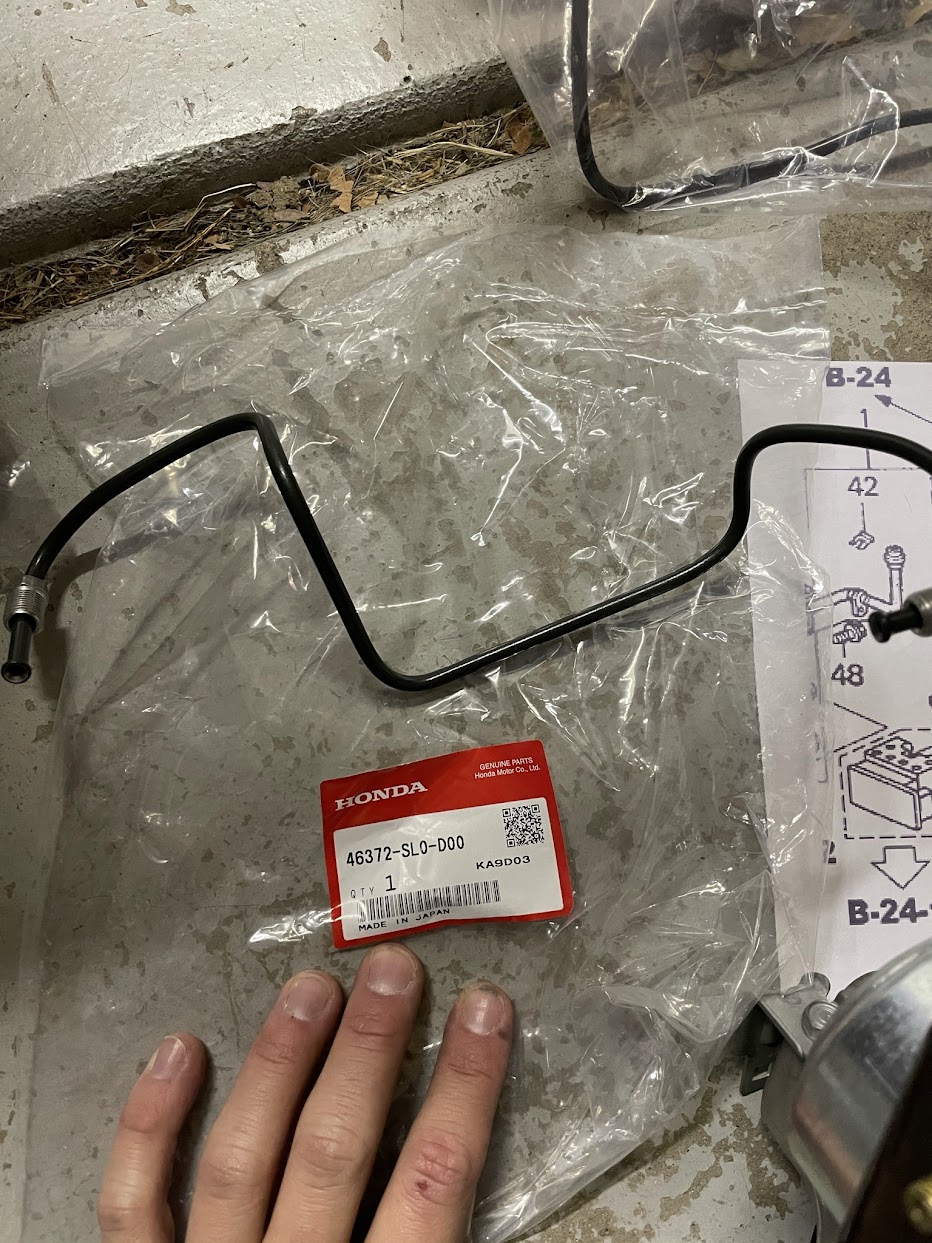
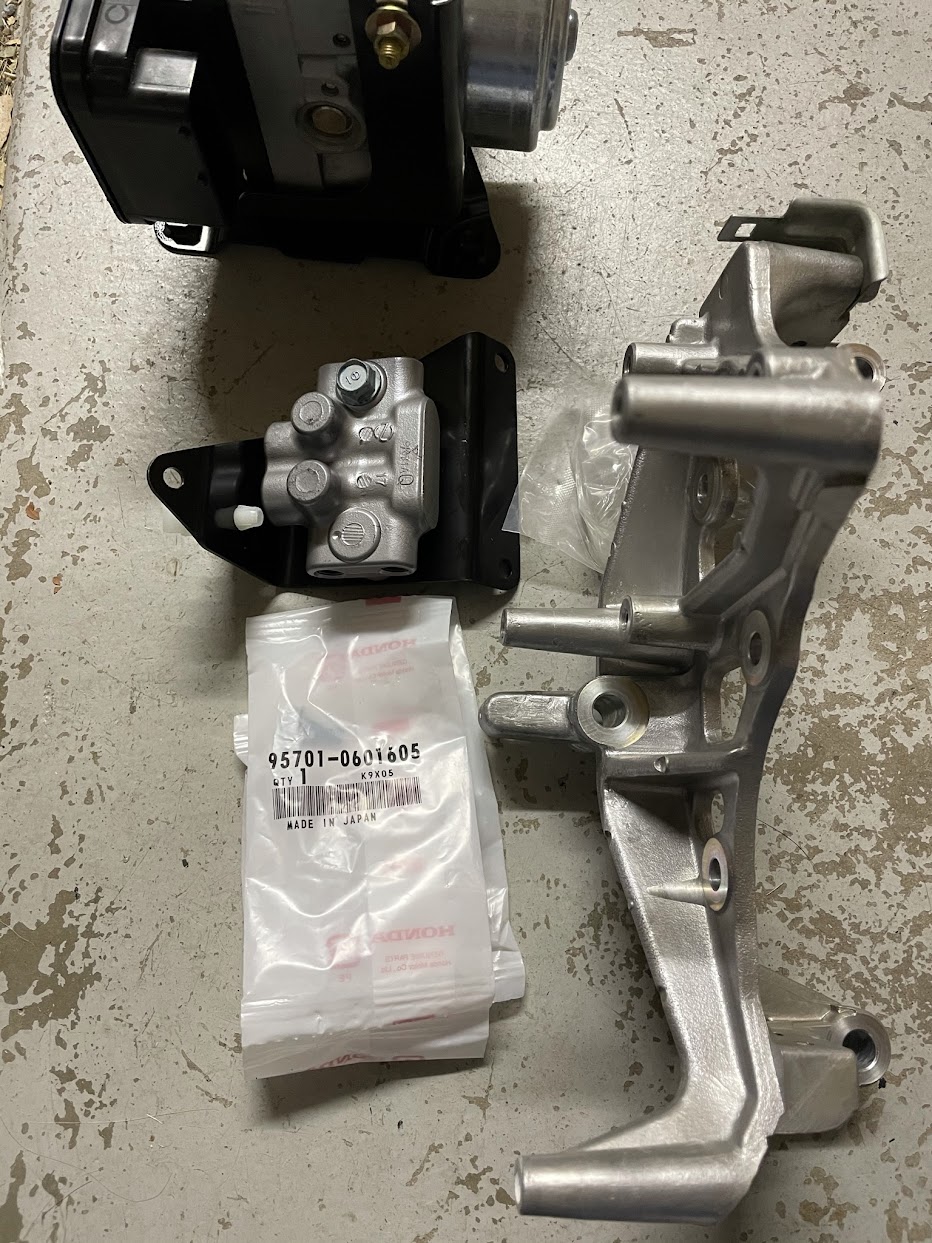
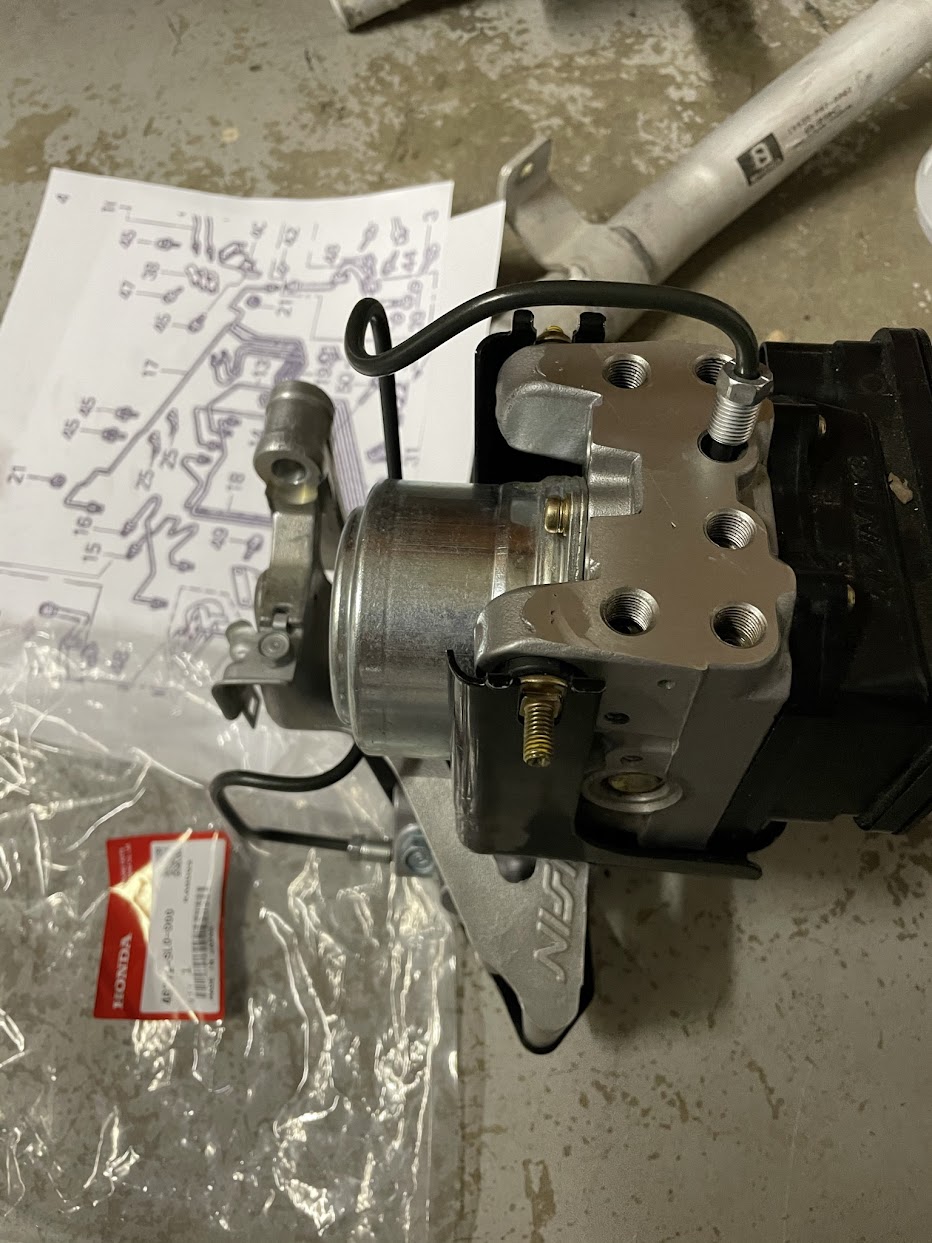
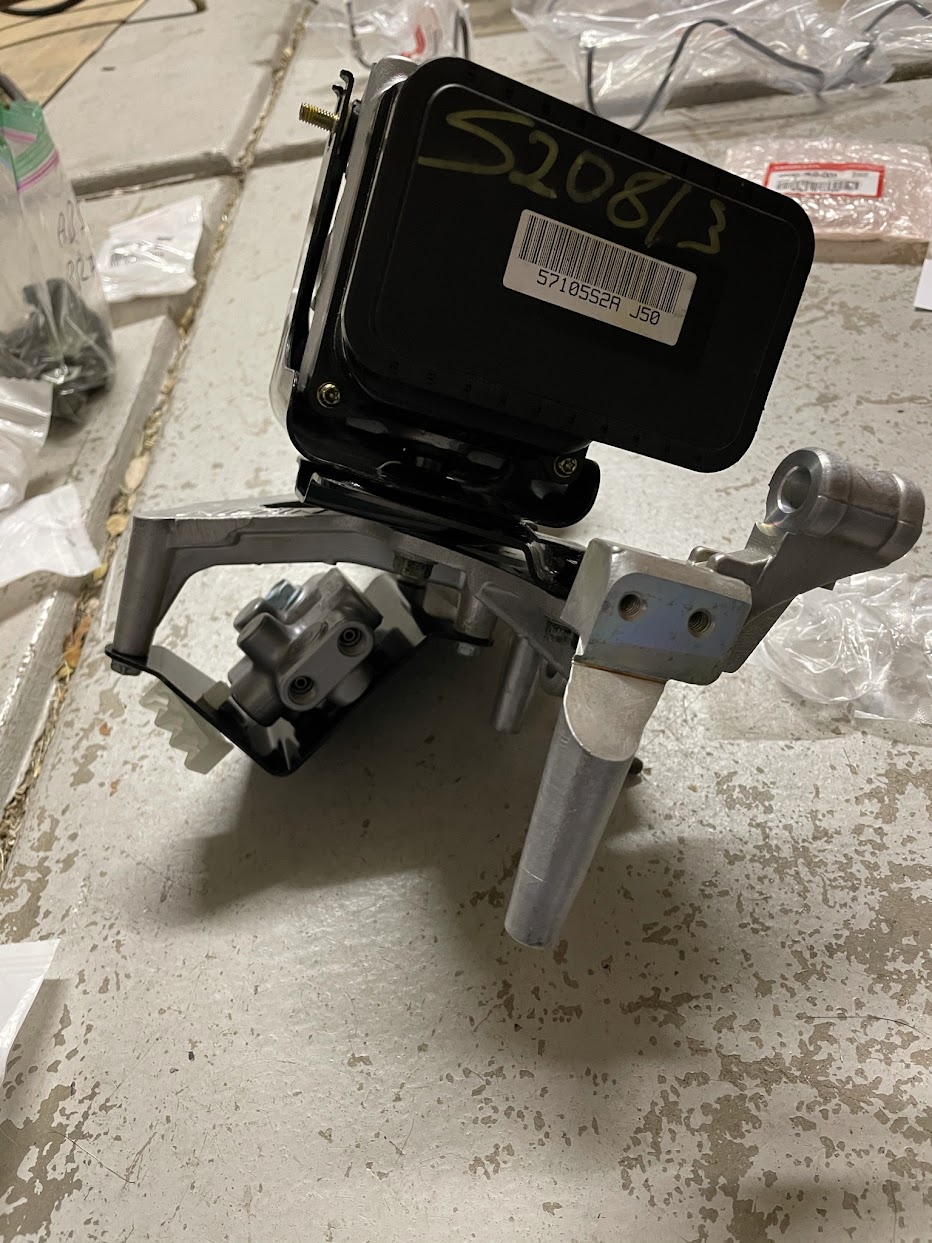
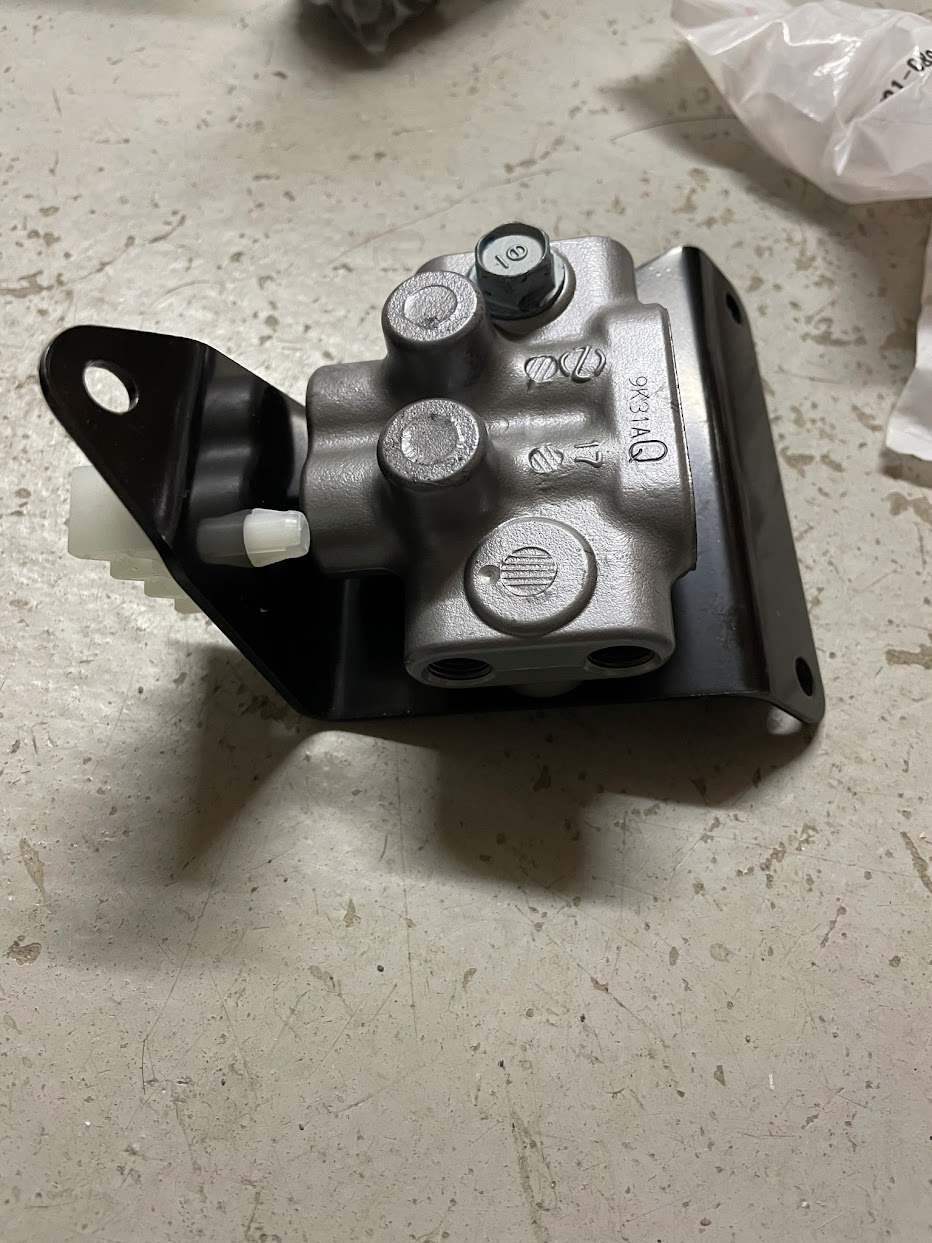
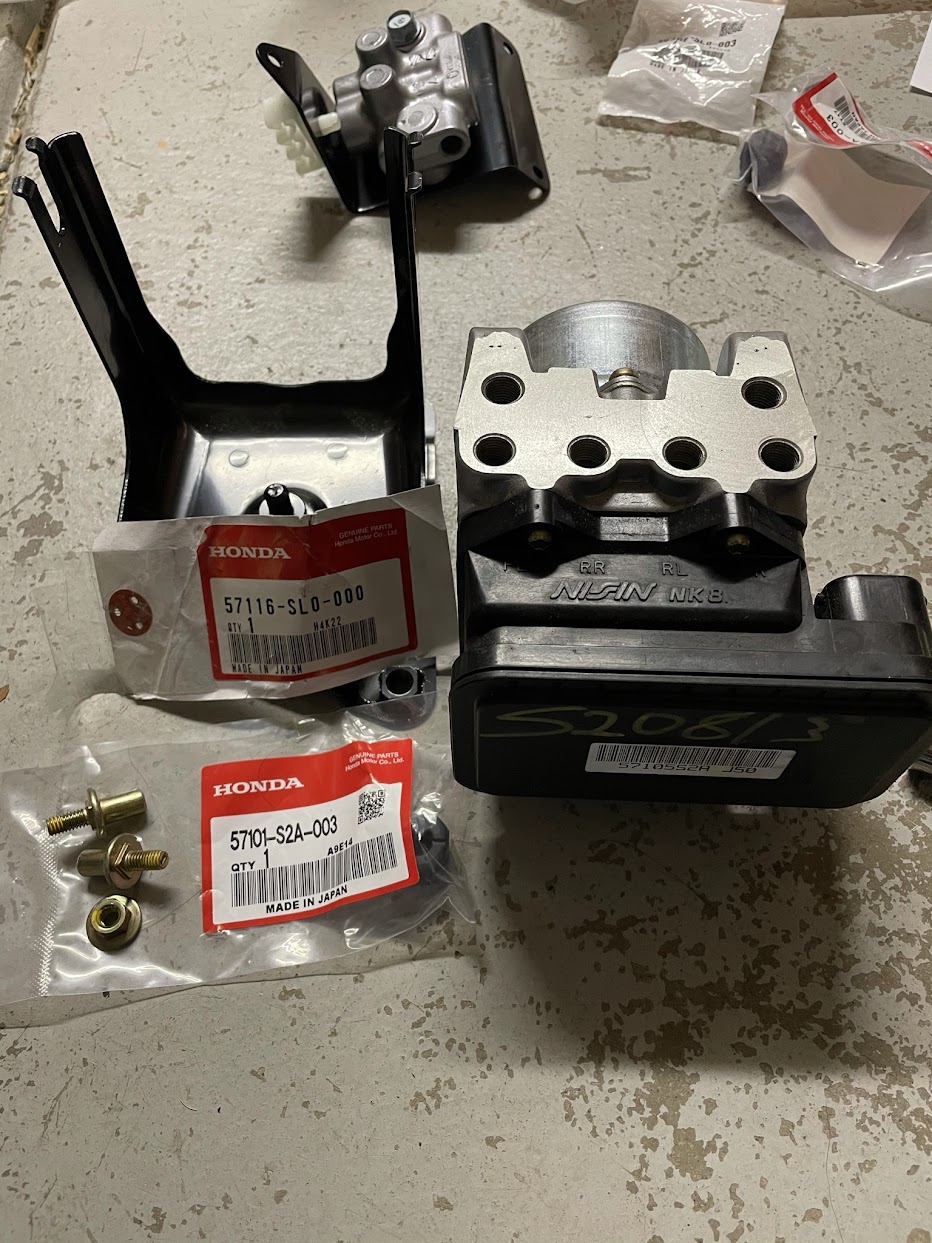
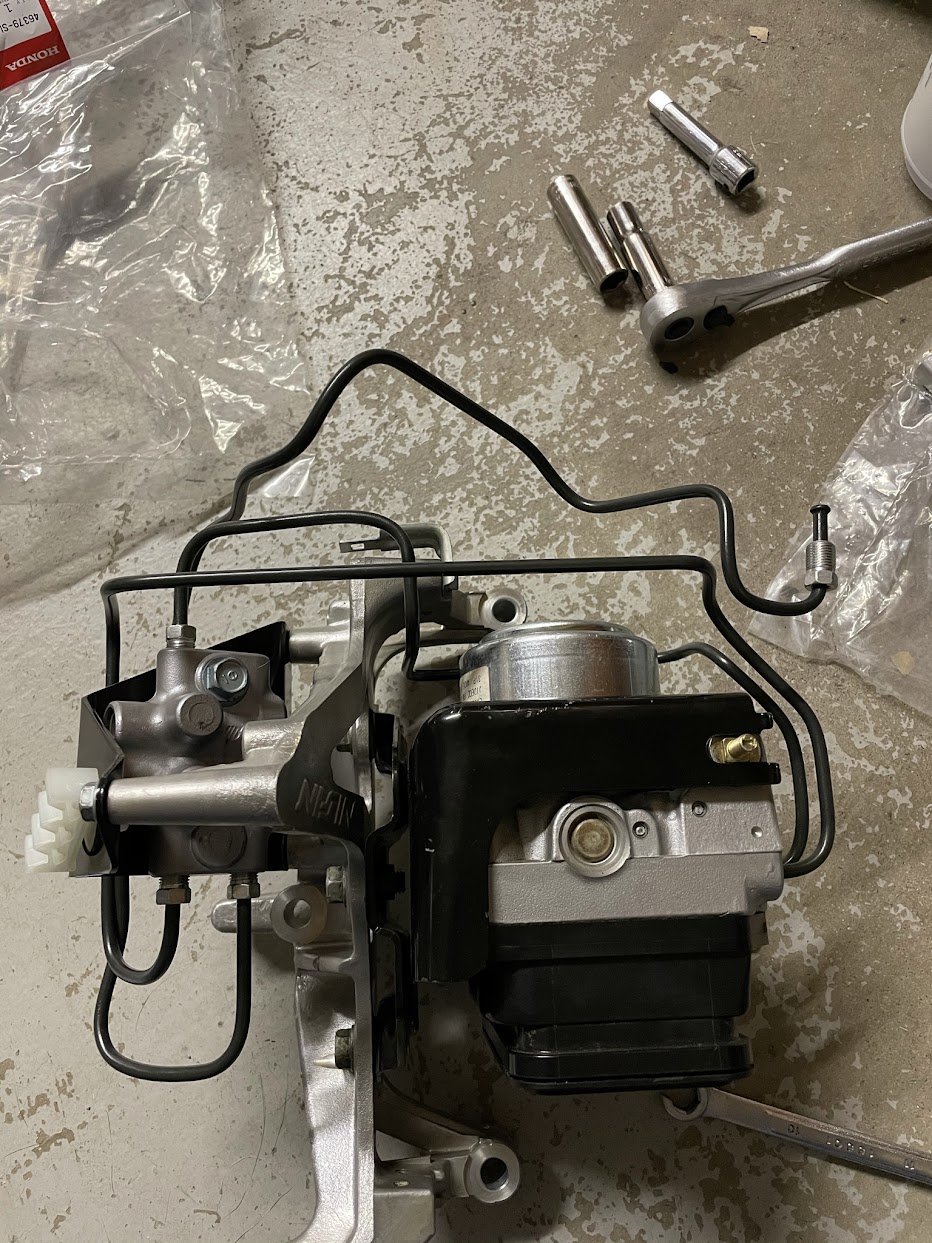
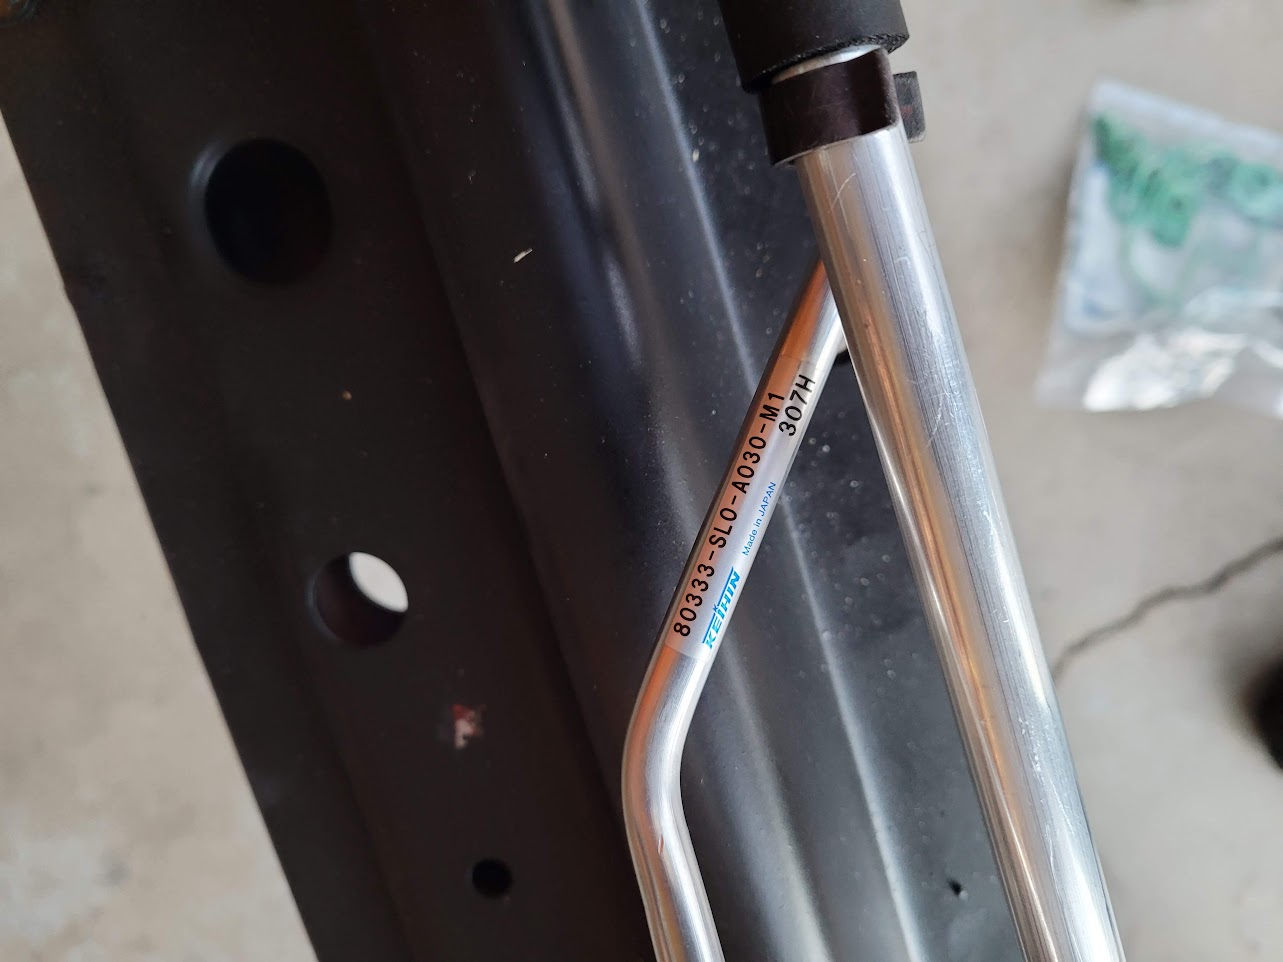
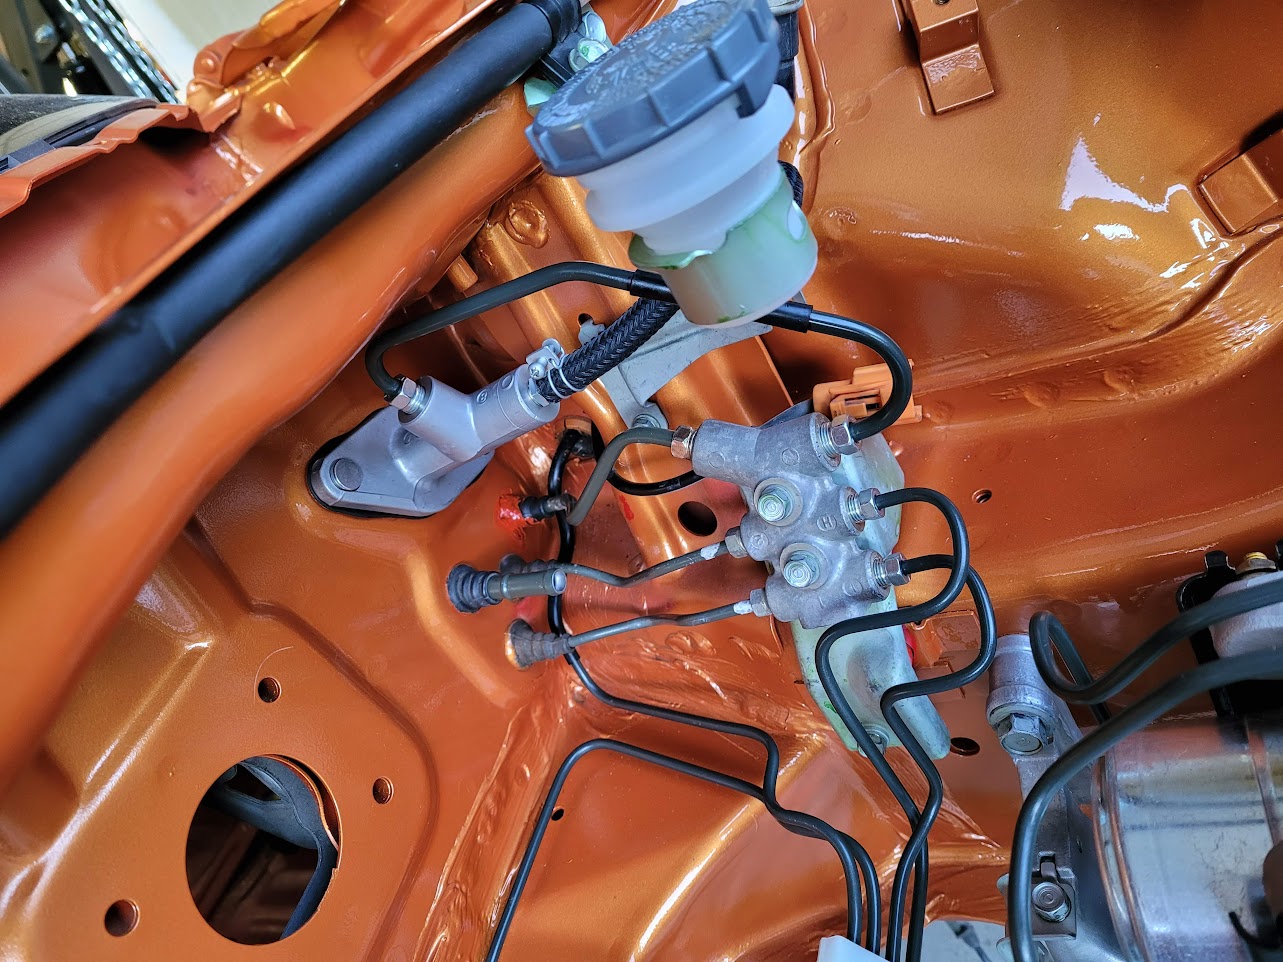
Assembling the AP1 ABS system using the 2000+ NSX brake lines. There is a lot of incorrect information on Prime and elsewhere about how these lines should be routed. In the end, we used the 1992 factory workshop manual, labels on the ABS unit and common sense to get the fittings properly completed. We determined that much of the confusion results from the Honda parts diagram, which has some errors that appear to be a result of transferring over the RHD schematic to a LHD orientation. After comparing our line routing to photos of factory-stock LHD 2000+ NSXs, we are confident this layout is the correct one. The lines only really fit one way, so it is hard to mess up. If you have to start bending lines to get them to fit, you're probably doing it wrong.

AM-JKLVhsrIsbA0j4OrCmecuHNaLe1-Nb2gsK7qKX9lNqb2QGohNlXJKmKNMaxzprLjKG9ZDEnDsPYqqLZbo2-zVQan3gbfHCyb4-C96nhLe-PDmvGopWsOSMpq3qupviPfxPcdKQL0xQ5_At1oRaqr7jiNu=w1283-h963-no


AM-JKLXmLIXEcuIE1M7TcKMS9QudXXhxunFgo0pLf7Z4LU1c8L18meKQ5BCZH8v78Cu3fWnioY7P9XFXuR88O93L_Og9qSQuqOkQ-kb_lN5h1uOZvC-AofE5pmiL6EjRnkONFvWZzGKpKCGuBY7GQklfGayy=w933-h1243-no


AM-JKLWeusBTWdN1OJ9MS93kQyXhy2L-hT4F8Hf1vshvTfEr09kNgW0Z82TpKGPOrvU0JBN8zkXuaK6IZ4U3RikfTKrnHNIYwG6vnCREqLNV9U9Meacan1CcSJ3XyF_xoA0sy4wtcnlrNSaDqA1CRgfedUdB=w933-h1243-no


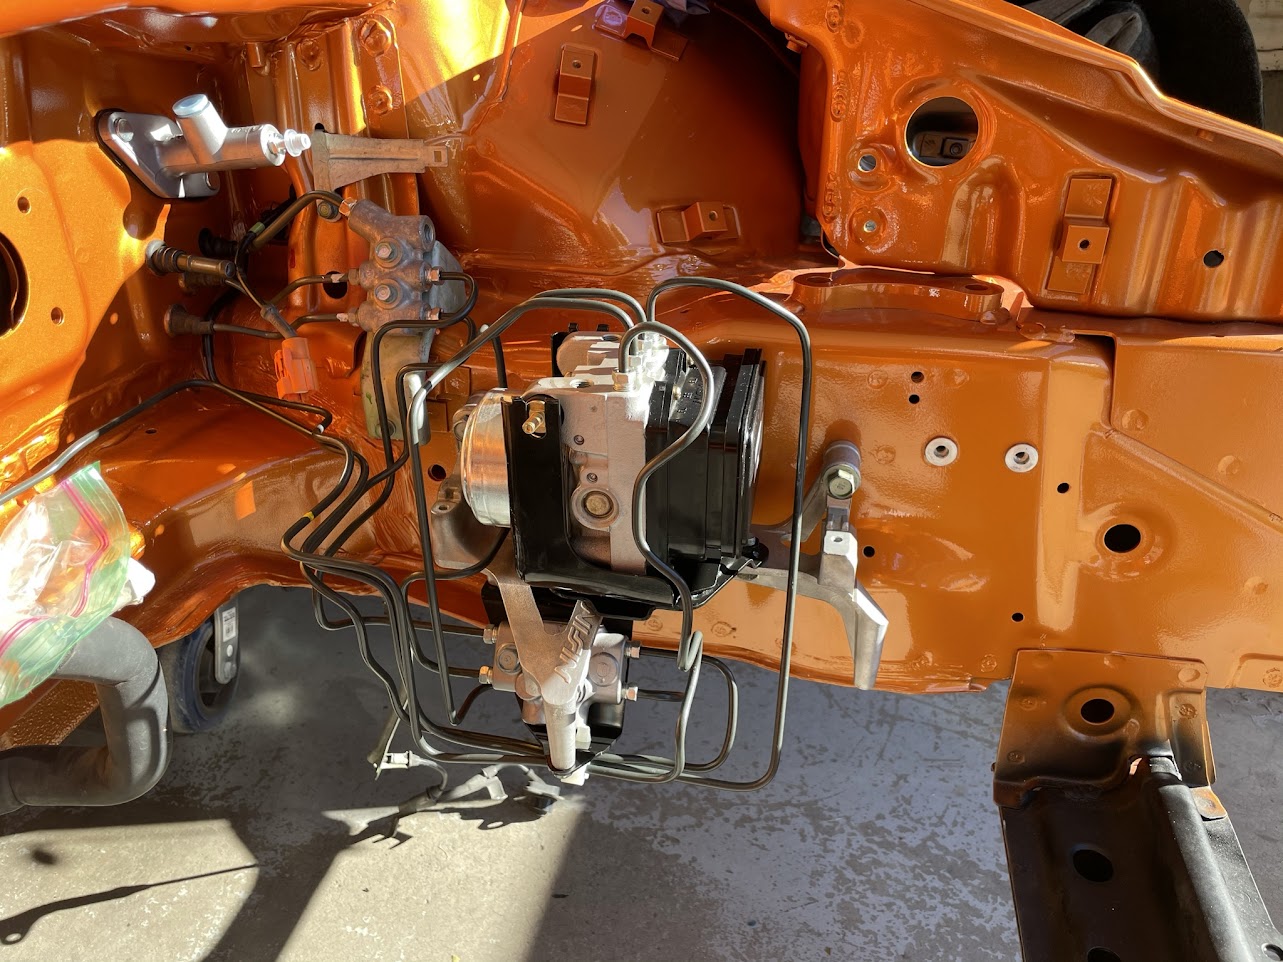
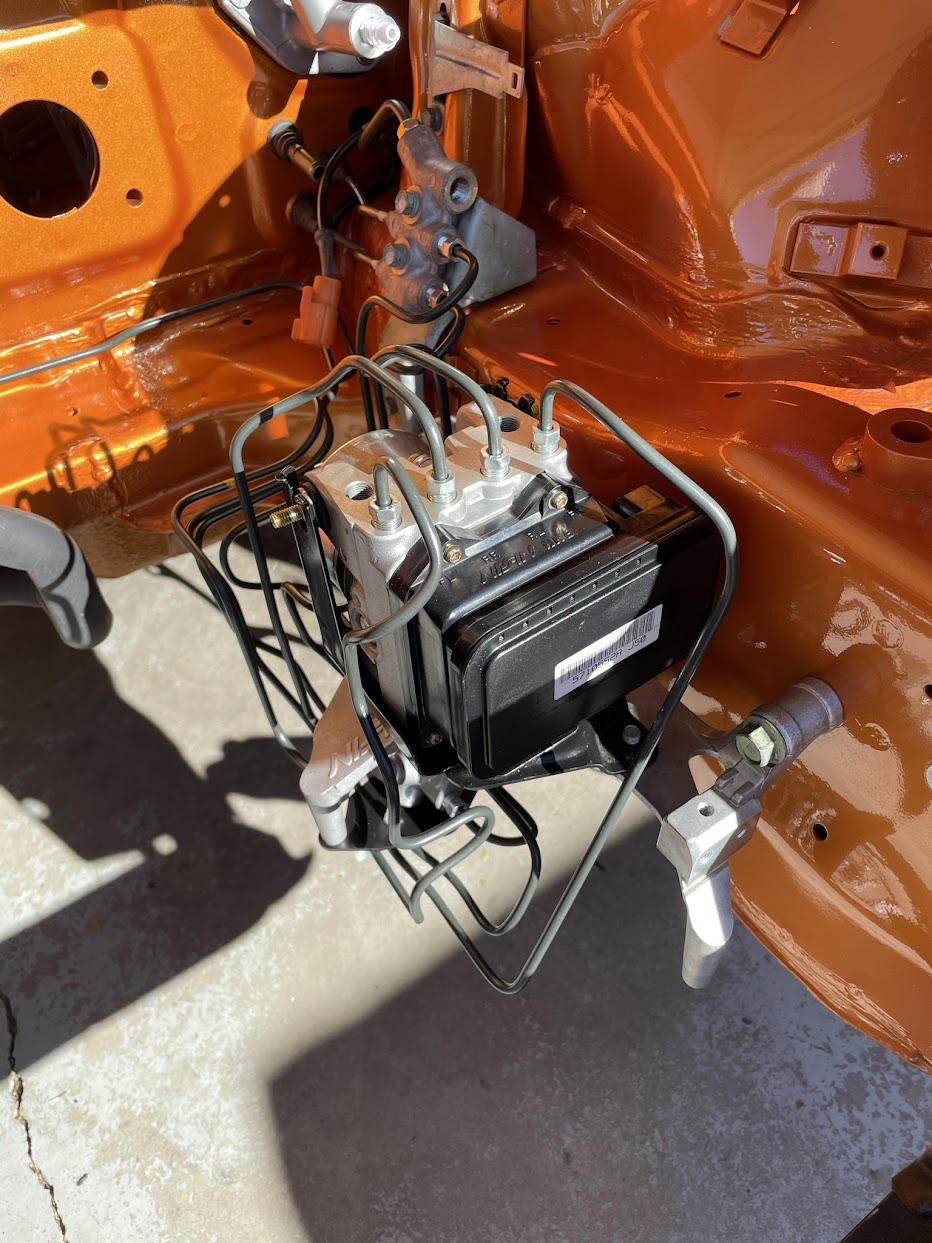
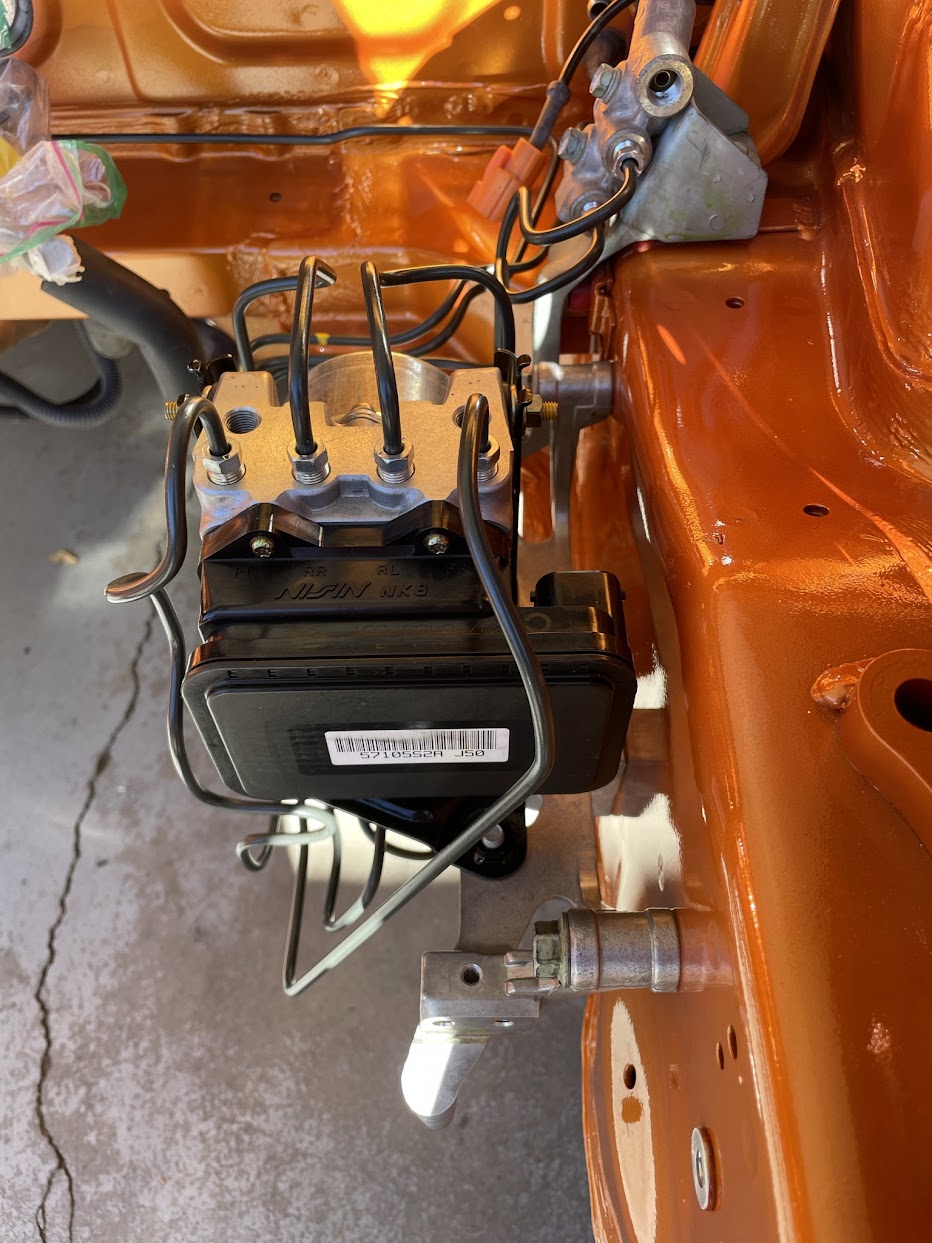
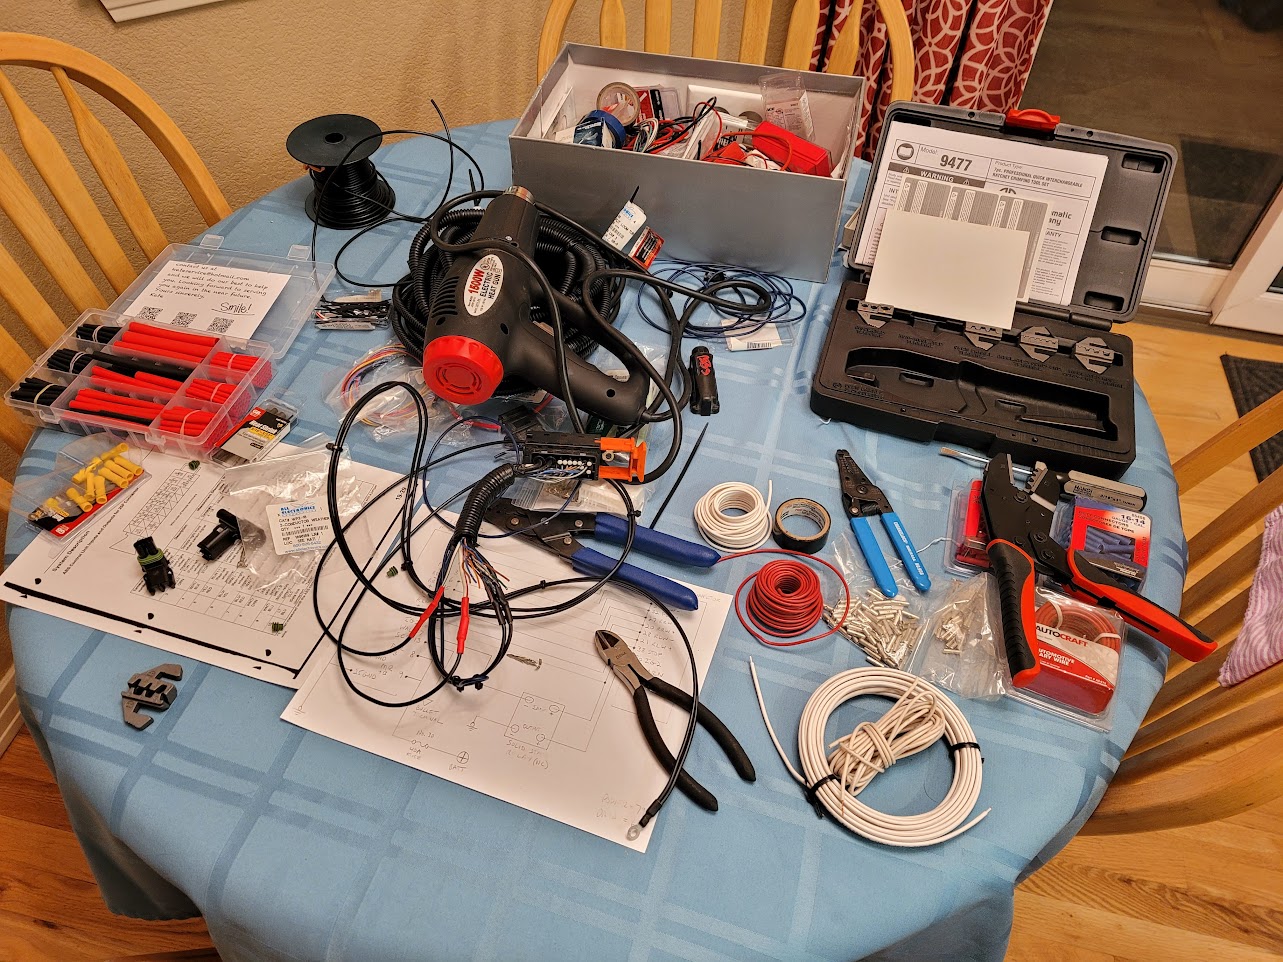
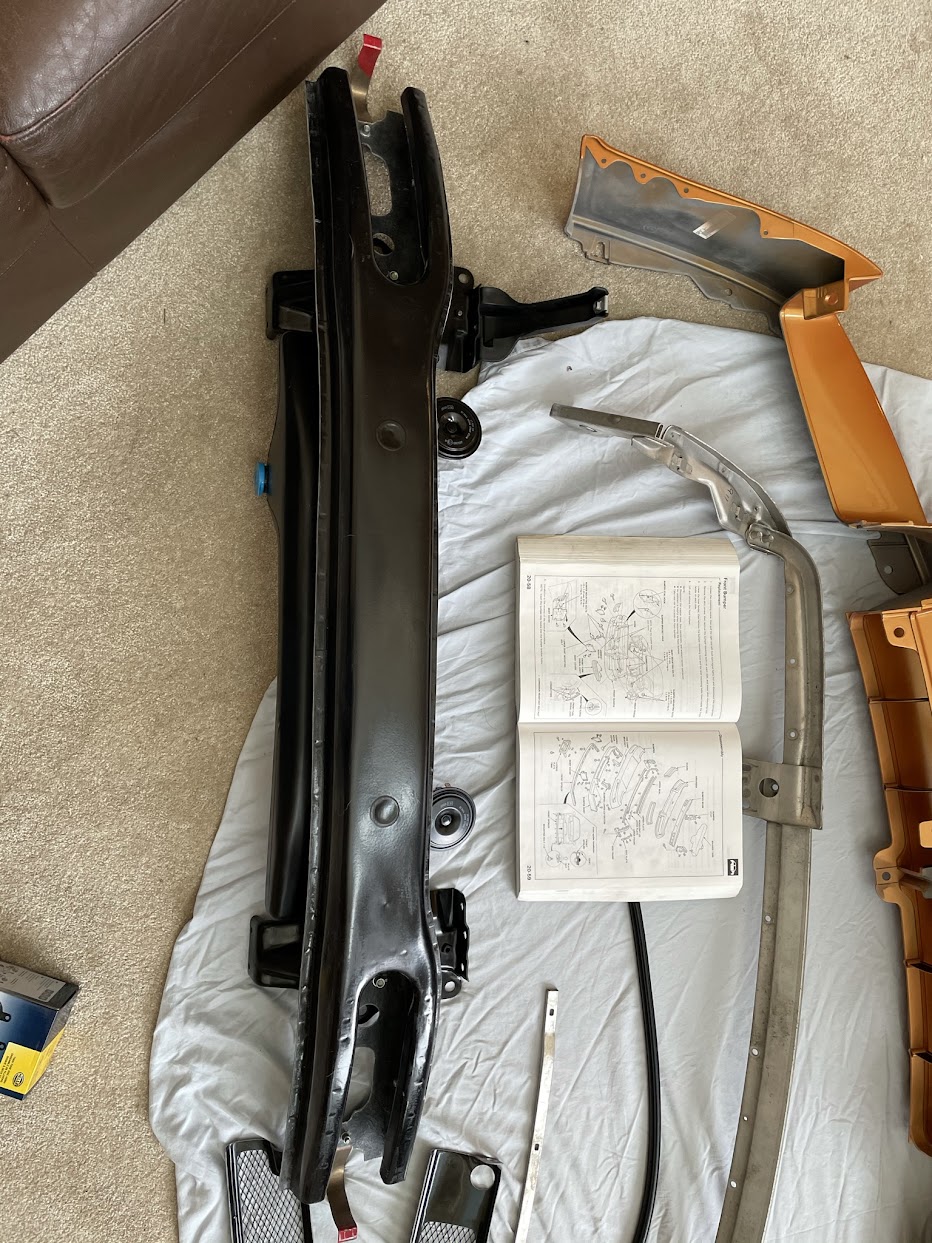
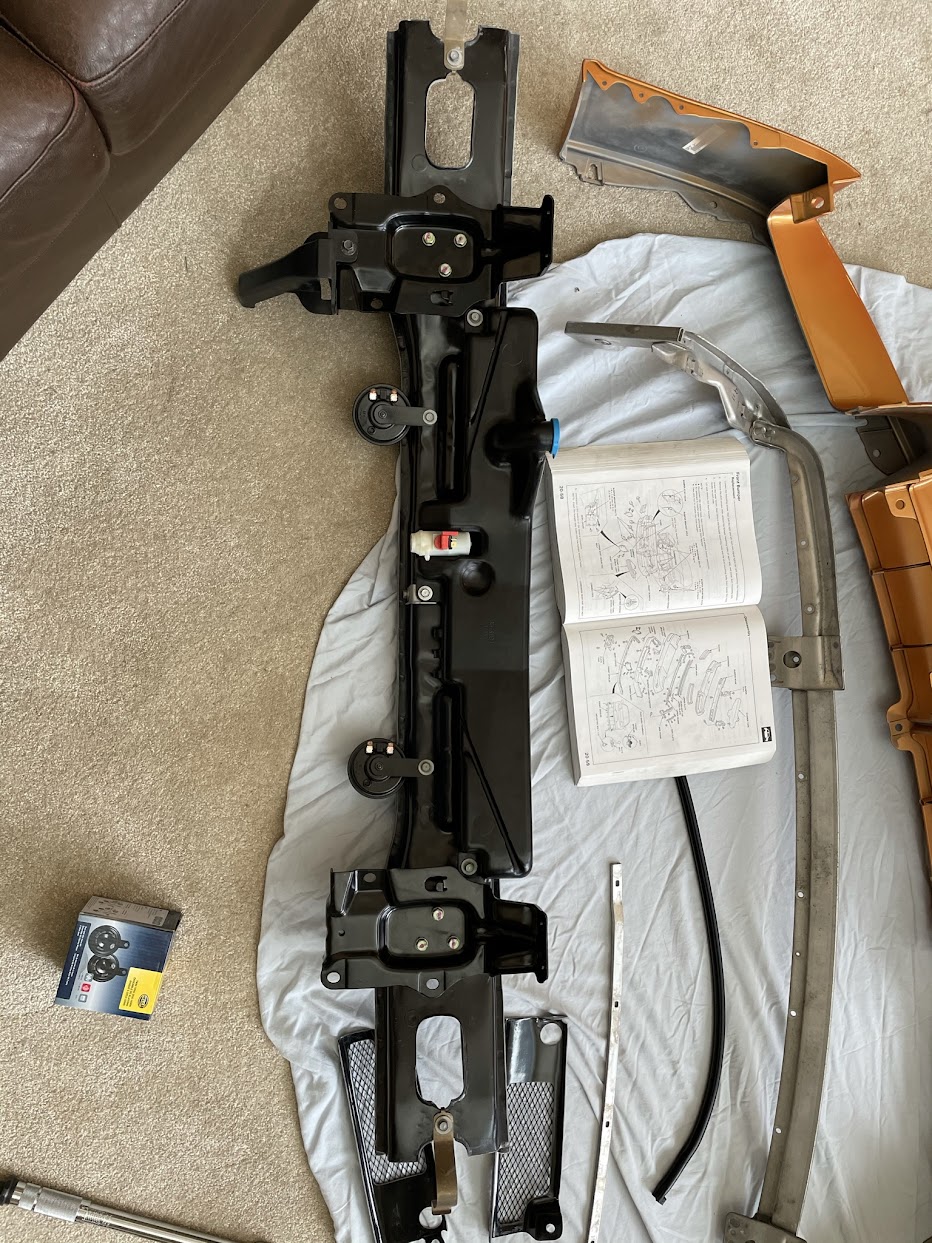
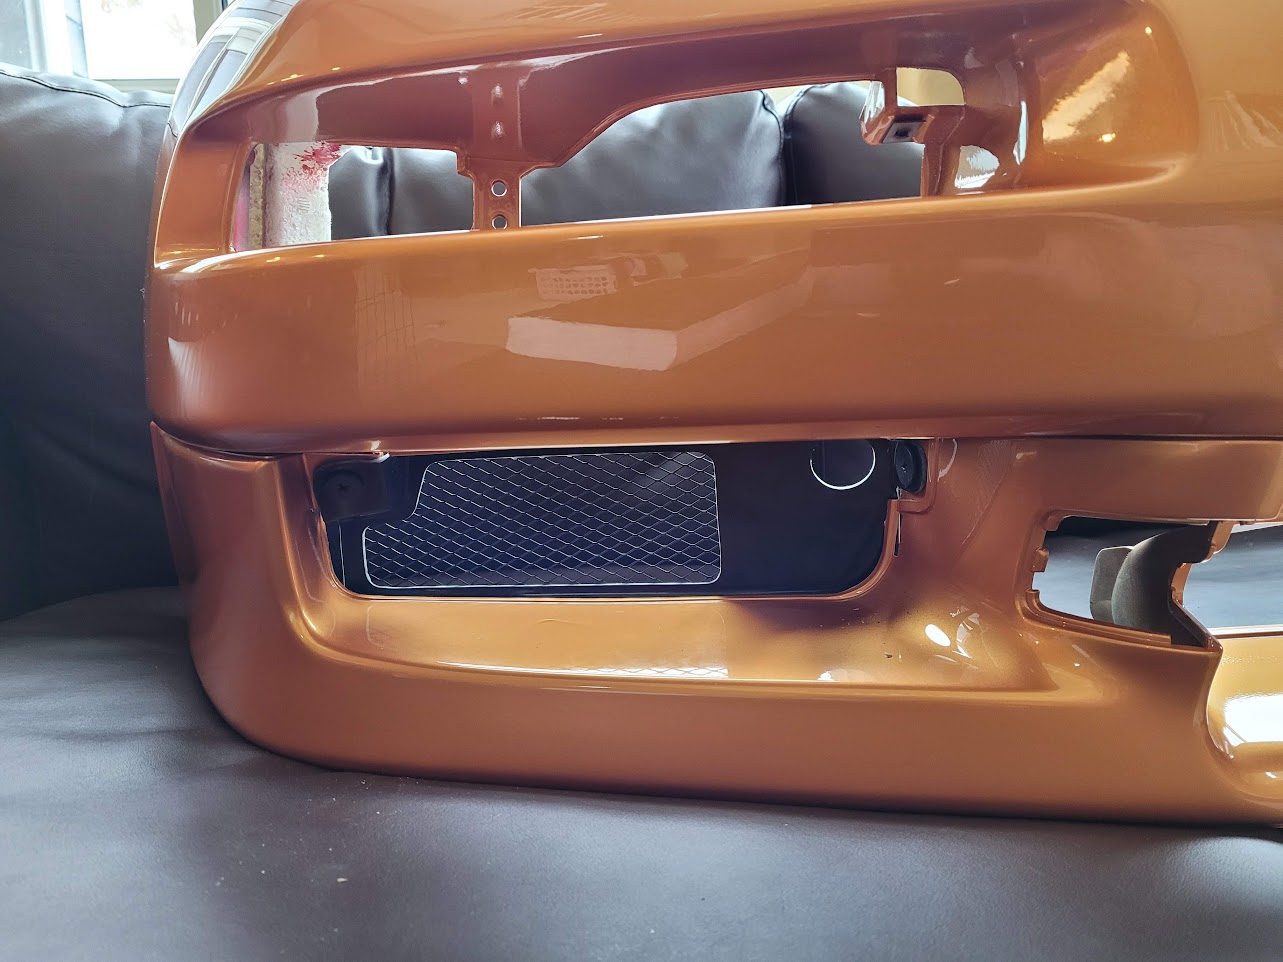
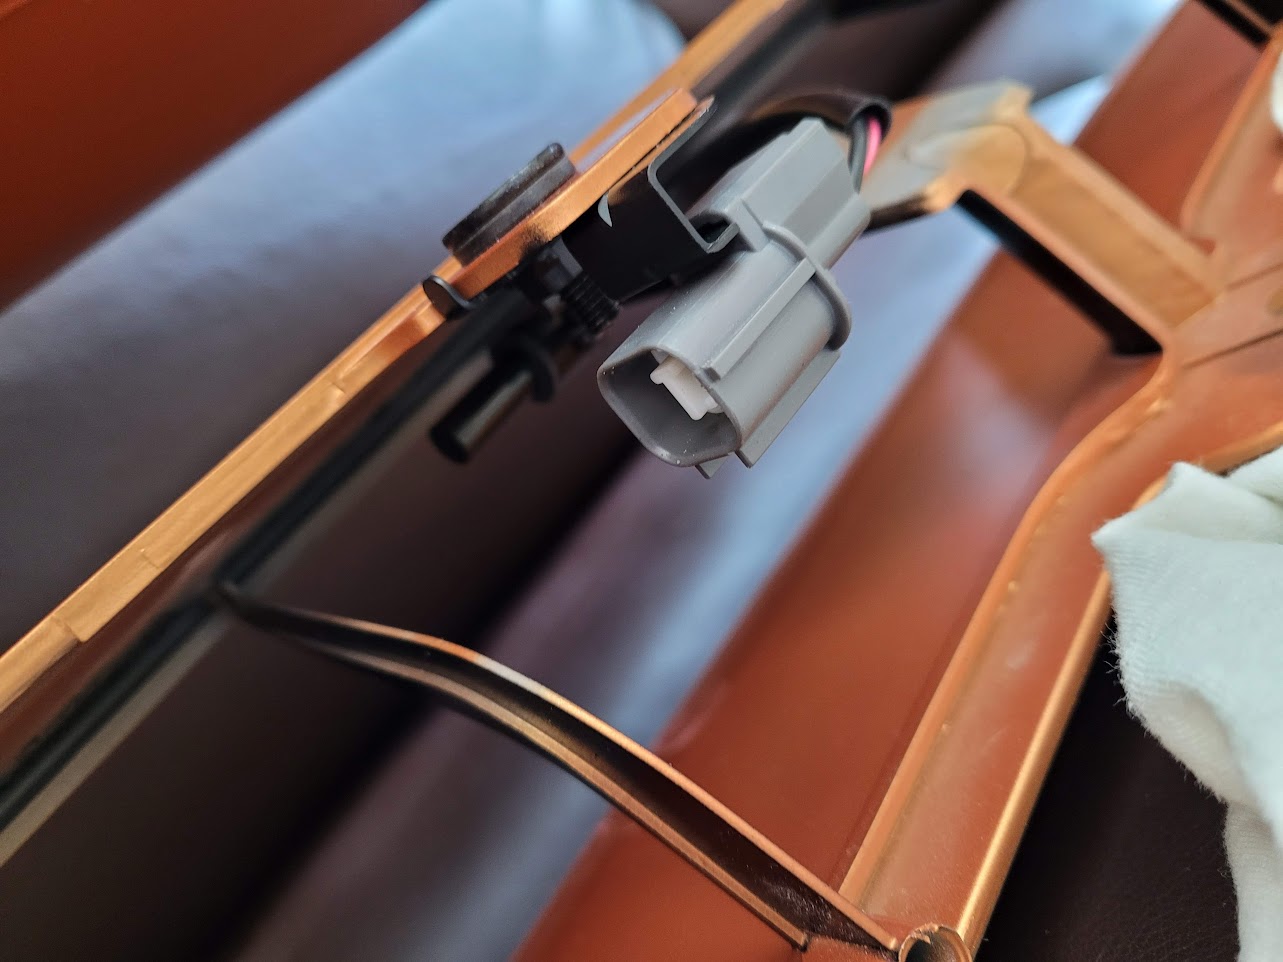
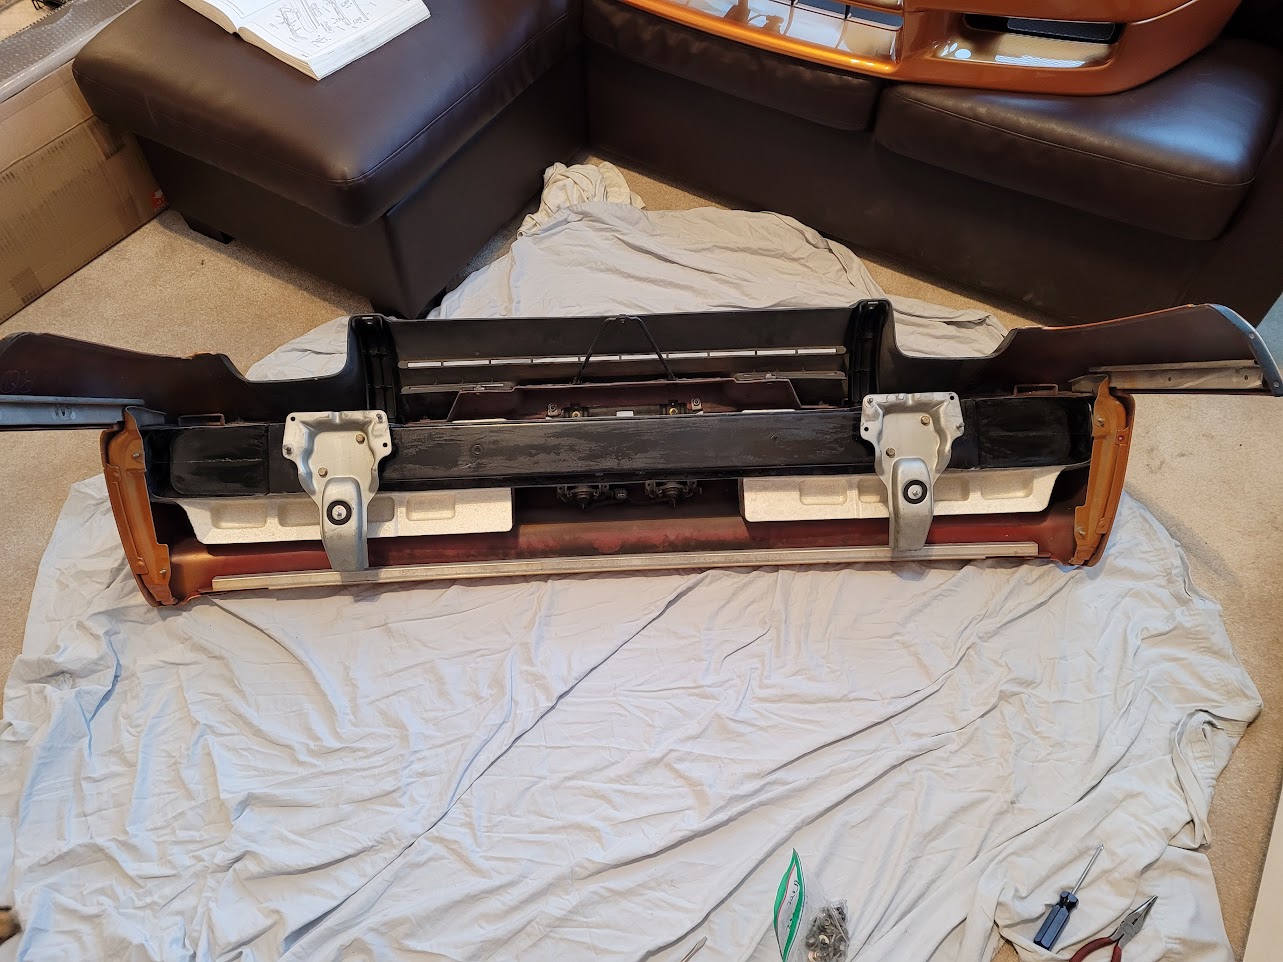
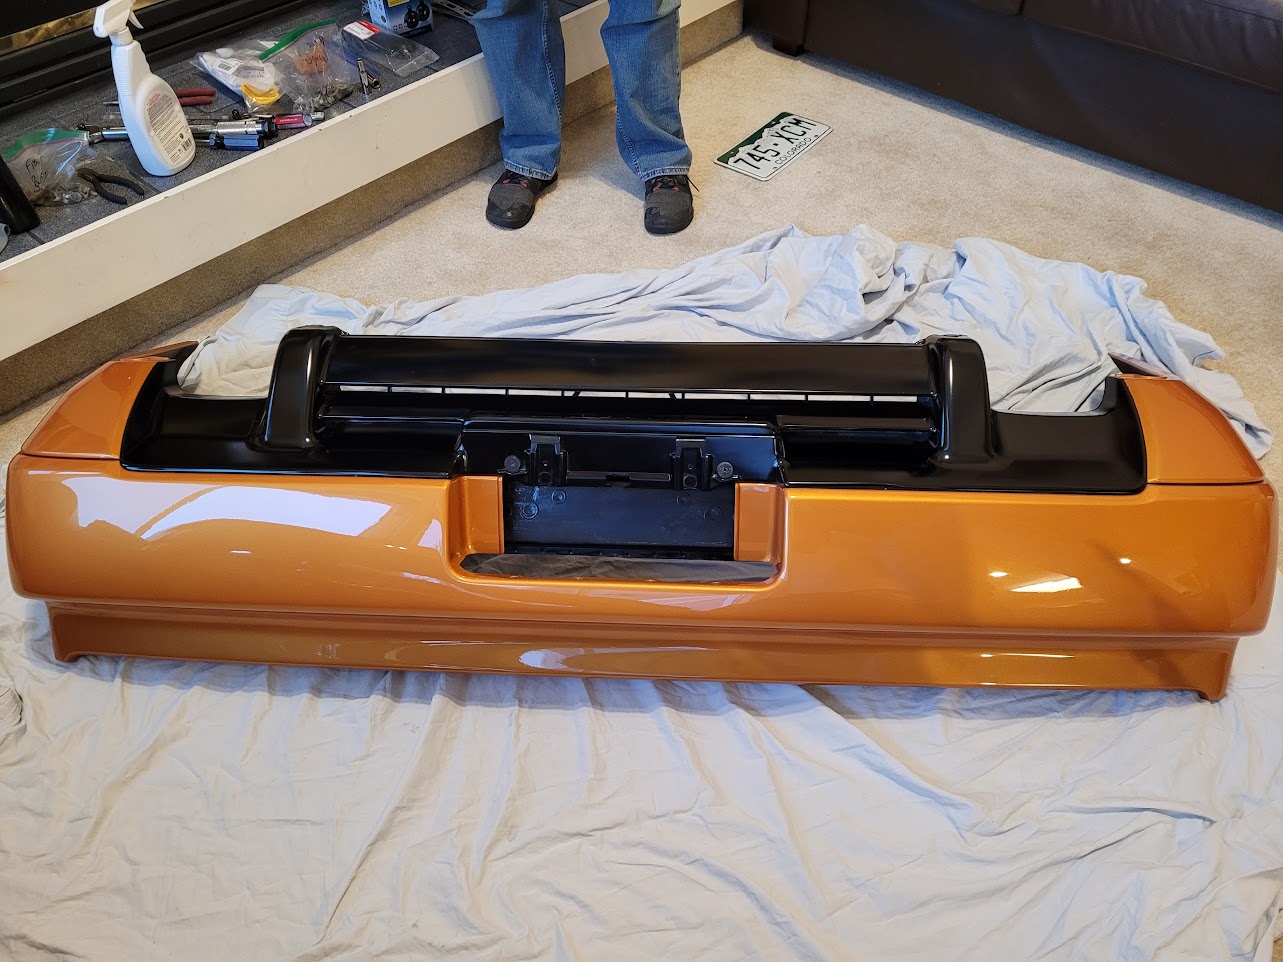
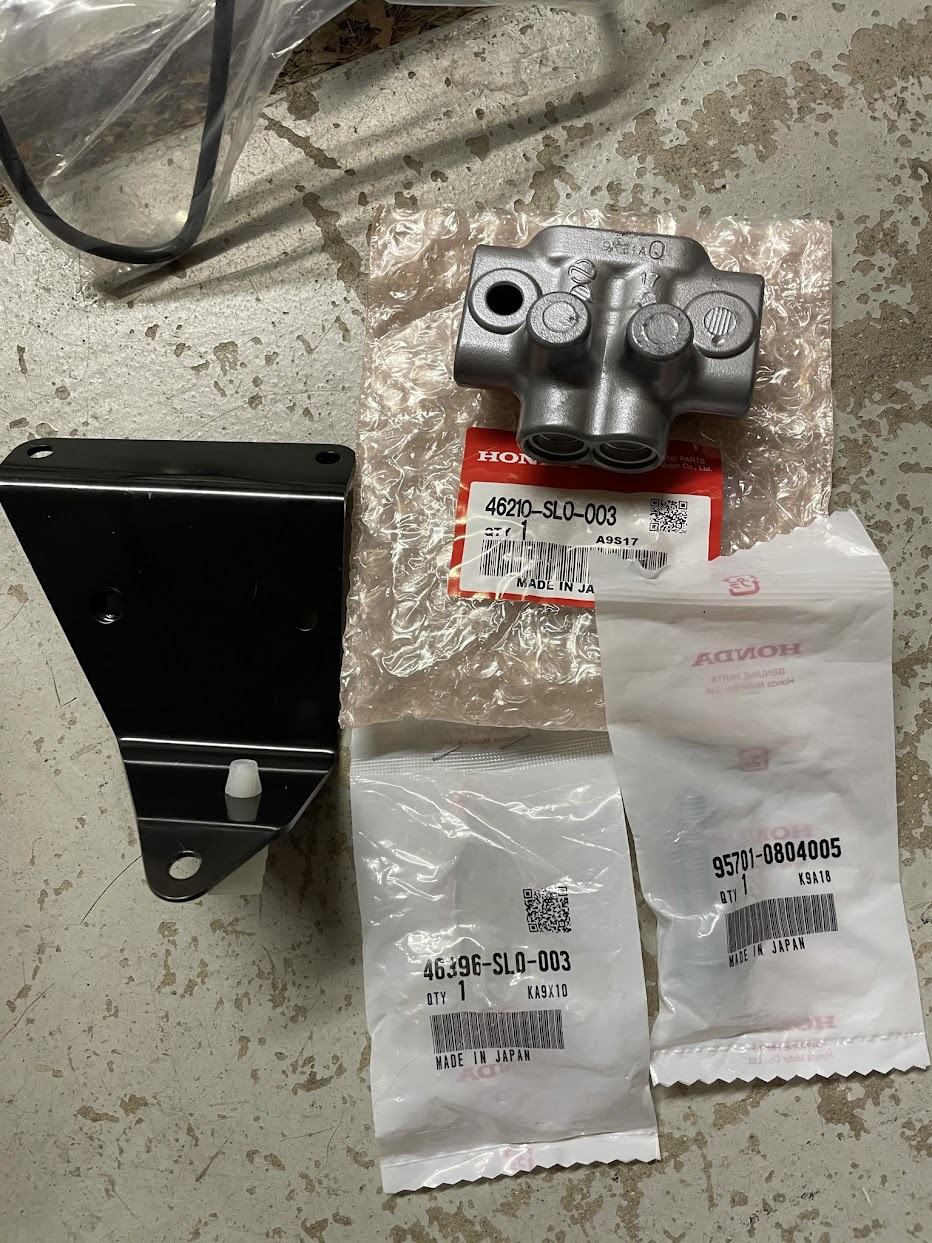
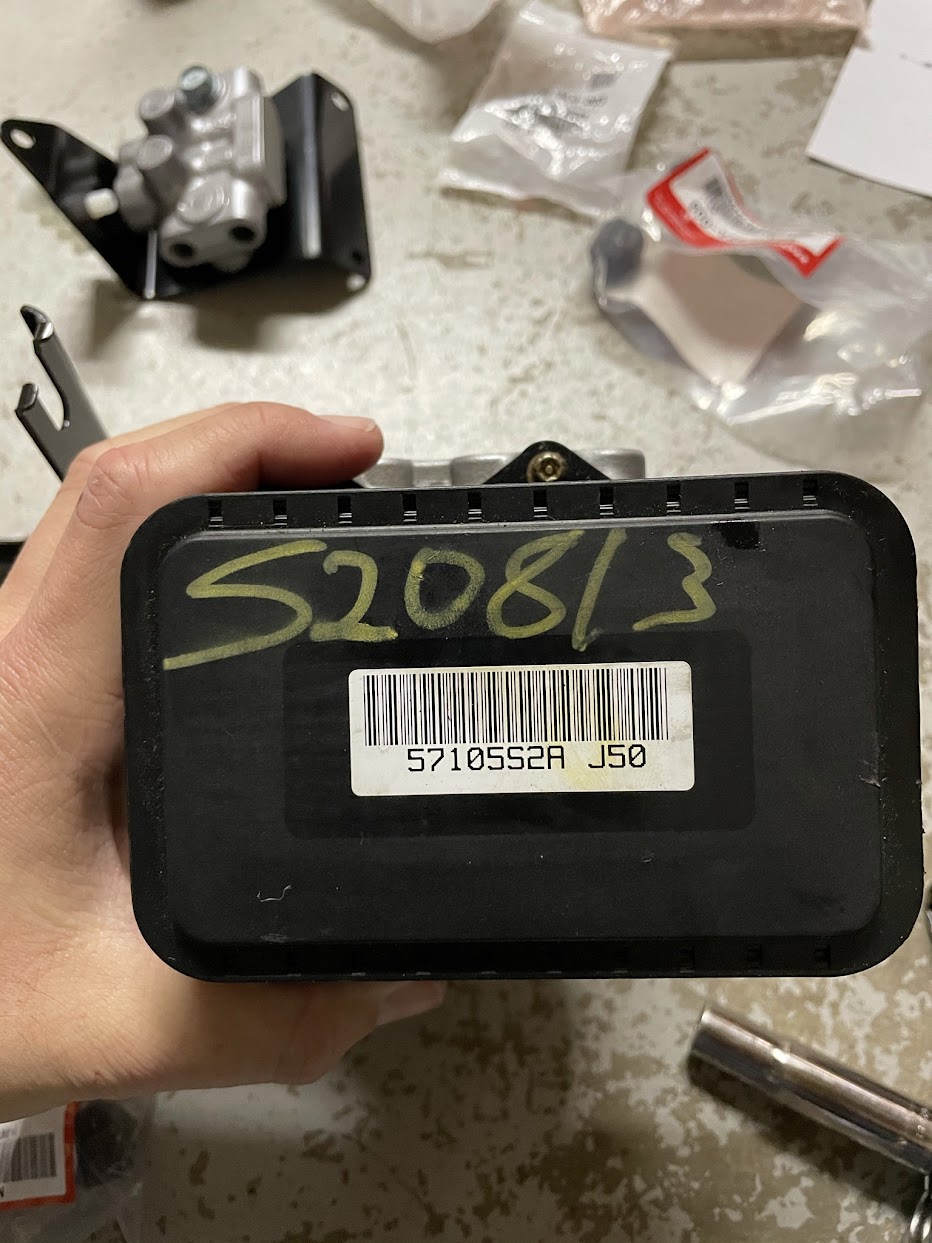
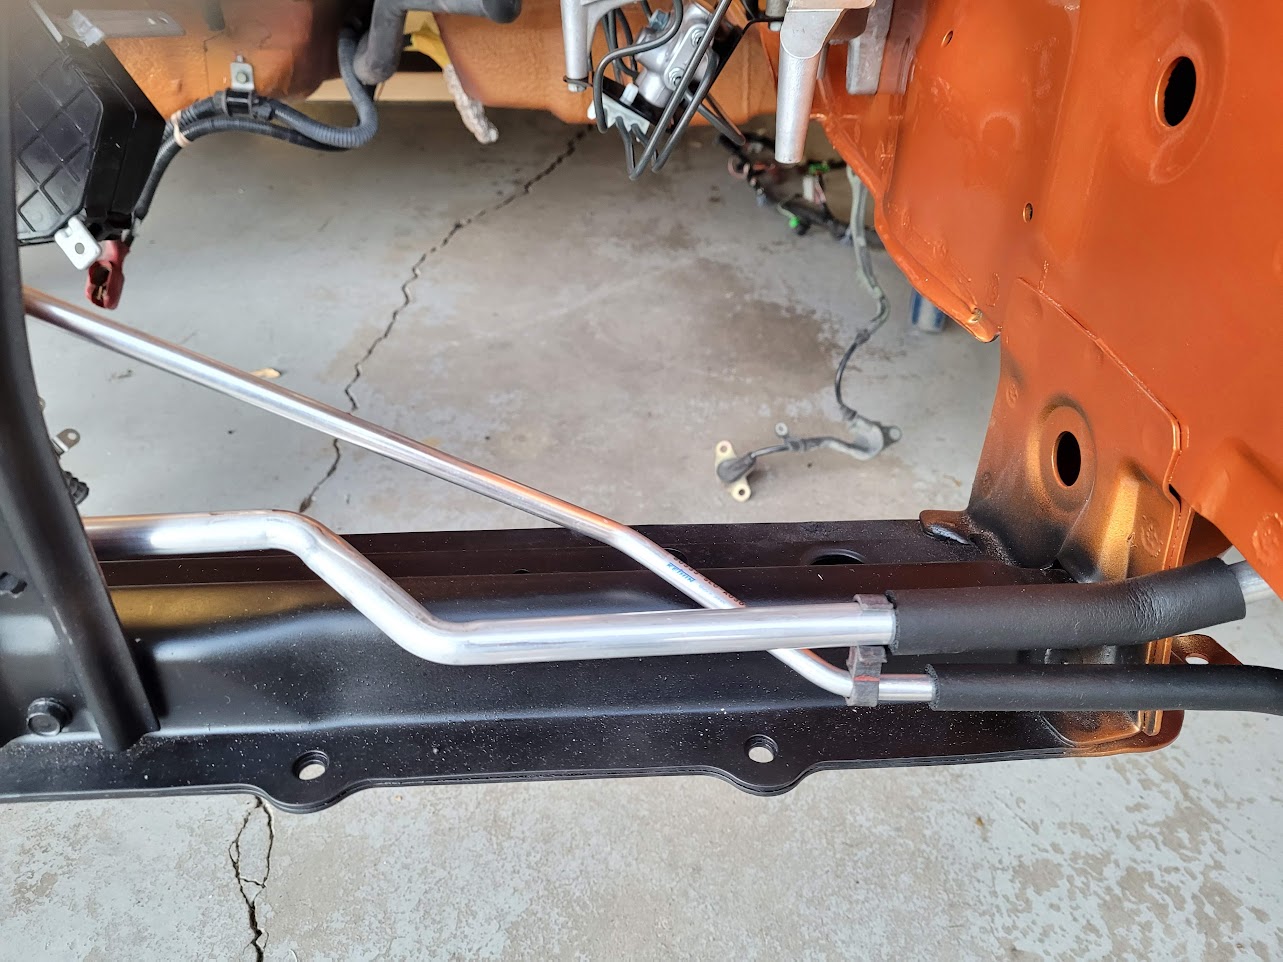
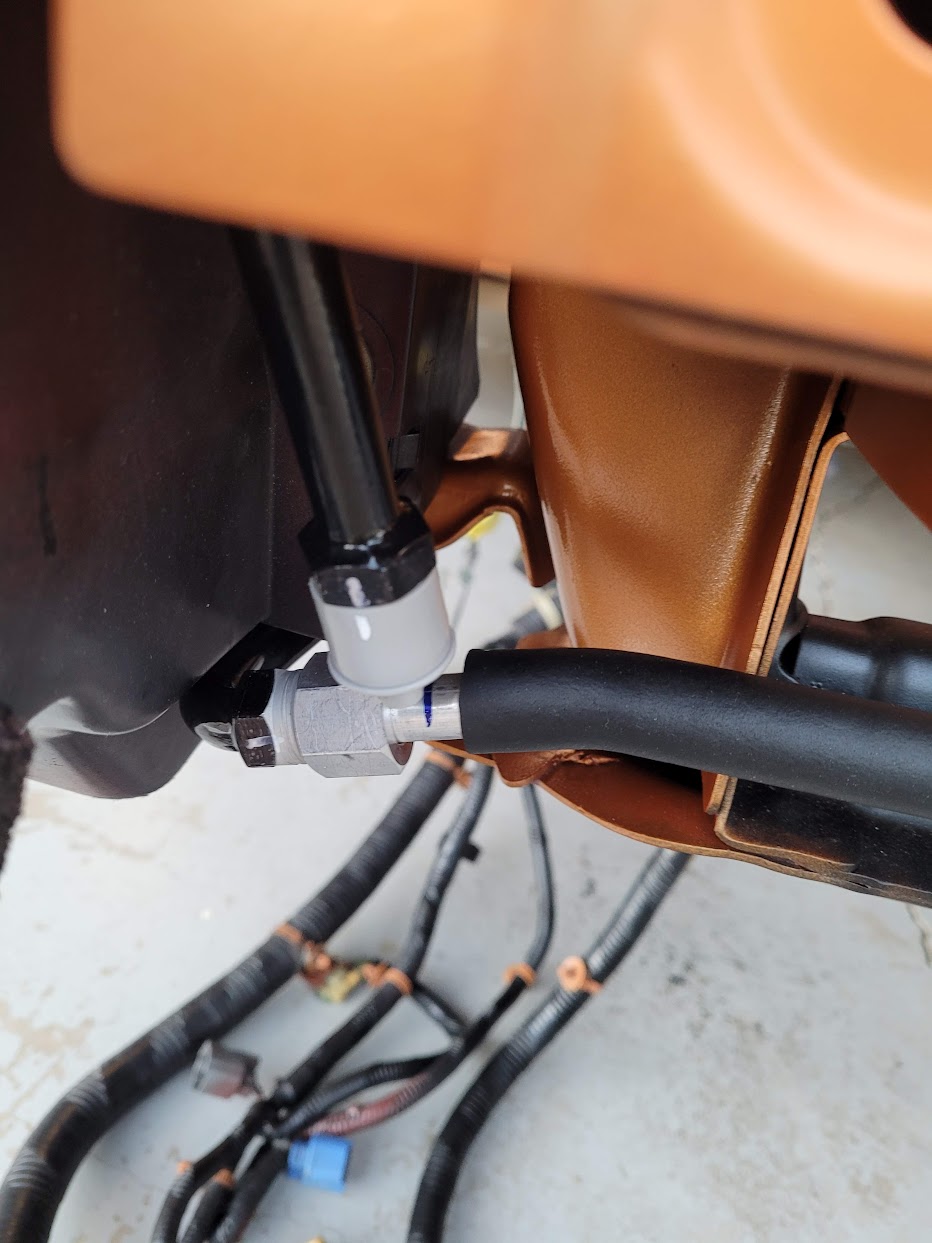
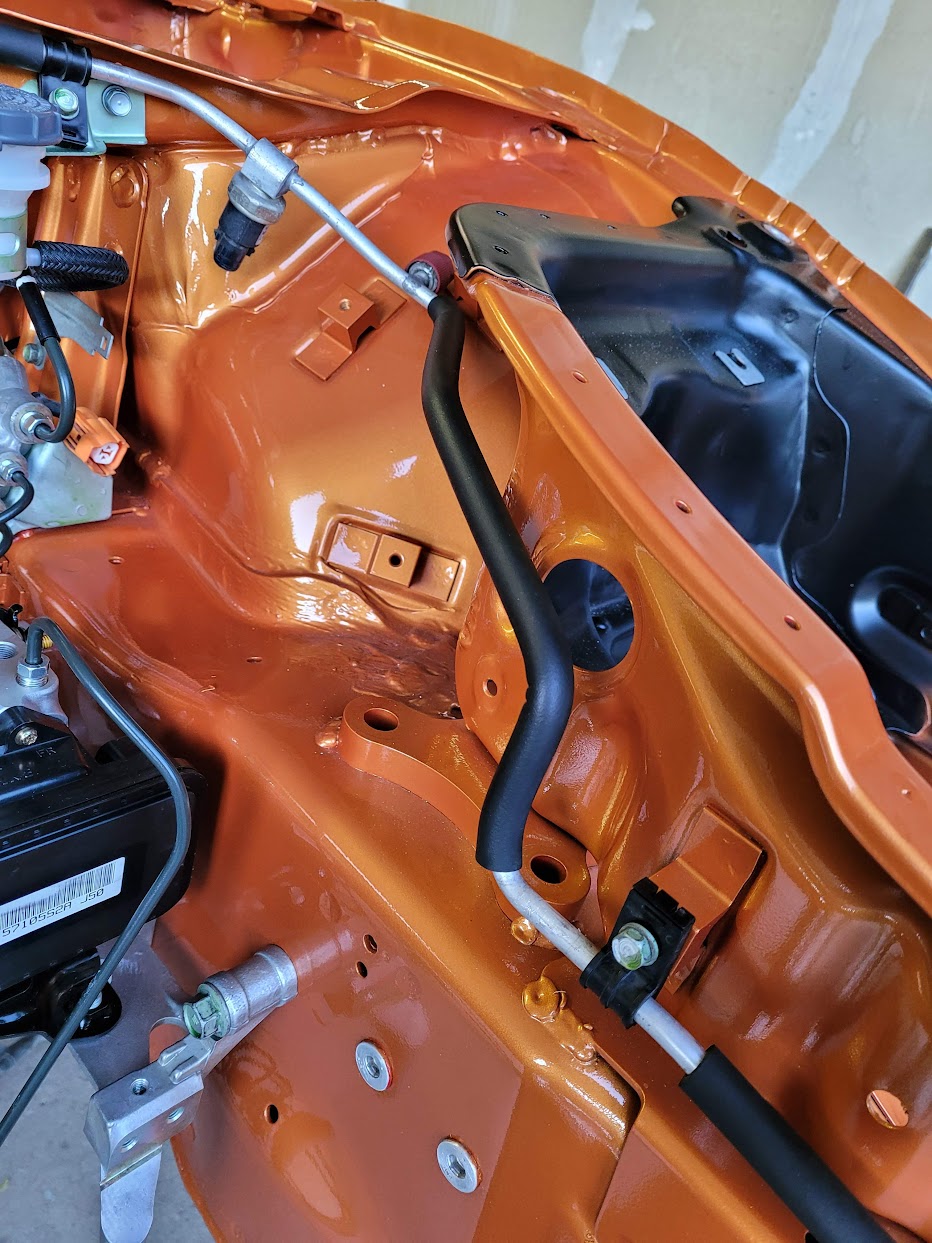
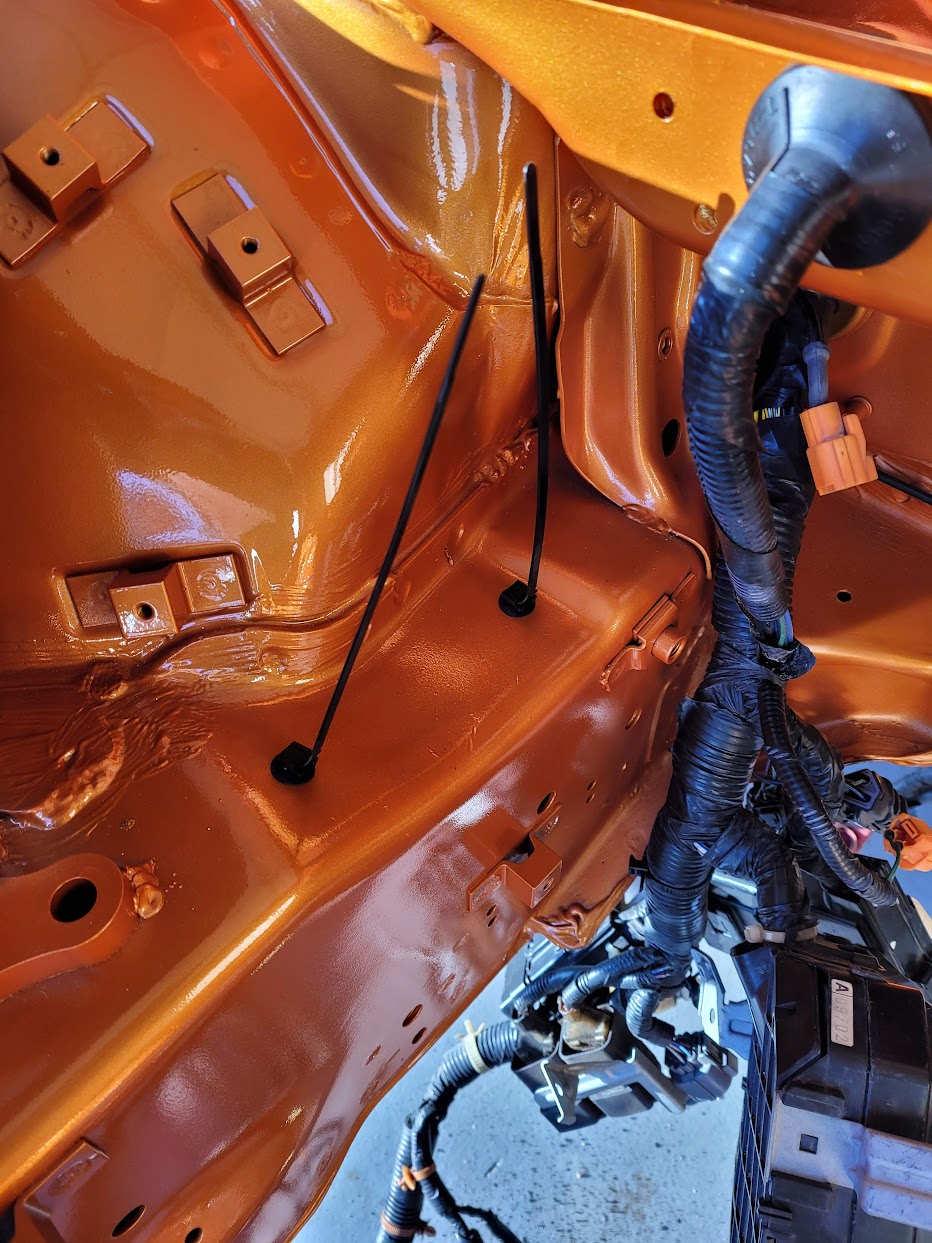
Some assembly photos.

AM-JKLVjsfcO_JvdsaBSMnA7ruq7WANQEeFkTJsuv8KGFqxj7M5cxzMeS8rBIHt0YAhet7zbt_077xJfmpopqkFoQinYDcwkWmhGvGE29vO29X5afRWiPclQchv0iAzeHrffDhtvZ34ljhH8Fi2bbkyl86b2=w933-h1243-no


AM-JKLUs4CuCP1vszb8SmqAA4RpyR_GUMoi7HaM7rYpOp7R2ZvekNOQYYr1NuaUaUnX3b_GI21BrdrhtWsySp4u7vlHwAvGh-aQFrnI0Yg4Lid3CQgzoGNVMYuww0KVOf1DFzF2uxQ-Mf-ylgwTYewwx8J9p=w933-h1243-no


AM-JKLVHlnZyykmd31vQX7YNakPbPJ8vrpnxpr-e0BAsKBApWvlc7Eq7fNAWKtU5uMpb4F3r-fKWJ2-Vn6Rg_c8aIAToz33h5yO9omFzLd0ZwYcZrOHTdJMU2xTAdCUZ1oo9jWF5OT4Hdm0AwnUpXQwaBh-q=w933-h1243-no


AM-JKLW56u7jgPq6o8WcjzZA24KMfbBK_DDInkHGBoC5fNvlM2EBIbSOOmI754sSyzqrzcmXt76faAJEXSoqOOT6IL-jY4oivKDVbxhM2mgbRL0IQFQWsuy38mYNSL484x1_3ZBDVNWCerUiD5G7vaox1FPD=w933-h1243-no


AM-JKLULCF0esUcCRPM6gw6vkCVSJkeaa0uzNkytxDmA6ix9n3_LzpEfWze-MpPoMItnJm15Q34OBRksVWgOSM2Jlt37IhDYV7GEFABF7ah0hq_3HW6vsRZmzhAf9Bgn_4lcxgEYz2OB0mJxIhuGsPvraFJk=w933-h1243-no


AM-JKLUoE15qLyIXVeuAeJNUQqW2_43B4xecA9zXSEhjPw7uGIXx_2IkPYgCKDUTHQ1y3Nj7eUfkdyU2JdttsyNaq5lJW3JsA8M_zz_L-DuIY4Lh6Vru2V9UU4GzLOu1sCRA_ZmzoR_wFuFWmaEFZ9-jS-wQ=w933-h1243-no


AM-JKLVHoI1mcBrho181HRKi2vrgonSJMTds8Su-OxGATYjaLXuYHRD7liSY1AmSLU0ciOa6rOW59Hp7XoCl3oMdb6sMB5XMamy8S9lh3GuMRTvlopmog1pky9LpK-DgAMoYC0WZHrWUW6G4pO9Hya30r5y2=w933-h1243-no


AM-JKLVpNJ8Vjb9UF52LjKWj2cVDPB8a90EHVmse1JC2h9ls_1R3hyzh83thntFakMpydyi_lF9apnWY180F6cVXrqjFjPPrgcyrQtqPzyqFeTTQNs4JDGPfebmMCcc0LYchkB41JxzcHqx8Gt9S2ZUhDbZr=w933-h1243-no


AM-JKLXPgeexA0yXy1w7wk90vqlq9dLFsnGlPY-rLJEhhypULSidilxs8oWz3hUdAamOD3Ov5XK-kcSqh6Id3u1jIS_qKZF0rD5HeW2ltE0HZDF38DI_UiJaIweRUOP3SZrsObH_xhFUYTCdZ67lkGT6M4Mt=w933-h1243-no


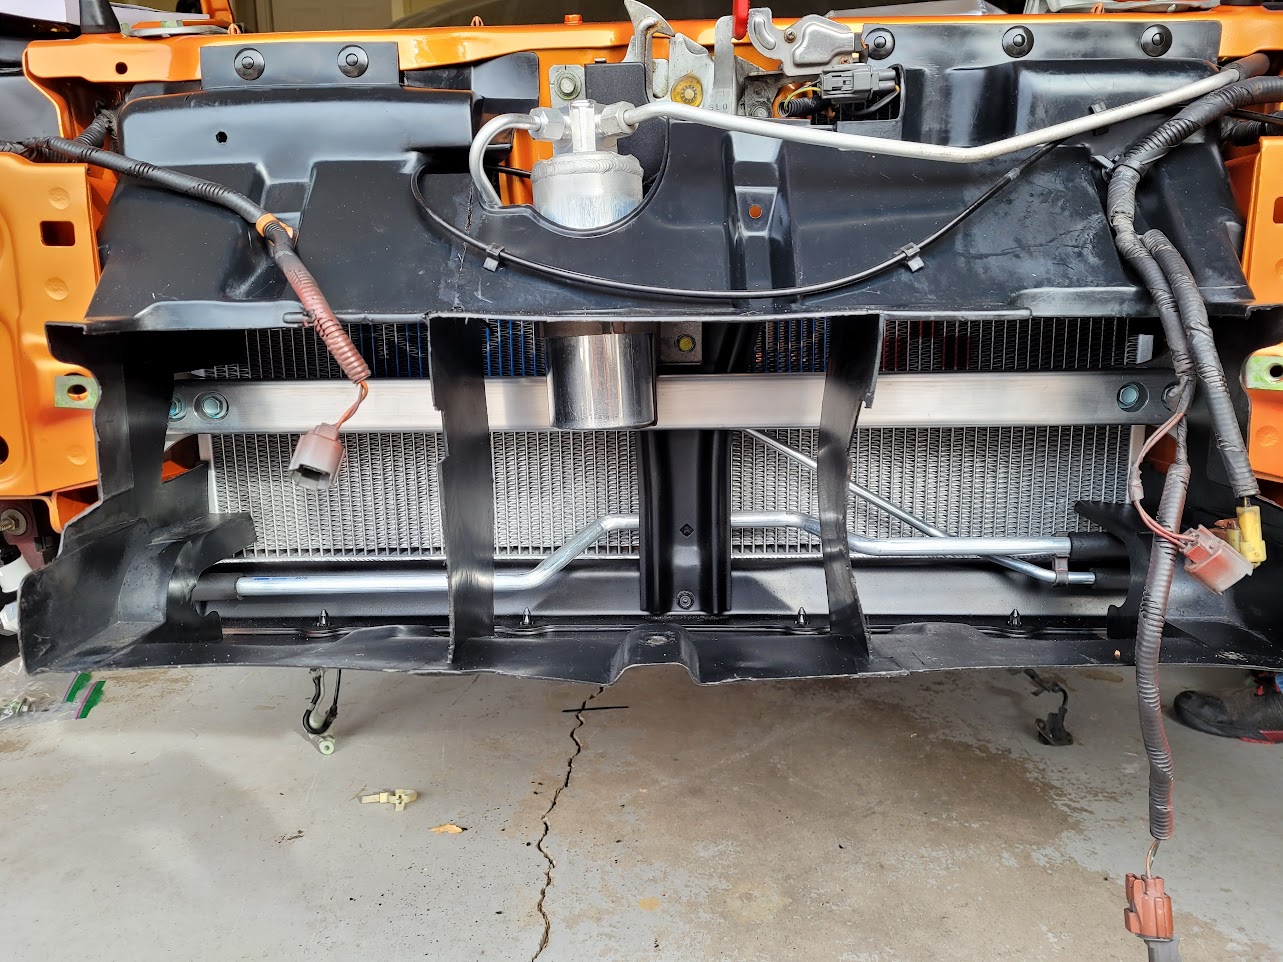
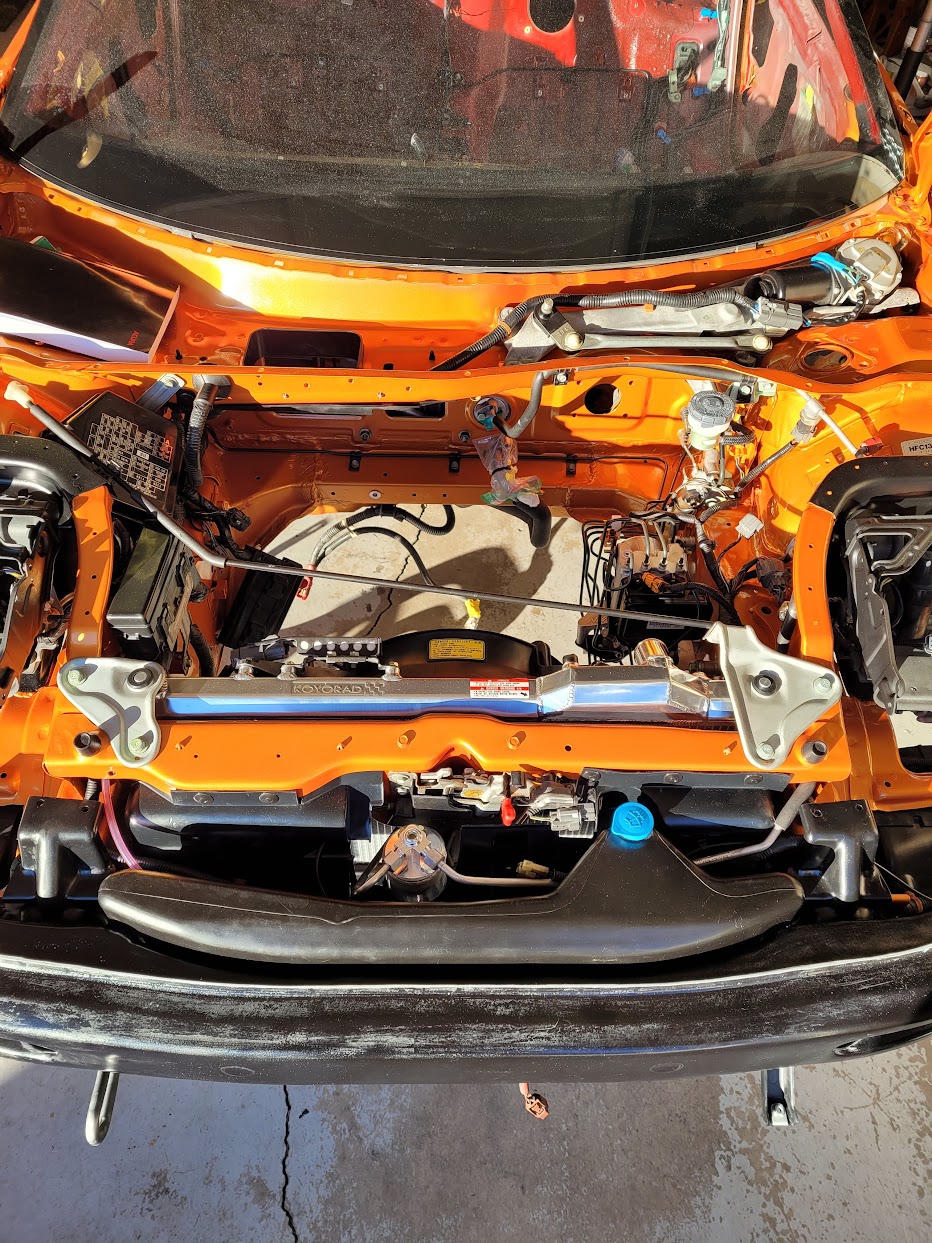
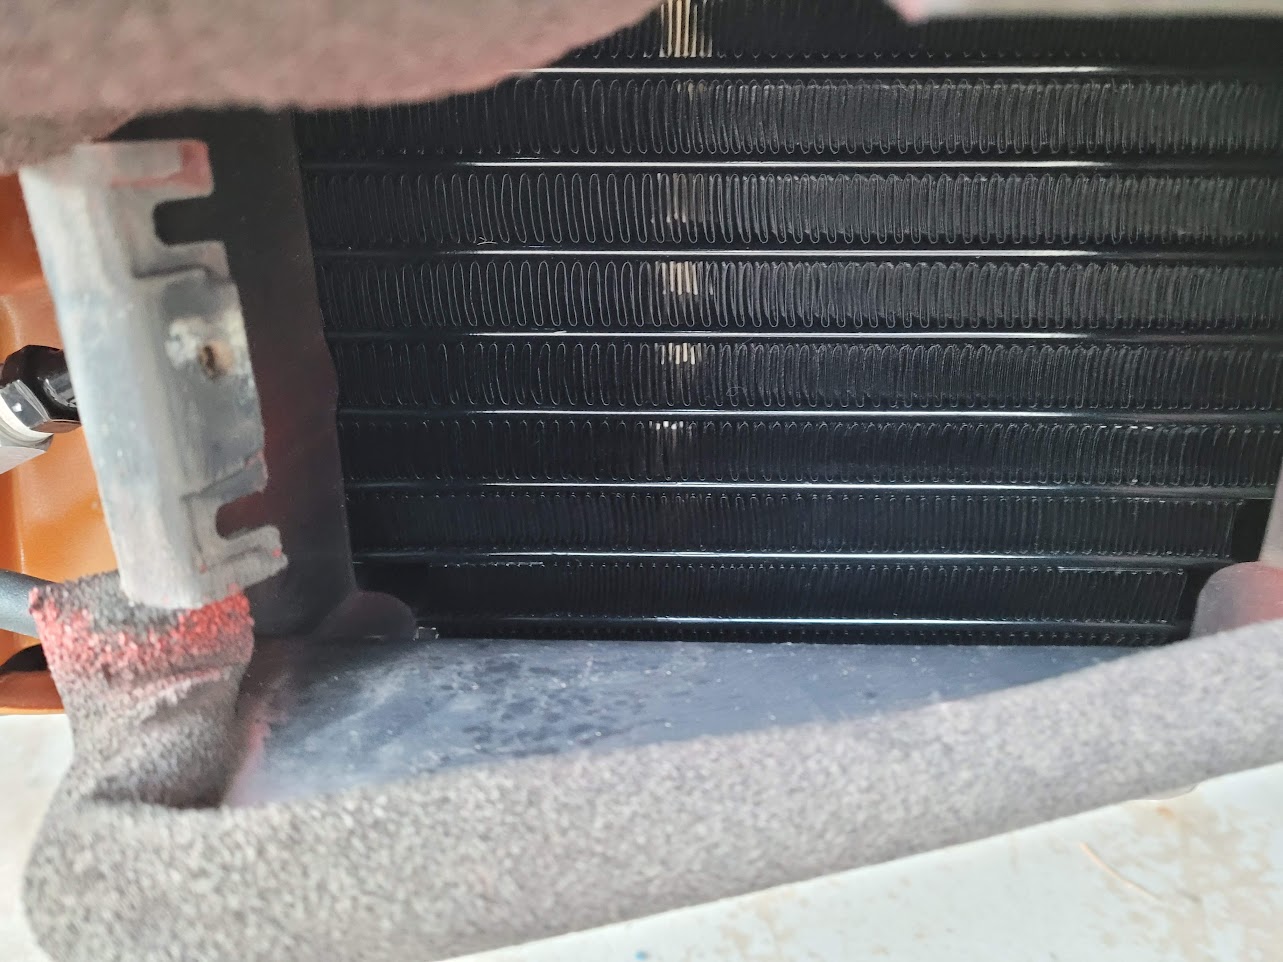
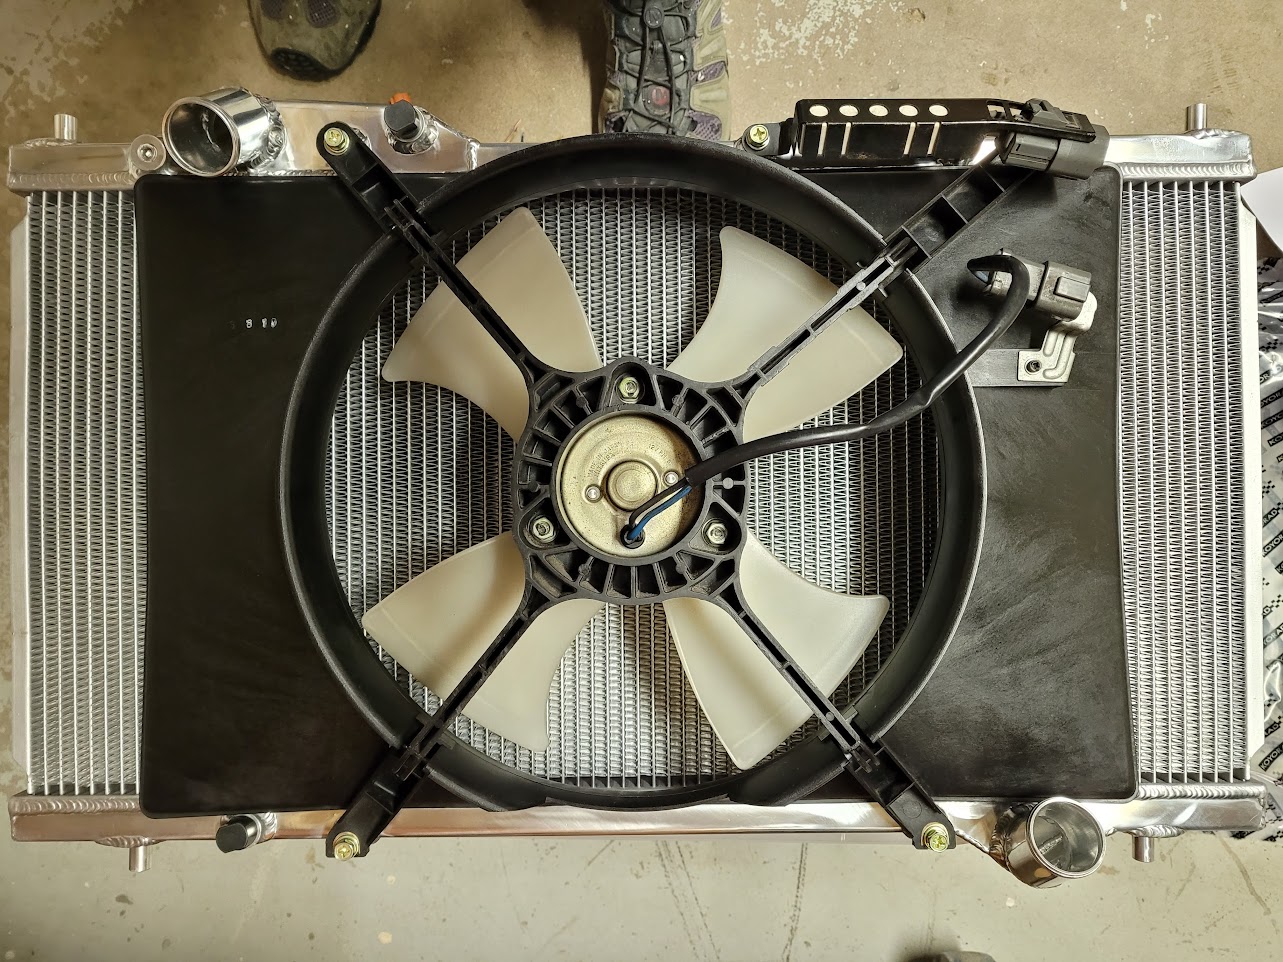
New A/C condensers installed.

AM-JKLUKJQdDu9HuqP3GAXEvhC5XovzU7PZTBAQFR9AMbalzb7VKzW5QFJNyvTuU_8ZPr14QS9bwN9pggKLStg31F87C2pxbhEMiQj7eyqz3G1SMXACBBneynFd6IQ-E4rck9dxaYG6f2LGb0o6EcklSV12_=w1283-h963-no


AM-JKLUJ9YOHaXx4qjVJYkp8gIig2PSriEteY9t2iQhgR6-f9hphS8uvJ3Yf6len8HxPs1ijKr45DrPxzbIxwbpfh6bq5aP_qo6uAEK7eIaYABBvrb_iBGELYnlE3j-nXOGIBgvjJqn9NKUGj3roaBfWiGms=w1283-h963-no


AM-JKLXBmK270iZ7qtWFdO9CcOyQKtmhTWW4YAj2cVMzuM-vcUvuxmhhlL7HRcua2F1vHWEkxYzH2_Ex0WKs71g8Mo2zcf9W6amXBS-w6jOal6PbdFFQpin7iE0tX7xh5wRQOPOuvwLQFaq54a-4rDFgzslV=w933-h1243-no


AM-JKLUcf7sH2kivd2FFVWW5cZdx00srISQ87BJVKCk_nBDLZQWpa9xyEpTqqw8hZ0MjE_dwAAAWc_GJ8cuWd1GPq1HV_DF37MSkVgKHryTDJO2XSBkMo8jiOT3_XqXDxSoBdCIlCXiFgHHgn9i88aYRJaUo=w933-h1243-no


ACtC-3dD02ru3TYHw8fI6_wCR-aEGkKExWdrl_cJUW_0wr3syJHkS5EhfuuJEFkYn8e6BcI7HyiiOdMMWnzW77C_Taku2AFZhUq5rL2WmV5PjeNk--acOpKgfNIJai4NhR8sc6Zt1LFtf_B74_ryFusxYeLd=w948-h1263-no


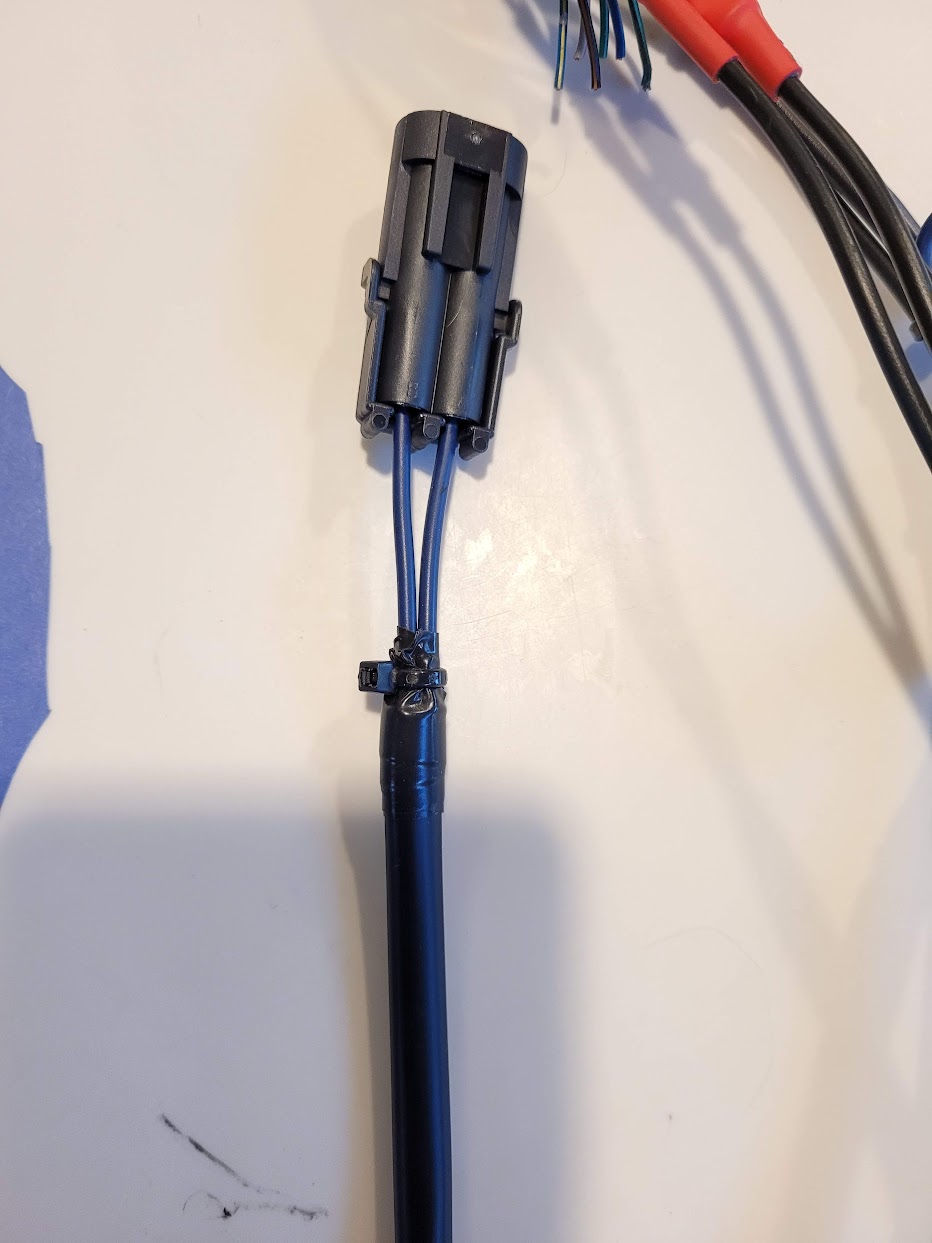
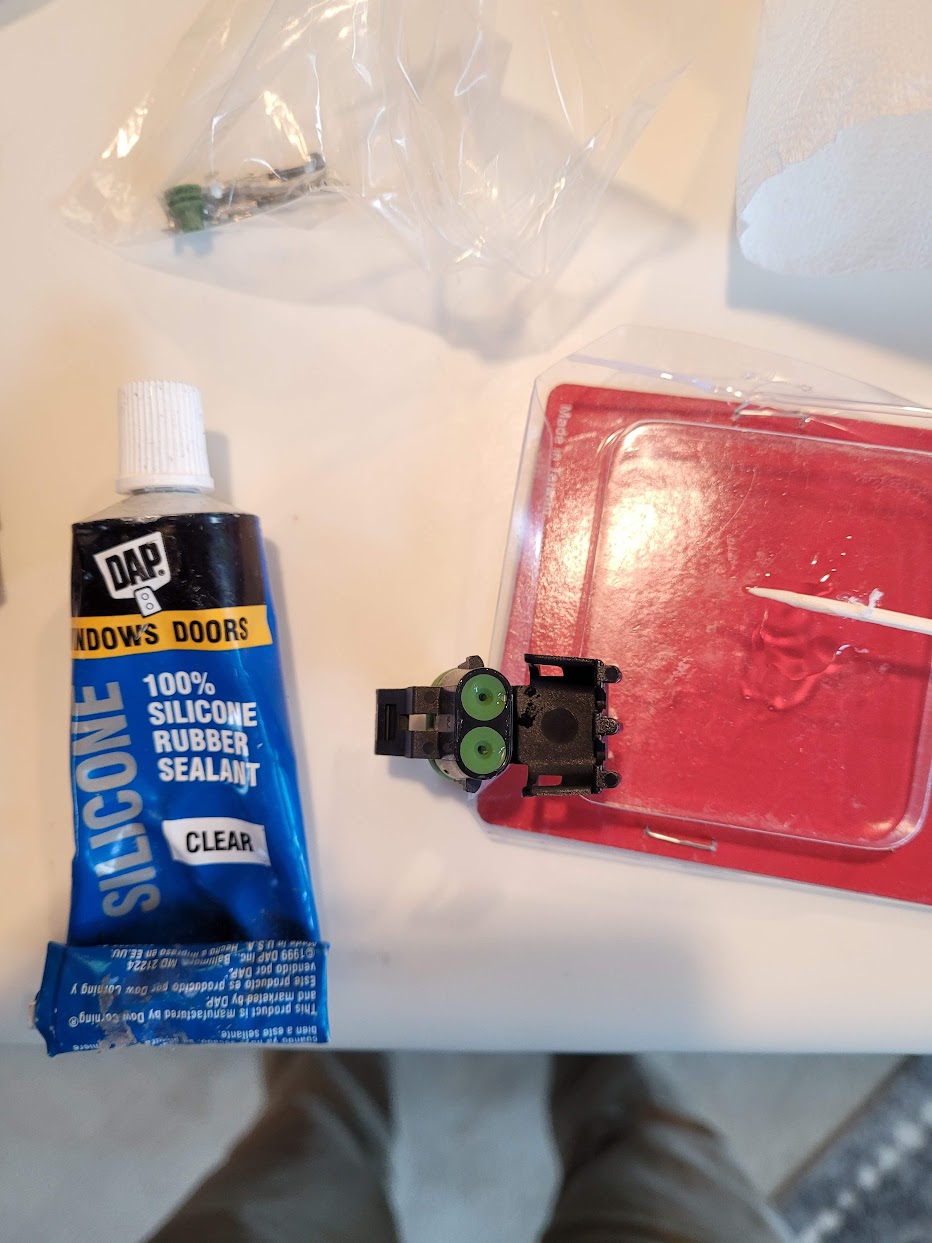
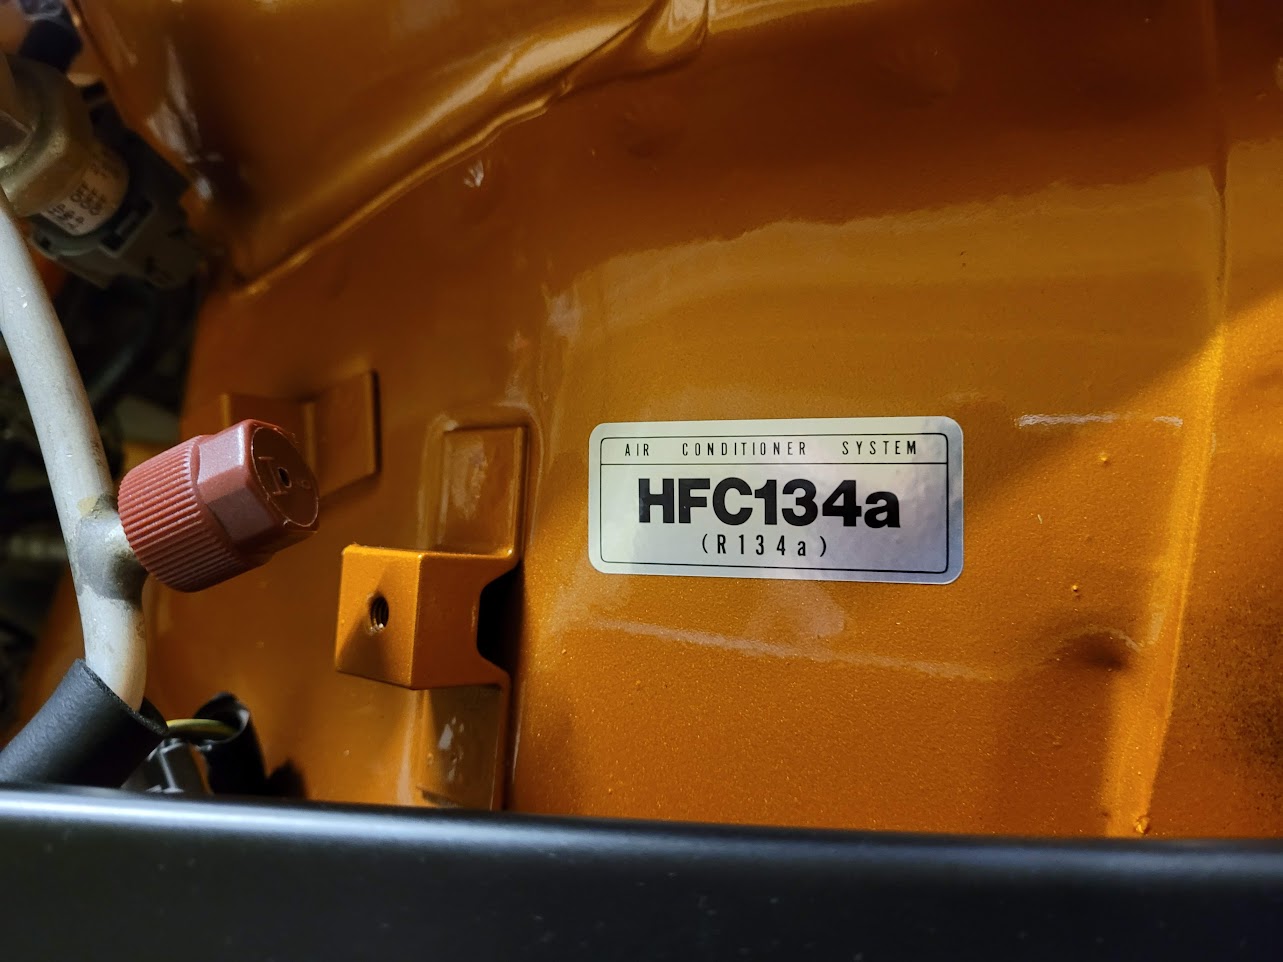
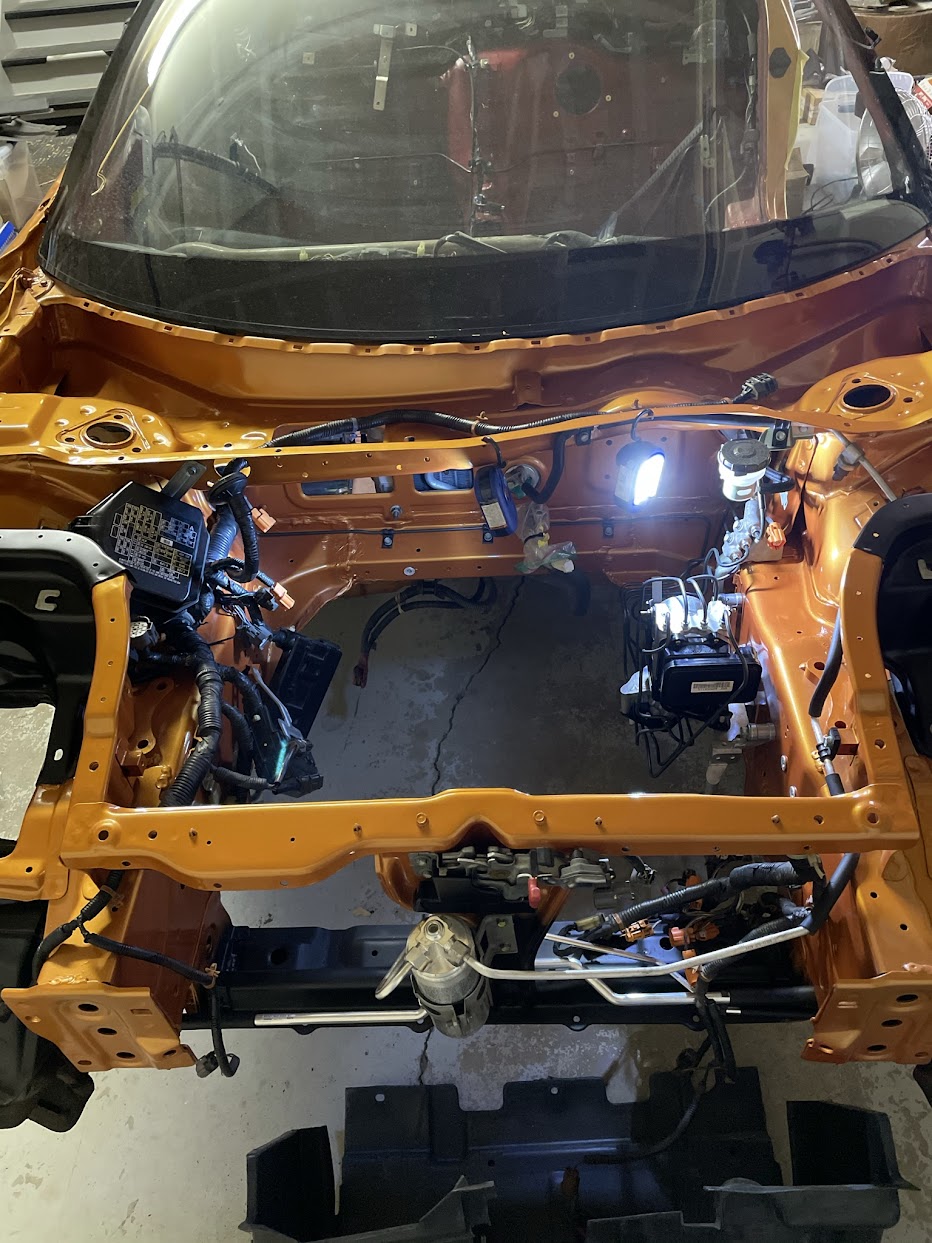
New A/C front lines installed and old main line installed. We flushed the old lines with the correct solvent/system and used new R134 O-rings lubricated with the correct PAG oil.

AM-JKLXyrtU89-ZgM5Wc-7TQPt6t-U-pmeeubu5iT-d1V1997gBAete4t6bwB5DmLH5mhPvmHmd9CAvhn4E7S_X_Emlzt-cVXCjBF4hcUqs87EW8nQ3Fr5tAf3t_oj7C155JF_jznMAJX8CYBAxC7-XBRSKb=w1283-h963-no


AM-JKLWE57pgGzX2uKrd0gVp84vfbNobS_O-3zFIhS-Na4PVcZGguwhzDmeNbKmm4KFdzJTdM-LsHueUWll_rehNu7yqMkP1lQzPSDgo47xZp4jL6puQEltYxPQ4pNzT9U-zv4HhS9gYnuJVDDDOKXXVzSmW=w1283-h963-no


AM-JKLW5NwzQNBd3FVB7XUCc9tfxz8FrJU94bxoJXDC_FzyTz6MN9yVHqo1WDi8A8SlWqUxG2bjjhGUs27YWuu-mpBqgU4Ou1Lw_RRSW9Q-8hqrTRQWEV1r9R_tChgiV3VxmubtoJ8XnGOjwcH9raluHtwUx=w933-h1243-no


AM-JKLVO2icR9Cj15xPcMXy-d1BQuje7-tkXyzakRl1e0wj-iIqquX6nuXvKsyvo_qNfE8XPGTENnJ1fhU8-pxi9tEGYDWGu3Nm4gOmQ8Vh_aE-cO7CYSmHvZm1rP2SZs2zZremLmN0mgtTUz9aIWYbikWXl=w933-h1243-no


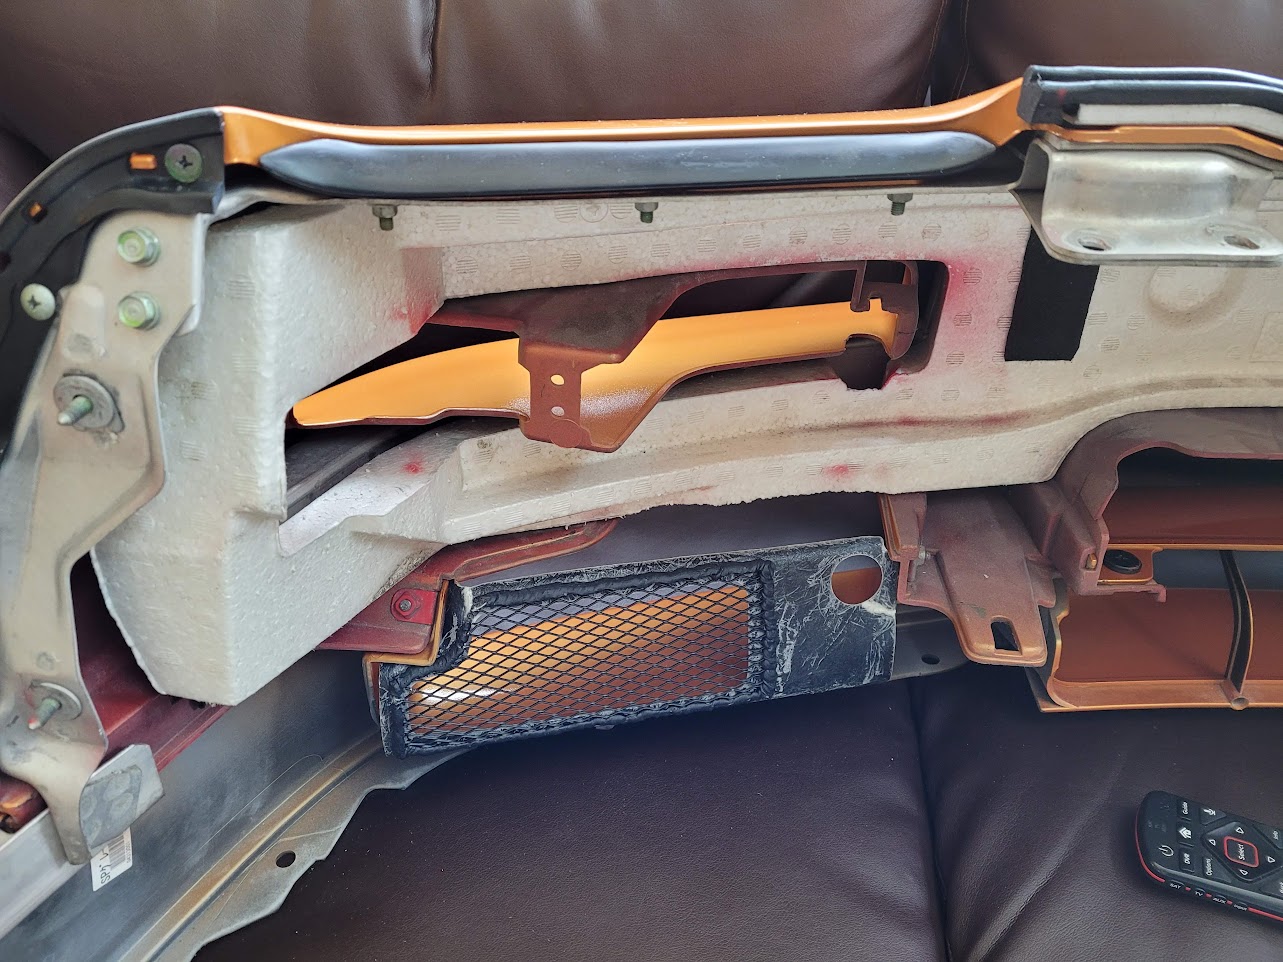
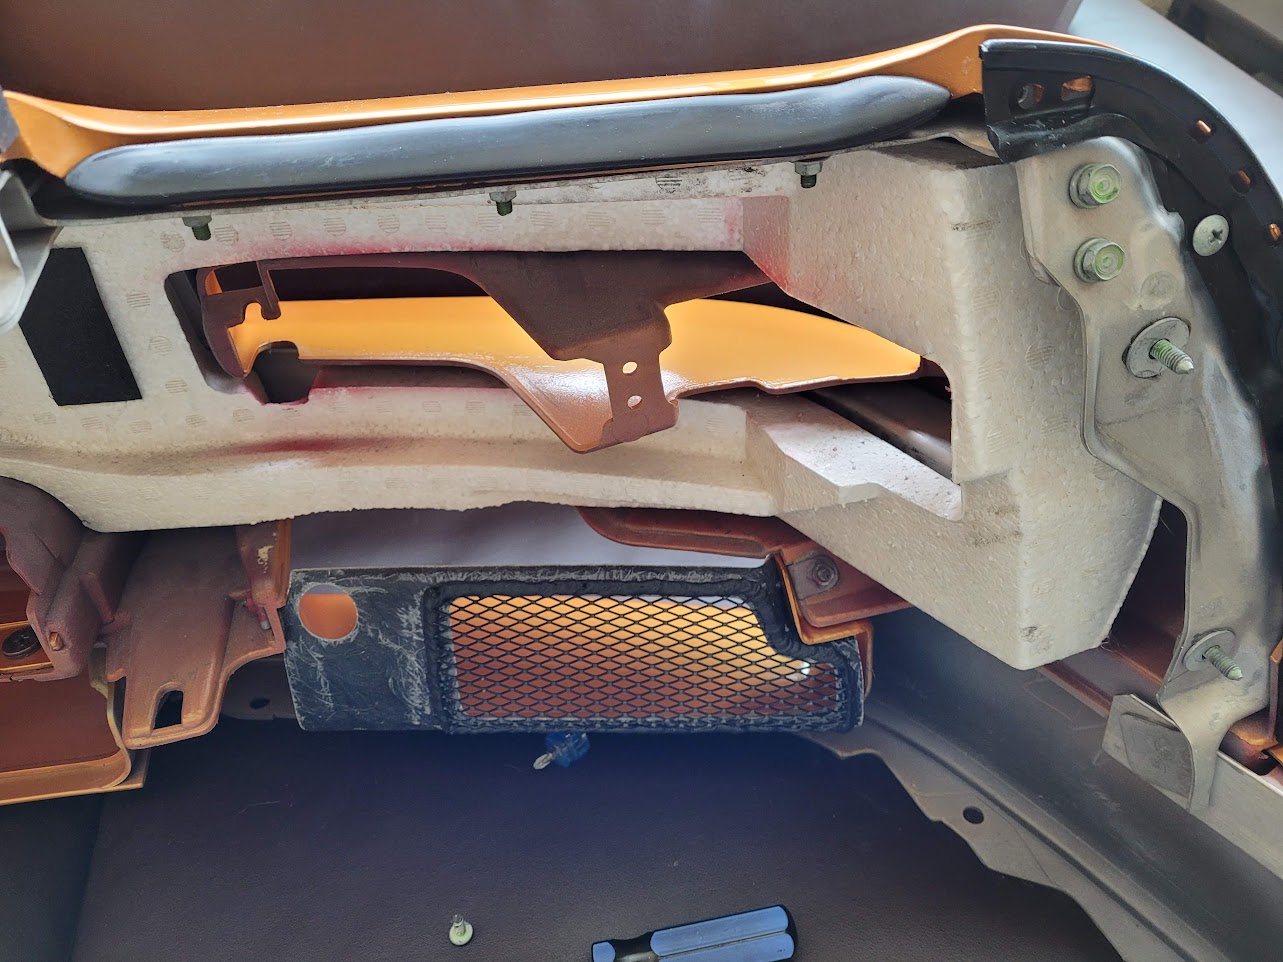
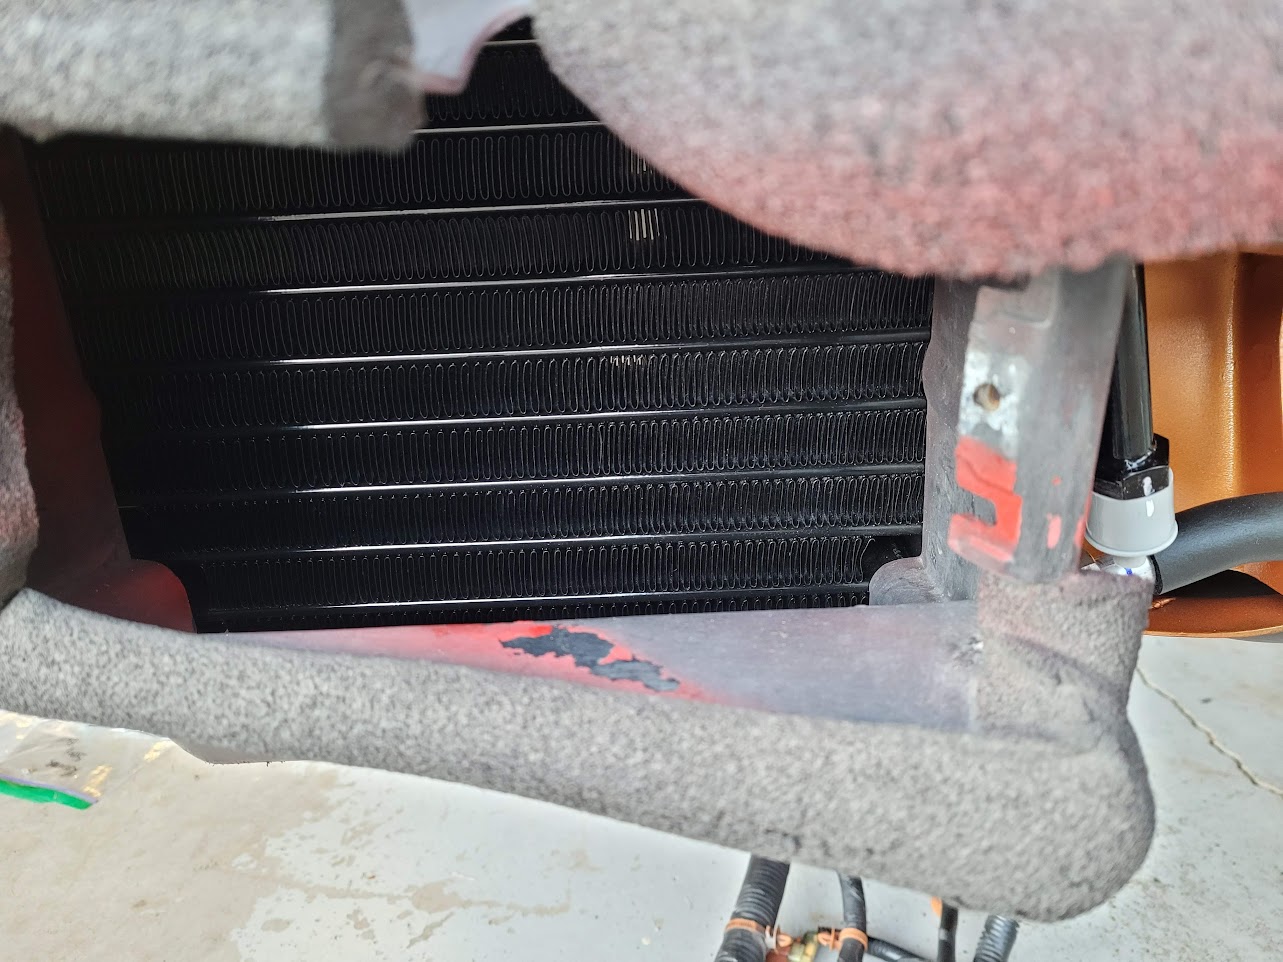
Note the orientation of the left main line. This is wrong. The black mounting tab should be facing down, not up. You can see how it pushed the triple-pressure switch nearly into the body.

AM-JKLUOp8gHK7mw7Lgb9YoH7jUW5c-fmu9FPnvn8rO_xeSvmw_JLUrbC2s43iEJXWAwVhMvPYX7viDJGloyXa0IfNJBmCz_v5WAP9bu6vdH_We1S73IxUIRijkno0JazKY6BKIia2JU9TF94oTyc-qwYqiE=w933-h1243-no


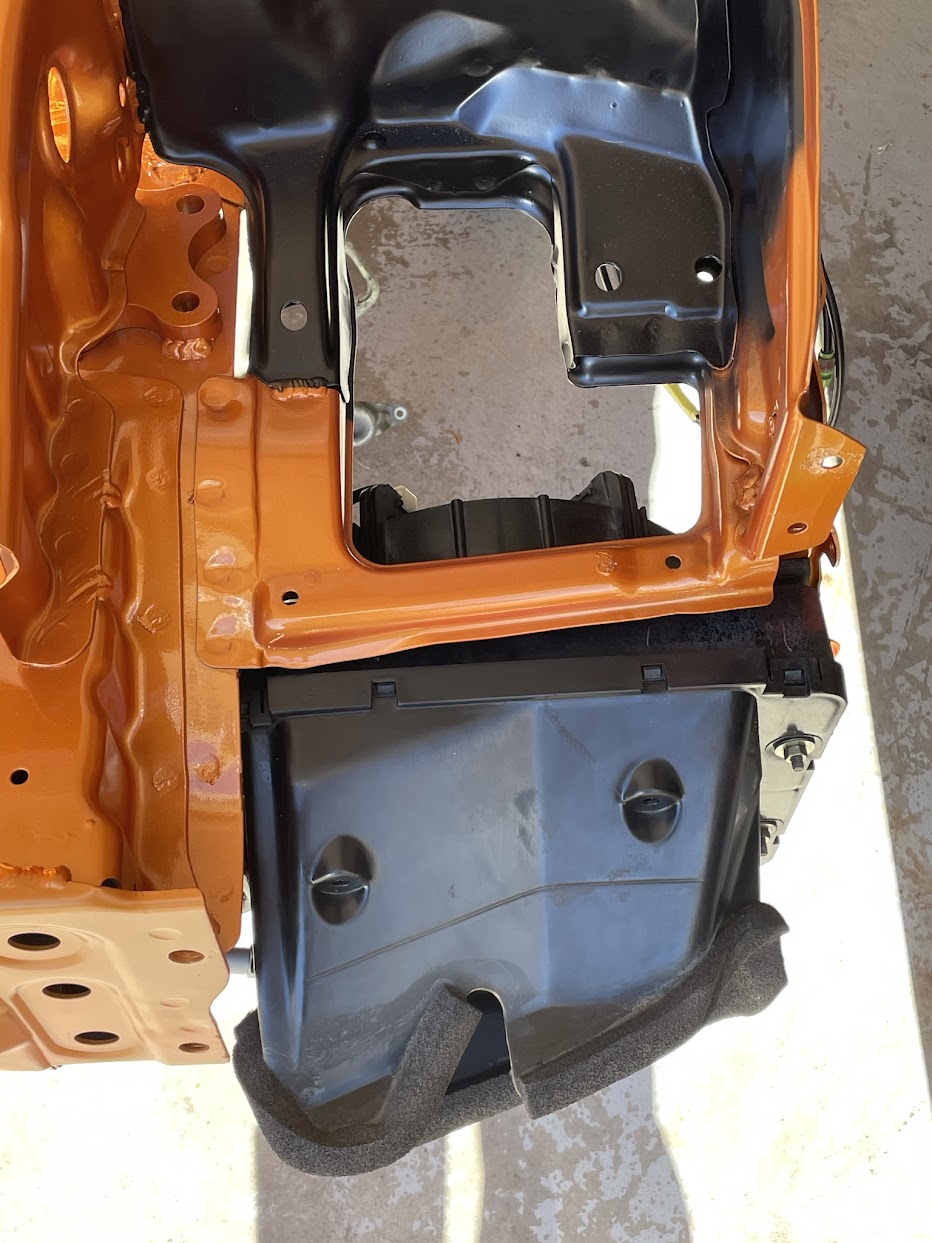
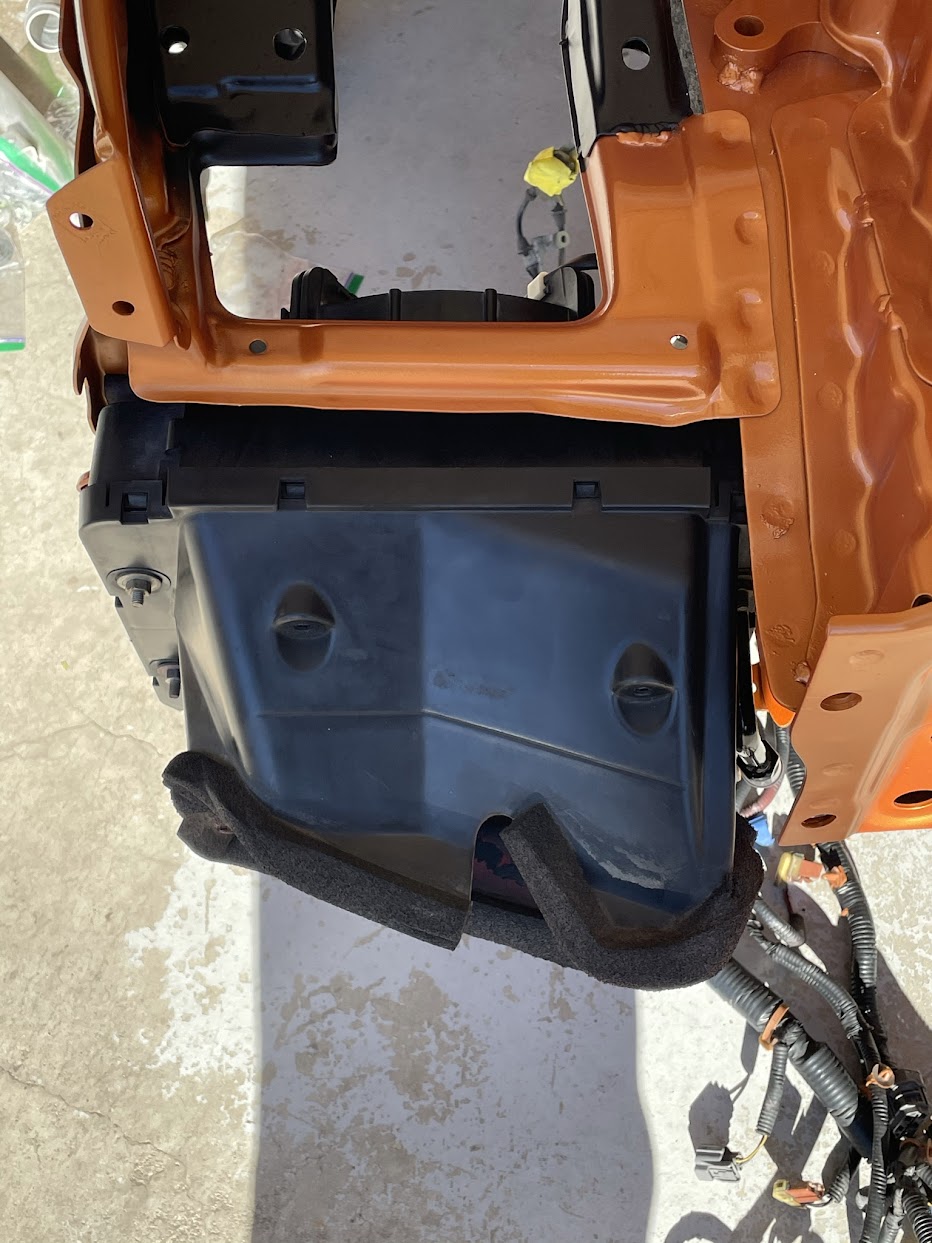
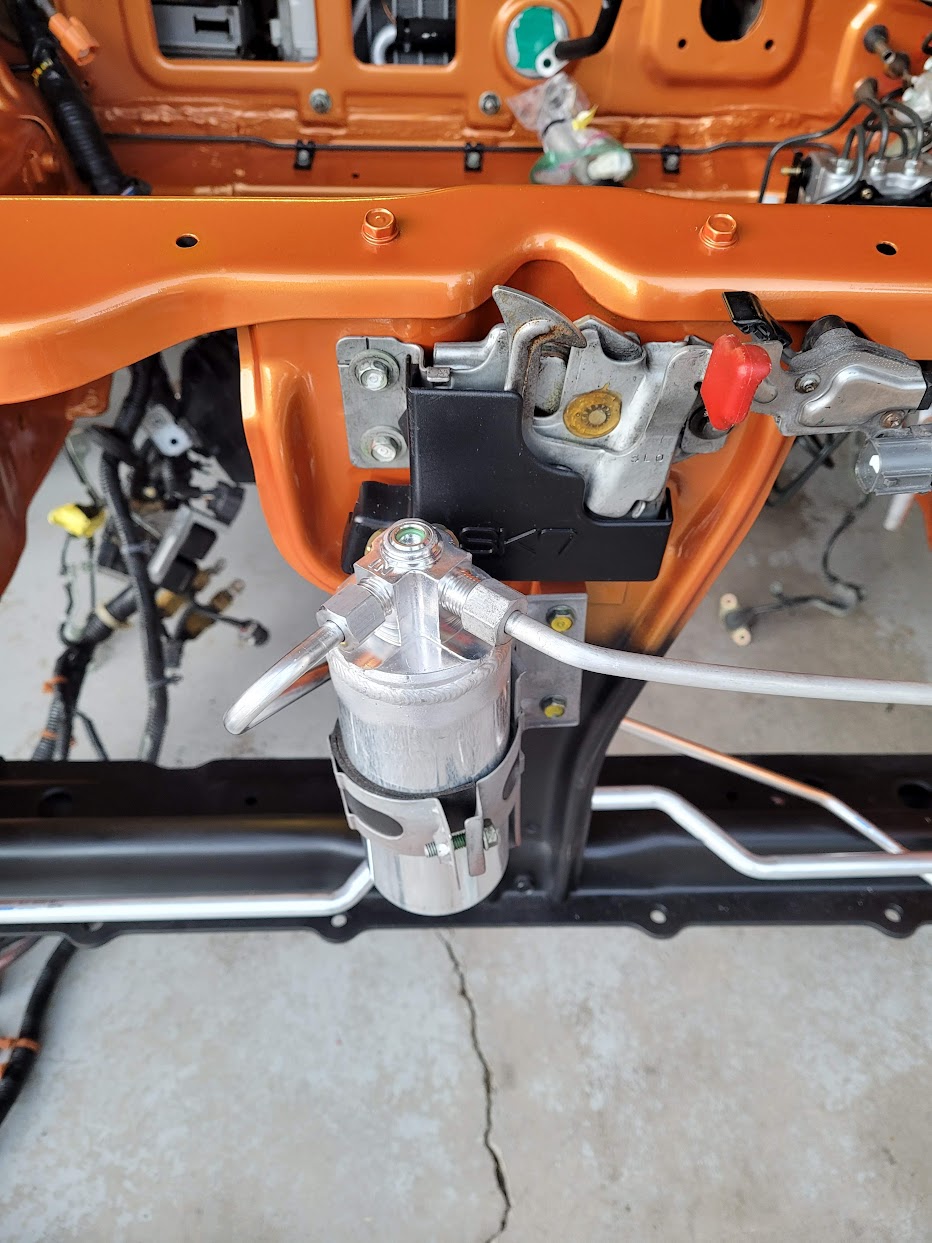
New receiver/drier installed. Four Seasons 33412- I was very impressed with the quality, considering the low price compared to OEM.

AM-JKLWYMX_v7xWAxDwaPL8zyKuSp9EAN36qG4BUgbf7PMKDJtG69OJLec1v1_w5j-AOX9Qbks7FE4GPOG_muayH2TeGtLJYEWNs_NSLIeMFj8T26o7tVOQ0Ht6AnFANJ5J_4VCDSU7imTQ2PHx39ijQTLAG=w933-h1243-no
 
Last edited:
Re-Assembly 6

DAY 3 - Clutch Master, Radiator, Wire Harness, Etc.

The new Koyorad with OEM fan shroud and resistor plug installed. We rinsed it with water before assembly.

AM-JKLXx-fUCoqr5qfYBukUAir8XEYqRH5gJ5UYcvv0t6S3J1VpPjDk506OnuzuMaJ-xX6aGfRelhlPn0Ol-djvIsus40ifLyPr5gLdbRi2si0jUafIZtaZEUmryBzTULVs0wNOihX5c-Y-e91CiRhuJmk8w=w1283-h963-no


New clutch master reservoir and bracket installed. The bracket required some post-install bending to get the reservoir to sit level. I realized I'm missing a hose clamp!

AM-JKLVe2UbcYoqM4BNT82btkJjEdKrlcp1wvnLtWrFPI_viSzRameIRpTegkKgpW7Q7dO_6wEnwsB0jS8iTQ81JJ1D6qWH-9KWXEjfU516zLvK2CICcNhYc7S4w4_LmOgYHpYaJ-69HGdhP7OhdD9joLiY7=w1283-h963-no


Clutch master hardline installed. All of these hard lines are tricky. After [MENTION=34522]NSX_n00b[/MENTION] cursed at it for about 15 minutes, I had to give it a good yank to bend it correctly to line up the fittings. The "calibrated hand" lol.

AM-JKLWTCCtN5bGmpHGfBoQAMMKINPqxHqld15tmf284XoAXJUtZMVhWaqK-XcjcJ3vLIsvSVYCtcgCjr1i-y8unmAiL-rgQB5_bBcjDm2wJcXccqaYVZI7DK-4bATwYYMeLl_h4C5mNgGbkTs0x9A9641sD=w1283-h963-no


Working into the night to get the front main wire harness installed. Turns out these zip-tie trees I found on Amazon came in handy. Many of the ancient zip ties were broken.

AM-JKLW4oUEnPAeb0-k5F_YyPct1lkoh3nG8ACbx4knzFXt4Tmrdwtde4Gh51K5N0o_ZTn_LBS9fWVlwI3Am6nRjHUJwjU37QOceKgtmz-mniBKwdA61yjGmfufNqdOFXujOHaOiDO_hvd9Os7DQqVfuPN_u=w933-h1243-no


AM-JKLUmsT8cAuGuBSVA0Obi-EO58-VYdVh_HgzO5Z9JD1If-1eGHRGGwRcumR1xuX5WY7bGWYOElUId2tOVVb0UXlXWxYrk3gJ4729tsO2DykwNTGZCjuCYXBLx4KRucCRjVezhSLl2Rs34CdIjOR4L9z8j=w933-h1243-no


Radiator installed with factory-correct scalding warning sticker. :)

AM-JKLWxmZkgMM45YjW1l5SndxoAgXd5e1Oe6DwA4w1W_Wk-9xvdyohNtsY-2j1Xd-nLgDaV3QBV1PccynDKN4Hkb-ukWaEUi1K17WTrhSI_JniLvt81gNu280OKvFIRDCldWI8v7LpeRU0MJk7FkJ3S-A7g=w1283-h963-no


It was getting very cold, so moved inside. Begin the construction of the "Honcho Harness" AP1 ABS wire harness. Since I deleted TCS, my harness will only use one connector for the NSX ABS system. Thankfully, the 2004 RSX donor plug has the same pinout as AP1, so I don't have to move any pins. If I ever upgrade to the genuine Z03 NSX unit, I will have to change some of the pin locations.

AM-JKLUwHRa7ypNSFEEWZEIlKVc2h7c_EBDAMWpSYxPdCaf6B_LmLm9cjFbP0no_T9vKeVq8UhDQGzihg4UA9ycNanPIurUAAuJfAQHqMc9HgWbdI7PYBumOrTlmgK_PuVJ00CTb5aAzLyCVffY7B3AcY1F8=w1283-h963-no
 
Last edited:
Holy crap :eek: those all-day garage times are familiar..plenty of energy drinks and beer on hand?

Please don't use plasti-dip on anything meant to look good for >1 year, especially not the brake shields. It will not last at all. There's some cheap high heat spray paints that will do much better. The dip is okay for temporary color changes on exterior panels, but even then it can make a huge goopy mess with age and fades very quickly.

Zip ties or silicone is fine for the shift cable hangers..quality ties will probably last longer. Let me know if you manage to stuff the tunnel rubber boot to the interior in correctly, I couldn't get it to fit right no matter what..

Looking forward to more posts, seems to be going quickly though I know how much work it is behind the pics ;)

Thanks Tyler! You're right- these pics are the ones we managed to snap while working frantically. I wanted to document it better, but you know time is money lol. As for the dip, I have to disagree. I painted my F-150 wheels black with this stuff and they have lasted almost 4 years of automatic car washes, getting sandblasted in the mountains on I-70, nailed with rocks going off-road at the gun range, snow, ice, mag chloride, etc. When I wash the car and spray some 303 on them, they look like new! I'm so impressed, I'm trying it on these NSX parts:

Windshield wiper arms
Rear brake caliper shields
Original "shorty" 1992 Front Lip

I'll report back if they end up looking horrible after use, but I'm encouraged.

As for the tunnel boot, it was a non-issue for us. Spencer pushed it up from underneath and I pulled it through with needle-nose pliers inside the passenger compartment. I got it to seat fully around the opening.
 
Re-Assembly 7

DAY 4 - Radiator shroud, wire harness, cooling hoses, etc.

The cold and the snow arrived on Thursday. Even with 3 space heaters running at full power, garage work was slow. Not many pictures from this day, as our fingers were freezing.

Installed the radiator shroud after repairing the crack and treating with 303. Also managed to install the radiator stays, prop rod and blower vent top piece.

AM-JKLW3yFA3sooWTEamEsM5YliyOHCmqxc54zfrOo9XDZccHSf8T-HuONh9zqGWDAiPRlwb3tDEsk28mI1nfLozxEiZou-riTEX0gle-AZ5U-49a3tMeVXj68FSN2Y-cQzOF4HP7uPNu8AnbzzEobjy64JH=w1283-h963-no


NSX-R upper chassis bar installed.

AM-JKLVaQ68g9LuHeP7HxJ27OkQPSQYdu1CUqMG_j1UTk5bnwkm51W-OrHQXe3K8Y5Ifp2ZcvTAaiQkrSSrchf5ghzSc76VumMi9BLxWovyQZBjLLWhLoN1u2oD8_5TJip7Y3wQeWdDG5IFw3dfl1oQdue2L=w1283-h963-no


Installed the new washer pump on the reservoir. Make sure to port over the black foam seal for the plug from the old pump if you don't buy a new one.

AM-JKLXVAU46LsSWdN1MHGvE07-wv6S42JydDqjV4vegYDD9kQBwqc4-yXYa_2xnOfr1dLVvUuDHA6EzzvfI0rq_9Nvi6ptpEqSgpTVgy_-_G0bJMPbwkYwqx1oRMKCNyqdvjLUnZffpXXx-BHmcbDuUJXGU=w933-h1243-no


We attempted to do the center tunnel coolant hoses (in order to mount the aluminum hard coolant lines) but gave up, as the chassis dolly largely obstructed access to the fittings. We'll have to wait until the car is back on jack stands for this step.

AM-JKLVVbck4RBvw1-AXKcUtdoP6oKgEa73hCZp1ckFb6WdLhxcRHt2odRKeF4_mOHsrIhxf89aaOUffacg3klwKjv3WJO5rYfS838x77cl4HKSxf7RYzrzg6eYRu74eKew2BjDohdSp3yNjCvuEt6LH93b4=w933-h1243-no


We also spent a great deal of time inside (escaping the cold) checking parts diagrams and old pre-disassembly photos of the car to get the wire harnesses correct and then back in the garage re-arranging.
 
Last edited:
Fair on the dip thing, my experience has been with my daily's side mirror caps and window trim. The mirror caps have to be redone every year or so since they fade from black so much, with gloss topcoat applied too. The window trim lasted 2-3 years but then it started reacting with the sun or something and turned back into a horrible goop that stained everything and had to be stripped off (where the personal vendetta really started). The car sits outside 24/7 so in your use cases probably much less exposure to UV/etc. Maybe it has better characteristics on metal substrates.
I'll just say dip's meant to be peeled off after a few years, so for wiper arms and that stuff I'd personally use something permanent like SEM trim black, Rustoleum high heat, etc. Just a suggestion that might save you some future work ;) sorry for interrupting your stream of posts.
 
Last edited:
Re-Assembly 8

DAY 5 - Front Bumper, Rear Bumper, Fenders, Etc.

With temperatures dropping into the single digits F, we resolved that Friday would be an indoor-project day. The two most obvious indoor tasks were assembly of the front and rear bumpers. I have to give a HUGE thank you to [MENTION=11589]N-Wing[/MENTION] for his fantastic youtube videos on the front bumper assembly. These great reference tools saved us hours of researching the parts diagrams.

The Imola hood ornament.

AM-JKLUzQeggE6uw2-U2cVVcYjb223WG-jlUbmAeHmZQet8mLysvNR9MNkngyiA2E2CYTPkiOt7ZCkdojlVBwY5Bk_LtQ0qDRD0edF0oFnvUKUaCe4e_R2AUeq8hH1Lq_WTm2Uyob_6GWXAIu3jBhH30TRw_=w933-h1243-no


The push nuts.

AM-JKLVbLgNy7nykpO_T8s1JMagayCOhOINxVJk4tX_XVb_EE5gqtSVQvorH73KiongTSUhpS-EGNj7gCSn9OIXUnqB8CoKqeu3cyD_Kn0WzM2qosBfn6YM29tt-l_jsRgkzm25arytKFMX4WqueuENJJAla=w933-h1243-no


Installed.

AM-JKLWayvHqUT1E1QFBnaboccdqU2T03LsXp_P7oRoGl4rIui0viBaMrWfDbC70gyAYbcESwyN-zWWMjp8XJNxqEPmxMqOGfv5ts0q6w3AH-pXZzuRkWFhtyQH1-TFxjqvXzYjNFXysh0VVnCVSNlR6kryj=w933-h1243-no


AM-JKLVwmlEtgAzB2wdCx22N04vdBXubGrTaocwpKmCVebcsBmYwV5ND5LTZ0arSXHleP2eNGqvz6hdWftl48osizP01yOhFFtjEH5YUAu650QsCaz7meOx74yWzCYjMF7T16jiKS3_QTx8hXbY4mkWIsL2Q=w1283-h963-no


Assembling the front bumper beam. [MENTION=35590]Big McLargeHuge[/MENTION] here are the hella horns! Changes the OEM golf cart horn tone to something more like a '73 Buick. :D

AM-JKLVGvza5X7xxN3uxzB3caGm0HxXfmLVKVzzcKvsG-ArLVJO-s9_SUYtEdLl4QfUp4qf5AVhFb4EI8hNGIeD_ezAA2aLnIdKgvUM1mzRvSSY3xXei-WXDb0Y9Ujc5Lom8iYzamvjzxffd-I-xEPNkVW4W=w933-h1243-no


AM-JKLWivXLFi2rzsgK6LOn1_5oPbcBSXZsDavN6wXOqcRKZwJLslLIPv6wukCkT0aWI4bEMkvkHeaxXhoFfCyiLQ1DusC4u4CwsDdk0oPhnwMqJ2PEC10XvrUBE87H3WWN2yEW1_OOrNZbiHNHduWWDA1H0=w933-h1243-no


AM-JKLX2zzEWL4WK2mxUKSUKQqD5a7coWz9eGGOIUdUjsNLTgCH1HXlH6XmQ2PiL0yz21eOIebN-GPDAtbbaTCHlwrJqNLOcfRuFxNLzIccAxVyQmCnASsCPvYwLdRqwxfGgIbB0byBF-eML12SRKtETPY-5=w933-h1243-no


Front bumper assembly, including foam, metal frame, lower skirt and Garage Kite A/C duct shields. Some filing was required to get the duct shields to fit correctly.

AM-JKLVgOiPEtqTkO1kAdcOa95SNOG_ZVmMGa6ekFLA6OkwwH0PtxntdtIP9RTruotBe1cMktcd5iAcFUqoRnyhUstw_fGA5RHrKP2RJKedBvbSwufiwMrtnODFxi9tdsEl_he4RXm1Ceovo-DUDNhgEgSQq=w1283-h963-no


AM-JKLXQ_A1tU7P1oDxrrPTN33Sg65NgPPnvPOrDJ_LZR4u4CcSav_byOCG4iz73tGwRH0zoKSKC9PRCLlqZc34j6X9wASQGuBu_hwMuUZ4f2ZtEhJm_xiHqU9Cq6Usv2AiV6AIgELqd3985QEYKByjzzX9r=w1283-h963-no


Note- the center trim screw in the picture below was missing from N-Wing's video. We found that installing this screw first centered the entire bumper to the metal frame, which helped everything else line up correctly.

AM-JKLWnMCNP0h4IuESCuavGVoBre4EBMsVwS9SMMoPCfpBfenwLCpTPN06seRClKVoa_okElQGde1UQiTQ0hX6H61DskVCCGxX5Zpc9fg9U0kTfwwZLzDPUMRK7LsB5lJaOzUpeEGivXAiovOKEekGl6uPt=w1283-h963-no


Re-using the old hood rubber trim. After cleaning and applying 303, I was surprised at how good it looked. This rubber was on backorder in Japan, so I will wait to order it until 2021.

AM-JKLVP99wFsnYz9tuZHV_ZuyXsLNJNSWz-j7Qs1vgbkbq5uZP6RD62ebwO4CJUYmmVFM0RnthBOKK4rZZl0qqbzy344lF4NbhWn1x06B7zDacybpsGv6iLcLWP8w2iRXsiFi8vc7UGUr5cJezr0a0PjiJX=w1283-h963-no


Complete bumper. Note the snow falling outside.

AM-JKLVcE2LXp192HtnH1T2cJsklx0lsWPP-yMu401MI5n0gylAgr6_pWxNkBcsyc7tQYuIp-m97AkhMTeR5w0SW32X-YqYc7Il7GPju3ROFilFEYMqzrAtcF2U-x126NSEJywrYKi5ruNQrgW0eAjCLht_r=w1283-h963-no


Nearly finished. Draco the German Shepherd was not happy losing his normal sleep spots.

AM-JKLVuzL0gwKA4HK2nDF_VuR3zIagvy8dHNIaVF6ijv6JuETbGaBktgVqxXNVjeba-2VEzGXcZxSrRUGMCc7mnIQVL79NY4FhWV6gPsbE8Kf7jSlAHoG7PUZQl4zFT2cu-b0E-5lBg1XIGk0YkonDYk5UT=w1283-h963-no


AM-JKLVsU69Y-FHogoLW7YiOckl4W5sSy07WHkjaecBWE32_Tbt9PJRyJo-LPJq08Sbhzm0oOusfjuXw_Law4uxJY9c1M_ub8iiWZeNndzDJ1OxI-Y3PHAXIvSAsrK9sFbgLG4wAPCJCbKncnxK_n20ioUic=w1283-h963-no


AM-JKLWCeL0ML11V-bAhbALIqs0ozdWMzQzCyHii6eTkybJCWWUQKdq5ihgjL3UWAJKfryBrb7NQP2UdDGj8bzY7Ug0o9RL0TGGDrI9ihWPq_-hnktYzuQKZEG-mc06gDby-5n7JY2DxOMjQMtGUKH9JJaqW=w1283-h963-no


AM-JKLVeSVv4g6Z6w1OIncy34it8vVD-183BrWf8RSKZIplvfuM_mlSEjg1wXQjuX-zGuwfIG2mbxc4oV-E4nfK6_KwIXLfrq0wagPVWm6MG5VtdLx-6bQhWFJpCGS2726Oc1Z5XBxHvu8FtGSB42TPtFtEz=w933-h1243-no


AM-JKLUNO0O6KSq6vMPkuulqvoBZsq9oninUtRAddMVlDveZKhVGbF1iczE9_q8-9rmQqzcrB1vh8rCYeCp7Mn0d4HKLO6qZAlf5jQ_6QFxtf6eq-src5g-6-V0o4MKcde5Fz-B81iPaaVOZhDynWu-zN6mW=w1283-h963-no


Garage Kite

AM-JKLV2tmsmjRQ3y1seC11zU762lus1FuHdpsdbCBIcwtUTJLq_c83NUixCDJp8IoTDUvN6AtJpq6PBraCGSpC6YbW3TJ7v22n9ZgPtdNiK2jk4di-AMHmkAxnwiRYYFeE2_WC7GAOkMkMJp31YFguZyLJ2=w1283-h963-no
 
Last edited:
Re-Assembly 9

DAY 5 - Front Bumper, Rear Bumper, Fenders, Etc.

New air temp sensor.

AM-JKLVxzkx2LSKmZ-UQFJErhTdlBQK3VUX9FjCxbMurowYVfHHgZ0nUvn9Ut--etSywxUfbUUpdQMVnt71-ob9dj5DwhjQZqg3BfKYr-F_Ls5r7ZXRTCINeApOeCFxSLRbAnzybo-_GDpKz0365ZPnonijq=w1283-h963-no


The rear bumper took much less time than the front.

AM-JKLVvGYhsmiDnkZowJLf0Y5w5NID6EzD3lLk_-25gL6xMCC-jWbsK_4SL2RULADtrTTUnagzwa8jx2YEROAyk3d3ZWbYQyBkNLKfXP8wd2g-qlXMrxDn38NZjSfZjwHt3MvKdHk1sU1nqXFvnPIz1UtMO=w1283-h963-no


AM-JKLVQxIVbQgKE_RGd3ZZ8UthLl4KXGj4qDo0-Xg7DVKZlmFuaOtFQAghqM7OqP_kjgA0XJzchFVIhVuZHnEfNJItlJNQOQi7pwq2njF-YFS2ThG_ADo-RnudgU8E8xncjsBSmYbsVh44ROem0NmV0nLrN=w1283-h963-no


With the bumpers complete, we began hanging the fenders and quarter panels. This turned into a snag because there is no guidance on how to align the panels and set the door gaps. And, we can't mount the bumpers until the fenders are set in place. Spencer is going to measure the door points and panel gaps on his 91, which as far as we know has never had the doors removed, to set reference points so that we can replicate it on this car. After studying the body panels extensively and watching how we can manipulate the fitment via tightening certain screws (you can move them up, down, left, right and rotate them too), I think we have a good plan of attack:

  • Align doors to body by measuring to a fixed control point (matching the 91 car)
  • Set quarter panel alignment and gaps
  • Set fender alignment and gaps
  • Mount bumpers

More to come.

Finally, a special thank you to Mrs. Honcho for putting up with us for a week while she handled everything else around the house. We couldn't have gotten this far without her!
 
Last edited:
Always happy to hear things helped. Love the Imola NA1


Sent from my iPhone using Tapatalk
 
Re-Assembly 10

DAY 6 - Bumper Beam, tidy up

Managed to install the new (used) defrost panel and transfer the VIN plate successfully. After carefully studying the mounting system, I left a little bit of play in the mounting screws to allow for some flex/movement of the piece under thermal cycles. I hope this will prevent cracking in the future. Note the new accelerator pedal rubber. The old one is proving quite difficult to remove...

AM-JKLX3ic4HkjgPsE16xggMlsCFc7dr48KoRESx6_sFaFikgFYasm0G31oUJ9DX6kzrEbkeeXgMU3FWH7siMZagL0hu1B5P3vEzq4Cg3lGCW9J7X-Ff_YvMjzGLcWtsGV0r54_VVSiYltMbqeZ-xBwr6AtP=w1283-h963-no


In watching N-Wing's video and considering the layout of the full bumper assembly, we decided to hang the bumper beam first and then mount the rest of the bumper later. We also decided to leave the beam mounting screws loose because they permit a significant amount of up-down adjustability of the entire bumper once it is installed. This should help get the top corners of the bumper to b flush with the top corners of the fenders. Then, we'll fit the hood and adjust to get good seams/alignment.

AM-JKLXSsK39rjHpVS-n7824FdlfRRGwwybTNPLAWk98pjY2qQ-Hg-ALJhfwPjf22eaMTquf4moYqjwj25QImgWfZRlMGaP7y1eABMdSJhAPx9LrsoGgQRA0PvLaaZHRWDkqZUbdrYphTGnHAgbjPW2oP1ij=w933-h1243-no


AM-JKLXVq0hjgruMDvgyU8BQXLJuqtaodoH663-j9Ct3po3vYskfxj9MCtS1CS3OQRKq8hA62Ya9nkpFHzmIJ1ZL48LSTb_tFzw4P5KcaV1wRbIJQIJ8TLDDExyeths3tNn73jqRzfjnM_E8lAdGTTFxKG-v=w933-h1243-no


The last few hours were spent tidying up the garage in anticipation for the next steps: installing the dash and interior, mounting the body panels, front subframe and getting the car back on jack stands for final assembly. In the meantime, lots of "evening" small jobs to do until then: wire AT--> MT changes, pre-wire USB for engine tuning and audio power, and other interior tasks. Also I need to finish the ABS harness so I can install the blower unit.
 
Last edited:
This thread is so incredible. A pure joy to see this car going back together like new. Much love and keep the documentation coming. We live for this.
 
Besides Anil and his NSX-R clone, this has to be the second best NSX clone project. It’s also great that a lawyer used a zip tie as part of the restoration. I used a bunch to put my kids Cozy Coupe together. ��
 
Besides Anil and his NSX-R clone, this has to be the second best NSX clone project. It’s also great that a lawyer used a zip tie as part of the restoration. I used a bunch to put my kids Cozy Coupe together. ��

My guys did some aluminum welding to fill some holes, etc., but nothing like what Anil did to his NA2. That car is a legend (both for the build and the Jon Martin 3.8L engine!) and I really hope he finds it again. I can only hope my little project is thought of in the same way by the community.

It's funny how useful zip ties are on places all over the car. In this instance, I needed something softer than the metal of the hydraulic lines, but hard enough to stand up to vibration. The zip tie worked perfectly.
 
Last edited:
For what it's worth, HellermannTyton is the gold standard manufacturer of cable ties, cable tie bases, etc. Longevity and durability is second to none. I'm a zip tie nerd from my days as an electronics technician.
 
wow so many little bits to remember to put back...:eek:
 
This is so incredible. What an amazing journey to witness.
 
Epic Build and my absolute favorite color on an NSX.

Thanks for taking the huge amount of time necessary to detail. This is what makes NSX Prime the site it is.

Has to be somewhat terrifying working around all that fresh paint during the rebuild?

Hope your prepared for what an attention magnet it's going to be. :smile:<g></g>
 
....The story itself would take days to fully detail at a cars and coffee...:eek:
 
wow so many little bits to remember to put back...:eek:

We bagged and labeled most of it. But, the longest delays have been when we can't find a bolt or a part. It can burn 45 minutes of searching the garage.

This is so incredible. What an amazing journey to witness.

Thanks!

Epic Build and my absolute favorite color on an NSX.

Thanks for taking the huge amount of time necessary to detail. This is what makes NSX Prime the site it is.

Has to be somewhat terrifying working around all that fresh paint during the rebuild?

Hope your prepared for what an attention magnet it's going to be. :smile:<g></g>

Thankfully, the paint shop put on an extra coat of clear as a "sacrificial" coating just for that purpose. We're still being careful, but the plan is to take it back to the shop once it's done and they will buff out the entire car to a high gloss. Then, it's straight to PPF lol.

....The story itself would take days to fully detail at a cars and coffee...:eek:

I'm considering some articles for the club magazine and also I've heard Acura might want to pick up the story for their press too... We'll see.
 
As Yoda would say.....Much content do you have......:cool:
 
It took me four days, but I finally made it through this build thread. What an amazing job you are doing on this car. When it appears at NSXPO 2021 (you are going, right?), I will be sure to give it its due respect.
 
Re-Assembly 10

Several arrivals for the re-assembly process:

Wedge Brackets seat rails. I may remove the slider from the passenger side and just direct-bolt.

AM-JKLUR7MKPrgEEZ68s_V_9QFoZqM0sI1oKrohgcEO6xRl_gJi9Jgp_uKzMG-_tK-WyWK0vTbcNlUdFfUjzCDUYFmzbnm29SrBuZoe2gg4Y2_-9JZXWoqrwj00Vh-IF0aRcK1ATkc74Lpfthv6srs49Bx_G=w933-h1243-no


Prothane Suspension Bushings. Several of the rubber bushings on my NSX are torn- time to replace them. This urethane will last much longer.

Rear Subframe Kit

AM-JKLW0jeA2sK0LGbTSN4hIcxdSI-5KCCrbWJ40frK35D7jWpPPcAd_dRY00qB1WuNMv_wChLIPrr6Fse1HJKXH73HirSmWJLT9dl-KvFUKUjwwSFrAXkqKedE21PTHEfyMPqDY_J5zxVhMmP2HNa8rxwnU=w933-h1243-no


Front Subframe Kit

AM-JKLVdXbuCJJIEB9LYXUHiQVn6YojV90Zl6fcCdj_rnVL-WRe4ihVuTl5BKhqQE1wJd24LzhFYX5BfPofbRpHxT3cP8KAQ0kUWUbGOOvWOY8QFB9xwR_ixpD1rlAi67HGWYj9Ly_5M-RP66LTMqGxyL0WY=w933-h1243-no


Seatbelts Re-Webbed

I don't know the deterioration factor of my 29-year old seatbelts, so I had them re-webbed with new material for safety.

AM-JKLWBVwSF3O9neu1eJ8dIvvJseHg2TQoSTWEqImcQz5nWBefKUxD2JwLstN-lkmBFB7DqQaqa-xWEcVvH4vy3e5Ak_lFfeA7B9atrHljkIv--JKv2HNoBGLGO-7mdZhV_UOYBXIyYrLd2ZJioDGac0rfg=w933-h1243-no


AM-JKLWmM9S2r8_pfgYlRErKxJzHj0zZ4TcGrzuC52wFDL060Ay0sNW4AWWoOdVZUTxU0Nc0R337K2REXQ6geVBulivff7xQJqhT9od8yCguUNyKeOc0wKqE-8-ypj5jzhpt2DvIE7qY37KxarT-M2SnX9nN=w933-h1243-no
 
Last edited:
Re-Assembly 12

Continuing work on the AP1 ABS harness. Wired up the SCS connector and service checker plug. Because the area around the ABS pump is exposed to road spray and debris, I used Weatherpack sealed connectors and purchased the correct crimping die for my ratcheting crimper.

AM-JKLWMXUbuRvqTUNfYVIst7pVfIYgJu7rMAj_zG6UpPaXMg3IiYYHhKay9_XSNwzqR9csLKWxBcLn874qg5TBuegbXUFICsbN_DmI91Jr0nvBR9sAfRggeRCHensw-IBmGn0QXiOJWIAizdZTlGDlexfId=w933-h1243-no


The service check connector. This goes in the glovebox.

AM-JKLX5Hi6LZlVJvMuvz1Ltgl7uMxsEJjBBgB0BUJs47HK2mSAWYLIbo9dLZW0Ws4OV6x3fKH_vbOXdBJmmolJUZBExzlufzub8jPUJqs7kzzdC6M2fI36LWU7cziumius-NykpLKEqe1-zHg5f8sc2cvC5=w933-h1243-no


AM-JKLWh6gx7JERkNugd3YythACfOzThAibTBVvSTnlfoR_fTsxfoqhyFKNVUk5AucEkt1tPiin1V1P7DRyllLBw3OesatGnmFD5HbjDv7IhKRh6CLpqpTJFs01m4a0bOCWrXBv7pcU1voZ3h42wHj35RCSA=w933-h1243-no


The blanking plug. To be used when running the car. I filled the wire seals with silicone rubber to provide a weather-proof seal.

AM-JKLVsm812nBI1YXyZz_81ZPG7UwZJ_SlWi7_WWoJf6QnMYsYKvLjx6BqjThltIAWfjcQuyxhyMDePhPfFY_YwWv9qfTjbIAiTNoce-hK9X1YhTdQeOoBrSeP1e1n0fo7zuEH8I4-D3w0f2SJVct_vUFxW=w933-h1243-no


Placing the decals.

AM-JKLUMakVCVKBxyGVIlPwWDsYUhY4WOST_pNqeoud-Tjx58gDCiDPAU8aJOezaKG5TQ0lHJH3pjil27uxhugxtlzVvrUixsJm4W63cUg1l3PBHj9Bz49ctKEEKwrnjdmzJ4sz198BXYnFc2IPNDPTh4TE9=w1283-h963-no


Replacing the burned and dim side-marker light bulbs with LED.

AM-JKLUjwTYn_zInpfMiV3N3OZy93Rw-_-kZHOEPlydCLAXh4MwZu_EUdKYlCTz0BTEVnS1mWhVvLJ7vrj3bIww8o_jp6DrxolWi5C1mddPJeyD_mAc9MRvznnmz5xdXMbDp1opBHROKKVzh69Ycc-UyhEeC=w933-h1243-no
 
Last edited:
.....

Seatbelts Re-Webbed

I don't know the deterioration factor of my 29-year old seatbelts, so I had them re-webbed with new material for safety.

Hello - Can you share the vendor details that re-webbed your seat belt?
Thanks.
 
Back
Top