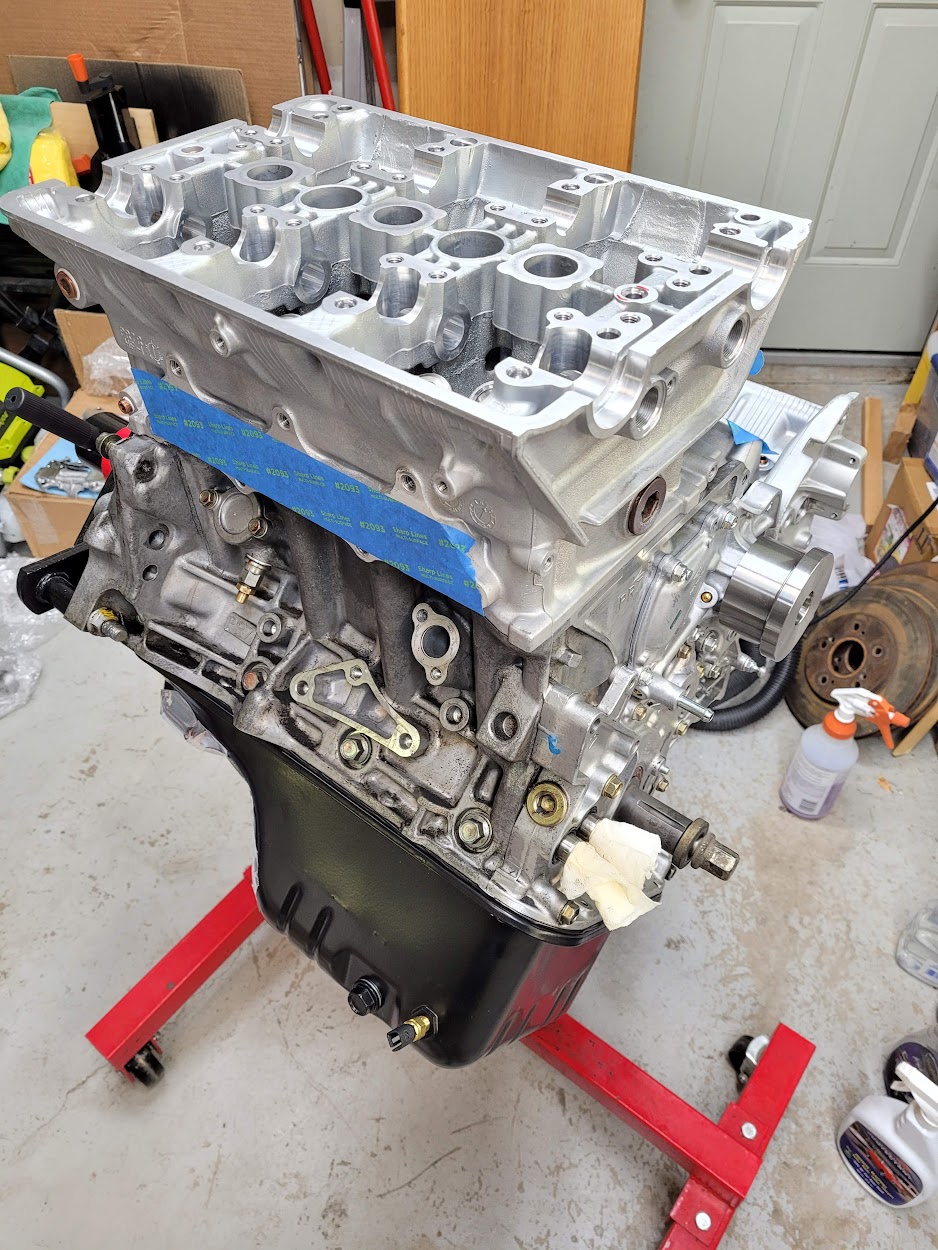
• Protip: Profile posts are public! Use Conversations to message other members privately. Everyone can see the content of a profile post.

Honcho's Long Road to Imola Type-S Zero

Engine Refresh 38

Coolant plugs, Bleeders, etc.

A few more engine block tasks to do. First is the coolant access plug. I'm not sure why Honda added this- perhaps as an access/inspection point? But, it has a rubber O-ring, so it's getting replaced.

Plug removed and sealing surfaced cleaned.

AM-JKLXnLHg0zUdeM2vTnGzWWMEnjvWF9Kd3fc-oAjeP4X5nJuzPyG_1rUejxQsEZlppHVUad5cEdH-aLs9rSzbNpeR4nXDPa2AZAgPhIhZZ5JvXd_e3PjfCWqNmbRWU7CR9YMO7DeC4rl5OYdxTPyzRdKdt=w938-h1250-no


The plug all cleaned up.

AM-JKLX-_4qlhNtosBOinrOSkjRslwqm1KnoTWNEnWGATyOTnbhVCrexrBiIk3NchGhC54lHL6FrlTWDBVsdWUrf-rzZIEJYS95dhAvjnKm5pMXK-qyuaFxizNrlVEAuPgYtVEmFpfsb7P61nMPGyT5eGjE2=w938-h1250-no


New O-ring. As with all coolant-adjacent rubber, I use a light coat of silicone grease.

AM-JKLVvL69vzviNTFPq13Fe5UIkM6JM2Jzgwe_Cjz8Gr2JNUQsJMlW9_yHHC2hDavRVCfJEWbWO1nVjiAN3dr1D68dyCtN8i5N5Wz49G-e-4guNboI8_zkBg_aZPmixXMNPvskOX8uG67VPcxfFFFp2Bsj5=w1279-h960-no


Installed and torqued. I also installed new metal washers for the two block drain plugs. One of the drains was totally blocked with crusty coolant residue, so it required some cleaning/prep.

AM-JKLWL4WnZQ1Vy0P_622CfDSy6t75pNZLd3eK5h-ngnoK1j3xg_lb1bPZqnL_JahbWDWCL4j7WhUxbq6Dw4f0yrlVwa97BOvYuvY3kln_h_6jksFMqTxm_sWqcJXOrjUENDYEggbs0BcIccB-fdYkuCtSM=w938-h1250-no
 
Last edited:
are you going to keep redline at 8000?
 
Engine Refresh 39

Oil Pan

Cleaning the deck and cylinders is a huge undertaking to do properly. Because debris can fall into the outer oil return passages during this process (even if you plug them), it's best to leave the oil pan off to allow for flushing any debris from these passages. Once the block was complete, I could finally place the oil pan.

To add to the Prime collective on this, the following is my process, which has never leaked:

  • Clean block surface obsessively. Wipe with acetone and a microfiber. There can be no oil, grease or other debris here- no matter how small- or it WILL leak.
  • Clean oil pan surface just like the block (acetone/microfiber).
  • Place Hondabond at the four seams.
  • Remove the gasket and wipe down with the same acetone microfiber to remove any mold release residue.
  • Place the gasket on the block using the studs to align it. Take care to to smear the Hondabond.
  • Install the pan using the bolts/nuts specified in the 1997+ manual. Make them finger tight.
  • Install the rest of the bolts in a clockwise pattern. Use three torque passes and then three more passes at the final torque. Each NSX is a little different. In my case, I always do 20 in/lbs, 60 in/lbs and then the final torque. What you are looking for is for the edge of the gasket to squish out and just reach the outer edge of the pan flange. For this NSX, it was 90 in/lbs. My 91 liked 100 in/lbs. If you squish the gasket too much, it will leak. The factory spec of 10 ft/lbs is too much.

My Hondabond seams. Just need a little here to fill the uneven metal seams. Most dealers glob it on, which can cause leaks.

AM-JKLVMsukM0_YanMA8vjoa9ea555Rkce20hunA9SE2oAK8bt77HaO5vVhuZWrrL5PT31vCyX9vG6niPGyIh6klUUx6zI5QoRst0TbtD7pzV_eJZQKY6lmeKcFUpQWg9w8zhcd1LG-y6lG9lQbWl8TzIipI=w938-h1250-no


AM-JKLX-DOZD8UyQLGIJXSzIUPO0z9j0ElpXmtORGCx7mGSm22UEYrDztbPwJdWoGFlNfYzamWW-Z5KE-rYEla3ey4GmU82evVnB3ILvYStMlnqlu7wEg8TwfnnASzFODQE3oEJtoWfcltjQHdsEV9SfOE-d=w938-h1250-no


Installed.

AM-JKLXq-GPYI7LXTttmc8CL8uw_htd90tSwNio4PRuDhQFy4291luIk5H0PLKd-p0lkxdklq6KDsHSUlnwO0pMAwVglpmooXrHqAOCvJVEpUHRBu3mVXyD0ysTuRAXE0Dg-BEyEmGA3oyKvvDRIvMXSdkz0=w938-h1250-no


Placed the DEI heatshield.

AM-JKLUBXQqGU-7reDjrxFmuX61uA2Up97Y_s_SPSITWtwFJ1erPxTLOBirboFrb0r_pFPnUZaegTFHgsDxE-4Ap9MjVGV1vsBLyIJhVJJ4ahBwLu9Prg1pY-BQHZbXR6aEKrNIIiewHz73t_rVC7PEqBhGl=w938-h1250-no
 
Last edited:
Engine Refresh 40

Cylinder Heads - Preparation

My 91 blew head gaskets twice sets due to improper surface prep and installation (both times at Acura). So, I am paranoid about prep for these heads. Here is my method. I prefer steel wool as my abrasive because the metal is so soft and thin that it basically disintegrates into a powder that will eventually be caught by the oil filter if it is ever caught in a bearing surface. This is unlike the silica and aluminum oxide based abrasives in scotchbrite pads and roloc wheels- if these get in a bearing or between the ring and cylinder, it's game over for your engine. Wetting the wool with solvent and using a very small piece both help with reducing any wool "fuzz". The steel wool is so soft that it will not mar the aluminum deck surface.

For the deck surface prep:

AM-JKLX8imOJcUPdAQ8hTJJpOCIOfIwMCFuxX-Uw34cisacX4W6ZfpyNuRZn1WAgDR4GURR5d6woz6D5R9a2R7b_7uFVU15oMEyPxFAlgD1LemwF-5QKwoSlK1TZbkzEVSeaOEglTLvF40DQXSbhAQM8g5WY=w1279-h960-no


  • Plug the coolant jackets, oil return passages and all other ports on the deck surface.
  • Work one cylinder at a time and tape off the rest.
  • Lower the piston and put masking tape around the piston gap.
  • Clean the deck surface with a solid brass (not coated steel) wire brush. I use ones for the dremel and a drill. This will remove most of the gasket residue.
  • Vacuum thoroughly to pick up any debris and loose wires that may have come off the wheels.
  • Using 00 or finer steel wool (a fingertip-sized dot) and a powerful solvent (I use goo-gone paint remover), scrub the deck surface until it is free of any gasket residue. Try not to run the wool across a sharp edge, as it will create fuzz.
  • Wipe the deck with a microfiber and acetone and check your work.
  • Stubborn flakes of gasket/carbon can be carefully removed with a razor blade. I find that instead of scraping, which can gouge the deck surface, I try to "pick" those flakes out of the surface with the blade. Often, they will be recessed into defects/pits in the deck surface.
  • Wipe down again with the acetone.
  • Thoroughly vacuum the entire area, paying close attention to the cylinder.
  • Remove masking tape from the piston gap and vacuum again.
  • Wipe the cylinder walls with a dry microfiber to pick up any particles that may have escaped the vacuum.
  • Vacuum again.


For the pistons:

AM-JKLV3JzCiK19y7HLGFkStzxg39ejpFxkidSO6TE3CZ6HURFtY5NYZAuM9raYph5-E6ZsbQiWWz0W6g6qaBkxRYWP1yXJIR1n6eQ14VizOU6GR0_mrIzAEyYF6SAwWcFFYaojt3PXH2IBE-STt_IQUAyHJ=w938-h1250-no


  • Raise the piston to TDC.
  • Using solvent and your steel wool dot, scrub the top of the piston. Keep the wool away from the cylinder wall gap- you don't want steel wool fuzz getting pushed into the ring gaps.
  • Wipe with a microfiber and acetone.
  • Now, you'll have a ring of carbon/crud around the outside of your piston.
  • Using your brass wire wheel, clean the outside area of the piston top.
  • Wipe any remaining debris with the acetone microfiber.
  • You may have to use a metal pick to get the carbon in the valve pockets. Wipe those out with acetone too.
  • Vacuum the ring gap very thoroughly. You want to pull any debris out of there. I use a crevice tool and go around a few times.
  • Lower the piston and inspect the cylinder wall for any debris/particles. Wipe them up with a dry microfiber.
  • Vacuum the cylinder again to get any particles you might have dislodged with the microfiber.
  • Lightly oil the cylinder with clean engine oil, raise and lower the piston. You'll see any particles you missed now stuck to the oil on the cylinder walls.
  • Wipe the cylinders again with the dry microfiber.
  • One last vacuum of the cylinder to be safe.
  • Re-oil the cylinder walls, tape it off and move to the next one.


For the heads:

AM-JKLUAECRSeaHGdcp3ExzUlH-wJWm443546axepq8dJMG3-vURLCLeSSyzOHo8ru5178FB2ioIEEeQNFauS4WkHgWkU2u7PqH6As6r5rYNLPpZFf11onwpe8PgRA4r8UBawjrYAqD_0PoKTjJXy197vUyK=w1279-h960-no


  • Once the deck and pistons are clean, tape off all the cylinders and use compressed air to blow any debris out of the water jackets around the cylinders. You can see the rear bank set up for this process in the picture above. The front bank has been completed and is ready for the head.
  • Remove all plugs from all ports and vacuum as you are removing to capture any debris.
  • Flush the oil return ports with brake cleaner to get any remaining debris out (MAKE SURE your oil pan is removed for this step!)
  • Vacuum out the interior PCV vent ports.
  • Remove the cylinder tape and vacuum one more time.
  • Wipe down the deck three times with acetone and a clean microfiber. Why three times? Did I mention my 91 blew its head gaskets twice?
  • You are now ready to place the head gasket.
 
Last edited:
Engine Refresh 41

Cylinder Heads - Installation

After all the careful prep work and cleaning, it is time to install the cylinder heads beautifully prepared by Heads by Drew.

The heads carefully wrapped.

AM-JKLUtEmtt7Q_wOmlWDm4Ce2P5pnvL2mX0hWIBXvdqgHKi-A9H4gvjvyPMHPtTHN1aBdaB8adsrEZBEFLqmqm3y0P0NdWqVbO_mntg3YzIJ86i_Baa8b1DF_2hbfjQZajkv11H-GuJlEGbkf-Epj1dJ-M4=w938-h1250-no


AM-JKLX8xaFicr-XCPGA9f29U6tf3Ovw-XbxuTvicoBAA4enSeZTSkTSb6JVoMqWLzoOL66UM_yBB0nlhXmiO9nbAOsuGQBdY3Vd35i-lbiYvuebRz2F8JWmW2Er6w7vo8CmCoG32SYfnVBLTJZ0bzCo4bR8=w938-h1250-no


Front bank ready for the gasket. Wiped down with acetone and vacuumed one more time.

AM-JKLVs8K3fBFXlOnj4bU_7RIOQDmchPEvDUUgHJhn4hzMdqa_Jf8W8pIhRWY4MJKsSVom_SZac01c67eFE_Aw3WKhor-_RI7nO1ygfqe73yqS_S_pjtOCTvNRrfy4lkMiR4E5cVUq6fQgEsJ2AHN9QKkrT=w938-h1250-no


Front bank gasket placed. These are Honda genuine NA1 gaskets.

AM-JKLXashq6bamglllDzA0e5wQswzAtUqtjbAsa2YBJzZOANJ8i406rV4CyimQR2dCfO0kvKa1Vd9HwZOVNlmD7kLX2CeiMqIMYqAKVuWK67ZZoL1f1YcDT48CRcasmYRKiicHvykvkSrN1_vGoZWuS6sYl=w938-h1250-no


Rear bank ready for the gasket.

AM-JKLXtjpXh1qFQtZl2xpKOB1Dpg9KadYqTGNIUgxPF2_gjVow3HEDRpbujwN4-FyVacIPcAnQovBizi7dkCFhPaWMd88tH9t3LU7-fSGOFfdy8FtRsm-m-W9HTIIiqrCKUH1RJ1hGLmZocaPoSuhl8j7iy=w938-h1250-no


Rear bank gasket placed.

AM-JKLVMuWbQG_VH_yY6DSNYAHcSMb1oqLtCb2VQ-3fR8gfYeHOFr3KdbjeyBxUfCk7VX2r3Tm3eQLAQIrjunGVHegOejw6trCtoBglrzgUl0qhp-qhB_qKZ0vEqHA2DDMPo_ZHU1zJHPz2QhnvMz8U-dEIv=w938-h1250-no


According to Kaz, you can re-use the old head bolts if the engine has not been overheated. But, considering the low cost, I chose to use new bolts. I use Melling assembly lube for these instead of engine oil. I find that it has better (i.e., more smooth) torque characteristics during tightening.

AM-JKLW0E6u49hT4sOohyvevaz95IUkBfzn891Xit5eqGa7WC9UOJ7knwppDYRTF_u0cKA_NYmGVO3yb8x6oB4fU6XDwo2ZtrK73SHJk48WL0oaeIDF9Bx68ACkUC0c-P9LwFHYH6NwcIXblYZDa8ZTEauUv=w938-h1250-no


Both heads torqued down. I went with 20 --> 40 --> 60 ft/lbs (2 over factory spec to account for any error in the wrench). Went back after 8 hours and re-torqued. About 50% of the bolts moved 1 degree of rotation before reaching the torque again. I may check one more time (Honda leaves them overnight for this purpose). No pictures from this process due to the focus.

AM-JKLVwNSy_XCB0jOv0_gLqp66FuaDI3MXbPm7TagUzjgXVOGFZUM2YvOyKtW5ZS3MpV83vg1d3l8PMKnOfLl4DYaXBPRdFxLQfQg0hmv-olDQNClTexd_1UU0npH-BodOl8PnyYbMER224vAzAY3JJSFdd=w938-h1250-no


AM-JKLVogZNk3qSzjkz-DuxZl7eannfB0SHoL_u7taDLo1QA6Al_ZUrR6xDQDNC7qzT-qlR-9TmX51nQVlN4AWvtD4tB0zKmxofqGbp1667hOzRxLjbBbjIeoZCbbyykpto-TDl81m79tFQhfheuKS8v3YAD=w938-h1250-no


I just can't over the beauty of the titanium valvetrain. It'll be a shame to cover all this up- it will never look this good again.

AM-JKLVz3IVHs73KG95rFJ-_t3WYu-23AsSra_u0JCI9ADuyQ-KvIoOH11ypEmBBPxJNYR8TLjEjU9dWqKAVLHnSMoZZMKFaFqwE5EE2QBknUTycpyGfLn2dIZ1GymgS8qfYE_vJ8pxkLbzhTYQH_nI7dBcT=w1279-h960-no
 
Last edited:
yep ......one of the great looking long blocks never to be seen again...


also my question might have been overlooked...are you keeping oem redline?
 
Engine Refresh 42

Cylinder Heads - Oil Control

If you do have your cylinder heads off the block, a good thing to do is replace your oil control orifice O-rings. These manage oil pressure to the head and engines have failed due to worn out seals. The rings are just like a dollar each. It's pretty simple:

Remove the plug with a 6 mm bolt. Just thread in and pull up.

AM-JKLX3rNgZ9HfB6HMyF8X3uguH4d6CskkcDgxh-WtaJHqBD9y81pHRHpEgBxYQ3QLMMTRoPMHd1YZuM4BxPMbNl0HKn-A-wyxRGyOLbjZ8_au8lzQnBlj25B7D9Ca4-XR6i-3eGqx9Ypa6WZfspwtmnhPh=w938-h1250-no


AM-JKLWDqtEGm_2y7N_Wn_RjUnGgU275b7CKafv5uveD4FxMd2FVMnl0A9gOWPEIbHFSmqjnlpLvC4h3s86ZNNWA05I_uqLe6fOLDdTb-ZUUzq9tnVYcj5r9gV-K59CVqcDdi3hSveartgR8cp9AES-baikT=w938-h1250-no


Pull off the old O-ring and clean the plug with brake cleaner. You want to make sure the little passages are clean and clear. Here are the cleaned plugs with the new O-rings. They are different sizes so you can't mess it up.

AM-JKLUgw4I5jlA0wkubVtSZ06GxjvL4mmdItaHSEUPu2v2Bwdu9bVRayheM6hc4vDMho23PDneJN31YsWgpskWPlMz3CcdcQM3bPRpXberYS2XdGy1__zvjaIeNKrCezxxh6ORDwxQeXT0gVWjv6SY70M9c=w938-h1250-no


Install the new O-rings.

AM-JKLUgpf5pb-bJ4aSLoIl0OCeDa3nX197JhxOidLdVco4wg3DFc2xmMHscmpSUtImaos89vfygrw7TFCMoULiL5yHGHMzdpZMbLOCdfDqCrb8H8hjjhUWOEGvY8W65C0-7ySOn486cq9hUVoPnX2DUmptV=w938-h1250-no


Clean the pocket in the block with a microfiber, coat the O-rings with fresh oil, and just pop them back in! You're ready for another 30 years of operation.
 
Last edited:
Engine Refresh 43

Cylinder Heads - Knock Sensors

Very important to remember to install the knock sensors before placing the cylinder heads. You won't be able to get a torque wrench on them.

Special thanks to [MENTION=33247]MotorMouth93[/MENTION] for giving me the ones off his 94. I cracked the plastic on my 92 ones during removal.

AM-JKLVPoMnc5q3YuAdIyzlYDQcxL7hCgeNasy6Jl8XOhSsdw0R6Jk25BrLKFuGCgGfHiJ3hIncvQNcERSo6qtg3myD0meGEZpxhSpTqRGUaUcYiib0VjiEUa8JgCv369V1KQVSKV9NR-XTME59pYJgXP3mS=w938-h1250-no


AM-JKLVQ9fMiFN6iRTgmEGheUKEQUxFRzmip1kkA4xBXayNQfWLcJKfgsqRPBEqGxBH6Hzuzrl4ossyKzQ-NR4k2U2rEmM1TNLtK6zvUfU819nxUmCNe63pOxD2YEExxTQPzdw81Mftittrsfq7fhoWJ5vPZ=w938-h1250-no
 
Last edited:
This water pump only has about 2,000 miles on it, but is almost 8 years old. While it looks ok on the exterior, there was noticeable noise in the bearing and internal seals. This is from sitting for so many years in the stagnant coolant.
What make has that WP seen in the past? OEM or other mix?
 
Engine Refresh 44

Rocker Shafts

The rear head. One more pass with the torque wrench revealed no head bolts had moved, so it is ready to install the rocker shafts. Started with the exhaust side.

AM-JKLUITNNcOoENQ5O8XAWKYYH1h-Ac69Uqiowhst_YGAqgJwmnqvwmynccANcUgFoI42YPDGL2kPRm-PpEtGKxDrGuQB2gDYNM6wZZ-lTaTbiqH8wGGDO270YmokpghDtbDfhqyonor3KjDlly3wx2JS4_=w938-h1250-no


The new LMAs. This is not an if but a when on our NSX.

AM-JKLX3dDQHh6r264zPiYEAVA9F1uTWpAVtz1mLCqvelGioT-z1AoAjOGA1QZmItZrgAr19XaYJd1E2IJKYdytjTfMKT6nC7e-_W_rb449tHP9TEVfbKrQfCrvn_q-OORJgj_ELlpJAan08iDs8VJtqvZ7V=w938-h1250-no


Placed the assembly lube at the LMA and valve tips. I switched to Mell-Lube made by Melling from my old assembly lube. The Mell-Lube still smells bad, but doesn't stink up the entire garage like the old stuff.

AM-JKLVZX7fyU0nXRZv1Ow_tnk_mp0_bqueoXomN5H21L2f6iikMF72HXOznMFQLHcXaY4xsiZw5BhmZhAZ_F-iAcdJfFne_Ca4Q_cP2GKOAxmGJznVy0iN44yDUPRkOSCTAzJ7jjKSwE2CDO7vwE1gtzhZ7=w938-h1250-no


Cleaned the rocker assemblies and placed the assembly lube on all the contact surfaces, including the locking pistons. This is the heart of VTEC and it important that everything is clean and well-lubricated. The hot engine oil will eventually wash out all of the assembly lube.

AM-JKLUujV6p47PmoWBZ1xaZqItSXfMUVu_GmMGSYXkBfPdF6ZboRMiamMUgYnDdLh4GsDWykZMwX2RHs3vzoc31MyakserBb-9XdxROH3p4HmFurW-QFCcvHXwfOAkTFnBPDXC2O7ZSQ9PC-eQvDW8TFC8L=w938-h1250-no


Placing the rocker shaft. Take care to ensure the end with the hole for the oil control fitting is in the right orientation. The manual calls for rubber bands to hold the rocker arms, but I find that if you take your time and are gentle with the parts, you can work the shaft into each arm without much issue. There isn't room for them to really fall out of position too much.

AM-JKLVcoxX2p0f5XFsQ2ceRTkTR2mtgIaMy7k0Zi3a1-NIJRArY_BsBJw9qe03UKLVxMkG1079VemHUeBXzBA-ixWRxIakEJCMzy2GipZzfJwwlHDT4ltIALKn_j1SFbUO-pykWCiZJm-9MjMhMDFpI9Hp_=w1279-h960-no


All exhaust rocker assemblies installed.

AM-JKLWXR0mpVJhIdTSML0vDXTNs41xuV1UEh11ARf96ATHr6PmrqxNSEHMgjxeVUaS4gflIK9nP9CYTi7sHPTs2fGdxnwGoA98hd5HTEjHLuBOM7QMFSlmdoygKZ5llFlmJ_uo4eu7JpvfbziBUdopnsyW_=w1279-h960-no


Placing the oil control fitting (with new O-ring coated in fresh Mobil 1).

AM-JKLXdrfqvT5057iYB8GRApot_VA2JK5vtGNtJeOY7k6pyyuN8ajnrublVCdCo2hsJgNEjfsq8_8QAf1jl-Pcd5yF2IuVWkDYXTUl6mbSXciTSDnOJzGSJPfq5jEAkBVkNkdD59IqwdwFDYxkUFVYWmp9y=w938-h1250-no


The manual says to spin the rocker shaft to make sure the fitting is in place, but it is easier to look in the cavity and visually confirm it is in place.

AM-JKLX0TJ93O4YJ6qszm4pfPN6h4DNWKiouYFHWNuwHGQBFLTm9hR7xHBfRXaNKpMlJ1luF8YzAw3wNLnvYMZyeL97vuG5fuMaZ3mU8Qt9n7PN7tYPQvo71oMtU8LCGEyvsJouLkqBKopP_zKYHMhmdJDCH=w938-h1250-no


The sealing bolts with new crush washers.

AM-JKLWb_vg5bkc0AHHrjS0PF9FLnActDe5ZNO1m-qvBRQduPEfIVwFUgG76J4YftE1_oSD4xvTdSwf_NLmJux_IeZT9bUnOj4IUuREK9ZKshOu6s7xnhZC50-KZw314cO_R6XxzShNWCP0eXJn9ZyR8HzMC=w1279-h960-no


Installed and torqued to the spec.

AM-JKLVTYbeqP-gkJt6S98yuXEErJ_jFz109m5B_vuUKX12QFLdEgV0ae08FezZ3yGah362yiIyDgJ5T3o30ZGLBbqFYa87DVn9juTSxgNI-Fylj2_nQTdE-JNgIHTkXOaVXNymq2kPKvM0P_aBpH5Lnpj7u=w938-h1250-no


Valves adjusted all the way out to prepare for camshaft install and timing belt tension process.

AM-JKLWjtU4bryzs2WijKWn1D6-APY8szQhad3ODJhE8gRk1O7EZt8bRQsdY1n0XYvnKGoJWJtA-5AAVruaBhGYkM7t0E5AK1Ne0xiGlp_giO__ToetFp8Tf-EN7BGtvtWTdhBBMUe-DvSADXLBU_DWg2hct=w1279-h960-no


And that's it for the exhaust side. Now to rinse and repeat three more times.
 
Last edited:
Engine Refresh 45

Rocker Shafts - Rear Intake

Not much to report. The intake side of the rear head valvetrain is complete. Next is to move to the front head for a final torque check on the head bolts and install the rocker assemblies.

AM-JKLVseTFM625Rj8NfKL-infa7yOcIRicVCYqbgyX71eCbI6yj3p0Bu9lBl5MCPLZUvVXumgnxZXLuvo0T6QJXKBEjrgaIN1x8TeuYmmL4xrO1yVkd-l6Wvr7kzga2ZnOT2lLn-sMisGnrNzgBiv8h073i=w938-h1250-no

AM-JKLVm-eefrduuXgqDq7s6bVbx2uFp4G9z2DQ__K_JOKWeu3JnUZ8VLKQTFoWv1QxWHZx-Zlu6AqZt9ftlRJeZ207Eku_oK4p8eJ_udhO7VYCE7Js3420i9lX9uQjq304OHKdo79oociUcmA9rcTHJMqJZ=w1279-h960-no

AM-JKLXwNt1_lzF8Jre07UTb9a1yQhdbAFSTY95sPLOCWp6imByEpd_QTp4ek4nkilSNpPTYeN8D7L2rbYS02qUr6O_-wqrRCzPuejopV6KYS8c0ZpI-OLZTO63ufuN5ZzOyO1sfqbbV8MOeBKbSS5K72OyS=w938-h1250-no
 
Last edited:
Engine Refresh 46

Rocker Shafts - Front Head

Completed the front head rocker assembly. None of the head bolts moved on the torque-check pass, so I am confident in the integrity of the installation.

The new lost motion assemblies.

AM-JKLXIg7tUNgD5AfKsNhwgr99kKDVgYOycXR9brSEODnjO7H-e130dlIT6rIsr-HvzZoAlYRAs8QvfCK0WjZ-Q5RTHJUHJyUQbv6yTxrn-j1lvyPLeMQsECxC5ZHLBslpi2nsxuxpaLmNU-MOkwrdCJAwS=w938-h1250-no


Just a light coat of Mell-Lube in the pocket. These will quickly fill with engine oil shortly after startup. I also coated the LMA springs to prevent galling of the aluminum pockets.

AM-JKLU2U75TZIyF9TqtkAbcQpqk6bx9WmV5Jdq2FO9t544k5Vswxx3Q7L1fyiC4o4YwCivr1Rfm4at8oVIBzpuvtbvoGqlsF2qR4ovU3pj5Wa2TvTZtzqqdIXXRccxB8Q6vPPp55n8klPGmyuO9MKL1y8Ao=w938-h1250-no


Intake and exhaust sides complete.

AM-JKLVa0InkbFsfJYWQv5tALpLBwF3co20pzxhstD66Imxvn10dTj3526OMblJrXvjSpWJXiaOR5olCRauculGdXcXwRztnWBbwIoDlUjD5lT-3-x6ltMq-eNcCVneggoUP46kZ7xaJXjrjzflk7Tl38Zob=w938-h1250-no


Shaft seals in place and torqued to the spec.

AM-JKLVbEWU2EQJ0LZWPkFZ9_KgpkOHepr-7fLOwHxIYzIYZLnPI6V59iTuJM_rFtJJxivG8-BPmL1Cz7LWbgQFp86LPaFWhyF54MYACVUlvLdequZALsJSsNfu4-jZUSmCXaRQv8KmfkUAQmrLGJAD6w20W=w1279-h960-no

AM-JKLXH-Xj2hkpTotfbIIWqyFluJPpUZ7uvMGykjxgSbHnDKm5tIvff2VJFkvaTpIiBw2Xrtb7GprpdYf6hZupLvkfm6-vL-2jEoS_g97WjE-x4NNXRvT3MSpD7PfRN6trC0FJZuoBtBuT5_UNzcObk5AwW=w1279-h960-no
 
Last edited:
Engine Refresh 47

Camshafts - Front Head

Finally it is time to install the Comptech camshafts. I've waited literally years for this moment.

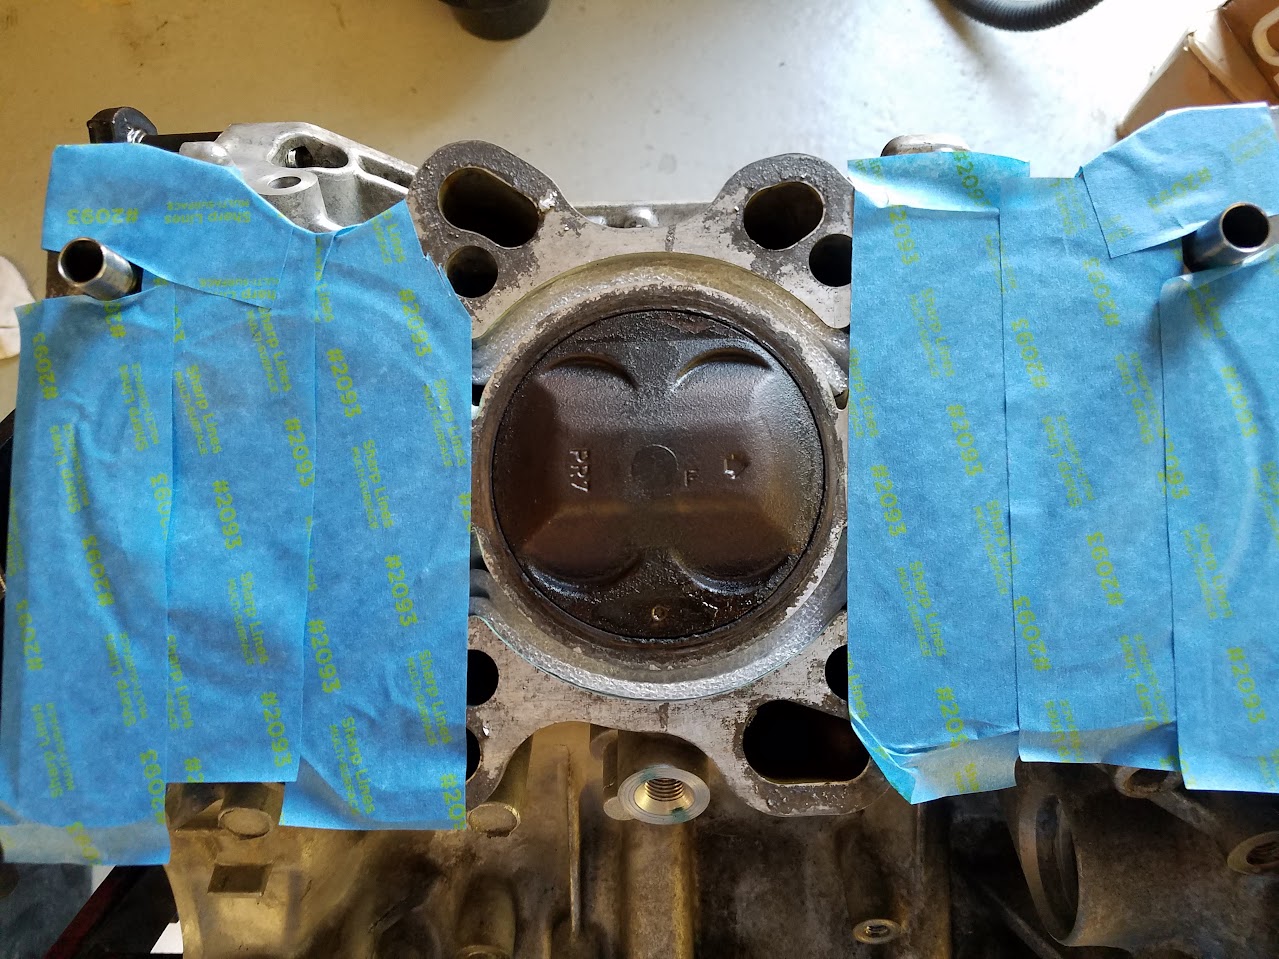
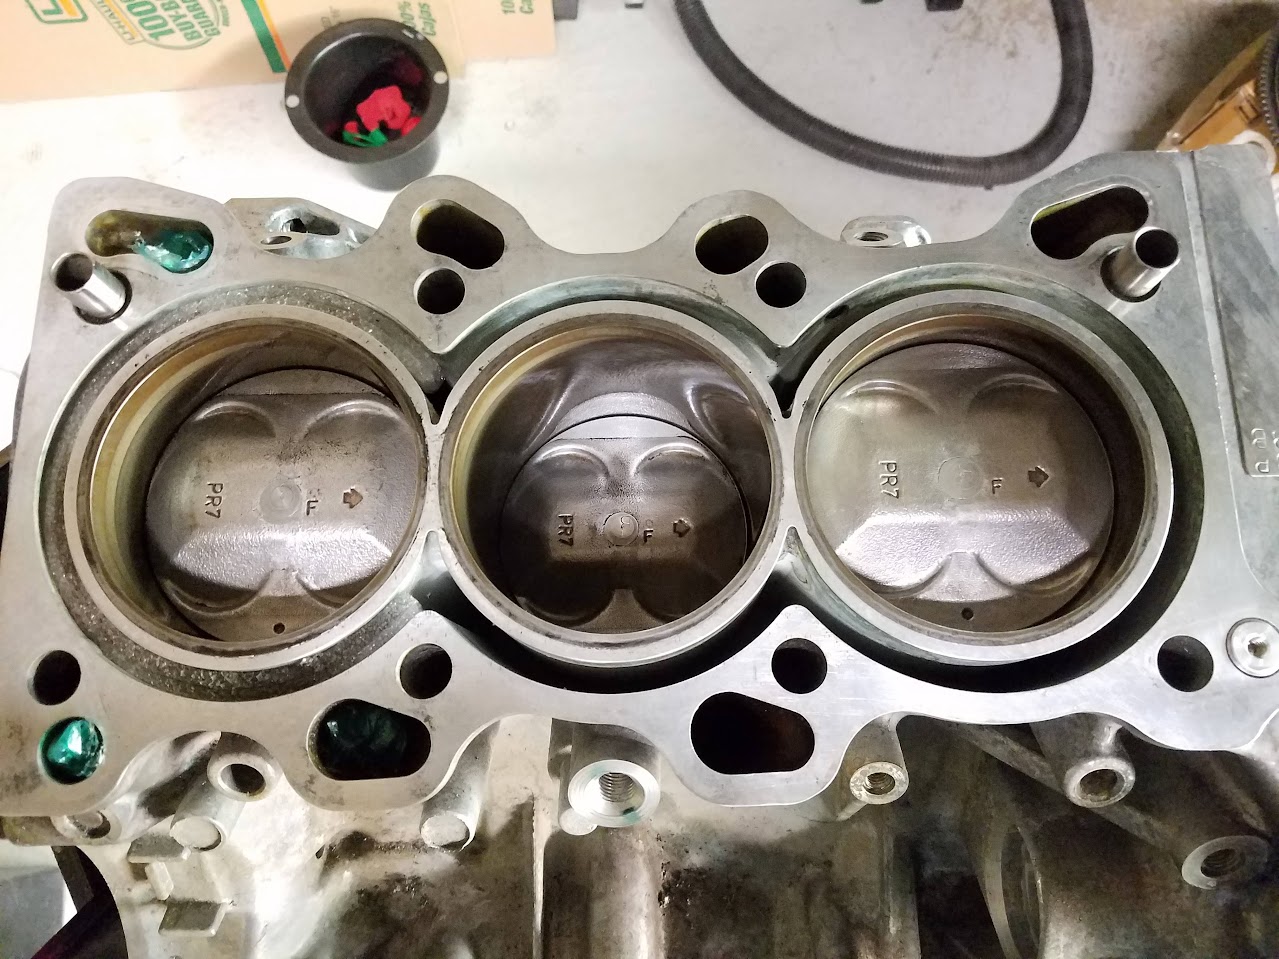
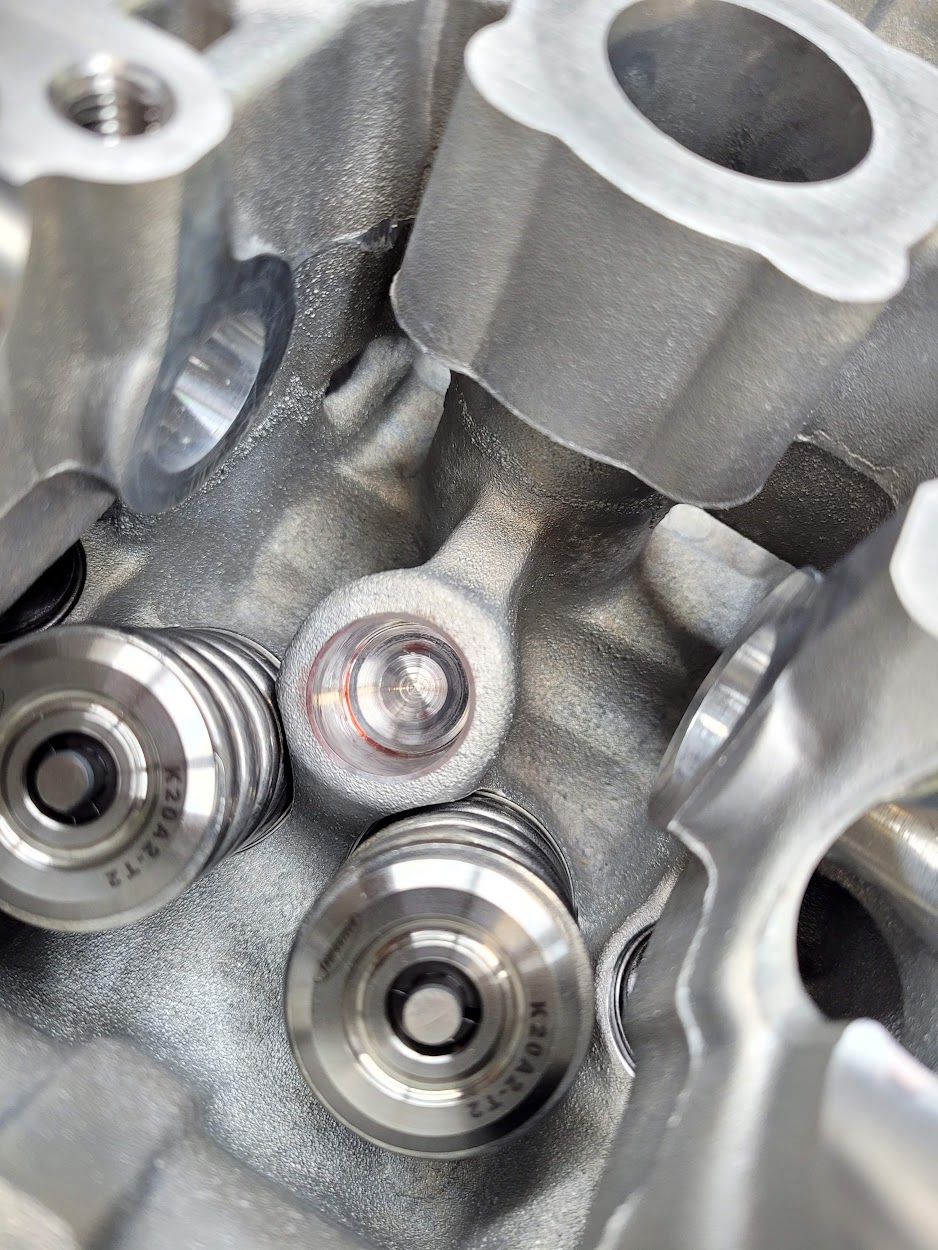
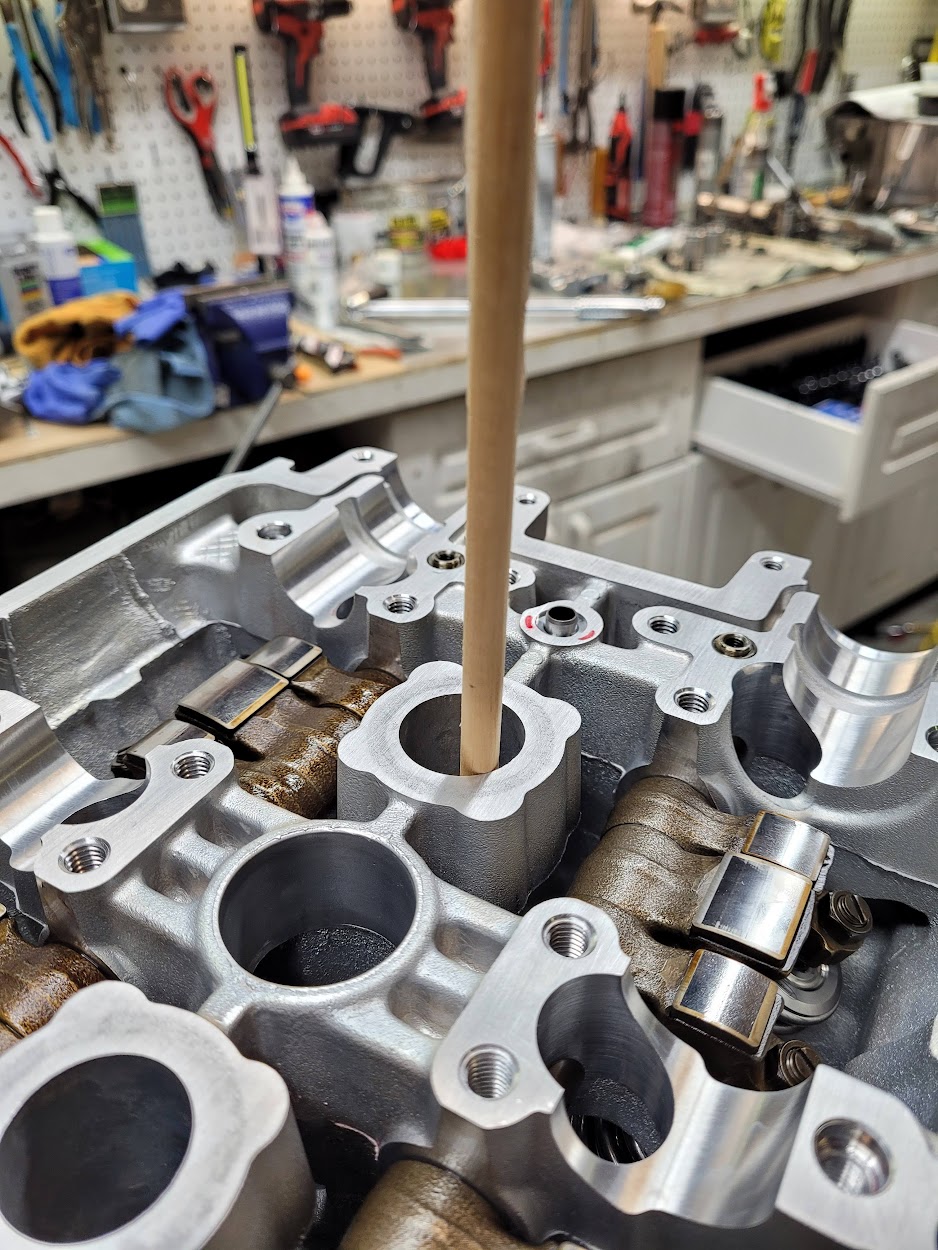
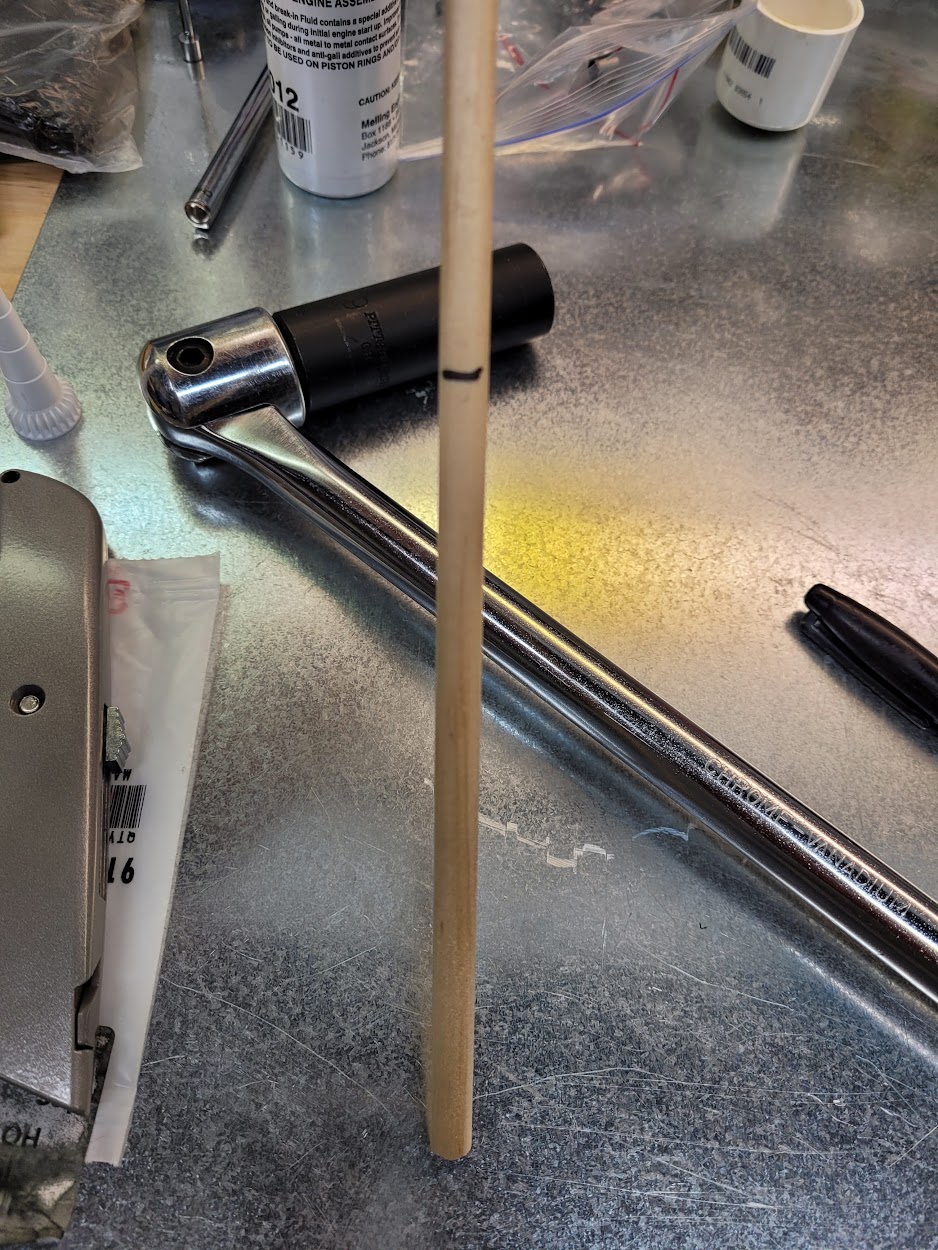
First is a little hot rodders' trick. Using a wooden dowel sitting on top of the piston as my "measuring stick", I set all of the pistons on the engine to below TDC. Even though I have adjusted the valves all the way out, this additional measure ensures there will not be any valve-to-piston contact when I install the cams. Because of the spring pressure and lubrication, it is almost impossible to get the cams in the engine at #1 TDC. I'll do that step later, using the 5mm dowel pins to hold them in place.
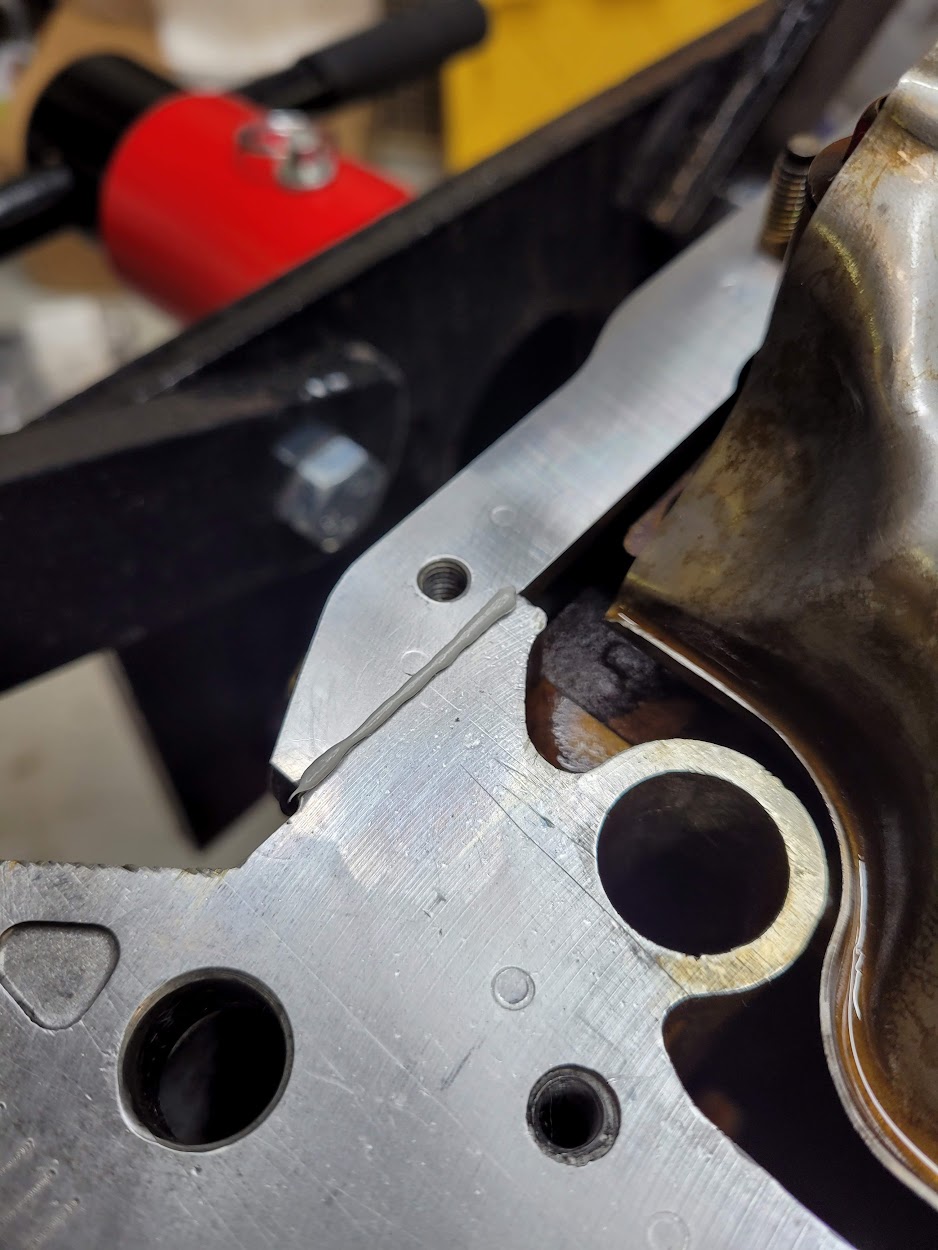
AM-JKLXoX9gmTRMww-Zxj90qw7uG8bEWqkJSD5KL5mZWprnzzokrOCGvHJ2qrzed6pdFHYpbIffpy3gx2QChIO0vJp03cq1aongC8prtelyzIKbSarO4elK1YH81Ay7V-vdFzEppxW9sgtGvF1aJiaRfuxGg=w938-h1250-no


My "TDC" mark

AM-JKLWOl-WwZwFztTIiW21ydqvqx7pS6fFdokD8j1NjyBMFRCRaEFbA8B6CiIxN4KlvtzzvygkJhgaxq08GwfMt6WQbDzU-WC5iLUF-OAZFtYC8dVsAplgiIzgYK4KxkpxHzhlZqOjO6SbXNZxfh05ndbui=w938-h1250-no


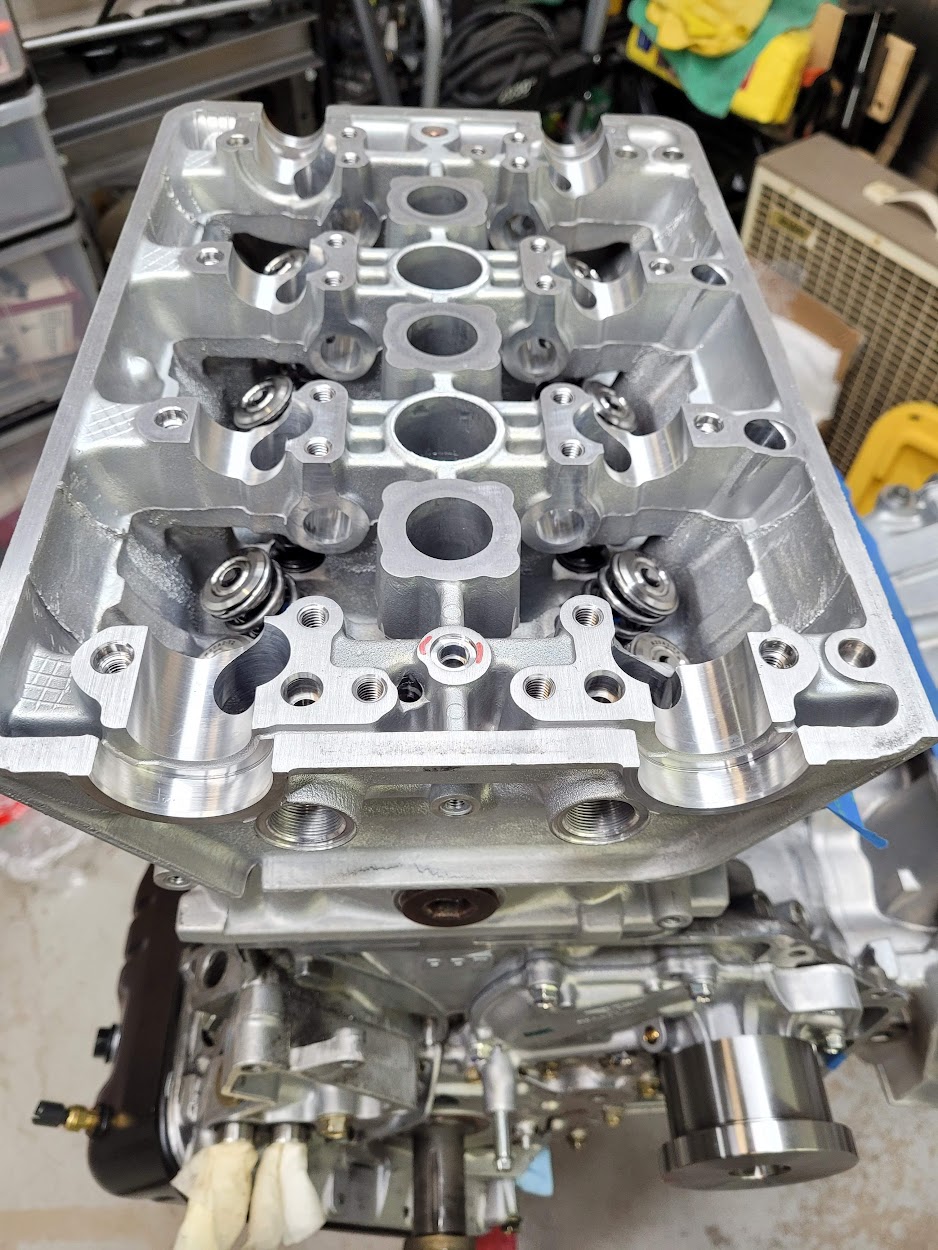
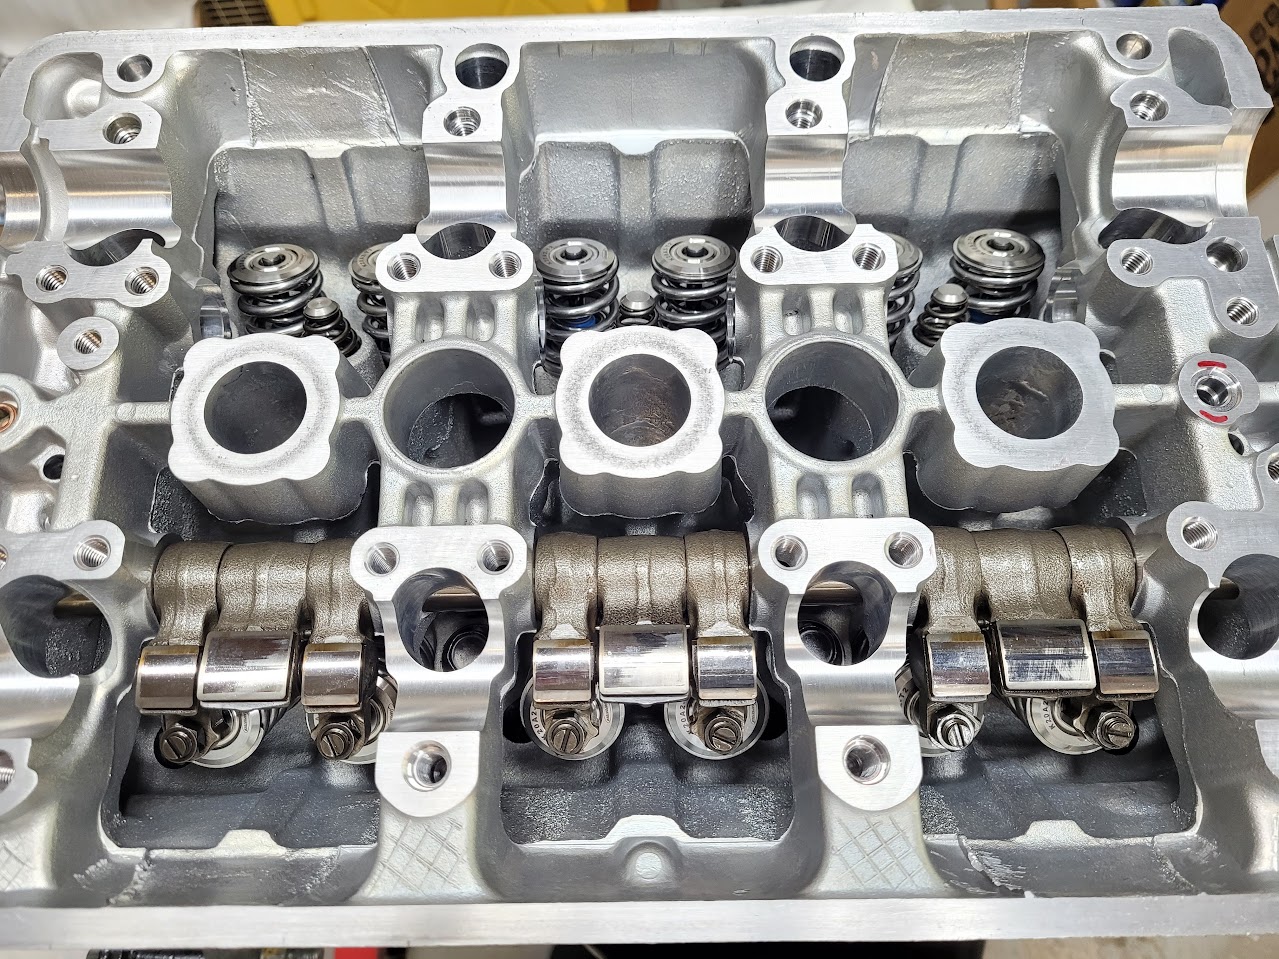
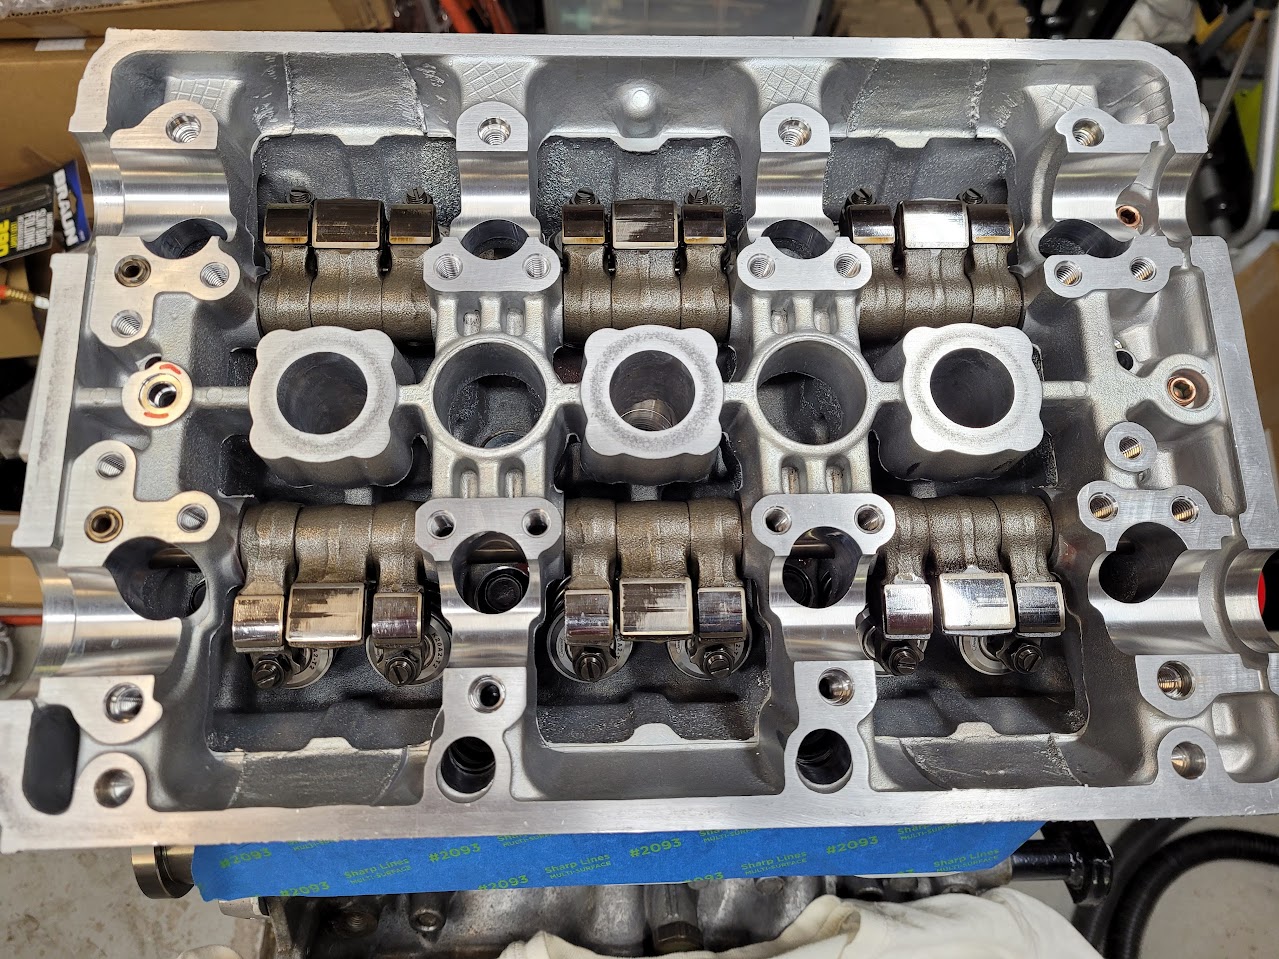
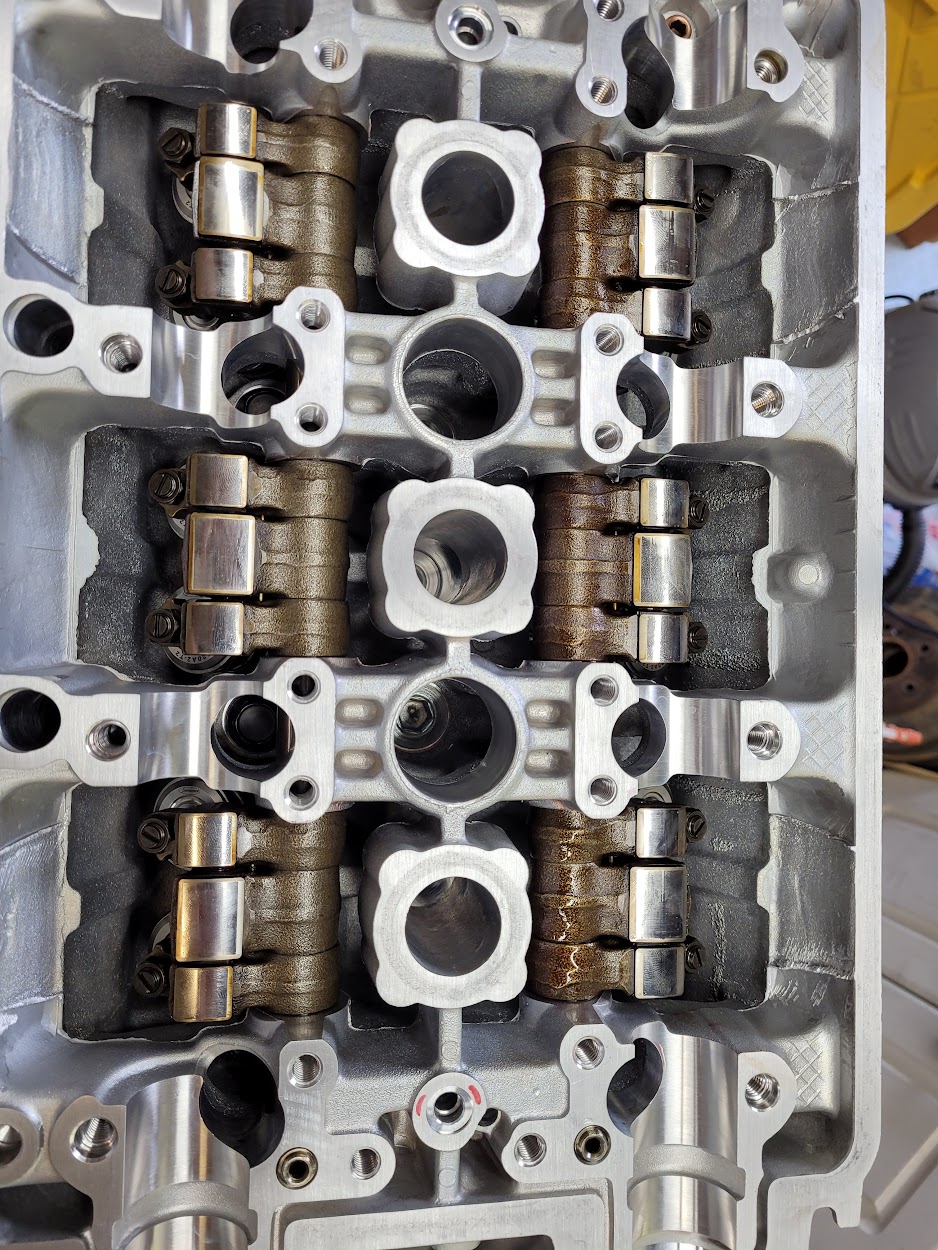
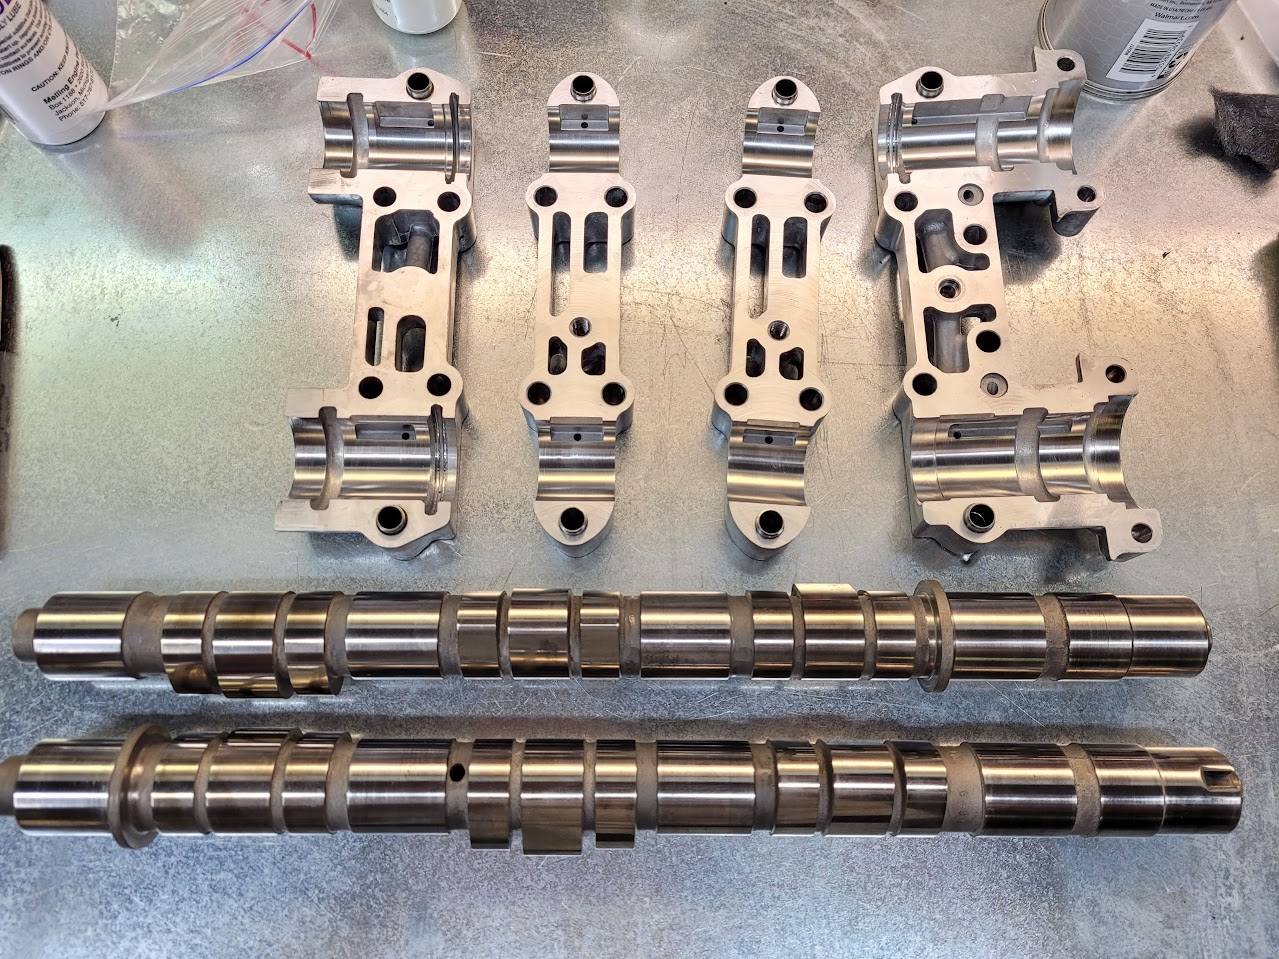
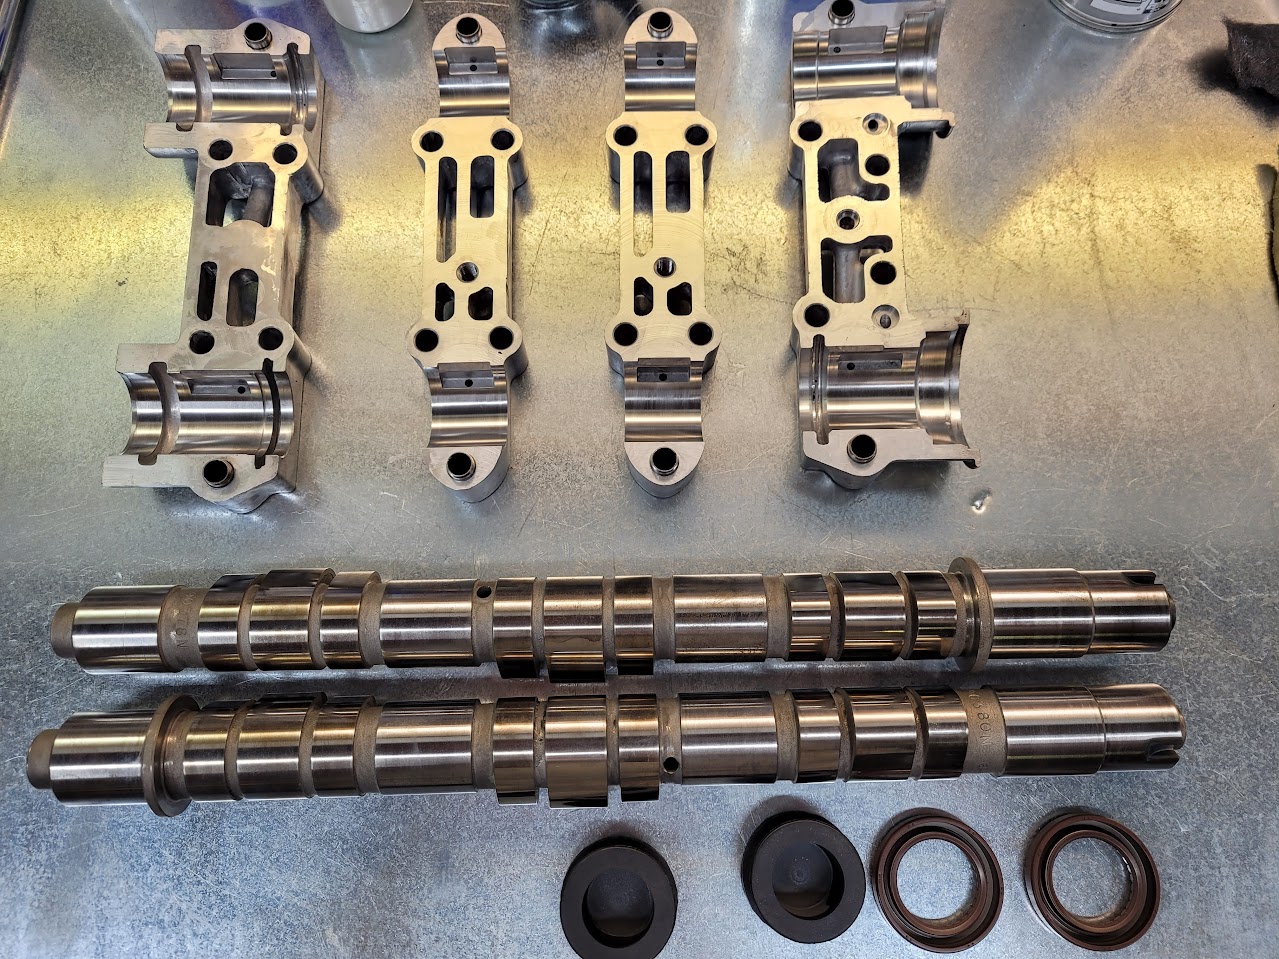
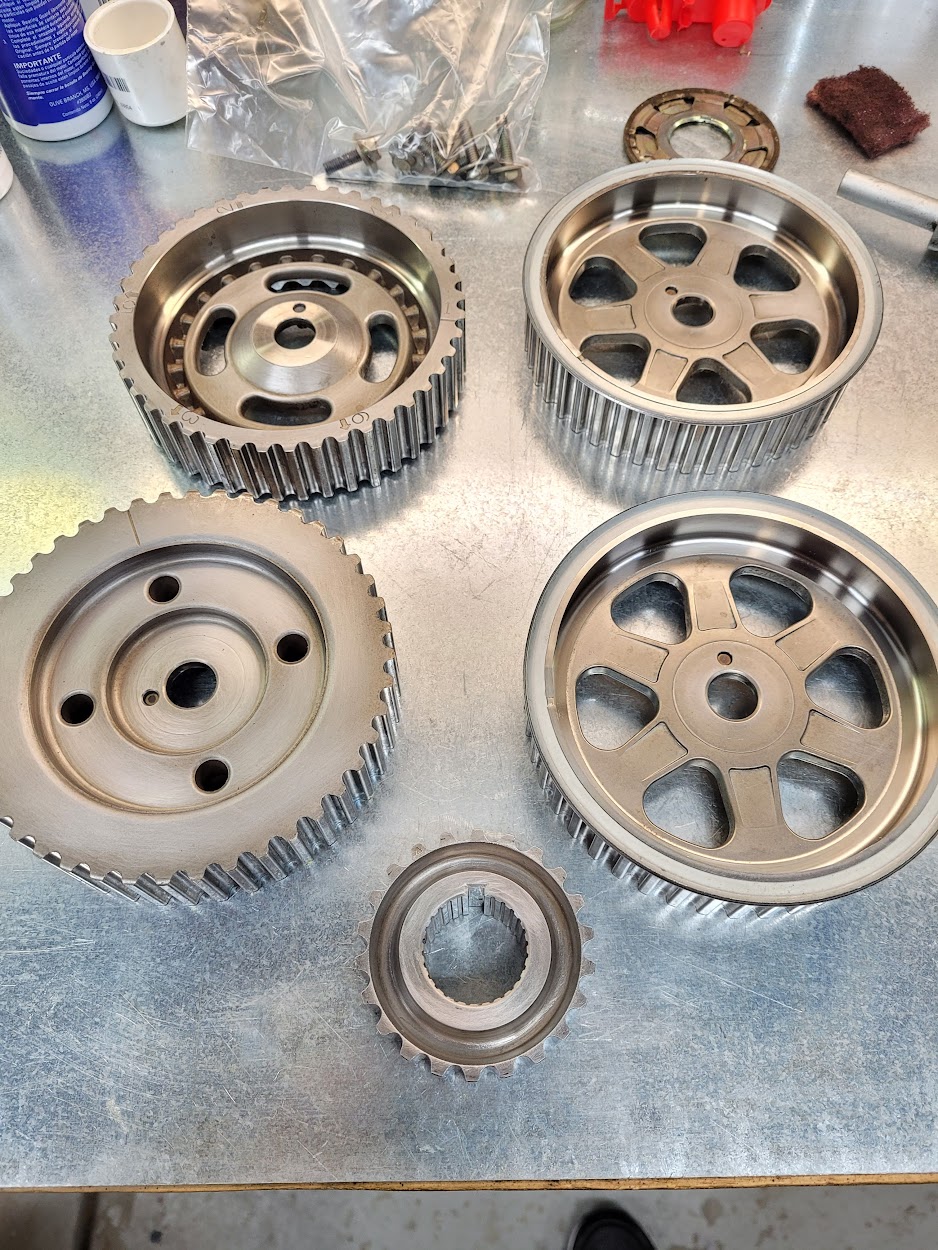
The gorgeous Comptech camshafts and cam holders. There was just a little surface corrosion on a couple of the cam journals. Some super-fine steel wool and engine oil addressed that. The hot Mobil 1 will take care of the rest.

AM-JKLXQJCP2v2hpMCjDTbHpraI_8S1ckK1a0MpWQiLCzQMAMlvmOL8BFYlE_eQIZITz8HaxxKXFVISdkMCnh4mvIjNpgXD8-IMOTnp6XcLxb3wjVDGmgBxgnnJGpil5QmQcW9mFQro6gx9lRd4zILqs73Vu=w1279-h960-no


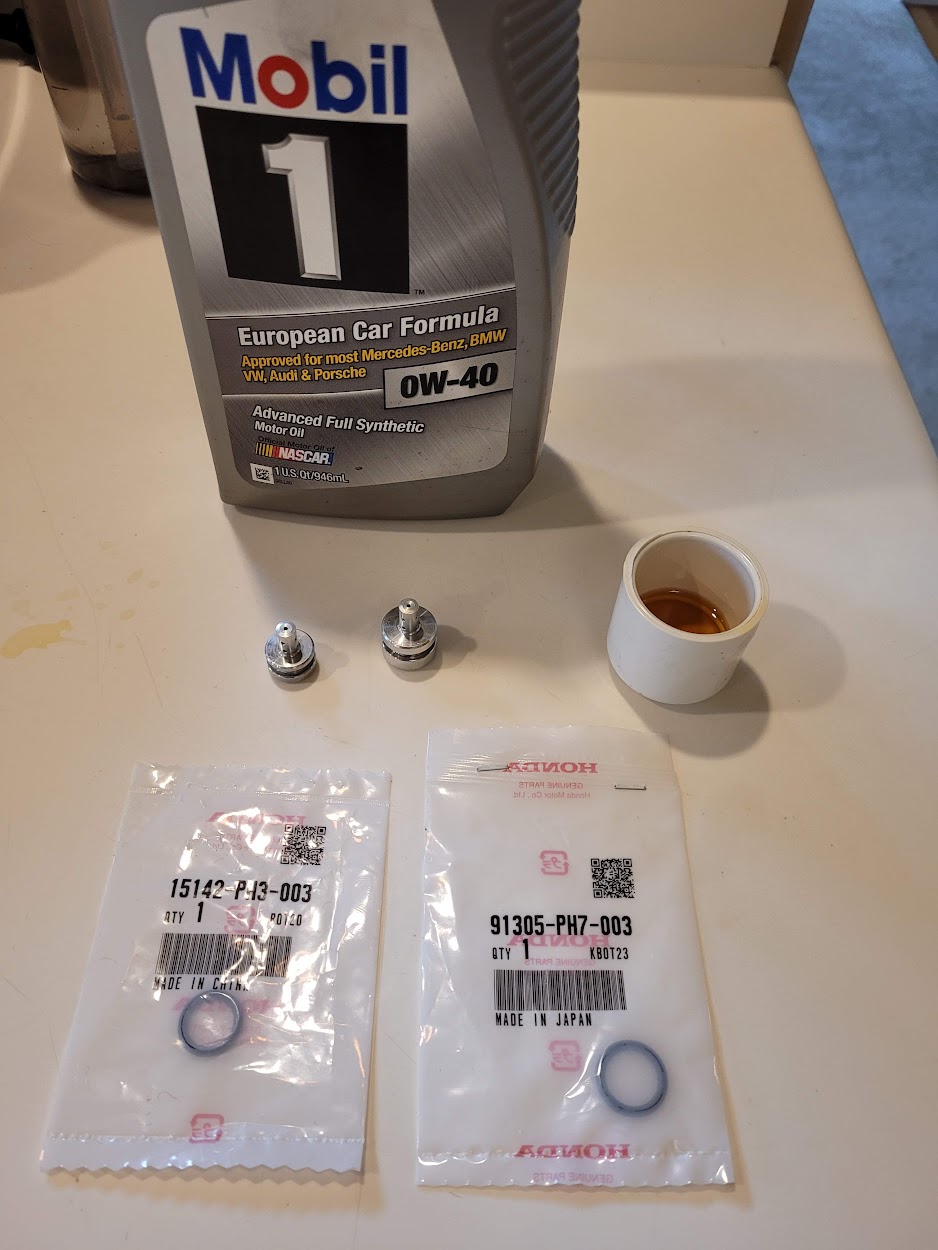
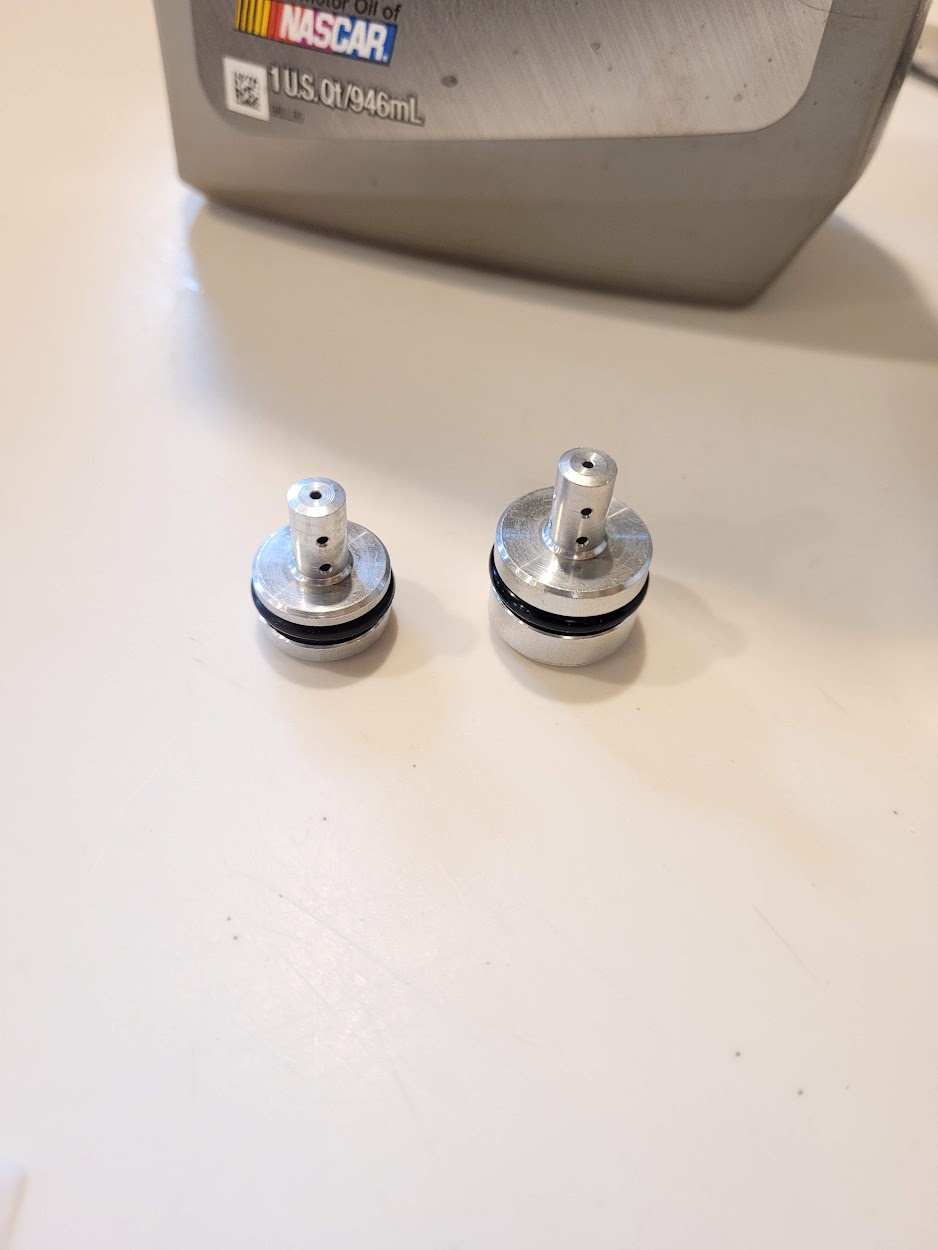
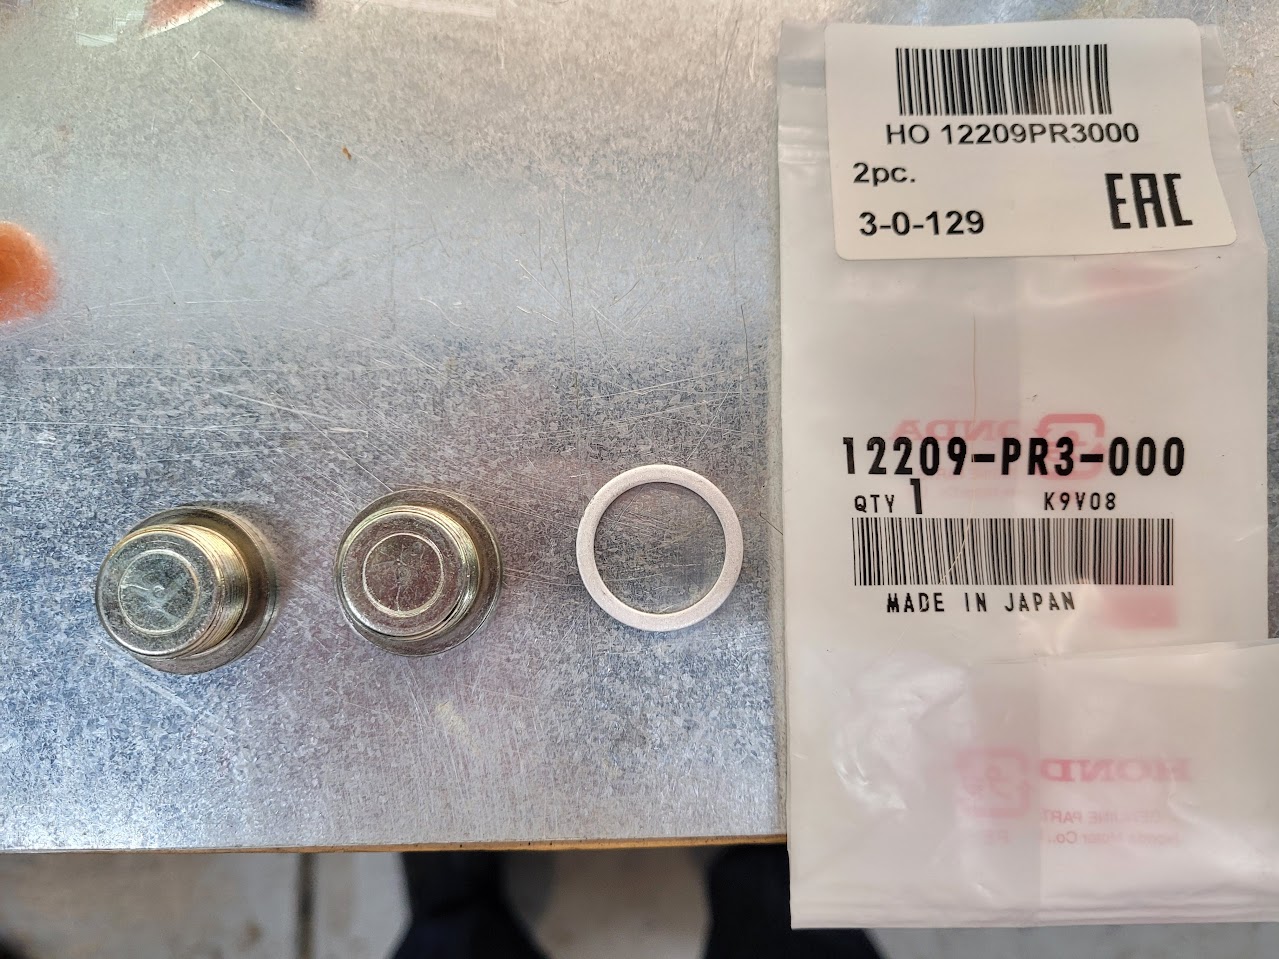
New cam caps and cam seals. Note the camshaft is marked "6-99". These were cut in June of 1999, when I was a junior in college. A little piece of history for my NSX. Note that the cam seals come pre-lubed with some kind of clear grease. I oiled the camshaft surface, but not the interior lip of the seal, since the grease is already there. Hopefully it is compatible with the Mobil 1!

AM-JKLVAyZ7vgQtEUaCQVf0PjLjl65mDX3VXy4RLr9mSCxlvYj8JRvN0E7LgUlXVVe-EGMolRW-kHKvZVF3p4LPppg79dwAZskFBV2_q698aVb5M_atCPOXoxj0fRwIUK4eAbexrBbkCoRoLFiMe0TSRULAC=w938-h1250-no


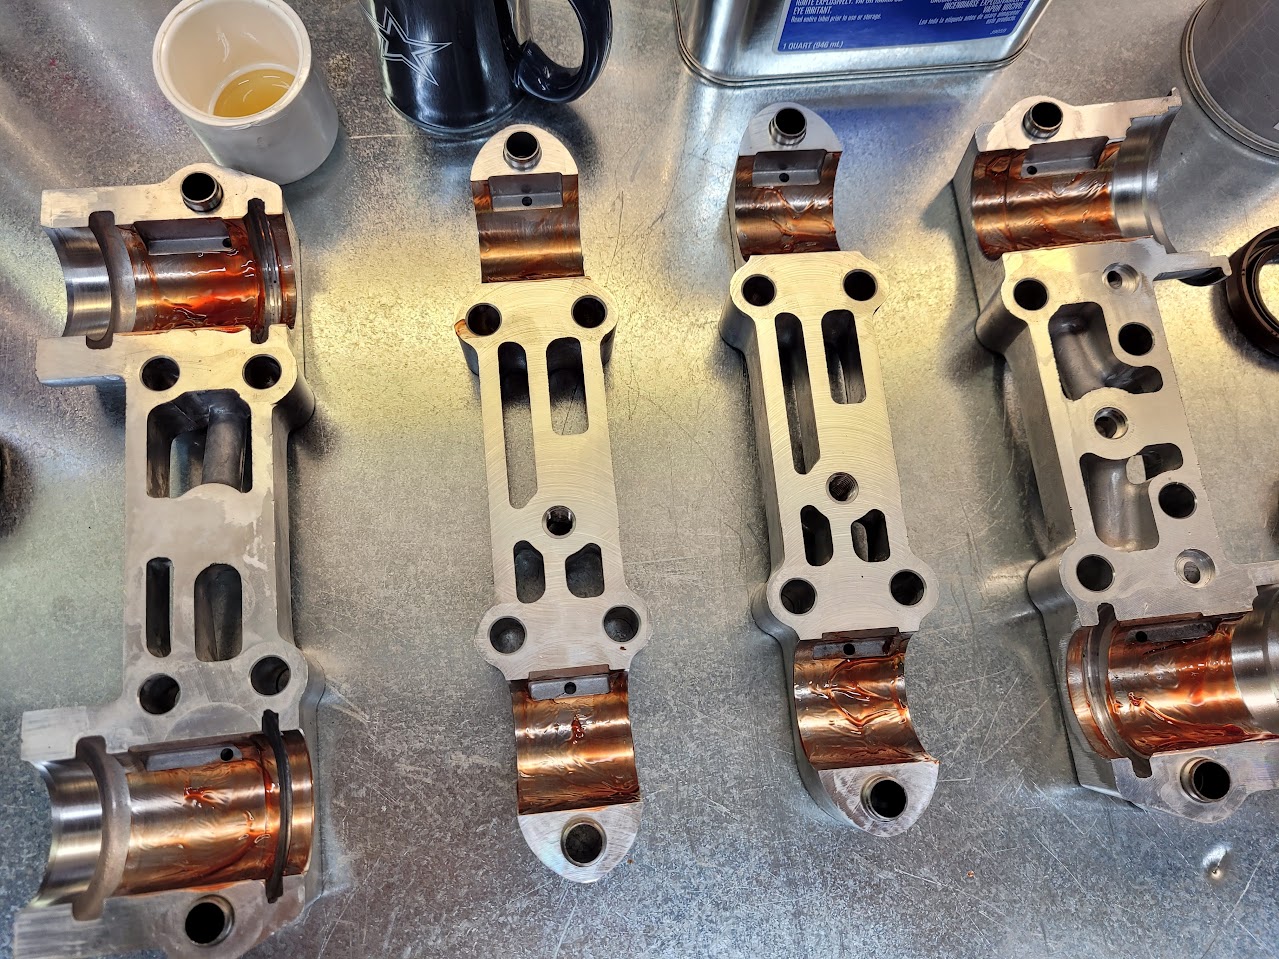
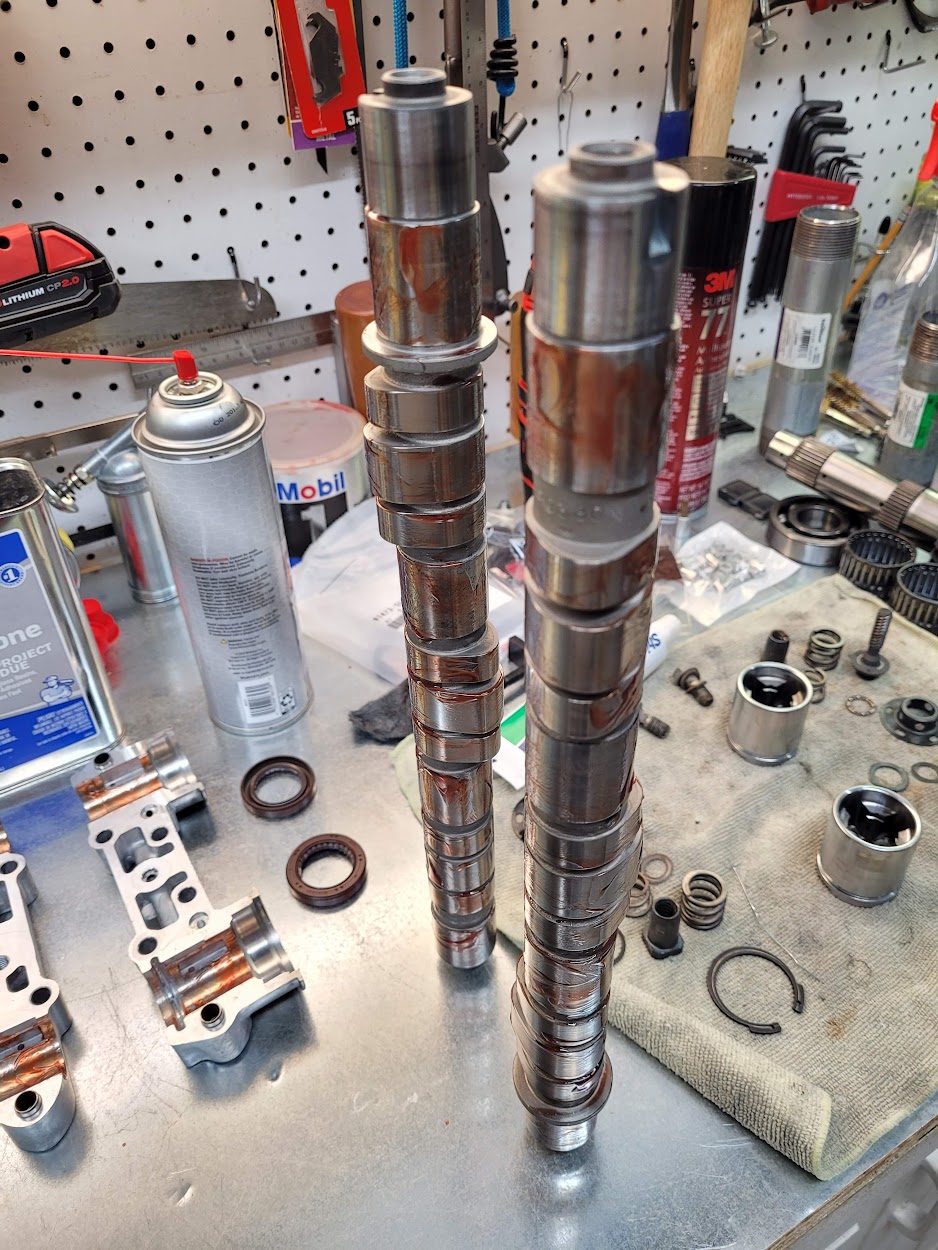
Preparing the running surfaces. First, a final wipe of the surface with acetone and a clean microfiber. You want all oil and debris off the surfaces- surgically clean. Then, I apply the lubrication. For the cams, I choose "Bearing Guard" made by Clevite (Mahle). This is strong stuff. It is much stickier than the Mell-Lube and has a more dense additive package. Considering the design of the steel camshaft rotating in the aluminum journal surface, it is absolutely imperative that you have no metal-to-metal contact during initial startup. This lube is extra insurance against that until the engine oil can make it into the journals.

AM-JKLUh67ZnCciXsPf5wpOkq8s09gKjV2RMkCYBN1U3sc4ZPoSk2CHl7zy9jgLkaz6LOLLKgAEgtabjHpyfj0g4304zJ8F652qur-Ik5T_D8SA0nx1_04OtiLcXGRoi8y79kokrsLjFIrg9ZhBOyxqIdCt8=w1279-h960-no


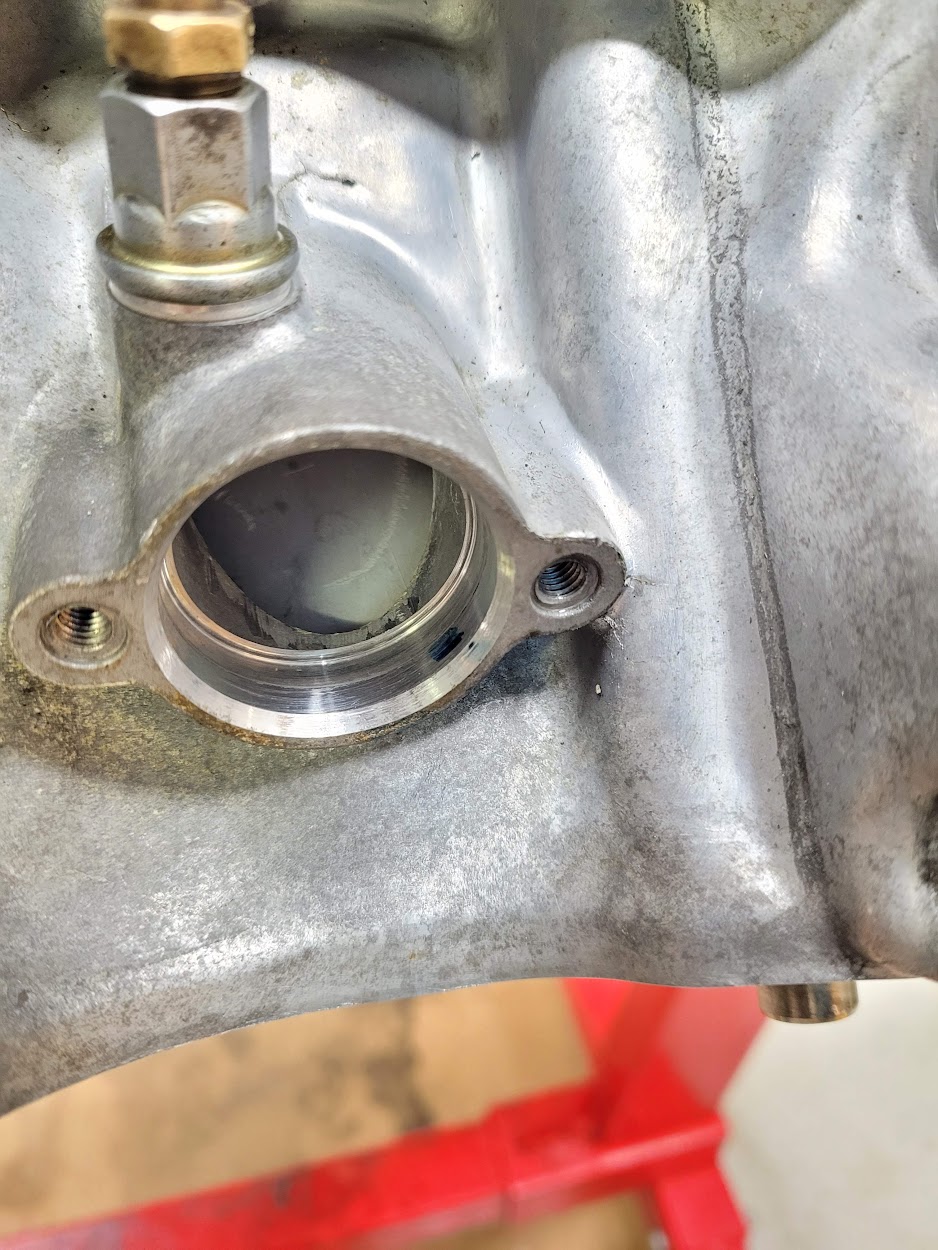
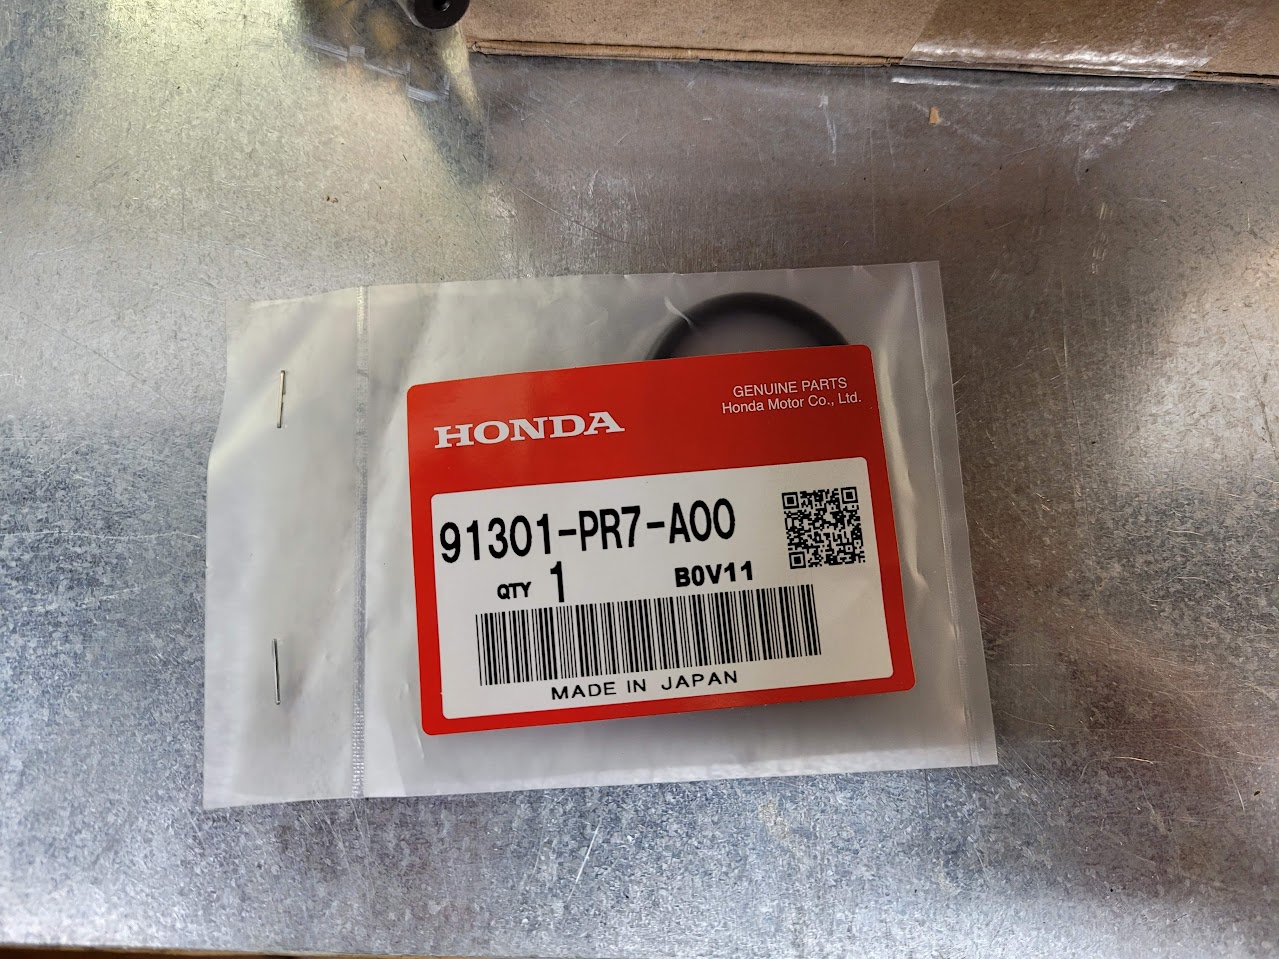
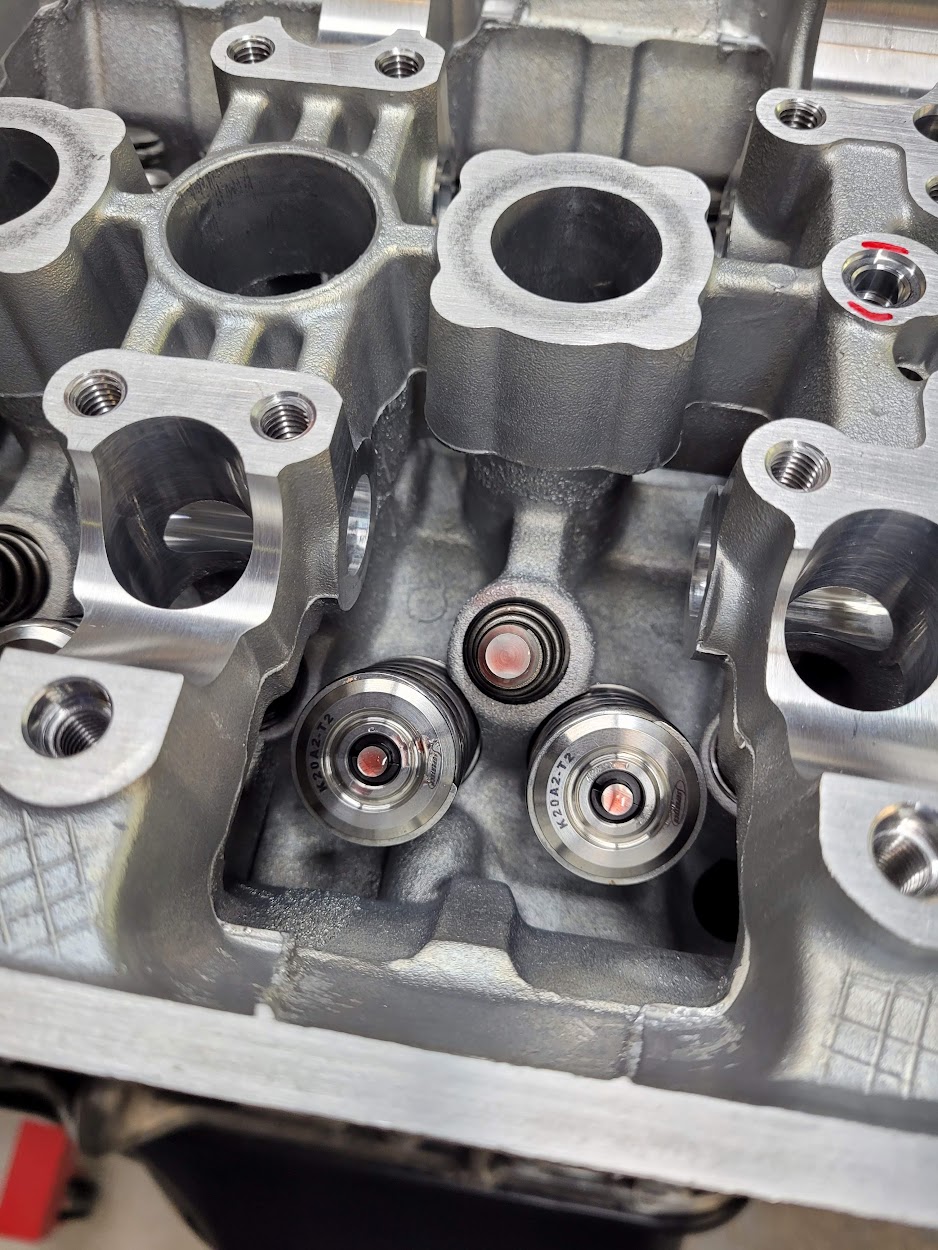
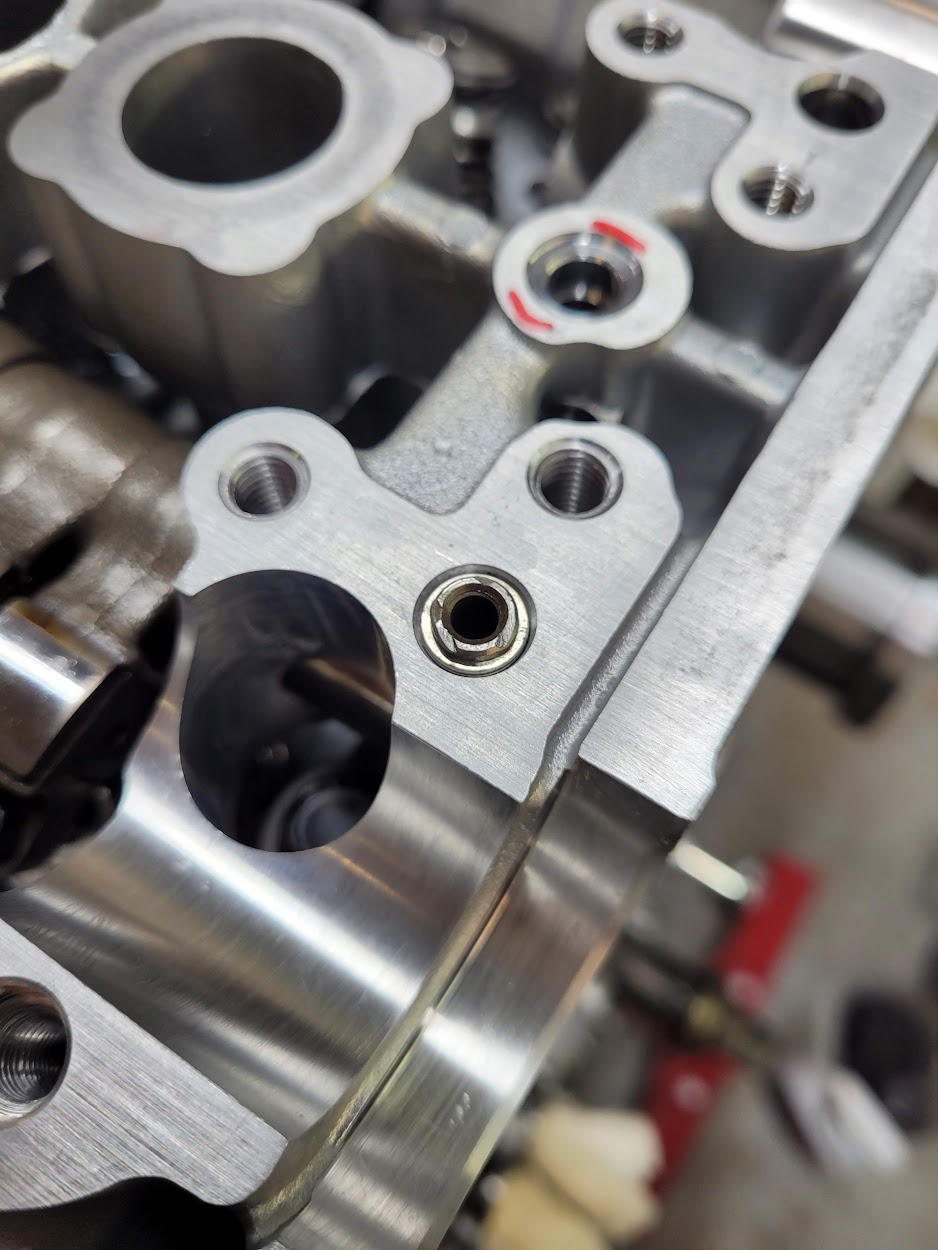
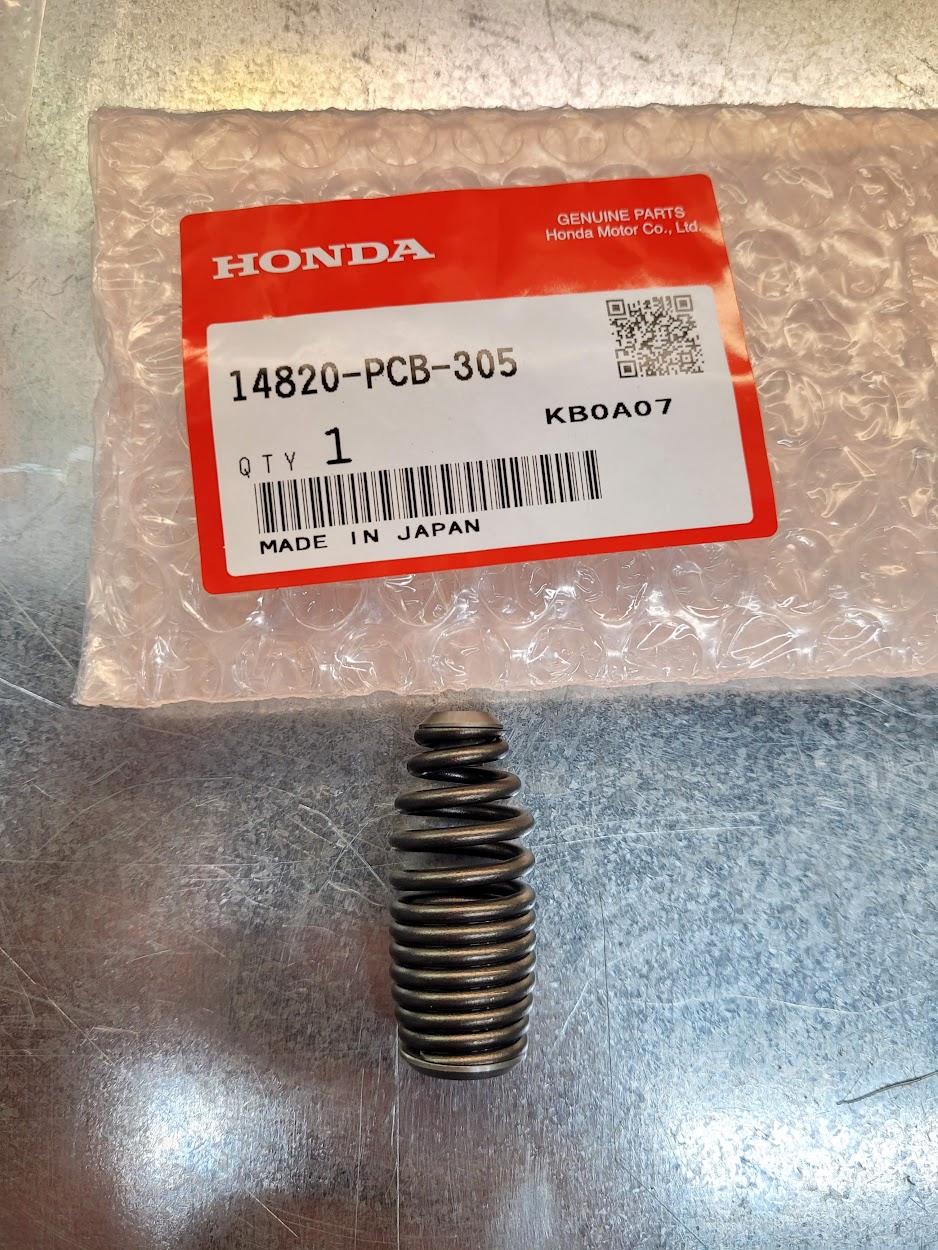
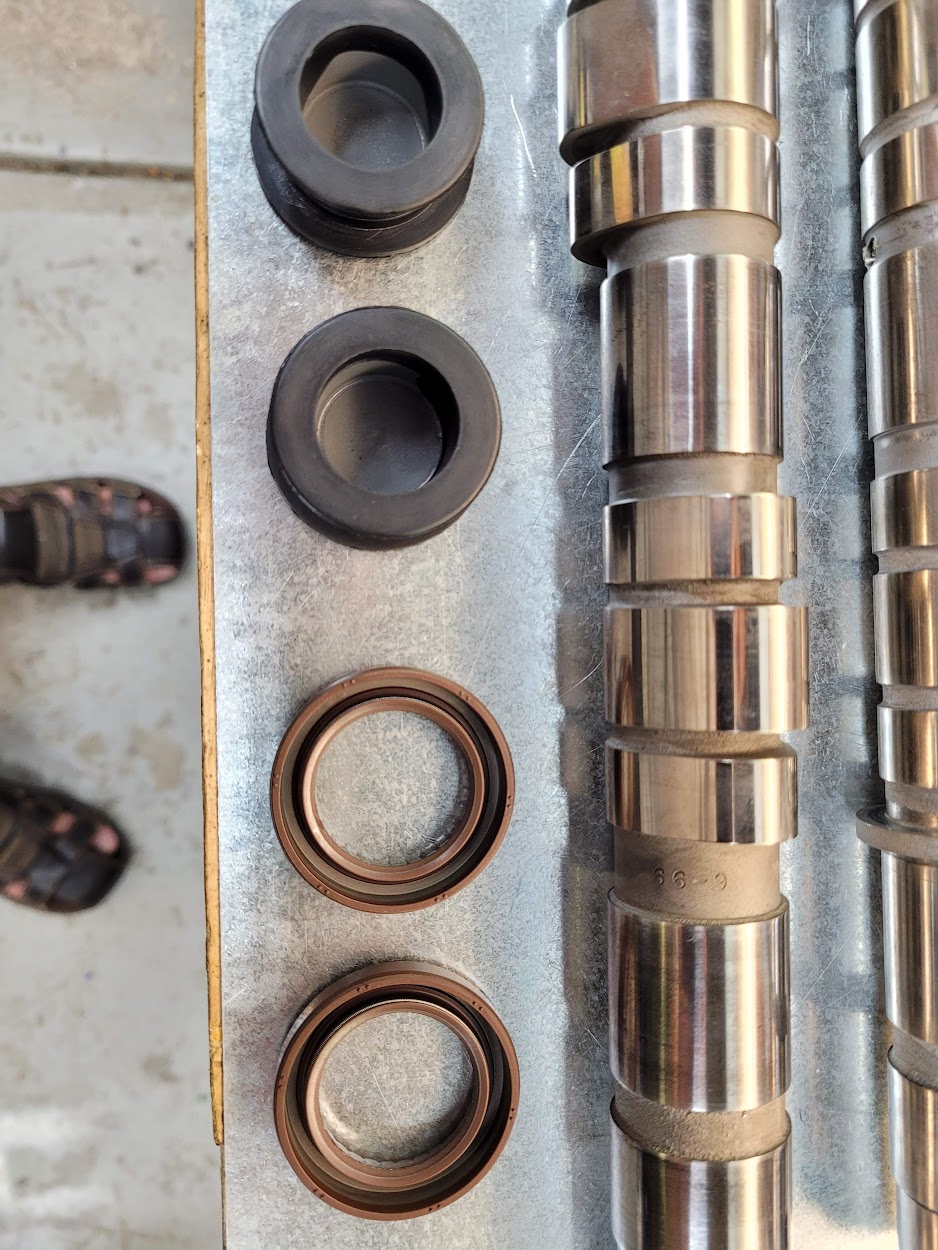
The all-important camshaft O-ring. Don't forget this one!

AM-JKLWiHYd8RRlzzgrnKLDMKGIty2kZh-EgHHTq8IbvOtiwKKzw-6JlEQfZ8wQa_j_9ht6lBuHRPxJ5hAPYho9Ctf6MCbfUPvu3af4YxjpMT9AyvTD9xjO0Jb3eT8vBXQYC37ORjMDE_X_vVc15Ejk9t98d=w938-h1250-no


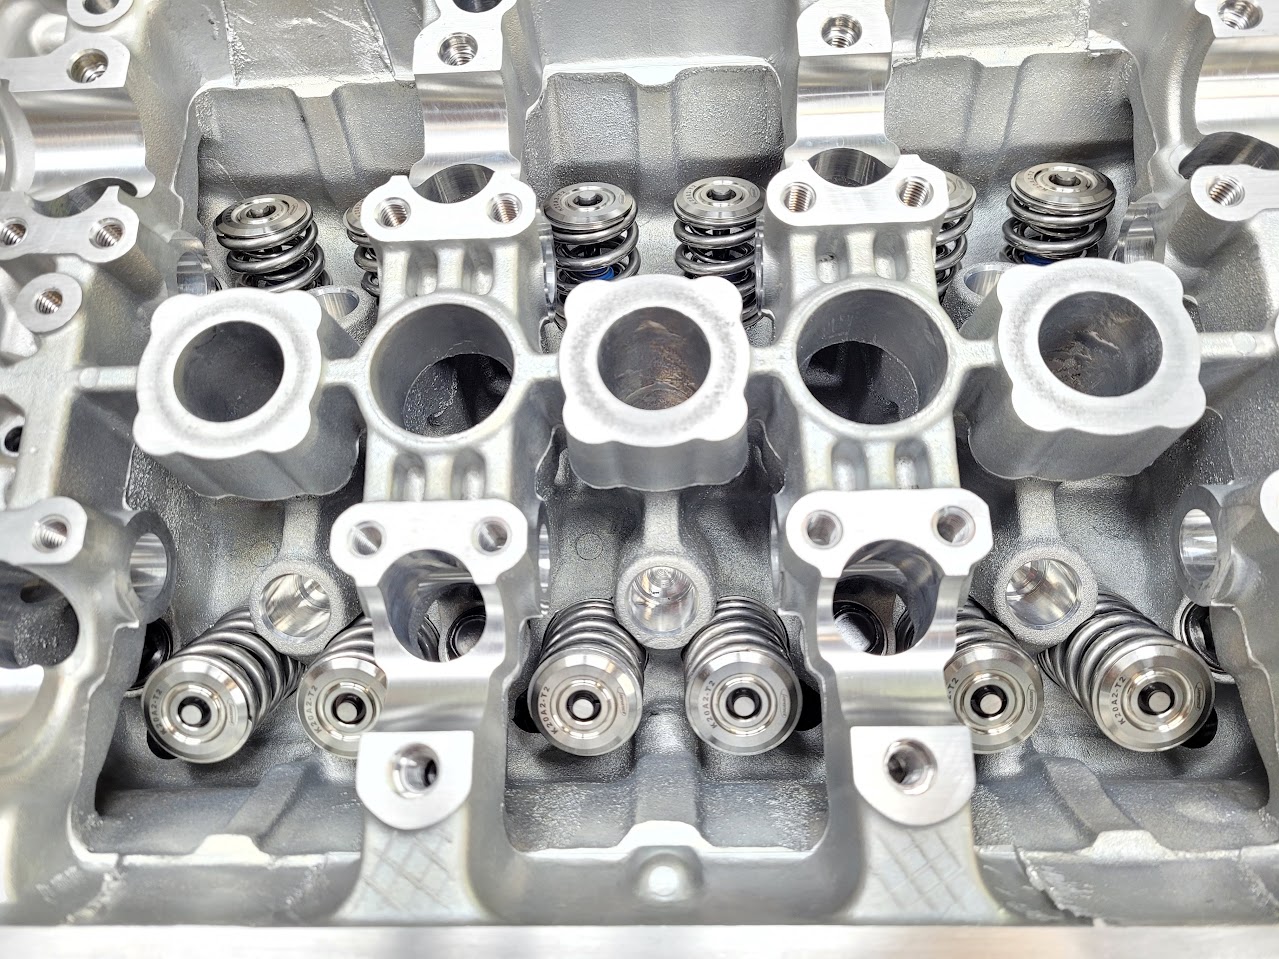
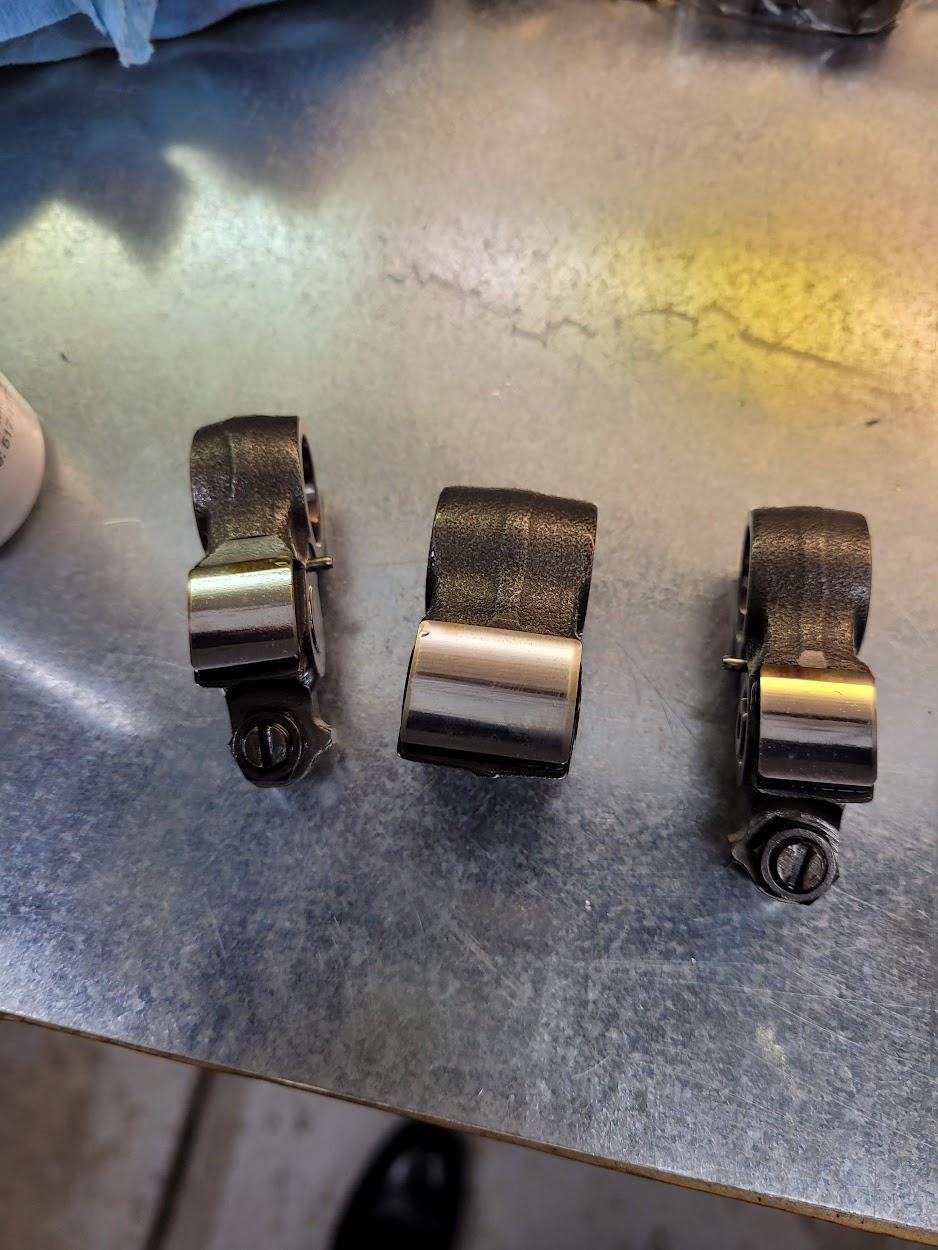
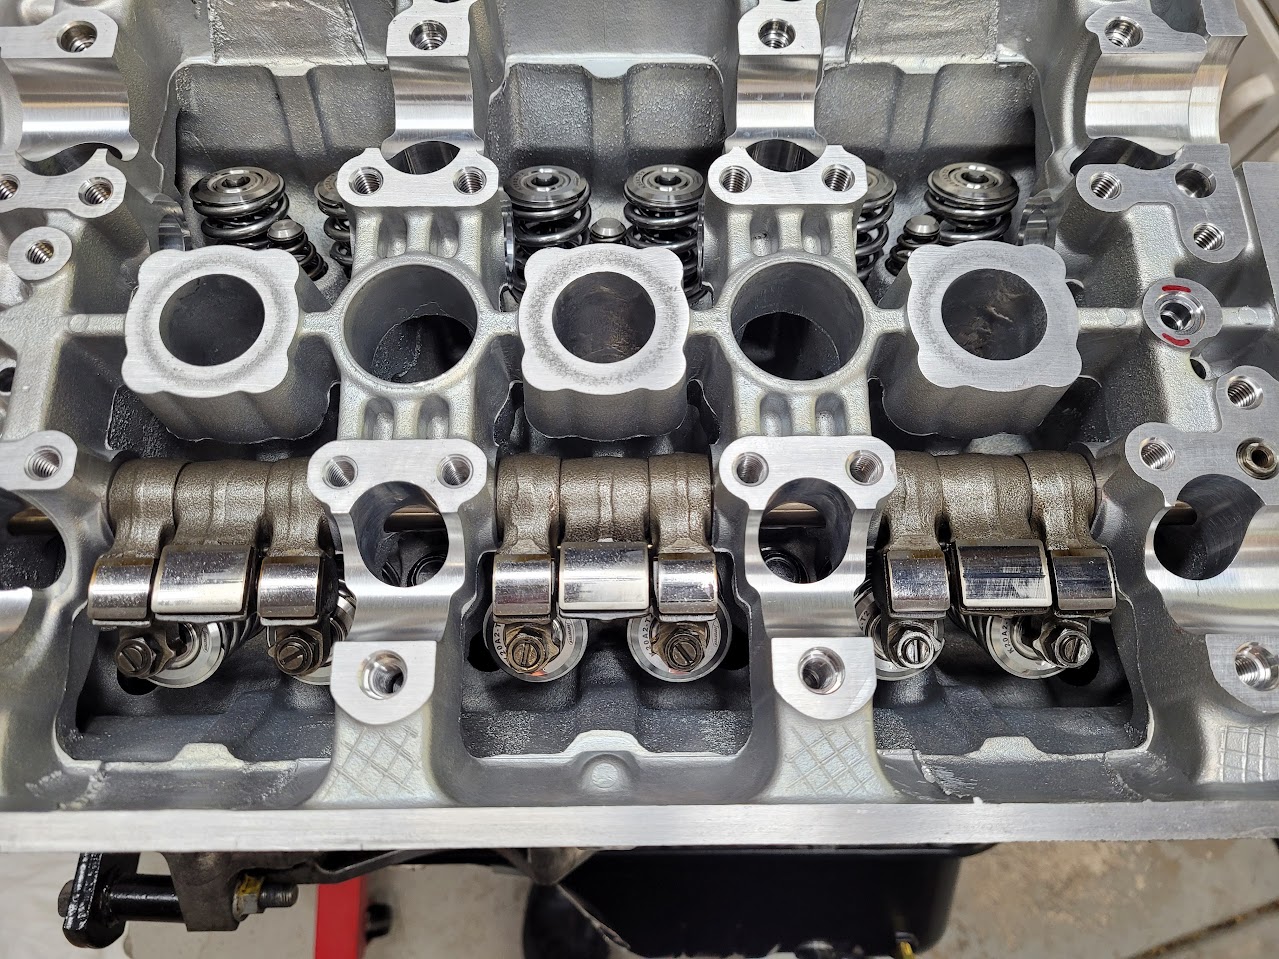
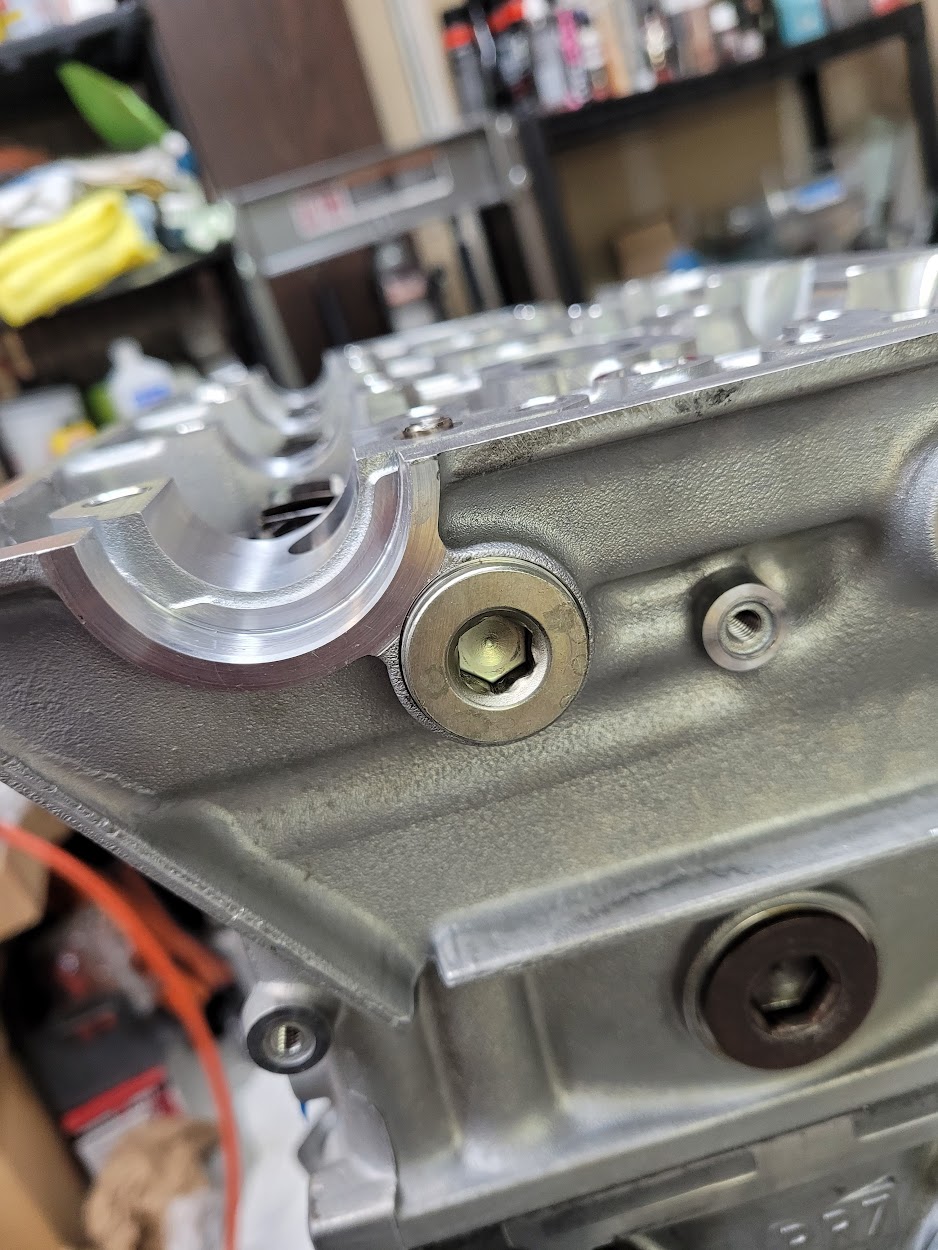
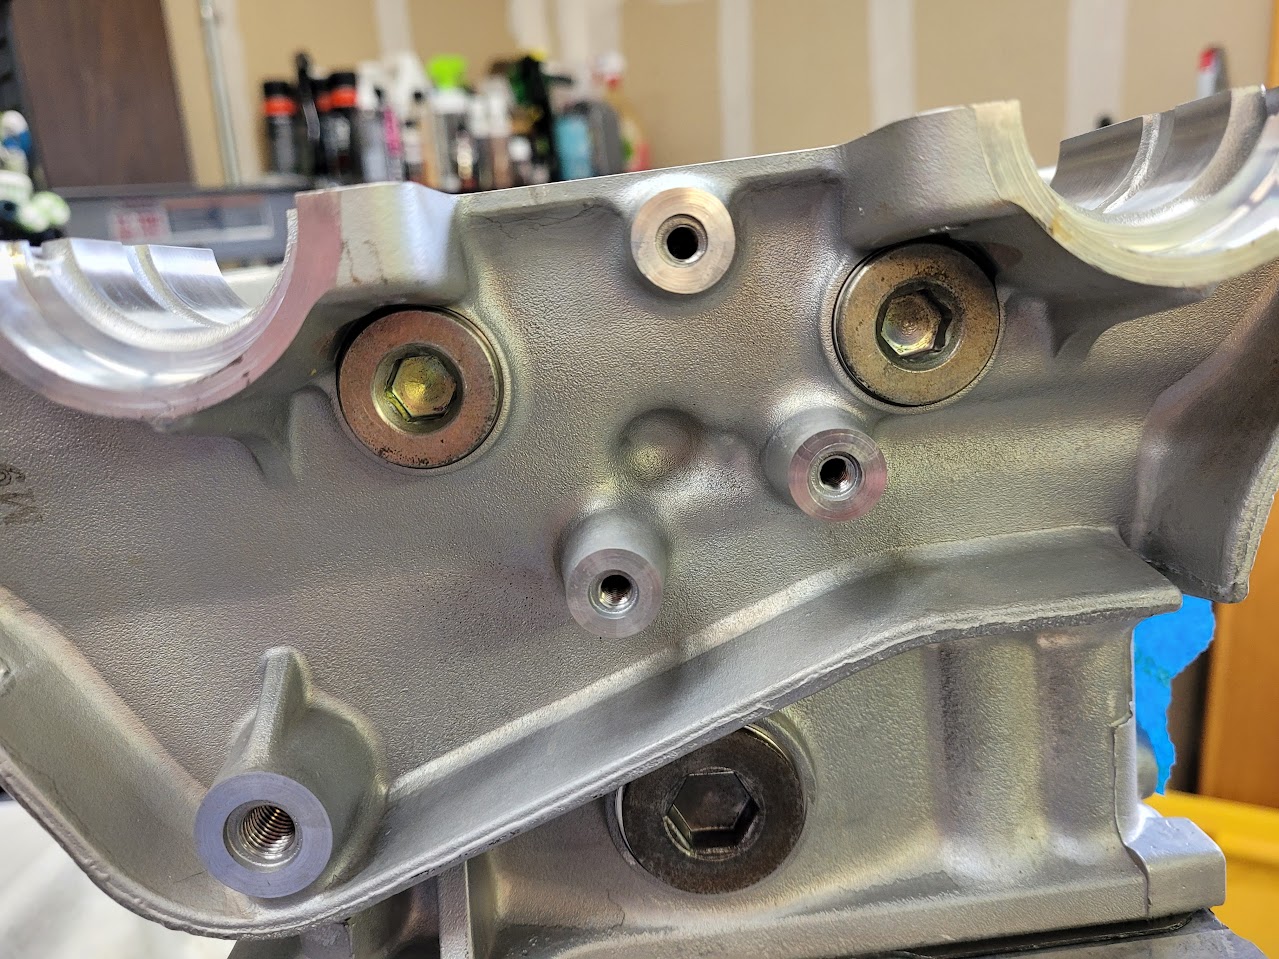
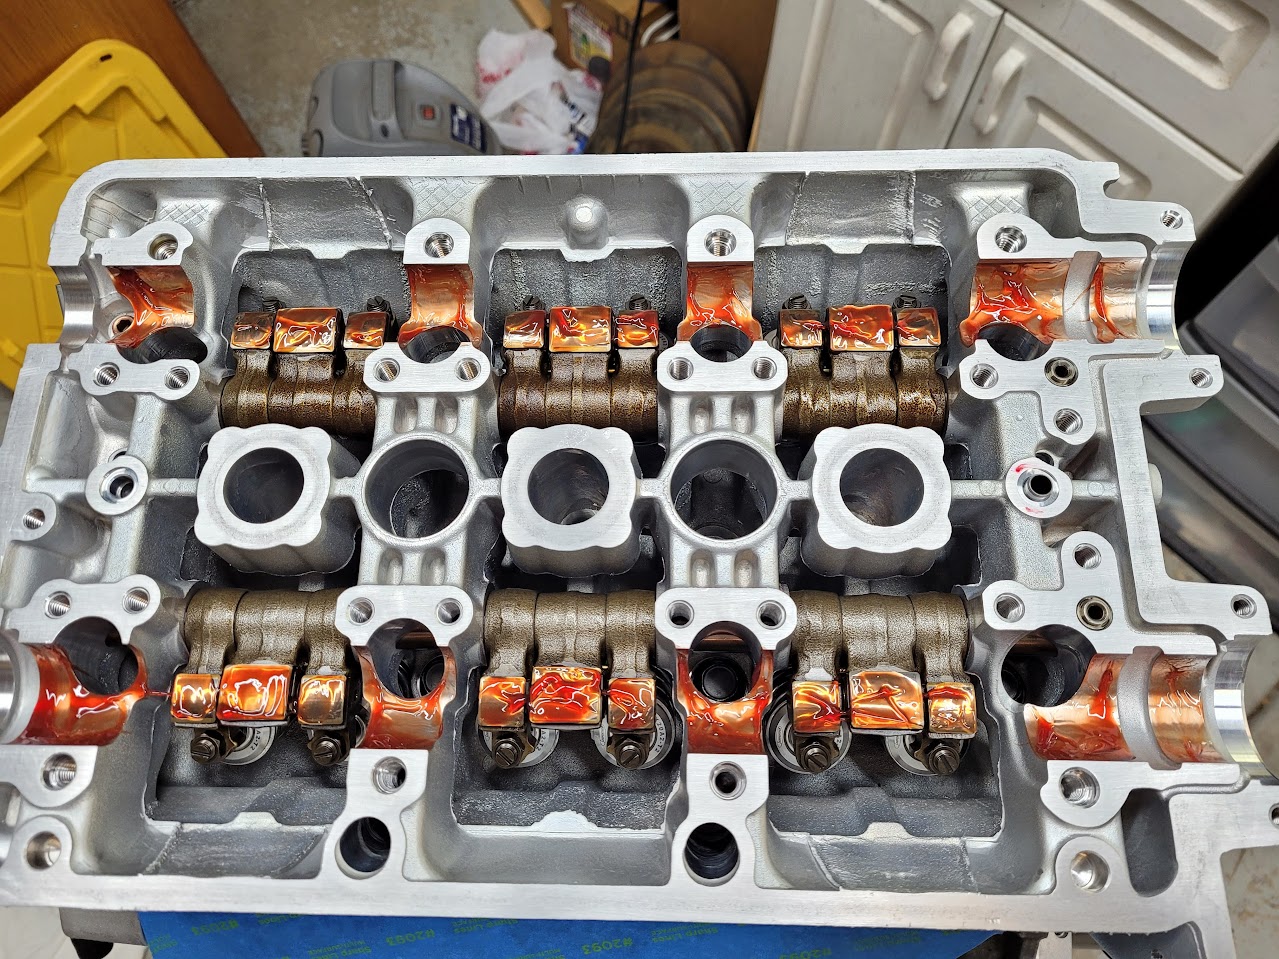
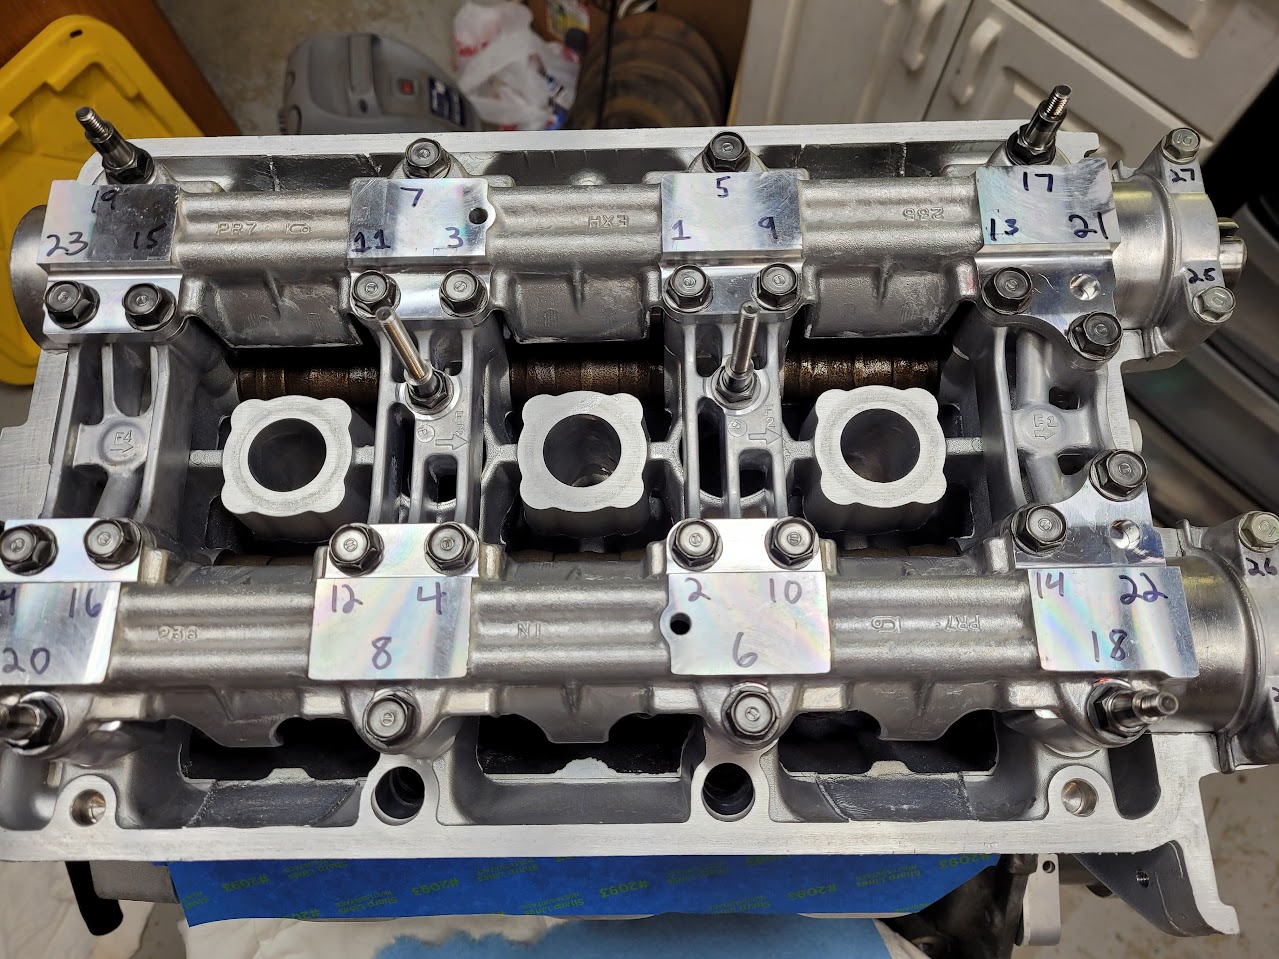
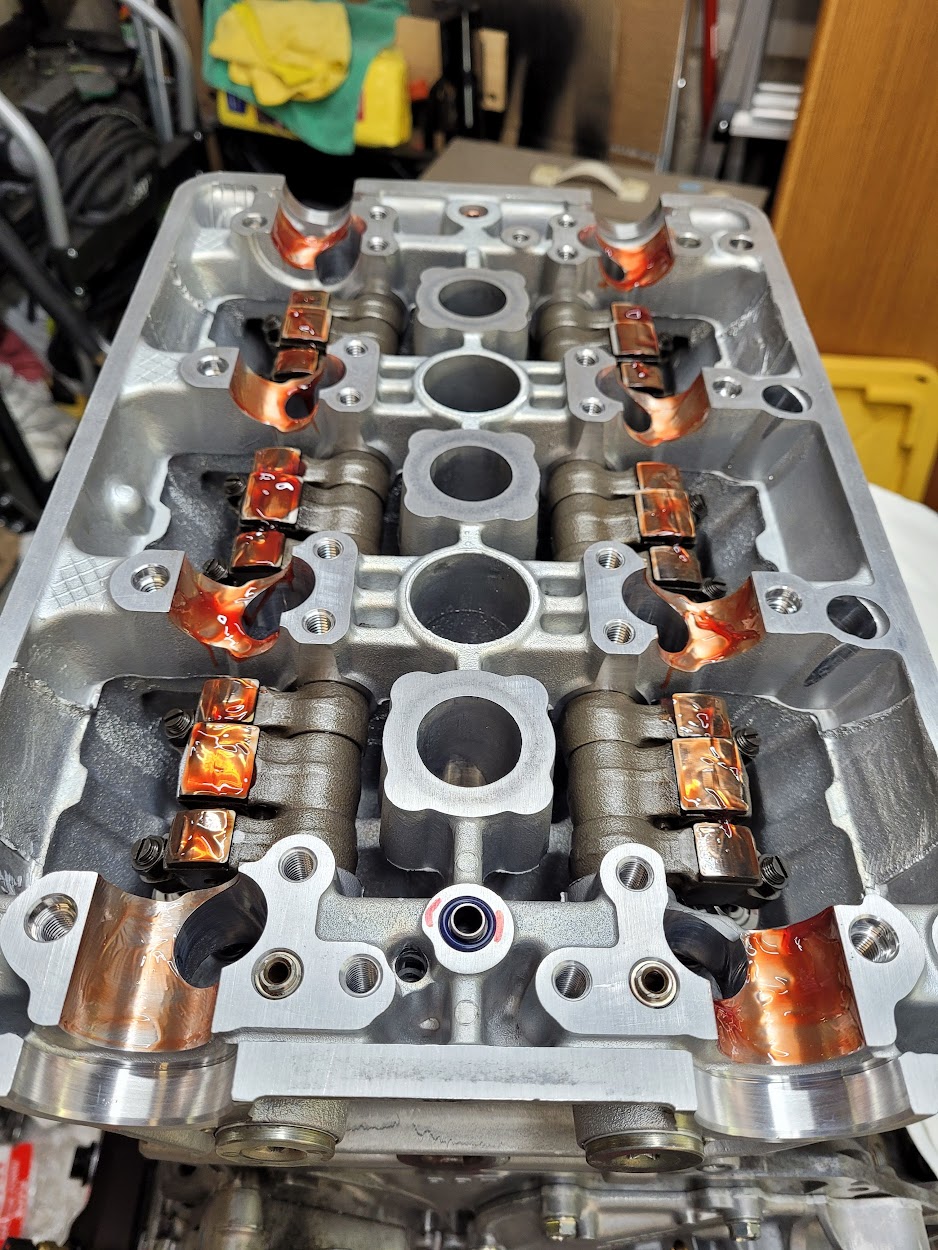
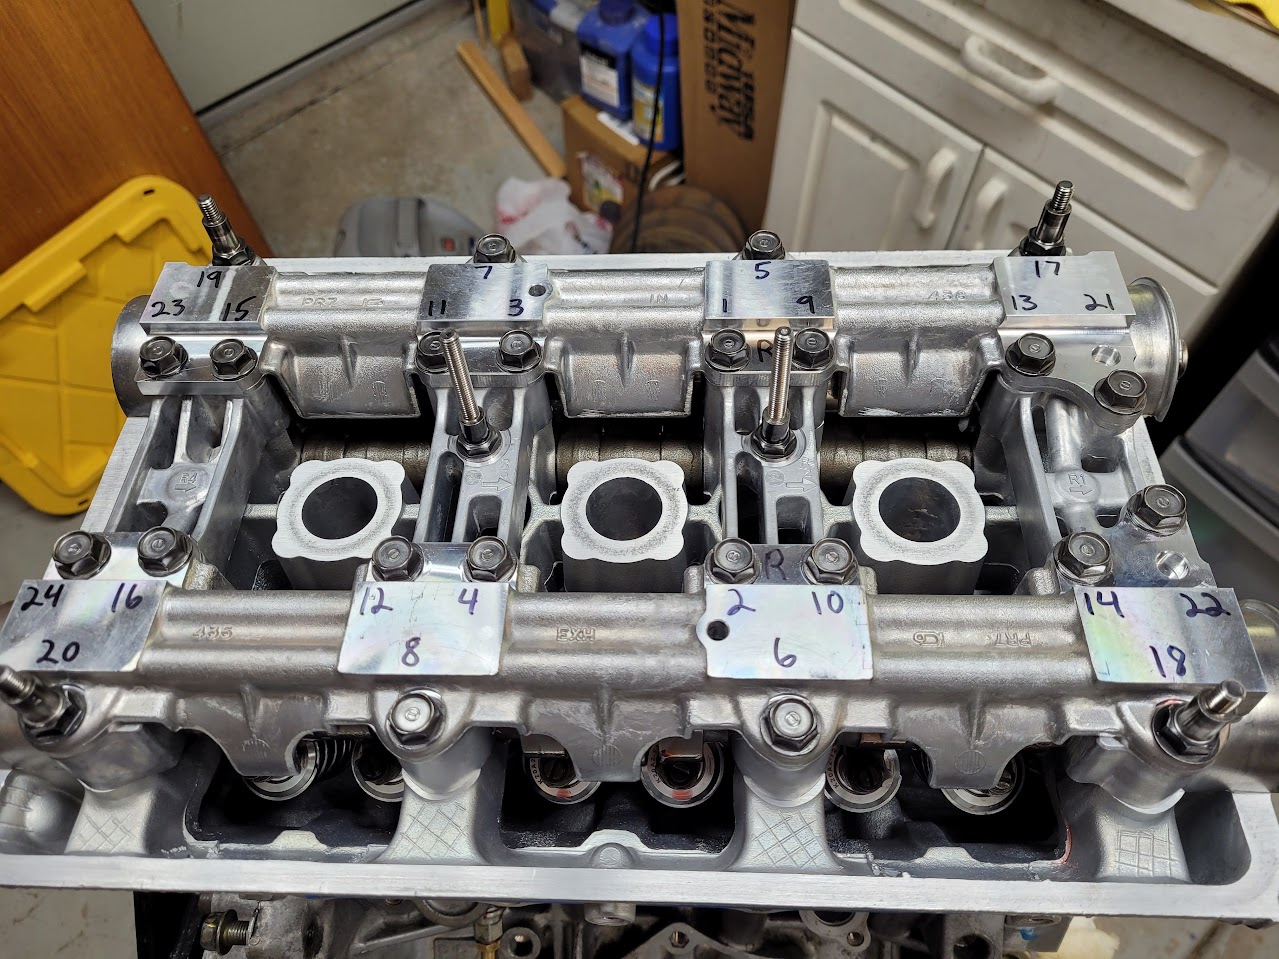
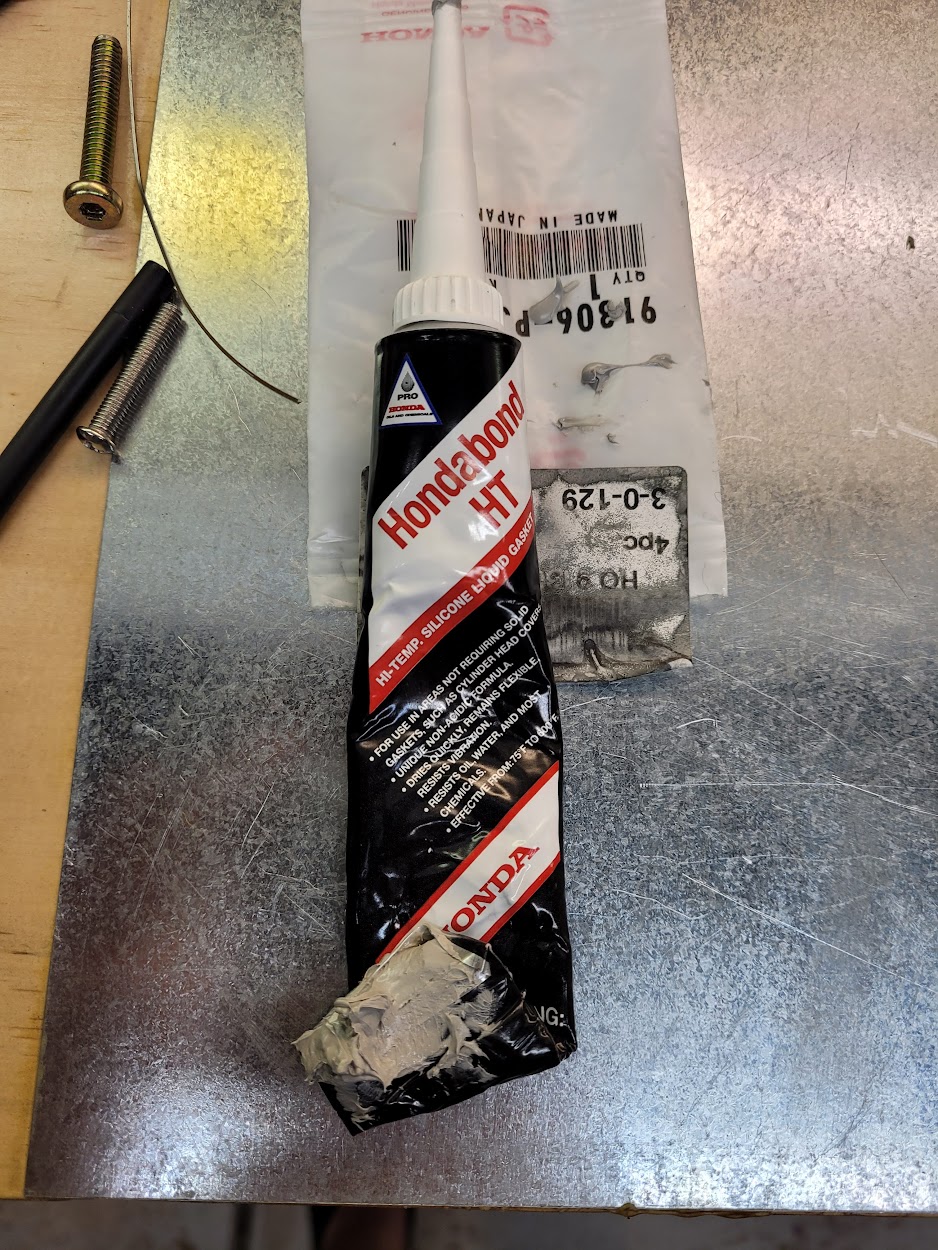
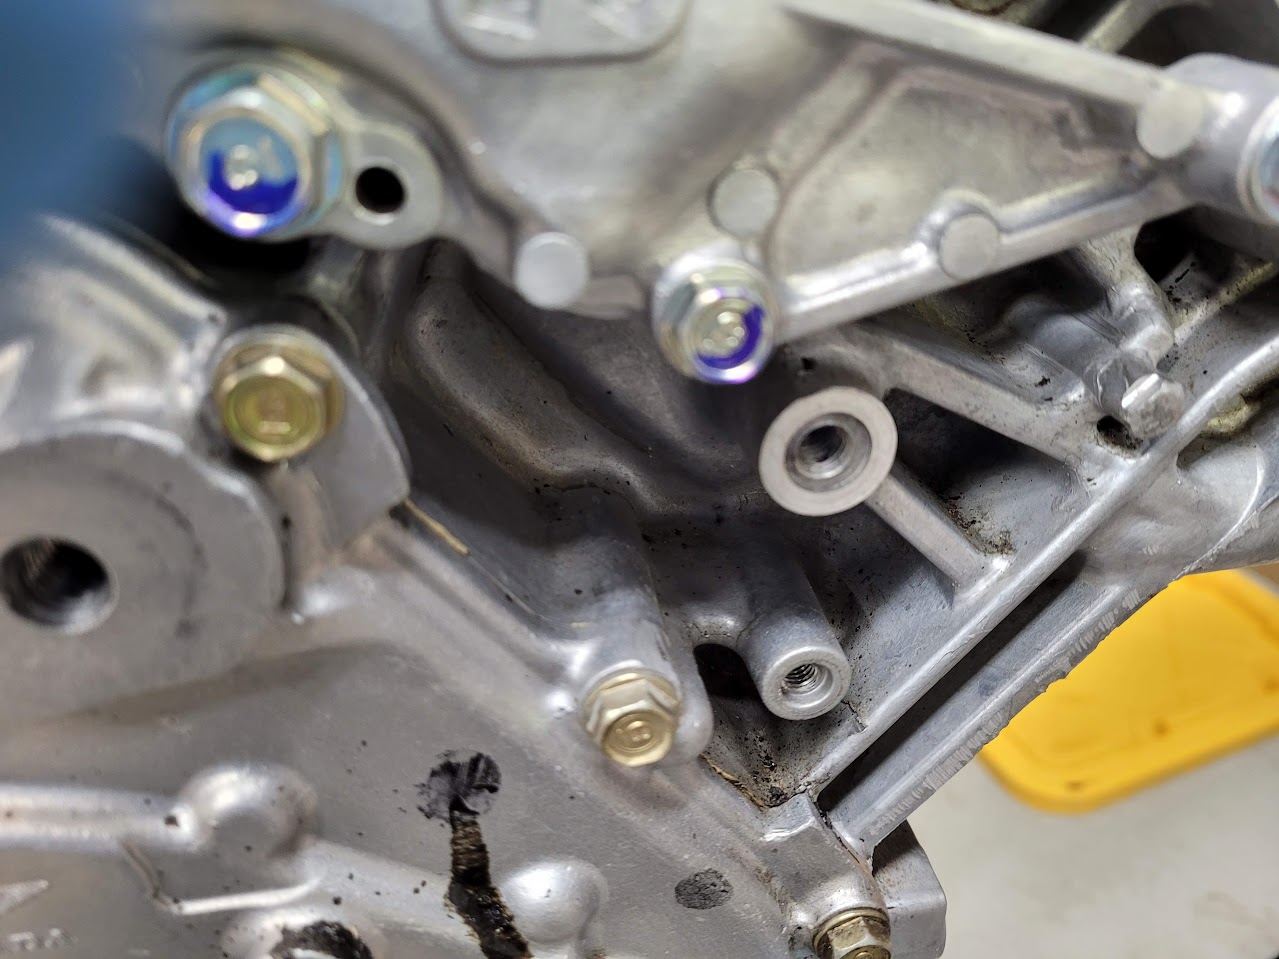
The cam caps in place. My first time using Hondabond (I always installed them dry, per LarryB). I will do a separate post in the DIY section explaining my reasoning/method.

AM-JKLUHdk3OW9H0dNnYHHudhaJ8pqSjoD0iGlLaPvMHwBp5hNX8VxnrjshV5fWjMDqx06qJcETDlRsHHoOWl2z1JhNR5K_zI_XATNrRSDCH5r5TGPL59cLcSEW6Y-KQmdUi6ng3uTm62SX9By8VFb5OsQM4=w938-h1250-no


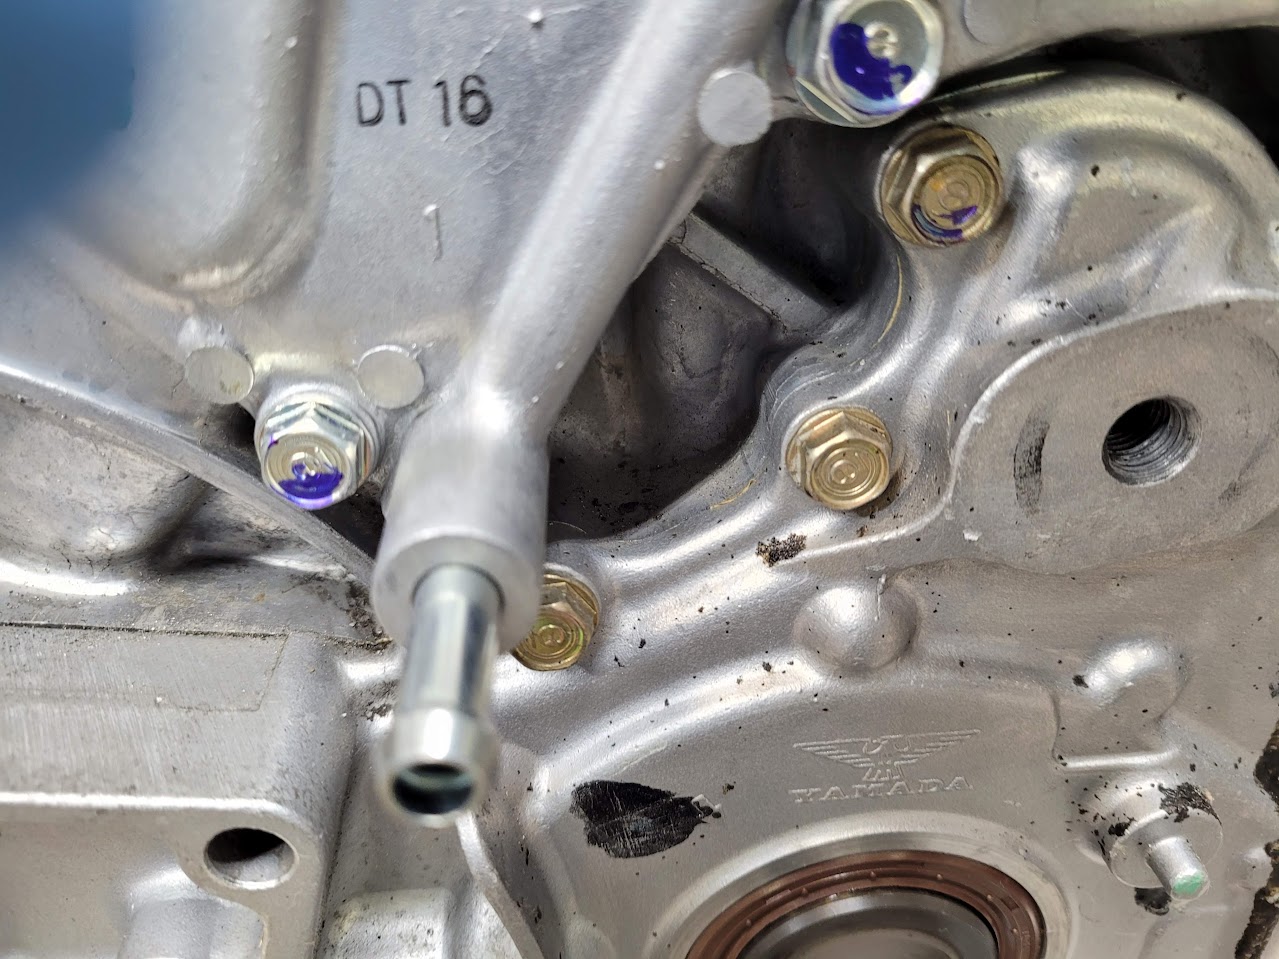
No time for pics with the Hondabond drying. Cam holders torqued down to the spec.

AM-JKLUinXFfEqk4FF4Sdvpp_Qec2562gWVuMg6VcR-AOCpCM41Yio7No-2J-9JKeHck-ngAMBXg2B4Dd64zSUn2TPz5feidJlTvfhV8jQ27FJAGVp7EFgK57HdJ6H66xyyv4izBifAGqSgV9_j5heke0Gle=w1279-h960-no


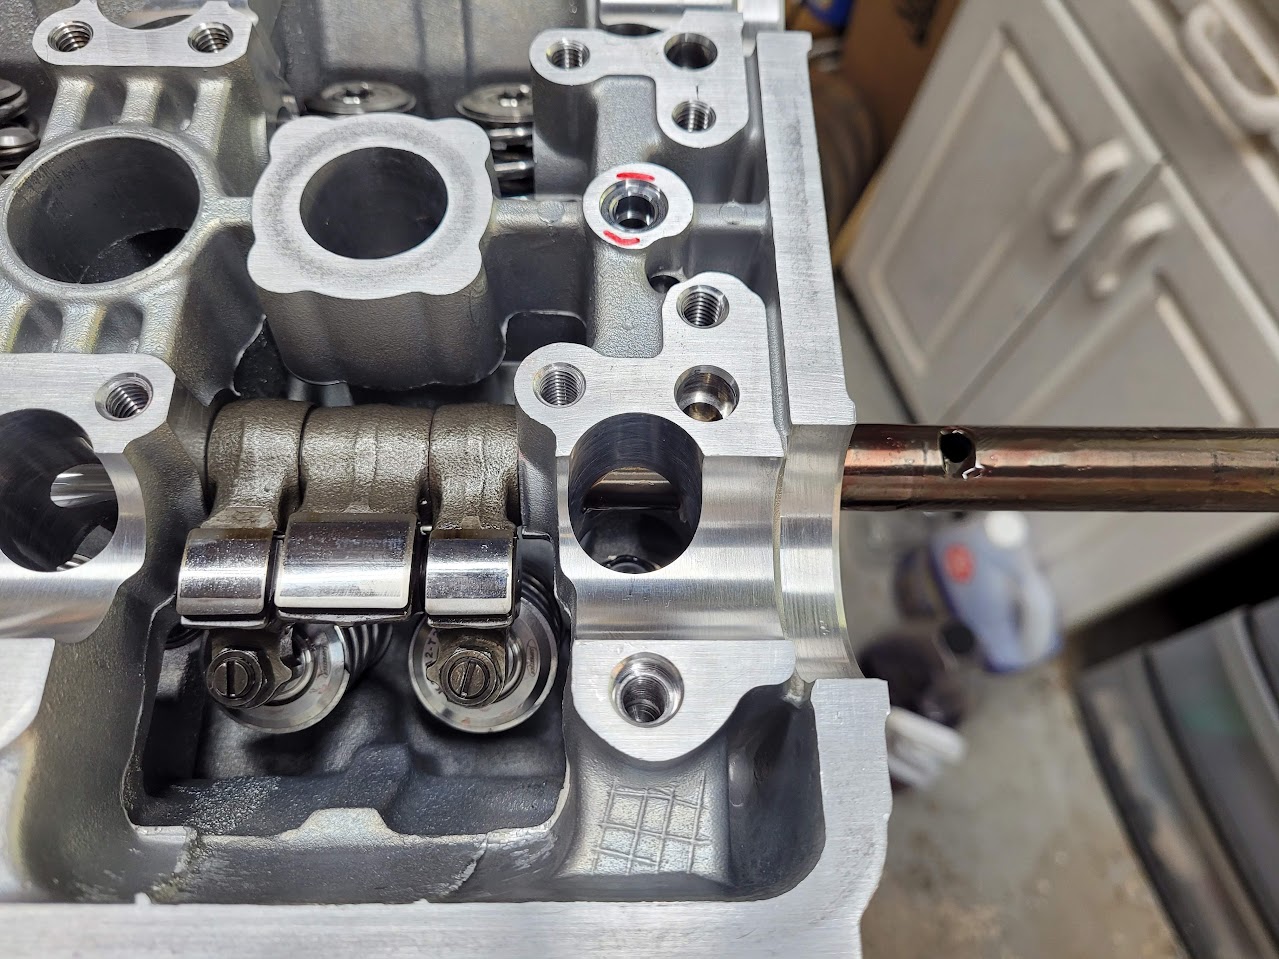
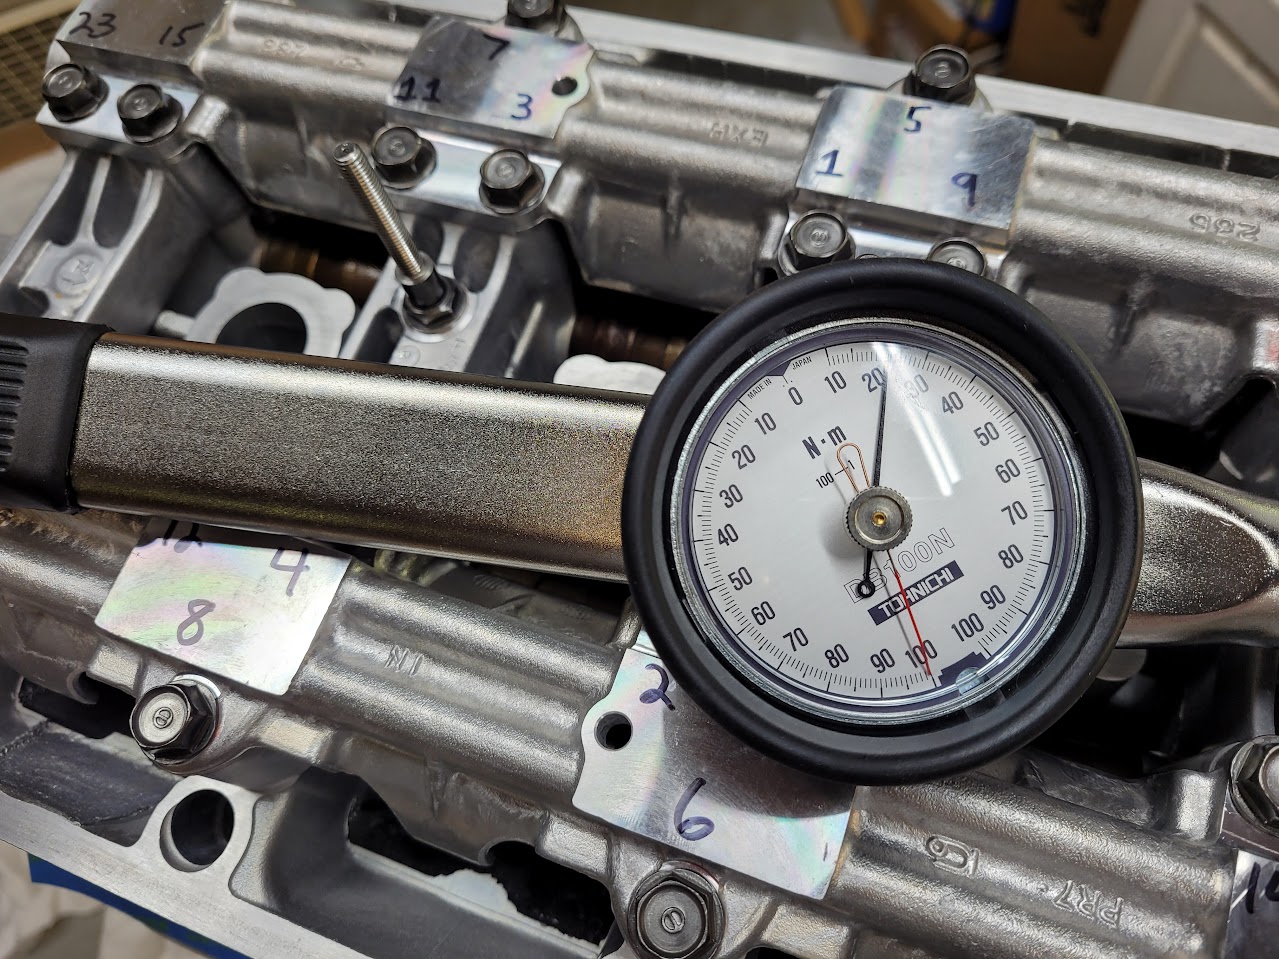
The Tohnichi high-accuracy wrench comes in handy here. Very important to get it even, due to the design of the cam journals. You can see it set to 22 Nm.

AM-JKLWLsgGz_6_6C0Qoq0s49VfhisKu11hmukkW1gFVX2q0IZzhXsy7WFK3W4qYwHHX4aoN47yhpH01SMfinZXWePIdC0v3hf3aKI6Z0UNEKeg3Hcg_aN-2w98adjnTOVQfto0-EgRCdKUMjsxzp6Er_Ds9=w1279-h960-no


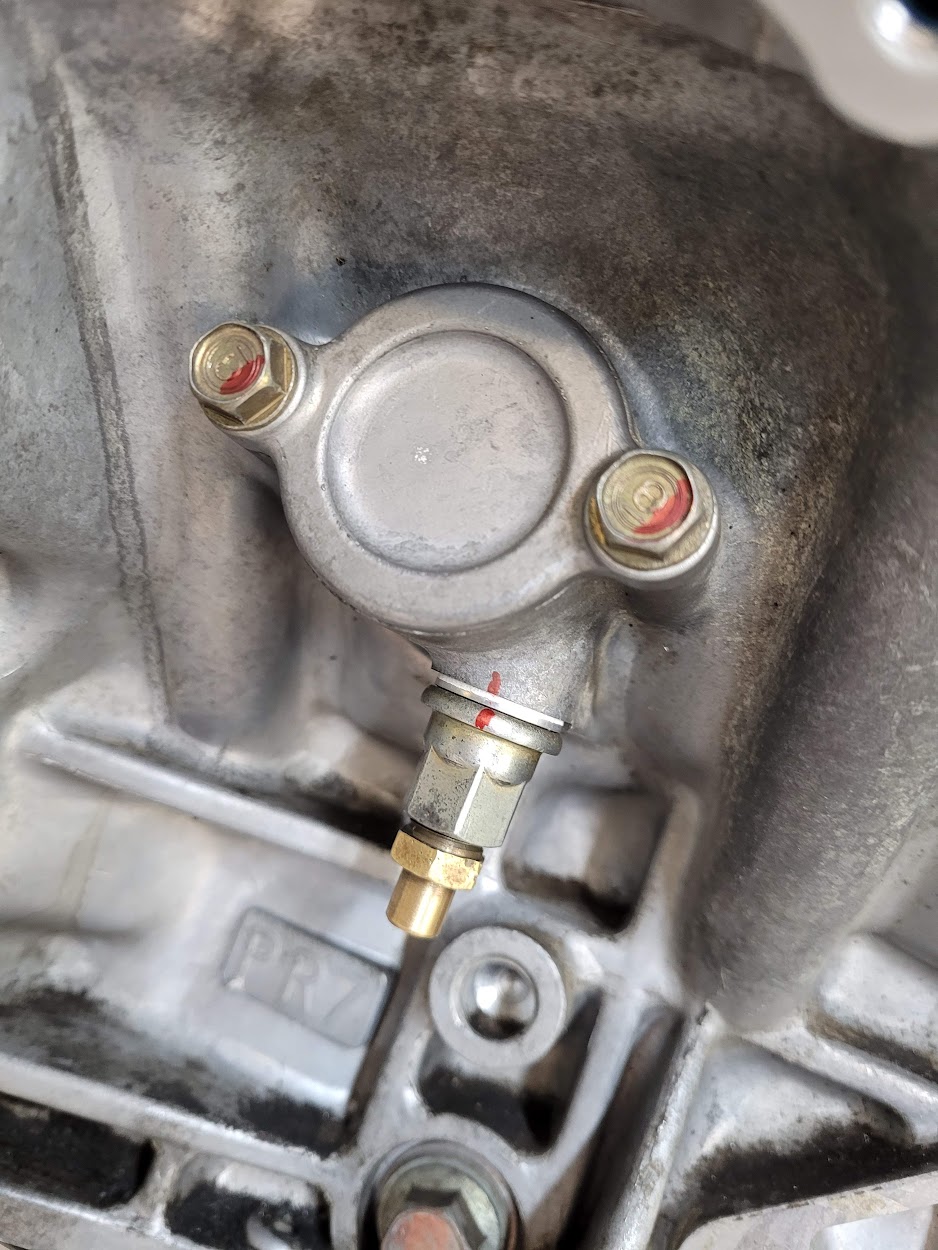
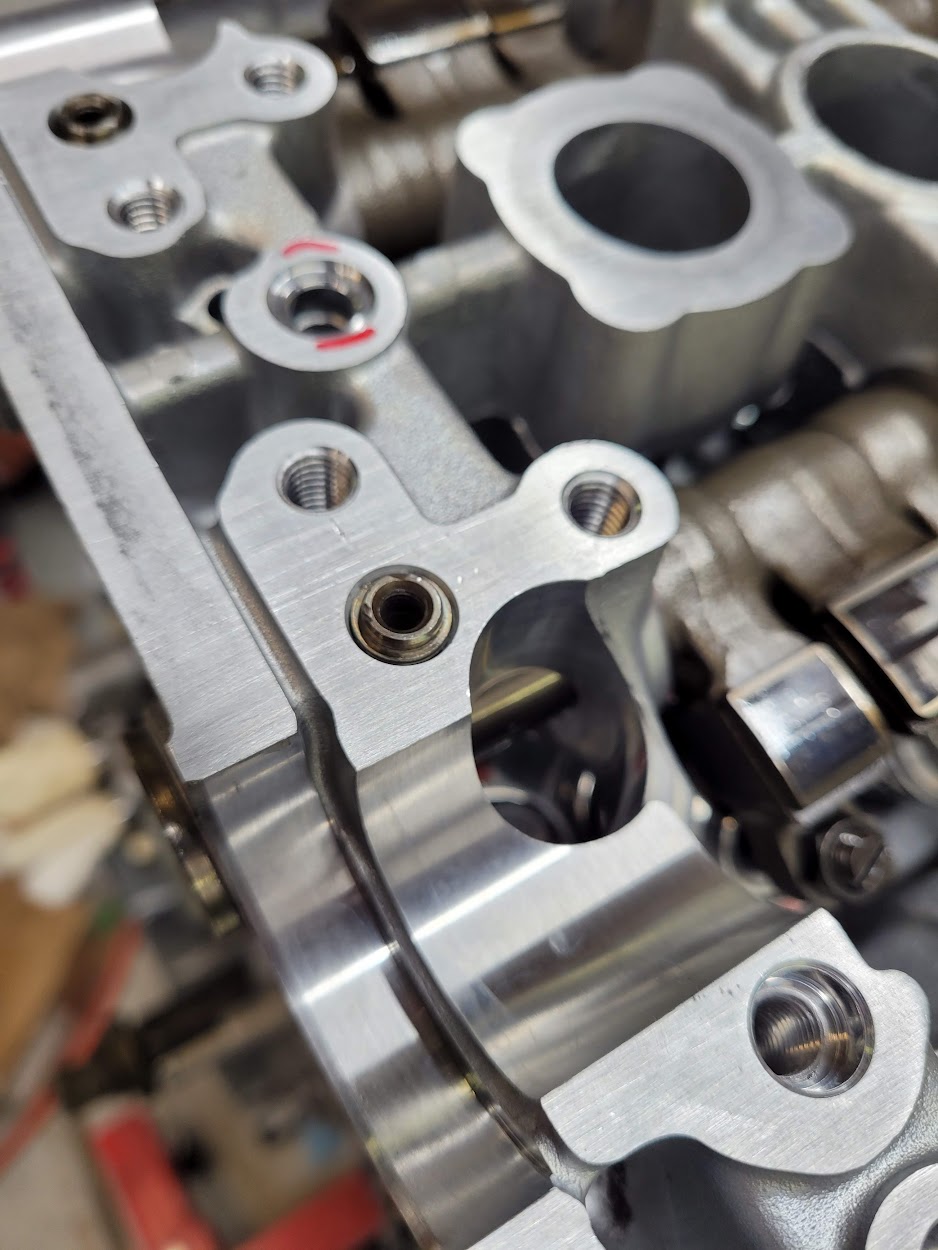
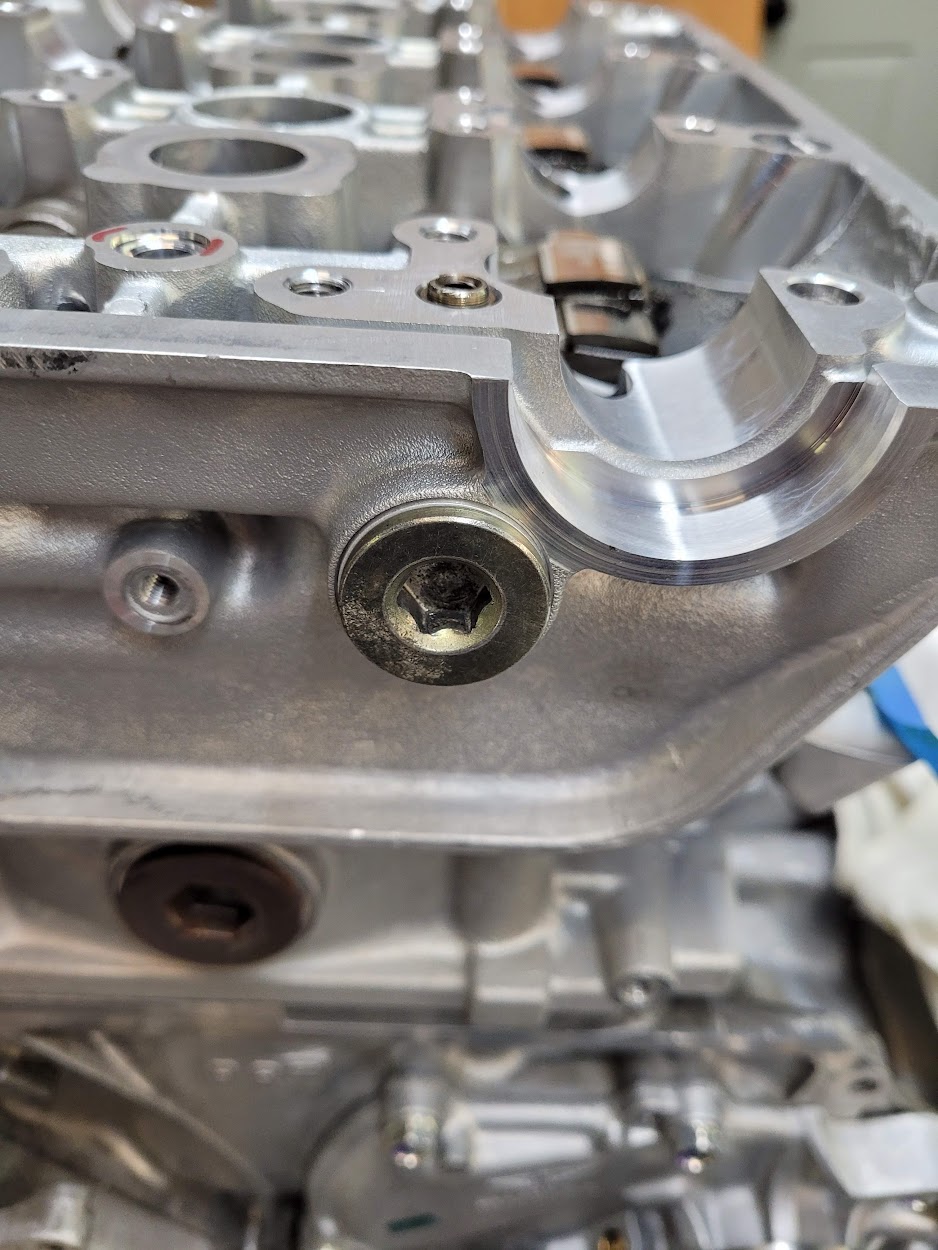
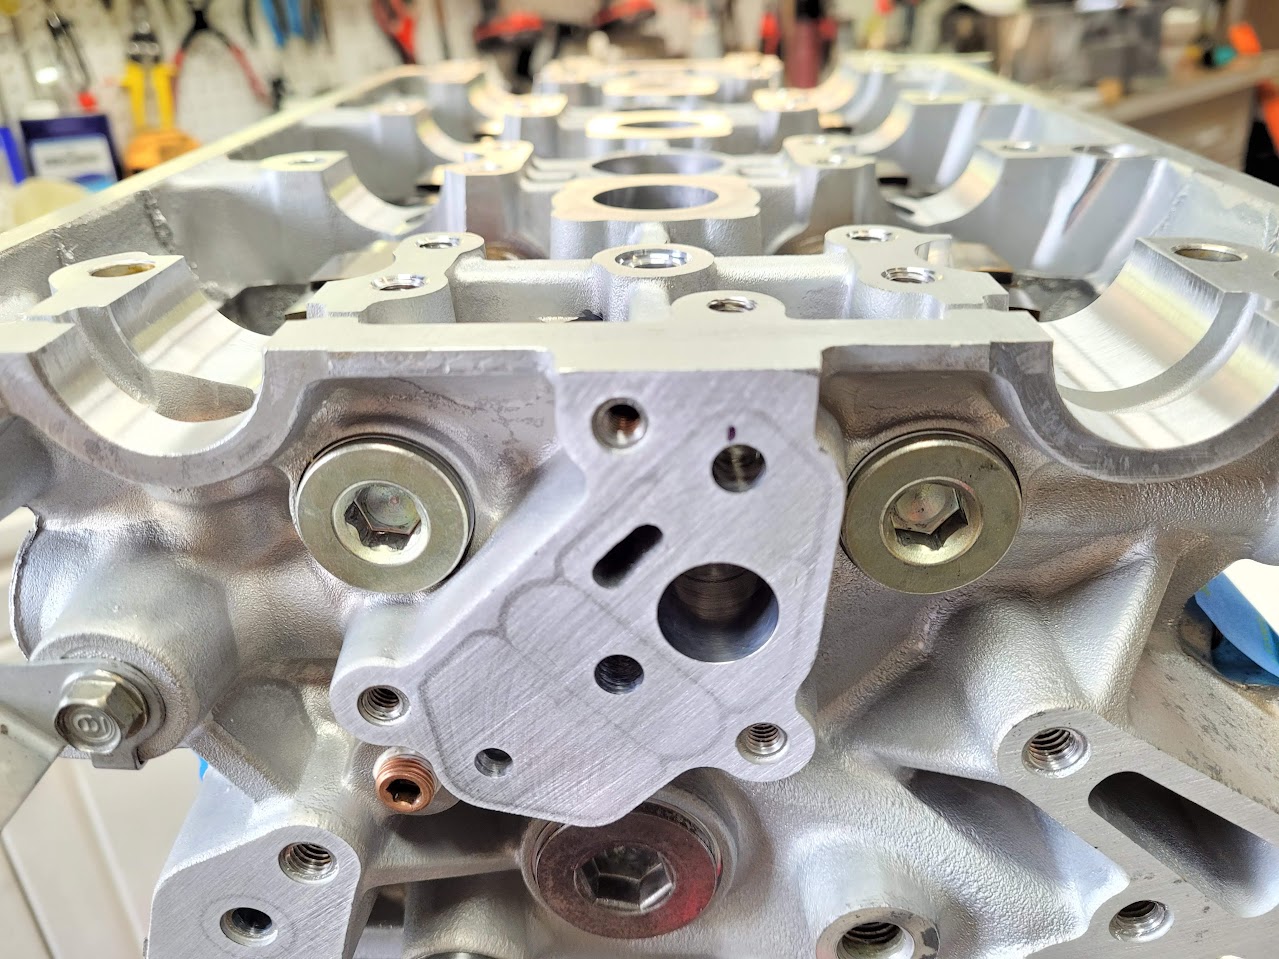
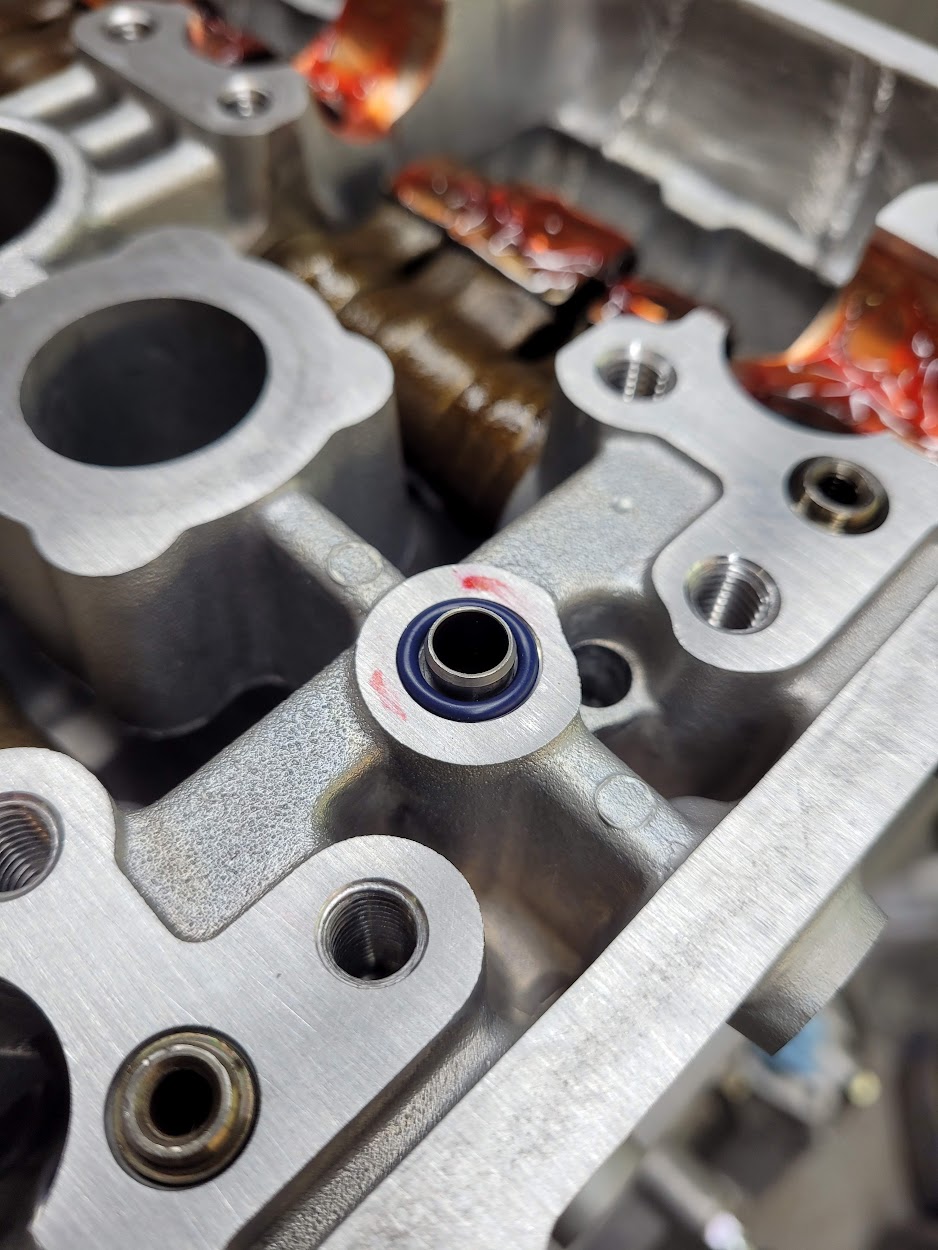
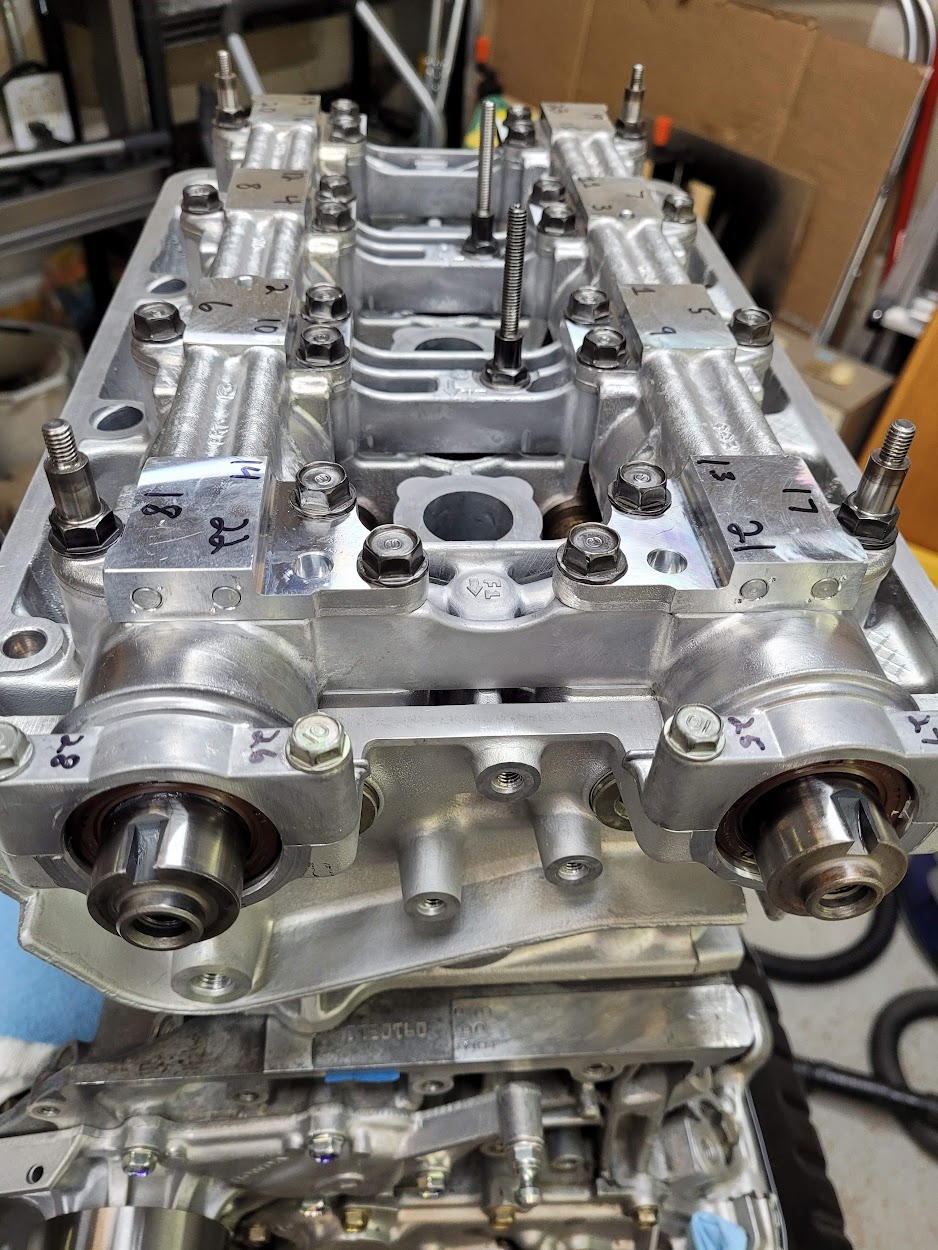
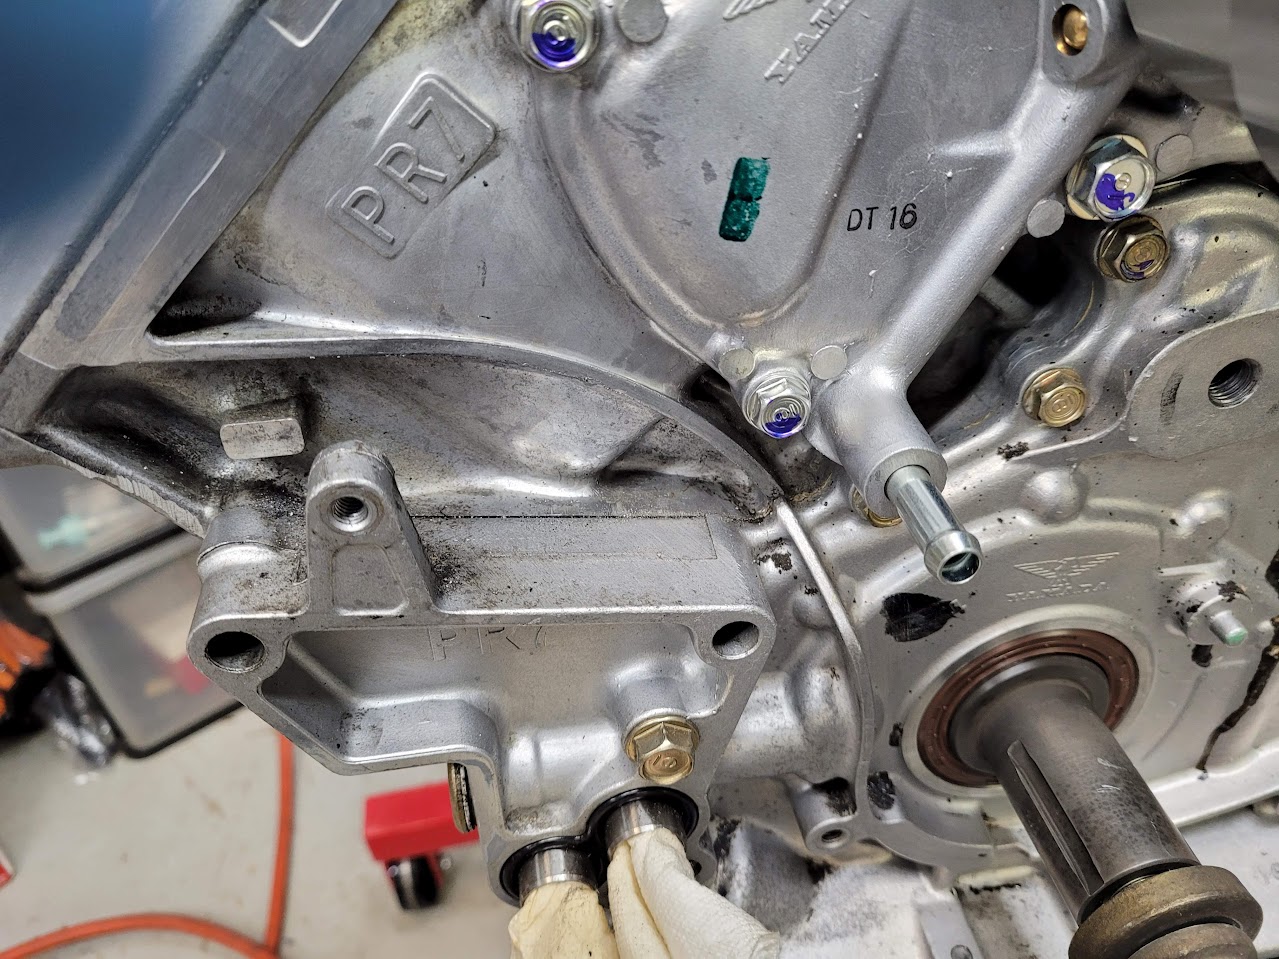
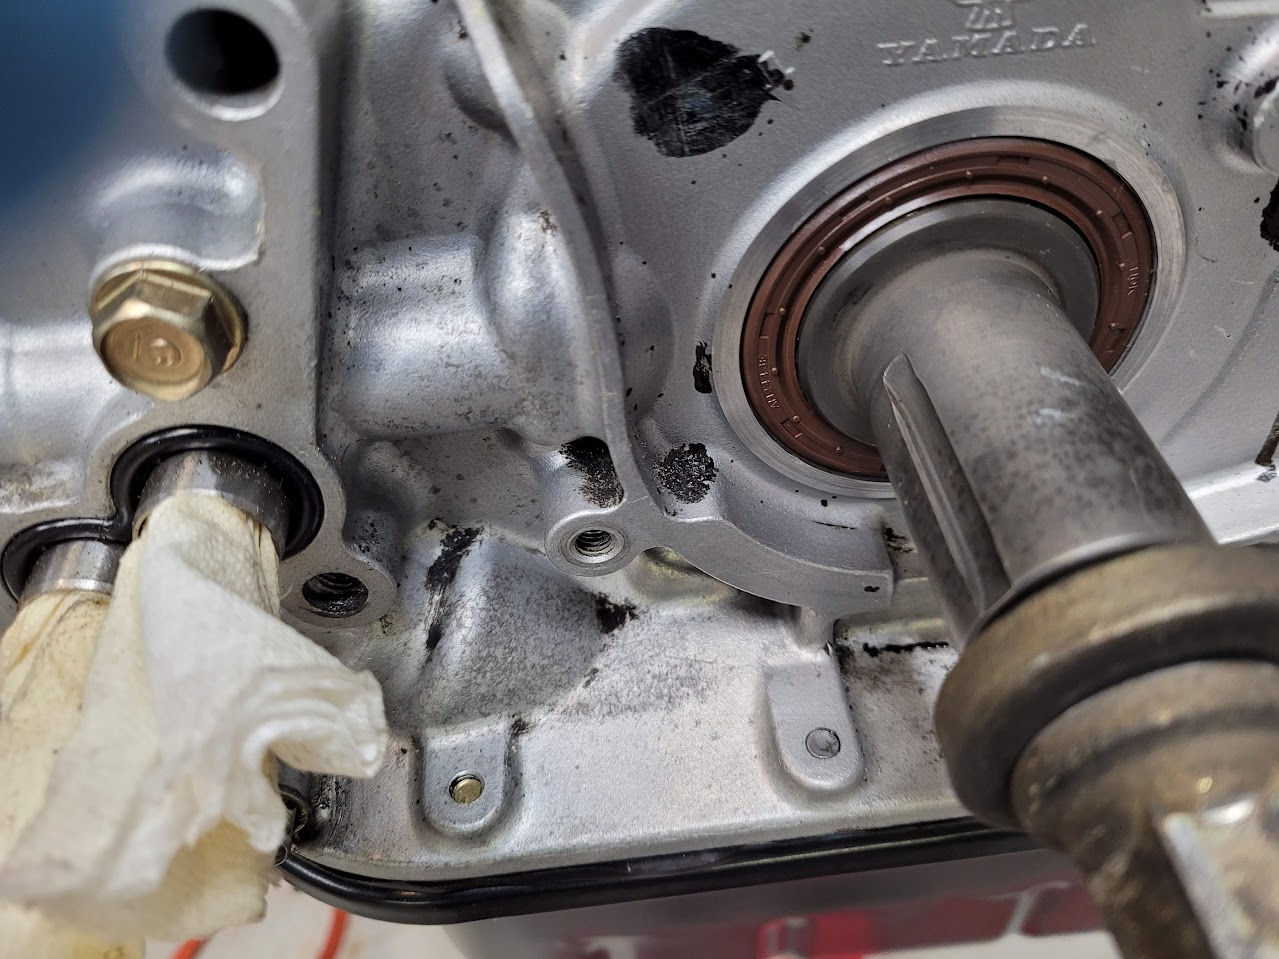
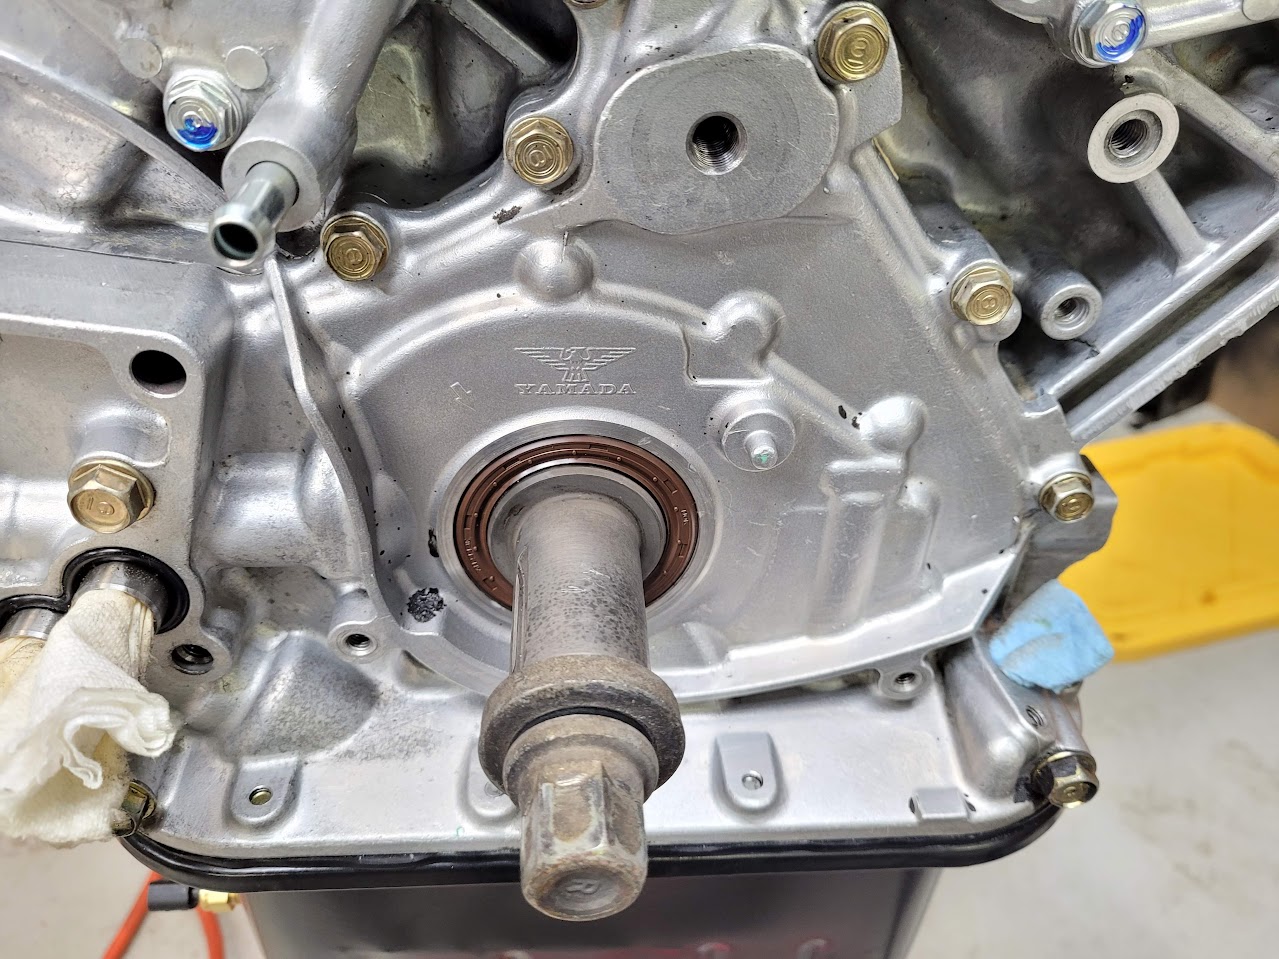
Cam seals in place. I found the collar from the transmission mainshaft makes an excellent driver. I almost got these cams into #1 TDC position...not bad.

AM-JKLVy-j5nGNmzRbQt0CrQ7YDlPDBi30pvU5jBKrK6RYhP1lLxzpgrEO2MKhI2g0b2pd1pfyti_TVDxiipMsKglaCFPSa3x6Dm7E24YW4nv5ABfdwXa7a471aUvEZSpfzk8yglRsSMqqVISn62GjtGSMvE=w938-h1250-no


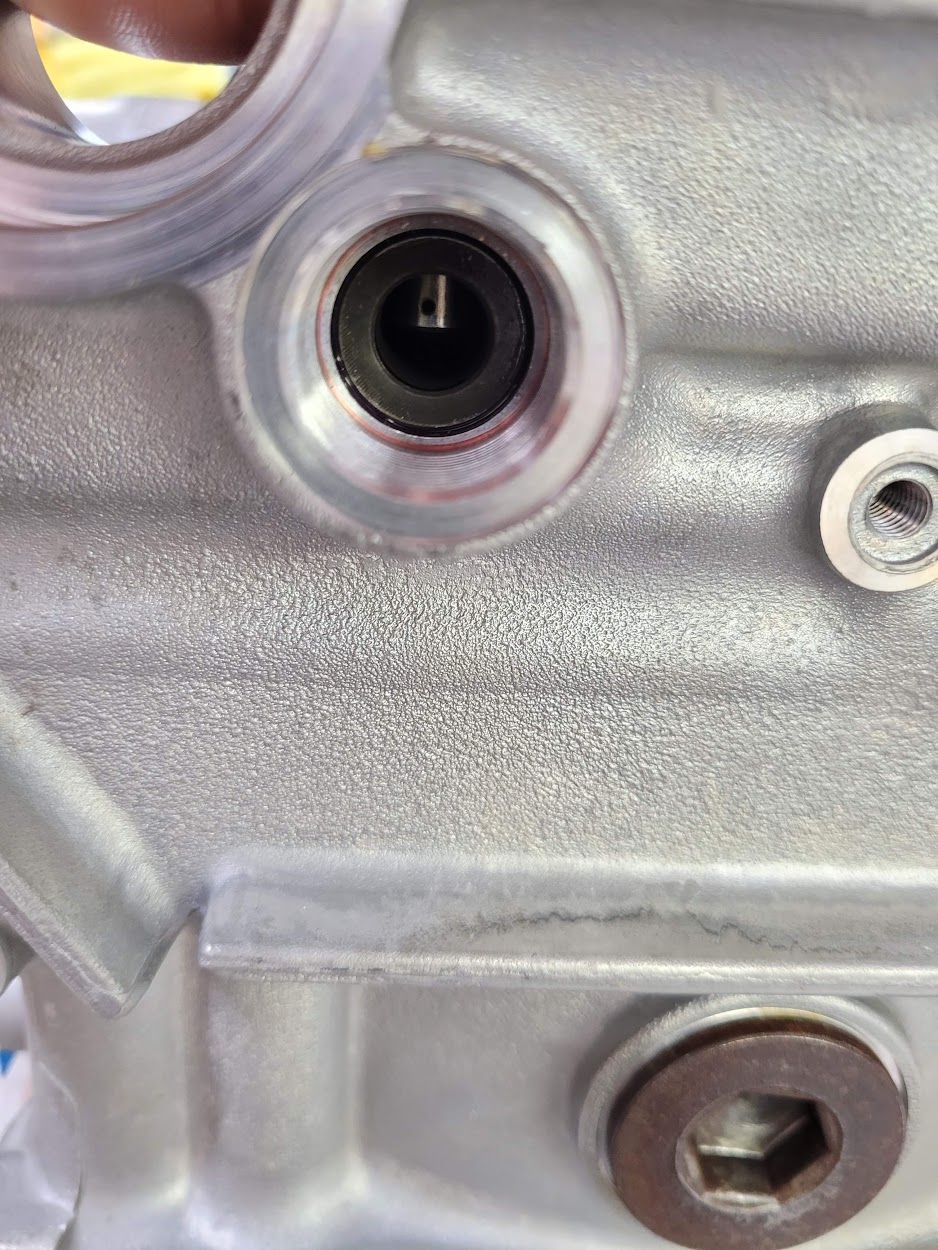
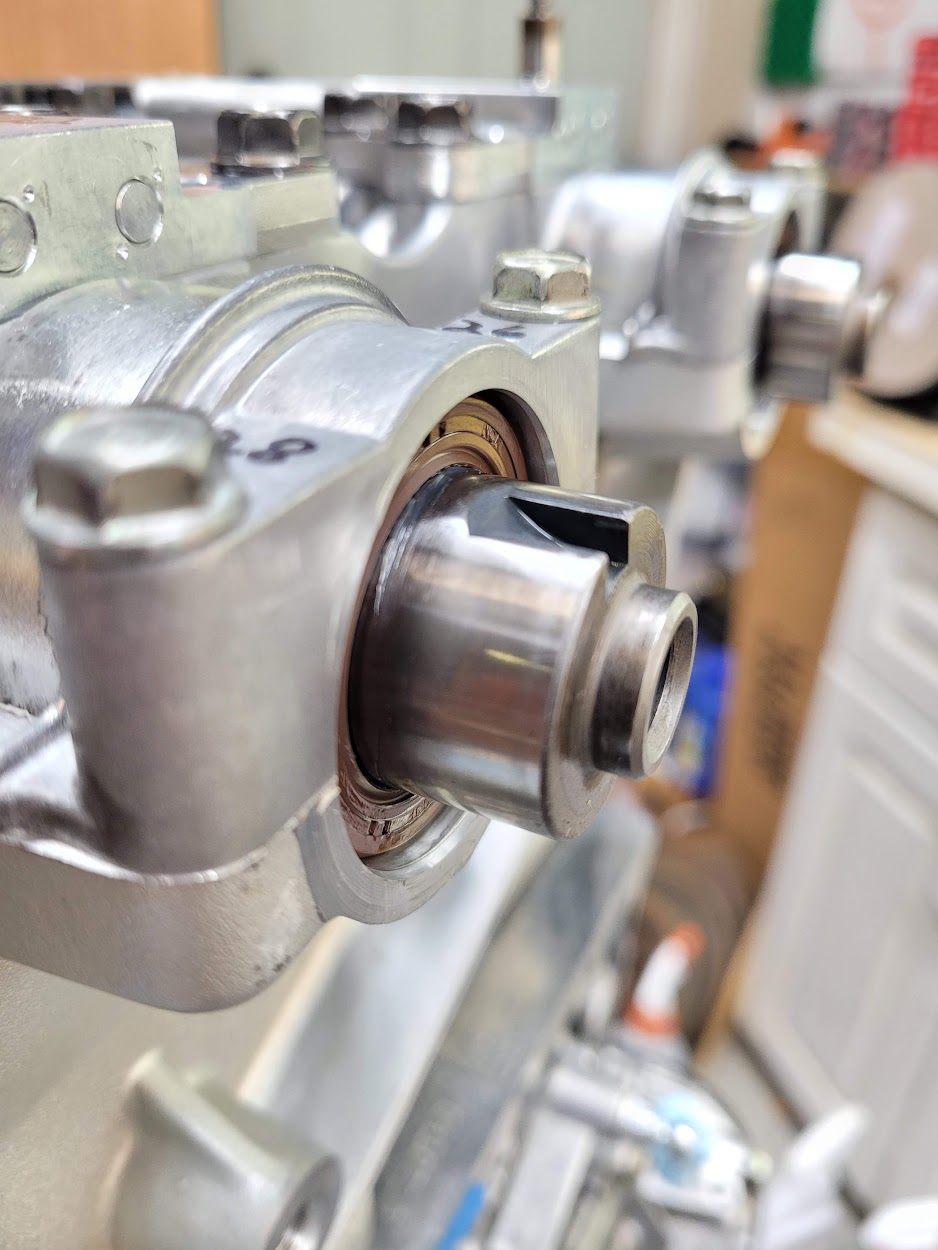
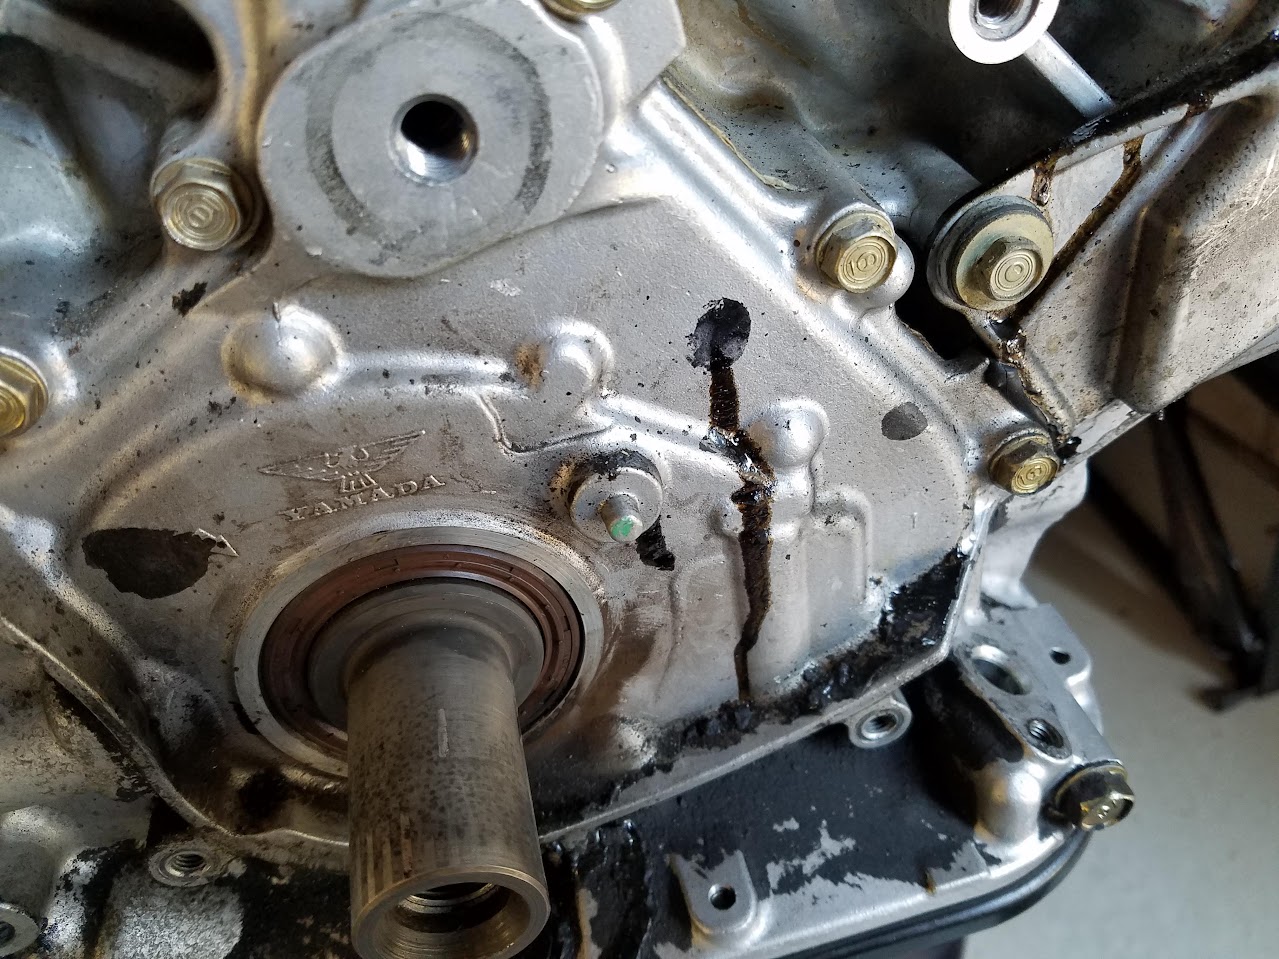
Photo check of the cam seals. Need to make sure it is evenly and fully seated, or it will leak.

AM-JKLXWktgwR6Ts0KxKoWx6ugKmtxJbk4wieR_FpzzvPi1qQ_Qws1-vft8--2i8tMLNxq_kHhbMDQycFJJ0NjBjG_STMfkDKa2MFXmxeLWeY0NXgkKMLe6RhvDTr2R2ygdi9J3ikt0JSAXMI1jIEa-EsvWZ=w938-h1250-no
 
Last edited:
Engine Refresh 48

Camshafts - Rear Head

More of the same on the rear head. The relevant parts:

AM-JKLWt6VJ9iYUcbof2SgKCH7SxaesqbtfKlhTYH62xtqea0c82NxmmBVr_oeZZq3B_GjUZBm5jXFn5T3LGnps2AgHwNus6AiDfCEgPdLqNVCp9g2tjTPw1s_PyKPYnUZsJQnix8AwKMbYbm5lSMs-VC3OU=w1279-h960-no


Cam holders prepared with the Bearing Guard.

AM-JKLWWAnb_MR6JBmYYhSzoy8vh0ZQTDtJAcKsCb519NczGcHlP7H6_KIJ2E8HPah8QdPLphyQJrlPCkKOQAczTU3Z8ZUAX6JzGH2CV5N_VM4DGiHPIPYzduvkon8b-Qq4FhXTwMDp3HRXxW9F1C1nAp2gL=w1279-h960-no


Camshafts coated with Bearing Guard and Mobil 1 0W40 at the nose. If I ever do this as a service for other owners, I might make a tool for holding the cams while I apply the lubricant.

AM-JKLWky6HWCGZCIRZY0Le1c_dEu2RQ2EFIFDwzE6KQDMJZjnqHuW15fPmktC8dKRRHviYPSHz6U6xniVQTFBz4t-JjXegJJw2dO-R4zpfS1vVZYMZUynBBrd0KY6bytjIYEnLAXbr3KPyEjdcIk_Y0Ve_v=w938-h1250-no


Journal surfaces and rockers prepared.

AM-JKLVxIHopTGQ3vH1Gx0Se8P0HHO0yXiYgG2fX_I4wz_B4KVk6PwZL-7PKpb6raABVxamVlQbGGsPKtRvH_IzzIpSBEw392py-6K7tUHwvcSa85d_go2Td_POAN3oXqwNyRMIe1zikF7yhMb6JEpl7x2Bn=w938-h1250-no


Cam holders torqued to the spec. One note- I was not happy with bolt #17. It is barely holding 22 Nm and I think the integrated nut may be slipping on the bolt. I have another parts order I'm putting together, so I will replace it to be safe. Otherwise, no issues.

AM-JKLWw2FywzBeZHm_lqKU_qDnkDQwdTPma77M52Me_wgYcxZ44igUZe_gDRk_LqAx2YMgqpPX9s64_3sb5LdBGYbvpGn1aqHpD5E5Syu4778sfWK91eSieQNo55w9p0x2mzMrzlILJ_gZDhas9BlCpstUJ=w1279-h960-no


Unfortunately, could not get these cams closer to #1 TDC.

AM-JKLWw2FywzBeZHm_lqKU_qDnkDQwdTPma77M52Me_wgYcxZ44igUZe_gDRk_LqAx2YMgqpPX9s64_3sb5LdBGYbvpGn1aqHpD5E5Syu4778sfWK91eSieQNo55w9p0x2mzMrzlILJ_gZDhas9BlCpstUJ=w1279-h960-no


Time to move to assembling the timing belt components. First will be a final cleaning of the surfaces and bolt holes on the engine block.
 
Last edited:
General

My tube of Hondabond HT exploded! Of course, this happened right as I was in the middle of the very time-constrained, high-pressure camshaft installation. Never easy.

AM-JKLX2EsK7XhBeIs-ssUxsFJEHSyWf_tz2BpO1vZTki7mxKMY51qWoYOYq_xBFWDdHL6NXuRg51zarcsAV1TxgHZ-W2v6sJxd7Vq3BZi8Lhs_yveNM9AO6tjFHCvCIlddelEzDj96C1h0Kt-adqvqIDImz=w938-h1250-no
 
Last edited:
Engine Refresh 49

Crank Position Sensor, Timing Belt Prep, etc.

Not much time for this session, so I could only do a final level clean on the timing belt area of the engine block. The NSX timing belt is one of the most protected on any production car. Due to the very late addition of VTEC, 8,000 rpm redline, etc., Honda went overkill on the safety margin for the engine in order to meet the customer expectation of Honda reliability. The main killer of timing belts is contamination of the belt from oil, water and debris (they will abrade/degrade the teeth on the belt so that it eventually slips), so the NSX has a nearly hermetically sealed timing belt cavity. On this NSX, poor prior service resulted in a highly contaminated area- many of the cover gaskets were missing, all of the rubber sealing grommets (alternator, water pump, tensioner bolt, etc.) were missing, and so on. Thus, before replacing the belt it is very important to take some time to remove as much contamination as possible before sealing up the cavity again.

As a note, the crank position sensor potting runoff isn't really necessary to remove- it is baked onto the surface and will not generally disturb the belt. Still, for the look, I spent a little time with some brake cleaner and removed most of it.

Also, I replaced the oil pump/crankshaft seal.

The cleaning stages.

Initial State

AM-JKLUWZx8B3vjhGzhYho6vlzPieAdXgUkVzhGTy8bJGA-Z8D9UoruueXR-t28-9hTM7IflgvHNEoIH-x9mImuKBp9OTg5AdD3IFCucUGxzR5S9sj_UsIocWaAurvKF6HQ6D30O4_21Ff_K54XEBCa0rhoU=w1279-h960-no

AM-JKLXkzCBZSA28HCDASAcRBAgiPyKwvNTRM_ugY7ybaFU_hWneLdFmoWBz7W44ybv2lXMortrZ5GeK7N_UmiXfHXUXE7jXV-nR7iy-NSb9LnyC-lZbQ5artPoNQofj4bSkc4WRPyLYqZJriVqhLafG0hSX=w1279-h960-no

AM-JKLXImvQqFkzYp51tZM1oQ1aznaCmqXDd2T6Cz_Voygqyo5YL07nzd6xsJsMa68OhRv6iErAepwAQW8MipdMGv7kCwKnCEQSa1CtdtBuw8kPVIpCY7wX-GU8TZZbd7prFf-99iJa64vKNfbXWIe4wseHH=w1279-h960-no


Mid-Level Clean

AM-JKLXYea29WDEVwOApegkcFvejM2fkycCbH2lyAZSrBGjTWwm9btn4DuUeEHjLjD_36oLrVUqitmvUZwolxPGfMu2dMtG9hJym3XFi9T2F1WgQGrG-fIdRNd4U2v1b8HBMQljiaK5ay5zBW52CGSpYLSPZ=w1279-h960-no

AM-JKLW3elNOvvj85yrpvRO8ZcHw61EX5jSDamAR6kfEkcYETJJocAjKOJ11JTWUfrDd22IkGXqayDCKqFqJNXH3wRiAWYvWqHzd1a0J9sxRrLHn_sd2N3ALubtyl8yXU4lYXrv8dVP1hQ0K2pnRxNKWCft3=w1279-h960-no

AM-JKLUwfrFljKNjmV5ZAk3d5xYffq4KYZ3jbFal34Tu09VPDeM8hD0x3Jey5w0fG1ZdyEs_Lo17Cpgkp6ns1C_sLODQf6dKAORktsXrNysZ4n2mCERL0jYmX8NPirJiQIFwE94C6vzEgjwzAXYPfCmBWmzr=w1279-h960-no

AM-JKLVnHgCeTmvt2GJnLkrPGxAZxOwHOANb_F9dUUQioqkusTEA4peC5hrmrPLjY8BlDiPwEJE8EeeG5EW5Rakb9cZCp-sChi6iDkt9GGNQQZnnPiHhzqZKfnv18_hVEMVXDBwaRQY1hqjpLZZUWdCb8buV=w1279-h960-no


Final Stage Clean - Ready for Timing Belt

AM-JKLUtK29Gt6Kp9NeE0ge9DSvGyQBttFWkF_WJZH6jJmxsVFWjWvDl9pcxby3SvugWiN1i5cWQBU-g0RgFGnNaVQbomhsZ3bxK-zwUDCpkInoNi592M5RzfvaEI6LcWle0S5R42dYAqutanCrNCLa6a0LO=w1279-h960-no

AM-JKLXnUY6PGwgVIBkrrsD58kbVq4Me5z4QMXZb085SNvglUDqv4W_VpAUcpBYX558h1YjwtVuPnRP0ddLnbrHDYAsr14_tJYfJfan6ohPV3GlDsCiEU_1QRmN8csqvScrfZAewMqkv26HS4nXo6ZQ9UlrR=w1279-h960-no

AM-JKLVeKGvbDEDtz4YCNPx420ROquYcBZLMGgN7kUU2psbnAMnHDVbu5XTGf_GYVCmvqxWP3UxAOKx90BdtdJ1naqrdxXqazFdQmxtc5C0S1oVDyO2UzxispTWOEh1pDmGhjmbVqkGvagO1JBF2xkEAMAAB=w1279-h960-no

AM-JKLXMjzZuWrdMJ4plUtMbj-yNUNEiIQsc2D_vnWisFlNQpTnNecx_0zKAIgB5zTGq8bK6aLOwR0o16QTRAc8L-7E_HA03BsoAaaDJq6r2Q9WSW9fBtmodwSWGv_5nK0hMau6C6pbStCWMhX_IcxDg45lf=w1279-h960-no
 
Last edited:
Engine Refresh 50

Crank Position Sensor

Not much time left, so got the crank position sensor mounted since it was a quick task. Next is to clean and prep the mid-plates with new gaskets and prepare for the timing belt installation.

The old sensor. It was working fine, but after 137,000 miles and in this state, it is best to replace it. The next engine refresh for this NSX will be in 2031...

AM-JKLUQc79yMNQ8B20Si127p5NSzHYVI4049TnhnxCOCsFRa1SsnXF3qHmBNdKiFGKgRwOdwd3aBdebQezqQ3tYZJqbMw4tW6oVIesBrmd8_qq2su-dAmNBWavtVz8fdIptTFRzydvgp2erjloJmxWicLHR=w1279-h960-no


The new sensor. Note the part number is -J22, as the Acura part -A03 is discontinued. I remember Kaz saying something about the newer sensors having stronger potting that is not as likely to melt, but don't know if J22 is that part.

AM-JKLXkAgV_322cr32MFjJjMoh_HRmcHJtzY-wJ4IiQRiGQYkrs-AD0ETrCYDQhygunC7pwZssAV4si0SavUr8UN-unPPGHlNXU6wmE7MYMteJ-fXJftjzY8liKfkQbggJX_kka8rc2U9dLpy3F3Kh01rDv=w1279-h960-no

AM-JKLXzJE-RY0ktrQkj7m0mI2R1HS9I8zhAXnEucORJt1epFSVlmK-uFx6gICdiiV2LVXwGfTjJUHt_Ni6I9VHNt9CP-sDkQX_P4MEmIWjCj-8ALq7d4w7eBEpgg1eNDzX0FzHolziwMt5Gj5Y-a27b-uUm=w1279-h960-no


Installed and torqued to the spec.

AM-JKLWLPe94gwb8FYvaRoiK7zfSRP3jyi6tWwA_v5I0Y4wwjgT7bXsOTQrpaj2ikYEVMWi0N7VChpCtAuLPu2ITzb_PE3IFc1xLxMOgK027g2kfXZ_R2LLiTakeALFC9je-RetsUaFXjU-JSZMXthj7ovfG=w1279-h960-no
 
Last edited:
Engine Refresh 51

Cam Gears, TB Cover, etc.

Broke out my "hot tank" again (laundry sink filled with very hot water and simple green HD) to clean the cam gears and metal back plates for the timing belt. Not many pictures due to the mess, but the back plates were quite dirty. Lots of oil and debris. The rubber washer inserts are hard like rocks- I will replace them.

Cleaned the cam gears to this level. All of the rust removed and a super-light coating of engine oil on the surface to help prevent future corrosion (but NOT on the gear teeth!)

AM-JKLUgE5sdarwrFDl4JNmnTp8Zr9x8r899a_MAfdchmdqhRddbG9G0JOaJY2IL9GappZu8doiDMpLr8TlnCGjlggeaAo6hovrCdoobBDODLTLYGUP9esKSrp_ykTNcZgqgQ2sBG5-TgGbkHWUBC3FIWNJV=w938-h1250-no


Thank you again to Tyler [MENTION=35590]Big McLargeHuge[/MENTION] for generously donating his used updated lower TB cover. I thought I bought the -305 water pump set (that contains a new cover) from ATR, but Christian just shipped me a water pump. I started to panic when I saw the cover was backordered as a separate piece, but Tyler came to the rescue. Once of the reasons I came back to the NSX is this community- great people. After a wash in the hot tank, the cover got soaked in 303 protectant overnight. I'll wipe this down tonight and address the surface rust on the dowels with some sandpaper. I purchased new alternator and water pump grommets.

AM-JKLU7U8V0AEz0PHhESiHDYzXufnJHA-NWpyyhfhwkTizZqWuxlu3vk0m41dHKqXClTONLGgIVEN-SZtM9jjhfRNCka78mVWZZr1oprZvSZLPcpgVSBReFEj6yErgHJ9Gp4Aj7jdZy63fatTADNi868smA=w938-h1250-no
 
Last edited:
Back
Top