• Protip: Profile posts are public! Use Conversations to message other members privately. Everyone can see the content of a profile post.

My let's see where this one goes "build" thread

Ya between these two pictures and seeing Akbar's Type-S wheels with black lugs in person I'm going to make the swap to black. Now just to find them for less than $6.50/lug nut...they are only $3 in Japan but shipping sucks because of the weight of 20 of them.

Also did Honda make an OEM lug nut lock in either black or chrome for the NSX or I guess just in general?


I got extremely lucky since they were sold out of the rears, I literally checked everyday and as soon as they were back in stock I pulled the trigger. I just don't understand what changed in a month to make them no longer willing to ship to the US. I really think we need to poll the community and see if we can get a large enough interest in 215/45/16 AD08R and if the number is high enough maybe Tire Rack will do a huge order for us? Either that or someone needs to become friends with someone at Yokohama and become the NSX supplier lol.

She came together so much faster than I had anticipated. I'm on 100% hold now from buying anything lol. I still have the Type-S Battery parts I need to put in but so many major things happening next spring that I need to save for...

B-82 paint job
New Radiator
Coolant Hoses (I actually already have them)
A/C Condensers
Brake Rebuild
Steering Rack Rebuild
New clutch (???) - Maybe I'll try adjusting it and see if that helps first
ABS Upgrade - I REALLY hope I don't have to do this sooner
Try to restore OEM stereo/wiring/etc.
[MENTION=34522]NSX_n00b[/MENTION], hit me up, I’ll hook you up with a set of black oem ball seated lug nuts.
 
Just when I thought all hope was lost I got a message from a reliable source with the piece of the missing puzzle.

The BBS center cap part number for the RG255A and RG256A wheels is:

56.24.055

So now the search for a set begins!


Sent from my iPhone using Tapatalk
 
love this build thread! NSX looks amazing - now what will you be doing with those Prodrive wheels you no longer need!! hint hint

Thank you! I'm very happy with how it has turned out so far.

Subtle hint lol. I actually will keep the Prodrives. The AD08RS tires on the Type-S wheels aren't rated for very cold weather. I drive my car year round here in Colorado so I will put the Prodrives (wrapped in S.Drive tires) back on once the day time high temps drop below 45. Plus I do love the wheels and the bronze will still look good on the car after it's repainted Phoenix Blue.

But if you are looking for a set of Prodrive GC-010E's [MENTION=25247]MexiRicer[/MENTION] has a set for sale :biggrin:

http://www.nsxprime.com/forum/showthread.php/210959-Prodrive-GC-010e-17-18
 
Thank you! I'm very happy with how it has turned out so far.

Subtle hint lol. I actually will keep the Prodrives. The AD08RS tires on the Type-S wheels aren't rated for very cold weather. I drive my car year round here in Colorado so I will put the Prodrives (wrapped in S.Drive tires) back on once the day time high temps drop below 45. Plus I do love the wheels and the bronze will still look good on the car after it's repainted Phoenix Blue.

But if you are looking for a set of Prodrive GC-010E's @MexiRicer has a set for sale :biggrin:

http://www.nsxprime.com/forum/showthread.php/210959-Prodrive-GC-010e-17-18

Good lookin out Spence! Yup yup, my Prodrives are f/s... can ship to Canada for a nice rate with discount coupon code n00b_10 :D
 
6 month update

Wow I seriously haven't updated in 6 months?!?! Oh wait, because I have barely done ANYTHING new. But here are the small things that have happened since September...

I got some bolster covers for the seats that don't seem to want to fit correctly:
XH2q9f6zcW4xZ62DtECpUtwaGEND4x9ujtNjtJVc_sJ2GG6Xfpn5QqsXU5PfvAy_6mk1R5i6qnC7zurz8-Ho5Cmew-Mb6v_NuTSrsRSDlkgInP8keJw78AKnZwzvtc76MrijOXOE98Dxh0ttmCICDN42gzI5ZAdFlP8fCNT3qLHScAeTGV5hHNAZrKUnsFgT3o4oswDLuH95ANfn3AIbEqQfeQ97sn0mZMvpWZGp0dSEccuyNbZYKG5Klhpp3aN9eq0jtkHLQX13QTGCtg9yiAEUdUmqm5giK20CgiFAxjFoJCkiSOVdJf1_n4XzmLY9lZr6tWihppadFynaCM_-0ZJGRY_woseqNOaFOdh7txJdMHscKSO7EOQcBf-cw04TRRfNzqO5FhBOD2BGoxpKfz6vYnpkm8MkrdaJRQRtEaz7SNaLuaarFDjoJ9x67eYsf4T4c04fvmaqXq3VGitOzQYASW_VEulg3yQ0GaOz_bHG_VKFDMIO-b1bQ5gUBgQSfGyx0sDpe2ev0hv2xcGh5Y6Mn3JmqmdeefqGW9o7OfnU8-txrxkPKZSOmwGEGyaAzjEyqvoent9anFTNnaDZ1CwC3tgvbgoOA2keU5h1JEJuRuNgfdI2iQD73FJ0KVQ2kh1rVe74TAP0VOmKtF4BofNWabYoW6aE2Nmzi_TmHNbb4MBfq00JO823zpbcH9yh2-2x5MeinoDqeYKykRlj0A7-RQcPQanESFIS3Zmo32N0d2DU9HLvgoA=w640-h480-no

i4bkeZ1p1aqtzRo8UAsBh6sGbko9XT2x07oVF61T3CLrKgVpBETTdji5Nkc4bFuLXewLDwxAe_gjDbIlwwObNiZhTu2hR3iiUpO5bdP4fprfkZ76K06ss7S7B8FGRrobjpmfenHRe_6Qwz5ClSnaSjVrlJDHEUbWi0ROTvwSWwcyxfJb2izR0E4P05U2bItSLZFkQ641UFlLd6XX6dubptNKd1BrKISquNKDeb0e0iI47pqCCXapPDKPymvK2WxE-1WKo_afSoQnSZaCF_0Va6YD2SpC0F9uQ9nS8l91SnMikBgg1Rcw7pX7CAIWSZcZVHWlpv9GO2QvgiwDNQXuBnkozWfitTYBBvbPnFW2Ag_LhOsAU5iIbitwFwet9M5FJ9o0wYLmJdg_e1c8u55qQwJ2Pe2s_vYWKPmj6r4RcoHSUy71WzfYrRYaUO919Zy8bv9FgwF1M2ecvCubveAdHVHdfdN2oa1LwLR6TL_kqi4Di3xBwdYthL-karFP48vyWSJFDBdIX5sW7QopQnL-gqPNtGKblW64smfJMC7TPknKjON_OoWbqrJ6XgNQMF7jtI77oEkj3CgY8tcrCtUW_BZRZ-FhTtHIuKJg-cNv9J_yPozOMX3UBXj5h57ruho_WYuG2VklGtNMLOm7L9S0CVF8buB7Vo92vIGNwVbcgzmaGrar3CQ-NDV99wEzNbcu1YLMsaZGuIz-BdvKtR0UfrGLEY79uP4Z0eKMf638XMvjM_hJuGPctUQ=w640-h480-no


Thanks to Kaz for the P/N, I finally got the wheel locks I've been searching for:
NyuRitFhi9IXT1oTGygdqUmqBVgCWn0O0vme316ClPVvJYZtly3Q8d_foLYtJtUVxjKwOonHP0GwW1Thgqw61PNhjDqhGzU4ppE6DzbyWH_U9cgOy6J68LR_4w1RLsD4eRaDFeGet558A0Ormdc0AGwxVvv6urFEyv28FXQZECFu_9OsBUuGvytMY8bXhdav3x5nzlMMe7FAGIBf8F8zgMEAnWvM1-qv6Jo1WMIs5msOn0UyHY5QLydDMPy18qiWt7WwxKtyUF6fJXtStpUA08HV2d03-NdxW1y5FVdAfNntAGCU6QuUECudX4OqbRGB4EcpStrY42xXrIj3jKijDqsqQtlBpUF-BqrHDOa9OGtV1PU566-fgbuAMiwoS0p_x1odgaylxW2FePmcsNOZTGhrGl5swhagGJLGtCmPFg9HFyeMsNxtP_L4m9mN7aKgdXXXG-j4CL4ZaGw3Sci23wTktuICVW0V0sxhGBjbbdpuuloi1eboz-oRlHVn986z9pBwuU1ps7qWdC51AJ_IKVOtm2lEC_u6OI_84pQJ3P7nmh0ARoj6AQbvaoSLhULp8gHsY0QT6cJdTylr7u5bl_IPYYlNxC0bMfGt6bEtN8vzIeNzSaYWJmbKt1N6hRZAum2rGn9YddXDsHD91ezjNaWgOYg-gICwqvNztGdhASX668h2Cvmo1F_VUdSXSgr5i-vw_AYsHFRbcg8tS5ZUWqPYoQGVijfV3bH1rNz7kvkBMTagFZ73beI=w480-h640-no

TjlYtQMu6YFloFheouD3uF5BxJbSoyU2Jwhv5mksQ3vGNllQV41Z4G1ntKiLC0GwF8aYcRPYfWD9TvY8aS87VqRhUZ3OfFj6rem4syE1bsya5ZaG20Ri0PCUDMuGA_MP6N2MJo9ukLcqguq2VD4M8YdW_vz3cTONo0NMqcFbNmLF7VyucLFdk8lQz5Jk-pg-vlFAZUrsbZlUwNE9xWZbIFNJAukVIFuMVXtaKFEyZ8oegXrc6LfO3d4n7vHVJtnPi0GUR37nuuJA6avUUZWtQNPp5-tjEJBDozuPfLNxE-Pbi4IG73cyGLSeRm5dmk9dnvTTnCaT8iJPuVogatFMc1dS0zaodxfSLzXUD2s6vEo-dt-RNfiGujduOJg4VTsbGpRitbxOybEFU5TgxH4mWMT7qC4dcmLYAHYD8Qx_lqK17jDEHdlzbw-WxCtzJ5ceCSnDsqBuvjBCQtGcVo9YkmxsHlNfB0q-id3wx5OhpAG2dfN_KDEMs5J9SFsB22mqW9o3zB_aoaJEZX_d5A1UBT4vXXbWnBKLrqr4sj0Yz1rr5LubhpV__2cJ-cLC4Nilil3vxDqBL_822Jw0NpBqYLVKR92WmyOvgRC7e0diBcXKqo-aLIhR79QmNV62pbhXHQMqrdGxsCVgxjbYO2sxBiiPRnZMkFRKXkm88RHi9d3jwVhMQgVtbU5R9GfoX3F2-A-ZuzeddwEwvLeEBB-gaNY9XlFUkZyDdYvJl7BtjigU6WxlrxFYB_I=w480-h640-no


I hit 54k on the way to February's C&C:
XWdLiNN1oQkLTYm-0wPVtEfbynhzN3YmZ8x3T82b78hvFyNgzS9rSw2UdBt1sdNBzWiDdF6xQoktbAZy0k1wdg8M5nipwEHu2JCOTymWz5L0kofPnpmB8pg3t_Yw9nzxgFmymt7ktiksBL_XLuXQ1dymyJPqRtsIFwuph7q8EZKvuBeiUHsObrpvrRplYMQknecNdPmWKbjFyzWHc9jp6BCLuLHeKpG2Ut_BwtZRC81zMj6KHaIzKVpVrNgY232C2ZR8bXh5GCxlQuxqchSw3tQdjE25dhgMnB-oFluvXDSV5TW-SwvNQEjwCAOwCfFXPWhdVibsw7IuecyF18UfzhQHCM-CF_Ap1KJzJxQWPTpOeCOr_6URf_Kc_myQwVB8tusQMz6Yh3FyjleMEU8QIHZ43IAtHG9RhCBA_66SzCyoy_LzJ8dUngrboMI-bT1VF4bBifBbdTJUOmpvAkmzAjHrOVPVyqACzFpmKugq6t4IFRU-PzeSJzOwRmf7i1wbALpkKAQh7lhAYIXvNvj_4btAKHDh0A7EOu1E0o1qZh-GvxVUg1gVwU5AtJN_AKlR3sQx69EDjJqqyayFpvoiWdXSbVsf773OiiUgxIXWH8XrzHyd-N8q0zkeMgOooCShQeRKY4q_WVPP3HohNaVRualcrVP1Lsgz1JtC3zFrTiUH_8j5yYfuv3DR3ZFXJ8AECKzEsEVYfCUAUhkAUL2iwy1N_8fRq6qOGDKDdi2NiQnzm3AJMhxcZII=w480-h640-no

aV7x-gODGmnzwPf42uJdpX6JeaF9ddzm0IV7GeDj3nZmqRL0NEGX7xFnGSBoJehbF4IMa9yynxUVN-T7B6aLurg33-UtFtbayREocmxzSKGxVcFcenF9Ae2np2eVSbcHUw121vn4ZNjv0JegB4k15dV7sAS7mUl2Po00Lwl_sGnpwsC3b7iOybh3benD10OioegmHklRb83ThDH9x3Ju9YkkeJtgncMepkX5BlSN0Kz3F4vm9NCt-5ukle5PUks7cyhIaDNmA1w-vKXb8fBAXr7yqxDRse9tUqqIqmmBHRaOjiH7NISe6bNO24-vVJZakQYI9Q80u-pGpMz-6tn3I_LjDIETjLfXeiPgYxrGewQQM6nt5VwgcnLw0Q8hhWX1wDAu2dtj0Lrvd7OpGsICjY91ZekGNbuTvbcsNdLnKk0KCZxFdI29D56QjP3qPFviVGKMTlj-_Zl8cqm_kj115i9ZP2bmezSV154cLtwOwNmMIyHMNNhQnsp4NVf1Op3bIrGU5iRIBdD2lKgHNUMP4qFKR5PhWpphhrIP79WRKLcWE6RFSMl9qVuZfMzQueMjaJGBWjCJU7mkYKNKRNTj5XuDs_d3Pfmz3CFtnPx7w-RDJ8EcpEacT-OzNY-Qhdr-Wb4QBbM9vpFr44IP72narWLtvdHqn3m_1fvOpKIEuqjR2W-rehNWlUtq7vBkMAdmlk-oP3d4g996PTwd9Rf2Bz2-mlvf8DMInQVKmRwKkGvc3GfUPBHpr70=w692-h864-no

kpmpbWTxupUnhI3tlMpmEUCLnHSM72QOicgeYzgM6PjiHnWcZIoZUXq09EHMkebsuXdVZeYjtiLWOI7faFCpzEYI-ZjEteVQ0_LJgJohP2rMSQQOFv8S2Db7Kvj2IGfUfKmGCTYuQRsw8tyBG86i40BqOGPlwajC3ByWC2dk8N_cmTPGT7IcewdxotivZiz5zLJKGwM_yckkF3xaxwDfU75aJ8J4tUNBJOZWMLkZLIkCY0955NLf13wIG3RO4m5Bpfzxcbr995oLELyrumXl4AWYCeIfY4D6FlXgpjplOFbSv_LWg3mFNgExI9ZPVT4d0LwSl0Pap4tp7NjxlcTDBEXY2n49zpxXXE9M0YSTlX69Zw-AuWnd0dvho52C_0r2V8LQ57NniwwMWtTFpTizdneZ_GbF_FF3CYID_n6A5_bYQVrZ-h_D9b3Tq3B3fIzyA-FBIi_qIOzKRoxwZhc6OYELyc8tELeHGGnaEv258aFYae39PKlIGEz8BJHW5KhyKfhe6RFi2AkKFtR1R09ZlF42MULsuFWmyoL0pZJzAOa5WUFks3Qq9Of4QCv8Q1a_sPeftOIgN6uGk_Uxv1hPGz49Gvo9kcjjyZL3h27EK-LAoIfri9e3WZM0OzOTPoDTisMlZERwkSF0ydCtlQNkbIPVNaiMg1fuX_hBv9kJM42dlN35Qfhdcycy526XWlzDlY0yBAMUiOsZV-zFX1P-VsnFMLMvkZhtthlEdC5FcofKiUwCaxs2yiI=w1280-h720-no

psIMcRJBB63E7itUdAW2C28SdktZMNClOmgO2IgD0ayxrYgn7jmkOah7jAyxAQFGOP_GlCXbACHTOmXlHOtaN3UW764-Ade00Ub4_84J2w8FTMrV23y8OfJW9b1Ca0EqpElGS2KqGjOUrb8yNQ8aZAw4Ud_LVmCNZreb563Fa0oecGZGFSQSi8XX7qSQOudYoxvVLg6cCKBxG3WsM-sjTRizoD_BApCe6IjgeTFVdh_GVX0El4Tuil1s9afW-vAjewElbRftxMlJMZqXqHyHyGItBre4KNom_HTY-8kG3D3pdyFVt2kXbLzQ_PWtguIhObBW43hklmDk650ZvO68yLwBiLnkv483otlmG3-rGL1HCuO7U5mANgat0Q0EbAAeJfyjo6Yu1XGDgJgomenphKrxoUWVwkQNdUhbBurysvTTdAdQ271mEJZnlmqxYikIfjPxrP7A9K7Ca26hyNlMgo2ZF2Ogdwdkws_rz00mCViDUMdF9jfqoydsspOKfUkzDxxShzH97OOiEeB5PgjDZo16r2yCEVNwIkwVcq7Othk4bbVoCt4NR1tnGBypr-MmRj3gtIXBuvqr0XpBnN9d5W0iFzvTJvCGQTv8YK-1wyuhWpt2weWa2qUlgPsnF5hZPQj1j0l6viABxhQunU3cPYV9OhsHcREBtB57bAzKs4uze01EFvAOCUUyJi7ys___2hjToG4x0LosyNH-k_ljr6w9sYPr4CpWiqi8tx9MZ1pWLg8_nt-mxgw=w1280-h720-no


And with a lot of people out of their primary source of income right now I helped out a local photographer make a few bucks...all while practicing social distancing of course:
P2inaRZnvhpXapBQcLmjKmsnyTXdGRQa06P5tCsRHY8Omz2RLeve9ZtQ8n8e_q9PQCJdC34vKrLexZ8NsGK1Snn-vfA2U-GO2ccRSIGNKvI2UobqVsgpHbR6RkTDr-plMl2mudJgSkc-IFjVhDQvizByv_AIakOLn81YakE8OdpyItkpzx2pEqPd-VMVnUSrVhN4KrukeWjcQEgZL6NQjOXzj0UvIAqRhshP_OPh4qeZFXi3aKwRUwKx5Kb5cj6_ryv-K-OsXP9XEBQwm5e7dBUtPA3pw1rvWIug4rUcX-cpb3gfwv3Vp3UyzelPf5fOkpfGqN7G5CzO5h41UE9Nc_6gA2SrMw-qExfBAl0RUWa-vsb8misv2YILdkIZtd5mTNhlzVYnyvBodvN77QAYUrBneq5SvyW3LrEJtM4AwIlTDukNDW6Bpq0XD_kKa_jw1WdwqK_1VLnUtjmw0DPQyJ2gRDlGN3JbQbw3zKTJO_vKml43lZlE0Ia6BoeVBVFbetZYX--GJmGkGH_D_ueVK6jqrRHDEqHb4CGtD3vF9XHmUTERyjZMkmQerftJFzAx9umgp95HZ_b7EeiOgwCtsgCfdOkS2AdUYRCmCiRRLM4sibu_KFlQKCdHfFG-YFUbqpcYeZDuAwgwc50pMyXmb2Yc7OBwUg8X5thu8Uzuc-E43h7z7g1rW-E4J1m0Rywn6HLt17G-7kgCQTUIvaVSAvNtNt0D6Ux2_kJFtB1IsvYAPiMo9L5JHKw=w480-h640-no


That's all for now. Nothing major on the horizon with everyone on lock down at the moment.
 
Here is what it looks like with the NSX-R buckle, you'll notice it's angled more upward and sits a little higher on the bolster.

9pYB0fJOKNFa8sL1Np53Bk_mvm8FYRfUSCTjFuZzgLPnx2FB4Ds9KtD5ZPqi-0apDh5ovdj0hKxPbymVam4yHDY_N2cTBDrzWQiKmPaTD2n8RhwTjNaZP-PIIX7u1ny4xSVDIT_rm4uYZQBg_kyoaVUcq4HopCcVeXI-zZWn3a8Dh8piLTnAQDMWhlRrixUwFu8wFmyu8GxjeOhYqx_reki9oxkYigAmaHDOYc5byXVQF72mdUG1uowwF_Ix-OGXSWNW2BEwZ-8SEQdRWJOBCI8TCZpQCSNhROPRI2pv0800qC0gLnIfB2HysngSvWbfZDAG8ekJ9X2wW5mHGi7jIYJn0J1bxiENVNPaHAYPE7ngyrjqwQuVUKlrjeNd9cu90fGeTwJSfVcnqE2edAvyqwBr3bNpma1JwTAIgFHmUmKaJRDoZLvGqg1eN4ZHsuBYEu_FXJzdxsAOIQJ-8ciIFyeobBgpSTCaNOcdD2umpws2yTYKEhqtSKst1iOYUegwTapCEu5p9a7E2k2szjZW8h43ZGhAXZamcZLvq5_okkgnKoUd55Ky-s2oIHMAIeLMKnH-4C9YnbNdCGzVMbq3IT6dIsRZTvNYWbVvEUrQ5lnxTrJEGmenyQX9pI_M89f-zlaAvtNO4OmRMYWkSDxNYQNV-KJqS3f1h9rkczD-4-Ce1AhRHgQXy90nhgDuUuDLSF9kwwKBdA8AhJ-OElCU5_pjZN6Em_JyQHrk4uEZx0GRU-Hl=w648-h864-no

Those seats looks amazing. WOWOW

Do you have the part #s for both NSX-R L&R seat belt buckles?

I have
81855-SL0-J22ZA left 81855-SL0-G04ZA left
81455-SL0-J22ZA right 81455-SL0-J06ZA right


I came across two different part #s for each buckle, looks like they are the same but just want to confirm. THANKS
 
Those seats looks amazing. WOWOW

Thanks! They aren't quite [MENTION=25247]MexiRicer[/MENTION] status but pretty close:

http://www.nsxprime.com/forum/showt...7-MCB/page22?p=2013269&viewfull=1#post2013269

Do you have the part #s for both NSX-R L&R seat belt buckles?

I have
81855-SL0-J22ZA left 81855-SL0-G04ZA left
81455-SL0-J22ZA right 81455-SL0-J06ZA right


I came across two different part #s for each buckle, looks like they are the same but just want to confirm. THANKS

So the P/N I have are:
81455-SL0-J22ZA
81855-SL0-J22ZA

The Right one obviously has the plug since it's for a RHD NSX-R but the left and right are actually interchangeable. I put the Right on the Left and the Left on the right, the only difference is the wire harness but the shape and mount are 100% identical. If you don't care about the harness you can just order two of the Left ones and save yourself some money.
 
Last edited:
Thanks for the clarification , your nsx has come a long way from the beginning.

Thanks man I appreciate that. I have a lot planned for later this year/early next year. I’ve been quietly accumulating parts over the last several months. I’m hoping I can be “done” by June 2021...if there is such a thing as “done” haha


Sent from my iPhone using Tapatalk
 
Thanks man I appreciate that. I have a lot planned for later this year/early next year. I’ve been quietly accumulating parts over the last several months. I’m hoping I can be “done” by June 2021...if there is such a thing as “done” haha


Sent from my iPhone using Tapatalk

It's gonna be huge. :D
 
Let the Journey Begin - Teardown Part 1 - The Trunk

Wow it's been over a year (ok only by a day) since there has been any activity here. It would be easy to say "covid" but the truth is it's just been a busy time since last April. We got the CO Owners together a few times for drives and events and in between those I've been helping out as much as possible with the [MENTION=18194]Honcho[/MENTION] S Zero project. But alas my time as come...

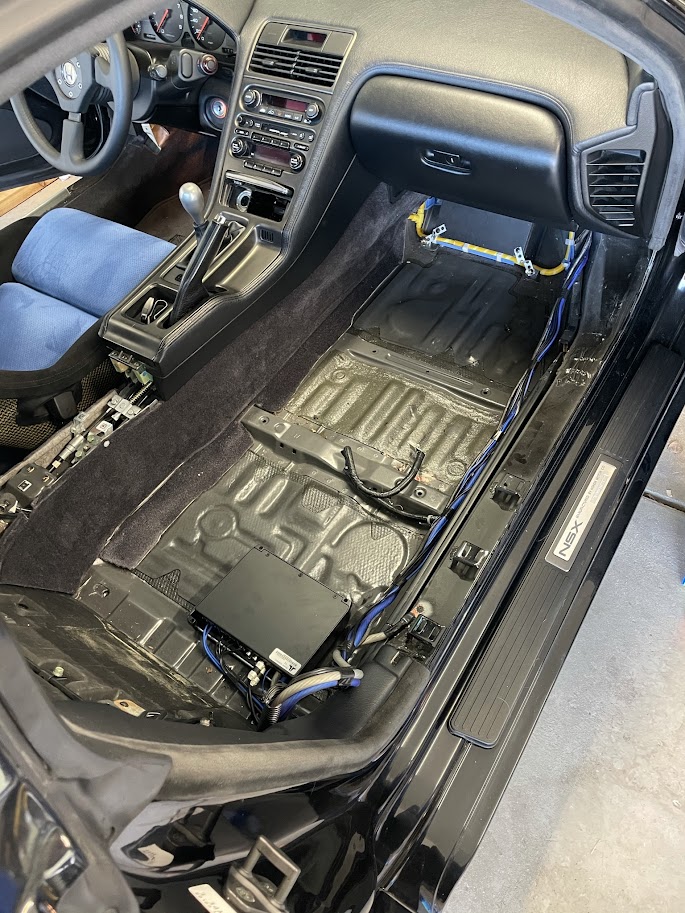
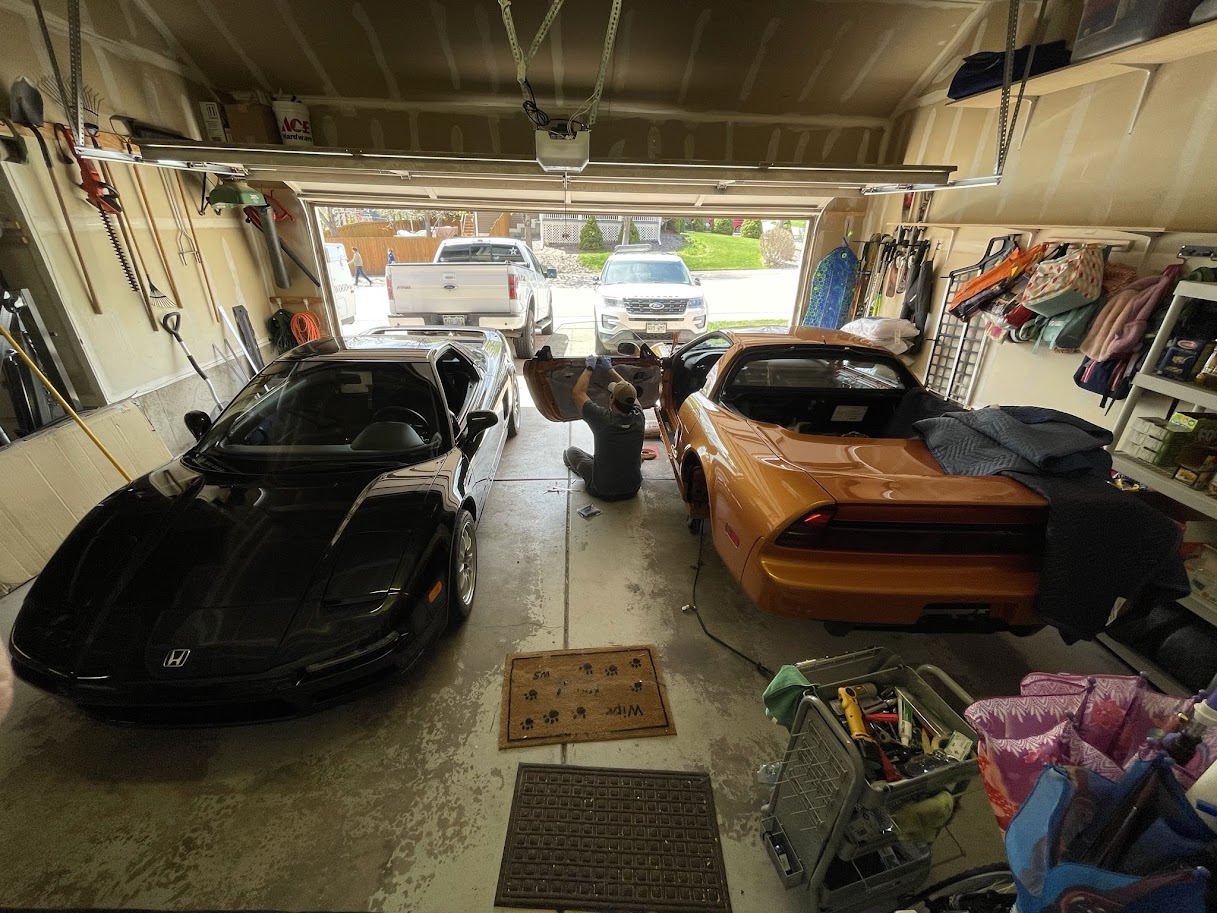
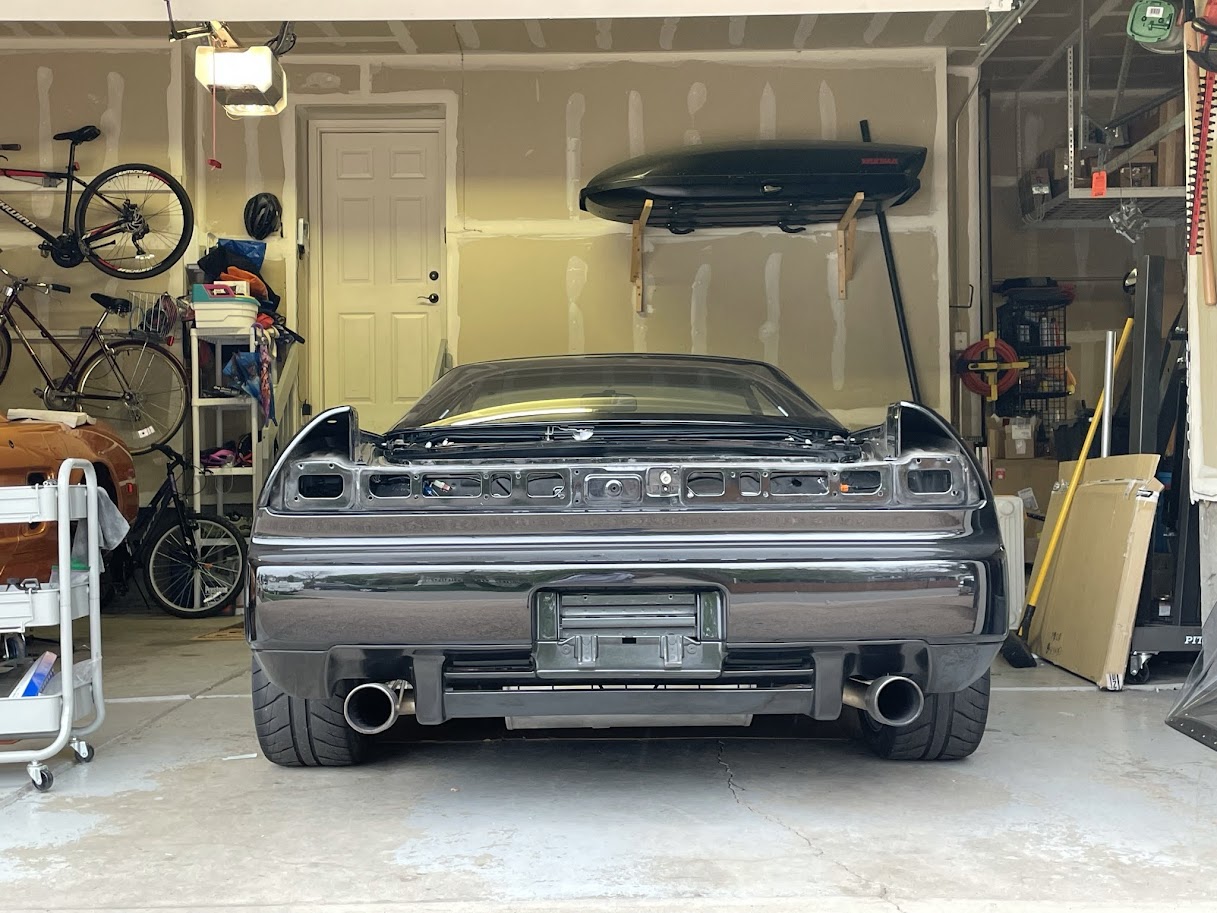
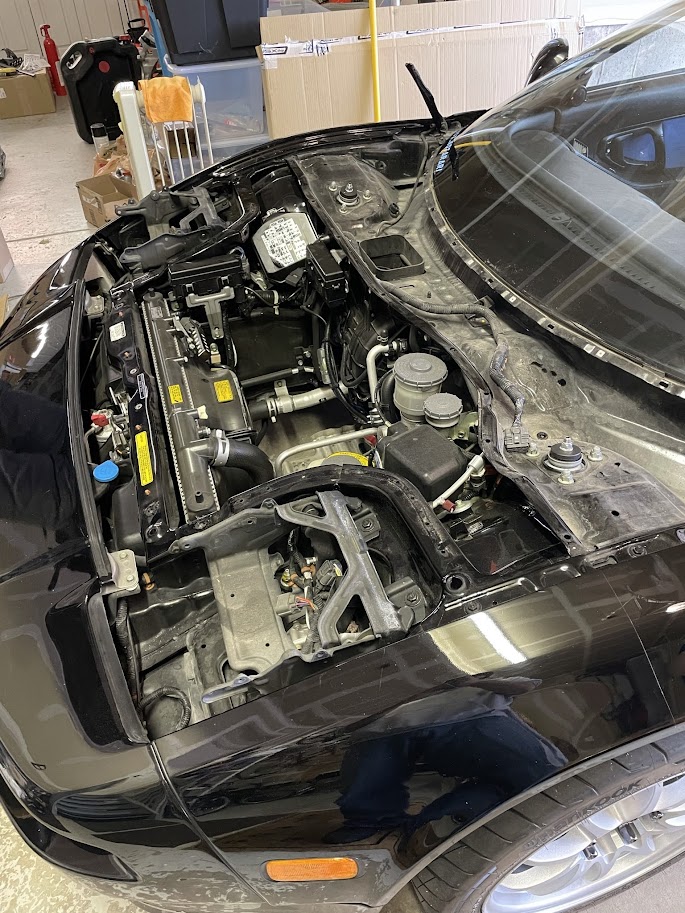
We are finally at a point with Paul's car where we need to get mine torn down and off to paint so we can permanently put Paul's car on jack stands to finish reassembly on his. It's a weird dance of where the cars need to be in his garage to pull this off.

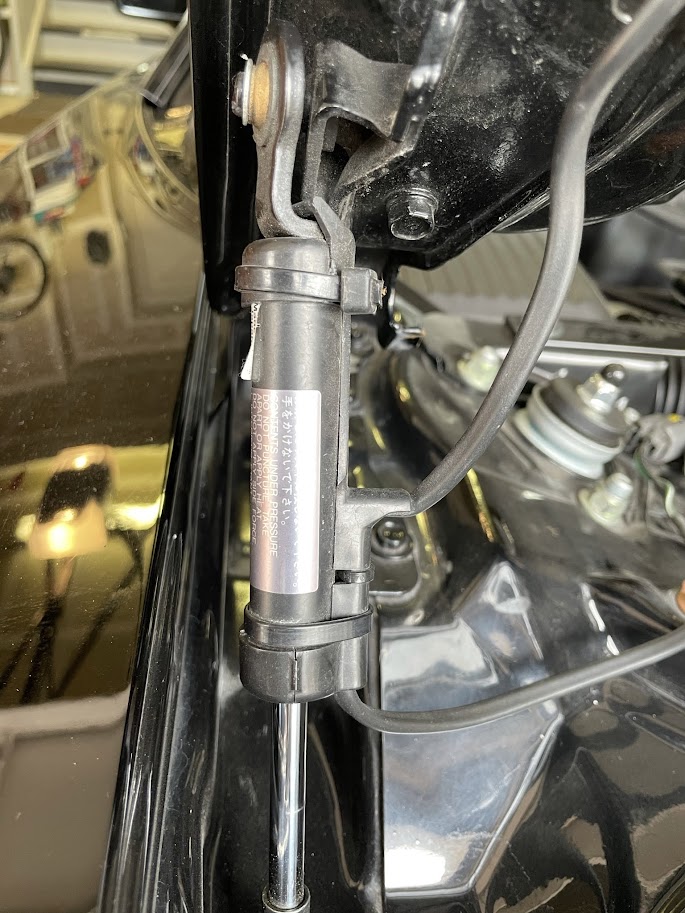
The plan was to start the tear down of mine in his garage yesterday but we totally forgot I need to get someone to come evacuate my R12 before we can tear down the front end of the car, so delayed a week of moving the car from Colorado Springs to Denver.

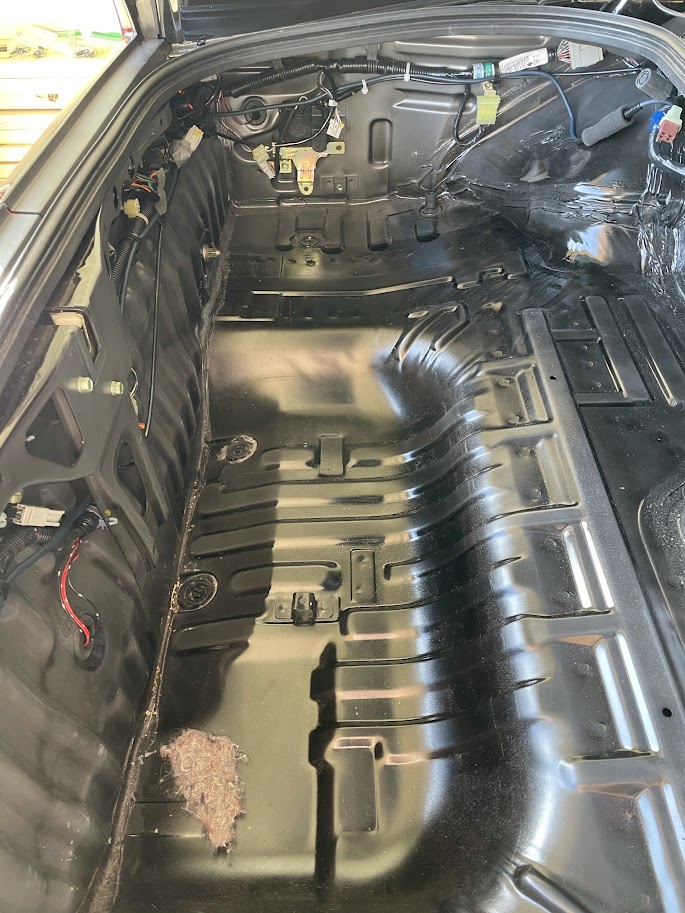
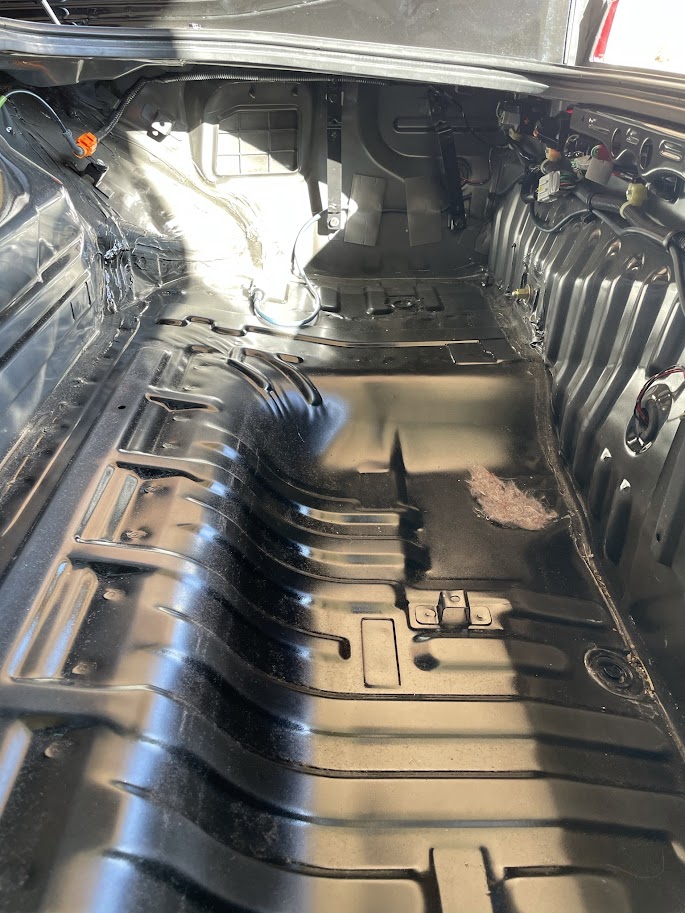
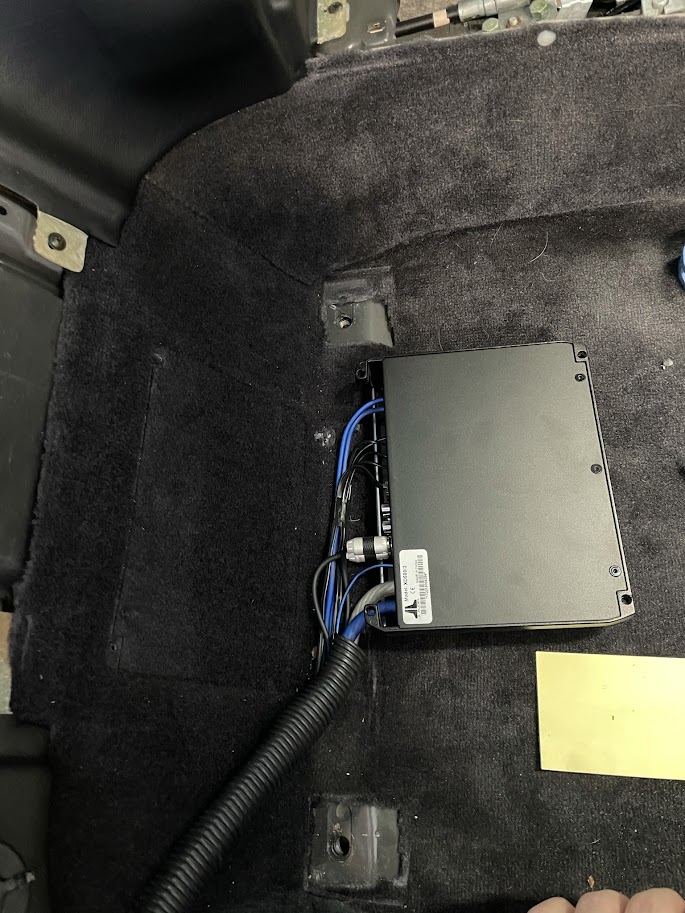
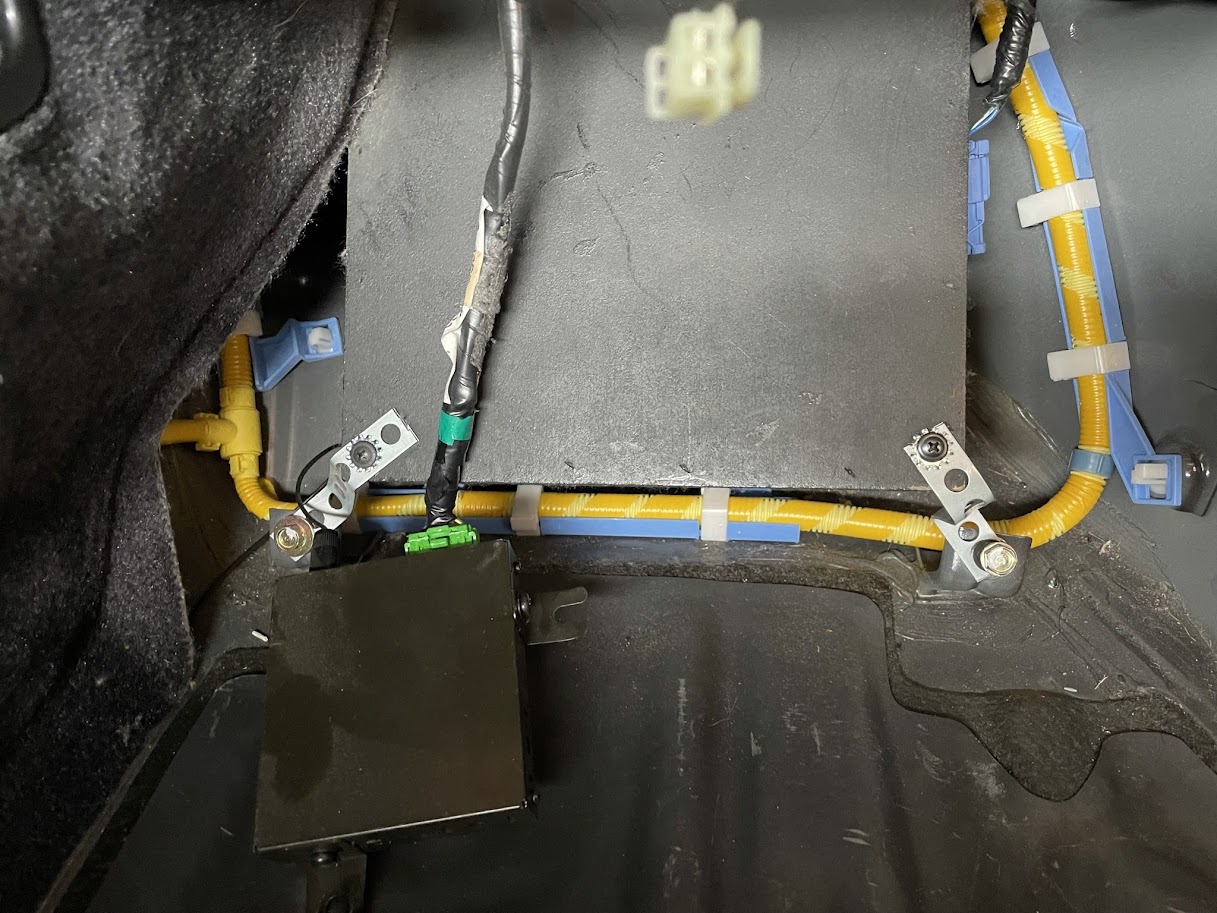
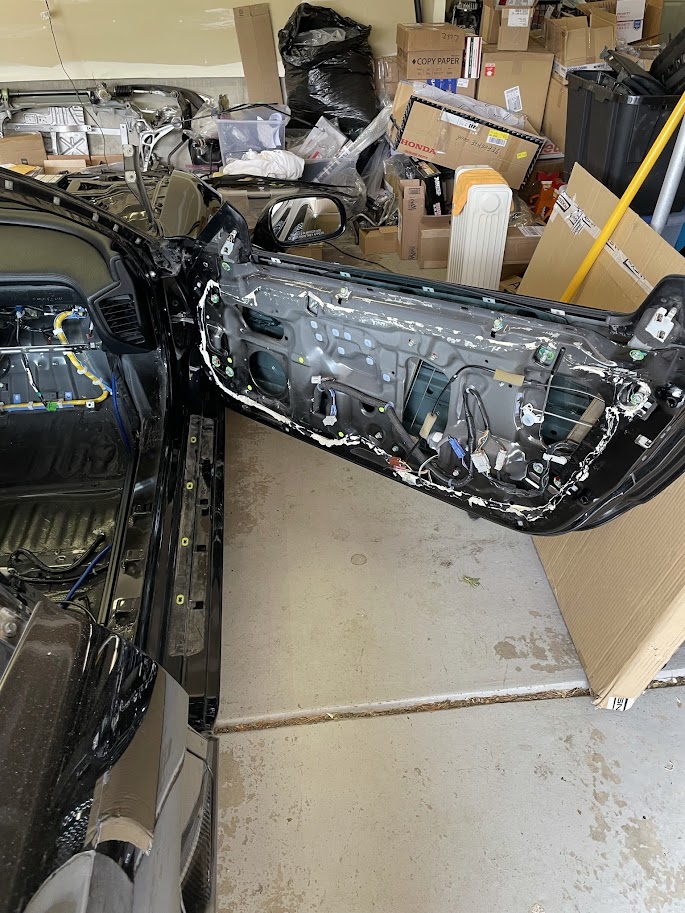
I got up early this morning though and started tearing down what little I could and still be able to safely drive the car next weekend...so I started in the trunk
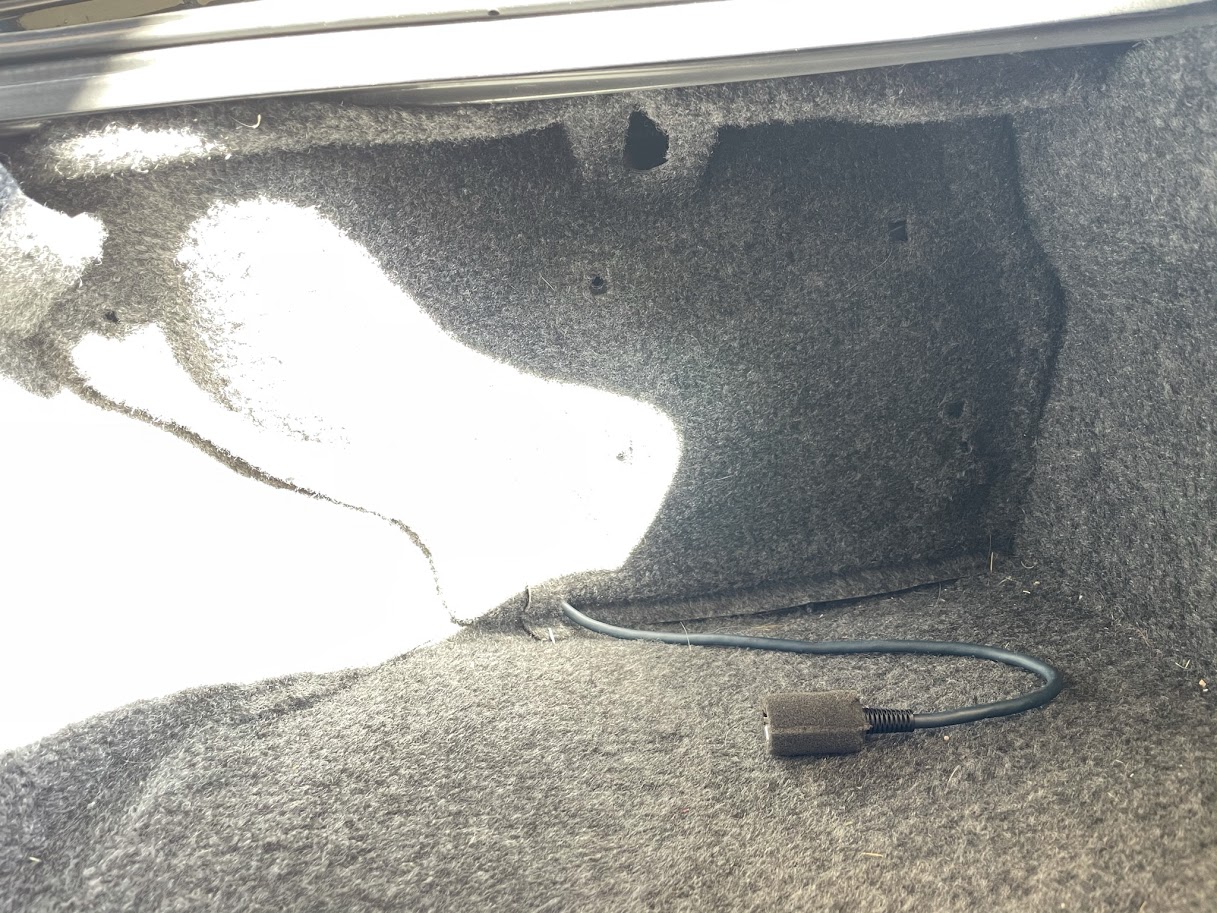
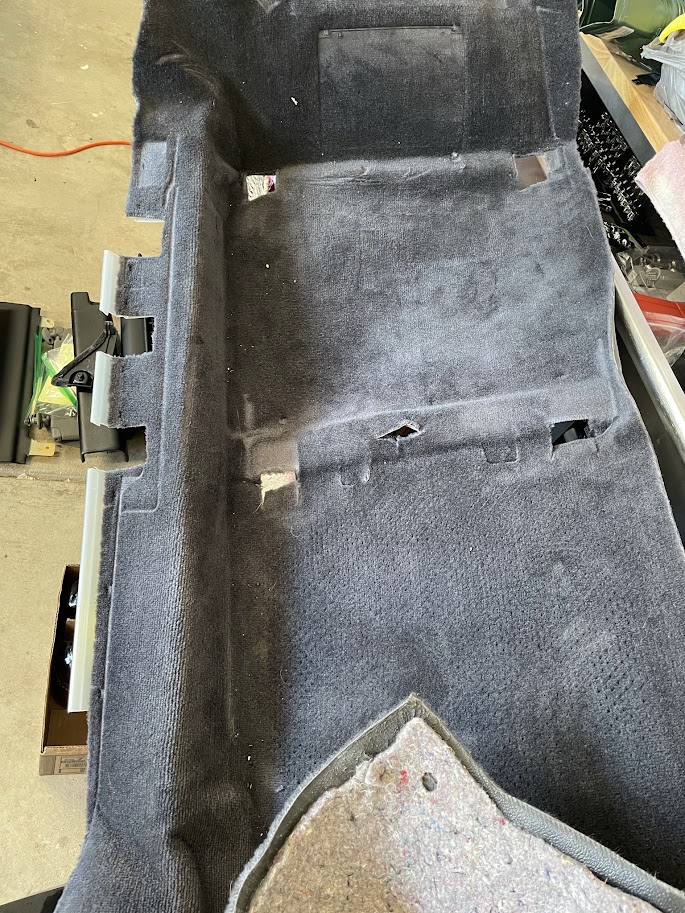
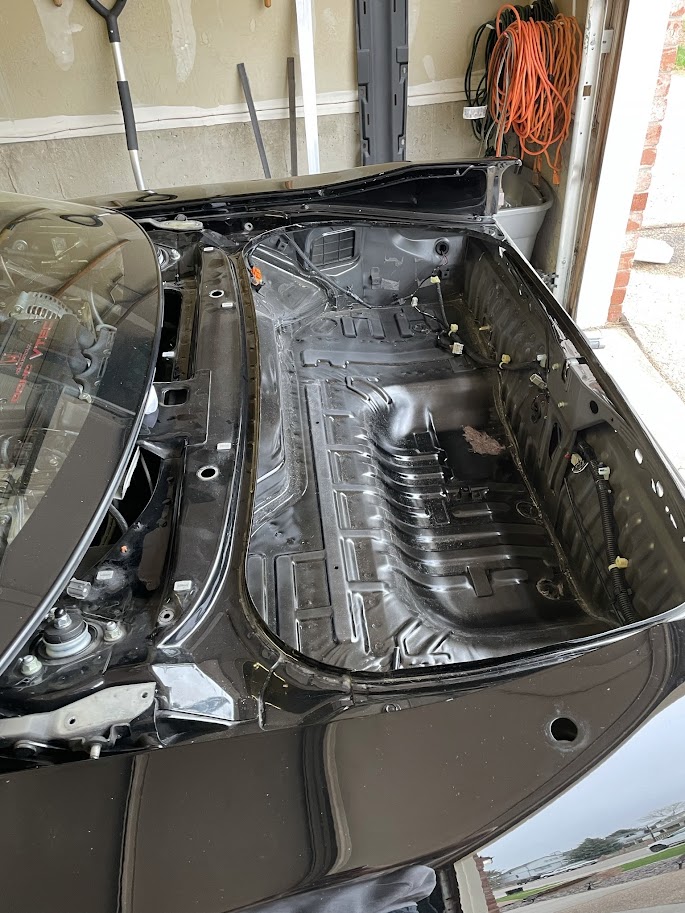
Trunk Lining

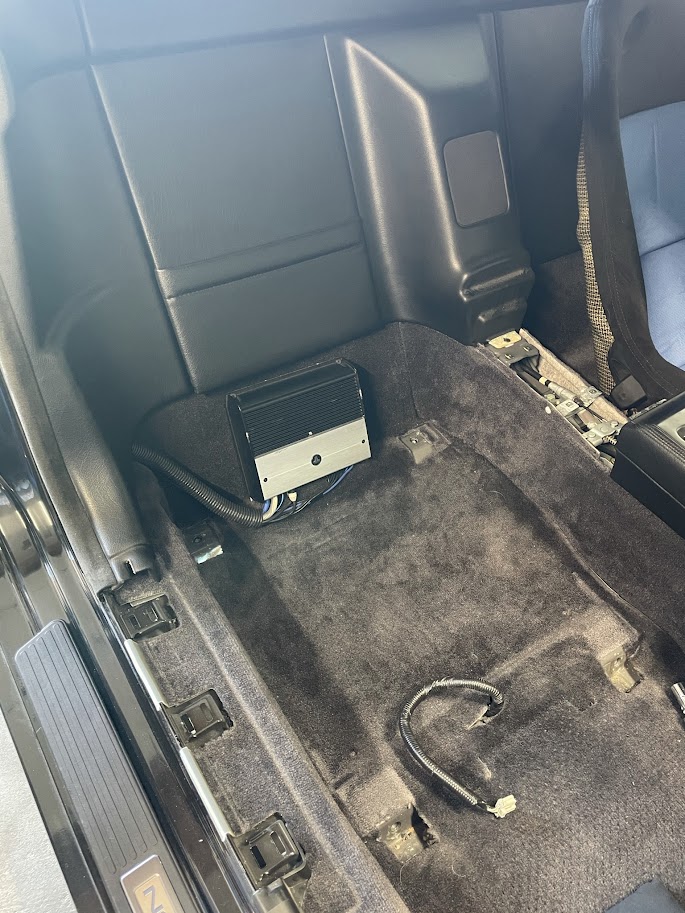
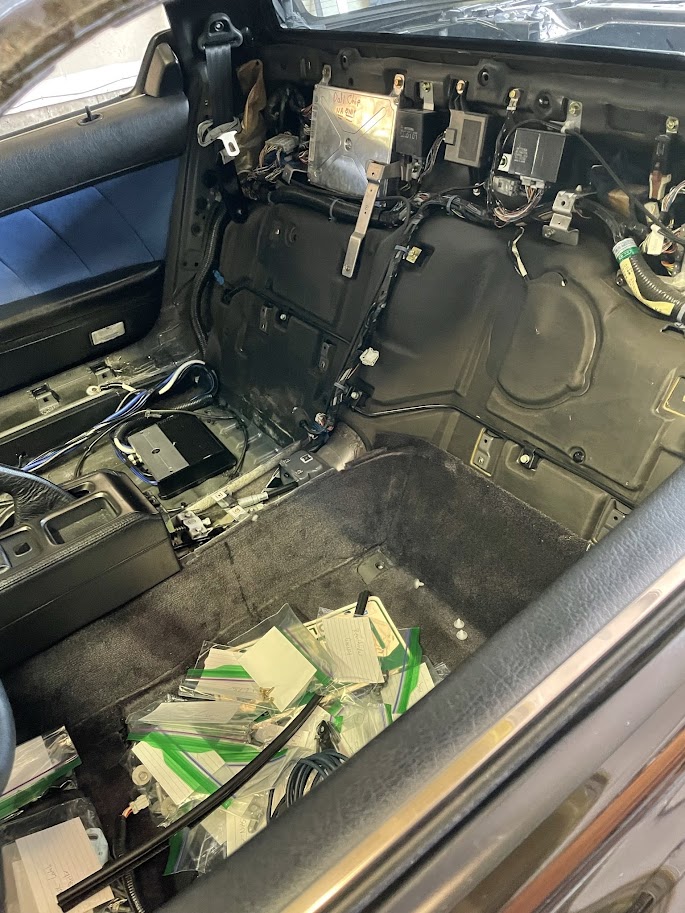
Most of the trunk lining has been pulled out by previous owners or myself and there were a few missing clips so this was pretty easy and quick.

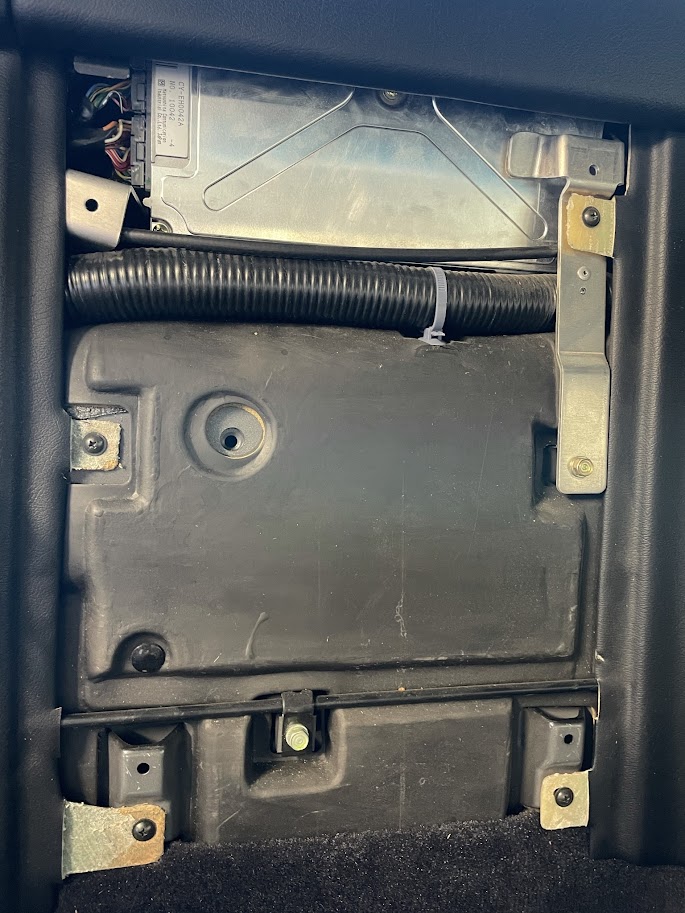
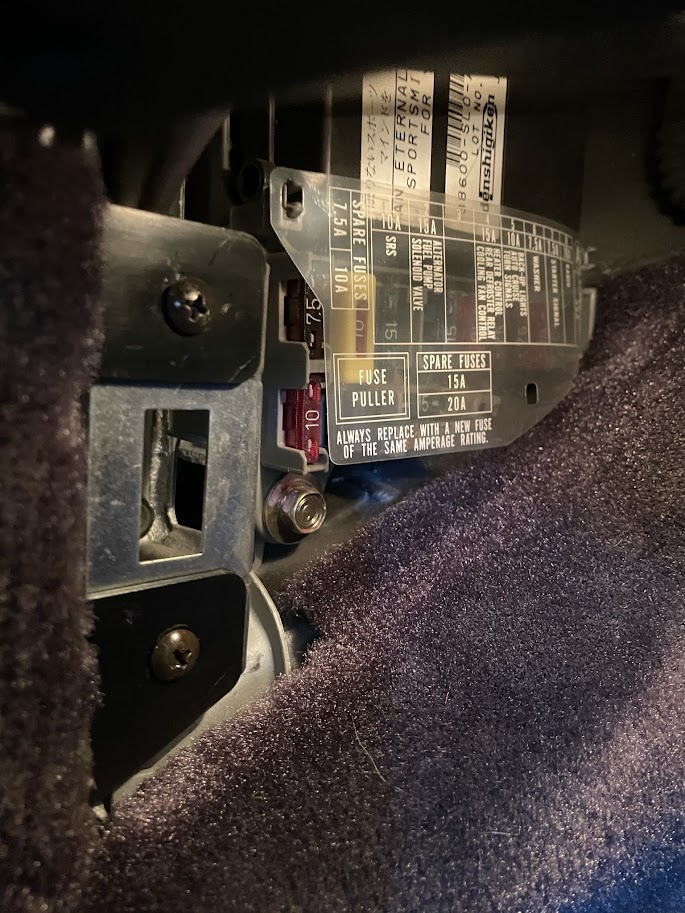
The Right Hand side panel is held in with 4 push clips (2 on the top and two on the side). One of the ones on the side will be hard to get to unless you remove your CD Changer first. Mine was removed by a previous owner so no worries there.

ACtC-3d0cBwD7rtDfqUqptWSphjQqIoLj_iYusBvMvzO8Vhgse53p2bMU6YonMpZFQT5JN-riBqq6BmsYe_wrCZF6uY_DFOTMerSPjLbkLO-SRl9juEiWcT0ErRBVl3ui9StU6pzthkcRH0-1yLUJodJG4FD=w1218-h913-no


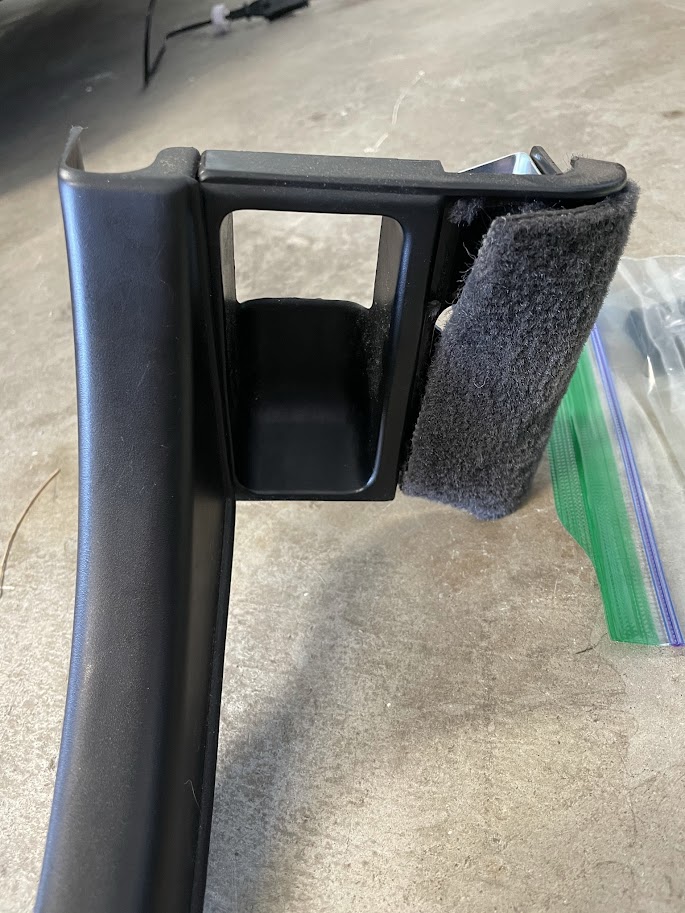
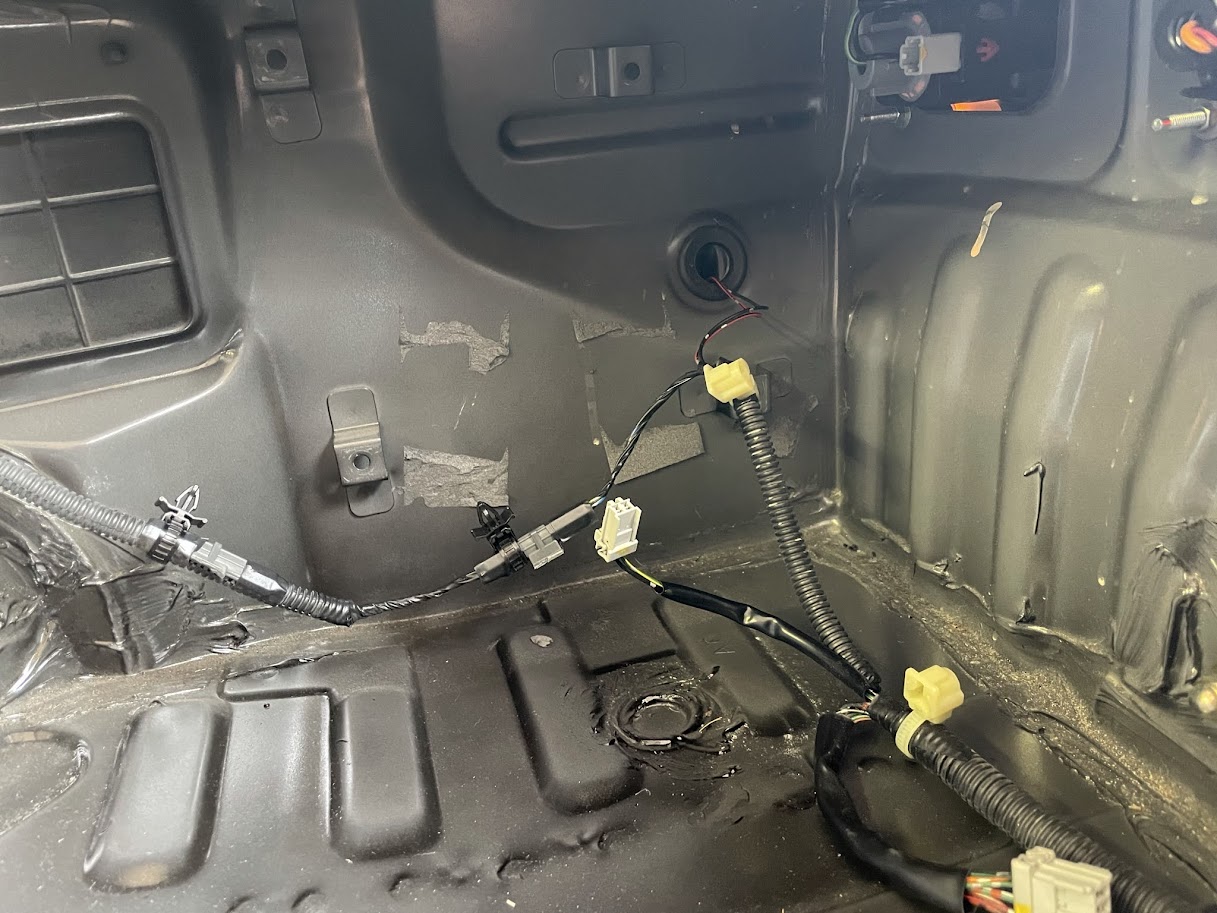
The left hand side piece is also held in with 4 push clips (2 up top and 2 on the side). Once the clips are removed and you pull the piece away you'll have to disconnect the trunk light

ACtC-3fPn5v7Csx4kOJyTVHurUl10GTLu2W5MFVeKW1DIzUAtKXnAoN2HVdeZj8FnZyzwgAthd64vqi10s8H0dUT4BH-slCLDyvIPvZh9n1ZXPx2-lMwORZd2MxXr2K1pFPUxpFATeK32S_0SW0ev50r-hRD=w685-h913-no


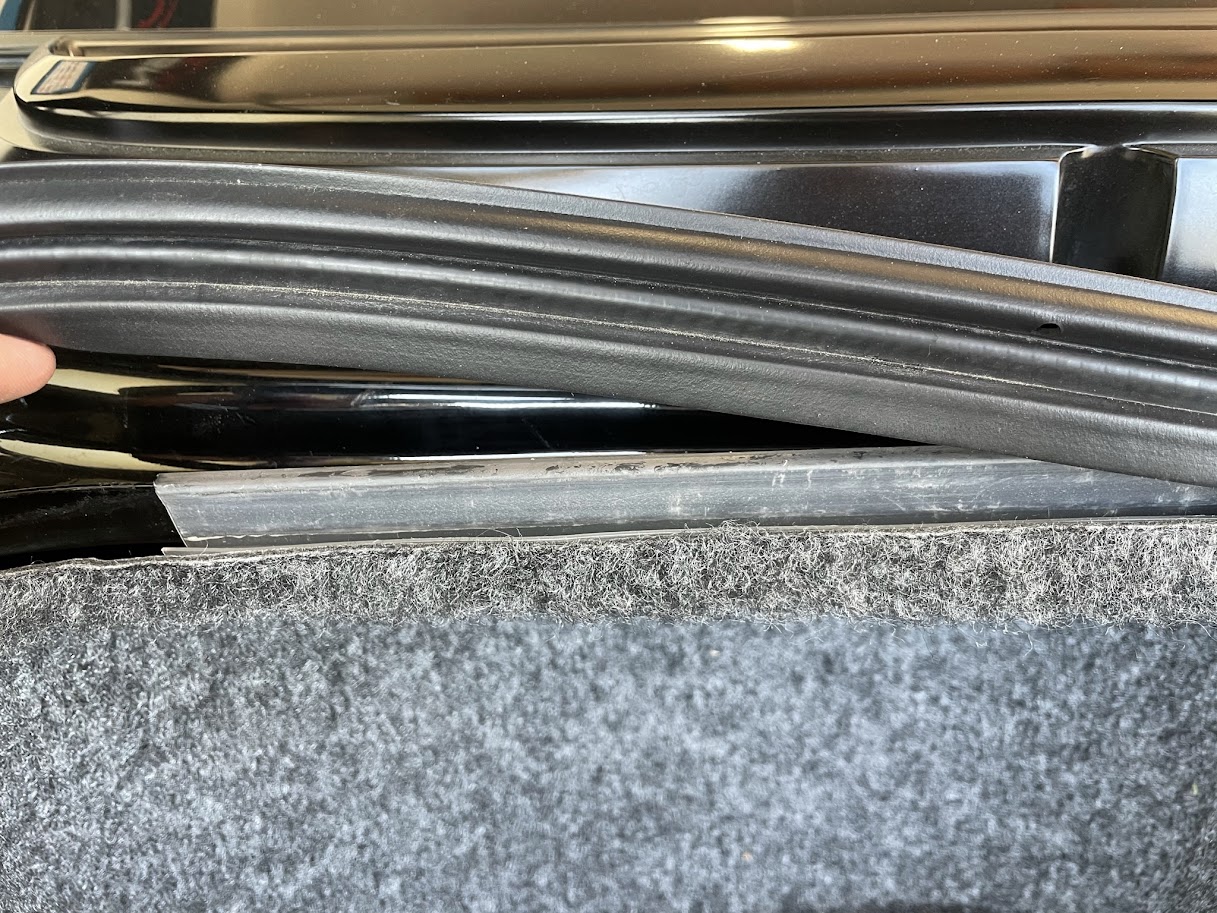
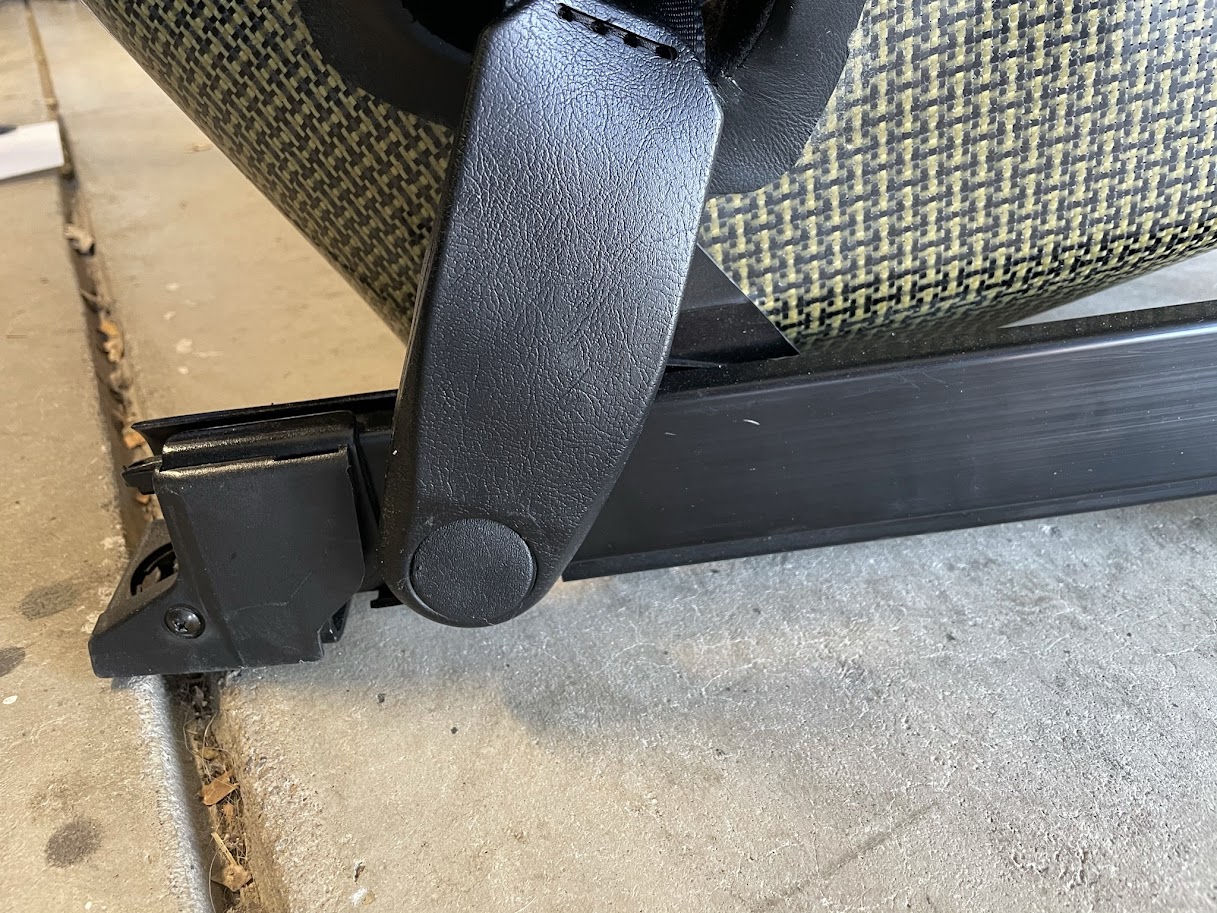
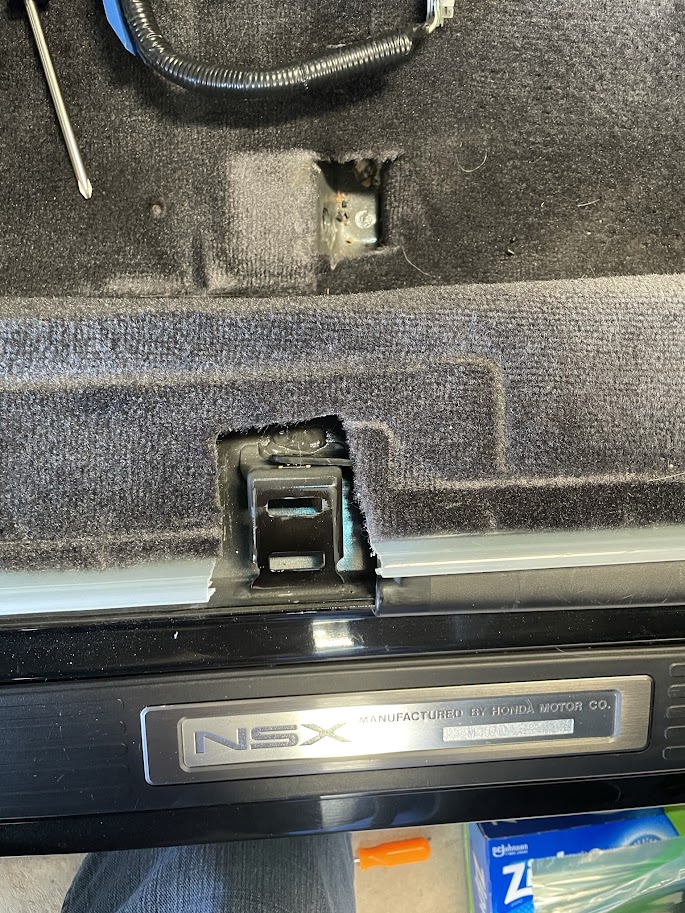
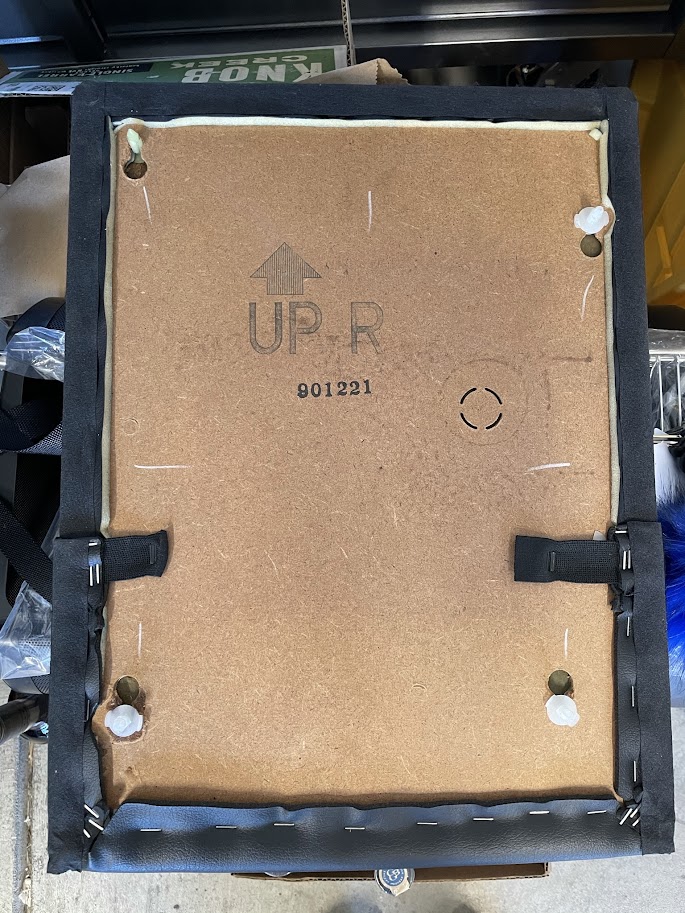
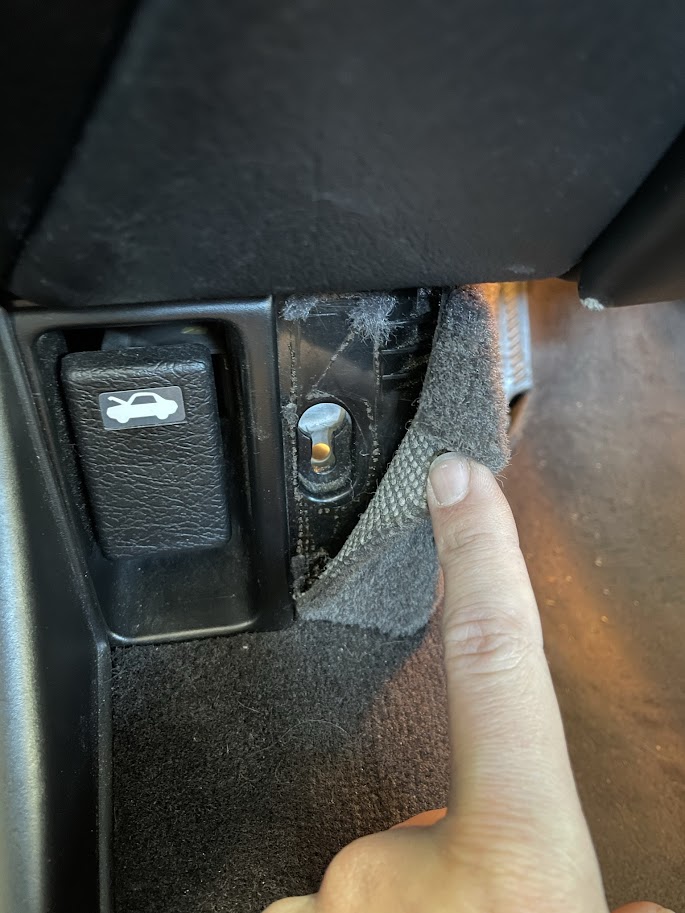
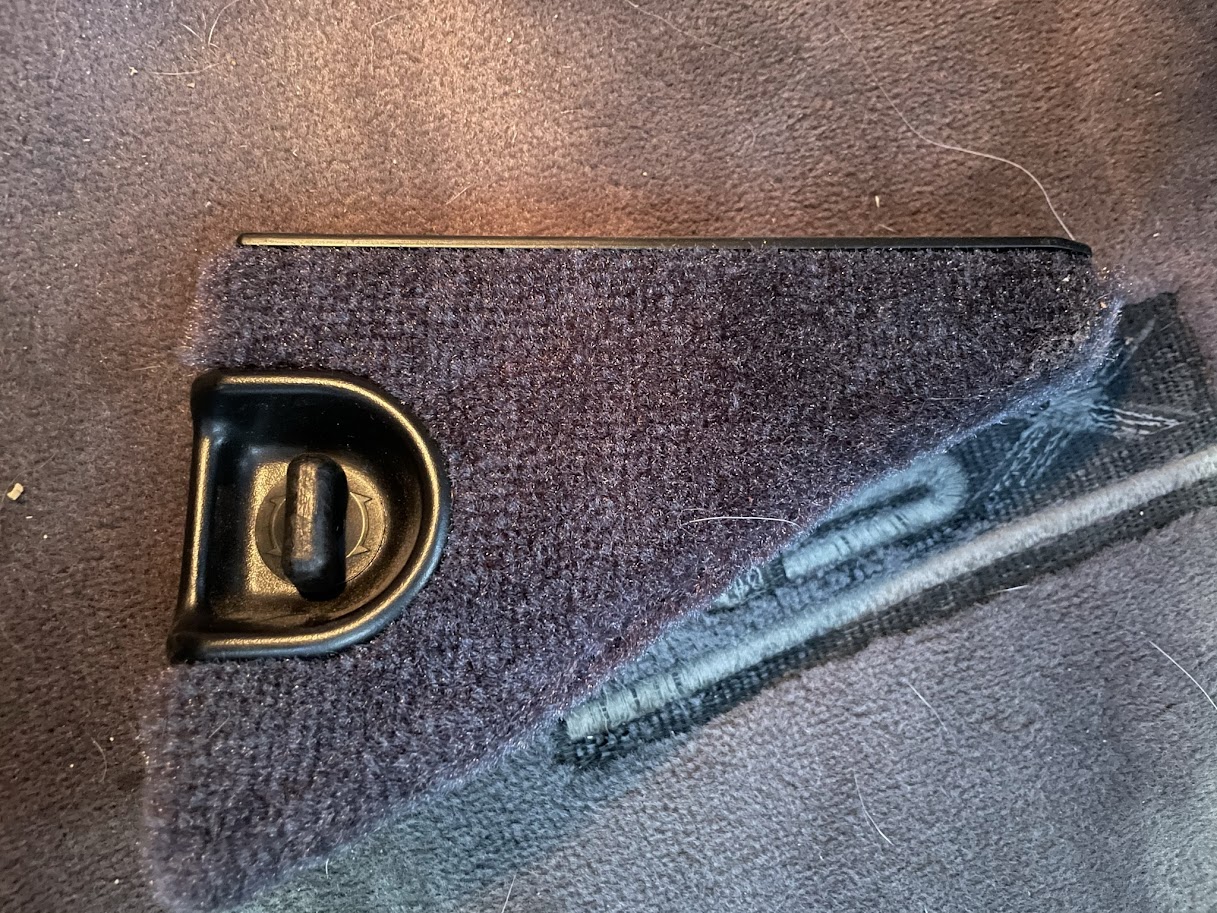
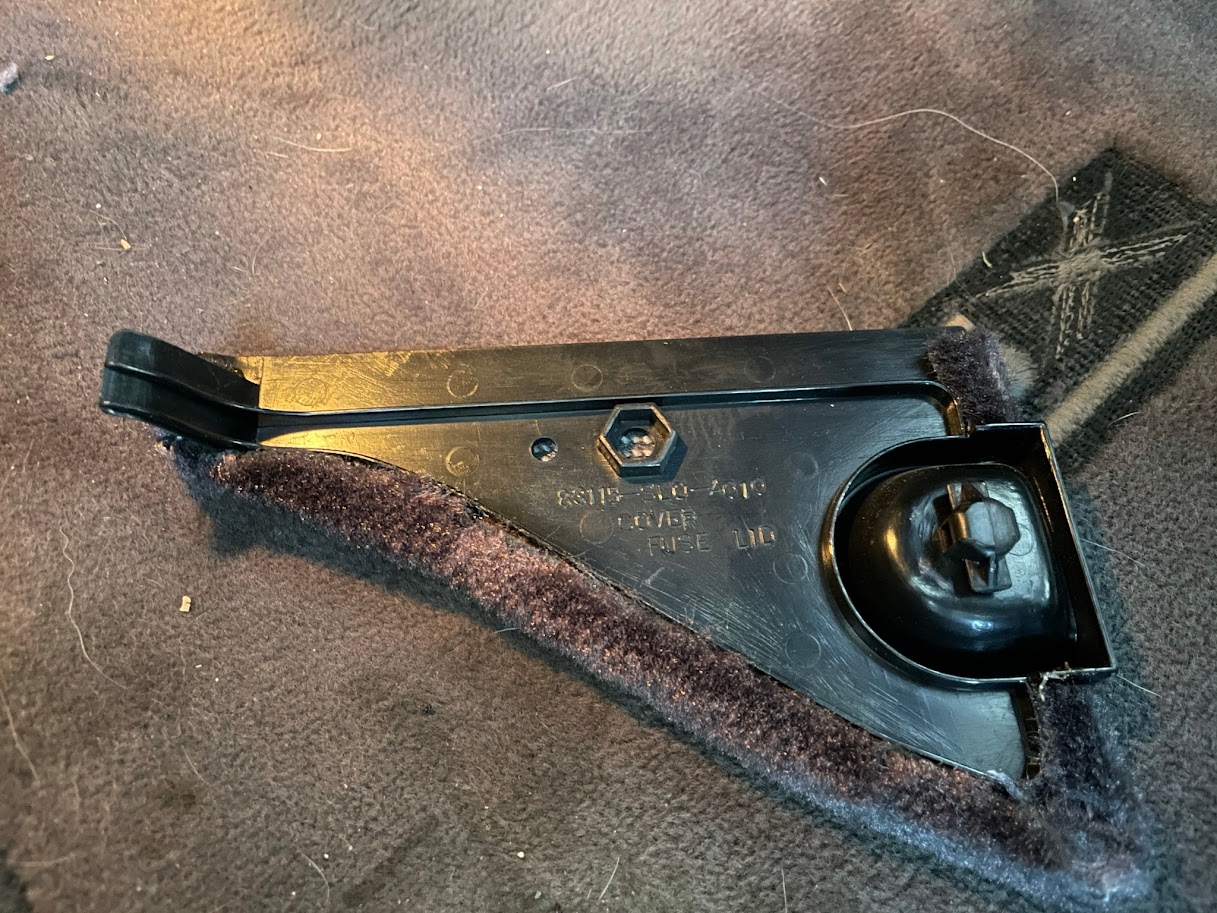
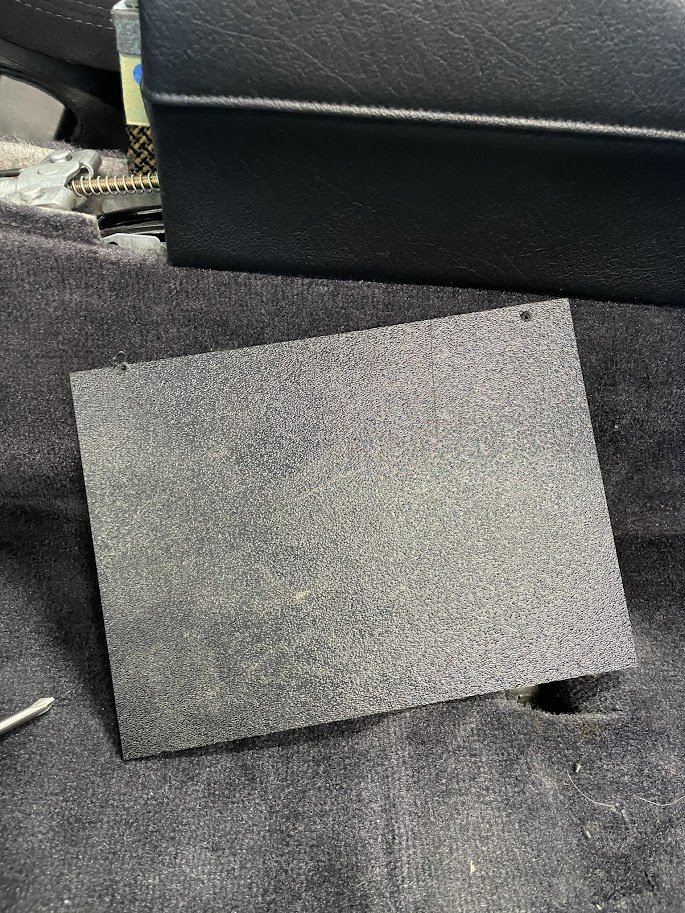
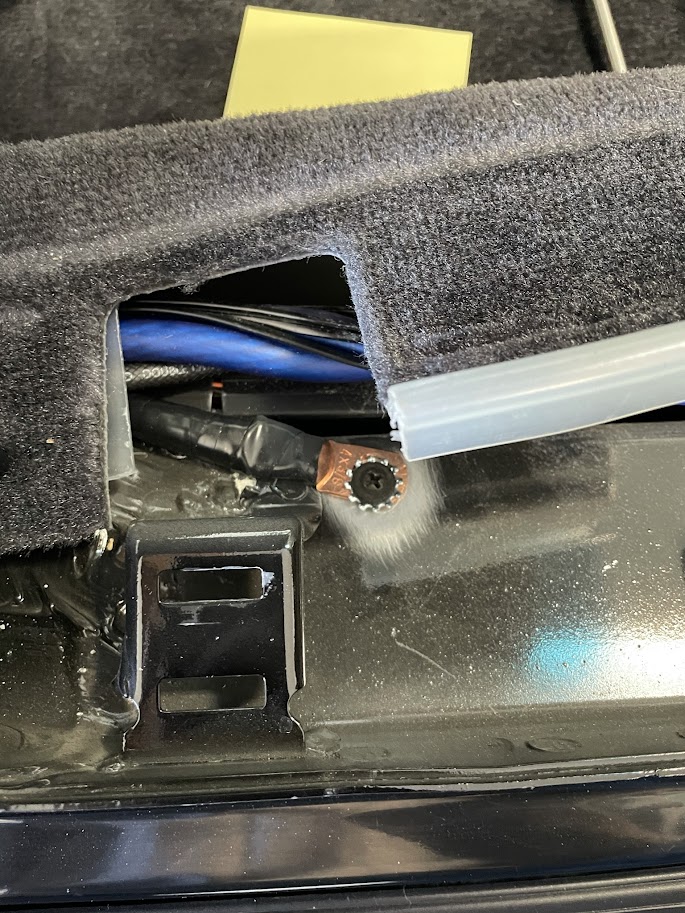
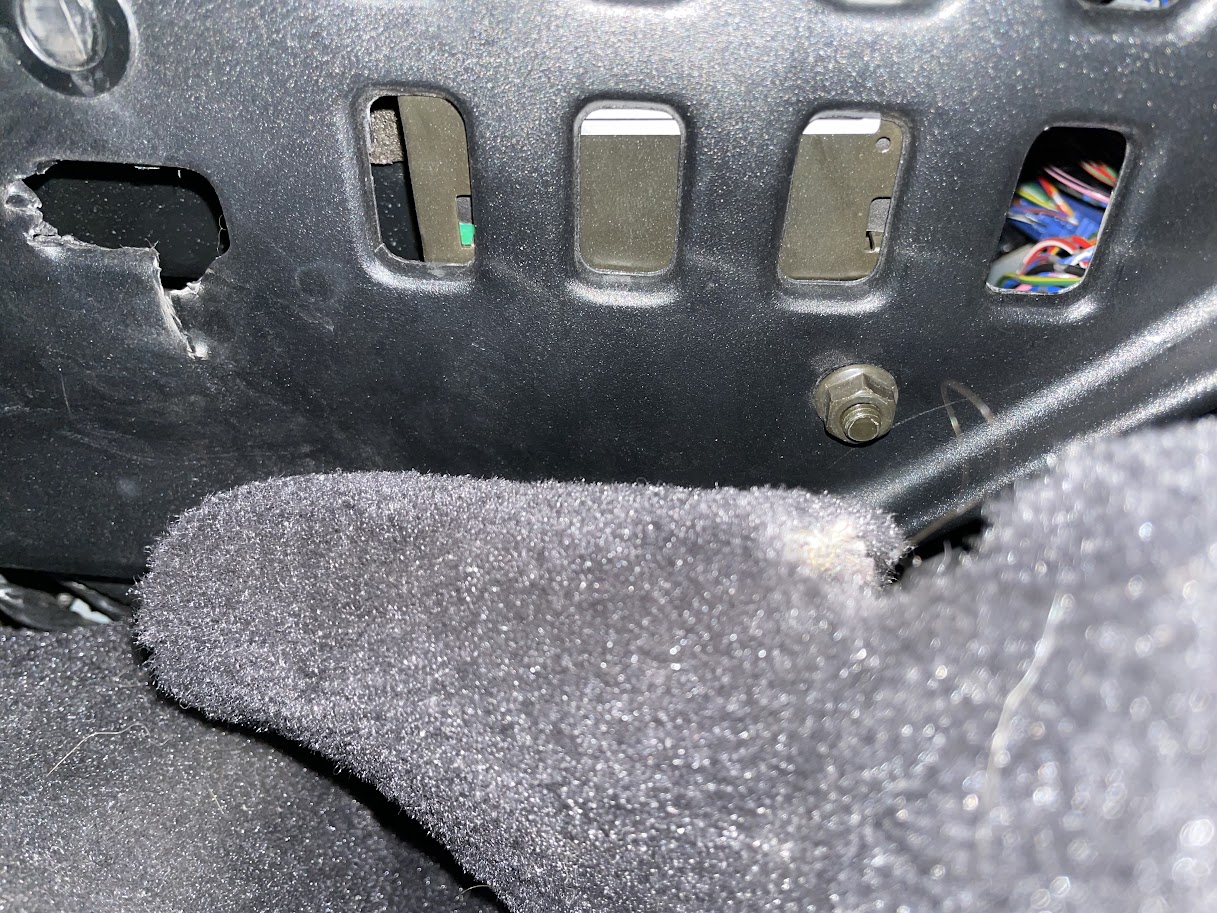
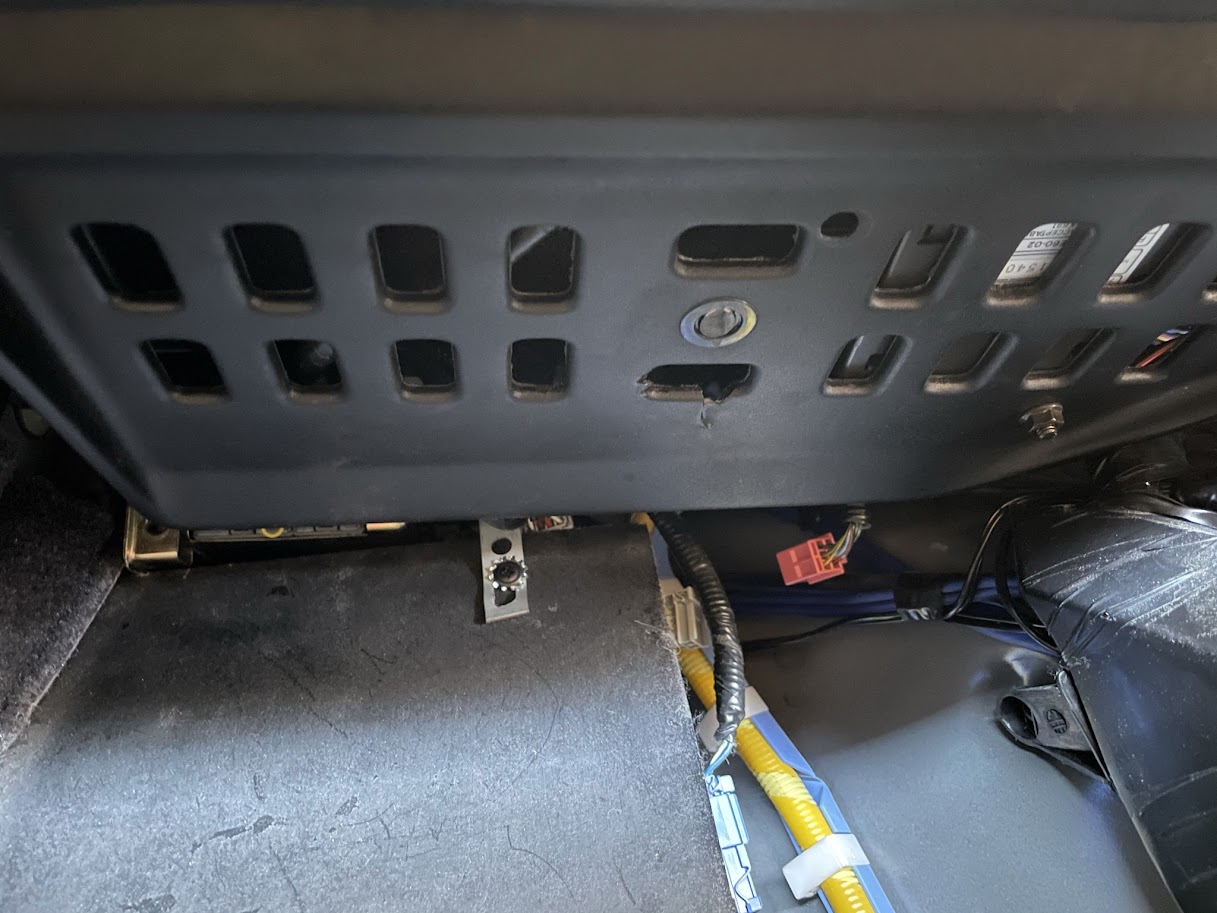
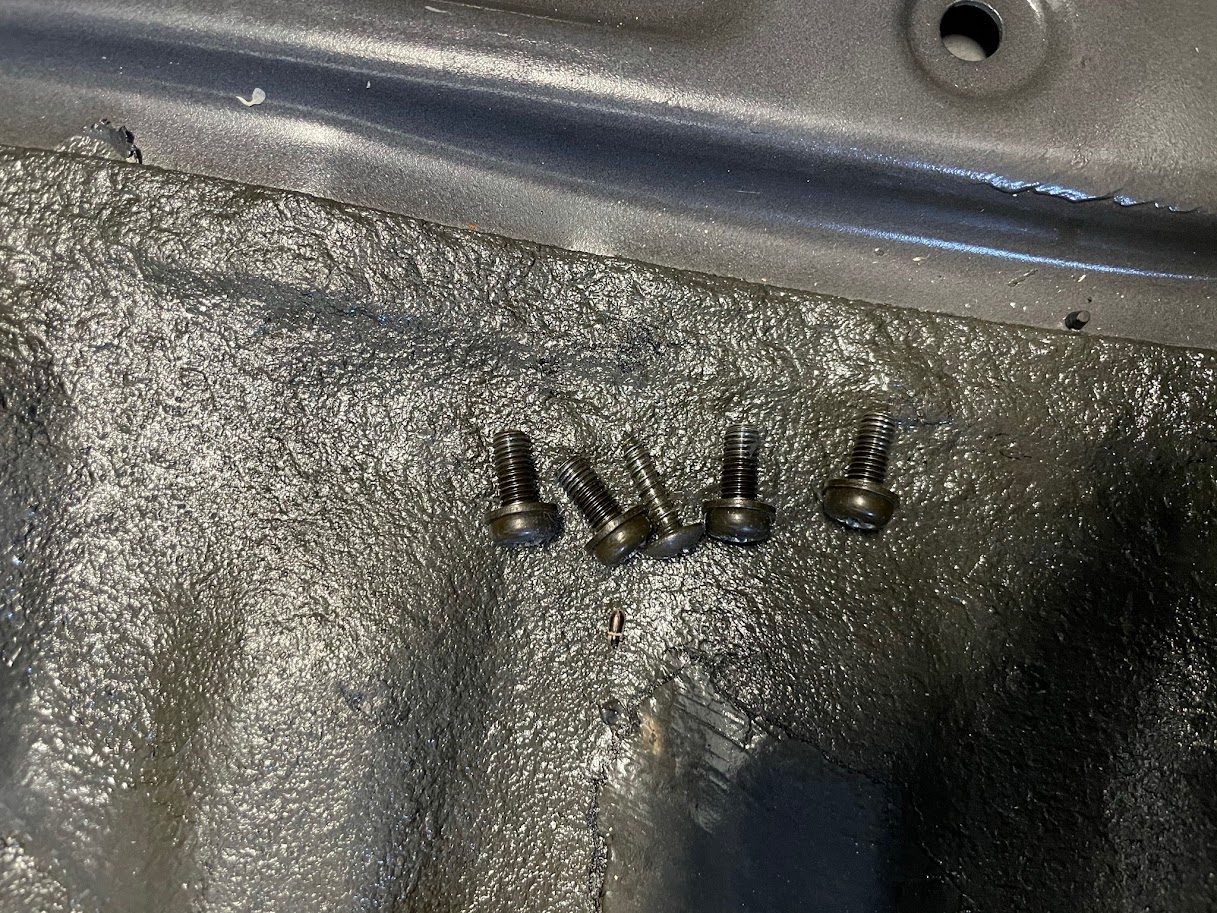
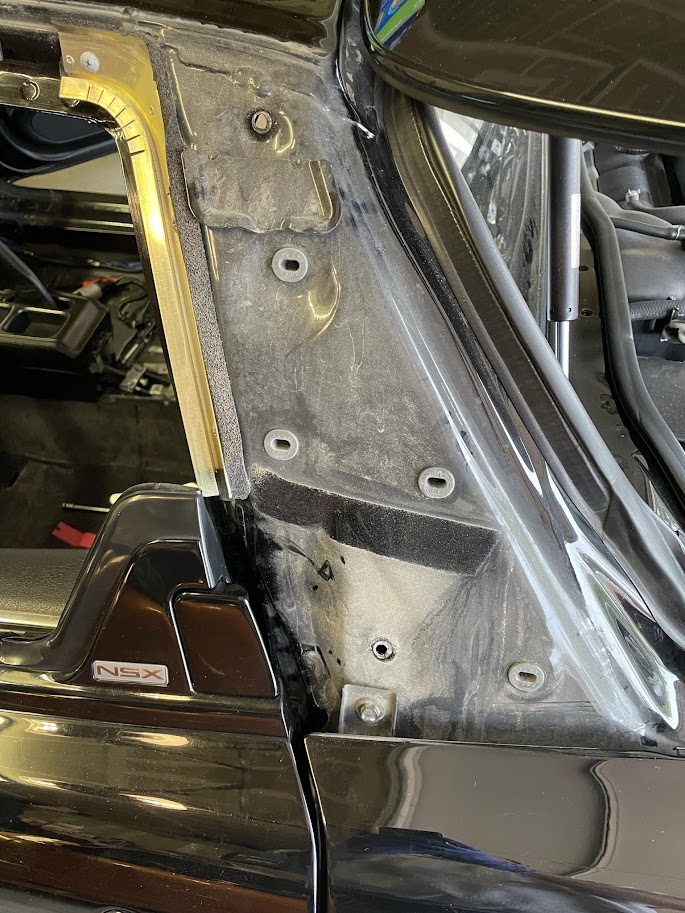
The main trunk lining is held in place 3 different ways: plastic pieces under the trunk rubber weather seal, 2 push clips, 5 screw push clips.

The 2 push clips are on the "bottom" of the trunk lining just outside the crease for the tool kit trap door. Four (4) of the screw clips are along the top edge of the back of the lining (along where the tail lights are) and the 5th one is below where the trunk latch is where the back wall of the trunk meets the floor.

ACtC-3c7FX1nzYnRJZxjewUivhE3ha9Duhpn72RvdX7dGbg7crWCX3SnUlhMP9E6DpyPImGu3fyceXIqGNpZqdpYjQK9fhIyZvGkqfAPjheBgw-Tk5PorcKAPQiqa0C0iseebTxvEqnaQ6NzcdtnQyuPHJNR=w1218-h913-no


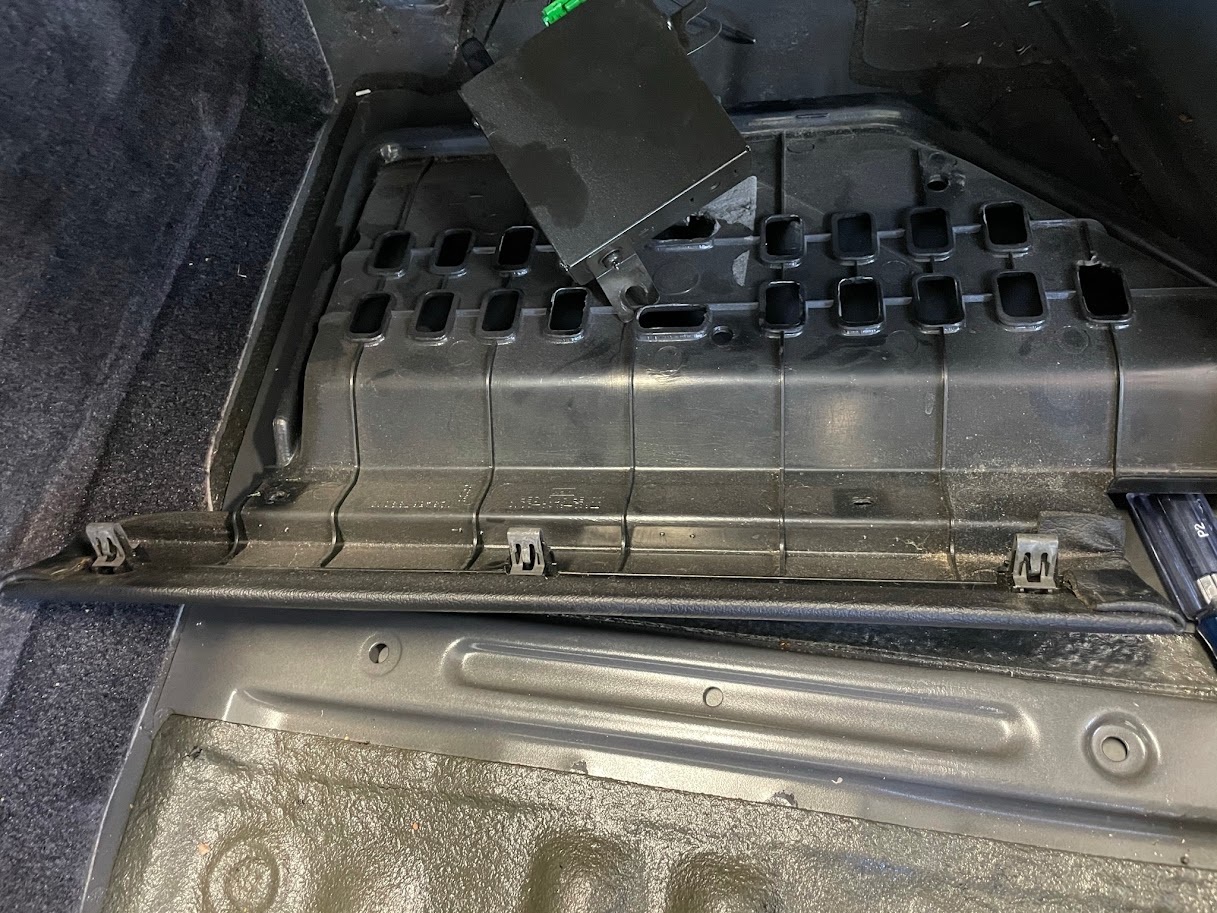
The plastic pieces are made in two fashions, in the front corners of the trunk opening (nearest the engine bay) they are just flat plastic that rests along the trunk deck lip, but along the front edge of the trunk (nearest the engine bay) the plastic pieces actually "hook" over this lip. Your best bet is to just remove the whole front edge of the weather seal until you have the main piece of the lining out.

ACtC-3fyoaim8ZhQS0WRJmsnatPuo-5iJqSaqPehwuvsuvDXSGp-ZIae0_qlG8fbDktL0xE7KyYIt443qUjShqiUDq09xh0w3fO5KxkrB3imfDpCFS4N_zdWbKYloHP-2yKZ9LibBQS-gZyvjOs7i0siASaX=w1218-h913-no


After that the lining should just lift right out, well provided you removed your toolkit already. The piece of carpet under where the toolkit goes may be a bit stuck but just pull and a slight bit of padding may tear but not much.

ACtC-3cKbKmgH2pnlnnuMW8O5QkQFlhV17WGpd5z8-gAU85jAueHdGO7lTxsRloQPZWPfwRUfUvWCQwjCky2QS4edM41OYwZBZA5FWpP5UlTfRs9iau8mgBOkDrJTmWe3hpX_JHG0vDPYYAsydEjhu_Iz2uu=w685-h913-no


ACtC-3eSSsy8u1A686iX6U01EI5BIeE73A0eUpb4AjyyHG32_H_gA5n-L_bisHaEtPj2fUNcClQK8Nv1L2GTtkRtGyQWBQPmb5irt3p-XRP6k3ESIVpRPTcgq-GstpPx2VxJe8AHWI-0y2SrMQunZFKuR6Xw=w685-h913-no

dcBisiMzAnjqqYVm9

dcBisiMzAnjqqYVm9
 
Teardown Part 2 - Interior Part 1

Since I still have to drive the car up to Denver I couldn't tear down as much of the interior as I would have wanted but still was able to make a good dent.

Center Console Armrest is a piece of cake, open the lid, pull out the false bottom, 4 screws and it lifts right out.

ACtC-3dyg7HRuSFI5ZrsJz_btcS4Ra3o963c2dXG7CUzntEuv2M0FqqYL3TZkY5JinuZub18WoOkcgaTCmnAiGaK_-KJtQzvuhYD_WFjbryci0VjOj2GA73GPkeZ8G6uz-cXIAMX1IWxbXfQ0qnHneJyJxC1=w1218-h913-no


ACtC-3eSXojxb2ScCTLyKJKh2Zvq4iD_M2BKNpFMJqsw--OEBsBu5yZsW4gnf8M-afZZSJK2w3IMci6Yc9v2oRWubheLUcHHE2wSk3XHjfbLAtjT-S1BzmVcTxO3DB2MXBu69Vc8yJAZ060YGc4oquDYc3gs=w1218-h913-no


Sun visors are also a piece of cake, 2 screws per visor (left, center, right) and they just pull down off of the headliner.

ACtC-3em0_wdDh3MOgfhJrfnwd_98WEZ05ds2ipyLcajhR2j1sHgAtomM1ZdZHAOy01eHVswbhHaLaeYg_RqWa3_gsIUXGN76f_vkPqxVlzea1JaPoCxfkBEe1TJ5k9PXLcfK8KeLBfXuASwoK8FWgEiC_7l=w1218-h913-no


Next up was the passenger side seat. I pulled my OEM seats almost two years ago for the DF-R's but to recap, slide seat all the way forward and remove the two rear 14mm bolts. Slide the seat all the way backward and remove the two front 14mm bolts. Reach under the seat and pull out the wire harness and disconnect it. Lift the seat up, turn it so the headrest is at the drivers side of the car and then carefully pull the seat out and rest it on the ground. Pop the seatbelt grommet off to reveal the 17mm bolt, remove it from the seat rail and CAREFULLY guide it back into the car.

ACtC-3eLBaeoKIbjgAsen2bsWrvUu0ub5UIIciC76nYBbdgIamDR2vcpDiKN423IFytym4PP3Jbcl3Z-6HgxcQWjiDzaQeINQ_10MtjgD0XyyedWyHWeMdZNoUznn54HT3dykKdHfV39ru5J-jzE6onijv5O=w1218-h913-no


ACtC-3cAQdwIVOPn89t7yyaMTQuzee0QpOhsYggkXCtN8VH6vF9GK33RSXUcXz-nfF2imCUS7AD9J8EIscGtZjk72qbQk1J3Y5RYtstn67rQhVclp9q5kxOSGtozDt4TZdDbTWRmsco4cSsfbxHCAwX1l0wO=w685-h913-no


Aftermarket amplifier for the aftermarket subwoofer and speakers, not going to be terribly hard to rip out but still, your heart sinks a little bit seeing it screwed into the firewall.

Oh ya and in the above photo you can see the sill cover is already removed. I always remove it before removing the seats so I don't scratch it. It just lifts straight up to remove. It's held in with three metal clips that pop pretty easily.

The next part of the side sill (the long skinny piece), is held in with one screw on the bracket where the forward most clip goes for the sill cover, and two clips under the carpeted triangle under the glove box. Remove the screw and pry the triangle piece off. Hopefully you'll get luckier than I did. One clip came with the piece, the other stayed in the car. When I tried to pry it out it snapped, so now I need to get in with pliers and try to pull it out. Add that to the shopping list of broken clips.

ACtC-3dA0ZFAnDBj-caTMLUn8-zMVdKGz7sJHBKv1NAZJxFq0hnhMNVxscOJhzedlljOes07M3qOXbGH6TBqyUqky5gmGCFjNl-N3PEJ7DSJapk9HjNpRVvu7hzm6cWlq3EiDuXR7VfgFzi9hDytMtcqbPN3=w685-h913-no


ACtC-3fc1A9Ek9tZjv27Lahl5G1qUntWWlQr3iQKHz8hbDxz0fgLL8sGmQM9BvbD6IoQLlEBb2kECtHZ4KHPK9tJp1Zhy7zCcc4NS7NaLpckl0G17dXim9LA6qo0QGr2KtiUGf9EGK4VCkxZBCVAZSmUr1pp=w1218-h913-no


ACtC-3dXoH2fK49PsXivBNQLoME2mGaISpvItVurBg0FfMQxD3jFWzL7BNwpwgF_zHOQ5kjtlfb1WINTj-MKiad49ASsI9bOS2d0e7vA-5cTE5oPymABgVE813u9yuaaodM8eYDXxlkjJMPszW1ik8-N01pZ=w1218-h913-no
 
Teardown Part 2 - Interior Part 2

After the side sill was removed I moved to the back interior panels. First the passenger side. It's held in with 4 clips roughly in each corner. Start at the bottom and pop those two corners and then work your way up to pop the top 2. I was met with a fun surprise. Once clip had been superglued :mad: and one clip was completely wrong :mad::mad:. The other two were pretty badly bare since this panel comes off so much so I'll just order 4 new ones.

ACtC-3fYAJyRD9rp3Jy-_jF8qi62Wzoewgdn5t1qXghisnzp9kaVPV1M4AoMaJerX2IUZsJtGWJ3Wxxhc81xW5hBiRvwA9Wsk_zhLPFsI_zboMLrxDuU7YOOwT_kMeb78n-PPQyOAohcRnyMgmssCI0iANIC=w685-h913-no


ACtC-3f23MfjyDvvq-USSKuBqtf8QLlGLXbEc4Vy3AGdVlfObKybQtOIeGjnBcH2m1tkjAa2l0xhvvUUdAKSHBBRl_40n5ebrtwLI-pkbDAZpGLiQdCW6dbwQcKBdVN1fXgisroB9zgpRjIVOkKdxwS0ftNn=w685-h913-no


The driver's side didn't give me any trouble, which was surprising since I had less room to work with with the driver's seat installed. Again 4 clips, all came out clean :biggrin:

(placeholder for picture)

After those two were out I popped off the long upper bulkhead trim piece. 3 Clips, two on the corners and one in the middle. My middle clip is missing (shopping list), and one of the corners stayed in the bracket and it broke being removed (shopping list).

ACtC-3fRicdOwYyh3t-NdNiHhFhDgEOQRGp7baZYSALzUCrCbwrH_Ucj6Gx4xMPzRvDpt_OJ_Me1BC2cr6pxTy-0rL-cVdlcewkNvx7zwu5Yon7z1jA3VLRw2xJ9-HHvoYNBu3jS4bmWvkP30Ly35fu2Ys-H=w1218-h913-no


Next up, the center speaker cover. Really simple, 5 screws, pull it away, disconnect the speaker harness and you're done.

ACtC-3doLVhiB7kMlMzF3k3yoWNAuoUT_xl_7f3TaPI4FdrSycCtpxQH5CPjxTArpZqnkwxJPnl5ZSzgIRTHetFdMihQWZsxwmJQLFqLWoaiWaV77R6NCRMKVfKKtWu6wT-DeHYIU5V3zPF4H4SRNBZfdCnY=w685-h913-no


ACtC-3dOSodlUbPL_msLhOobfJT_m9XrfBoHjGKhyjko6Jbg0YBxbsGGf7okJYF1wSxJTgUiDIzVYey5WHQpVs4GzUKS82oE7JJMJ_n4PJgN5L563VZLKNWiXYRS8WY10tZYjPHblY1fnSP-uv0_Br3ZykTu=w685-h913-no


ACtC-3c9wb4qUhpMC43GA-HmWNwgvZjMUo_LRONt5X63lzS71i4t9jORI6dnA5LhoVTvnlGKXr3wnZ1xa_wygJoB85UDT3SuxGRl-fv2PYJhWsf0-TEwo6WHFTcHJHqht8xppMGeiJ8pdCE2uKihbGqPMl5d=w685-h913-no
 
Teardown Part 2 - Interior Part 3

Moved over to the driver's side for a few pieces, I'll admit, was in a groove and forgot some pictures.

First thing is you need to remove the fuel door level cover. Paul's was a PITA to remove, you just need to pull it straight out but it's on tight. Well mine took no force at all and pulled right off (probably should be replaced). Then the side sill cover just lifts right off, again 3 clips.

Then for the side sill. The carpet has always been pulling away from the triangle piece and I never understood why. Well now I do. There is a clip behind it and somewhere along the way it was removed and the carpet was pulled off to reveal it. New clip and glue is in order.
ACtC-3erG4JKdowc6rrXN8gyRgpy8lajK8kBlq-gYVRJ7I3FP4u8Hz9joTEMFbEFuY7aIbKSbf15oOPTSM2GkE9Fwl3364qiKtXiD3qsoXVPfzTnvvgHyu-kON2V3anaE10-p9jgmCo1JgBl4ize6ajSeH8u=w685-h913-no


The fuse cover door is easy to remove, just twist the lever and the triangle piece pulls right off.

ACtC-3fi7ekTpJKAKudz0pWlC5J8xD0IVx1mJNgoGHnfz9_TZIz1C2HasJCatrgOqV-dBiBa2Hz1ShmLC9s4x2vESsh4teNcXrSz5ipxdw821VvVuWjJ-dM7oCpiAx7k174NlRV3u2rGumvuQvJRtWHMLTNq=w1218-h913-no


ACtC-3fKN8u-HM6vWlj5N_aAb-ip8jDdNifOJ3wJb-CMD4tvvU43htt11gZ2bvne55nWtt8_vES8rSiL3Jhvuy-nEoC_oXRDSrBYggCE43LLGNPb6qQOAk5gj7fpMMfbOnmEuEvB0MhxrYD9mzSQp9OT-Zx9=w1218-h913-no


ACtC-3eftrmbsN_80Erwoa9GYYy2pkq1VqTzUY3Ly8Q4REs4n5jaZ2I_UHzmpaTRY-JaO0L3hw0sfgFBQVUoj8bYu6HnufJCqx5dtMXFVlbSx4vcuhYGnzMm0PNQu8WjMbwojemjQ5xhwYVX_zeVJ1tWKgAI=w685-h913-no


With the clip missing and the fuse door removed all you need to do is remove 1 screw (attached just like the left side sill) and then maneuver the piece around the hood release lever and it lifts out.

ACtC-3f5TmG7P87e7TB15o8IEQZOahpa9EcnnyHADRt3nQnwjD_8SbjO7K-CpmUcDGI5nqXFMVF9kxN-H2LylQLyfu1p7p1E1jGWECCRn8lMldDtxx7NJ7LWEPNVGr-FDGKq0PxWnynH4cabQZO2CUfsdkNu=w685-h913-no


ACtC-3emccMS5KSrCZtFwiX65hSyYnXzbp8RmdKH_WdZxvzUQQsz6hpcb0rbcDms8HBsOXQGeLvNRTM3ILjbXzIVdfuPloPbHWXwNx8sQpK7_BfXe5_tI7hlyXqTLWyKvDkuR8guG8rlntv0boJsymnIPe1Z=w685-h913-no


Then it was time to muster the courage to see what damage was done by the aftermarket amp. It wasn't too bad...

It was held in with 4 screws, two of which weren't even screwed down all the way.

ACtC-3dB-Sn3LOsj_nVGGhfuqKVlytic5-i8njGVirKRe0VOSzlCVxemiJ1jeiTHyCg32Unvst7fkO_cjmB_guKc512w9j4sQ9aTS5MOzJsgFTMQVQ16ExYfMjdSot1bo3r0KVfNJZIpZl2y1EbxOxKxIVHn=w685-h913-no


ACtC-3cSrzpo4wkWkYnpdUd7t2s5-ZNR7E73e-SD5OiYrGLIXaAIQ3LTx-2wDOyoz2hELvMbkbyZxu8NAF4vLzMfslwfRdyDb4x_wyCyMjstv7d1WSHKUtk_evNdtnP7AAyaOLTCQMxHukPK9Hjice4T5rVW=w685-h913-no


And behind the carpet they had put a piece of ABS for the screws to go into, but they had seriously misjudged the placement.

ACtC-3cQLZIBaZEHai35gMd8yIuTlWyYG6E8qMB-D1y57ho4l3qVLHAIL-On-Y_MbKqoTf7cBH7PPw1ogqA072ma6m99LDgqyltemxJKr2v-vNUBHO3Nu4zaWO2f3cUBlYErf1QGaWnwZKp4kQ15CreOCPoX=w685-h913-no


All the cables ran along the carpet under the side sill cover to the aftermarket sub in the foot well. Of course the created their own ground location.

ACtC-3cT8TVTDGM50Q84DkNXouORhLZoY5p69PlfliyHZuq-_AifM6_jp12En1yCADXbNpFHJQmzA4HW8dQLmUkaK42IcNTrCpLdsnvEnKj8fStfbZhzfGIg8CdpIhgb8B9rVeRm5mrvV2sPbCABk69uzcsF=w685-h913-no


ACtC-3enqdNDHUgbK-19YzbLKLhYK9dDeLELtwIqozZa4x4StmNx41C5EpZyl-ve_mbT8sllf5UVLaoa8QxEYz1z1R59kQfl-N9WODbdEfeZ0LXEG8I0Tvn0oW8YyGFUXmytAXwbxfC81rrPuVmdvVwgMXUC=w1218-h913-no


ACtC-3doxjXKjVJ4W6OiytzdB36z_R8TPsvbYK78nkRojjsTbz9B3vNf0zC-s5r_hwu-Os48ODSAWYRPL9tgx3EUK_mefQu7aNUem_fRa7vsXdmgiTTulhHwSBoC8AFsE9bbTO0jwQBRCq5rHgjwfgTzVI-m=w1218-h913-no


Since it was easy enough to slide the carpet around I just went ahead and pulled it out.

ACtC-3fL-iUkddLdO8RUxLEmMbplfnxsdm_guTQuuNj_OED2Shho3TQgc5l9kv9v5LMsSHbXTfZplnra6v-nllcZv2exNtme_eqOb4EXDdMMTz6lEoW1iyJzZ6obndeyPc4k2Dxr106CFF0QF8Oi_pz6JtMg=w685-h913-no


ACtC-3fo84Zwx7LU7T58P3wC4nPHaK9u5-f9qNyxjcDCShZ40_igCyx889h-AhvUl_KeIPaxNagBm_TceV1ARt6jbj42c-kCB-U0uNPdvLRJFJgttHh1SHVX6v0bE2evPxuFor58RtLjRU-RH6Cfu0siDZdc=w685-h913-no


I also pulled out the white clip and the screw in the air vent of the console carpet

ACtC-3e6RiZQ0Vp2klYGJDxw7XwJJEbmhrGCTLC5DZZonip1aBaqKWu9ka7CZfVbDZCWhV-_nPPN__zNzwUHf-JXCqc6cSdoaLSanzmSNb8Op62I8W3C9KN9iLy6eUys60uFyvJx75pIm-xahEyyvhBxSa7R=w685-h913-no


ACtC-3d367IqFXgtBXnHJY3eTubHIYFFgN5ob_jBNJ8J8M_HRlqyCVpkagRL8glJn_af8NcQ2cYSi4vvc3-L7mevcB3ZalPdU_4BwT8S3nXlt37gqDl8DyTkt69l11SEAiZ3gCI6n8PvAGCgGwmyqu5QBp2a=w1218-h913-no
 
Teardown Part 2 - Interior Part 4 - Glovebox

The last thing I was able to do was remove the glovebox and related componets.

First up is the dash lower panel. It's held on with 3 clips, 2 screws and 2 nuts. The 2 nuts go to 2 bolts that hold the KES module to the panel, so I guess if you don't have the KES module you're situation might be different. I actually found one of the bolts under the carpet and no nut and only saw one nut on the panel but noticed the panel was mangled a bit.

Anyways, remove the two screws and the nuts (if you have them) and then just pull down where the padded part is to release the metal clips.

ACtC-3c7Dd67-ClDvVTSKDvRn4zKGm9L5cNdNL3Yk3XOb9PaL3AszDTXa9fNUPY3S1oOxzUgr7NjnReMTqFN1S2rA7Sq-7yfu9icZp6K-WFWQ4h1mHvVgtWZBmEXWtaa5s_79hArUcPdCox_b5K9MG3qM-Gq=w1218-h913-no


ACtC-3fO1kgJzAVBqL2KtZVDRv7UTwc9FYmpclTWbWPfQY3XEhgs_wj0TCXaSfxOYPIZcI2eglfcRzPzv5CrTh0rlcL7pvi04ZrkplsOuImTiZa91TyrXb0PgoWb_06R2_EGS8gCoLetg433w4iQkmQUSUig=w1218-h913-no


ACtC-3ctcZGDNqWLMQqzG1fh0rYXdmKSquurJqR2WmS2r2TRkQi45C4r8aFkvGVfBXrzfEENzpekO9K7K9CzlWDAvR1iQrXGl80_gAtMO6Kgl4a_Mvh3L0Fq56n6uHXqw2jsoL8YW9wUPeSQxsmid8JtuM9q=w1218-h913-no


Next up are 5 screws for the Glovebox door. The middle screw is different than the 4 outside screws.

ACtC-3cd8sf4Ut2NVT3U9NuWomkCvFP8KlURN5h62uOiDOL_TBX4Z0q8TBvzaYz4PQIoqhWu76lZQGdyRpio9djm8QGqUj4ygvjGz7SuySbZyblMyOAw4KDRdtv95iNO5dNlcWJtFtrZv-FHNJM9MqKoNz19=w1218-h913-no


ACtC-3eVOgys8b-sFydUpC8fNpxS4Xim7XeVrV-zhJyNaVUqL-dtaq3F9DeLN_BYIzcUIjEcc5xJu65oLhXm3SBgfh6nbnkYHJzC8g-5HMi633Y4rG9mbRdnBecHYq-sC_ytbK9bzYaue9td2Oj32t7I1wuf=w1218-h913-no


Next up is the actual glovebox. There are three screws in the upper roof of the box (sorry no picture). Once you remove those pull the glove box out and you'll have to disconnect two wire harnesses. One is on top for the open/closed sensor. The other one is for the Main switch. This plug is actually hidden right behind the metal brace for the glove box, don't try to remove it from the switch itself. Its the gray plug in the bottom of the photo.

ACtC-3cu9Hh5qLK24Z9KOa0QM-fq9Dy0ot42MDM3FCb8QUi_JbUZ4asLd2hLLl0kwdctQAomPIMf4pU-k-YK4NYR-MD0K9f7PW6omAADivZiACclK_Xta-oA9DagfvMH_i6PkePHc0CsB5jYNSlO7DSW_uiZ=w1218-h913-no


ACtC-3dRLIcxP2S5yfUky-7vnqCZfIFG3-RD_3YPT7Imrpogde6PqHLkp7ucRkbGj9RBdEw3U80-_XdJ2-kLOXVyGlKDe3GhexVYG0OV0_Ql-pllDiorFdqThwiHCBKvAtqHTZI9G82jHwO10f4N5ZelX0Hw=w1218-h913-no
 
Teardown 3

After the last post it was time to move the car up to @Honcho and his garage to complete the tear down prior to paint.

ACtC-3cnEoJkvdRrw_yPbfELQLWhdc2HiFaysIecthPbtPpQR40VfclSBUpOJSfNVxU9tNRDQcqSXMYeY6QnQeTavED5UzkAOeOP2li6tkMZ2bl-8yUDaN_8Bc9a_MWM3qCACJI9HR7rjnWCNHzkQplRAgJl=w1218-h913-no


Goal is to get all panels off the car ASAP since the shop wants them mid June and then will take the chassis beginning of July.

Got right to work on the trunk, no big surprises here, my wheel speed sensor grommet was popped out for some reason and the trunk struts must have been recharged or replaced since the wire harness piece that snaps onto the trunk strut was zip tied in place. Also looks like the wire harness on the right side of the trunk is actually designed to clip into the cd changer brackets. I'll just snap it back into the cd change bolt holes and I think that will work.

ACtC-3fH6PBihGb8pjn4jiqHSqzxhBSFWU_b-lHxqwecObp2HKWVQt5ouvt6r3xMpRNdH1GnEndrA4HfZvyL0AZqJ-VjMIlyJuxEM0u3kfzOtMqZXZntiAUPUCXG4RWhqSvauxiouaHk4S2bwmdDFyt7C9yj=w685-h913-no


ACtC-3evxZ3oDP35HjcEo7A5Atxlc-CMO8_9Hco6pJ_L2S6gSEfp5Nrb7oZRWtgc6SpmFpTFP14QJoAvMAolmnpCWb1iFPCsLDh-E46W4knO-jTTKj9q6LhdbGIW8HSv_a22QNaYwQQeOjjuk_O1G19TV7N-=w685-h913-no


ACtC-3cvXLYiMTCKi0i0cdTaipKV45OlFILemBTfNAGzKVSmMDY_EnvH3vWgh98coFty5-JhrtRzrxZZlEegpUEa445ASfn6QAY8i2zeLFkPzUbZqBORJgwcmzDN-ZBYf5Nuk7A-NB3xk1QUWr6dq7TSLLR7=w1218-h913-no


Spoiler, Trunk, tail lights, rear window garnish gone.

ACtC-3c2kMXg8zDuizKexw2N78BpECFzwqYXaC2LeYnqerclxQ_W-TwVBeC_Afm-hK3wFtih1jGOxwWnPvDj6UYpHwt-YCrLXw4_17KQtysxbHB0aXv2L-uJ2Rv_xvUz6DgMPI2ubgND-7jrbkP_PWG1x-6b=w685-h913-no


ACtC-3fAP_8oYfsnvswspAAUKx99l_9yXcN3_vldQ44Y2VKPX8fFhYSFVegyDX00n5WHyqgYYrvhGnVerEEM4rHGDwLCqXyzoa4ELEfRBNQ76IYTaqc2gvvr9yOg7Z-Fk5aybgl0qoxhZCbJr-ZNNnUSY8-C=w1218-h913-no
 
Teardown 4

We were working fast so didn't take too many pictures but moved on quickly to the front bay.

Off came the hood, radiator supports, and headlights came out, followed by all windshield lower trim pieces, wiper motor and wipers.

ACtC-3dorOsl2C9FBVZKBjiknOfpqX68ou8rowTURDvH0bce8oIRjOkk6PJYzBBBw2ejVvo9sWnJh8xDbIf0t99nvJi_Nvsp4ULv6sn-jSHgyA9isvVgcyP-SSnjaiOVM2OudxKm5roSiqbenMRw_RVJ6umZ=w685-h913-no


ACtC-3dAl8PgyH-8IC7_NGQuMCDncarhRneT8M1E-T2XUyobg26hzI2LzJp8KtM6E6ZC6mR-Zui8uUwfiEAcv9QLaARX9RtsdCKpZva2nMAW3QbzLRmgaQjeXmoaq9N0BQQvRGrWKhRuv-mi_dwWTgEEHLbL=w685-h913-no


ACtC-3fZRYrIbZCOiVepvdHh_PFvkjF7l6BU9o4H2gIWRnTE9RDuTnNBVDtFLtSDeSsp4t6oAuH1rIIwVb7zQL5q4h0riiGfeJQ9zfNUscEaVdy0zSTDFvWR1NIF5raJTTxKmSBr_7iI6ojdzQbbYESQ4E7k=w685-h913-no


ACtC-3dBzIe-Tw-rDIF9TPkObzQlNMwCH9ibkUcBPWZEkbYIDQw60uJKUhPgSwbWPVC_RPGoQIOhg-QPEToLRgrwmwozyPcS5XbmXVLJM3E43sGvOveiFd1jEfKz4xdEZFyoU92KskIIktvVR0YCcj97tA6M=w685-h913-no
 
Teardown 5

Moved on to more of the panels: A pillar drip pieces, B pillars, Front Sash covers which also lead to removal of more of the interior pieces, A pillars, B pillars and headliner, and fuzzy door pieces (my official name for this part)

ACtC-3fGUFTjECry6Whbs6NWz6-P3gQkTMntmdJWk6xKt9kcv6SLJTxpF-G9TMGTxBo3mwwb_Vs7fwdOGbzSjUho-WgZ3HKFln5wEPxdJl1hzVVt7o5jA2a7nN2QNSezbK9brfcZQmK2AUKWl6aMj6plLRq-=w685-h913-no


ACtC-3d6zyrtOP5xM0QPp0_8OquPvpWo7feOWZYPsWsuWdCaz71Gdi4ZJTcExY-W2M5aJ3wrxrwt2PfqpCF3z78MIoTaxchg1plMHc_PbILZ2HqzPVXW-iv6d-lJEv2a7HI3jx3TiBJE0-KuVWr9V3vgtzKj=w685-h913-no


ACtC-3dtUQaqvO-B51J_WvJ-0R7OCT6ZS4n9Ry0Vh5qCzq7GzkjM9HSrierNeG5d0y_gDnm7mlDKrXWcrGa3rYqLrzPPEVw9zgNIYI13TszDyBR-cj0NaA6H9g2jC3vhdnVjm12R-JlXgLriEVVWvphmIBSL=w685-h913-no


ACtC-3exmajG-HJ3f1KNl-uBQRZgyQ2zJ1Y-yL1k5Q8RW4nnv8bjlyxoL7ETAQHO1JR2RMAqA2P_XlLfmrryUc77t8VwhCg7y7DpWEWYG0cTBIVGrvwFaVjaVvBVp-pTzwVxp7BUhs3D33ElRV_AP5iwTVIV=w1218-h913-no


ACtC-3cRg0Z4Om3w_0UEzm3E5Pu37ElIxdmZLJIFAfL6cKmikILlT8fukkMHdmhfAPJdW8eutIse4NVDLZNzNqu6MEA-c8lXWb25OzjnwSX840J-EwQpANUpizuvb8SUn2tnoJAobt2gLdc_F0urH9RWRpXF=w1218-h913-no


ACtC-3f9AQq2Eo7fUO_--pdnvISkkZNkXAl-1ua6eUwHgnLZ_CewewVEQShCIH9AgigOAt6NOSrG5oGT6iwxDWbyGid9pecf-B33zEugcDsEd7yMEvVx0UIxMz95j9iNUiJ71S5fT2DSfH3su8KDTduvTYl1=w685-h913-no


Not a bad haul for day 1:

ACtC-3eYg6hnTLGas_cXpC6Pz6CyiaPRkqlb4AUp_9bCw2wOYIrH6JS8LbXaRkQXPZWMGnhPvQg6UGLRZuAKEDxGpbN3LdwROMtVsA1I2PGOLkQxBpKsUBswwVbUrkUo-ddu3F4rYFilkNihbXLS0VB3wPSe=w685-h913-no
 
Teardown 6

Back inside the cabin, time to tear apart the center console for a few reasons, CCU will go to Brian K for preemptive repair, I also need to trace down all the wiring changes made for the aftermarket stereo system so I can go back to OEM

ACtC-3d9JVlGEJGxFx83hcgtmL3wmGOt70gU8UikNvynBmz5m2a_e6Ujsp_BI_fm0yzwDK05VCGbVEnchknMwJj2KJH8KZy5MHYuXv2fzF6aTIfCsYC1JKBhj-ai3d-PqDpEqb3JO39PknwPqDZFTsTb5kSO=w685-h913-no


ACtC-3cU1NeW__1cQYxF_O-yQpsJPOXN69PoncYymy20oM-qAx9BqbH3EzKMa40CcyQaHplWOnfOwITTz43CaWB8Iq9kM1DrAaNQENnpoue9WRmrQuNHuTlI7GhcPCUGl_4CYAD2iu94J8pB-_9aIqWAfoTQ=w1218-h913-no


ACtC-3cucFporwOeEwiqIY2rAkq4XVkrWHOC3N3QrsxiYSPgtsGVqexyI1hIl_aXfPTHrqcs1rw0t-vnmsEQG_sfpO_DAMz6ycxiuQqmySik0HEkrI7xkl_eWwoaMG69l9Pqr1etVuGRUzwwXTCGQm1EYDS8=w685-h913-no
 
Teardown 7

Moving on to the doors. I knew the horrors that were awaiting me after I removed the door panels a couple years ago to replace the door cards, but this still made me cry a little inside. The passenger door vapor barrier was being held on with brown duct tape! Who does that?! Not to mention the whole vapor barrier was trashed anyways.

ACtC-3fSmU0gRmAWqBYNXY9hNWH6kLxMGEBUHNh4tMf9Vs8HGh8dg4T6-unv1aHbtlb9Q3toim04mrqCwiEAwpl0b6rI8mGr8ZxTDlEKxeXpgOcHPODt26o5BHuC0WXTDO2Z1TTEppExK1owdA16n293ya6l=w1218-h913-no


ACtC-3cDOj6xvETLXo9bBGFxKj3J4RBk6uO6qc6916q91kJPjV1oMZdVOsecy6aW1bsCqYG6_dgxzJU2IP75zakbpciC0Yxp4Pe7mGsxfJnDoKn3yJAR_zxspHwfzMExgnKadIWqmZIkxkJ0g3dLHCRC1gui=w685-h913-no


ACtC-3fB0gUyLoZ7rRj_cKh6ciL0dswiB7OwL06mTrBJvB6EnuJFW5HsklrBjI9rrotP1wveJ-HQvBbUa1SH-mNew4U_s-iMQ5PC1qaxffGdBUmiQoNTsF8EJp4099jotn_KYpiDPQyYTAfhsoQbLcC_NBmF=w1218-h913-no


The aftermarket speakers had tweeters, well thankfully the installation wasn't to cut into the door panels, instead they were screwed into the front sash, only problem was they couldn't get the sash to clip in so they did this:

ACtC-3c4btvHtOX7XD9tWTorkJfMAnwOWSm5QhqpvsPtXKe4LMN807tV5U3a2F5QDBx78PIFGvNwUJlIbmePBu13Qy-dUA7cukxeqoyYYV9v6MRJ0dzZhgO8ryz5B1F2hC0dgvEyaCGfDz-kz46C8scDincV=w685-h913-no


I knew the passenger window regulator had been replaced in the past so that explains all the green paint circles around the adjustment bolts but figured I'd add my own using my girlfriend's nail polish

ACtC-3eadaaBvWCswSzJqotNwEdcnW4hD6ilyARZL-lzkQ32_bHjrmpFZVoucDsUfMXUcNGtI1X-EJuo2OwbPt3p6sxPK0APpq58-9ohRJ3NxoD7UpRiI3uDIgNzeWAsUF9AQl0866gxmp-XswbtufgGfgTR=w685-h913-no


ACtC-3ccv-shD63wd8b1y-QlAHMfwkiPVHfu9dVuHCdRIYW218289b3dwCrzs12KdwKocXiMXgOKDqh5XJSZOxM-f05rpuVKvYes-j4Pa36YVRw9QjpapizjQwNpJBpfV4-CdDNUpCpyeSnpKsCrPVhF4xfp=w685-h913-no


ACtC-3cYb352uMW6H-fiD3jV-Imd0QT5U5DMKESFbiAc6PGDqkdSOciCTKIYZhoPKttISxMj6goU11p5mS2nYgkYa8dbU0Xe4EXu6ASN4mP3YEWz0IY3736QC28tvI-DdLlvBlWl_VOZXLhS8wYcDUX-70yo=w685-h913-no


Driver's Side vapor barrier in shambles:

ACtC-3c-4urIbysxbdhR0GNB8WxY5kPq4U06Ynfc_xFkOJmhsdXUlPyeWOIIu3HjWSNJSA3lPedPCxxU5t10j1v2iujjqHXNxj231pHEO6_ZesPb-r_sU3E7YJLSG2K4JpwLTHZY6apRf62gHK7vwAWefNX8=w685-h913-no


No different surprises after doing the passenger window, except I don't think this window regulator has ever been touched, which explains a lot actually.

ACtC-3cQedRynlgbc7OhVJ4NE49GOeor9r3tNu-5S7tqLhdpYfNY_LAPhl-n1nAYtbmkicrjASw-hqxPYbod9IBMxUaBXMYob97rLOL5W654kG__NS2wHERj1nvY8ifc-0O8nRpVDZYO_zxG7u3AQpDV-bKN=w1218-h913-no


Nail Polish marks on this side too:

ACtC-3cFvErqGLYvzLtQgpHkalYTsgatRFlU6F-zCeEi7Blv8WV5gqqjr_sBcUBaRlgQF43xV223UItnTosxkQNNpWAjVmOOnZOGrhs00Soq1xbuY9a4Vl608gVOmGSTYLcemnyrBsV8YYsj5UKD9-banU0M=w1218-h913-no
 
Back
Top