After only 7-8k miles, I'm removing my old SOS twin carbon clutch on my '92 5-speed with ~128k miles due to the shudder from a stop. Otherwise, I love the clutch.
Anyways, one of the reasons for shudder may be from worn transmission input shaft bearings (ISBs). A quick google search shows this to be the case for many old Honda's once they get around 100k miles on them.
Since I'll have the transmission out for the clutch replacement, I may as well rebuild the axles and change the transmission ISBs.
Thought I would give some pointers for those that have higher-mileage NSX's (over 100k miles)....
Study the applicable Service Manual (SM) sections.
First, on the clutch change, there are a few tutorials on here with pics. My recommendations are as follows though:
1) Clean your engine bay and underneath the car before you begin working. Nitrile gloves are great when wrenching, but it's still nice not to have to deal with excess grime.
2) Buy a transmission jack. I didn't get the cheapest HF one - Mine was the hydraulic gray one for a little more money. Just followed the hydraulic bleeding/fill instructions, tightened up the adjustable saddle, and did a 100lb load test for 24 hours before placing it in use. Worked great.
3) Pull out the front beam (while supporting the engine obviously as there will only be one passenger-side mount holding the engine. It really opens up that space when trying to maneuver around the transmission, and also makes it easier to access other stuff when taking the tranny in/out.
4) You need to pull the clutch fork out of the way before you can separate the transmission from the engine.
5) Once the transmission is out, and old clutch removed, clean all tranny/engine block mating surfaces and the end of the crankshaft thoroughly.
6) Replace the rear main crankshaft seal. If you have over 100k miles, or the car is around 25YO, it will leak soon. Might as well do it now instead of dealing with a puddle or clutch contamination later.
7) Replacing the RMS means you'll be removing the oil pan and replacing the gasket, which is also another must on the older cars. You should have unbolted the front bank exhaust from the cat/muffler before removing the transmission. With the front beam out, it's not that much more work to remove the front bank header and therefore the pan.
8) Once you've cleaned everything, replaced the RMS and oil pan gasket, then you can begin installing the new clutch. When untorquing the old clutch, you are potentially rotating the engine in a safe direction (clockwise when viewed from timing belt side of the engine (passenger side). However, when you torque the bolts for your new clutch, you may potentially spin the engine backwards, causing the timing belt to skip over camshaft teeth. When torquing the flywheel bolts to the crankshaft at 76 ft-lbs, I use this setup so the engine can't spin backwards. For the pressure-plate, I screw in a transmission housing bolt and wedge a screwdriver in against the starter ring teeth. Alternatively, you can spend money on the nice Honda tool... just don't let the engine spin clockwise when viewed from the clutch side.
9) Due to my previous shudder issues, I wanted to measure flywheel runout like the SM does. Spec for a new flywheel is less than 0.002 inches measured at the diameter shown in the SM. My new Exedy (NSX OEM clutch supplier) measured 0.001".
My RMS was replaced when I rebuilt my engine a few years ago. This area just needed a quick wipe-down:
View attachment 148329
Torquing the flywheel bolts:
View attachment 148330
This step isn't necessary, but I'm not taking any chances for a shuddering clutch!

The rest of the clutch install is just standard stuff. Before opening the transmission however, I rebuilt the CV joints and intermediate shaft....
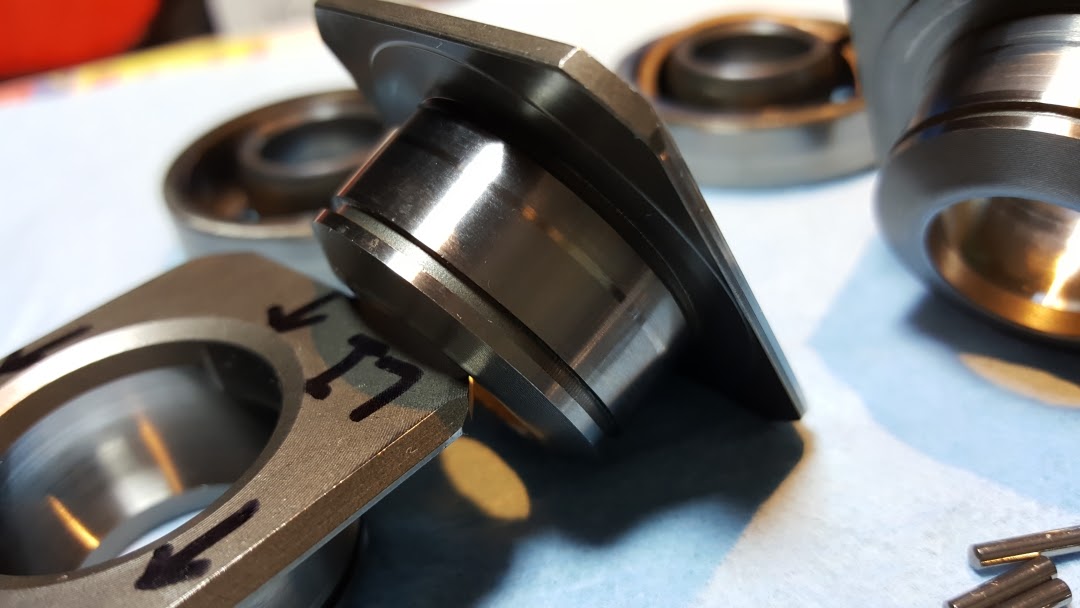
With 128k miles, my intermediate shaft bearing felt fine. However, I don't like pulling axles, and thought now would be a great time to replace it. Buy a new Honda bearing and seal. After some cleaning, I took this to a dealership and had them press out the shaft from the old bearing, press out the old bearing, remove the old seal, and then reinstall the bearing, shaft, and seal.
The CV axles took some work removing. A Harbor Freight 900 ft-lb impact gun and 36mm socket took care of removing the axle nuts. Sprayed some PB blaster on them the night before, and it took a minute or two on each side with the impact gun. Once the nuts are removed, use a brass punch to tap out the axles. Please don't use a hammer or a hammer on top of another hammer.
Clean the hub and splines, then coat the hub splines with anti-seize compound.
The axles weren't difficult - just time-consuming.
Kaz has a great section dedicated just to axles. One of them is here: http://www.nsxcb.co.uk/entry.php?2034-Eng-Refresh-LMA-etc-39
* Mark the location of the axle shafts and ends before removing, and then mark the locations of the roller bearings as you pull away the cups.
* The outboard cups have a lock ring that has to be unclipped before you can pull out the axle.
* You only need to remove one spider hub from each axle (using your brass punch again). It takes some patience removing the locking rings (and reinstalling them).
* It's very messy. I used a lot of old newspapers, paper towels, and gloves.
* None of my joints showed wear, but I went ahead and took all of the roller bearings apart for further inspection. There are 53 pins for each roller bearing, so don't loose any.
* Degrease everything very well and keep it all clean. Contamination is the source of most wear (besides significantly lowered cars)
* Clean/inspect the ABS trigger in the hubs, and also the trigger teeth at the outboard cups.
* Now is a good time to sand, degrease, and paint the axles and cups.
* Use electrical tape over the splines to protect the new boots when sliding them on the axle (you only need to remove on spider from each axle, so you slide both boots on from one end). Install the big lock ring, then the spider with the correct offset relative to the other spider per the SM. Again, installing new lock rings takes some practice.
* I used Redline CV-2 grease. You can proportion the amount of grease in each cup per the SM, but I just eyeball it. I like the little plastic 14 oz containers vs. the tube. You'll need one 14 oz container for each axle (two containers total).
* If you're rebuilding these for a street car - DO NOT VENT THE BOOTS. Moisture will reduce the load-carrying capability of the grease, and any contaminants from the road/track will further ruin the precision surfaces. Don't vent unless you are only using on the track and frequently rebuilding axles.
* The rest of reassembly is pretty straight-forward per the SM.
Before:
View attachment 148327
During Cleaning:

Finished:

That's where I have stopped for now. Next up is taking apart the transmission.
In summary, for cars that are over 100k miles, around 25 YO, and you need a new clutch, consider:
1) A new oil pan gasket,
2) A new rear main seal,
3) New front and/or rear engine mounts. These do crack with age/abuse. Mine have been beefed up with 3M Windoweld in the past. You'll have these removed for the clutch change.
4) New transmission ISB's
5) New intermediate shaft bearing
6) New shift clutch fork, clutch fork holder, and throwout bearing guide on the transmission. These are wear items. My bearing guide is in great shape, but I needed a new clutch fork and fork holder. You'll also need new transmission seals. They're cheap insurance.
Big thanks to [MENTION=10201]goldNSX[/MENTION], [MENTION=25737]Kaz-kzukNA1[/MENTION], and [MENTION=3729]Larry Bastanza[/MENTION] for all of their informative posts over the years.
Once I'm finished, I will list all of the Honda parts numbers for the stuff I used.
I've never opened a transmission before :smile:
Anyways, one of the reasons for shudder may be from worn transmission input shaft bearings (ISBs). A quick google search shows this to be the case for many old Honda's once they get around 100k miles on them.
Since I'll have the transmission out for the clutch replacement, I may as well rebuild the axles and change the transmission ISBs.
Thought I would give some pointers for those that have higher-mileage NSX's (over 100k miles)....
Study the applicable Service Manual (SM) sections.
First, on the clutch change, there are a few tutorials on here with pics. My recommendations are as follows though:
1) Clean your engine bay and underneath the car before you begin working. Nitrile gloves are great when wrenching, but it's still nice not to have to deal with excess grime.
2) Buy a transmission jack. I didn't get the cheapest HF one - Mine was the hydraulic gray one for a little more money. Just followed the hydraulic bleeding/fill instructions, tightened up the adjustable saddle, and did a 100lb load test for 24 hours before placing it in use. Worked great.
3) Pull out the front beam (while supporting the engine obviously as there will only be one passenger-side mount holding the engine. It really opens up that space when trying to maneuver around the transmission, and also makes it easier to access other stuff when taking the tranny in/out.
4) You need to pull the clutch fork out of the way before you can separate the transmission from the engine.
5) Once the transmission is out, and old clutch removed, clean all tranny/engine block mating surfaces and the end of the crankshaft thoroughly.
6) Replace the rear main crankshaft seal. If you have over 100k miles, or the car is around 25YO, it will leak soon. Might as well do it now instead of dealing with a puddle or clutch contamination later.
7) Replacing the RMS means you'll be removing the oil pan and replacing the gasket, which is also another must on the older cars. You should have unbolted the front bank exhaust from the cat/muffler before removing the transmission. With the front beam out, it's not that much more work to remove the front bank header and therefore the pan.
8) Once you've cleaned everything, replaced the RMS and oil pan gasket, then you can begin installing the new clutch. When untorquing the old clutch, you are potentially rotating the engine in a safe direction (clockwise when viewed from timing belt side of the engine (passenger side). However, when you torque the bolts for your new clutch, you may potentially spin the engine backwards, causing the timing belt to skip over camshaft teeth. When torquing the flywheel bolts to the crankshaft at 76 ft-lbs, I use this setup so the engine can't spin backwards. For the pressure-plate, I screw in a transmission housing bolt and wedge a screwdriver in against the starter ring teeth. Alternatively, you can spend money on the nice Honda tool... just don't let the engine spin clockwise when viewed from the clutch side.
9) Due to my previous shudder issues, I wanted to measure flywheel runout like the SM does. Spec for a new flywheel is less than 0.002 inches measured at the diameter shown in the SM. My new Exedy (NSX OEM clutch supplier) measured 0.001".
My RMS was replaced when I rebuilt my engine a few years ago. This area just needed a quick wipe-down:
View attachment 148329
Torquing the flywheel bolts:
View attachment 148330
This step isn't necessary, but I'm not taking any chances for a shuddering clutch!
The rest of the clutch install is just standard stuff. Before opening the transmission however, I rebuilt the CV joints and intermediate shaft....
With 128k miles, my intermediate shaft bearing felt fine. However, I don't like pulling axles, and thought now would be a great time to replace it. Buy a new Honda bearing and seal. After some cleaning, I took this to a dealership and had them press out the shaft from the old bearing, press out the old bearing, remove the old seal, and then reinstall the bearing, shaft, and seal.
The CV axles took some work removing. A Harbor Freight 900 ft-lb impact gun and 36mm socket took care of removing the axle nuts. Sprayed some PB blaster on them the night before, and it took a minute or two on each side with the impact gun. Once the nuts are removed, use a brass punch to tap out the axles. Please don't use a hammer or a hammer on top of another hammer.
Clean the hub and splines, then coat the hub splines with anti-seize compound.
The axles weren't difficult - just time-consuming.
Kaz has a great section dedicated just to axles. One of them is here: http://www.nsxcb.co.uk/entry.php?2034-Eng-Refresh-LMA-etc-39
* Mark the location of the axle shafts and ends before removing, and then mark the locations of the roller bearings as you pull away the cups.
* The outboard cups have a lock ring that has to be unclipped before you can pull out the axle.
* You only need to remove one spider hub from each axle (using your brass punch again). It takes some patience removing the locking rings (and reinstalling them).
* It's very messy. I used a lot of old newspapers, paper towels, and gloves.
* None of my joints showed wear, but I went ahead and took all of the roller bearings apart for further inspection. There are 53 pins for each roller bearing, so don't loose any.
* Degrease everything very well and keep it all clean. Contamination is the source of most wear (besides significantly lowered cars)
* Clean/inspect the ABS trigger in the hubs, and also the trigger teeth at the outboard cups.
* Now is a good time to sand, degrease, and paint the axles and cups.
* Use electrical tape over the splines to protect the new boots when sliding them on the axle (you only need to remove on spider from each axle, so you slide both boots on from one end). Install the big lock ring, then the spider with the correct offset relative to the other spider per the SM. Again, installing new lock rings takes some practice.
* I used Redline CV-2 grease. You can proportion the amount of grease in each cup per the SM, but I just eyeball it. I like the little plastic 14 oz containers vs. the tube. You'll need one 14 oz container for each axle (two containers total).
* If you're rebuilding these for a street car - DO NOT VENT THE BOOTS. Moisture will reduce the load-carrying capability of the grease, and any contaminants from the road/track will further ruin the precision surfaces. Don't vent unless you are only using on the track and frequently rebuilding axles.
* The rest of reassembly is pretty straight-forward per the SM.
Before:
View attachment 148327
During Cleaning:
Finished:
That's where I have stopped for now. Next up is taking apart the transmission.
In summary, for cars that are over 100k miles, around 25 YO, and you need a new clutch, consider:
1) A new oil pan gasket,
2) A new rear main seal,
3) New front and/or rear engine mounts. These do crack with age/abuse. Mine have been beefed up with 3M Windoweld in the past. You'll have these removed for the clutch change.
4) New transmission ISB's
5) New intermediate shaft bearing
6) New shift clutch fork, clutch fork holder, and throwout bearing guide on the transmission. These are wear items. My bearing guide is in great shape, but I needed a new clutch fork and fork holder. You'll also need new transmission seals. They're cheap insurance.
Big thanks to [MENTION=10201]goldNSX[/MENTION], [MENTION=25737]Kaz-kzukNA1[/MENTION], and [MENTION=3729]Larry Bastanza[/MENTION] for all of their informative posts over the years.
Once I'm finished, I will list all of the Honda parts numbers for the stuff I used.
I've never opened a transmission before :smile:

")


.jpg")
