


I need your help to organize my sensor display. What would you use?
My HKS F-Con iS (piggyback) setup allows for a 6 sensor x 3 screen display. This means each screen can display 6 sensor readings only; 3 screens available.
I foresee practical usages for each screen as follows:
Screen 1 - Used for Street Driving/Cruising and focuses on efficiency
Screen 2 - Used at the track and focuses on safety
Screen 3 - Used when tuning and focuses on peak power production and health
Optional Screen 4 - This shows all the readouts in sort of the old style DOS display. Its T.M.I. when driving unless you have a passenger.
Below are the parameters available for display. Each sensor can be duplicated on different screens if needed.
How would you guys setup Screen 1 vs. 2 vs. 3?
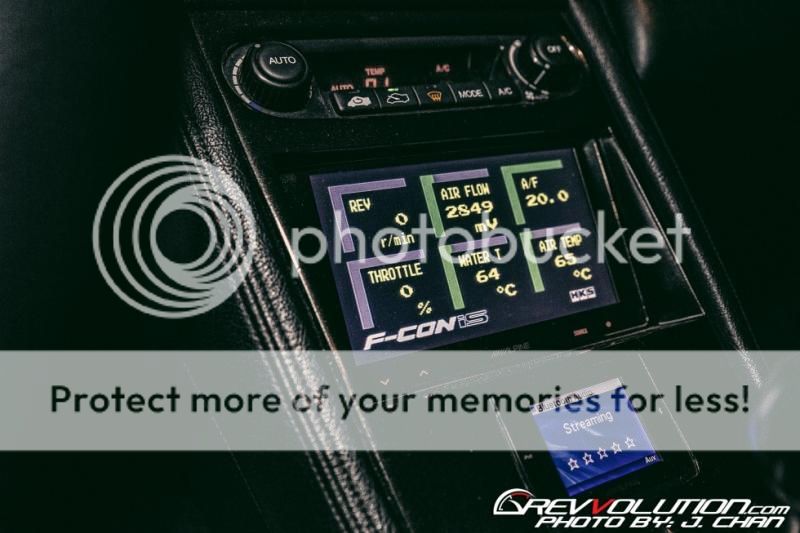
Here's a sample of the visual display. The bar graph is green when cold. It's setup yellow when optimal. It glows red when exceeds limits. Each parameter is configurable from my laptop.
My HKS F-Con iS (piggyback) setup allows for a 6 sensor x 3 screen display. This means each screen can display 6 sensor readings only; 3 screens available.
I foresee practical usages for each screen as follows:
Screen 1 - Used for Street Driving/Cruising and focuses on efficiency
Screen 2 - Used at the track and focuses on safety
Screen 3 - Used when tuning and focuses on peak power production and health
Optional Screen 4 - This shows all the readouts in sort of the old style DOS display. Its T.M.I. when driving unless you have a passenger.
Below are the parameters available for display. Each sensor can be duplicated on different screens if needed.
- RPM
- Air Flow / Air Pressure (from OEM MAP)
- Throttle %
- Water Temp (OEM Sensor)
- Intake Air Temp (OEM Sensor)
- Vehicle Speed
- Vehicle Voltage
- Main Injector Output
- Air Fuel Ratio
- Knock Level
- Boost / Vaccum
- Fuel Pressure
- Oil Pressure
- Oil Temp
- Exhaust Temp
- Ignition Timing
- A/F Trim
How would you guys setup Screen 1 vs. 2 vs. 3?
Here's a sample of the visual display. The bar graph is green when cold. It's setup yellow when optimal. It glows red when exceeds limits. Each parameter is configurable from my laptop.


")