• Protip: Profile posts are public! Use Conversations to message other members privately. Everyone can see the content of a profile post.

Honcho's Long Road to Imola Type-S Zero

Cooling System Refresh 2

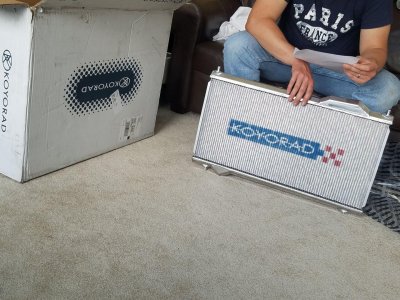
Replacement Koyorad arrived today in an undamaged condition. Such a nice finish on this part. Got too busy with work during the week, so I was unable to deliver the parts to the painter. Hopefully can make it next week! Need to start the engine refresh and transmission rebuild process!

koyo.jpg
 
Are you doing the power-train yourself?
 
Amazing amount of work done!
20 years ago, I restored a series 1 4.2 L E-type Jaguar and it was also hard work but definitely easier than an NSX that's for sure (apart from having to change all rotten panels of course...)
When I finally got to drive the car, it was quite disappointing as it was in fact an old car with approximate handling.
At least this will not be the case with your NSX!
 
Are you doing the power-train yourself?

Yes, engine and trans refresh coming soon! I am having the head work done by a machine shop, though- I don't have the proper tools to remove and install valves. Not touching the bottom end, per sage advice from LarryB.
 
smart about the bottom.....I think having the original rotating assembly and the magic metallurgy/fairy dust from birth increases longevity....the top end not so much..
 
Thanks- that means a lot. I've always wondered who is watching this build. I've heard rumors I have fans even in Honda Japan HQ and at the Refresh Center. But, who knows? I'm sure if I instagrammed this build or put it on YouTube episodes like @R13, I'd have a lot more attention. Still, it brings me joy to just do it and it is nice that my fellow Primates care too.

I'm watching, in amazement. What a project! We're going to have to figure out a way to get both of your project cars together for a photo op.
 
It is an amazing job you are doing and the documentation is very impressive. This is some serious information that will aid all NSX owners for a long time. Thank you and keep up the fight.
 
I'm watching, in amazement. What a project! We're going to have to figure out a way to get both of your project cars together for a photo op.

Thanks Will. When NSXPO is back on the East coast, we'll do a photo shoot with both cars!

It is an amazing job you are doing and the documentation is very impressive. This is some serious information that will aid all NSX owners for a long time. Thank you and keep up the fight.

This is my main intent with this blog. NSX Prime has been so helpful to me over the years that I hope someone will find the info here useful on their own NSX project.
 
Honcho's Place - Instagram

Due to many requests for more social media exposure, I have started up an instagram blog relating to this project called "Honcho's Place". I will post more detailed build content here on Prime, but much of it will also appear over there.

Head on over and follow: https://www.instagram.com/honchosplace/
 
Engine Refresh 12

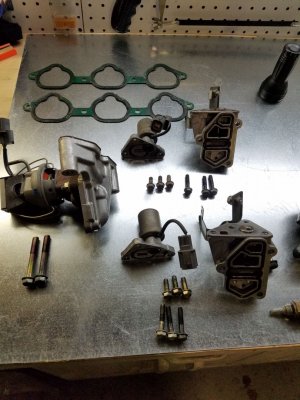
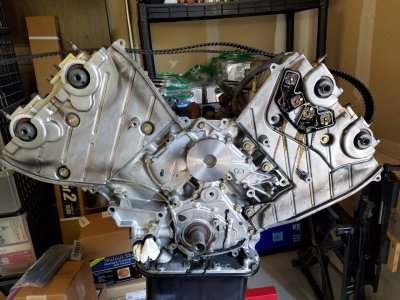
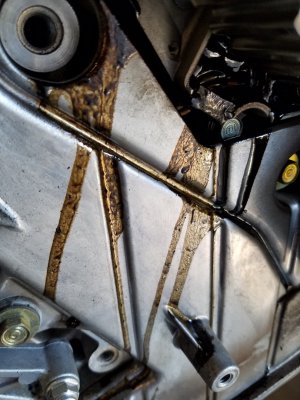
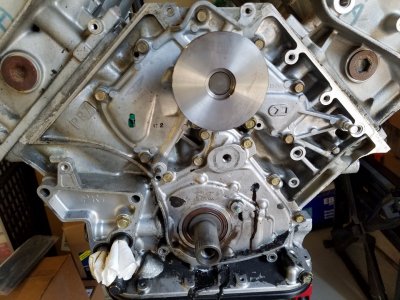
Due to a serious health complication with the painter, body work has been paused. All body panels are now Imola, but we will have to wait for the chassis until he recovers. It may be some time, so must turn to other major tasks. Proceeding with the engine refresh service and preparation for removing the heads. On the transmission side, removed the spool valves, EGR and oil pressure sender. On the timing belt side, removed the oil cooler, oil cooler block coolant passage and dipstick.

20200611_235328.jpg
 
Engine Refresh 13

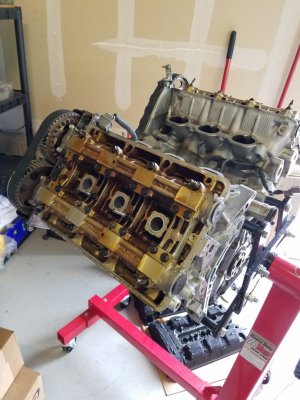
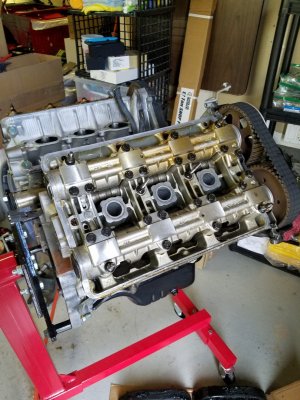
Inspecting the heads. This NSX only covered about 3,000 miles since its timing belt service in 2012 and it shows- the level of varnish and PCV crankcase blow-by on the front head is really sad. It smells just awful. Please drive your cars- the hot engine oil will clean most of this contamination. Rather than spending eons scrubbing these parts, I will give them to the machine shop to clean in their chemical tank. The circulating hot chemical bath will also ensure all of the small oil passages that are critical for proper VTEC operation and cam lubrication are 100% clean.

20200612_175846.jpg

Rear head. Much better from contamination standpoint, but still lots of black, smelly old engine oil in the head recesses.

20200612_175823.jpg
 
Last edited:
Engine Refresh 14

Moving on to inspecting and removing the timing belt. The Acura tech who performed this service did a good, but not great job. I would give it a C+.

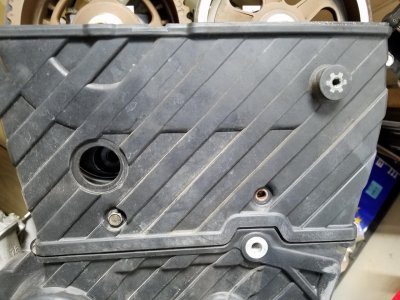
Front upper timing cover was missing a bolt- you can see the corrosion in the bolt hole from water intrusion. Also, the alternator bracket mount was missing the gasket.

20200613_072641.jpg

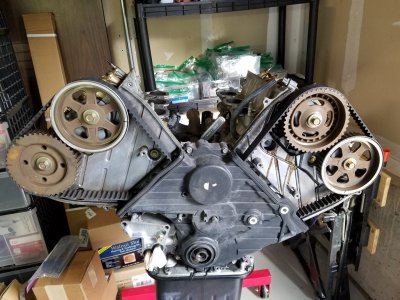
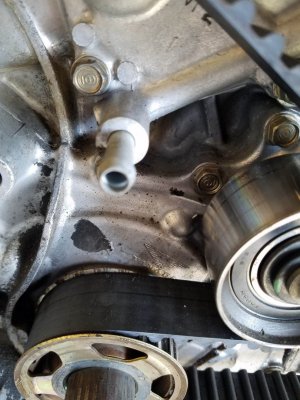
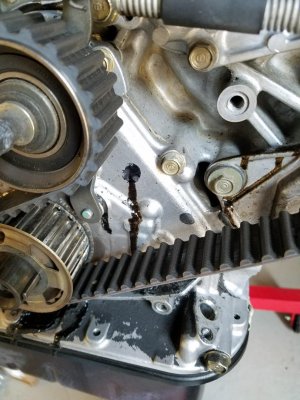
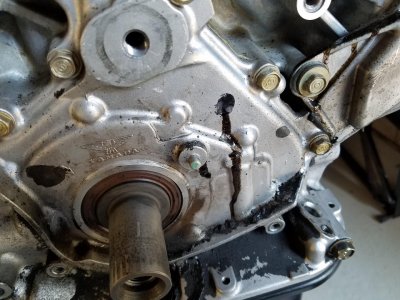
Both upper timing covers removed. The lower cover appears to be the original unit from 1991- the tech drilled a rough hole in the cover to allow the water pump weep tube to drain properly. While this solution works, it was not done well because the hole opens the timing belt cavity to the outside environment. There is nothing wrong with using the original cover, but if you do, please make sure to drill a proper hole and grommet it to protect your timing belt! What's odd is that Acura did not use the -305 kit on this car- maybe the owner wanted to save a few bucks and opted just for the pump? Who knows... Even worse, I thought I ordered the -305 kit (containing the new cover) from ATR Parts, but after searching my parts box, it looks like Christian sent me just the water pump and timing belt, so I have no updated cover. Looks like I'll have to buy the 305 kit locally from Tim P. At least I will have enough new water pumps for the next 14 years! They also re-used the original timing adjuster bolt- it is badly corroded and missing the grommet.

20200613_073715.jpg
 
Last edited:
Great stuff so far, sorry to hear about the painter situation.

I have my old lower timing cover still sitting around but you'd probably just want the updated one (edit: I realized mine was the updated version, do you want it?). I'll be interested to see what you choose to do for the engine internals. LMAs I assume, and I seem to remember you have Comptech cams? How about valve springs?

I also just ordered all the gaskets for both spool valves, they're the last remaining leakers on my engine :mad:. Runs down the front mount to the oil pan and grubs up everything.

Looking forward to the rest of the engine work, bodywork pics, and when you get to share in the transmission experience ; ). I see you have a shop press, that will make it much easier. If you still haven't dropped the countershaft down from the snap ring groove, you have to open the snap ring much wider than you think and then the shaft should drop on its own.

One other question, I see you used sodium bicarbonate blasting media in the past for the aluminum parts. I will probably do the same in the future since all my parts have this horrible flaking black coating on them, but did you consider using some sort of clear coat sealant to keep them looking good after blasting? Might be more applicable to the bolts/hardware, would blasting those take off the Dacro coating and cause corrosion issues?
 
Last edited:
I had an extra updated timing cover still in the packaging for a while but I think I threw it away when I moved, but I'll check. :(

Also your pictures aren't working in the most recent post.

Thanks John. Let me know if you find it. :)

Great stuff so far, sorry to hear about the painter situation.

I have my old lower timing cover still sitting around but you'd probably just want the updated one (edit: I realized mine was the updated version, do you want it?). I'll be interested to see what you choose to do for the engine internals. LMAs I assume, and I seem to remember you have Comptech cams? How about valve springs?

I also just ordered all the gaskets for both spool valves, they're the last remaining leakers on my engine :mad:. Runs down the front mount to the oil pan and grubs up everything.

Looking forward to the rest of the engine work, bodywork pics, and when you get to share in the transmission experience ; ). I see you have a shop press, that will make it much easier. If you still haven't dropped the countershaft down from the snap ring groove, you have to open the snap ring much wider than you think and then the shaft should drop on its own.

One other question, I see you used sodium bicarbonate blasting media in the past for the aluminum parts. I will probably do the same in the future since all my parts have this horrible flaking black coating on them, but did you consider using some sort of clear coat sealant to keep them looking good after blasting? Might be more applicable to the bolts/hardware, would blasting those take off the Dacro coating and cause corrosion issues?

Drop me a line about the timing cover! :D As for the engine internals, here is the list:
1. Comptech camshafts
2. Updated LMAs
3. NA2 intake valves (36mm) (Shad recommended them to work best with the CT cams)
4. SOS Valve springs and titanium retainers
5. Supertech billet keepers
6. Viton valve seals
7. Supertech maganese bronze valve guides (Kaz recommended replacing the Honda guides if using the NA2 intake valve)

I am not touching the bottom end at all- just cleaning it. I got sage advice from LarryB years ago that you should never mess with the short block unless there is a clear reason to do so. The way the factory put these together in Tanekazawa is very hard for a machine shop to replicate.

The soda blasting works extremely well on the aluminum (also plastic and rubber!). It's quite gentle on the substrate- it does not remove the Dacro coating at all. For steel, I move up to ground glass, but it will leave a matte finish on the metal. I'm going to try walnut shell next. I'm going to try aluminum oxide on the rear brake calipers, since they laugh at the soda and glass. Thanks for the tip about the countershaft- I've fiddled with the snap ring and spread it to what I thought was pretty wide and...nothing happened. LOL I'm holding off further efforts until I start the transmission refresh. There are a couple big projects to complete first (remove heads, clean block, clean rear subframe, refresh drive axles) and then I will tackle the trans. I'm already getting nervous about the thrust shims- I'm kind of crossing my fingers that the existing shims will work with the new mainshaft and bearings.
 
Engine Refresh 15

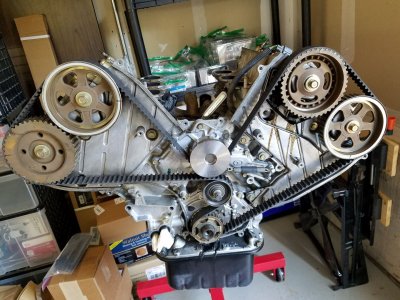
Timing belt revealed. The belt tension was very stiff- probably over-tensioned by the Acura tech at the time of service. Also, the belt still smelled like new rubber. Makes sense considering it only has 3,000 miles on it. Still, I will replace it because this car will be run hard on the touge and at the road circuit. I do not want to open the engine again until the next timing belt service in 6-7 years, so just a precaution. If this was going to be an everyday NSX with no track driving, just cruising the streets and hitting the car shows, I would probably re-use it. It's in excellent condition, even considering all of the contamination entering the cavity from all the missing bolts/gaskets on the timing covers.

20200613_084532.jpg

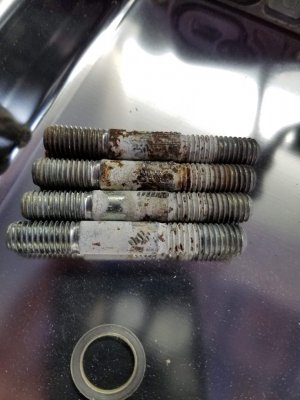
Noticed some strange white residue on the intake manifold studs. It cannot be corrosion because no coolant passes near this stud. Maybe corroded from wash/rain water? A mystery. The studs are only about $2 so I may just replace them. They were quite difficult to remove. I had to use a pair of Vise-Grips and carefully twist them out. I was terrified I would break them off. I may leave the exhaust studs for the machine shop...

20200613_101126.jpg
 
Engine Refresh 16

The disappointing result of all the missing grommets, holes and missing bolts on the timing cover. Look at all the debris on the drive pulley and tensioner. It's going to take ages to clean all of this. The timing cover sealing parts are small and cheap, but dealer techs working in a hurry just forget to replace them. The car will run ok without them, so there is no incentive for them to take their time and be meticulous. Their haste has given me many hours of extra work to do now. :mad:

20200613_084603.jpg
20200613_084554.jpg20200613_091352.jpg

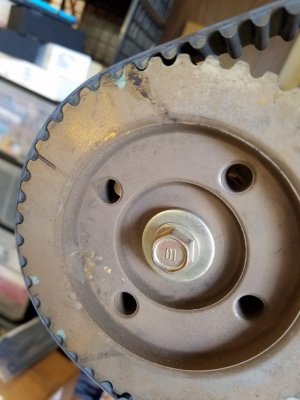
Rust on the rear exhaust cam gear and water pump pulley.

20200613_084613.jpg
20200613_084618.jpg
 
Engine Refresh 17

Cam gears and timing belt components removed.

20200613_092818.jpg

The awful state of the crankshaft position sensor. This one has had it. So much of the potting has melted away that the wires are exposed. This is the most critical sensor on the engine, as the magnets tell the ECU where the crank is at all times via pickup teeth on the front intake cam gear. If these magnets move out of position, then the crank will not be where the ECU thinks it should be... not good. I have a replacement unit and I hope it is the updated spec from Honda, which supposedly is less likely to melt away.

20200613_092825.jpg

So much melted potting. Does anyone know the best way to clean this? It's hard like epoxy.
20200613_091435.jpg

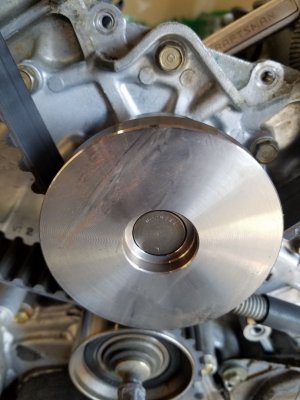
Inspected the water pump. It is in excellent shape- turns smoothly with no noise or friction. With only 3,000 miles, that is to be expected. But, it is now 8 years old. Again a dilemma. Do I leave it in or replace it? Kaz has said on his blog that the bearings can rot out from just sitting in coolant for a long time- apparently common on NSXs that sit for a long time and are not driven much. I do not want to open this engine again before the next timing belt service...
20200613_100251.jpg
 
Drop me a line about the timing cover! :D As for the engine internals, here is the list:
1. Comptech camshafts
2. Updated LMAs
3. NA2 intake valves (36mm) (Shad recommended them to work best with the CT cams)
4. SOS Valve springs and titanium retainers
5. Supertech billet keepers
6. Viton valve seals
7. Supertech maganese bronze valve guides (Kaz recommended replacing the Honda guides if using the NA2 intake valve)

I am not touching the bottom end at all- just cleaning it. I got sage advice from LarryB years ago that you should never mess with the short block unless there is a clear reason to do so. The way the factory put these together in Tanekazawa is very hard for a machine shop to replicate.

The soda blasting works extremely well on the aluminum (also plastic and rubber!). It's quite gentle on the substrate- it does not remove the Dacro coating at all. For steel, I move up to ground glass, but it will leave a matte finish on the metal. I'm going to try walnut shell next. I'm going to try aluminum oxide on the rear brake calipers, since they laugh at the soda and glass. Thanks for the tip about the countershaft- I've fiddled with the snap ring and spread it to what I thought was pretty wide and...nothing happened. LOL I'm holding off further efforts until I start the transmission refresh. There are a couple big projects to complete first (remove heads, clean block, clean rear subframe, refresh drive axles) and then I will tackle the trans. I'm already getting nervous about the thrust shims- I'm kind of crossing my fingers that the existing shims will work with the new mainshaft and bearings.

Very noice list ; ). Have you given any consideration to a reinforced timing belt like Toda? It's red so it's supposed to make your car faster.

Thanks for the blasting tips. I'll try soda for aluminum and have some steel brackets to strip and repaint. I looked into zinc galvanizing for the bolts but it's probably best just to clean off the rusted heads and maybe paint them.

In my single anecdotal data point, the OG shims for the diff and mainshaft were way off even though I used the same mainshaft. I changed the diff bearings & races & ring gear & clutch pack shim so that one wasn't as much of a surprise, I'm sure the manufacturing tolerances of all of those are enough to require another shim. You could work with a local transmission shop since they probably make their own shims or have an alternate source, or you might get them from Japan if you don't mind waiting 1-2 weeks. If my own new ones don't work I'll probably try to get another Honda/Acura car's shim of the same design.

Maybe the intake studs experienced galvanic corrosion? No idea what metals are used there (steel/aluminum/magnesium?) but shiny new ones would be nice.

For the potting, you might try a heat gun & goo gone/acetone to soften it and a plastic scraper or razor to remove it if wiping off doesn't work. Just an untested idea.

I'd certainly remove the water pump and take a look at the impeller. It might well have rust on it from sitting, that might provide the impetus for replacing it. Would be good to clean the threads on the block (I didn't ;) ) and make sure both dowels go back in..
 
I'm weighing my options for cylinder head upgrades, so I'm curious about your reasoning behind going aftermarket for valve guides, especially in a very mild build like this. Everything I've read on valve guides indicates that OEM guides will have the best longevity by far and aftermarket shouldn't be used except in fairly extreme builds.
 
I'm weighing my options for cylinder head upgrades, so I'm curious about your reasoning behind going aftermarket for valve guides, especially in a very mild build like this. Everything I've read on valve guides indicates that OEM guides will have the best longevity by far and aftermarket shouldn't be used except in fairly extreme builds.

In discussing the engine with Kaz, he suggested the change based on failure data from Japan. Apparently, there is a statistically significant amount of intake valve guide failures (cracking and/or falling out) on C32B engines, based on the small number of such engines in circulation. Honda and other Japan-based NSX-specialists have studied it and the current thinking is that it must be inertia/resonance-related because the valve guides are the same between C30 and C32 and only the intake valve changed between the two. It can't be heat-related because it occurs on the intake side. Most affected engines were used at a lot of high-rpm operation like track day cars. For about 90 bucks, it's cheap insurance to swap out all the intake guides and yes, they will wear faster, but that just means they may have to be changed during every engine refresh (6-7 years). Since I'm using titanium retainers, I'll likely have to replace those too in the same time frame due to the wear characteristics. I'm treating it like an added cost of high performance. I may just replace the exhaust guides too.

**Edit**

Did some reading last night and the wear issue might not be as severe as I thought. Kaz referred to phosphor bronze guides, which are made of up to 88% copper. The maganese bronze guides from Supertech are made out of about 55% copper, so they are much harder than the phosphor bronze material, but retain much of the valuable heat transfer properties over the OEM sintered iron guides. I'll talk to my machinist before purchasing, but it looks like the Supertech guides will last a long time. There is a lot of advice out there to get them honed and clearanced, however.
 
Last edited:
Very noice list ; ). Have you given any consideration to a reinforced timing belt like Toda? It's red so it's supposed to make your car faster.

Thanks for the blasting tips. I'll try soda for aluminum and have some steel brackets to strip and repaint. I looked into zinc galvanizing for the bolts but it's probably best just to clean off the rusted heads and maybe paint them.

In my single anecdotal data point, the OG shims for the diff and mainshaft were way off even though I used the same mainshaft. I changed the diff bearings & races & ring gear & clutch pack shim so that one wasn't as much of a surprise, I'm sure the manufacturing tolerances of all of those are enough to require another shim. You could work with a local transmission shop since they probably make their own shims or have an alternate source, or you might get them from Japan if you don't mind waiting 1-2 weeks. If my own new ones don't work I'll probably try to get another Honda/Acura car's shim of the same design.

Maybe the intake studs experienced galvanic corrosion? No idea what metals are used there (steel/aluminum/magnesium?) but shiny new ones would be nice.

For the potting, you might try a heat gun & goo gone/acetone to soften it and a plastic scraper or razor to remove it if wiping off doesn't work. Just an untested idea.

I'd certainly remove the water pump and take a look at the impeller. It might well have rust on it from sitting, that might provide the impetus for replacing it. Would be good to clean the threads on the block (I didn't ;) ) and make sure both dowels go back in..

Power Enterprise used to make a reinforced belt, but it left a residue on the timing components. The Toda belt is the same one as used on the JGTC GT500 NSX race cars. The up-rated belt is only necessary if you are increasing RPM beyond the factory limit, as the OEM belt was not designed for that speed. I'm keeping my RPM limit to stock, as I do not want to invest the money on all of the other things that need to change with it (oil pump, increased cooling, ATI pulley, adjustable cam gears, locking tensioner, etc.). So, for my application, the Toda belt is not needed.

Something you may want to consider for dressing up the bolts is a tumbler. I have one that I use for tumbling my spent brass for reloading- it is a "wet" tumbler that uses stainless steel pins and a mix of water, simple green and some dish detergent. I'm going to throw some dirty NSX bolts in there and see how they turn out. If my spent brass is any indication, they should come out gleaming.
[MENTION=13737]OLDMNSX[/MENTION] had good luck on the potting with some brake cleaner and a plastic scraper- I'll try that and see how it goes.
 
Last edited:
Driveshaft 01

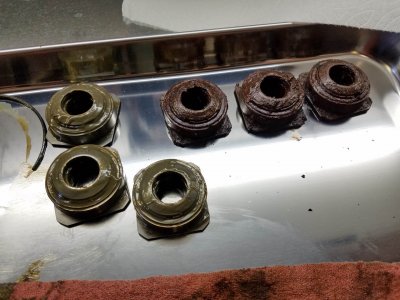
Time to tackle the driveshafts. First up is the old AT Left side shaft. I'll eventually put this one up for sale to help fund the project, as I grabbed a MT shaft from a wrecked 99. I was not prepared for what came out of the inboard joint.

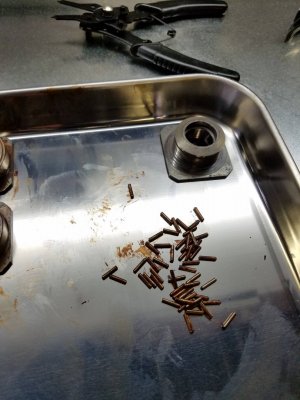
The Horror. The inboard joint was essentially empty of grease. What little there was had combined with rust to create this brown paste. That meant water got into the boot, but I could find no tear in the rubber. By contrast, "normal" looking mocha ice cream grease on the outboard rollers. The inboard joint was the worst I have ever seen on a NSX.

20200612_143600.jpg

The pins were no better.

20200612_161831.jpg

After an acetone bath and thorough cleaning, the rollers turned out not to be that bad. Some pitting on the races, but not enough to ruin the free movement.

20200615_214736.jpg

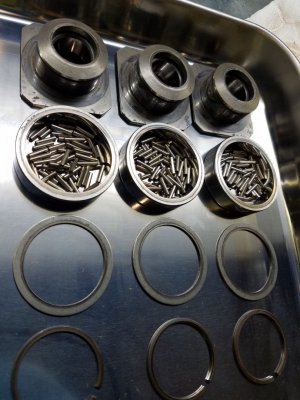
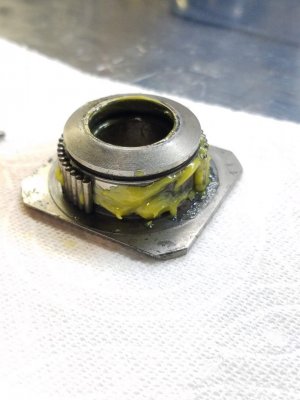
Carefully re-assembling and re-greasing the rollers.

20200615_220945.jpg

20200615_221007.jpg

All pins in place. Time to put the snap ring.

20200615_221657.jpg
20200620_213338.jpg
Movement check- completely smooth movement with the new grease. A successful repair. One down, five more to go on this driveshaft...
20200615_222239.jpg
 
Last edited:
Engine Refresh 18

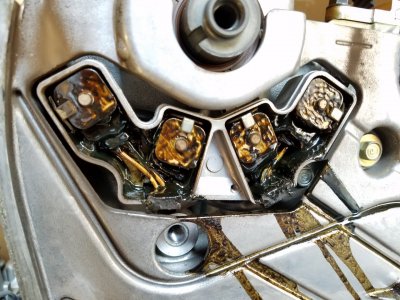
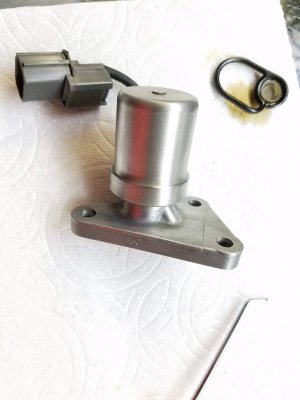
Cleaned the front bank VTEC spool valve solenoid to this level. I will apply some silicone spray to the metal to help prevent future corrosion.

20200620_215206.jpg

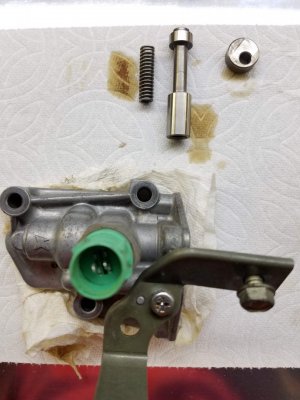
Began the internal clean of the VTEC spool valve itself. Lots of black, smelly old engine oil came out. Will clean out with brake cleaner (must avoid getting it into the pressure sensor), coat the piston assembly with fresh engine oil and reassemble.

20200620_220328.jpg
 
Clutch Overhaul 1

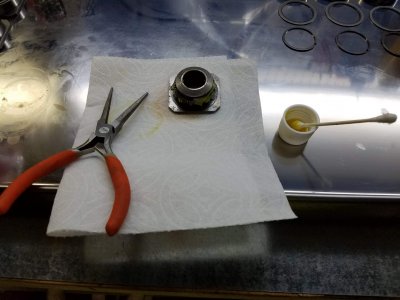
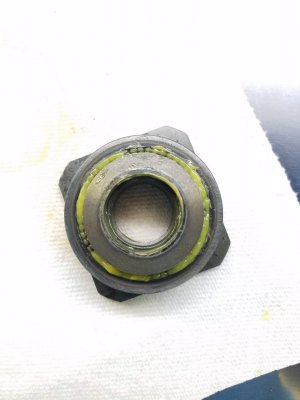
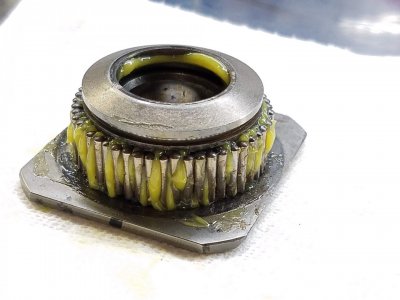
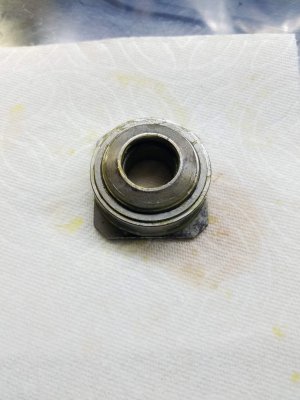
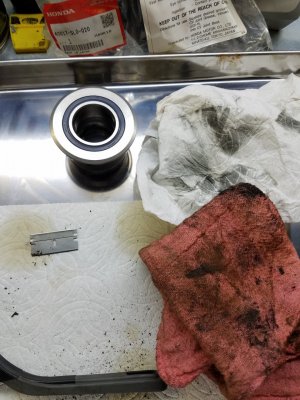
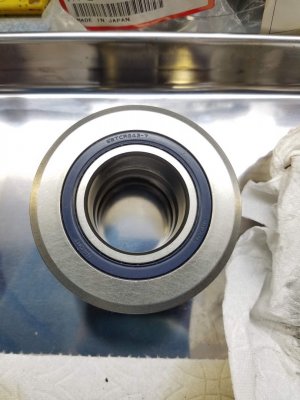
My 70k mile 5-speed transmission came with a used OEM twin disc clutch. I would like to use it if possible, as I believe the factory twin-disc is the best clutch option for naturally aspirated NSXs. So, time to start the inspection and overhaul process. First is the throw out bearing. Upon initial inspection, it appeared to be completely trashed. Turns out it was just dirty. It was caked inside and out in a dried, carbonized grease- clearly the wrong grease and far too much of it used. It took ages and ages to clean using rags, the brass brush, brake cleaner, acetone and 0000 steel wool. I even needed to use the razor scraper in parts due to the terrible state of the dried grease. However, my hard effort paid off because the bearing spun perfectly after cleaning. There was so much dried grease on the outside that it was impeding the free movement. No noise or rough spots after cleaning and I can re-use it. It's $230 from Honda, so good savings there.

20200623_221331.jpg

20200623_221359.jpg

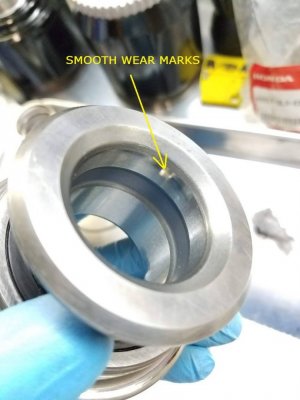
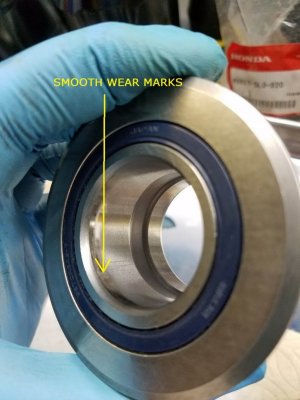
Note the polished, smooth areas on the internal bearing surface. Evidence of metal-to-metal contact- likely a result of the incorrect and poorly done grease job. I am using a new bearing guide plate, so hopefully with the correct Honda urea grease properly applied, it will have smooth movement. I will check the dry movement before assembly just to make sure there is no play or rocking, but I think it will be fine.

TOB_1.jpg

TOB_2.jpg
 
Back
Top