• Protip: Profile posts are public! Use Conversations to message other members privately. Everyone can see the content of a profile post.

MotorMouth93's 1994 Berlina Black NSX Thread

Nice updates, glad you came back ;). With all the trouble you've had with machine shops I kinda don't want to get my block prepped for an MLS head gasket like I was considering.

I reached the same conclusion, though John has been ribbing me for months now to do it. Though, on a 3 liter, you only really need to have the block decked and time-serted. You shouldn't need to disturb the sleeves, which is where John had most of his issues (how hard is it to cut a perfectly round circle, right???)

Still, cracking open the short block appears to release some of that special Honda unicorn magic installed at Tochigi and never to be recaptured. In seriousness though, while they can do a competent job, no machine shop or mechanic will be able to get it quite as good as it was in the engine assembly room at the Honda plant. This is because no mechanic has the tools and machinery that are available to Honda. One example is the robot that tightens all eight head bolts at the exact same time so that they are all within a fraction of a Nm of each other. The PMC uses similar tools and machinery. Thus, LarryB advised me a decade ago not to do it unless absolutely necessary for this reason.

I was taught that MLS is only really necessary on the NSX if you are:
  • Increasing bore size (and thus decreasing the thickness of metal between cylinders)
  • Increasing compression
  • Increasing RPM
  • Adding forced induction

Note that all of the above are elements that add heat to the cylinders. On a stock 3.0 at factory compression and rev limit with a properly-functioning cooling system, the engine will not generate more heat than the OEM gaskets can handle. Remember there are plenty of NA1 NSX-Rs out there running very hard laps in very hot temps just fine on their NA1 head gaskets.
 
@Big McLargeHuge generally, a machine shop cannot/will not deck a block while it's assembled. The block is locked into the mill by the main caps so the crank and pistons have to be removed.

The good news is you don't have to do anything to your block to install MLS gaskets, the factory head and deck surfaces are "fine" if properly prepped and cleaned, plenty of people have done the conversion on otherwise stock engines and I haven't heard of any failures.

That said, the arguments for installing MLS gaskets on a stock C30 are are few as @Honcho mentioned, I made a thread about it here a while back that goes into detail about the process: http://www.nsxprime.com/forum/showthread.php/214014

If you just want to bullet proof your engine as much as possible and its already out of the car, head studs and MLS gaskets are worth it IMO because it's nice peace of mind. But realistically, for an engine that isn't going to be boosted, the benefits are negligible. The stock head gaskets generally last 20-30 years before they start seeping coolant which should be plenty to cover the remaining useful life of most engines. MLS gaskets are also pricey, the conversion will cost $500-600 for the gaskets and ARP head studs, versus about half that for stock gaskets and new bolts. For any rebuild though MLS gaskets are a no brainer.

I looked around a bit but decided that I don't want 2nd hand wheels, the bronze ZE40s, like the OG bronze TE37s, are anodized instead of painted or powder coated so can't really be repaired once damaged.
 
Last edited:
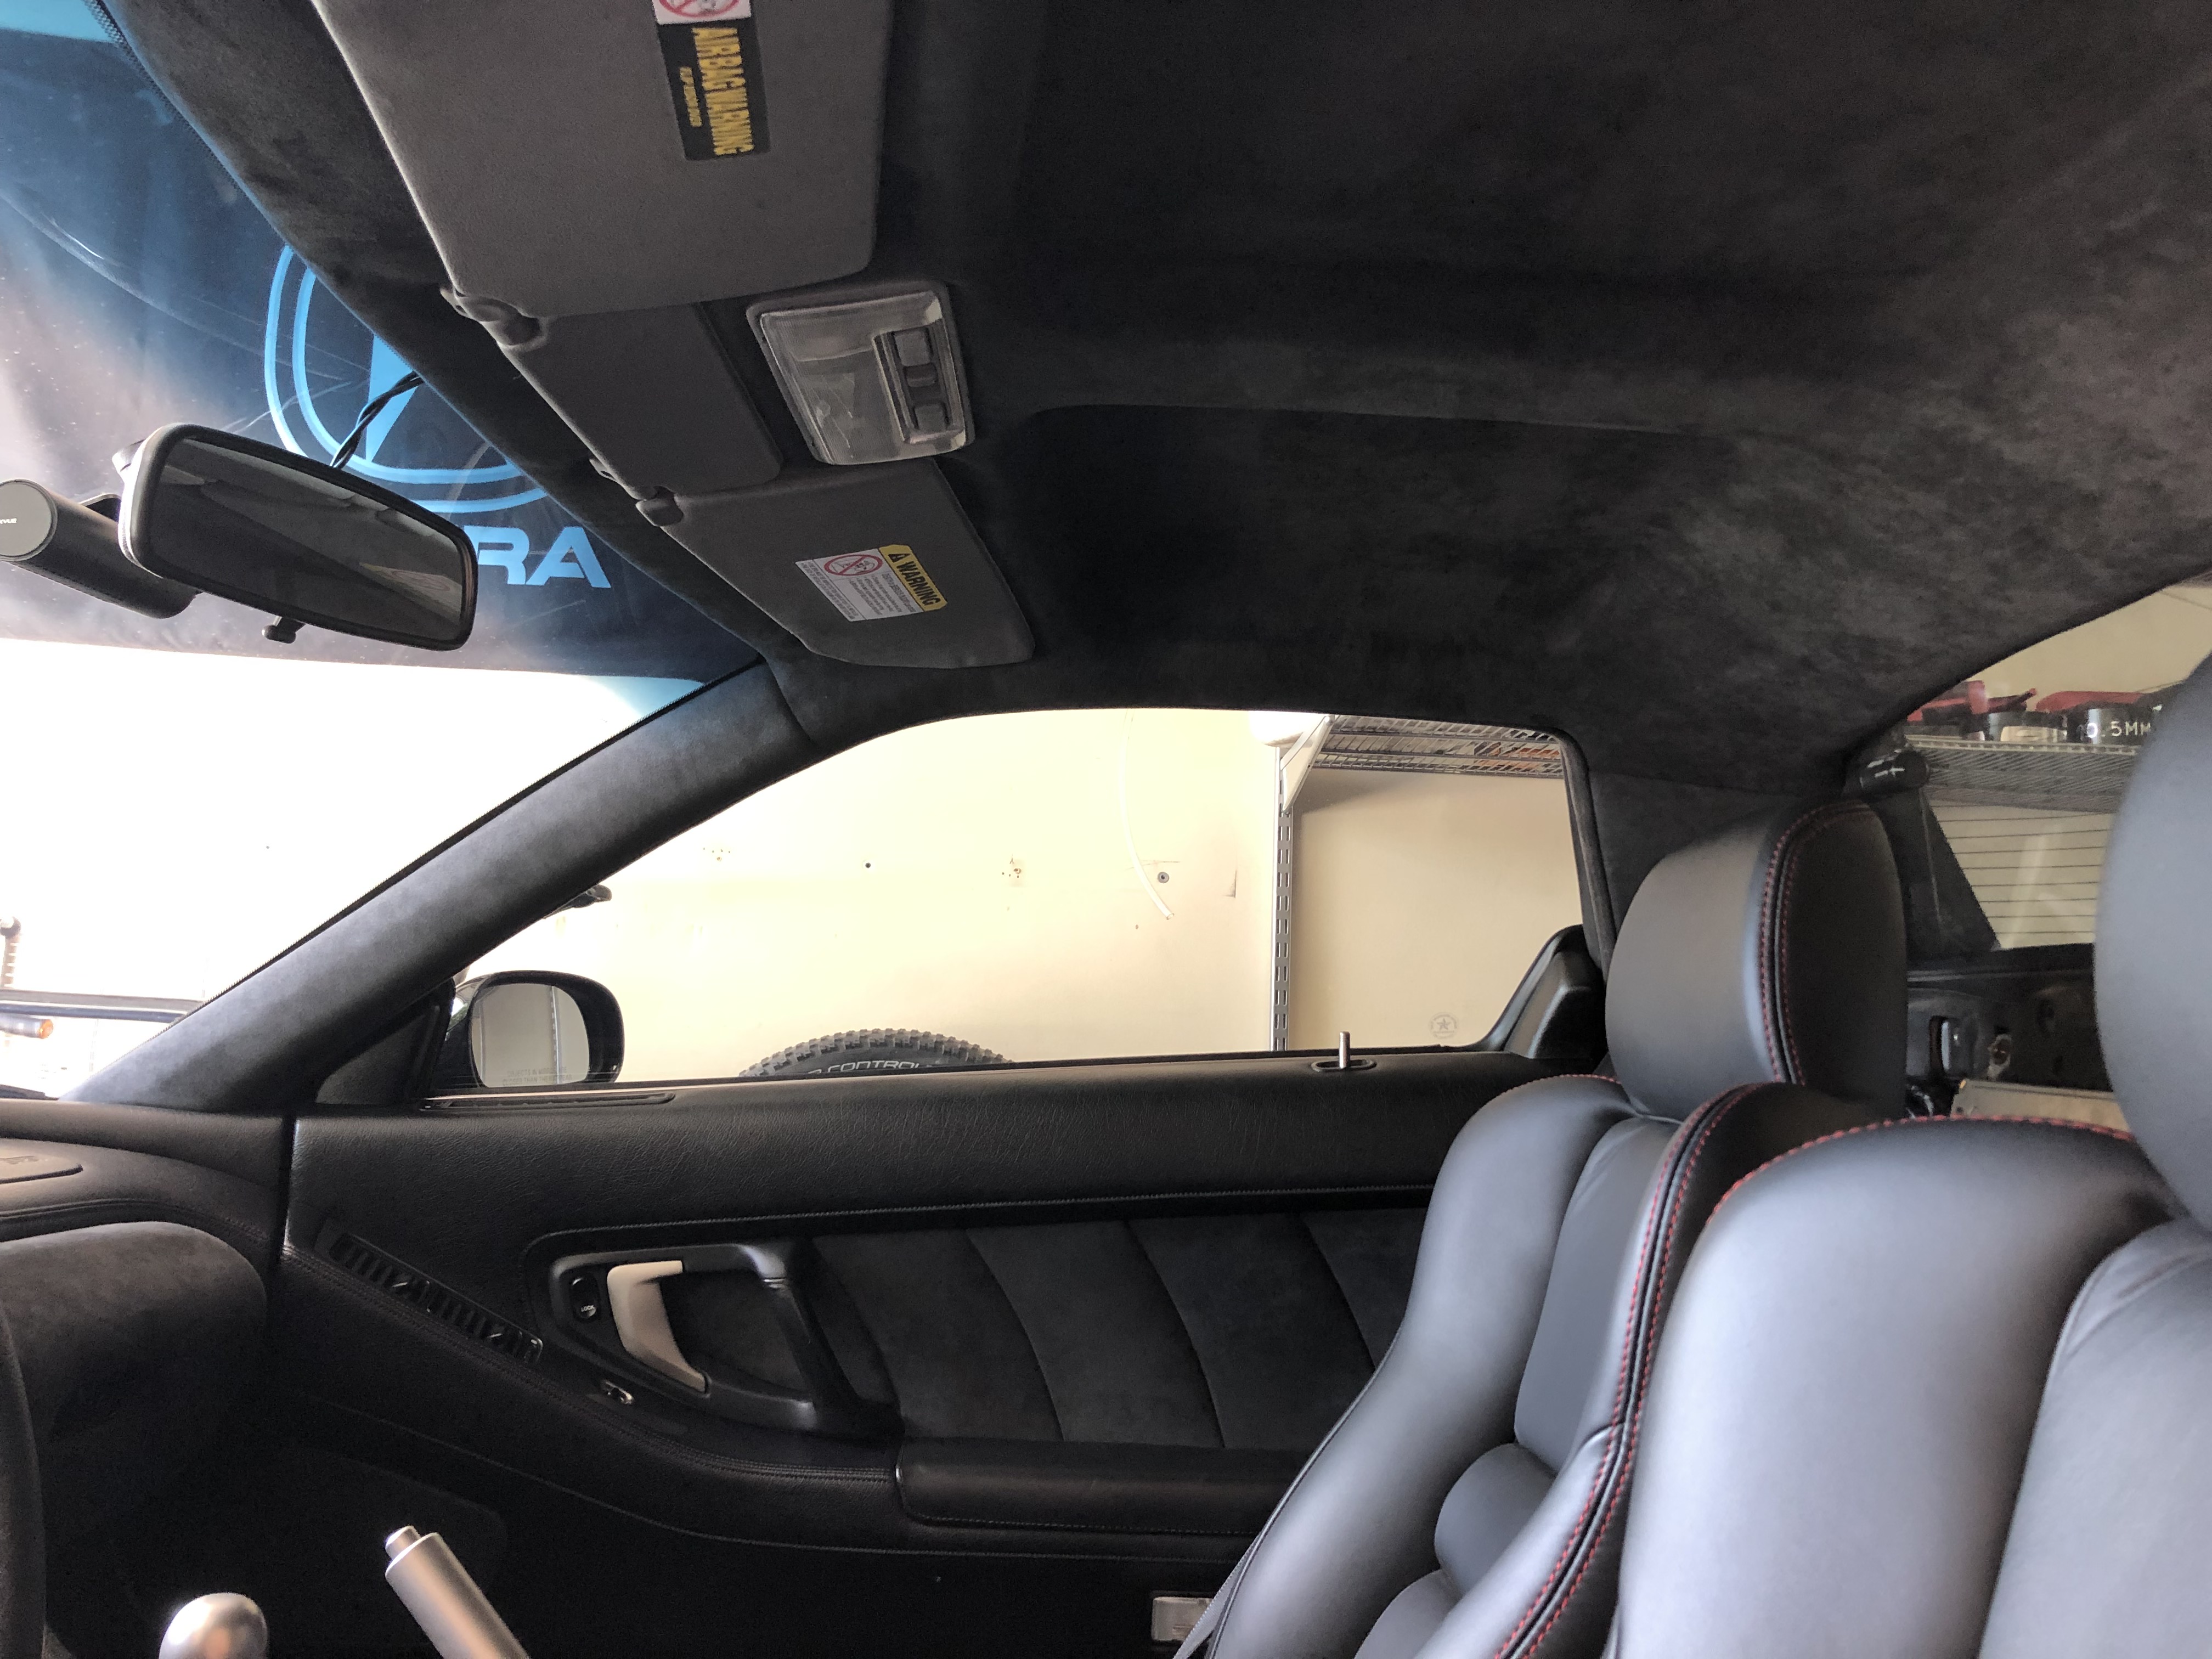
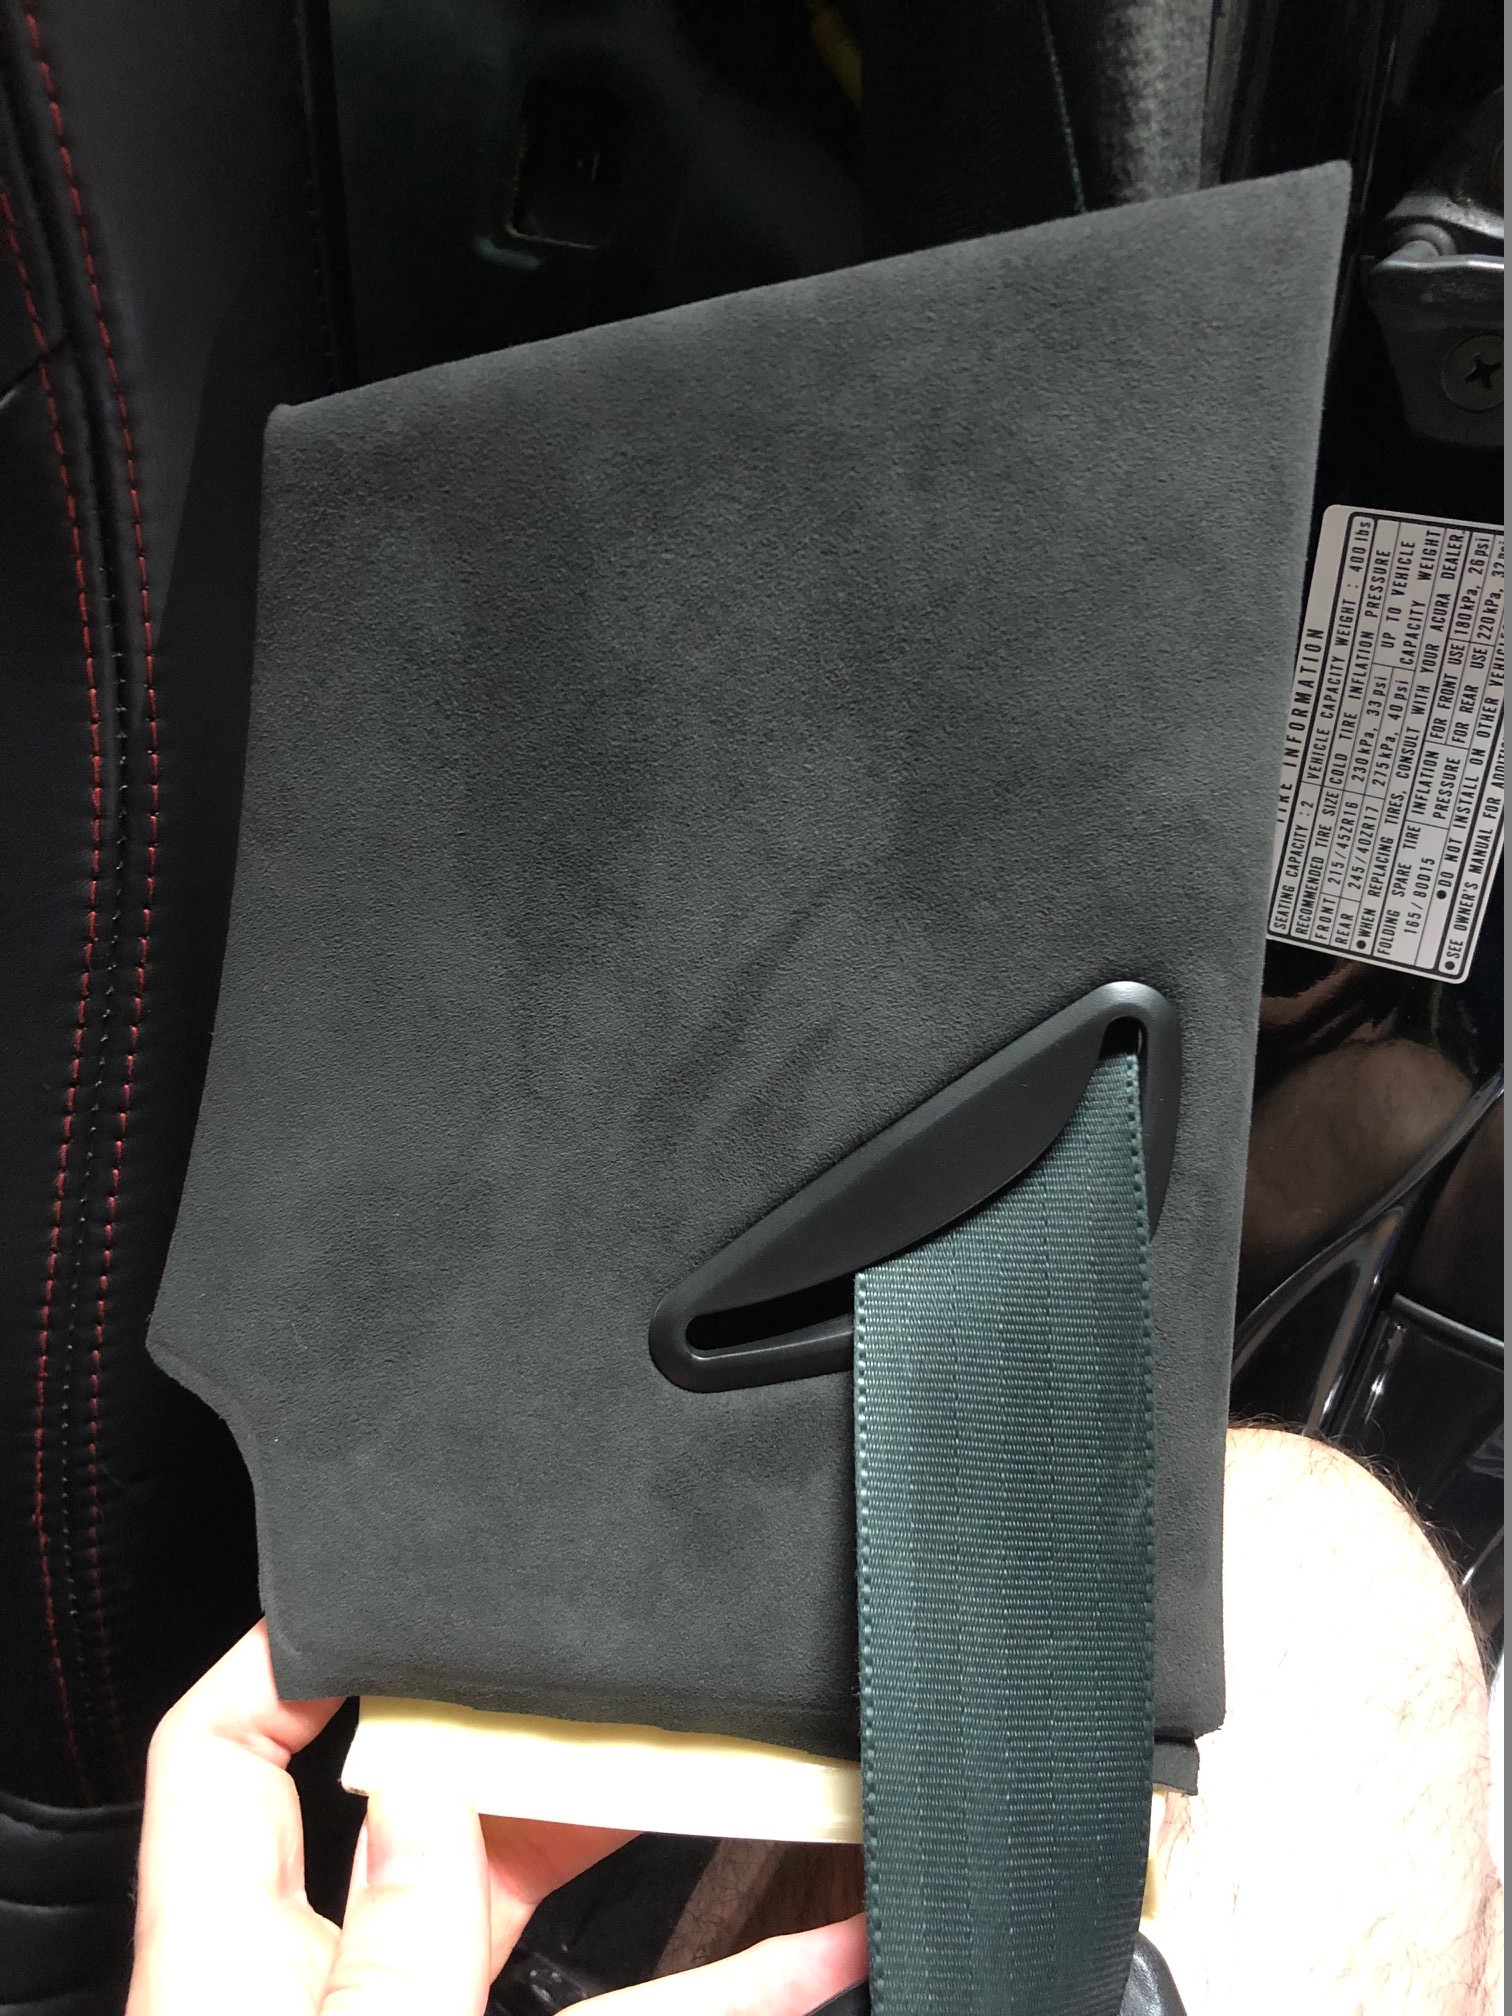
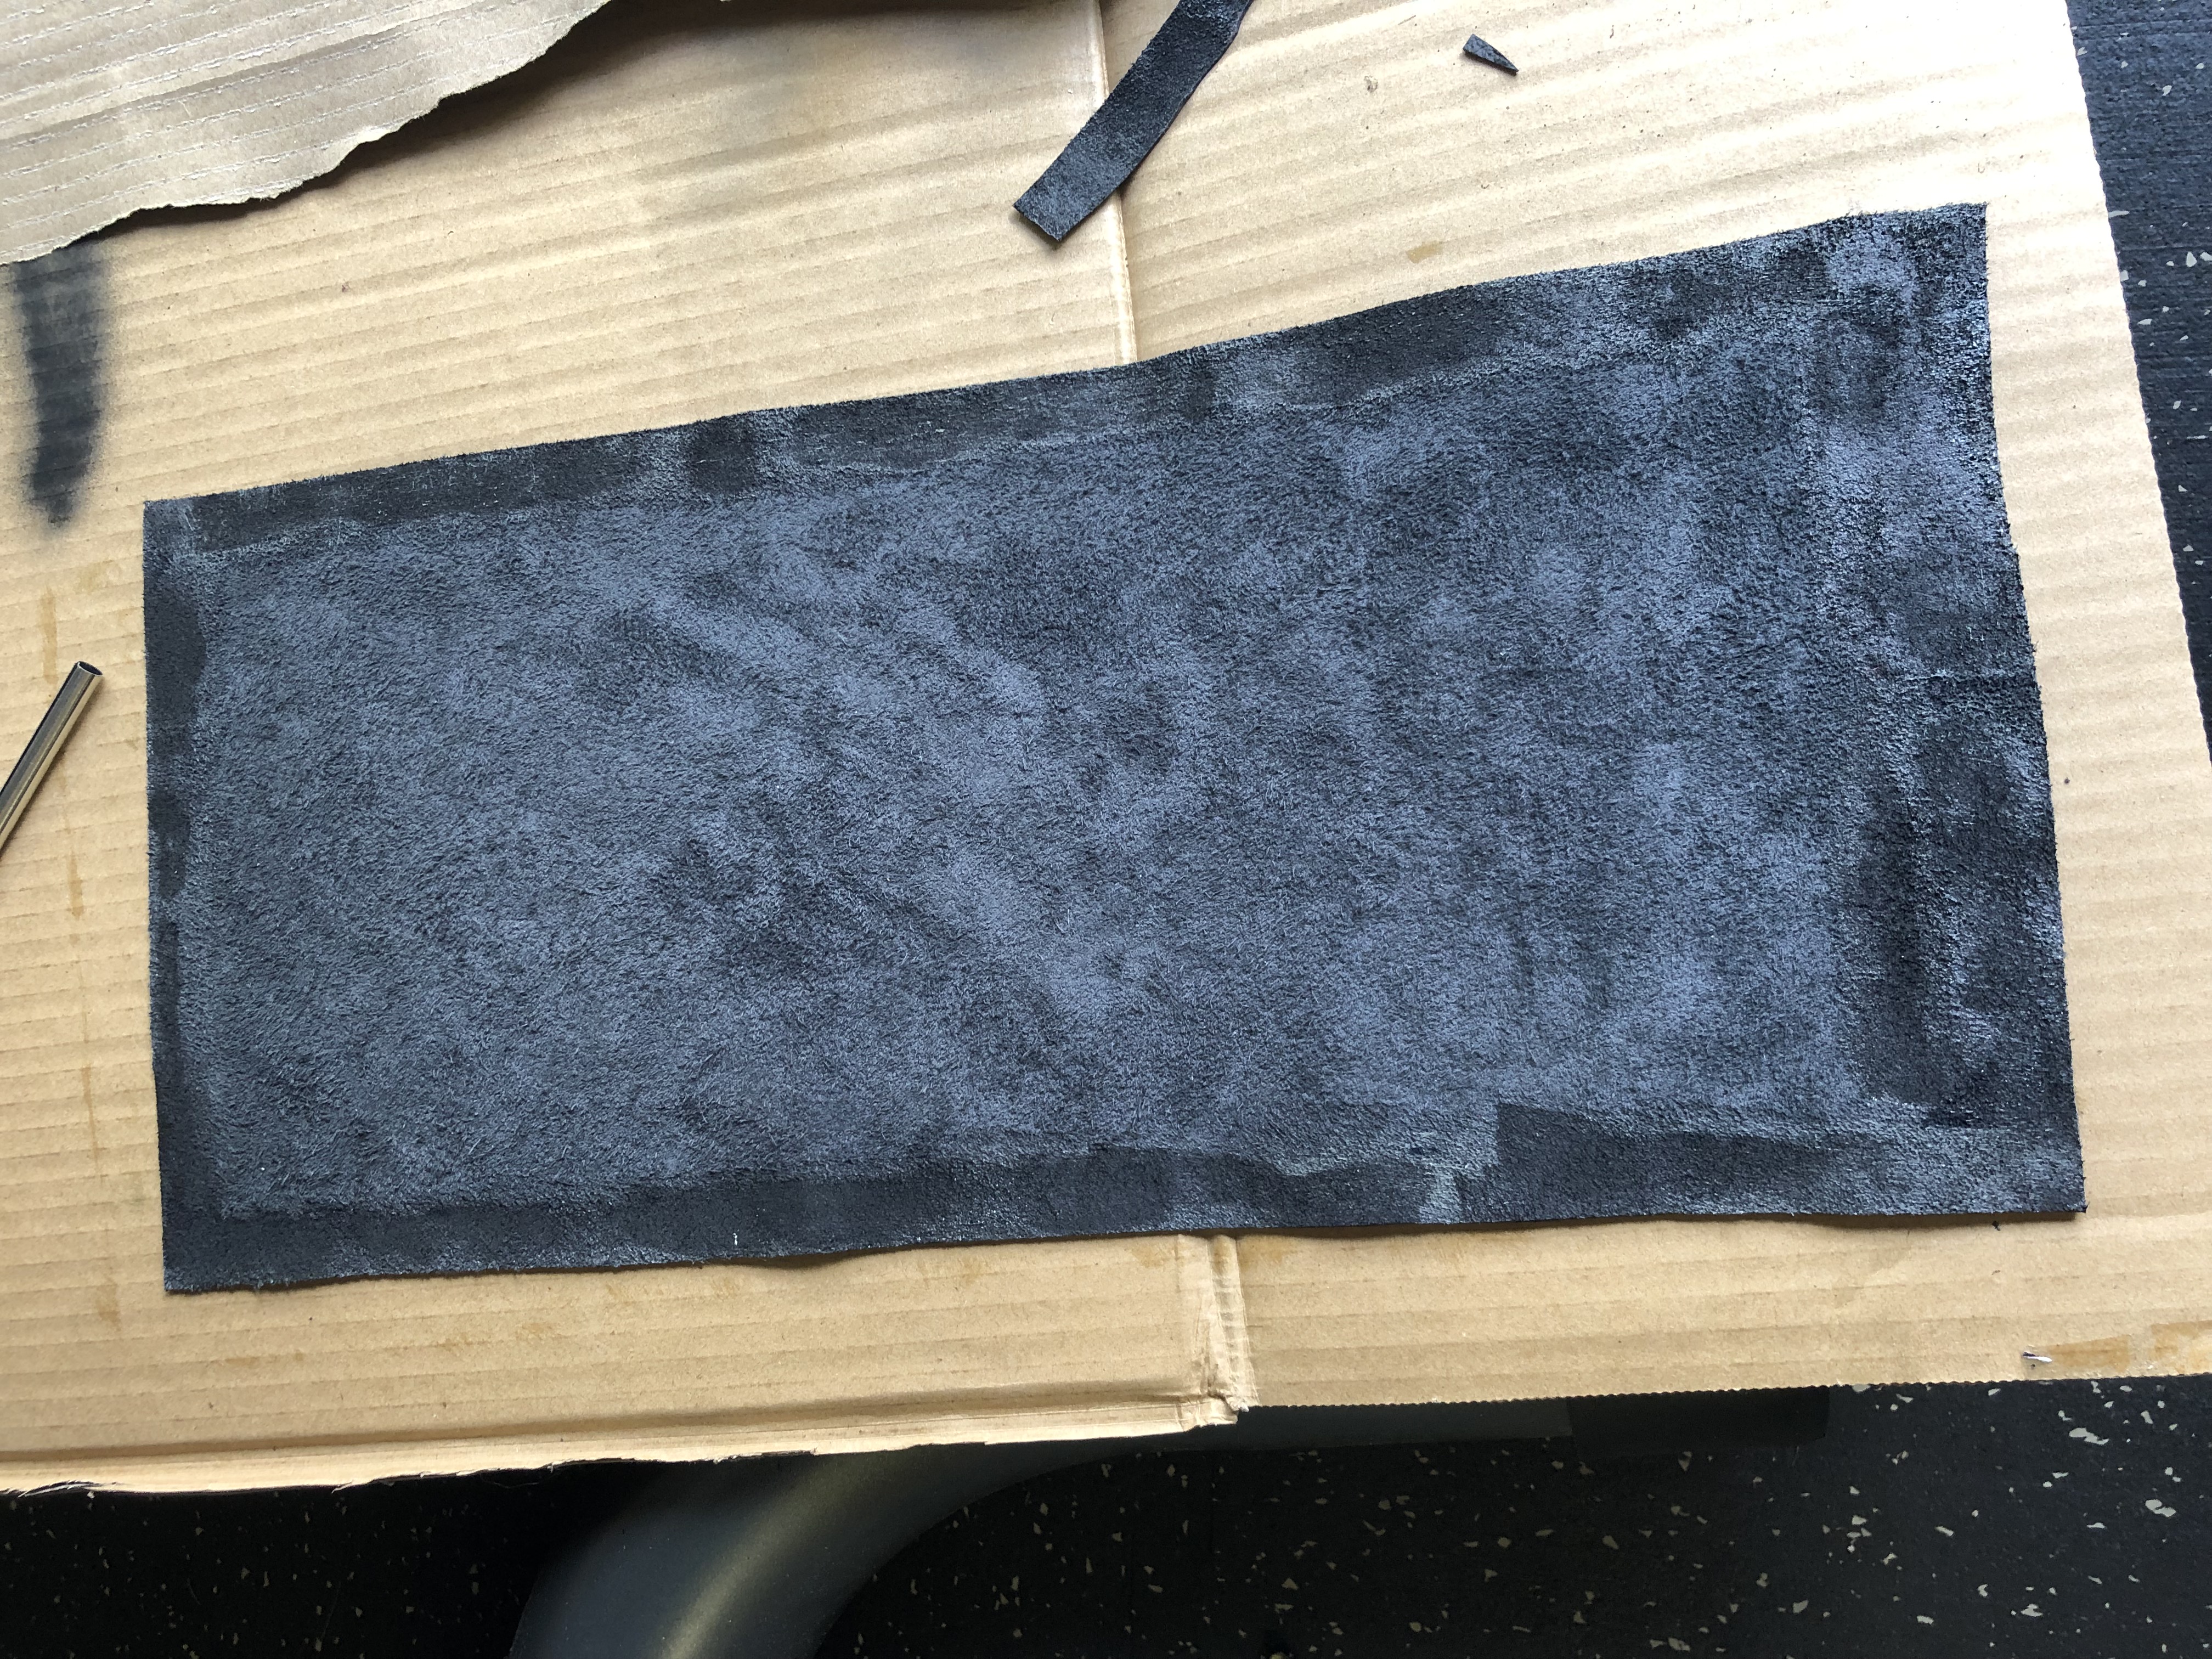
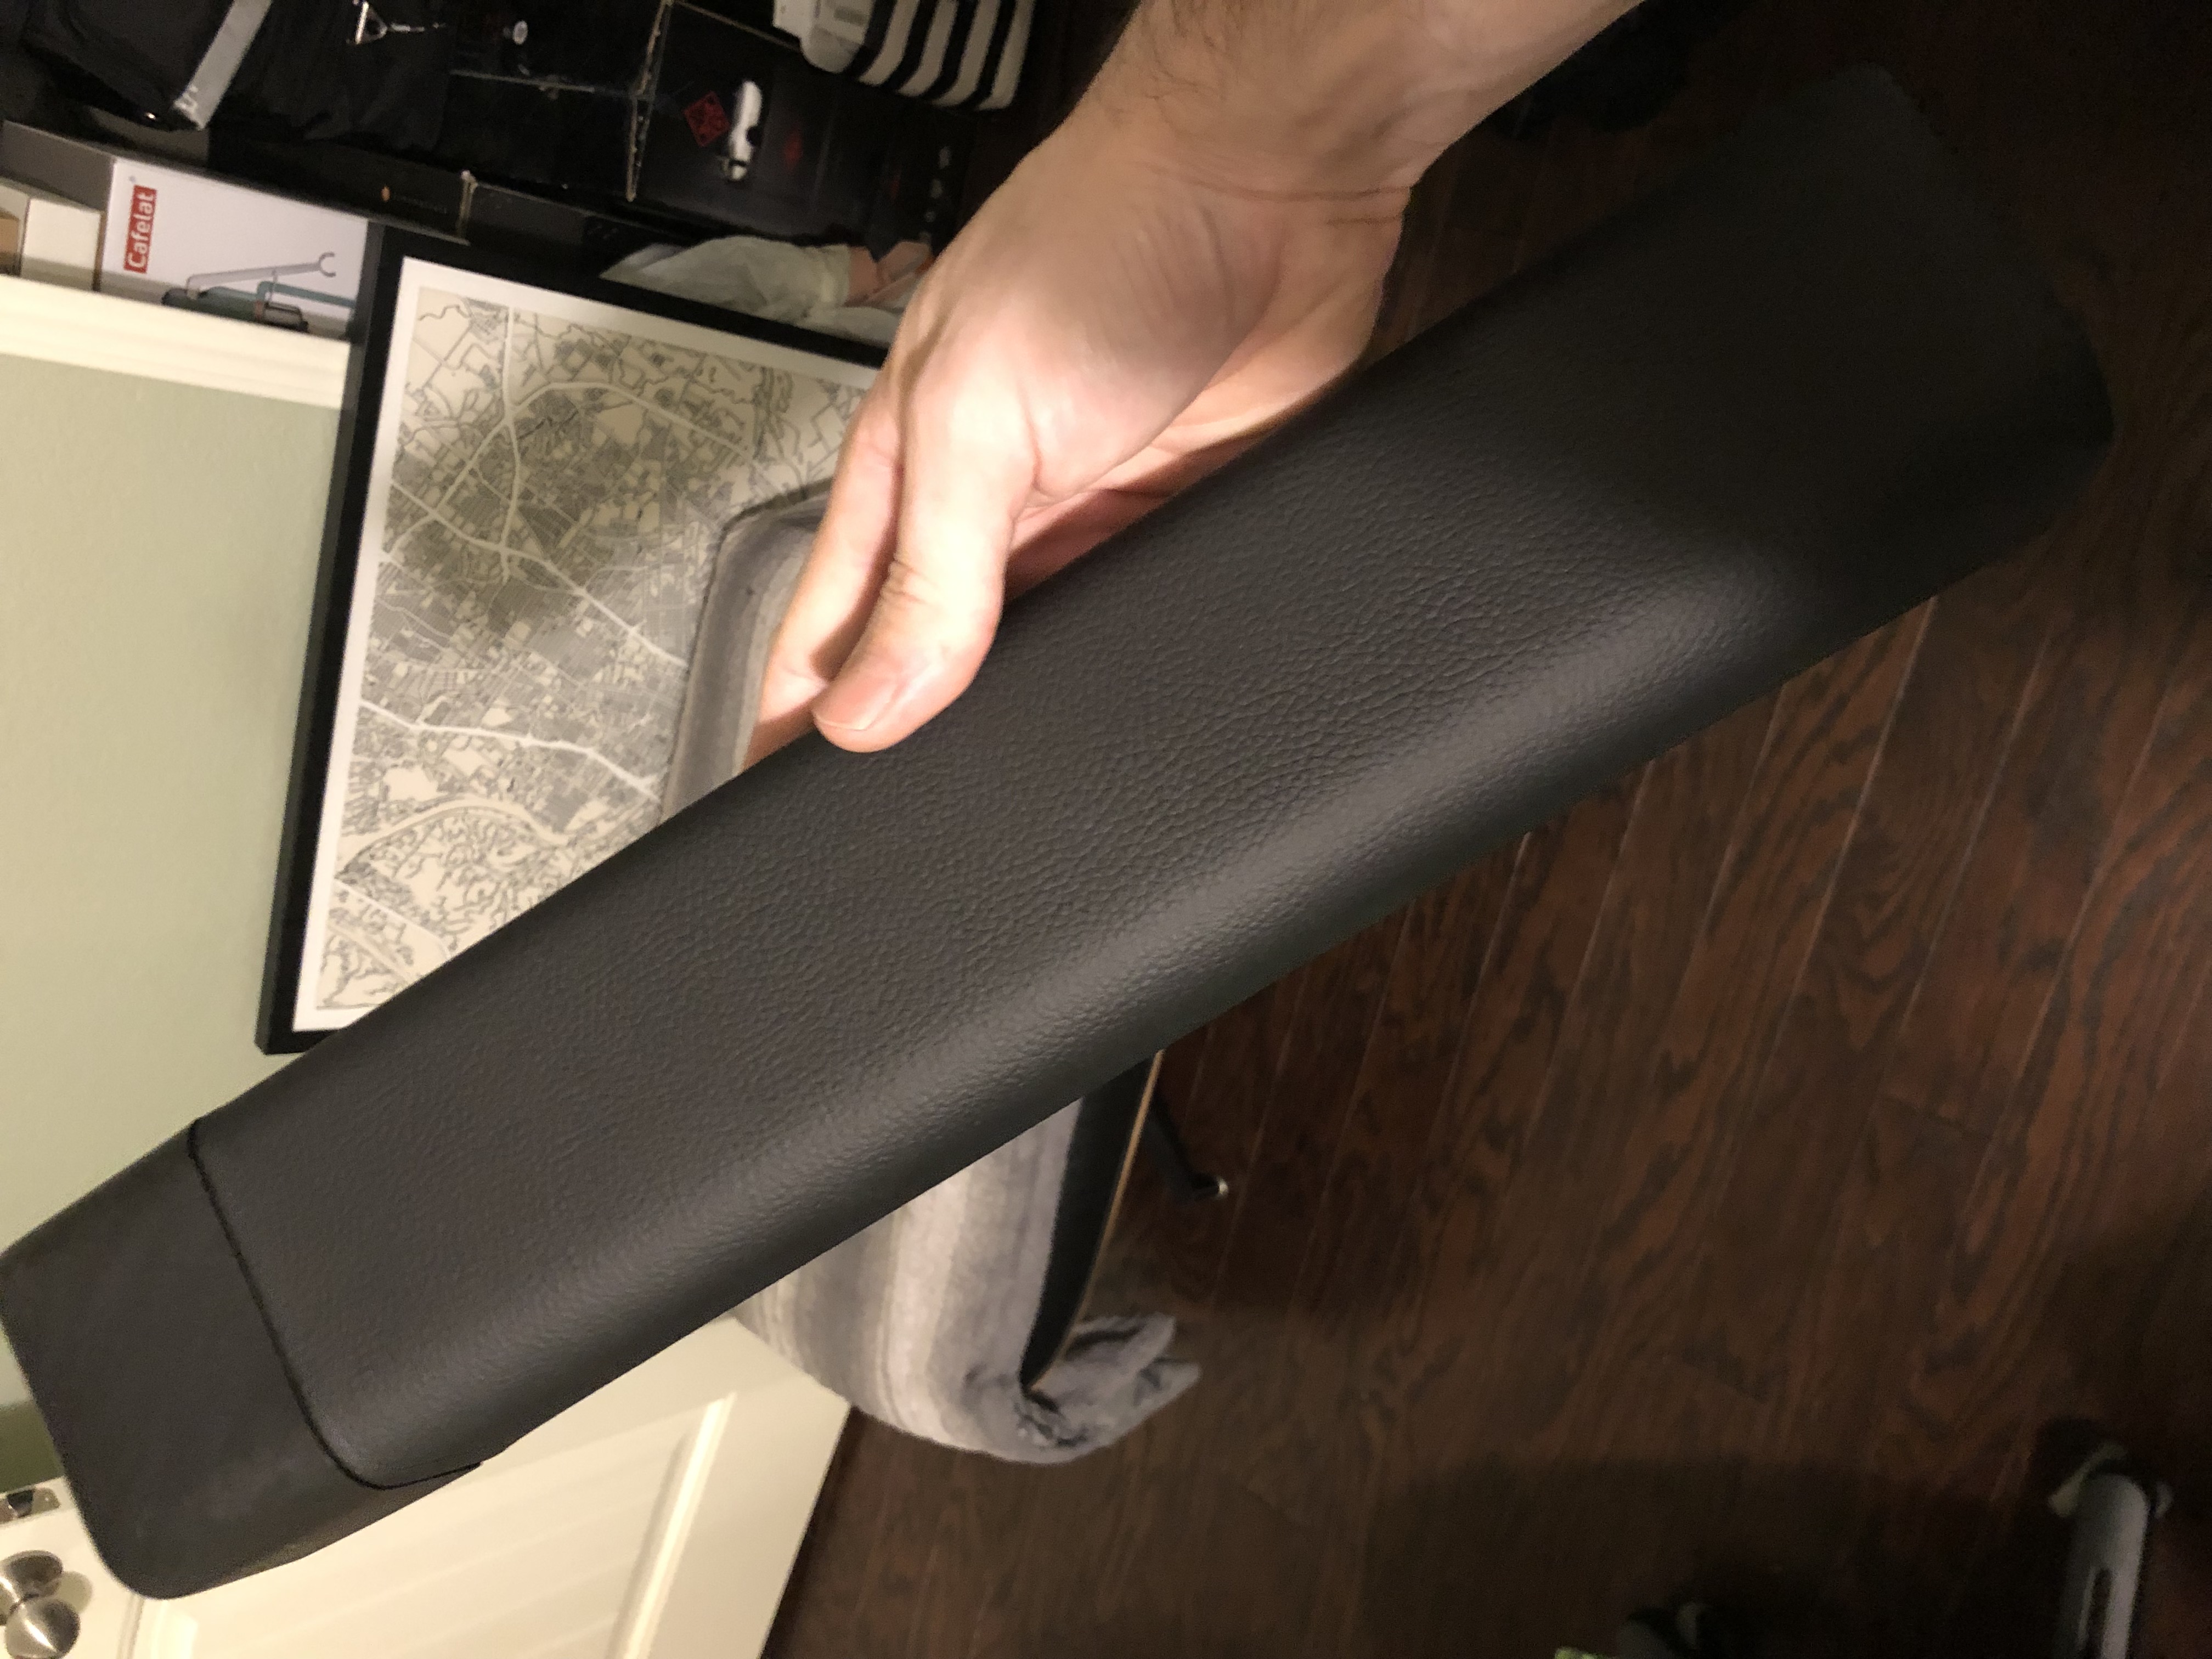
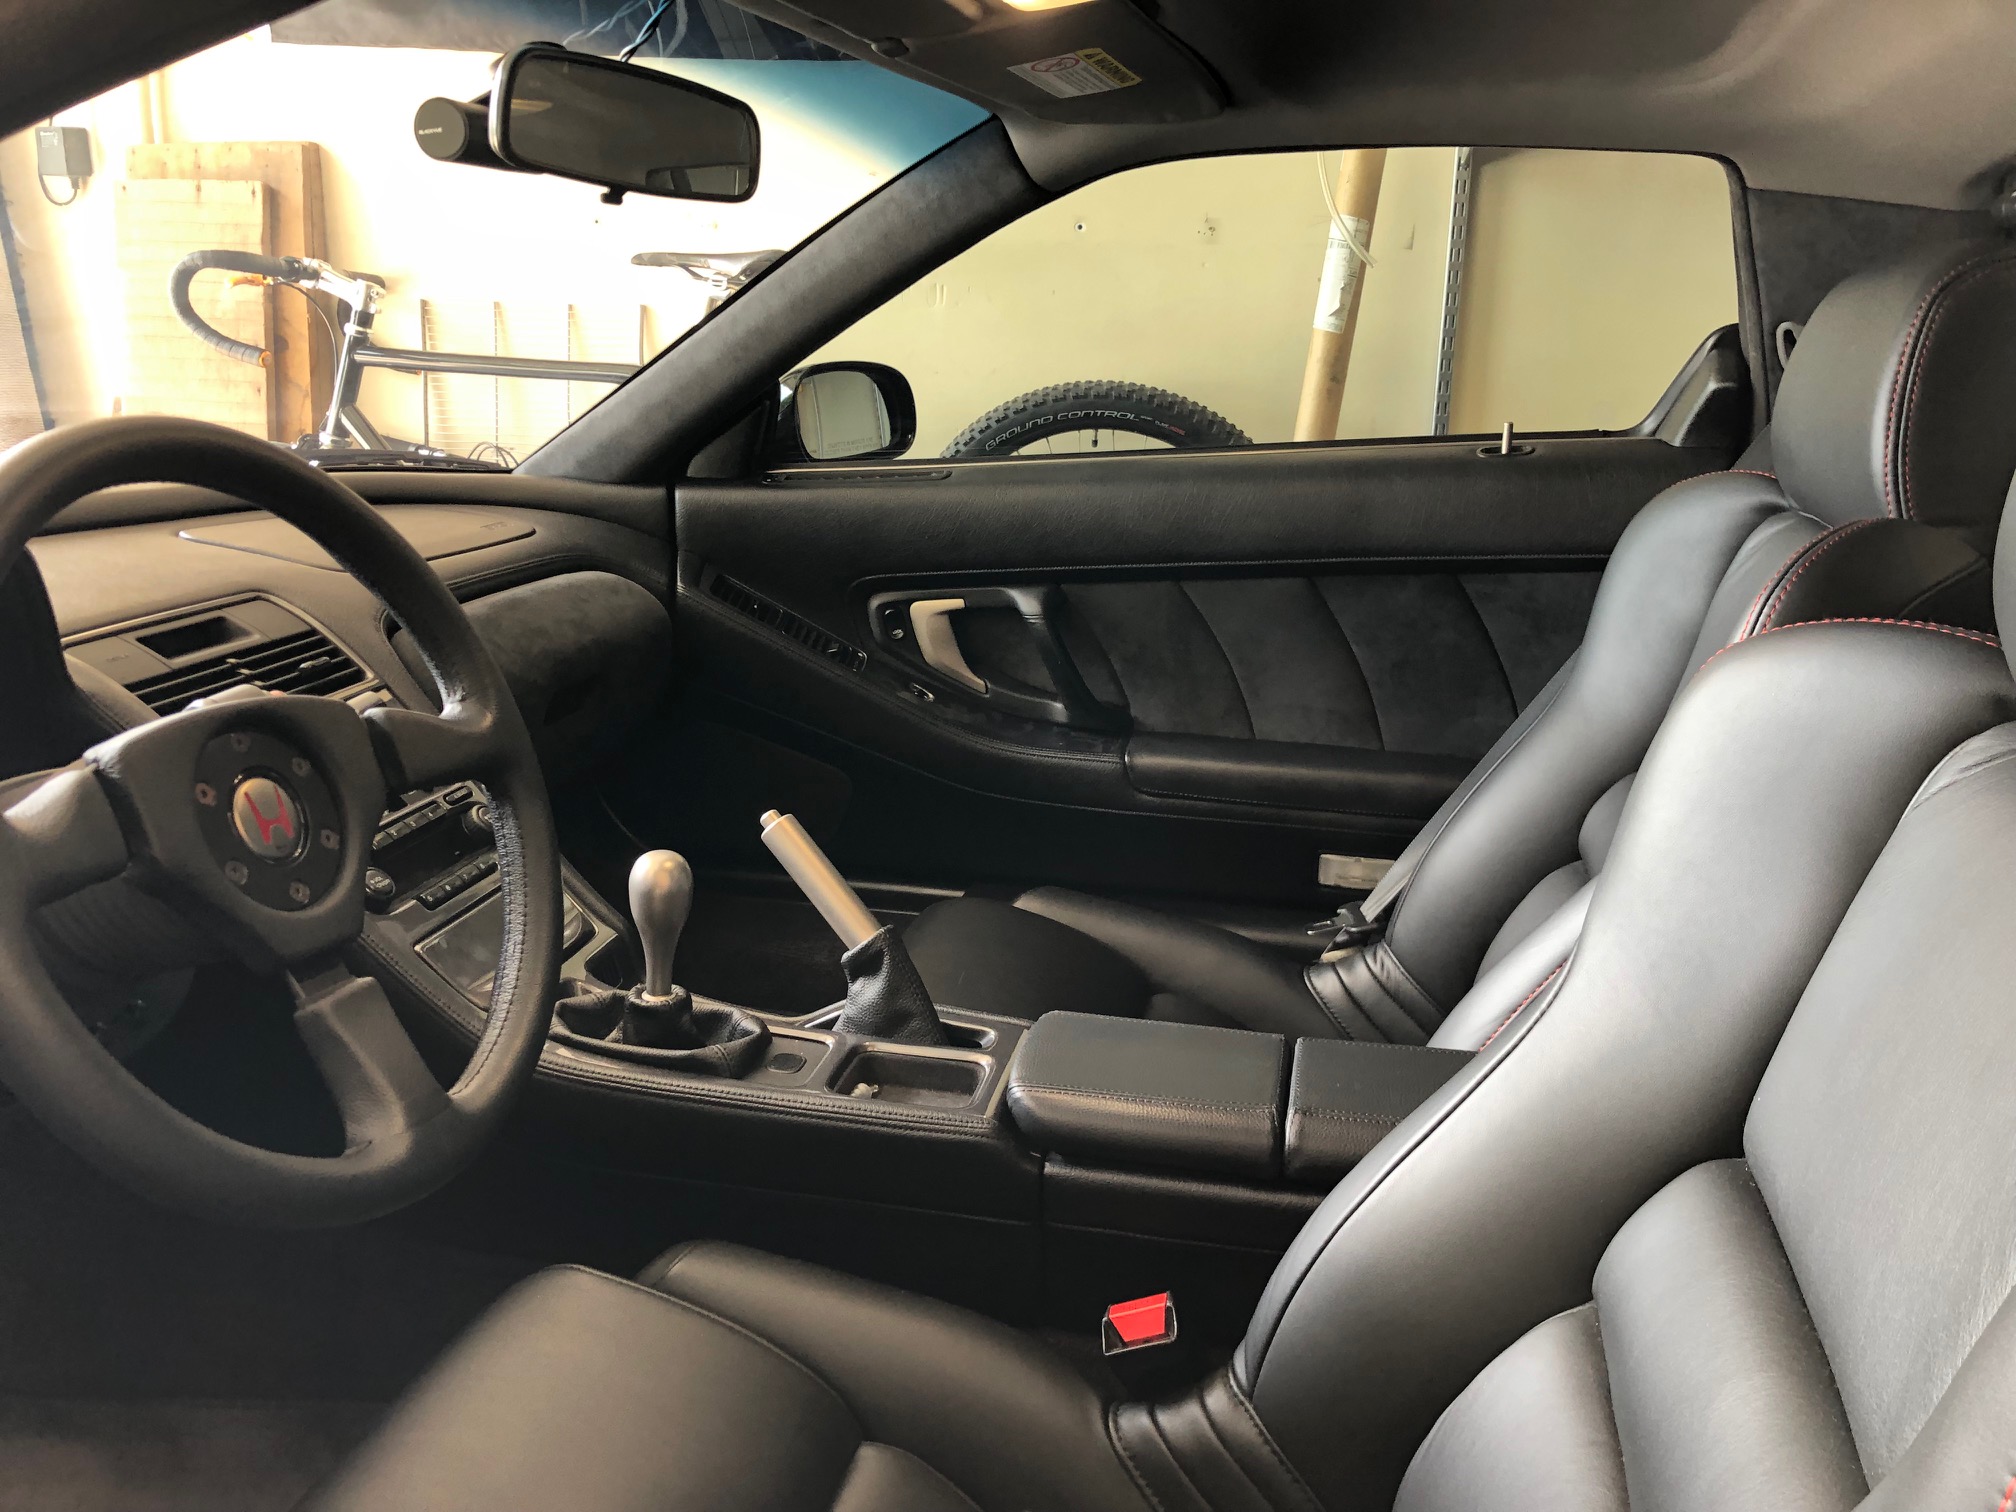
I was getting a bit tired of the dated gathered leather door cards and I also don't really like the grey vinyl headliner or pillars so it's time for some more interior mawds. I started off by ordering 2 yards of foam backed anthracite alcantara from Relicate, as I plan to do a lot of interior surfaces with it.

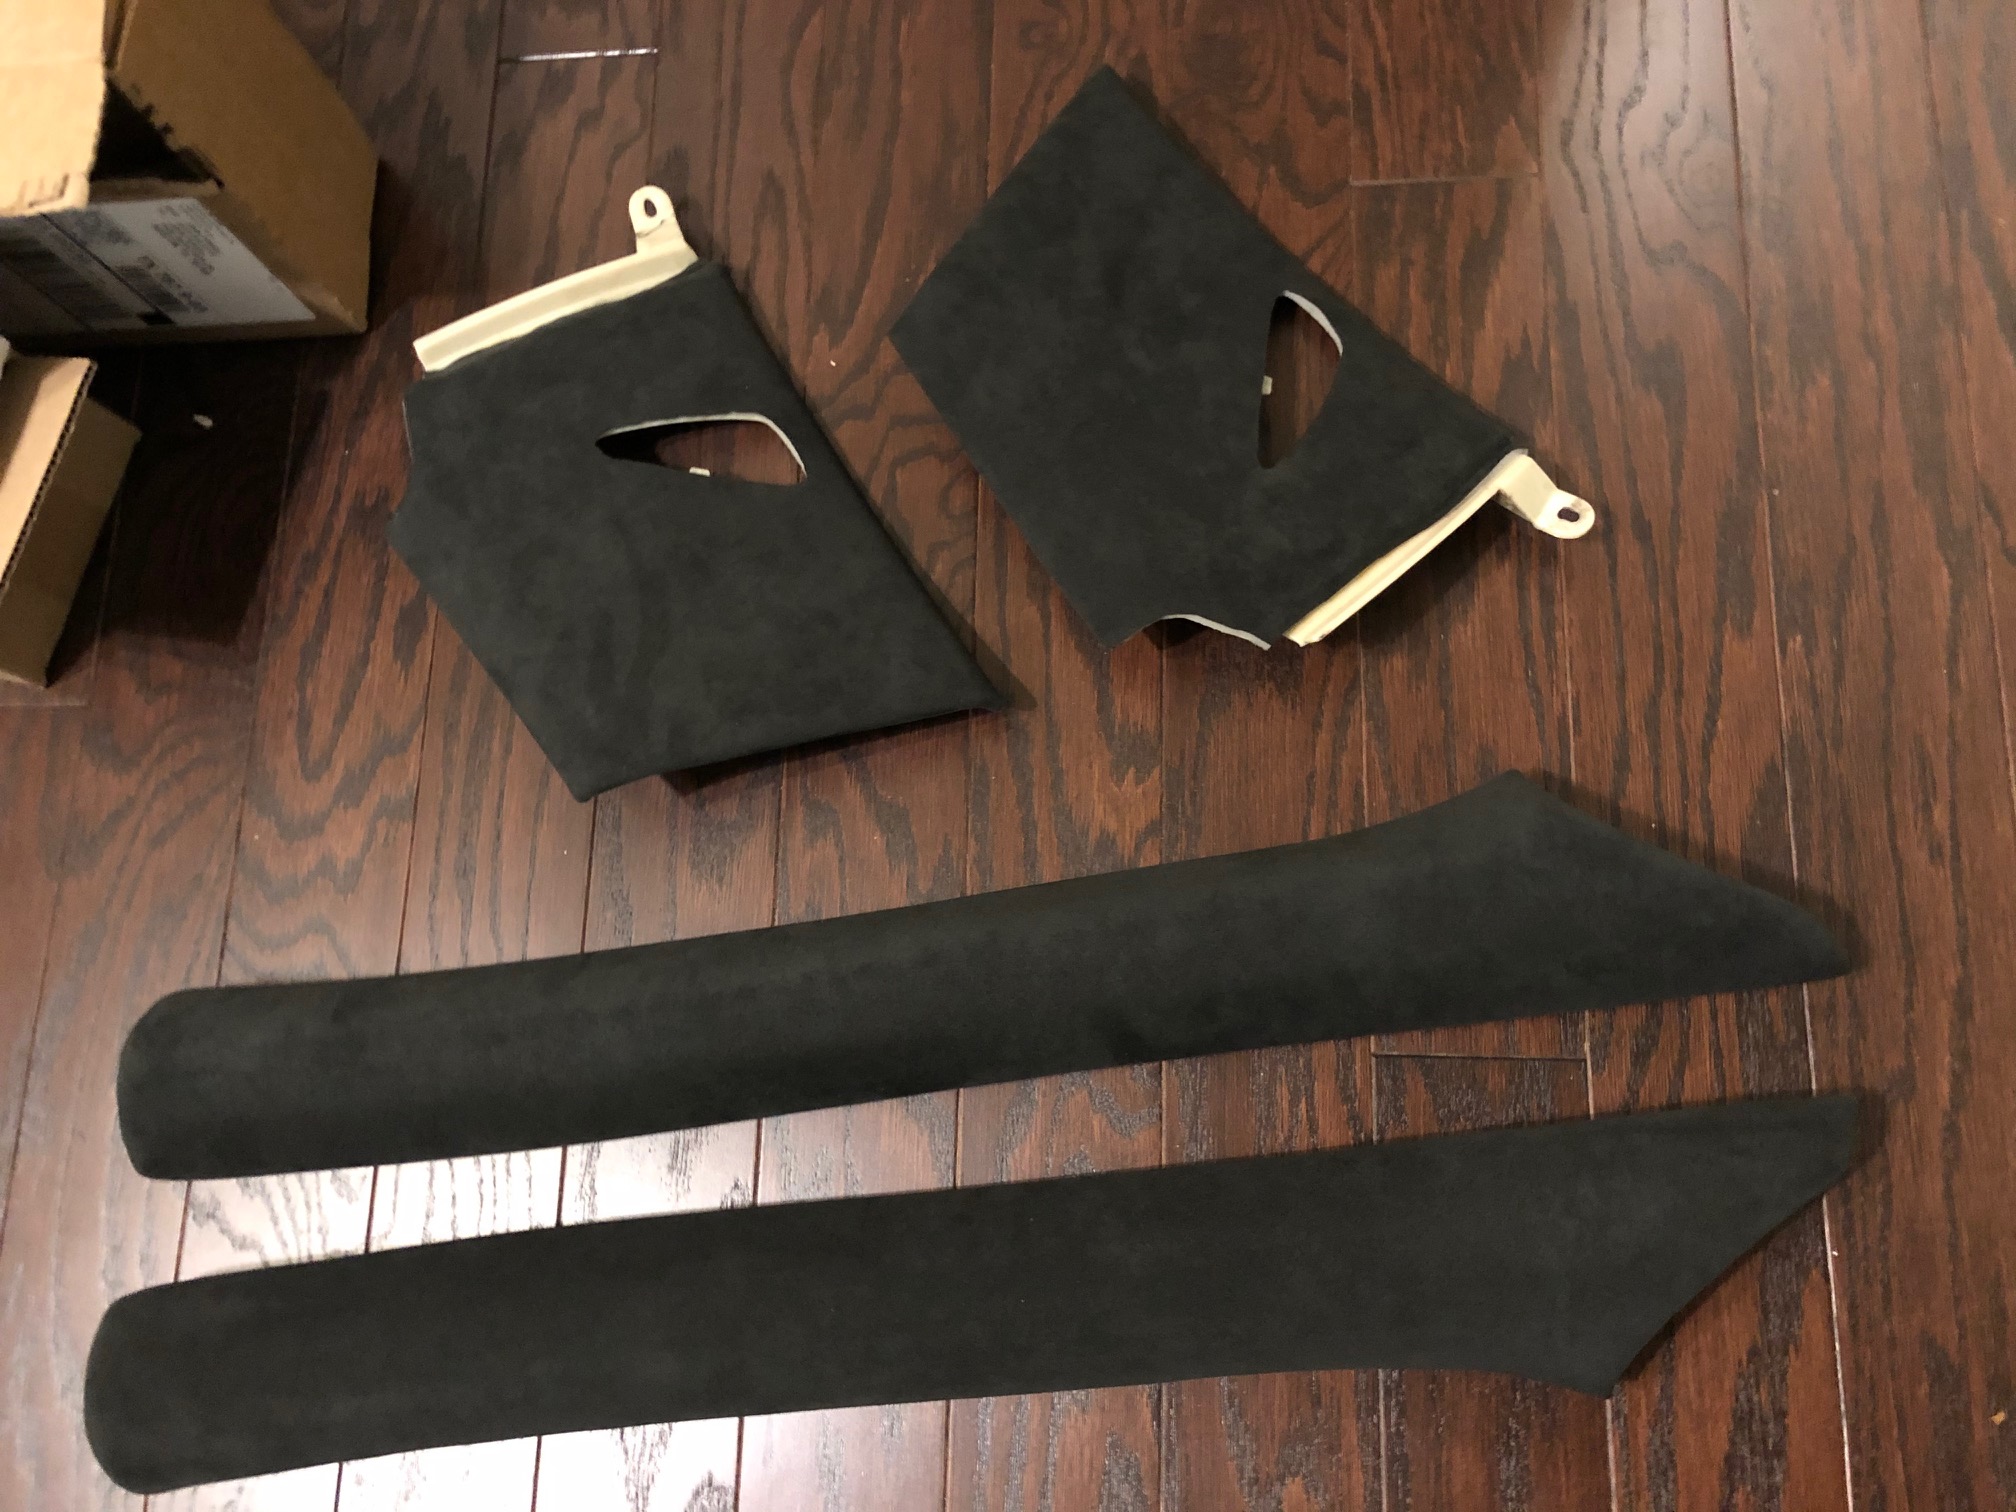
I started off with the easy parts, the A and B pillars. They went pretty easily as no fancy stretching is needed, basically just peel the grey vinyl off, fix any the cracks in the base plastic using a liberal amount of solvent cement, wrap the new material over the edges and glue it down with Weldwood contact cement. I apply it with cheap $1 1" paintbrushes and just throw them away when I'm done for the day since that stuff is impossible to clean out of a brush.

IMG_0978.jpg


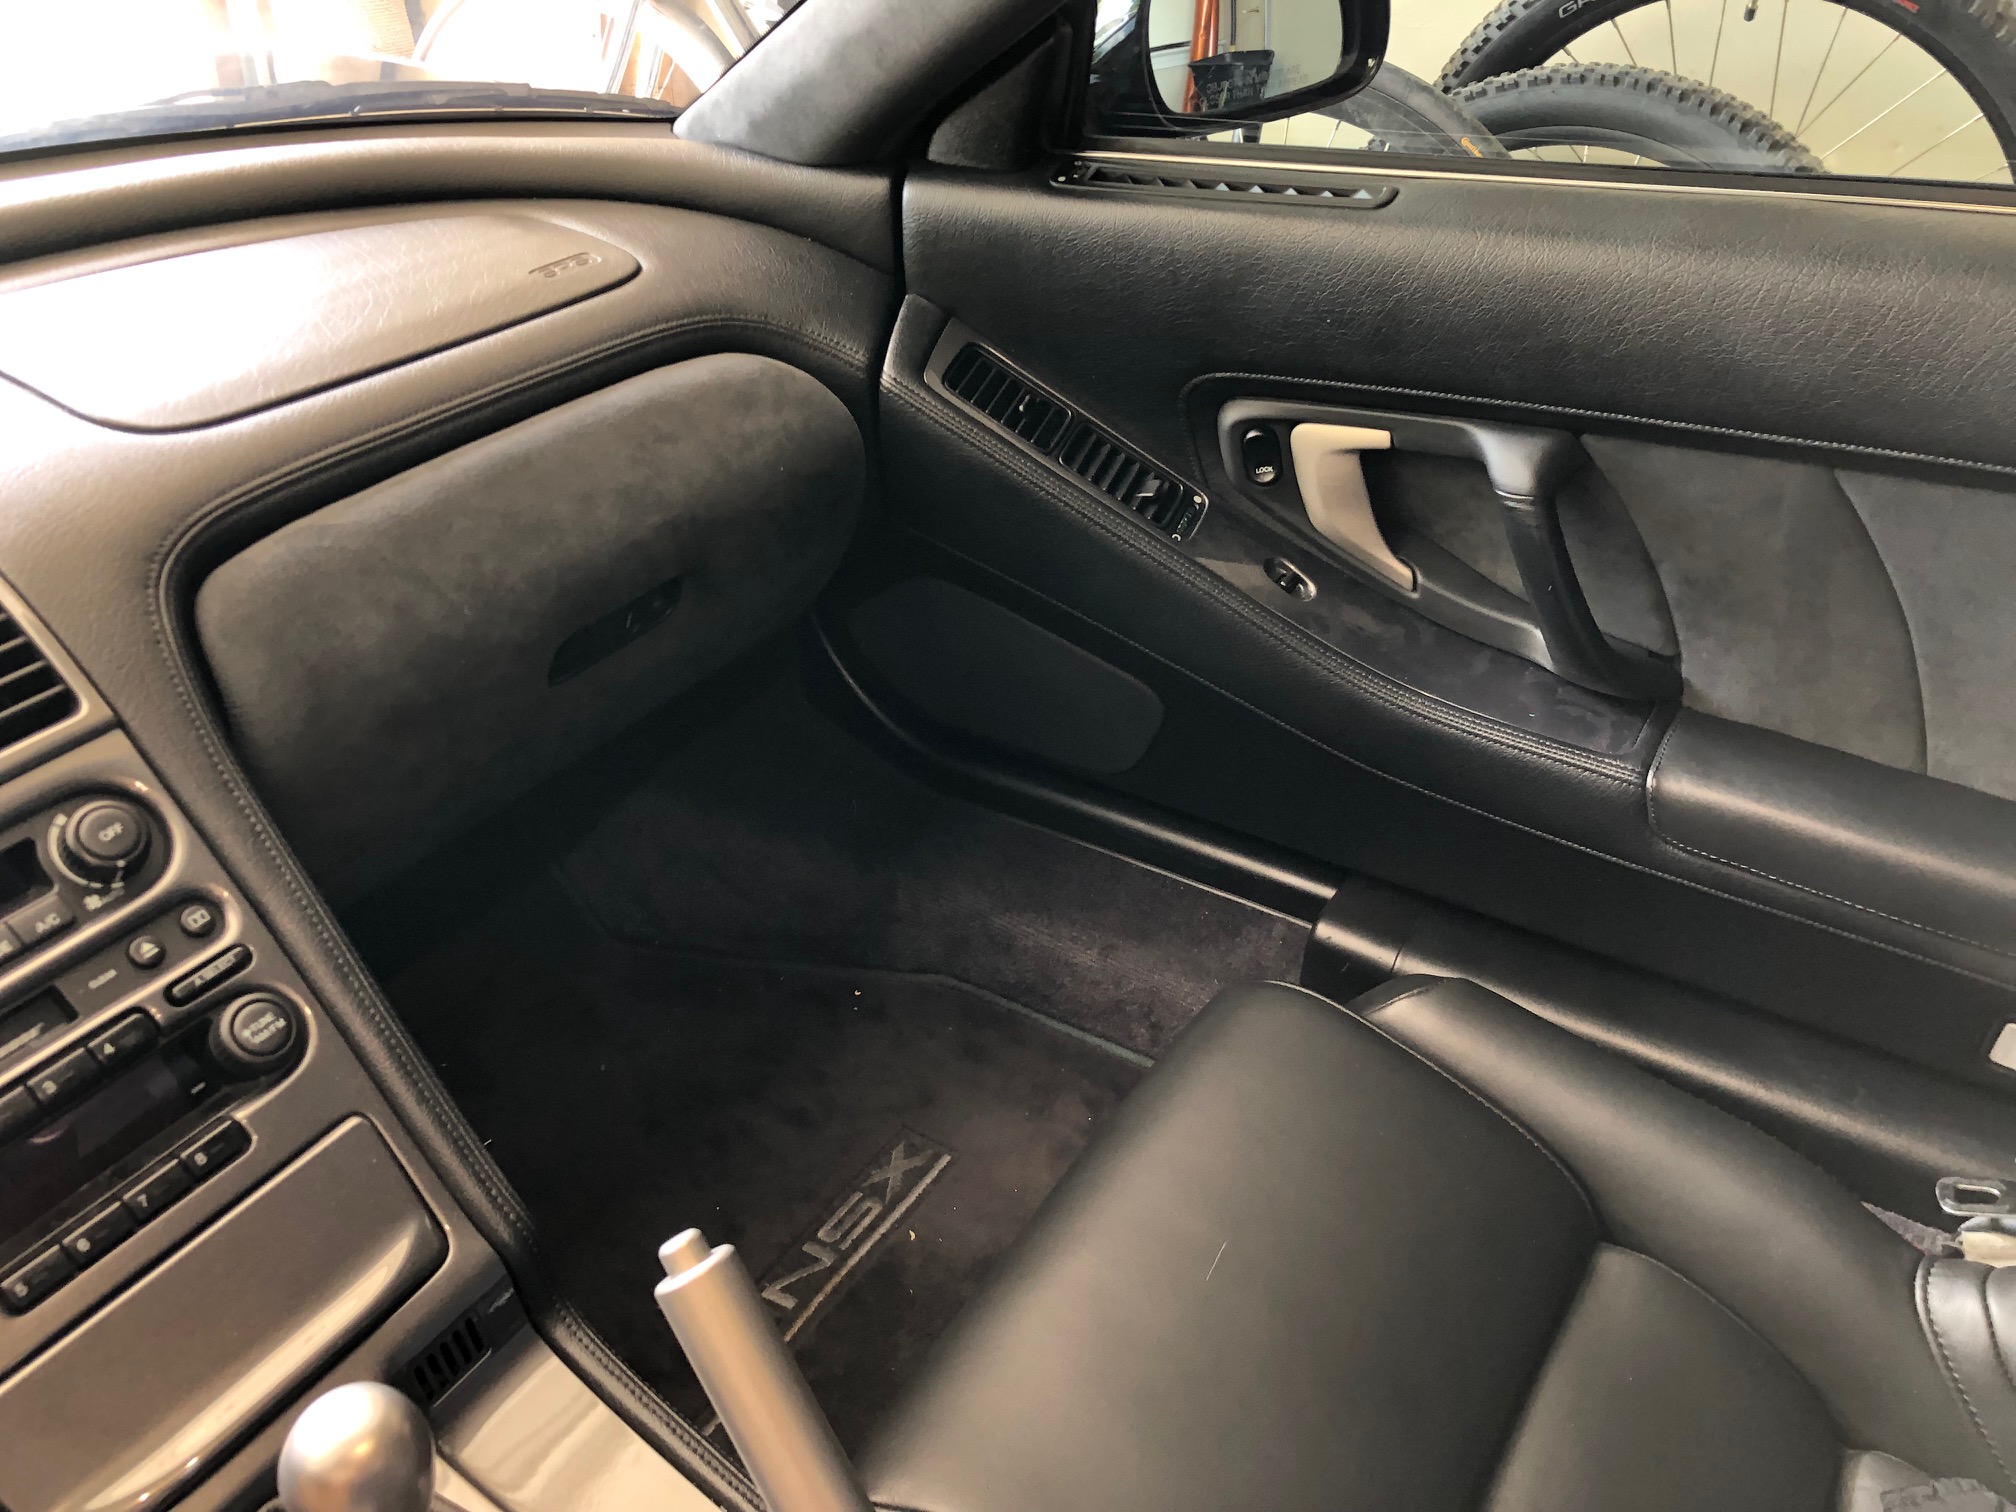
Next up, glove box and knee bolster, these have some tricky curves to wrap perfectly and the OEM black vinyl isn't even perfectly smooth, after some trial and error I was able to get the alcantara to lay down acceptably smooth. After peeling the vinyl I prepped the surface using a maroon scotch brite pad for the new adhesive.

IMG_0987.jpg


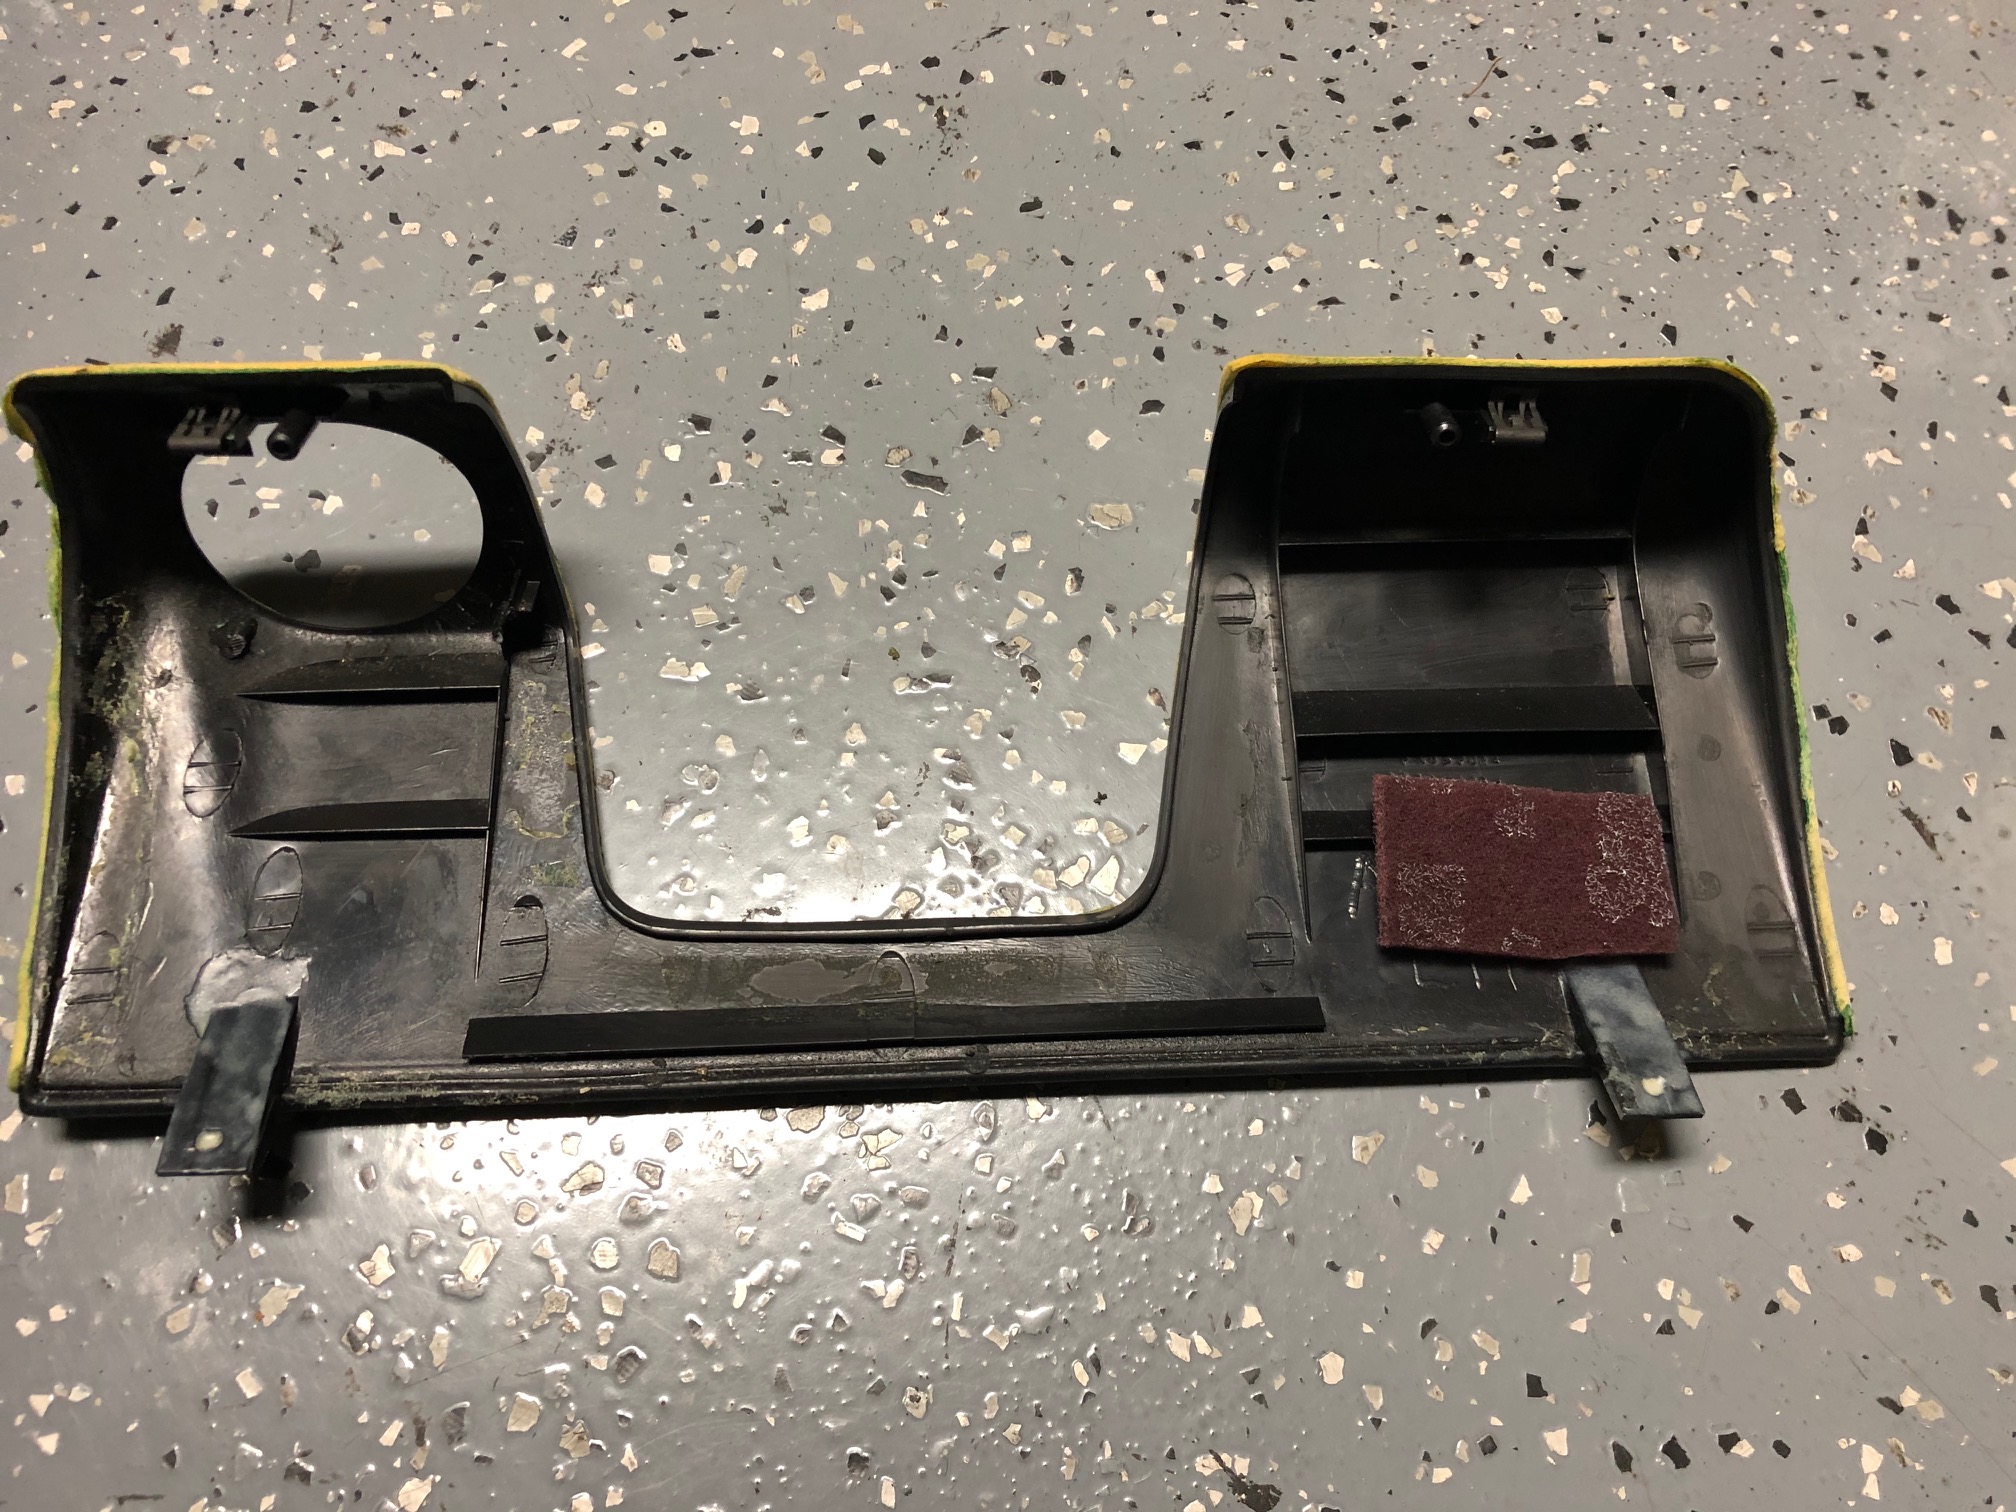
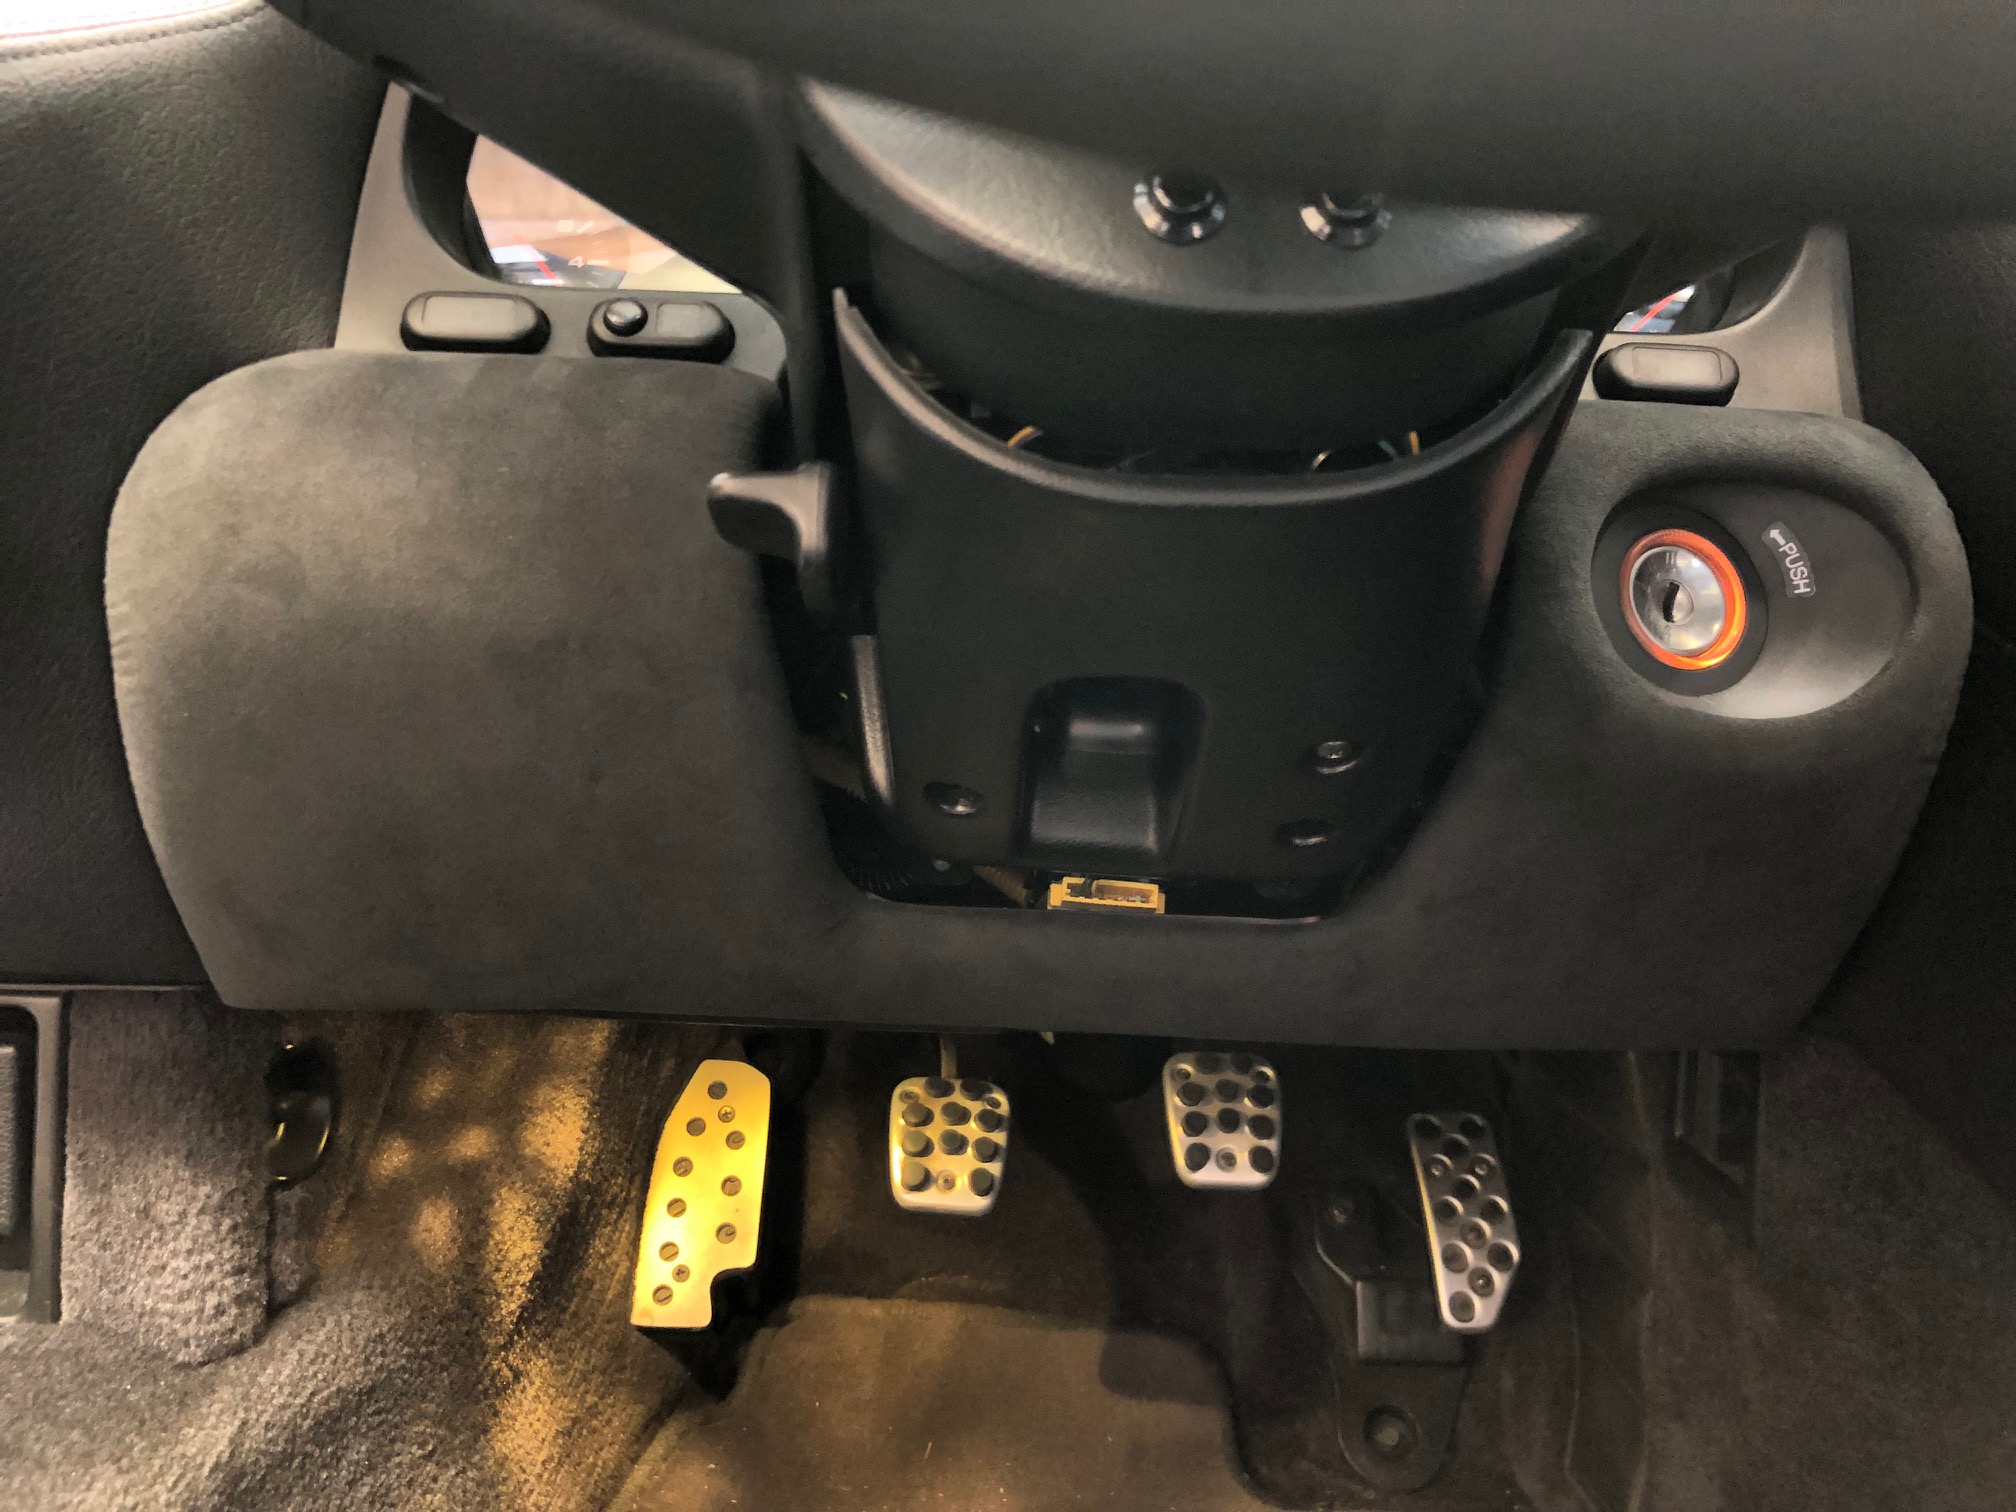
I must admit that I'm quite proud of how I was able to get the material to fold over into the area where the key hole is. I removed the whole key hole piece as seen in the previous photo then glued it back in when I was done to get a perfect wrap on the edge. There's a few more wrinkles than I'd like around the sides so I might end up redoing this piece but it's fine for now.

IMG_0988.jpg


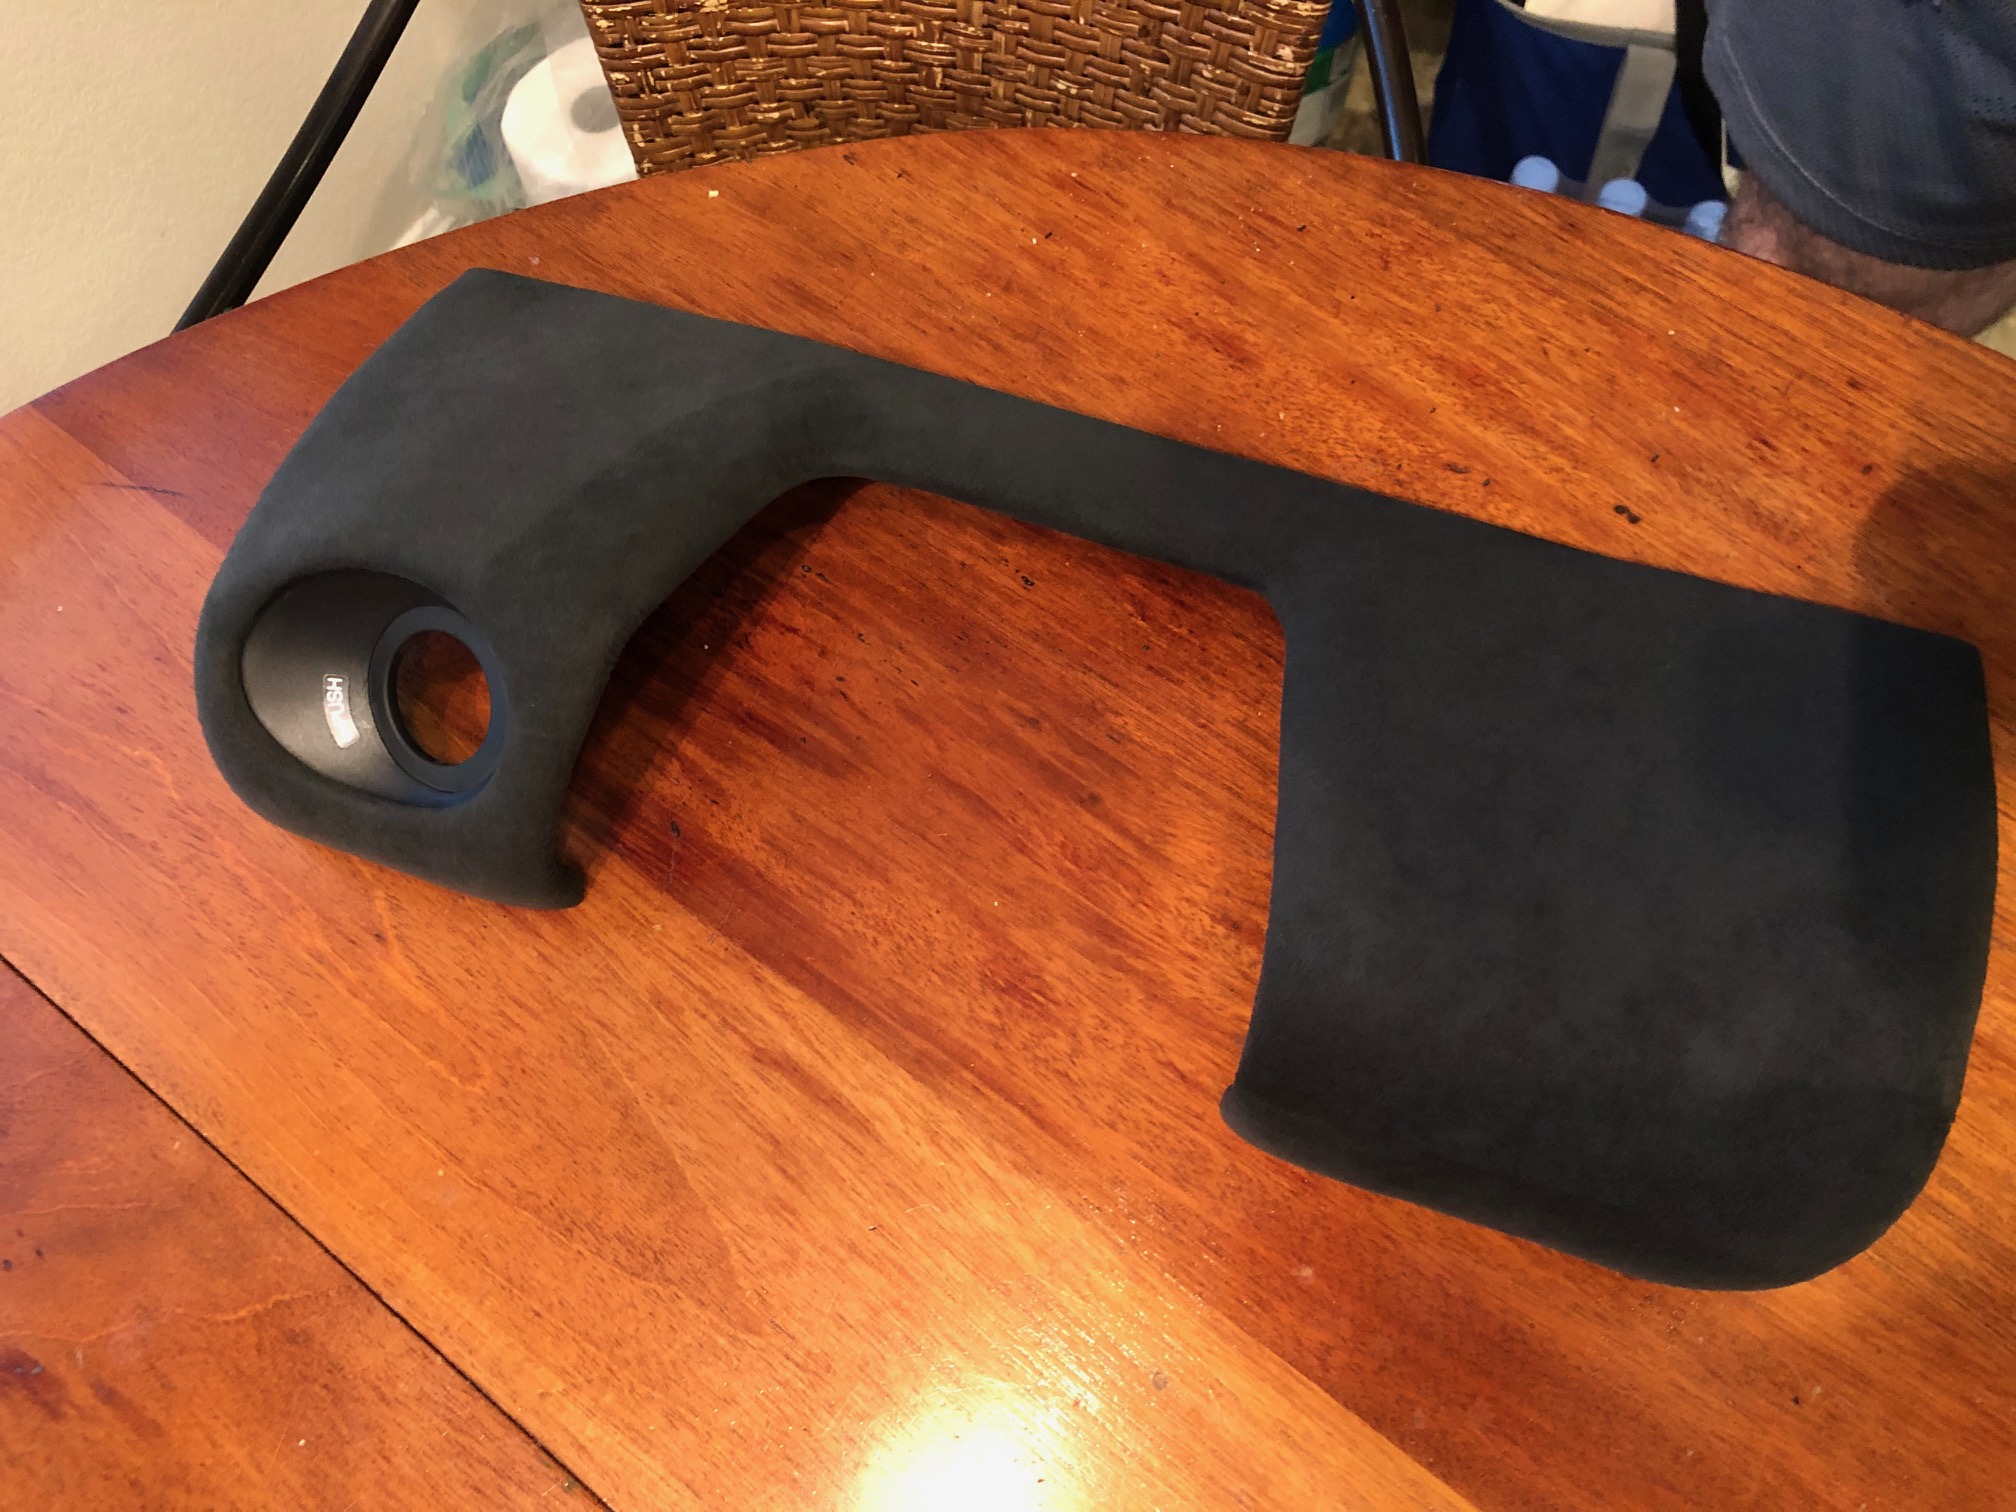
The glove box turned out nearly perfectly. Here's a comparison to the stock material.

IMG_0973.jpg


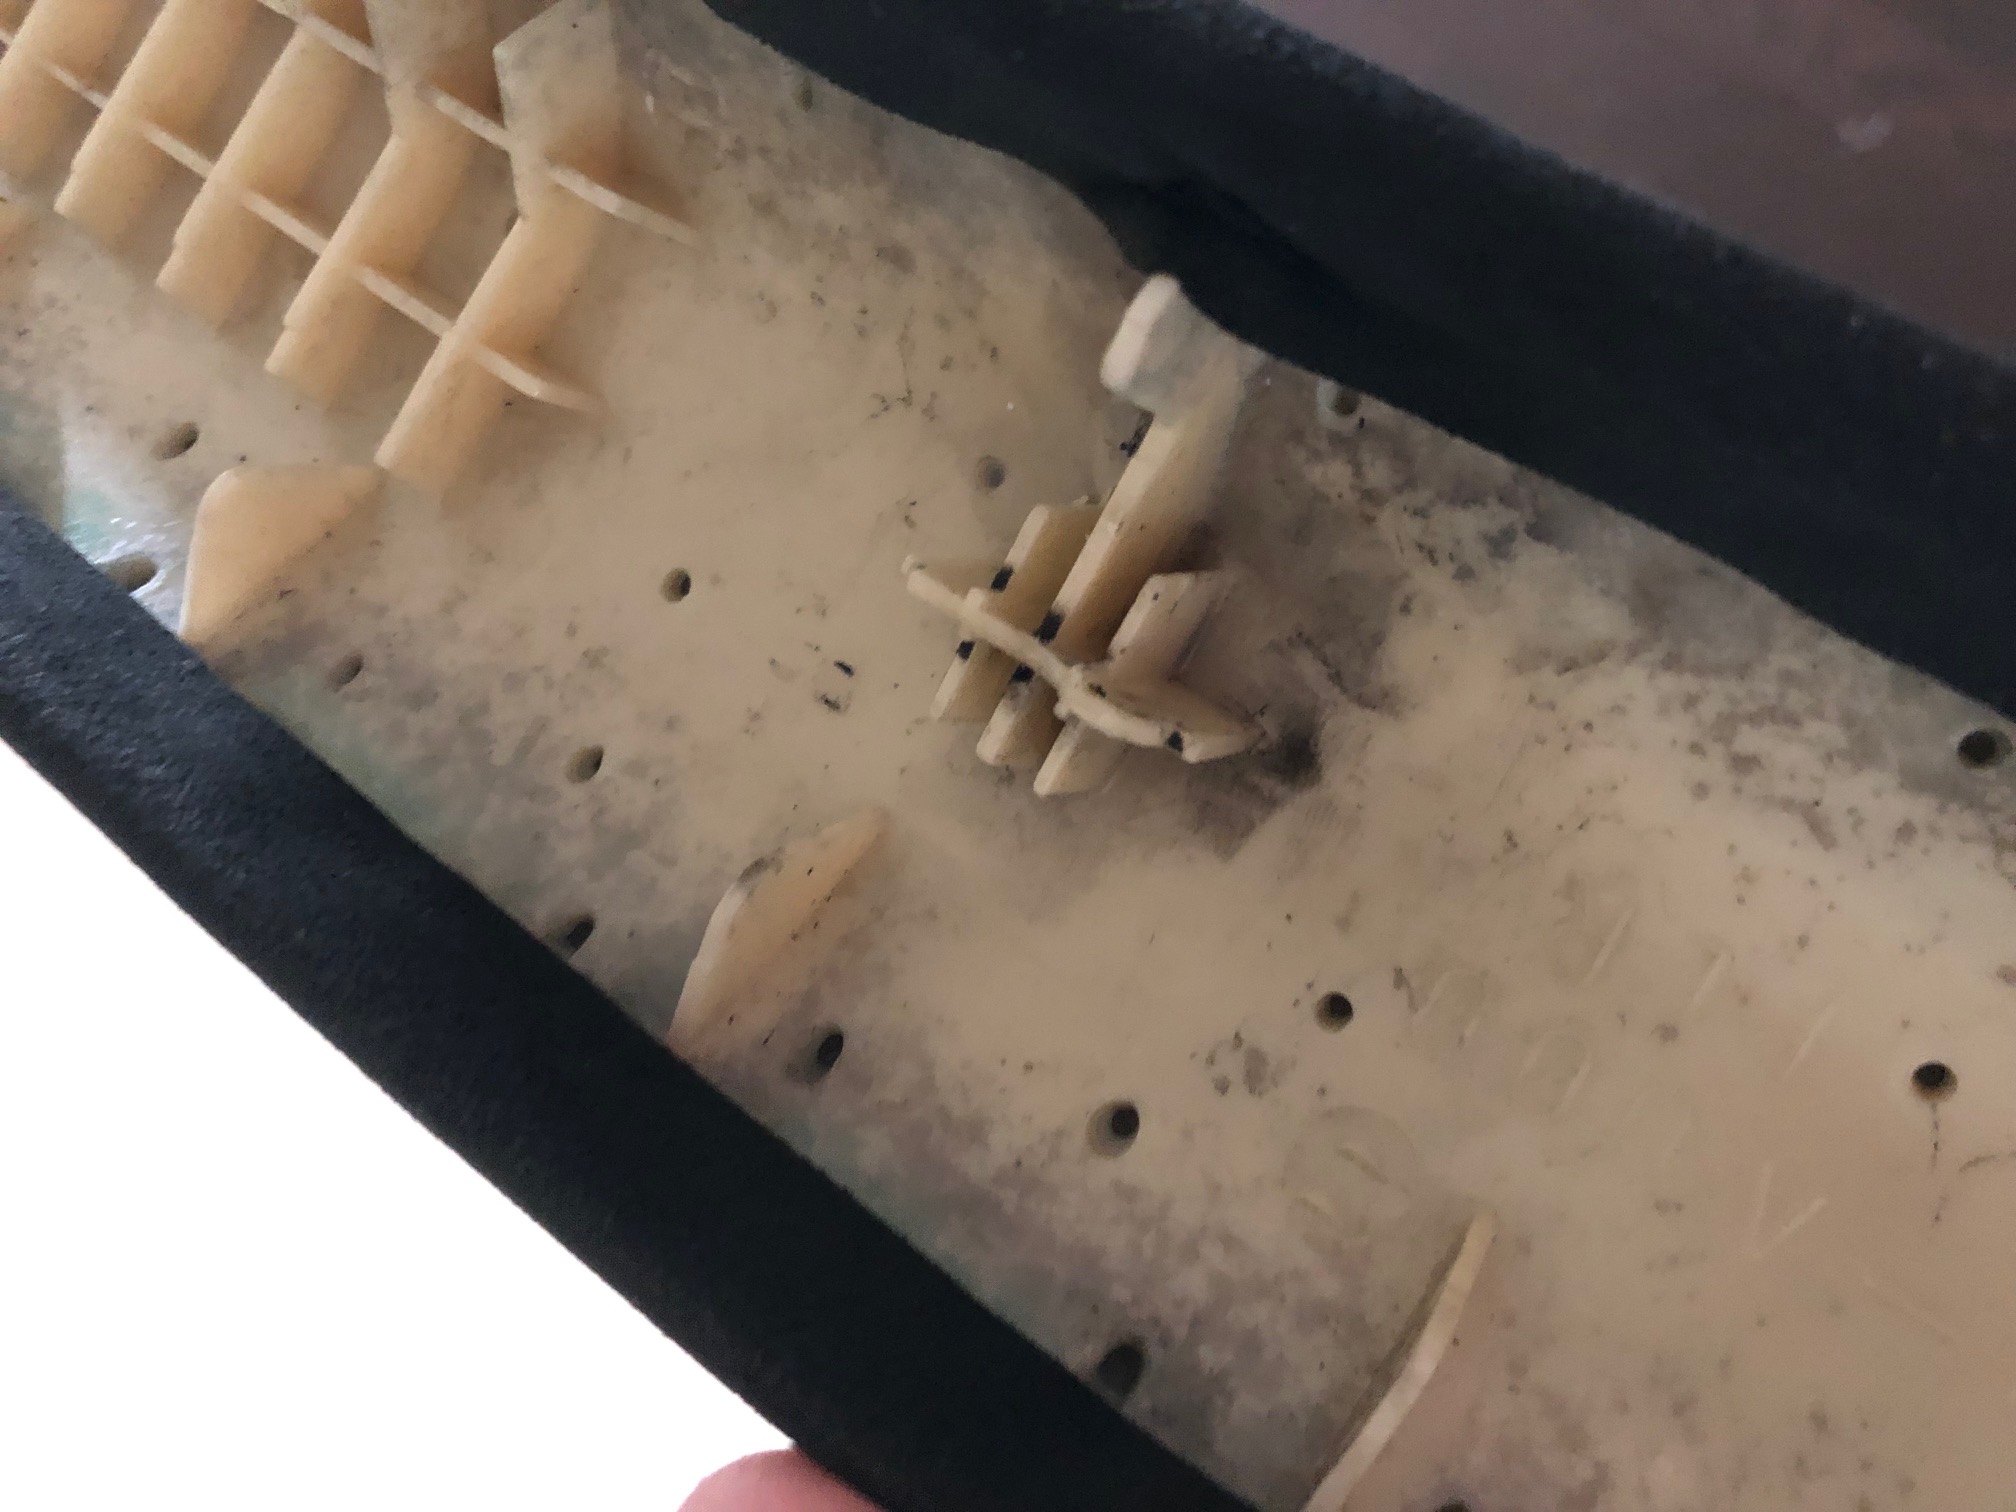
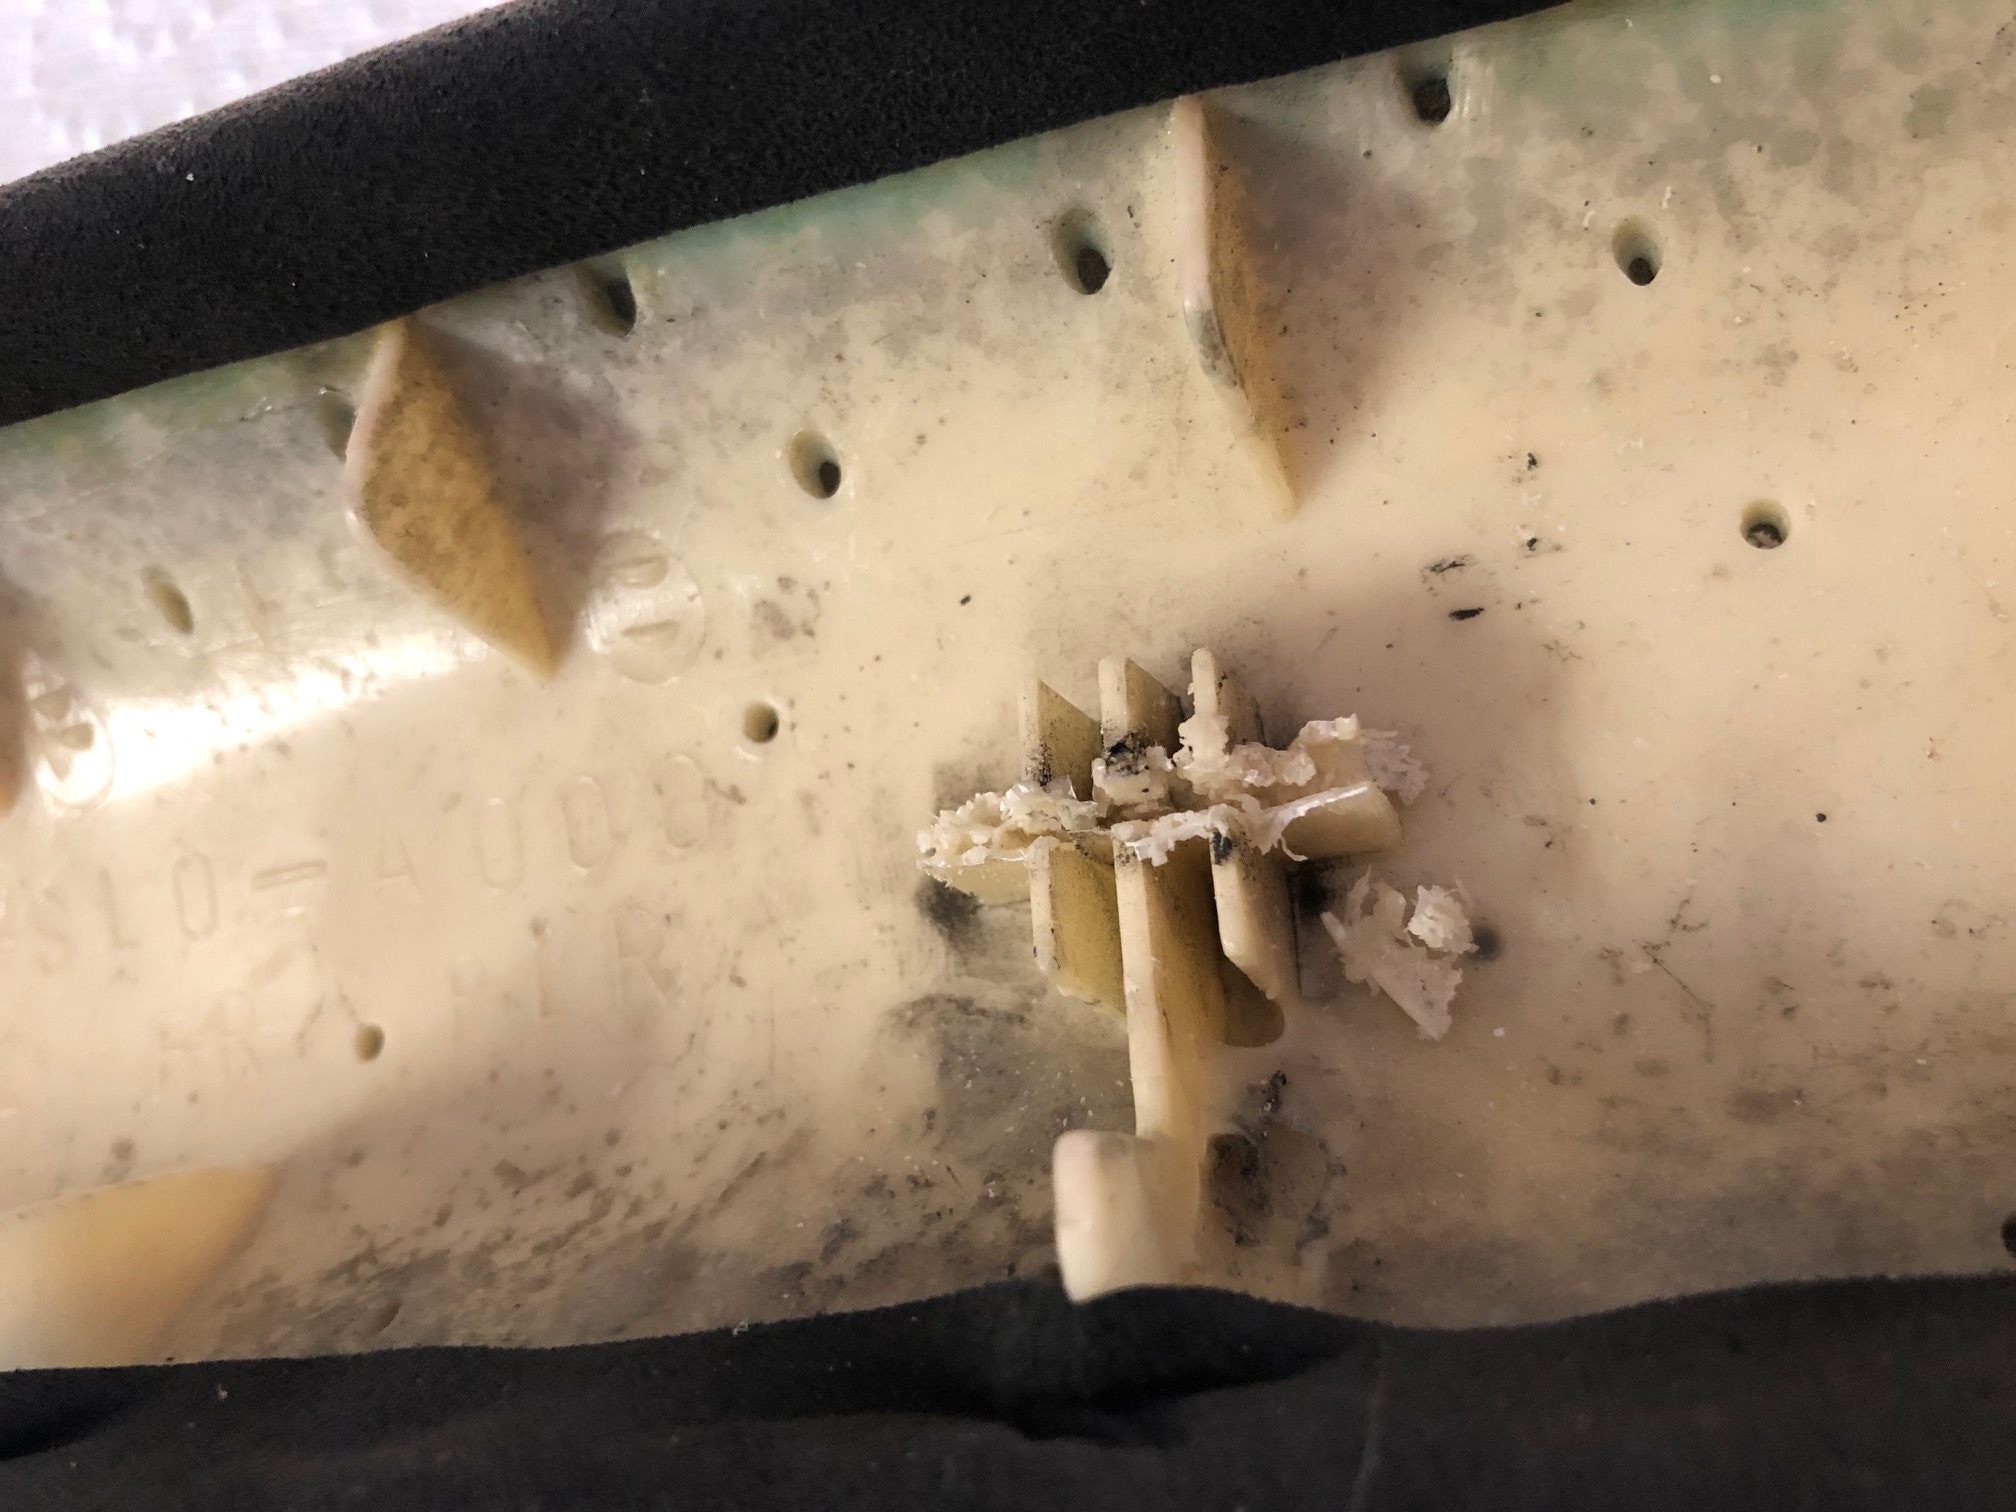
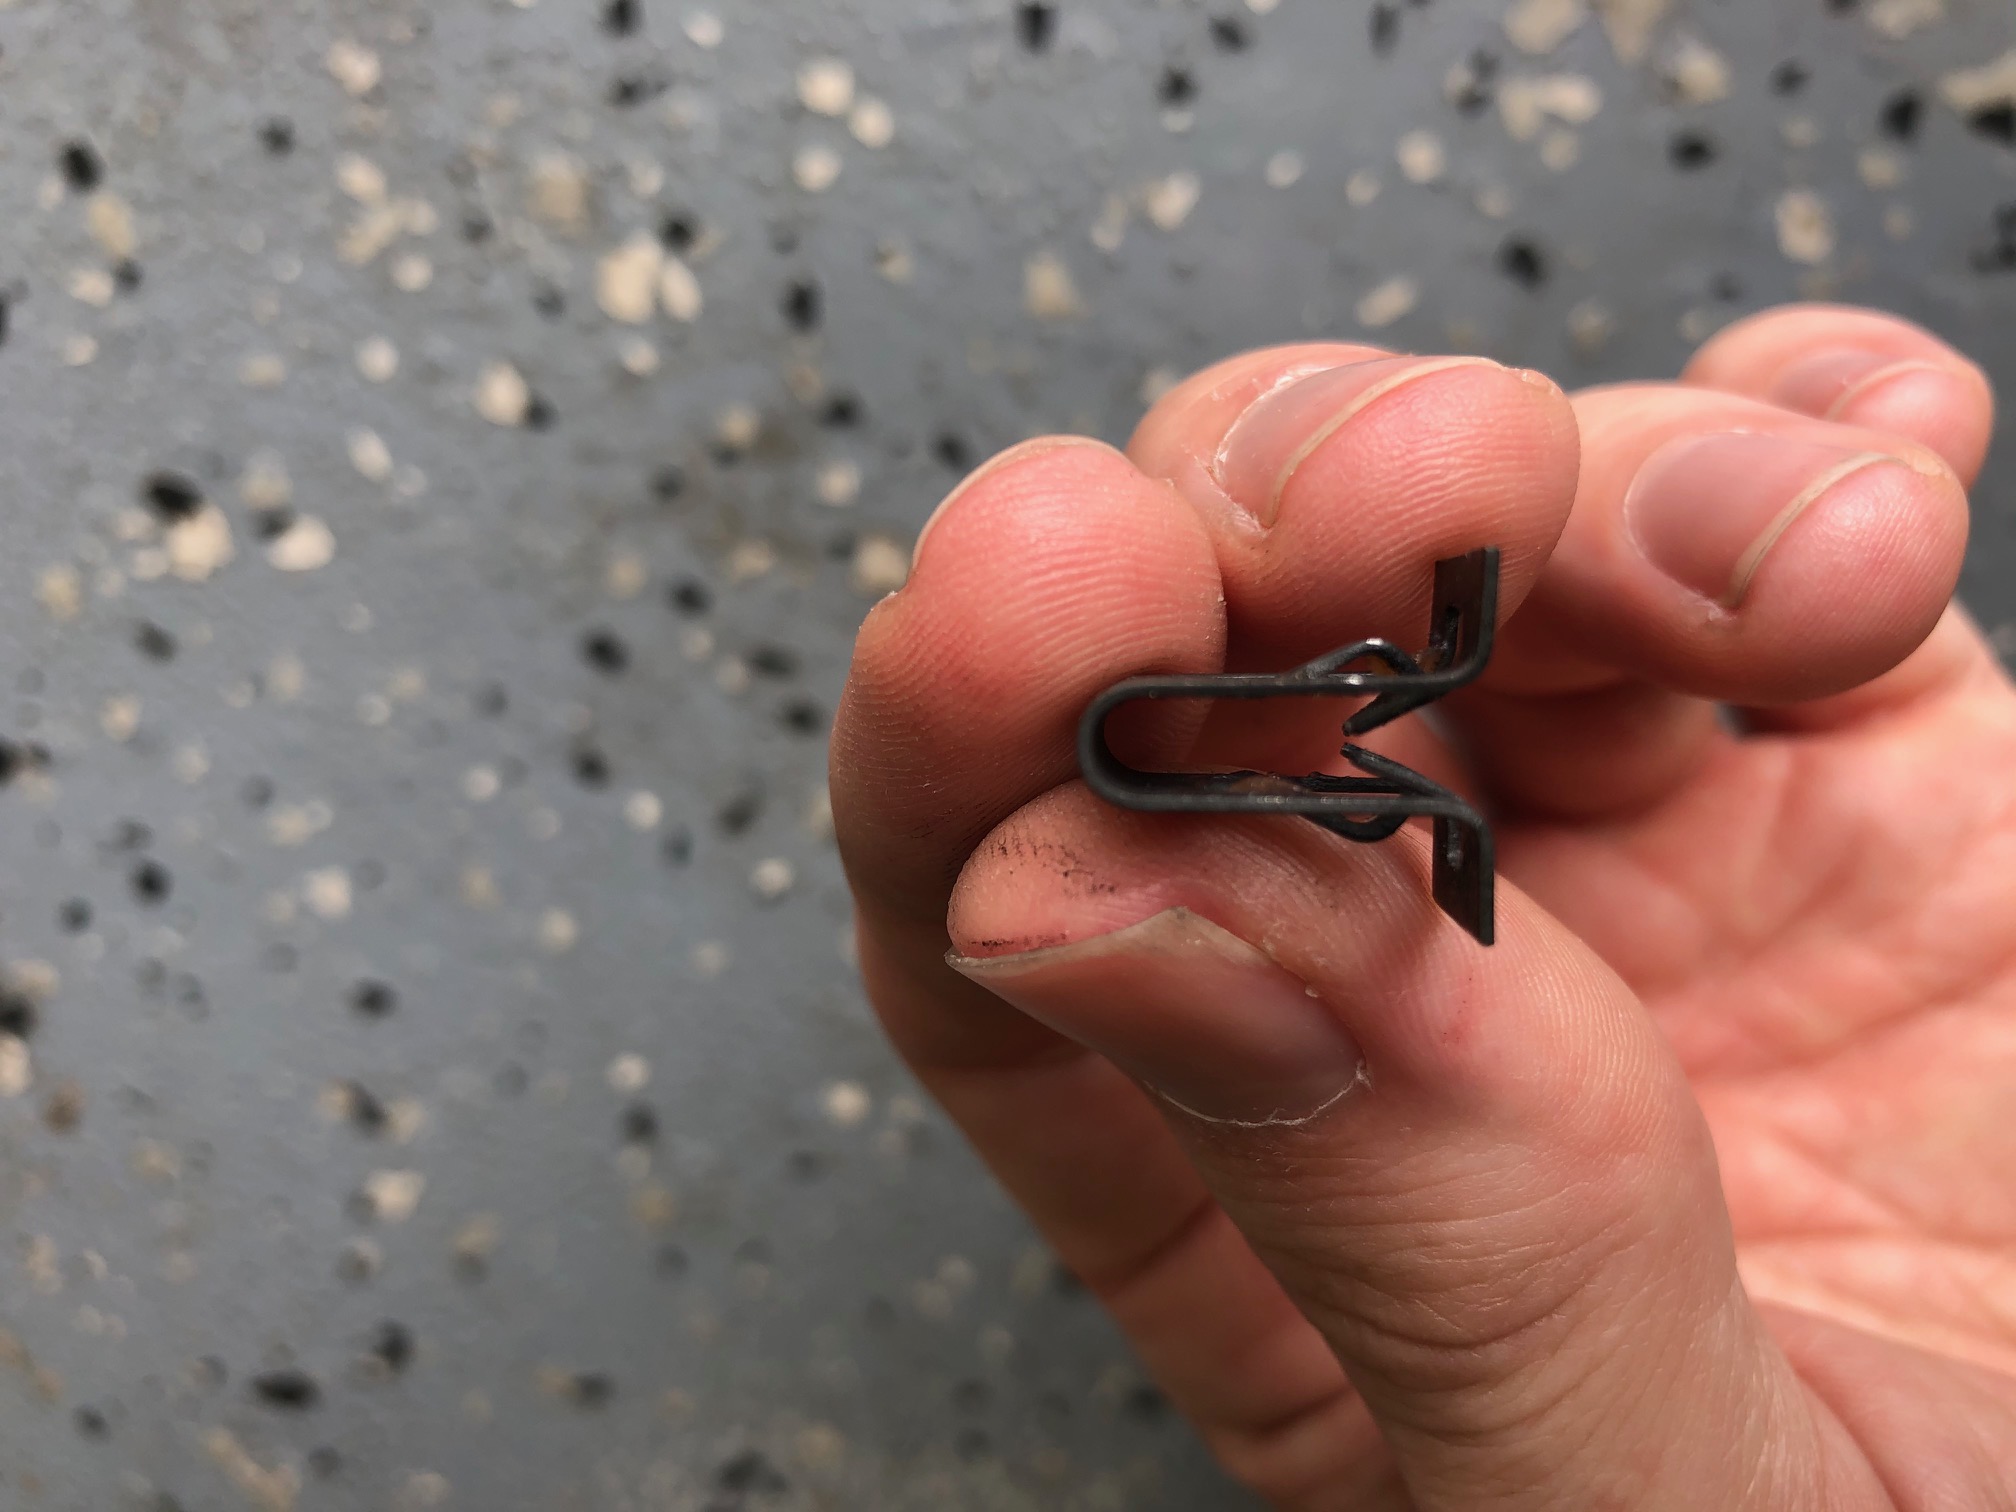
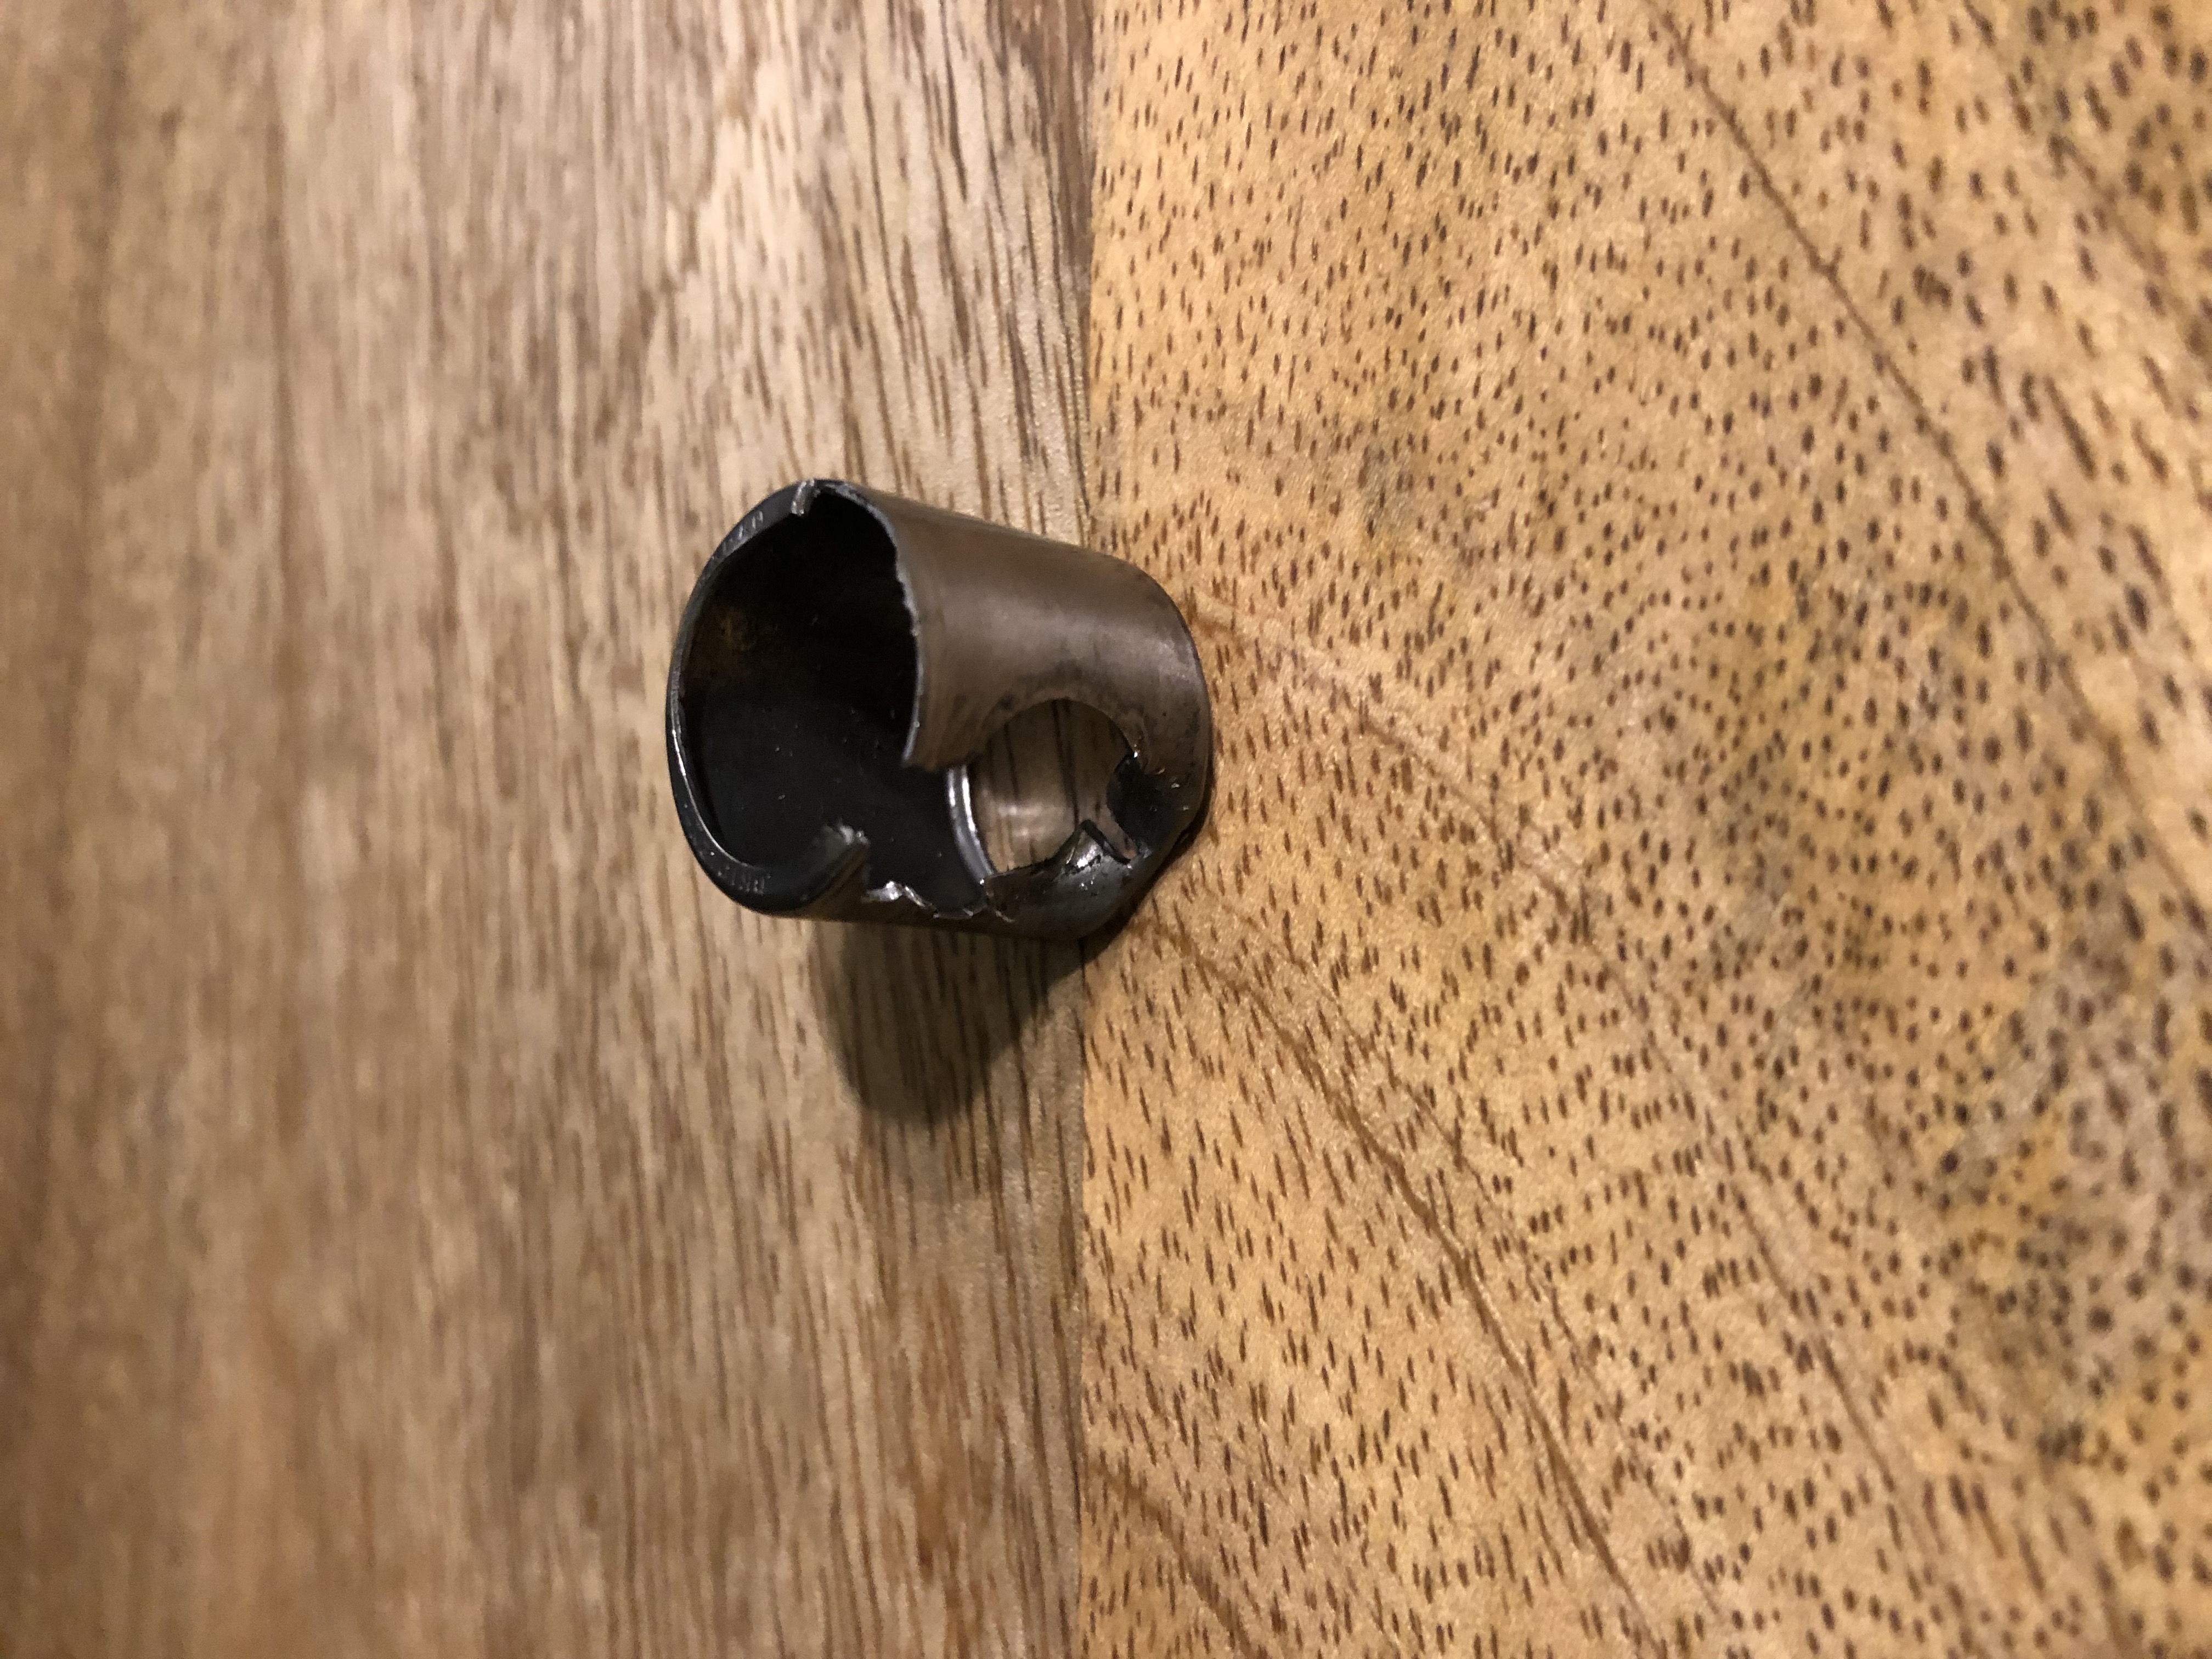
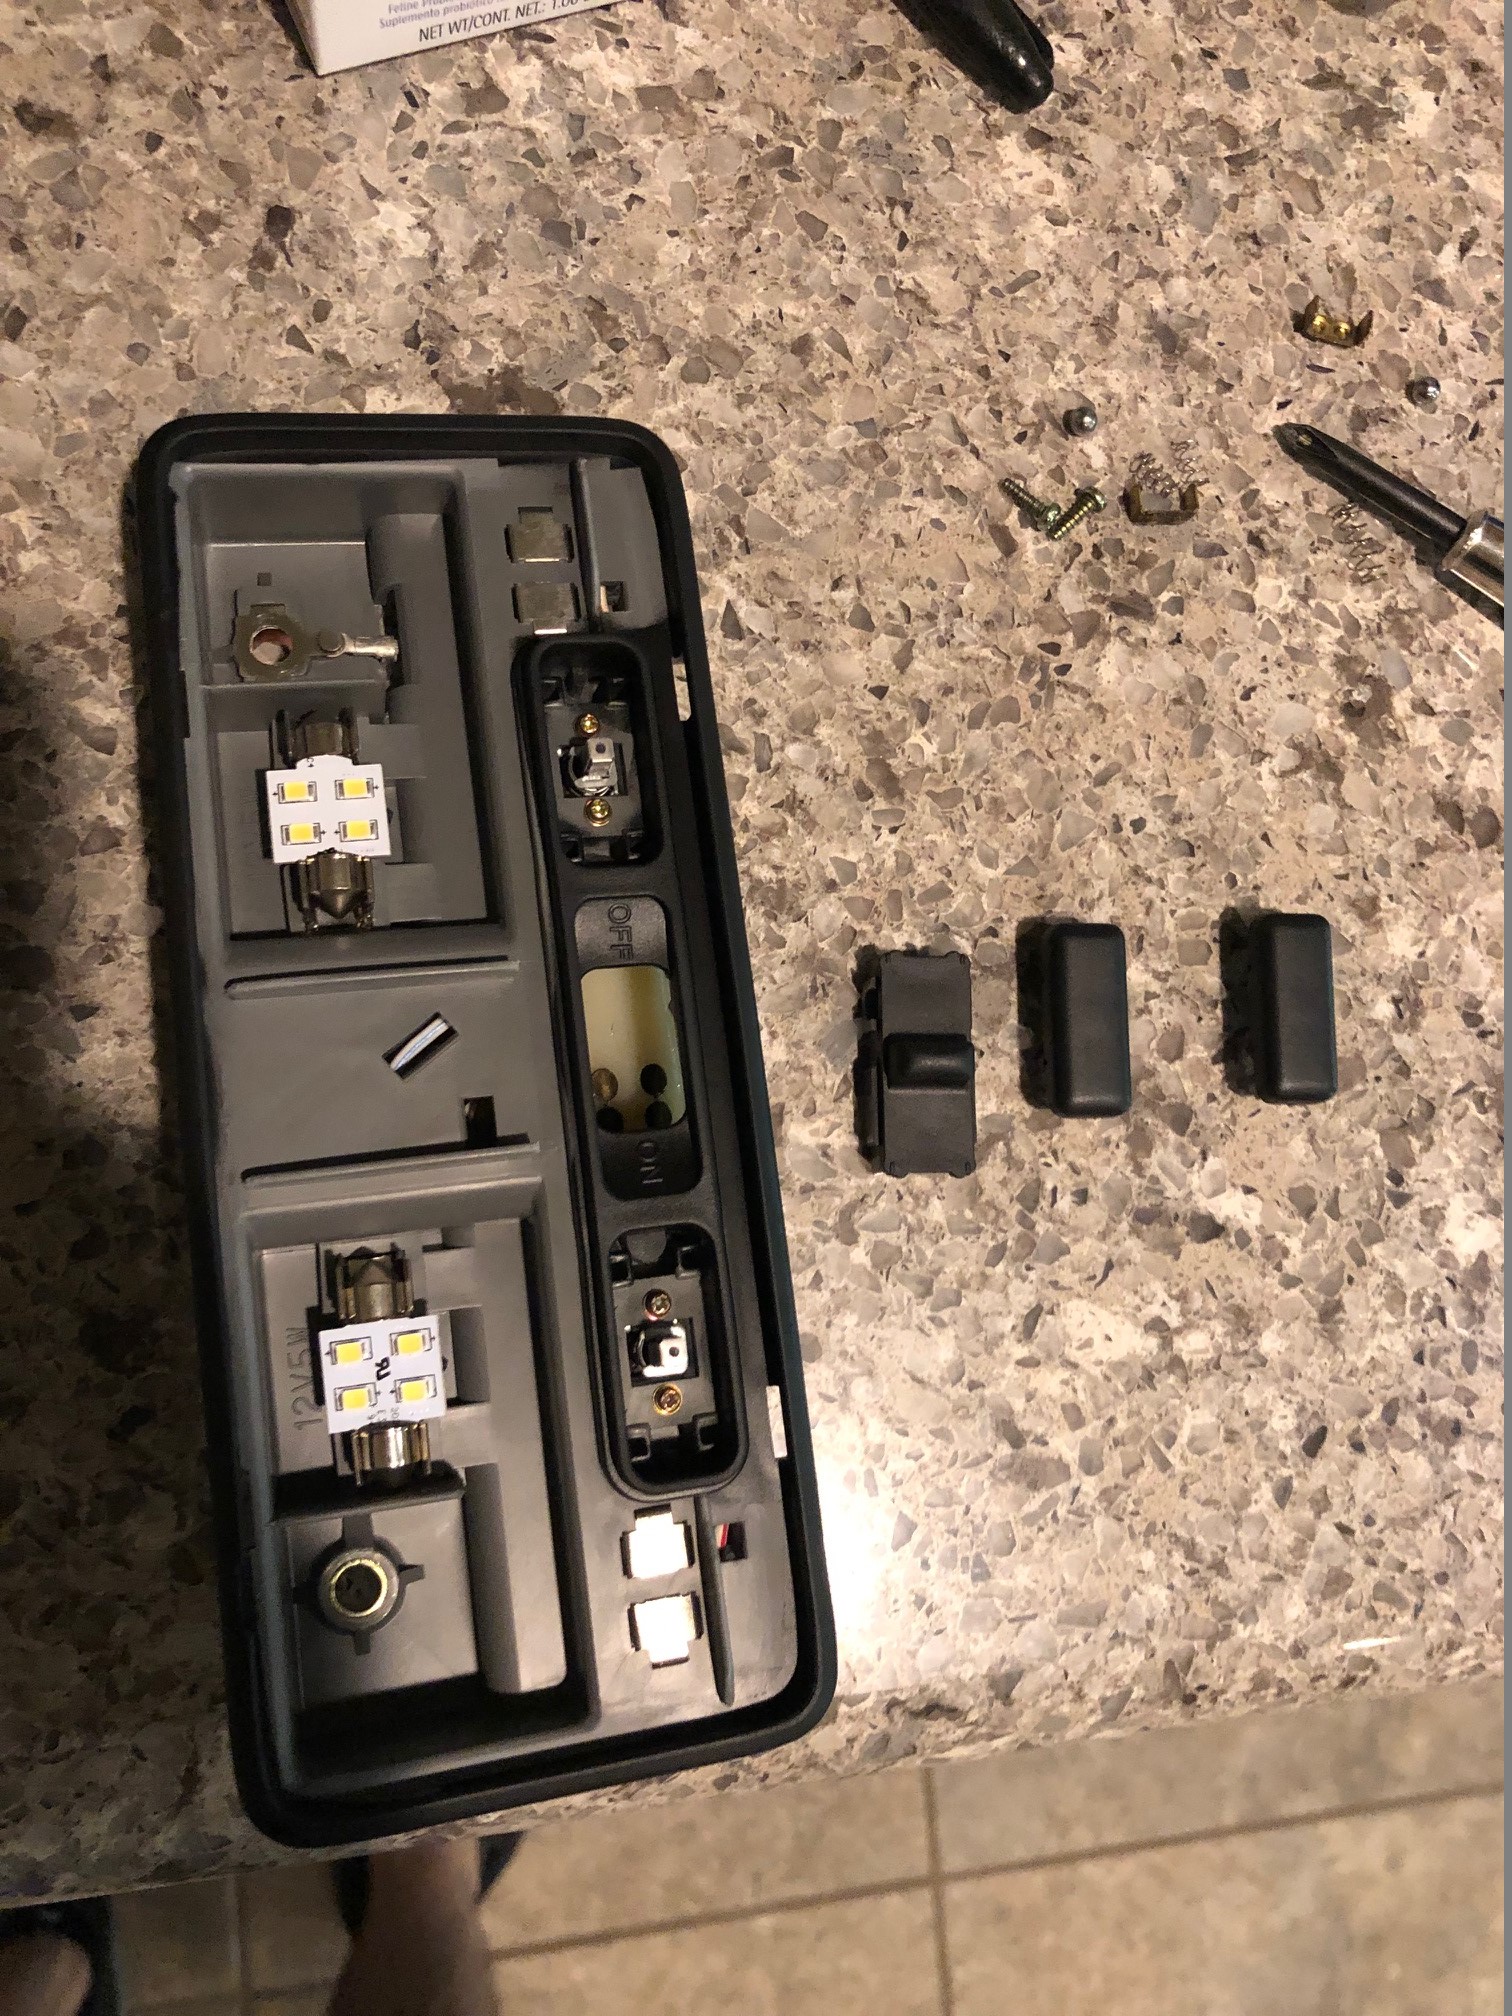
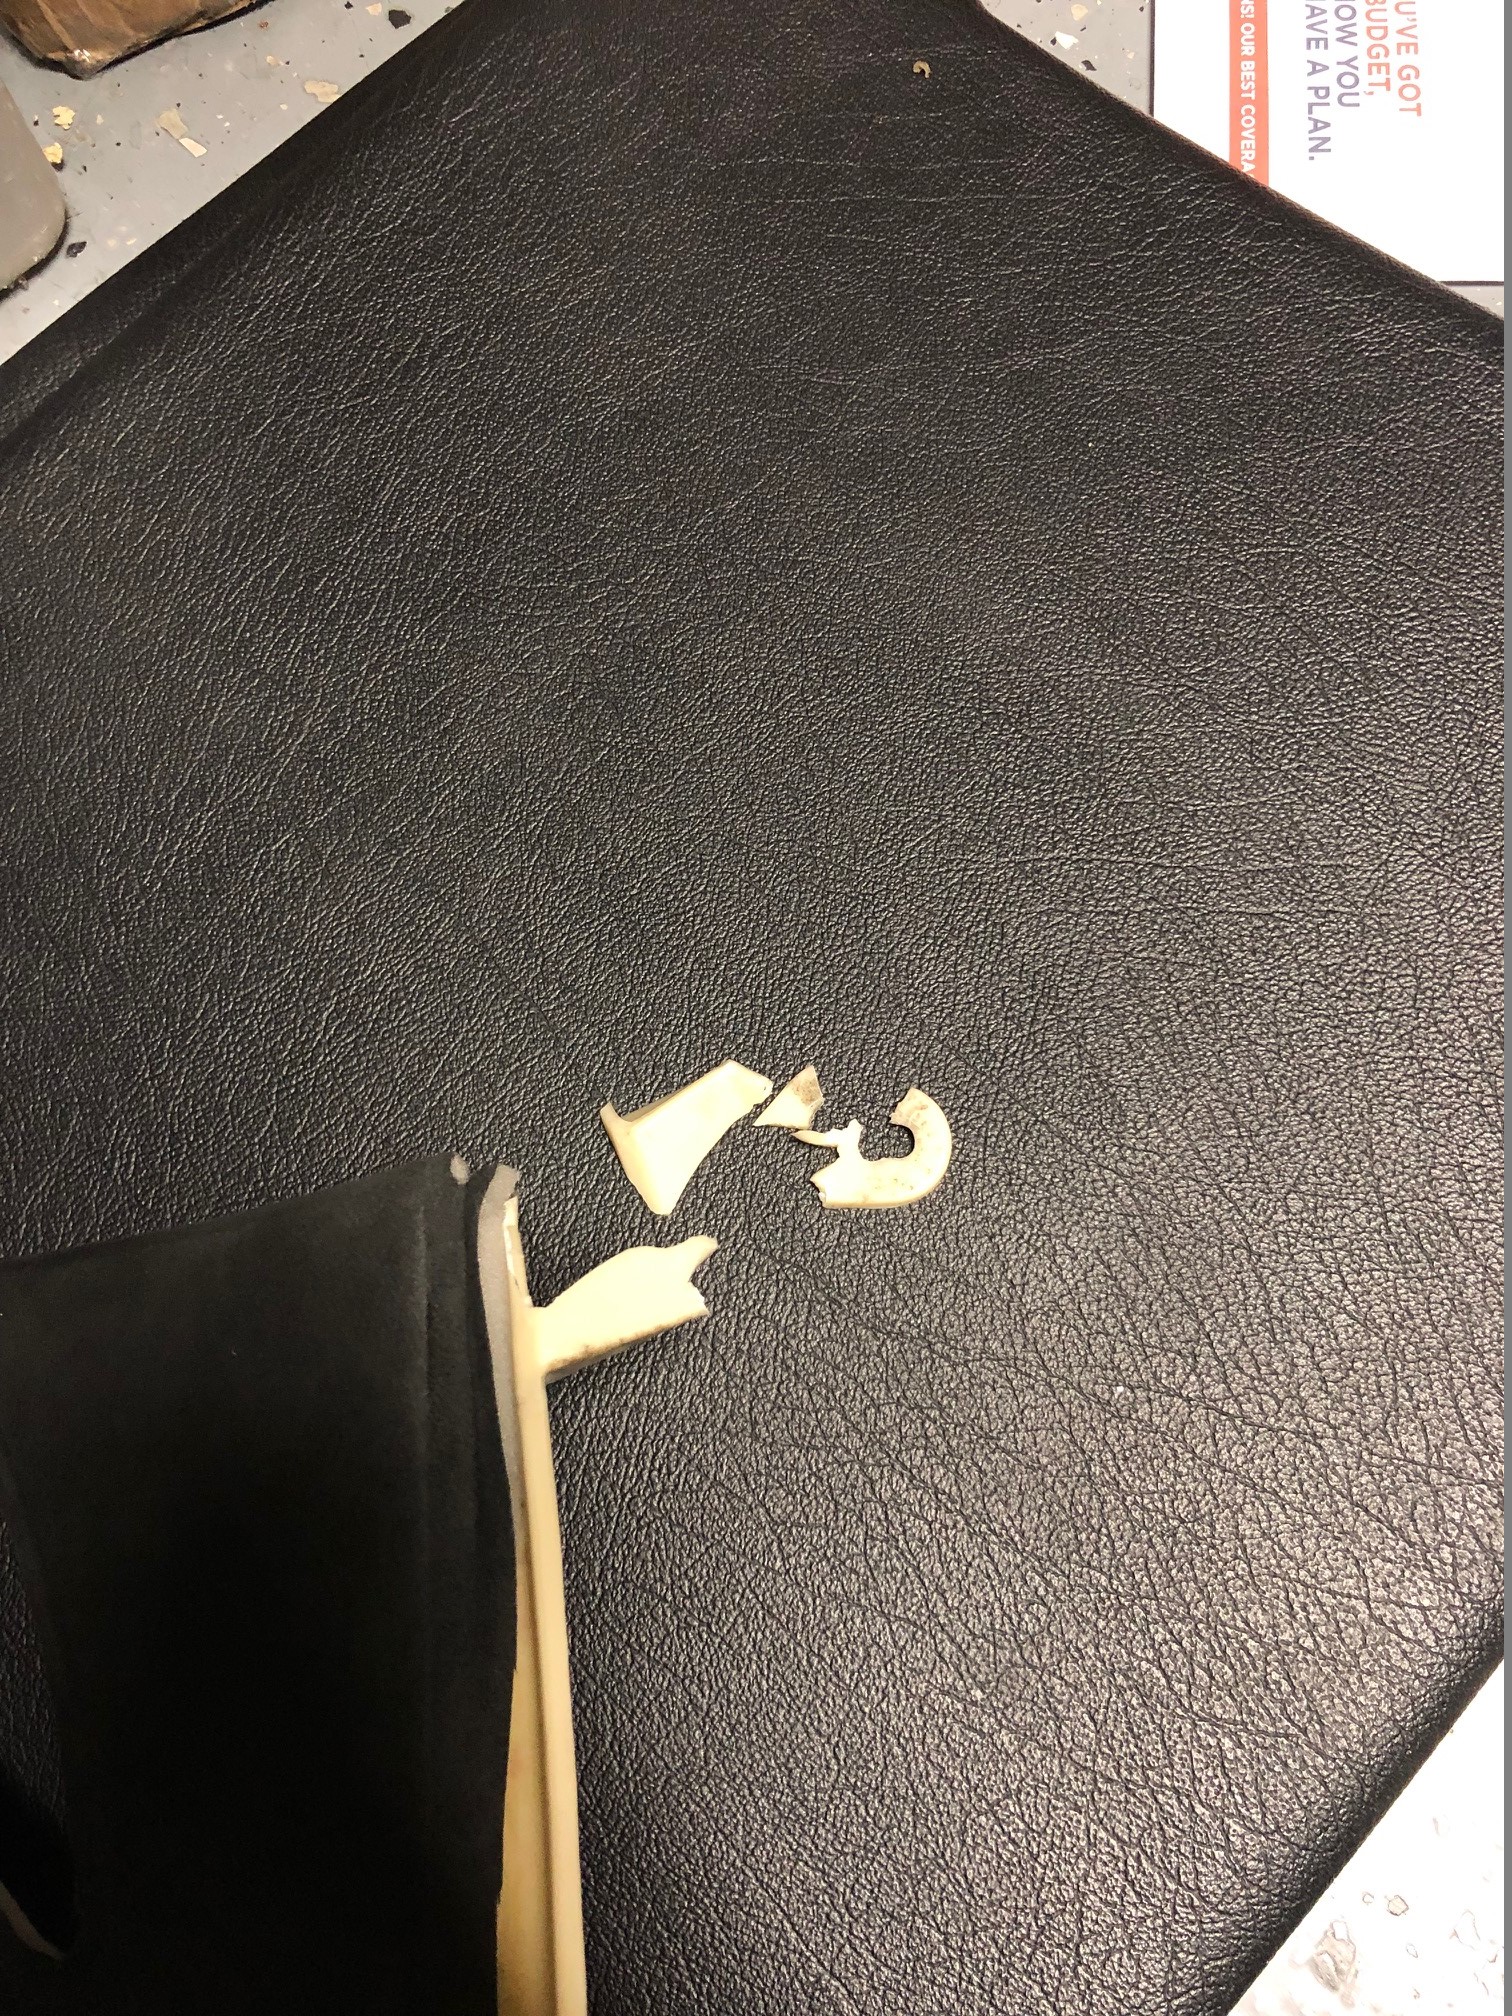
Some of the plastic tabs that hold the trims into the chassis were broken, so rather than replace them I opted to repair the tabs.

Start off by flush cutting the remains of the tab as much as possible.

IMG_1061.jpg


From there, use something like an oscillating multitool to slice down into the base of the tab, we need to support the new tab as much as possible and this works quite well for that. It can be quite messy, it doesn't matter.

IMG_1062.jpg


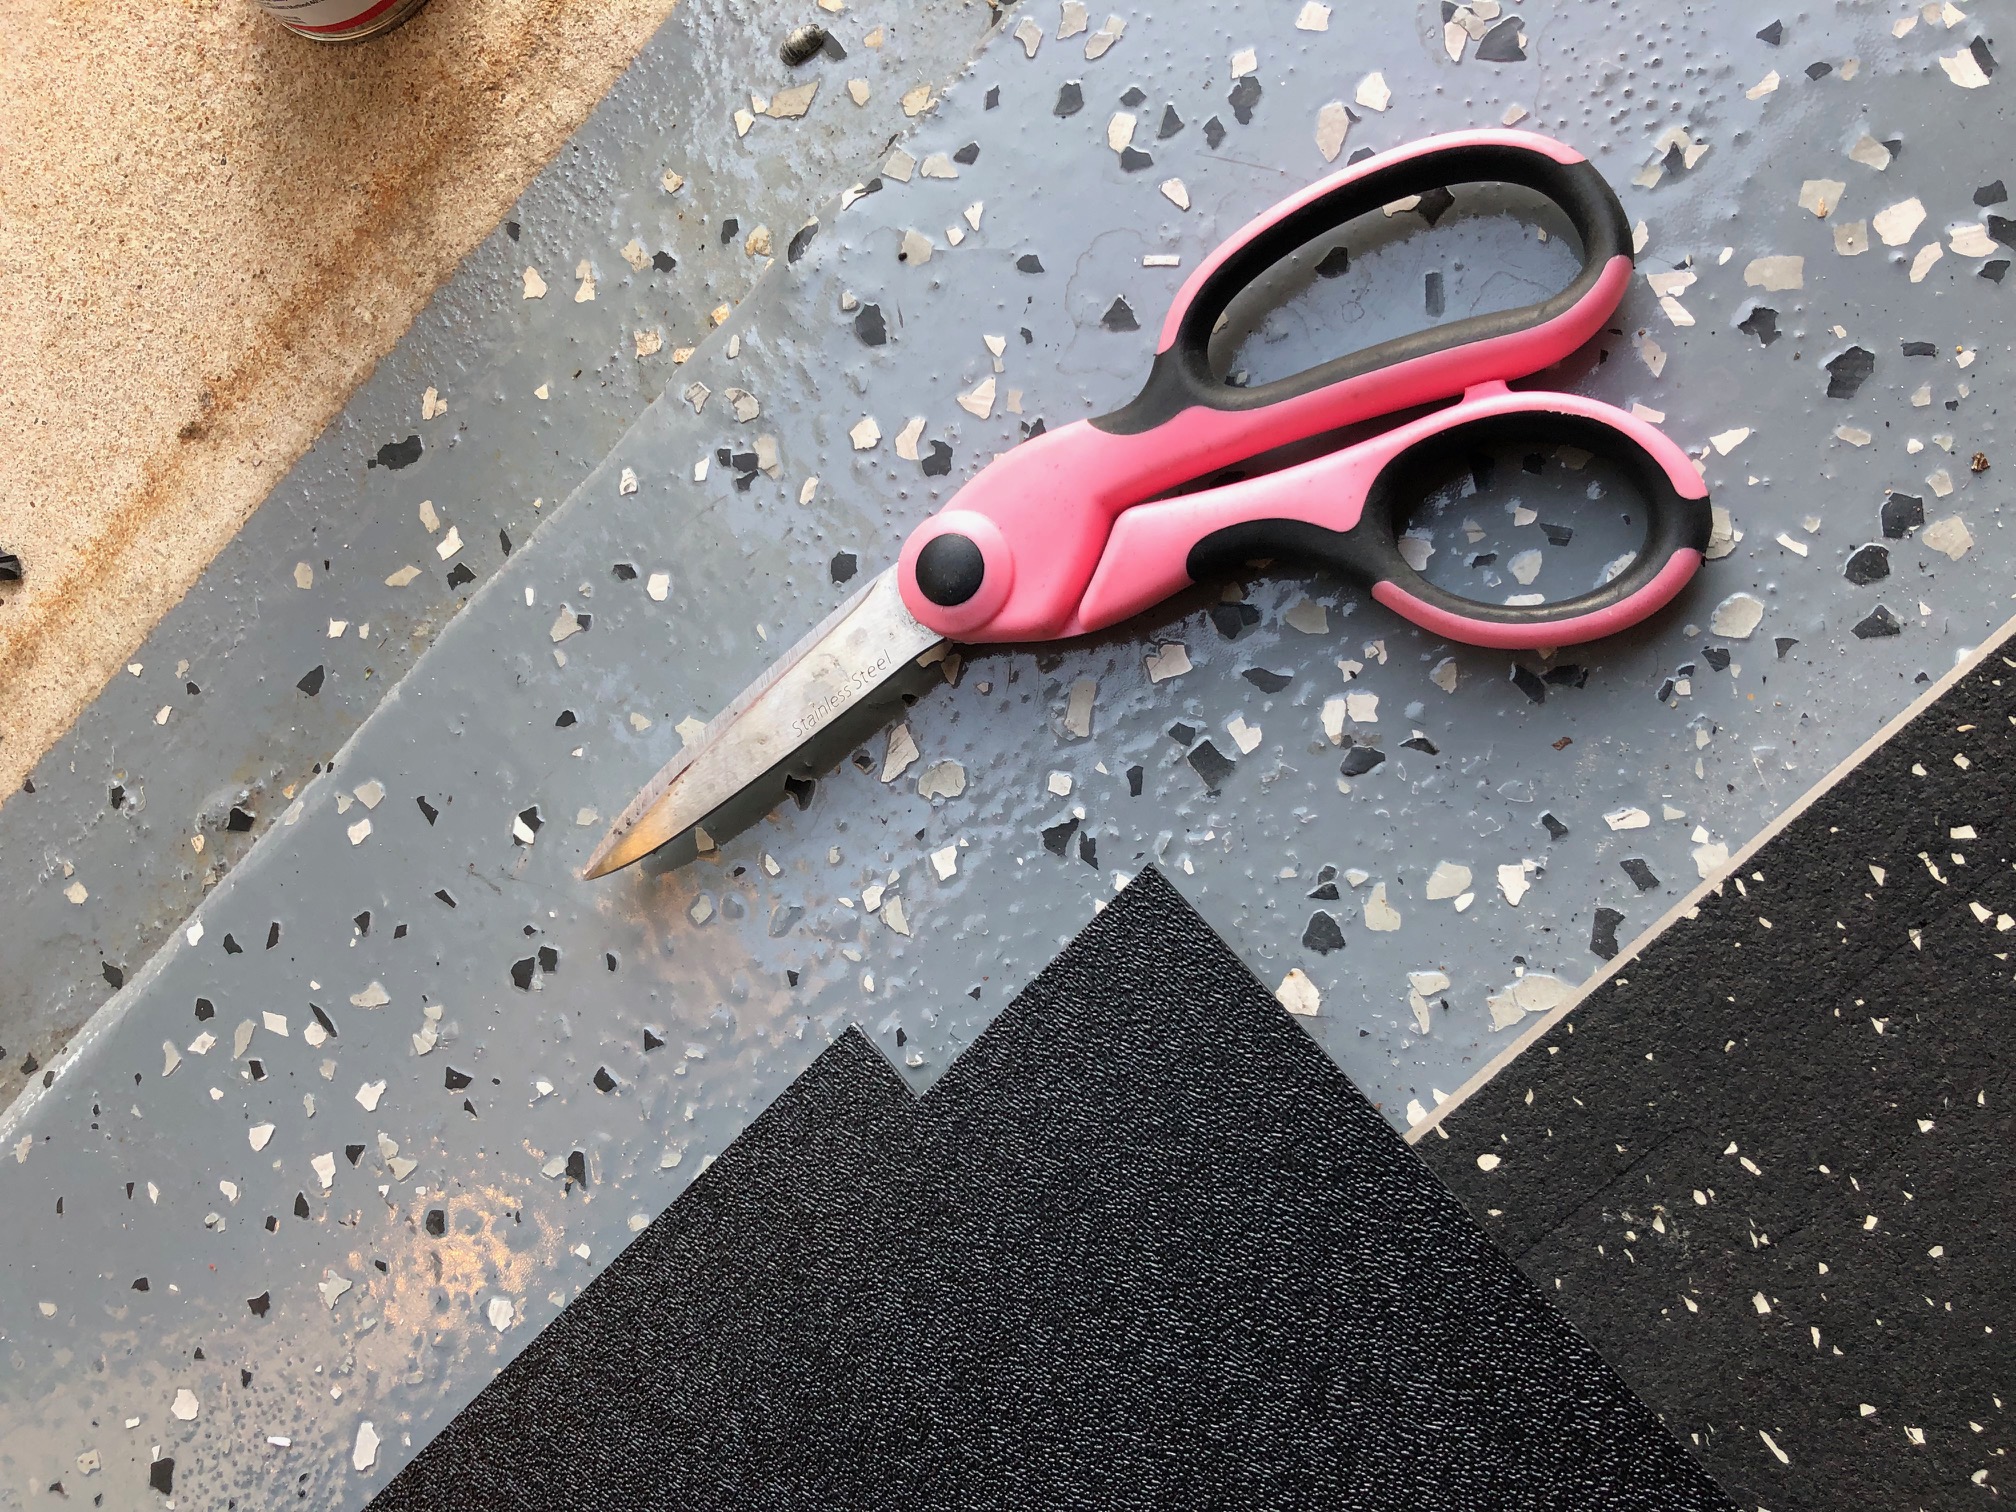
Once the slot is cut, cut a new tab out of 1/16" ABS plastic stock, I got a sheet of it for $8 on Amazon and its easy to cut with scissors.

IMG_1064.jpg


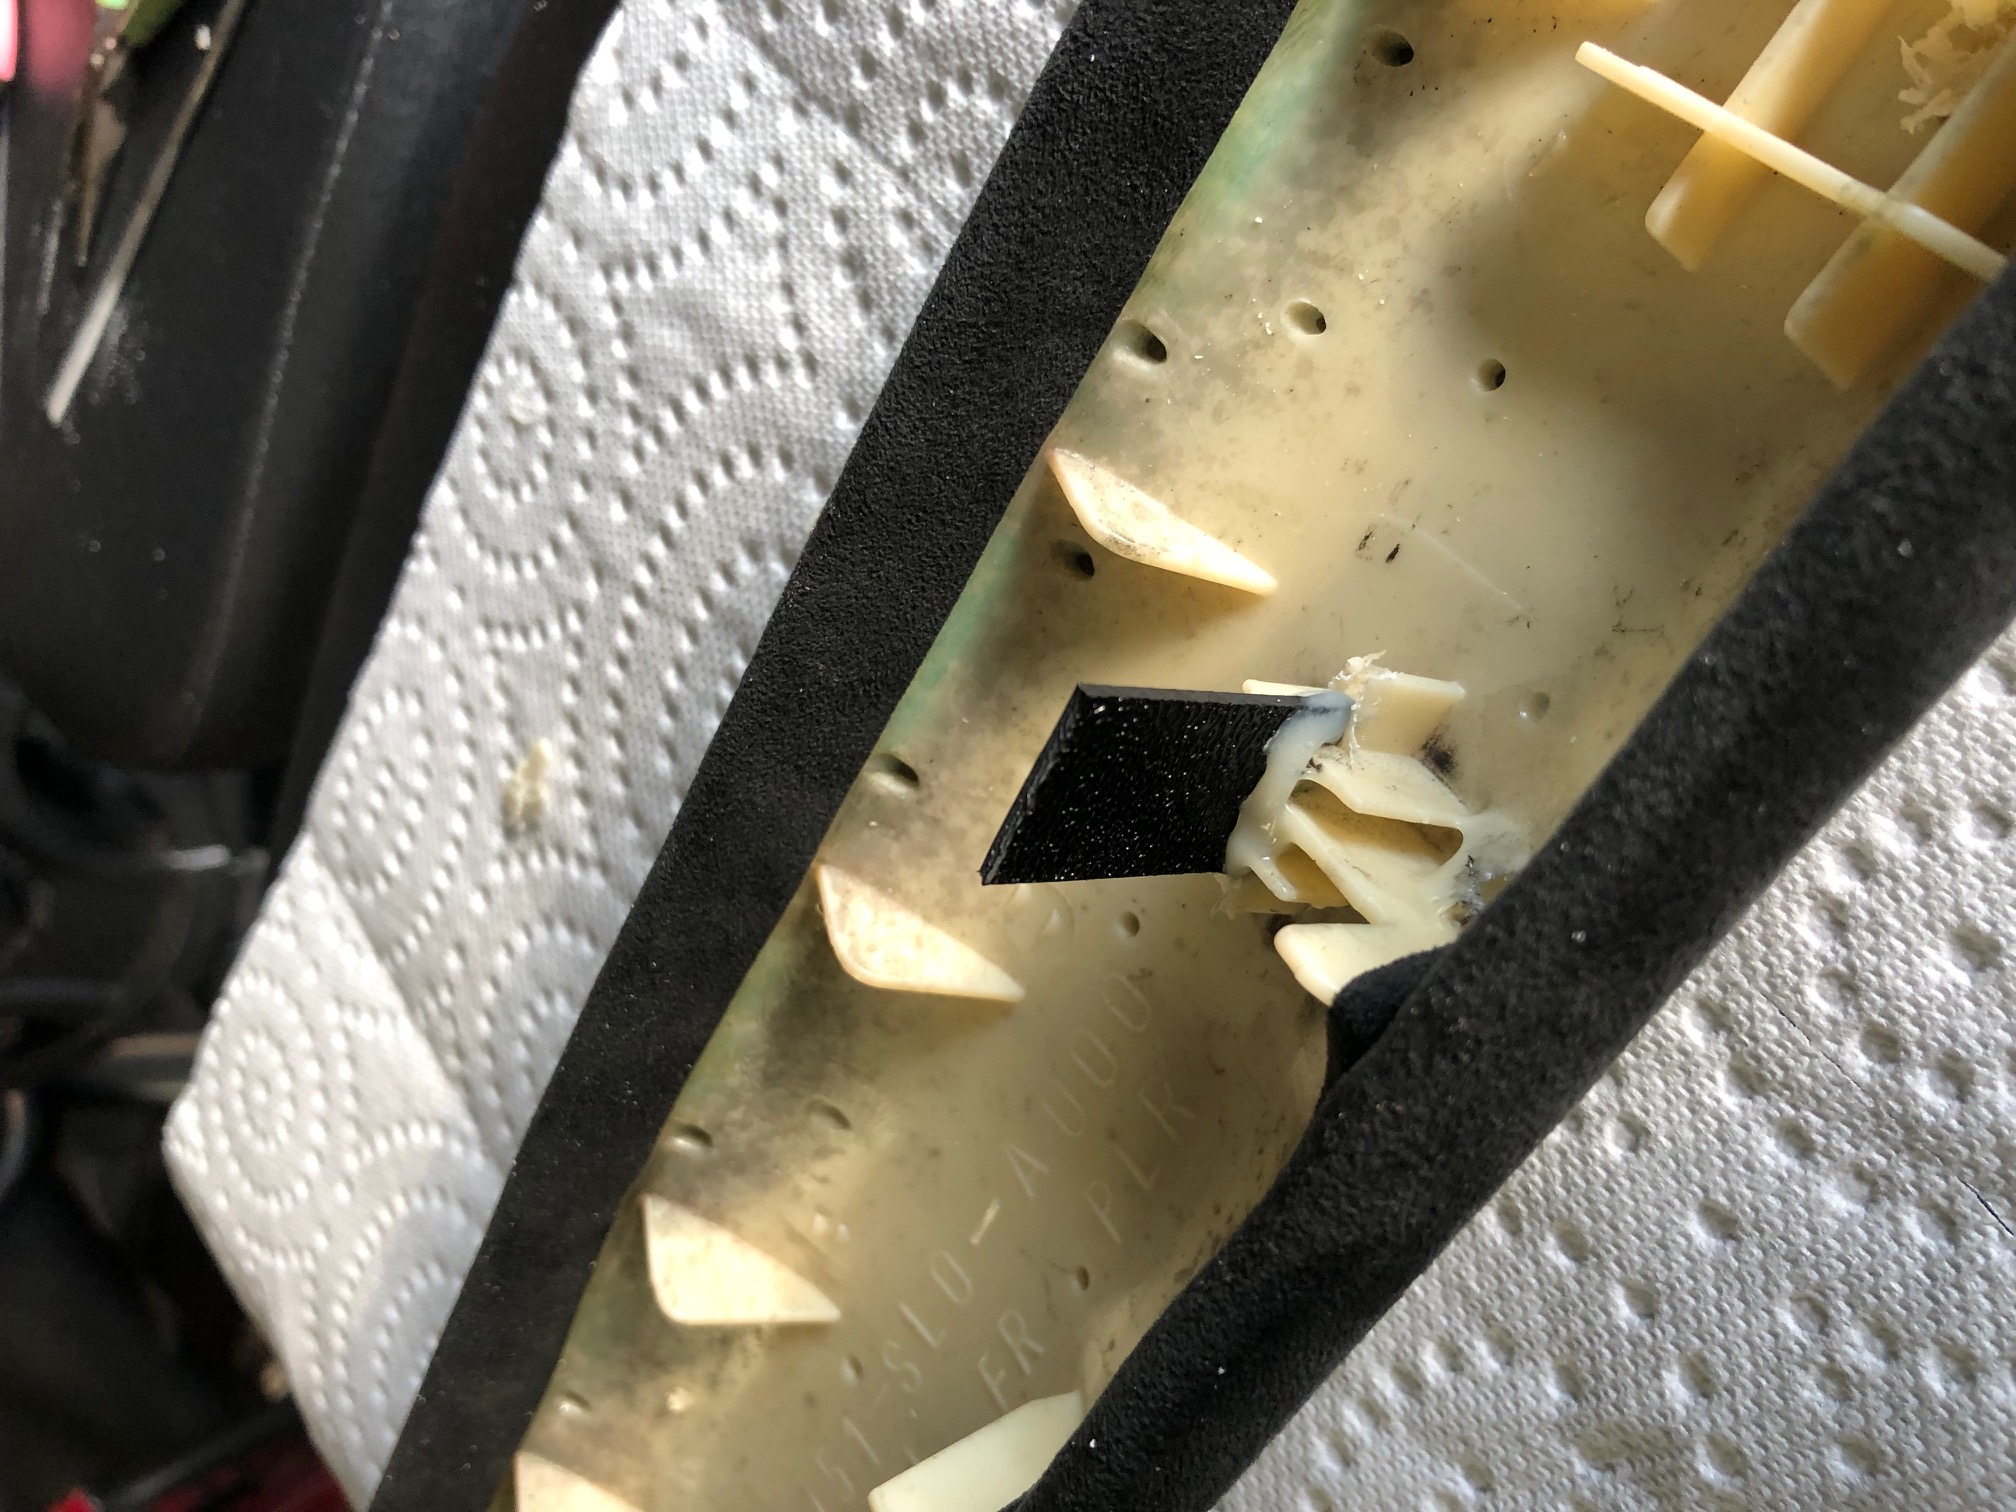
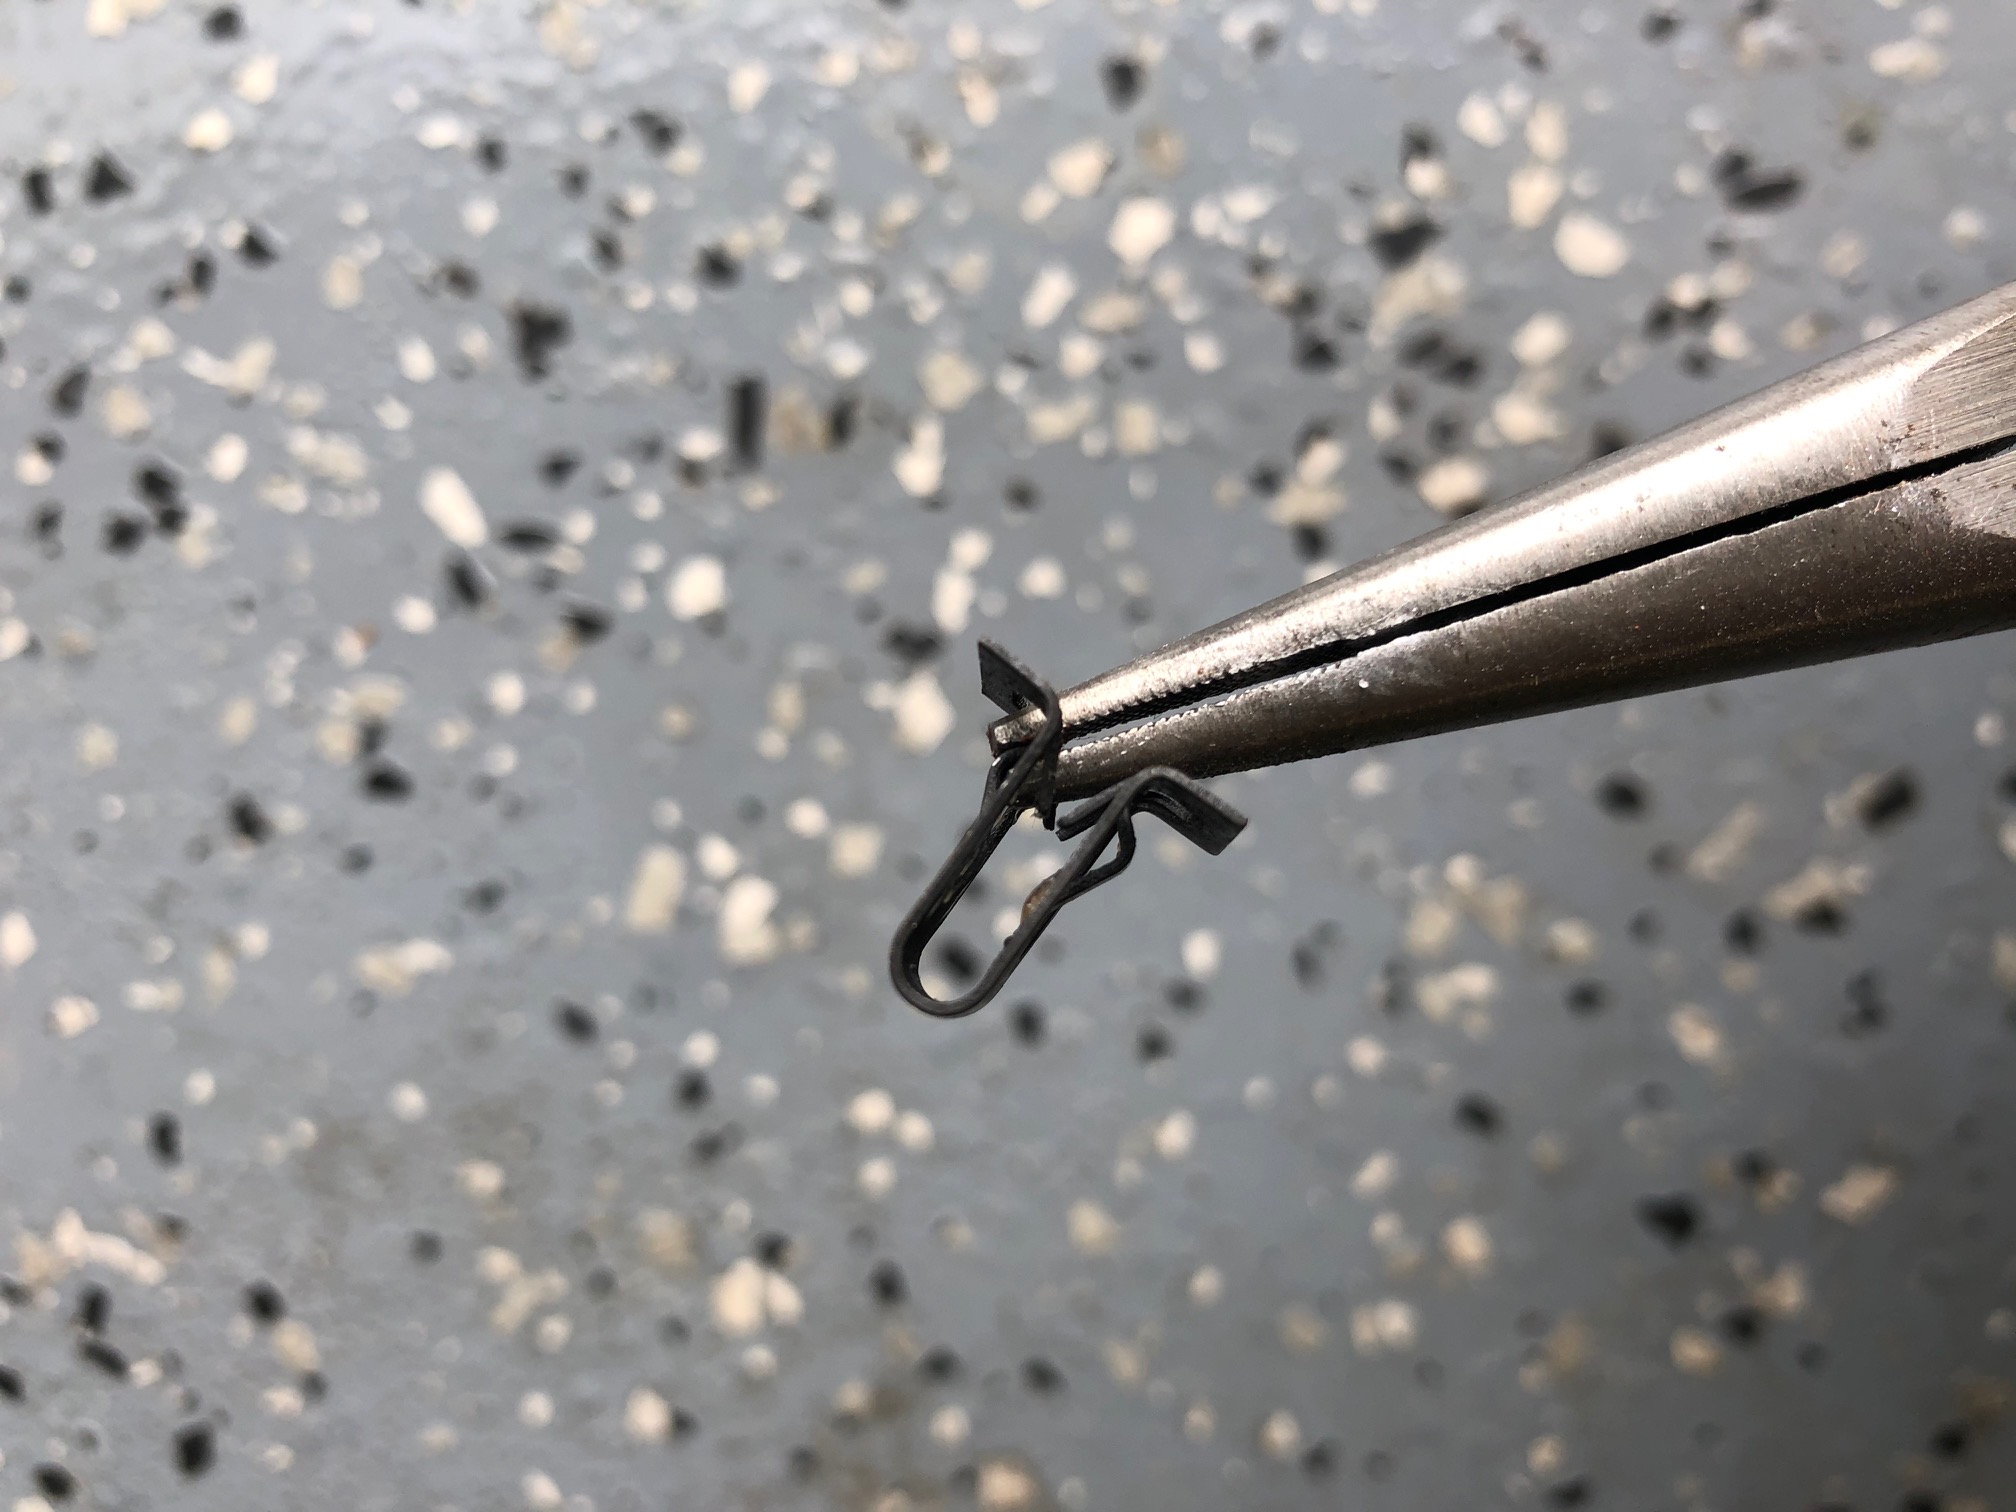
Use solvent cement compatible with ABS plastic to glue the new tab into the slot you cut, I left excess on the new tabs so I can trim them to fit later.

IMG_1063.jpg


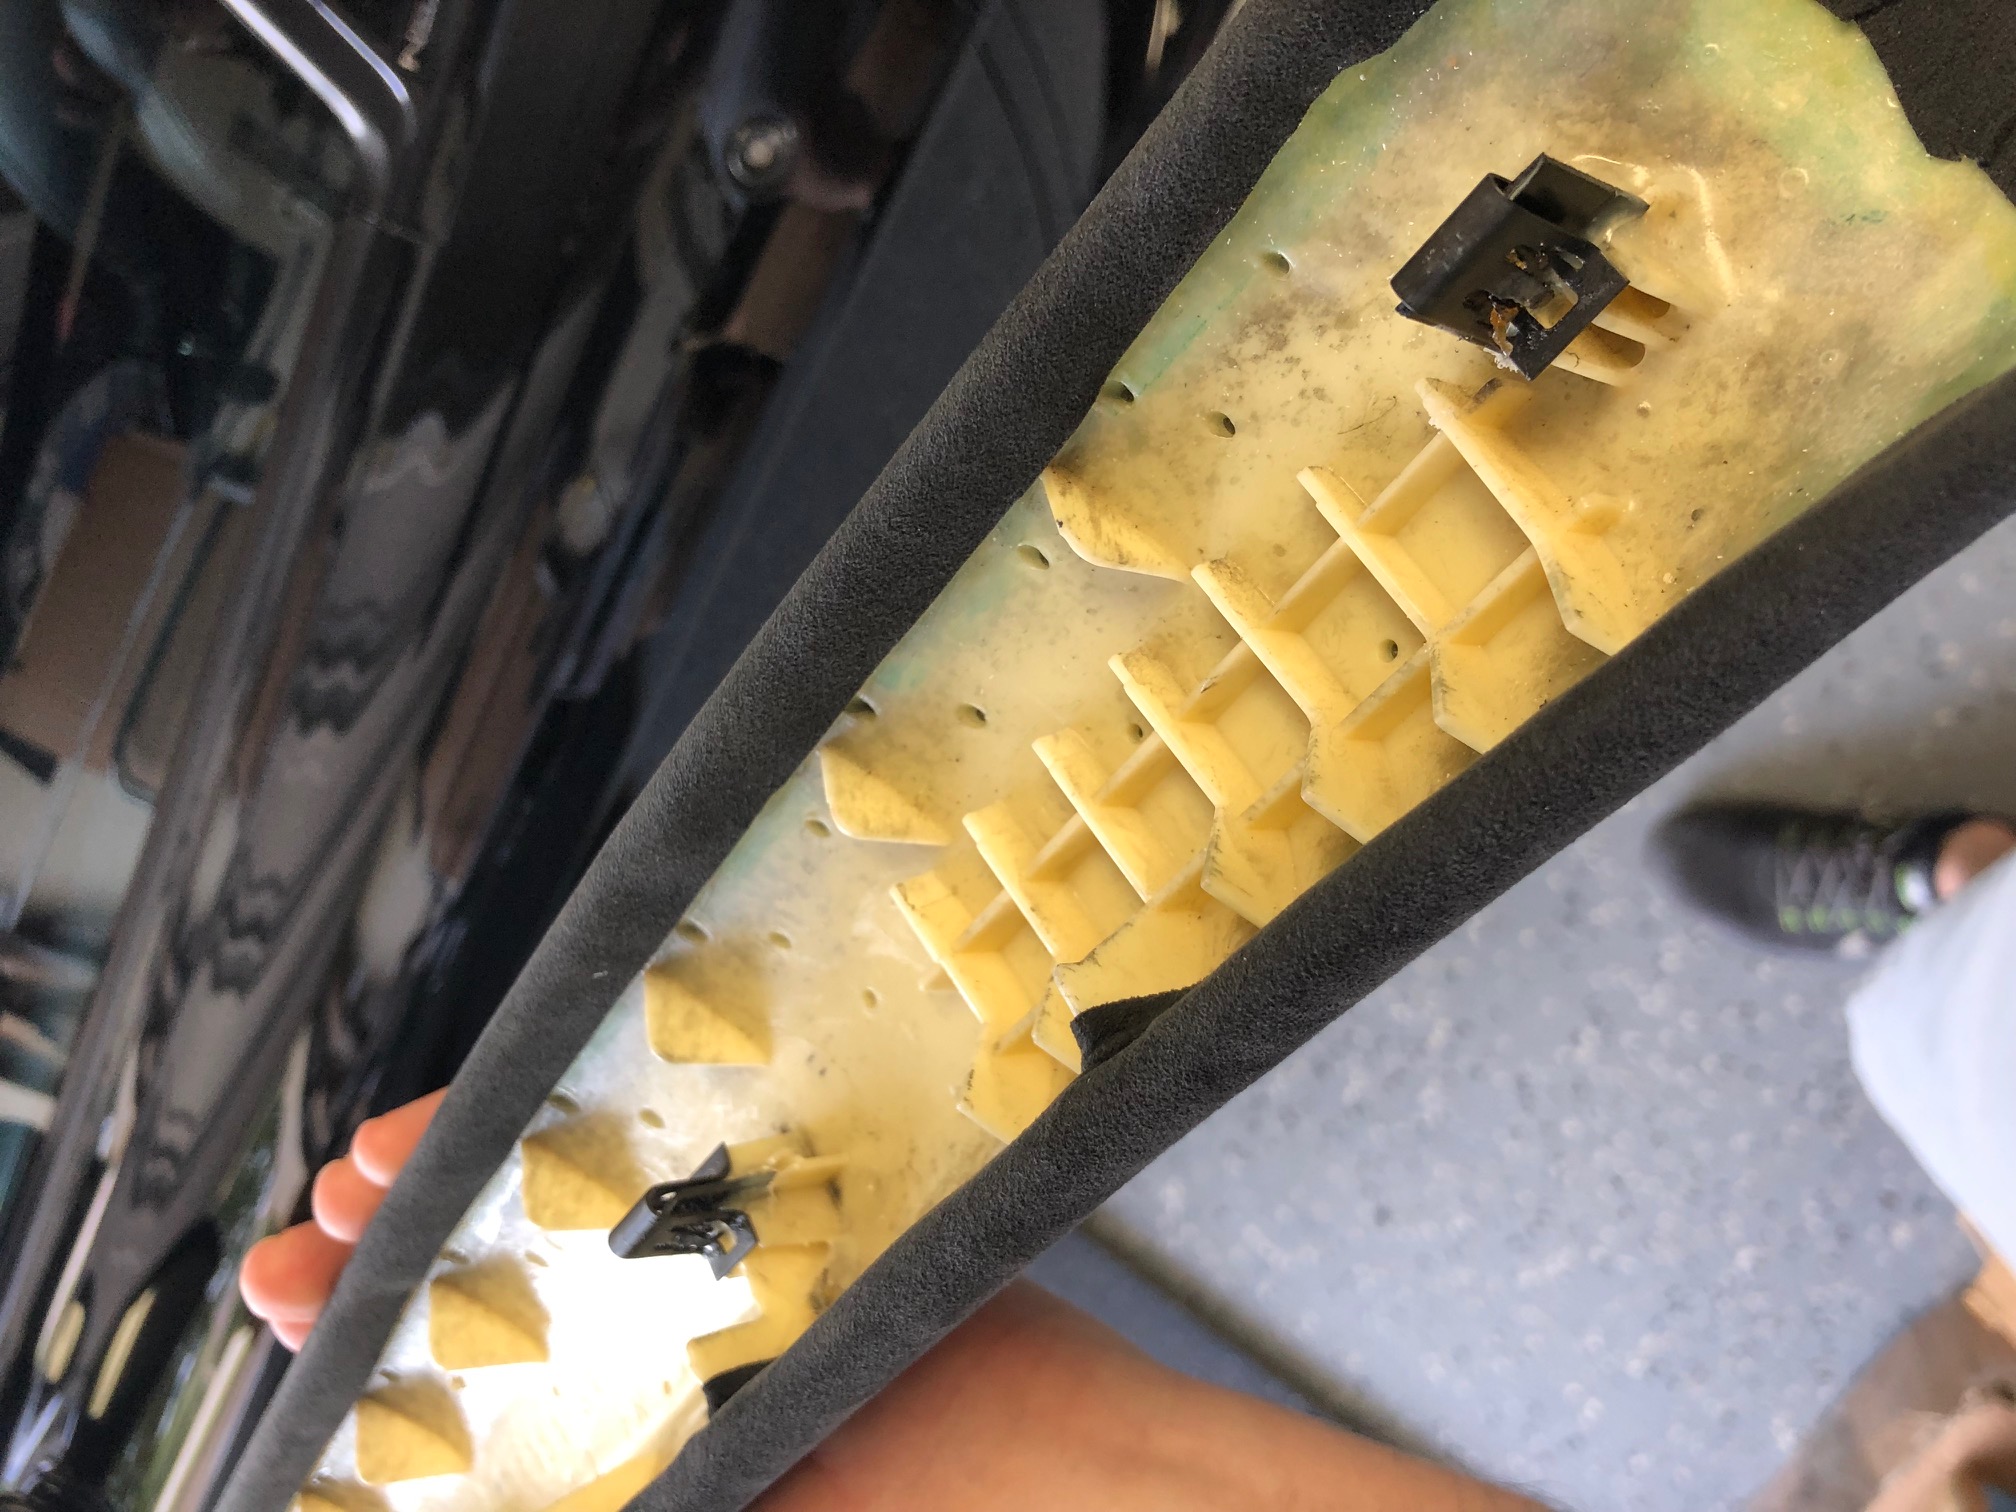
Both tabs repaired, trimmed to size, with the metal clips ready to install.

IMG_1074.jpg


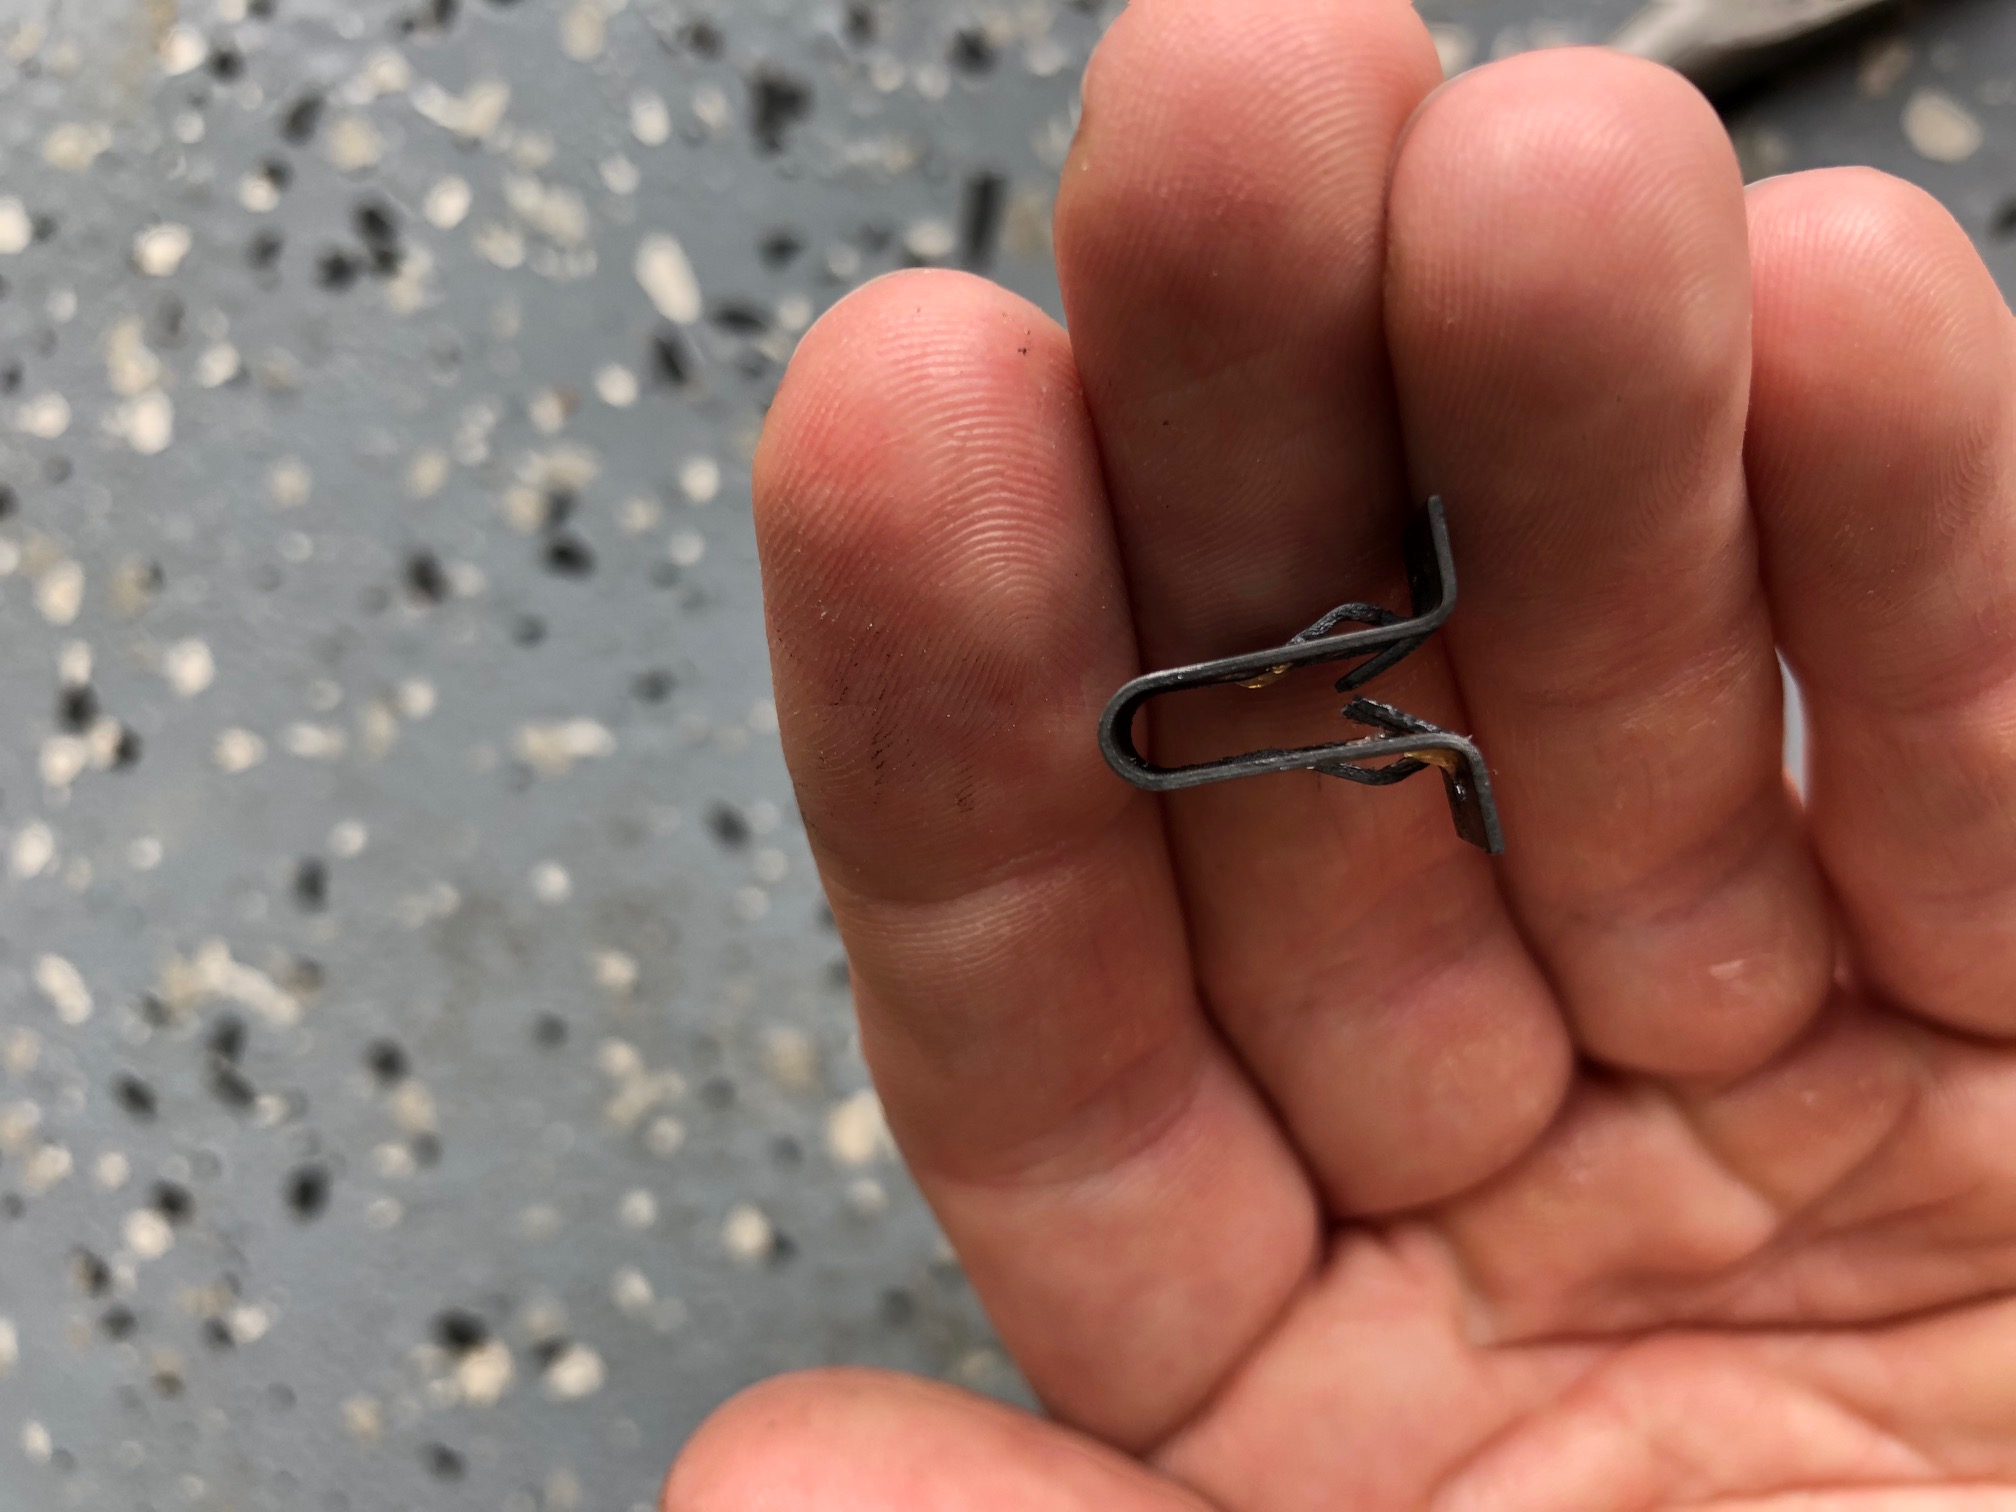
Another good trick is to modify the metal clips a bit to not grab as hard and reduce the chances of cracking the trim pieces and ripping tabs off if they have to be removed again. You can bend the barbs flatter so they're less grabby with needle nose pliers.

IMG_0992.jpg


IMG_0993.jpg


IMG_0994.jpg


If you find that the panel comes off too easily you just bend them back a bit.

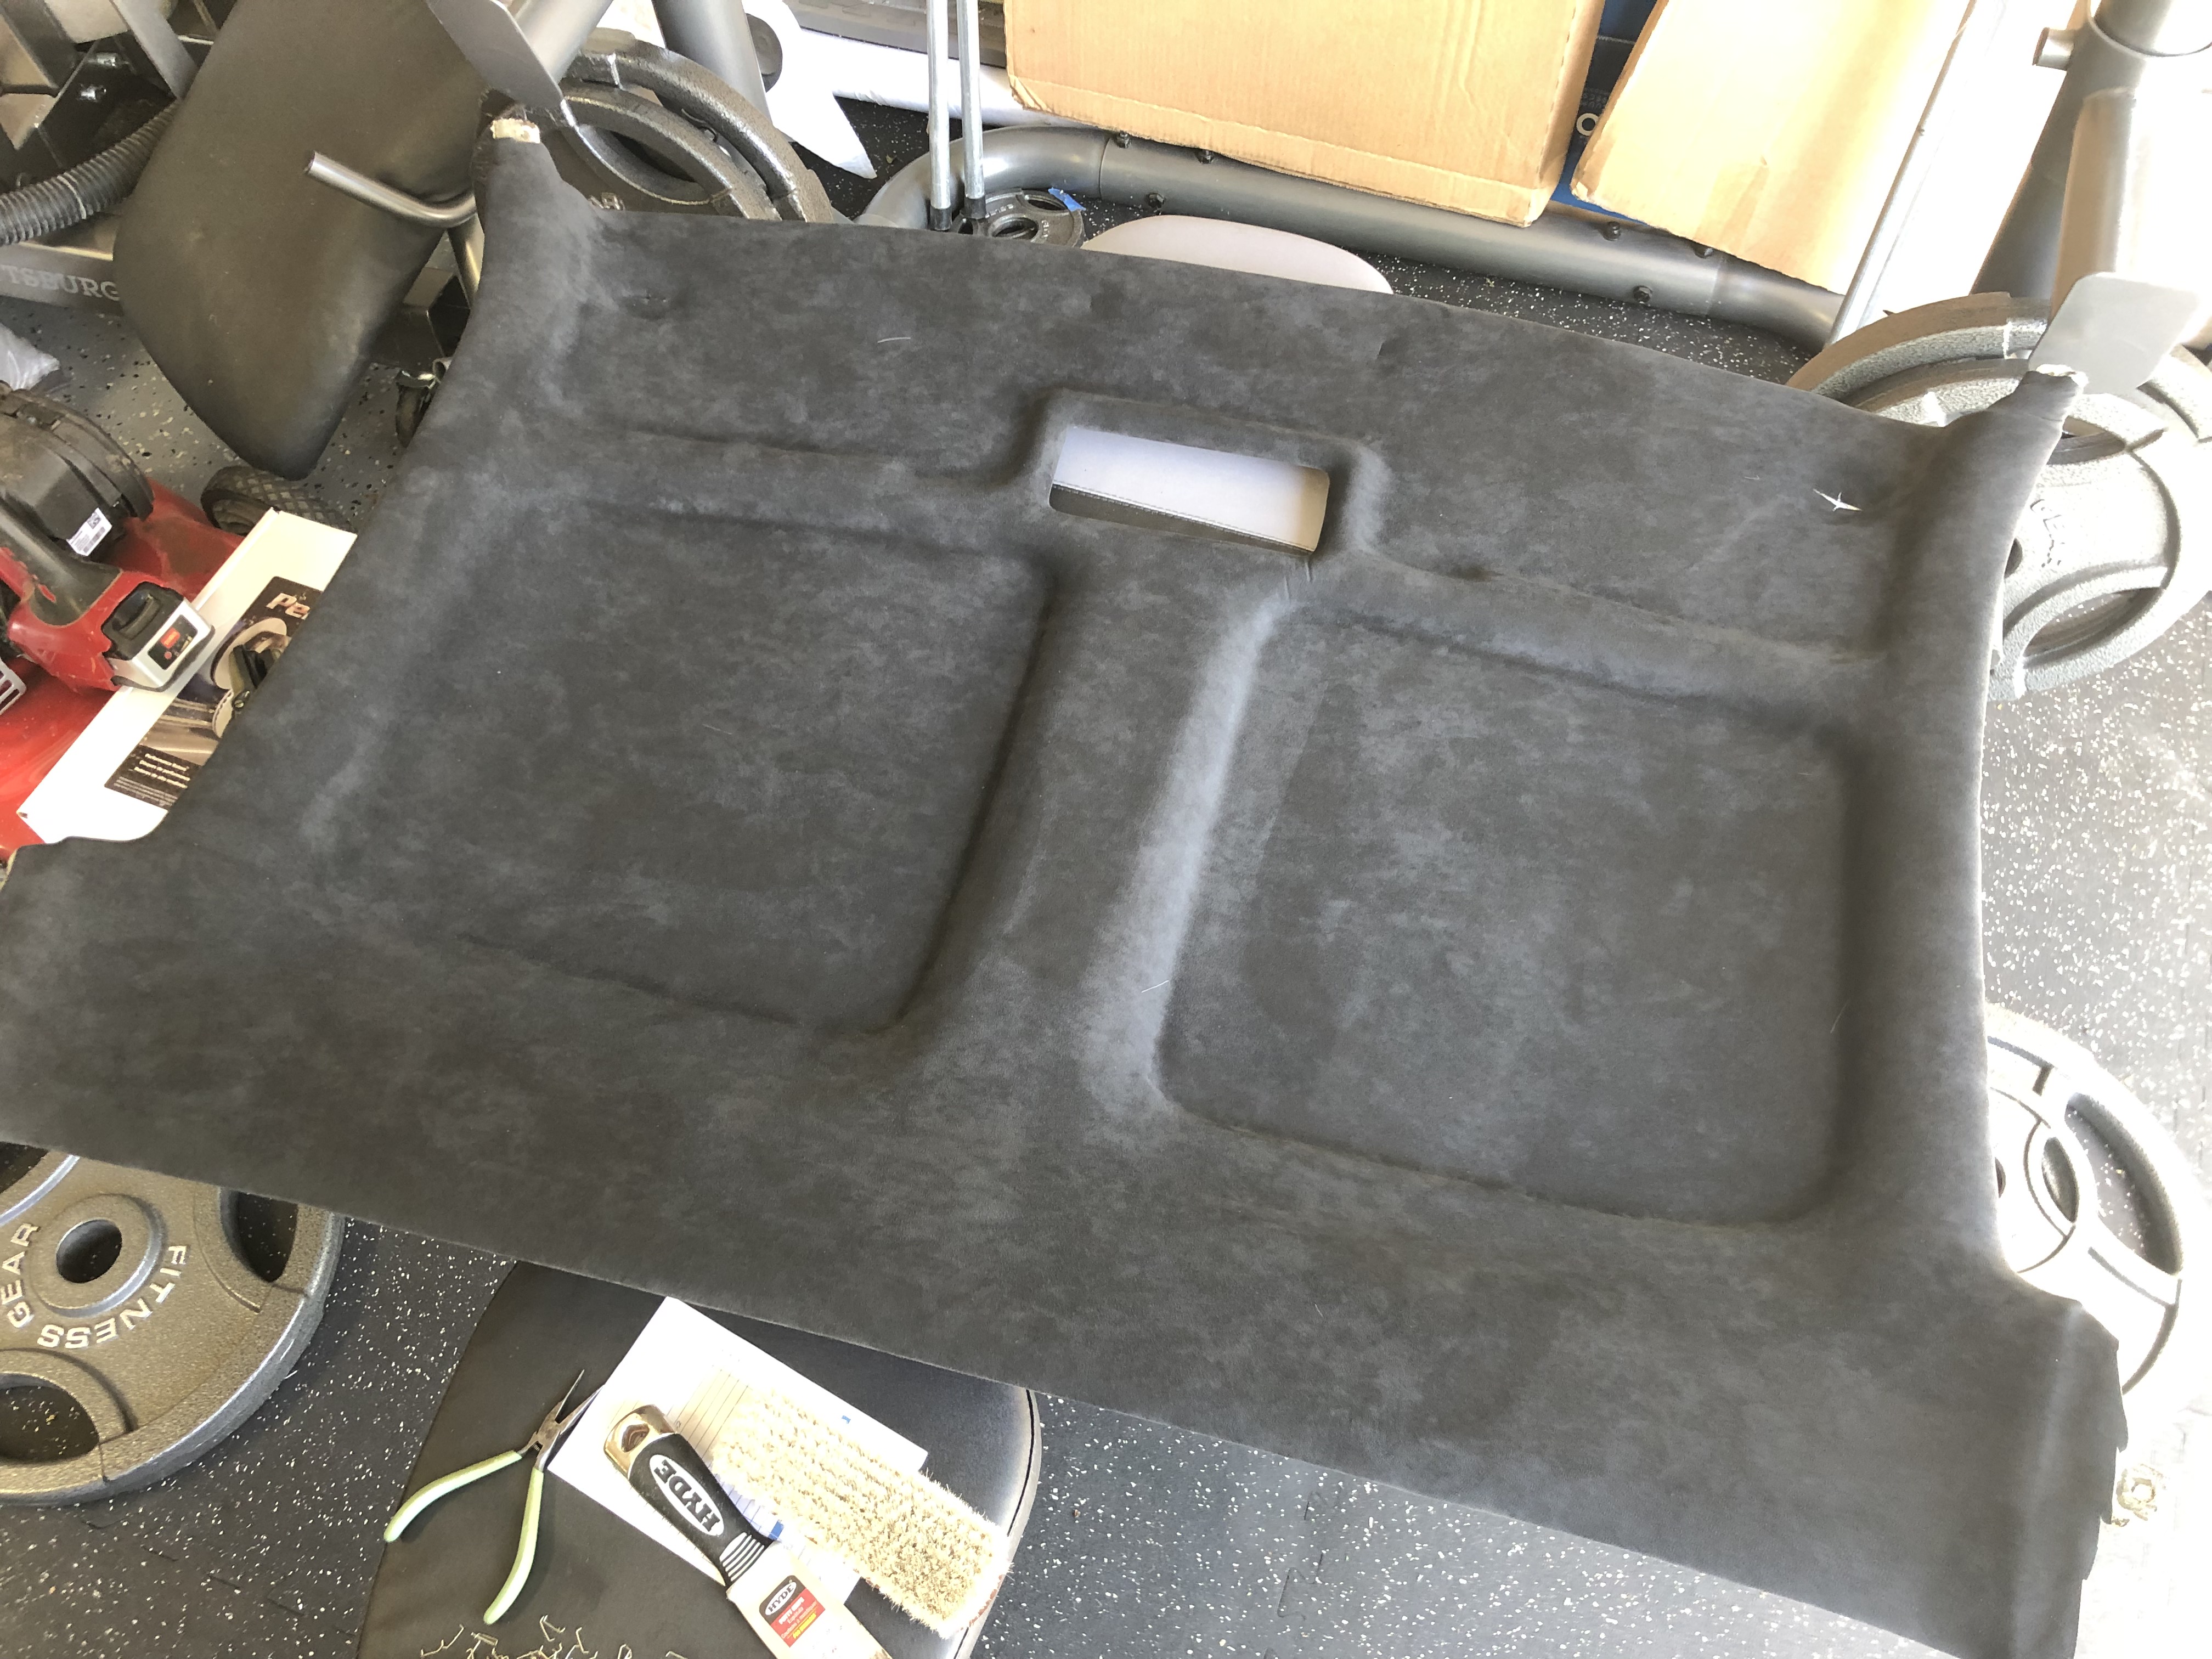
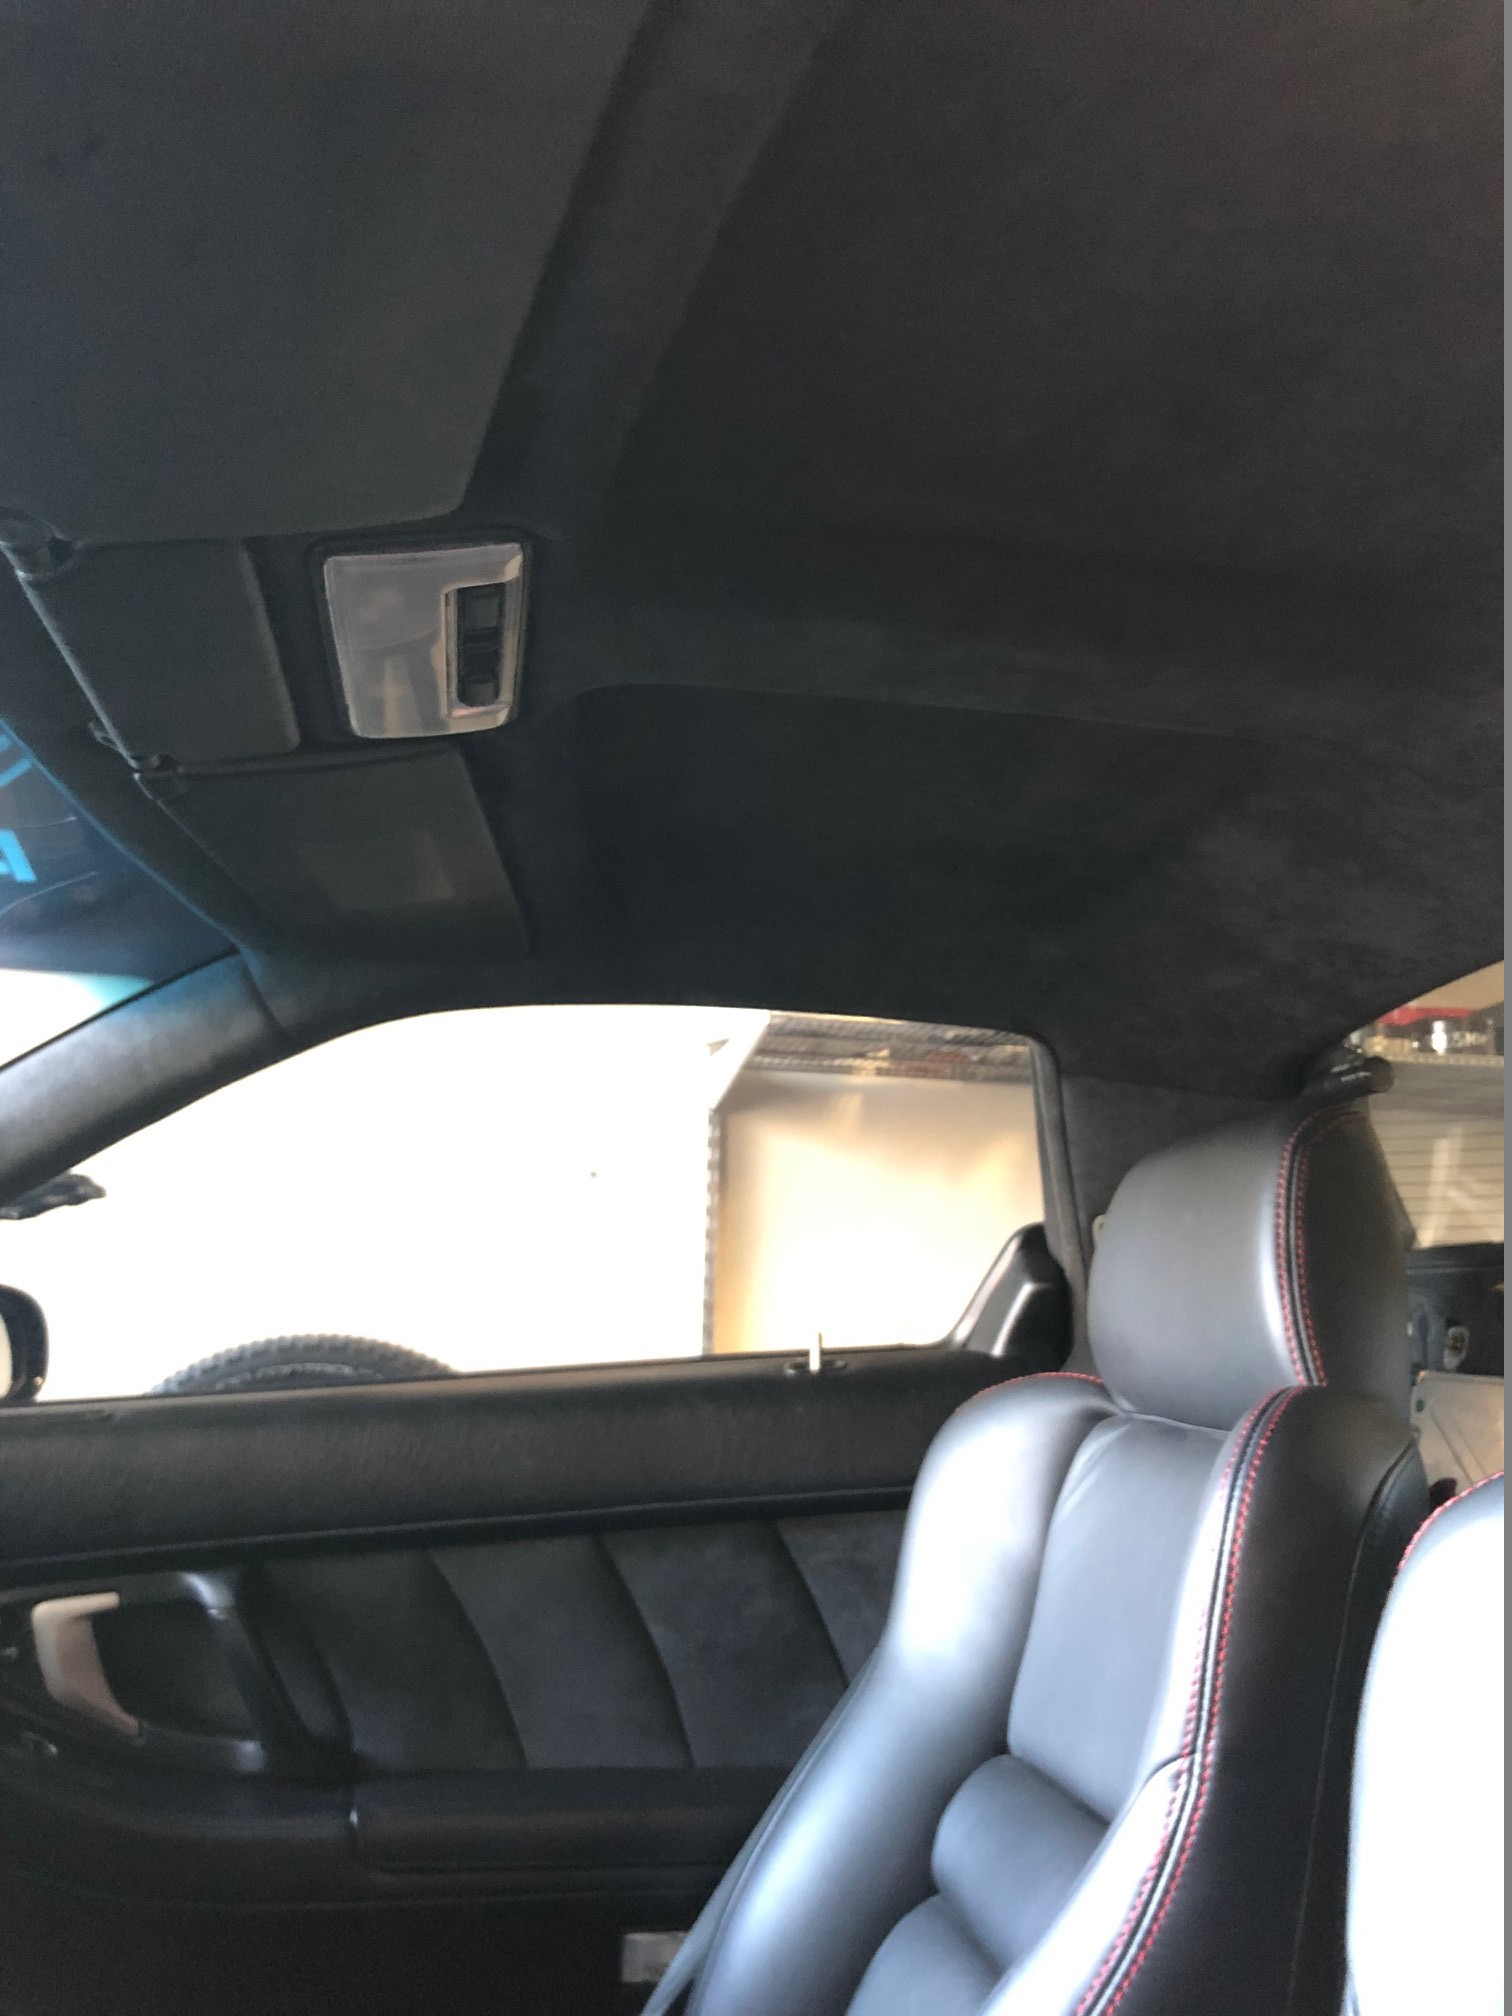
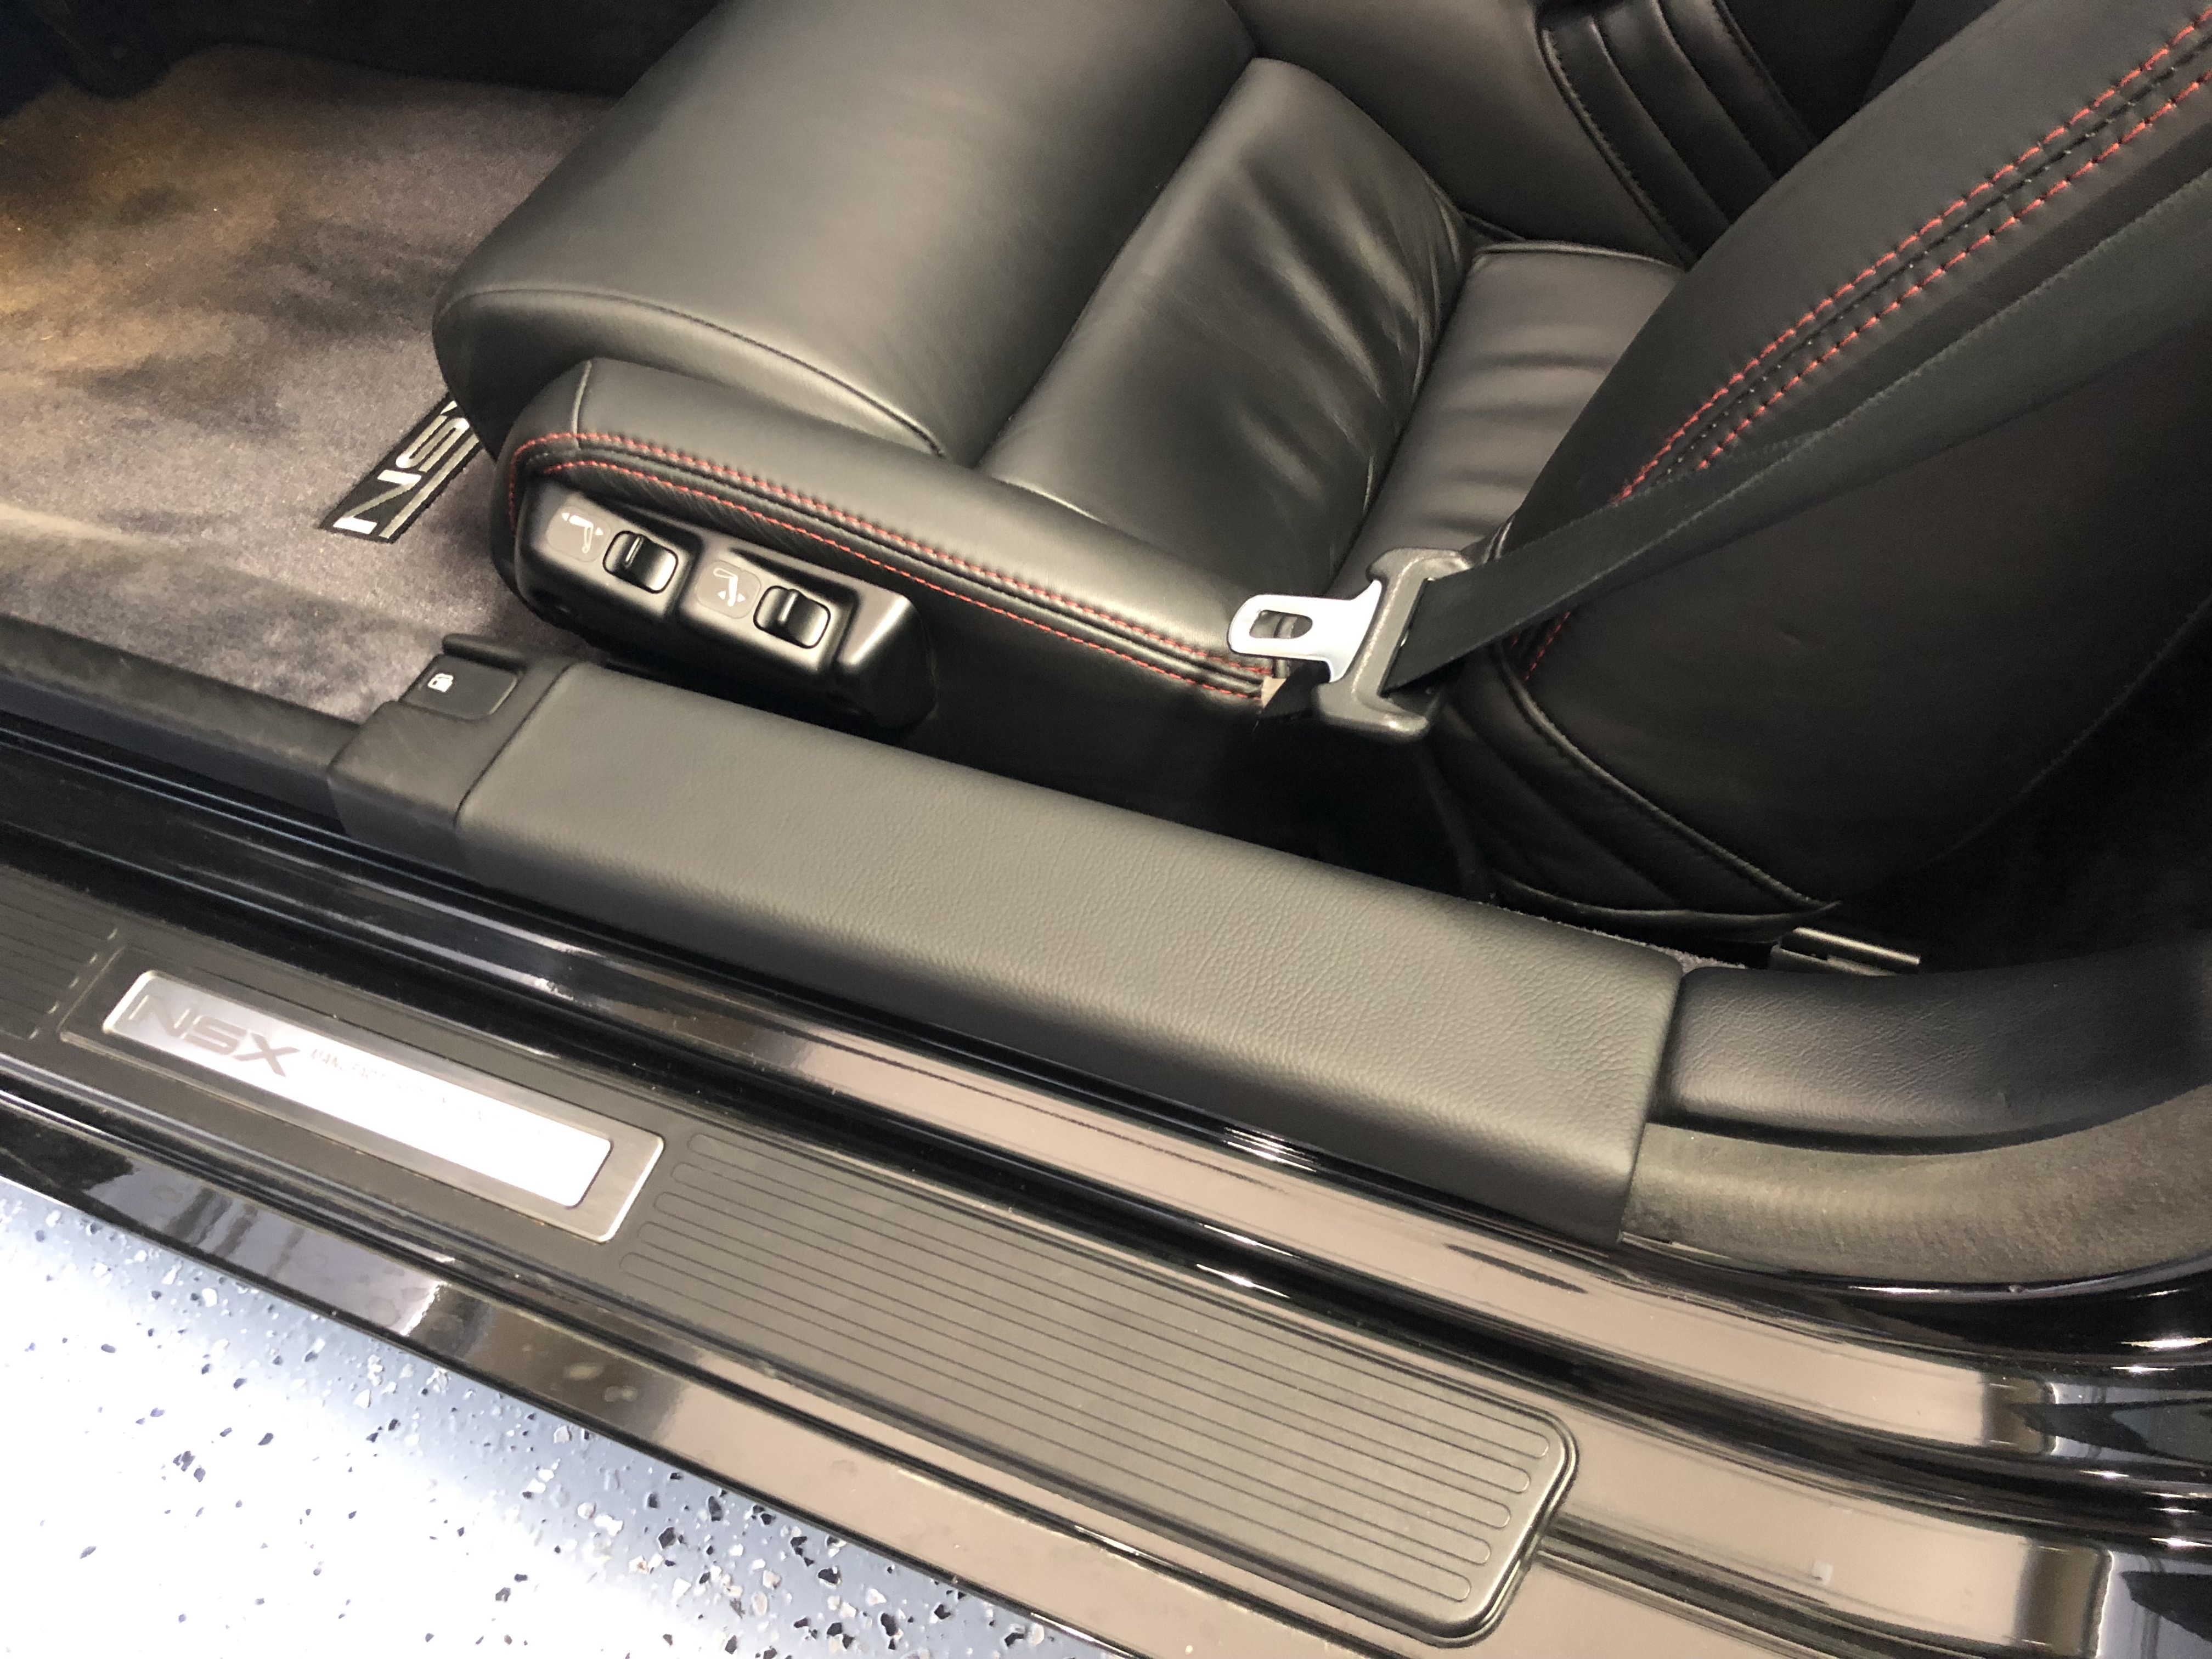
Anyways, here's some finished shots. I decided I'm not going to attempt to do the headliner myself so I've enlisted a local upholstery pro to do that for me, but he's booked solid until August so I'll have to live with the grey headliner for now. Once the headliner is done I'll start on my sun visor upgrades and post that in a future update. I've decided I don't care for the red interior accents anymore so I've removed the Zanardi floor mats and gone to the original black/grey floor mats and have also ordered a black H Type S horn button to replace the red Type R horn button. I'm not sure if I want to try to dye the red stitching on the seats black or just deal with it until I eventually switch to pole positions. I'm really liking the all black with titanium grey metal accents look, it feels more "OEM+" than modified even though almost every part of the interior has been messed with at this point.

IMG_1077.jpg


IMG_1079.jpg


IMG_1081.jpg


IMG_1083.jpg


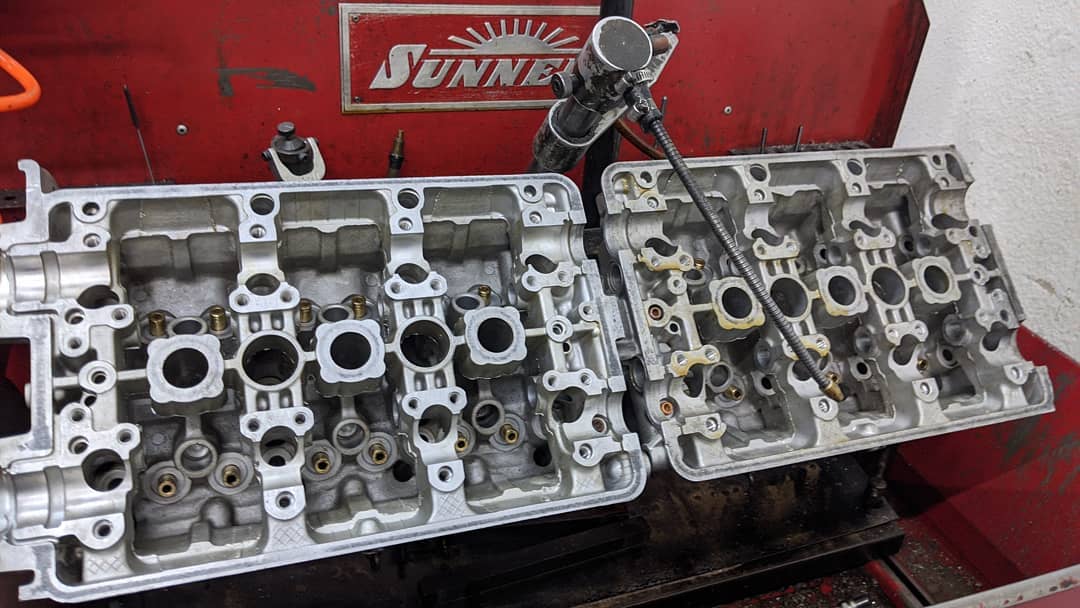
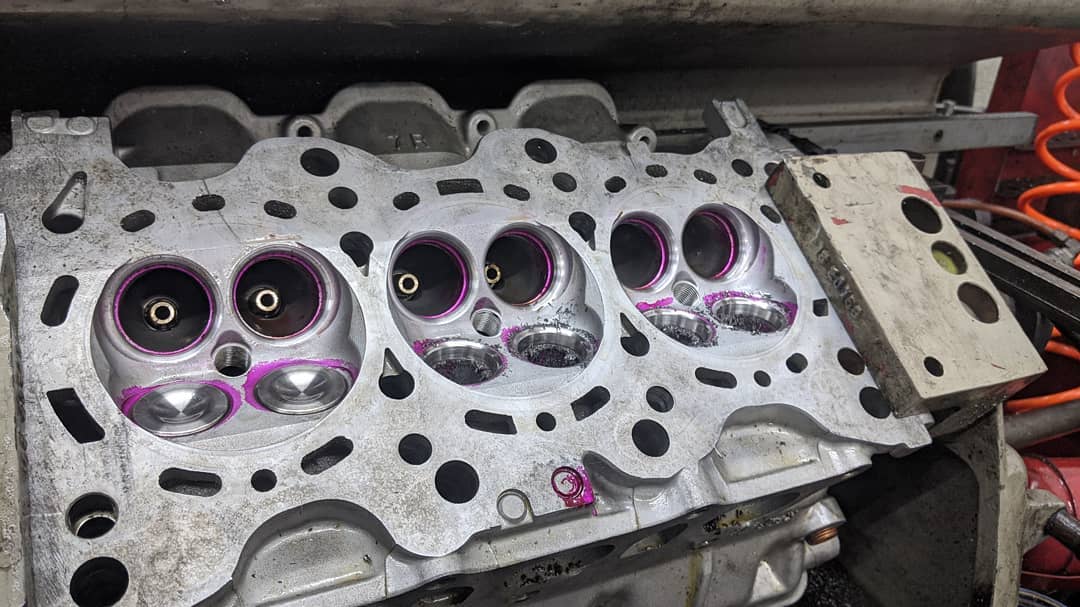
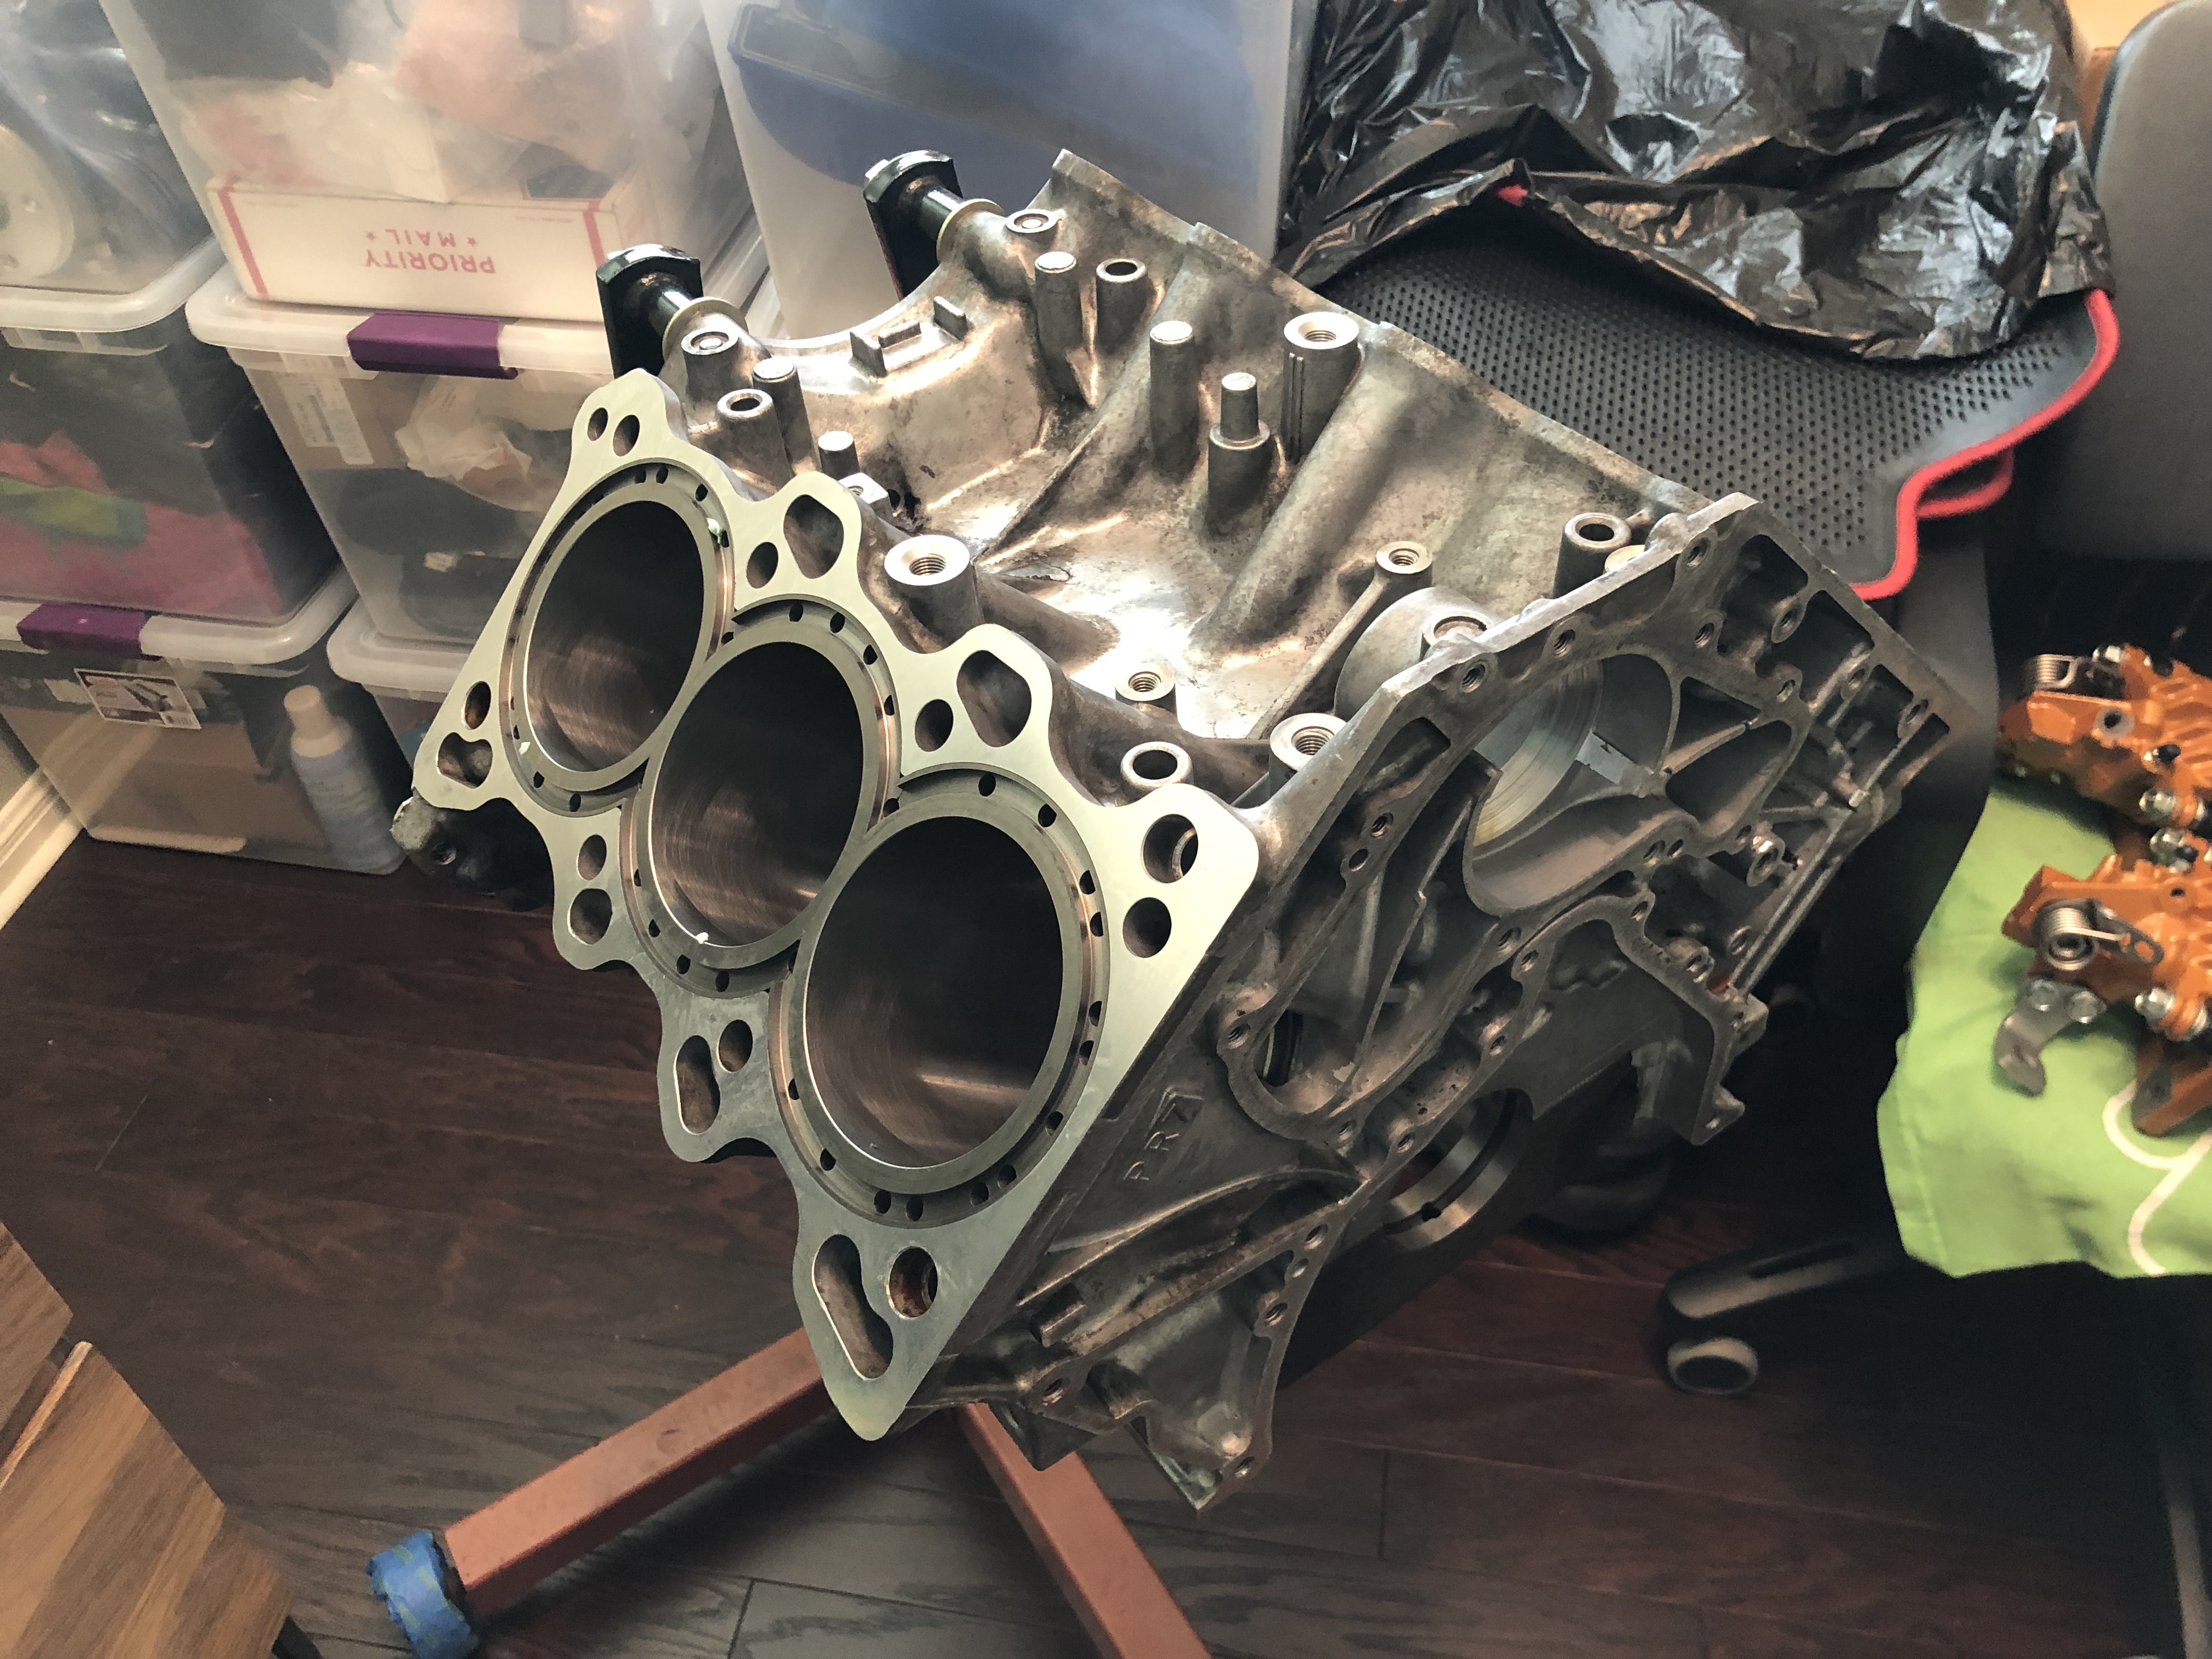
Oh and some engine build updates, the cylinder heads are finally in progress. The heads I sent off to Bad Guys in CA came off the used motor I bought last year, they had tons of leakage out the exhaust guides presumably due to the motor sitting in an uncovered barn/shed thing (in addition to smelling like manure) but luckily the bottom end was in great shape and has been running in my car for the past year/6000 miles with my set of rebuilt heads from engine #1 .

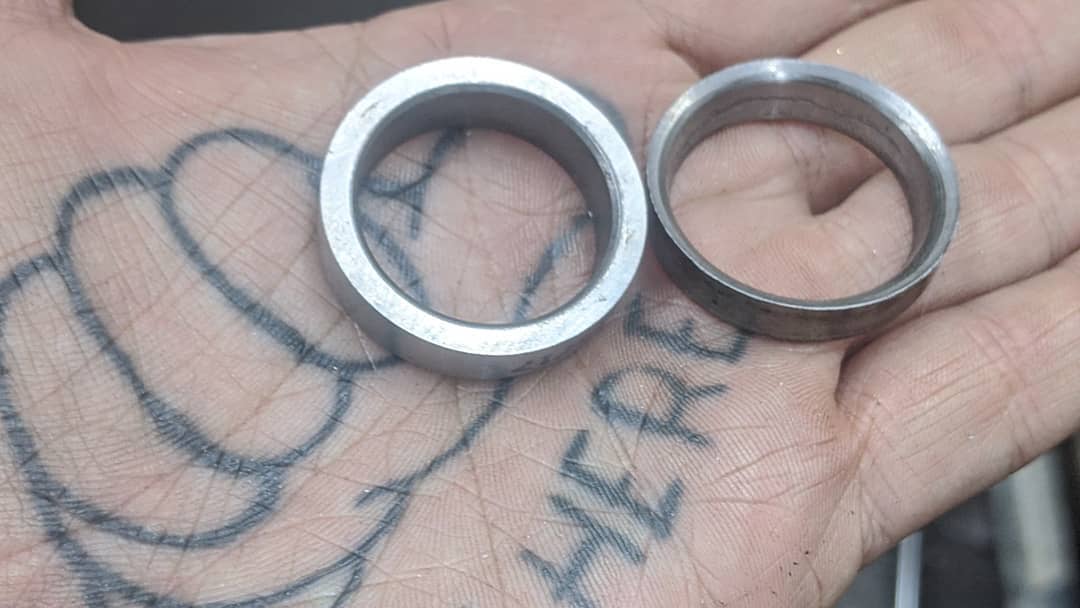
He started by sending the heads off for vapor blasting then knocked out the stock guides and installed new bronze Supertech guides. The stock guides in these heads were actually serviceable due to the relatively low mileage but since we're going up to NA2 sized valves and I want to rev this motor beyond the stock redline we decided to go bronze due to the few reports of cracked intake guides and subsequent destroyed motors in C32 motors.

ch0001.jpg


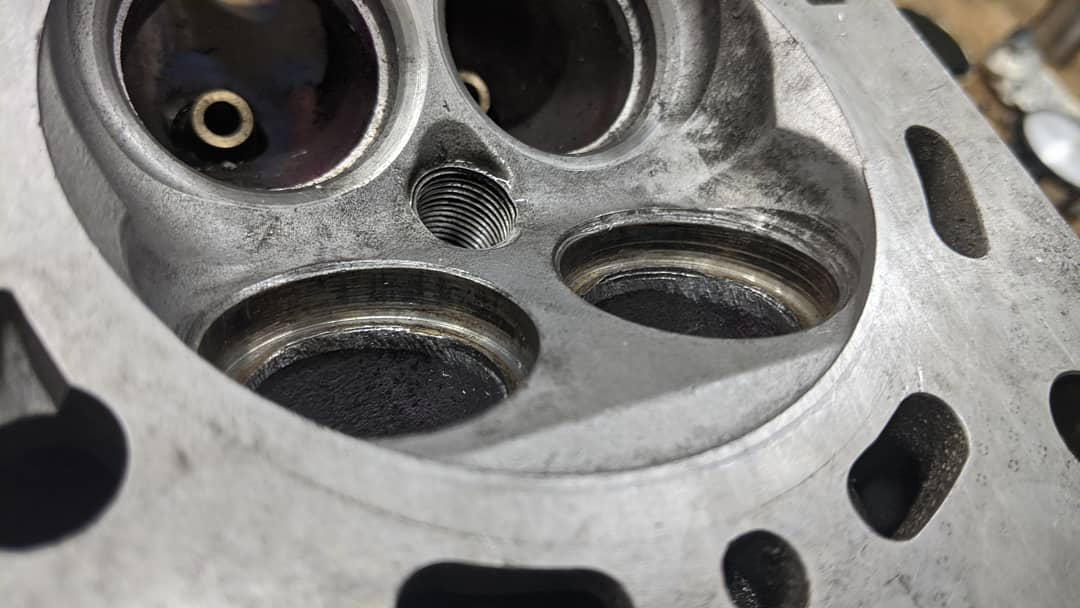
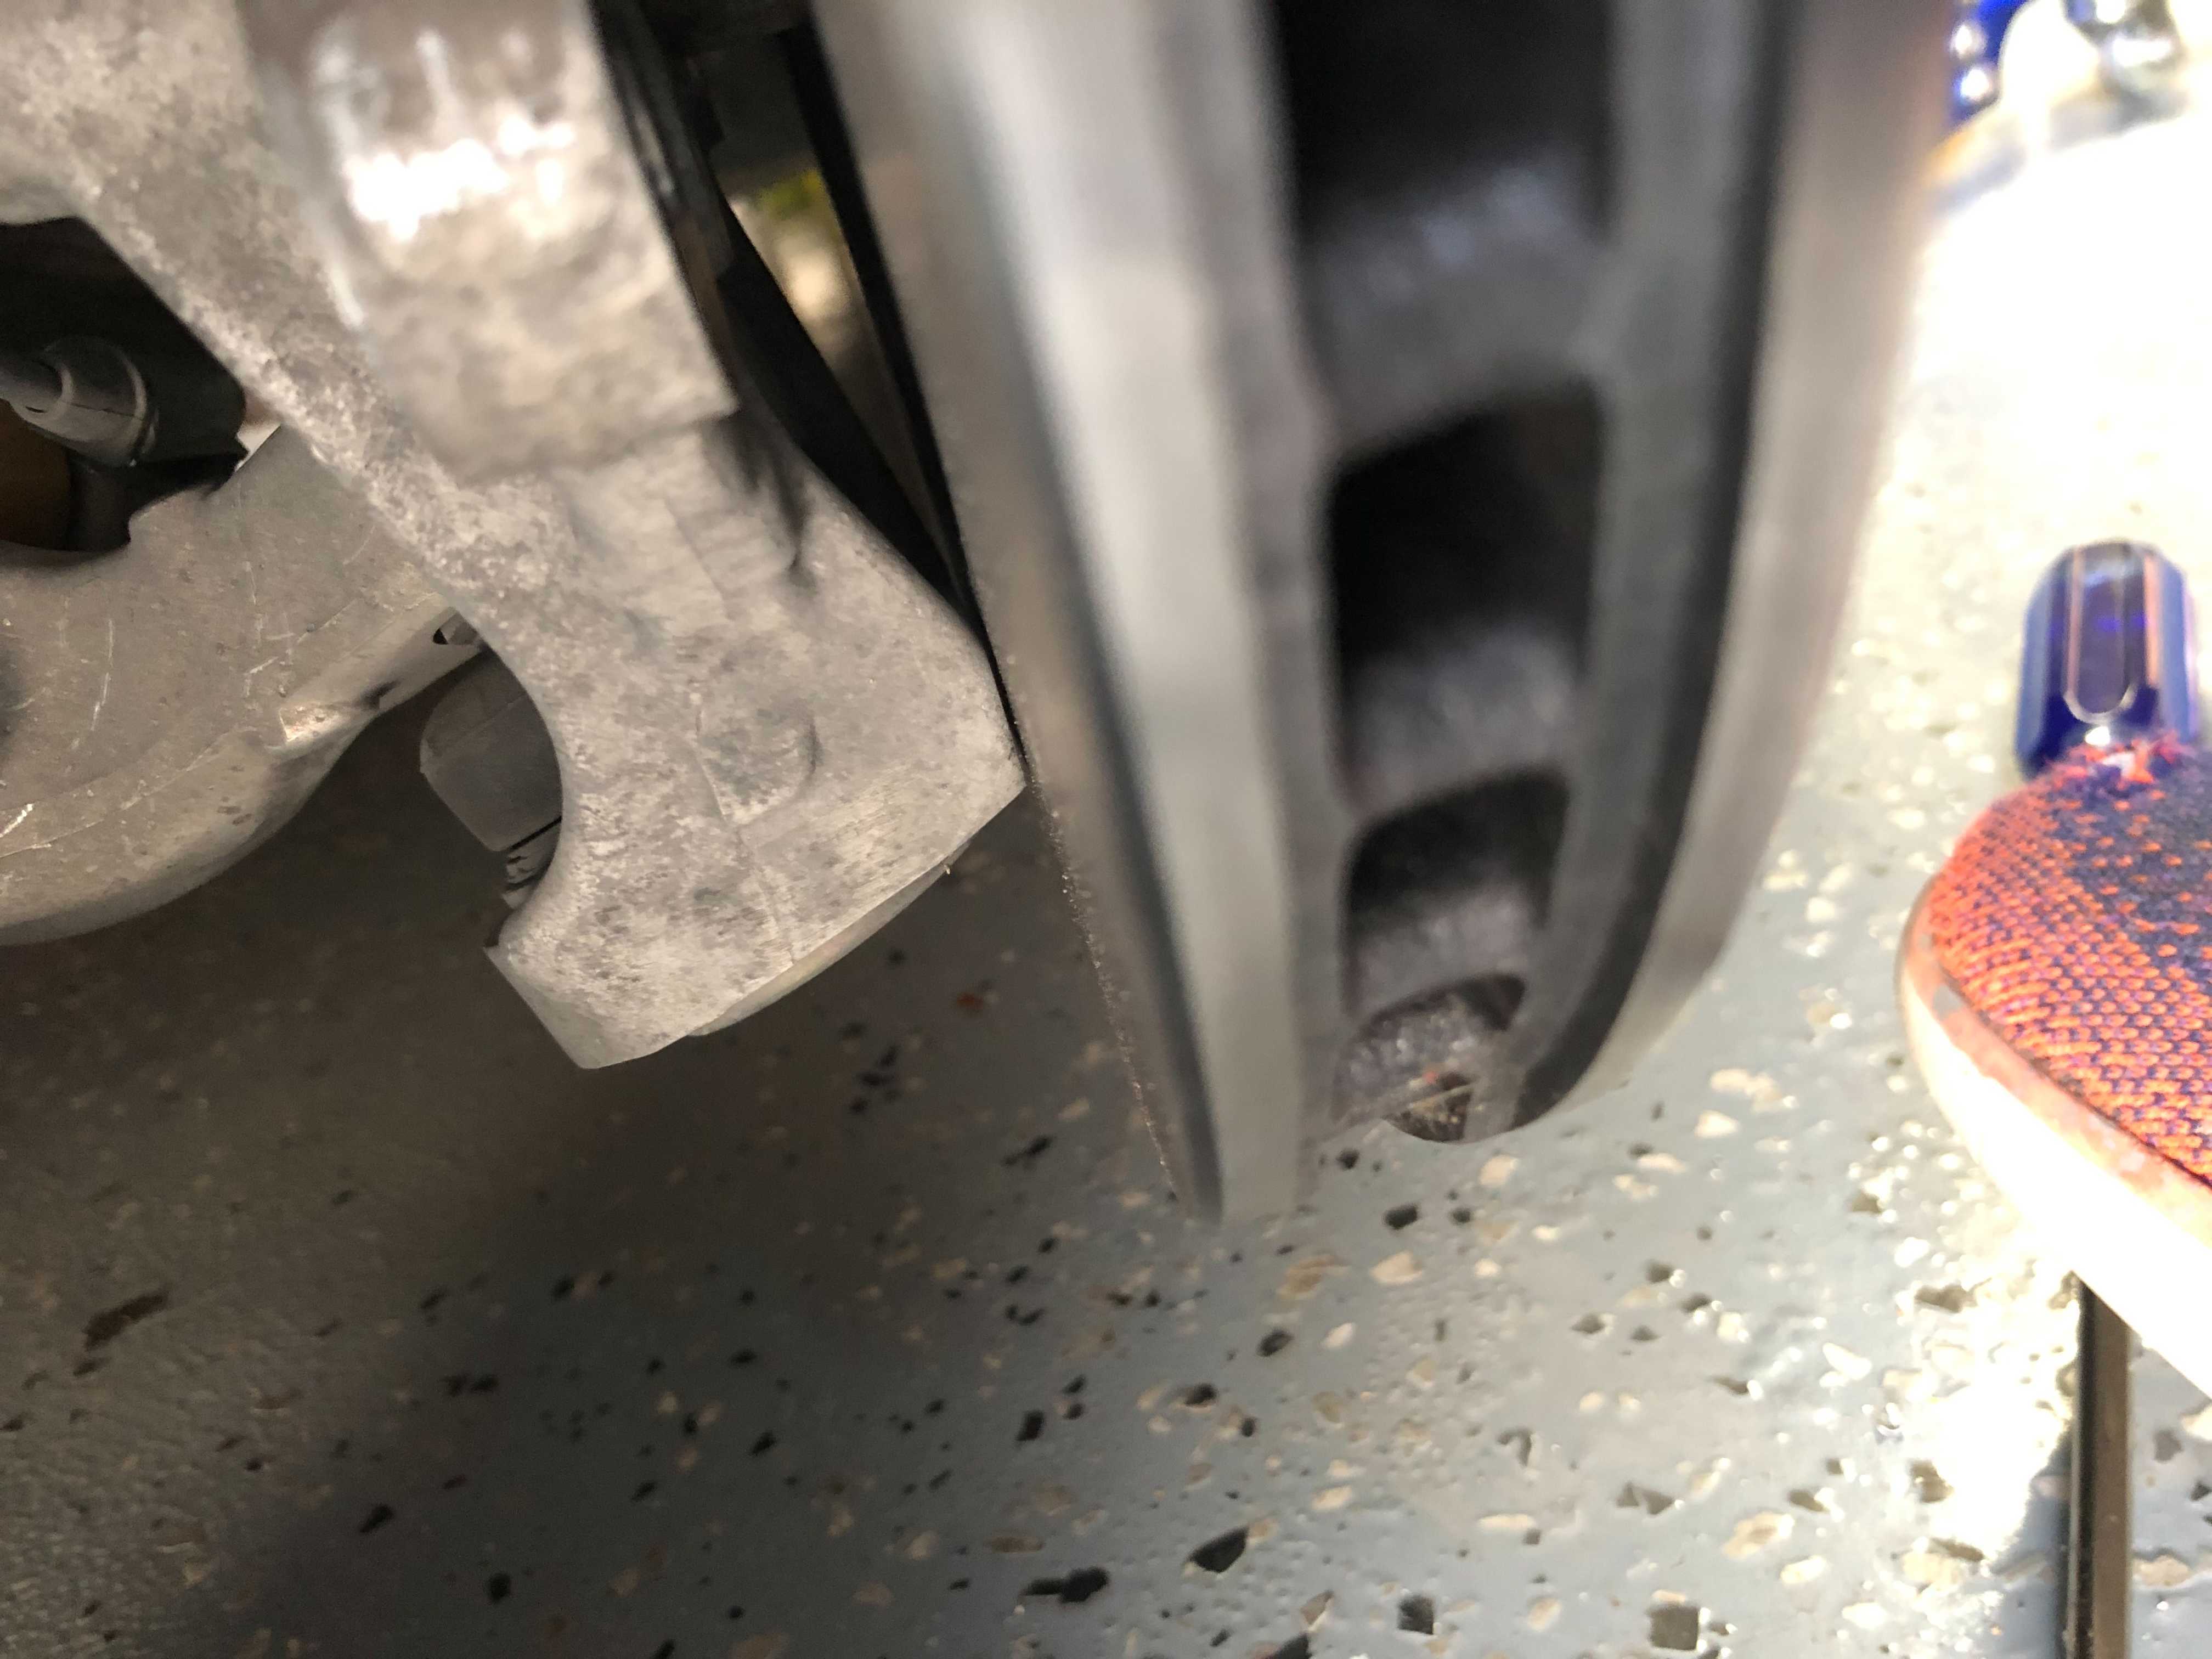
Two of the exhaust valve seats were also pitted badly from being stored improperly, cutting through the pitting sunk the valves much so the seats had to be pulled and replaced.

ch0002.jpg


ch0003.jpg


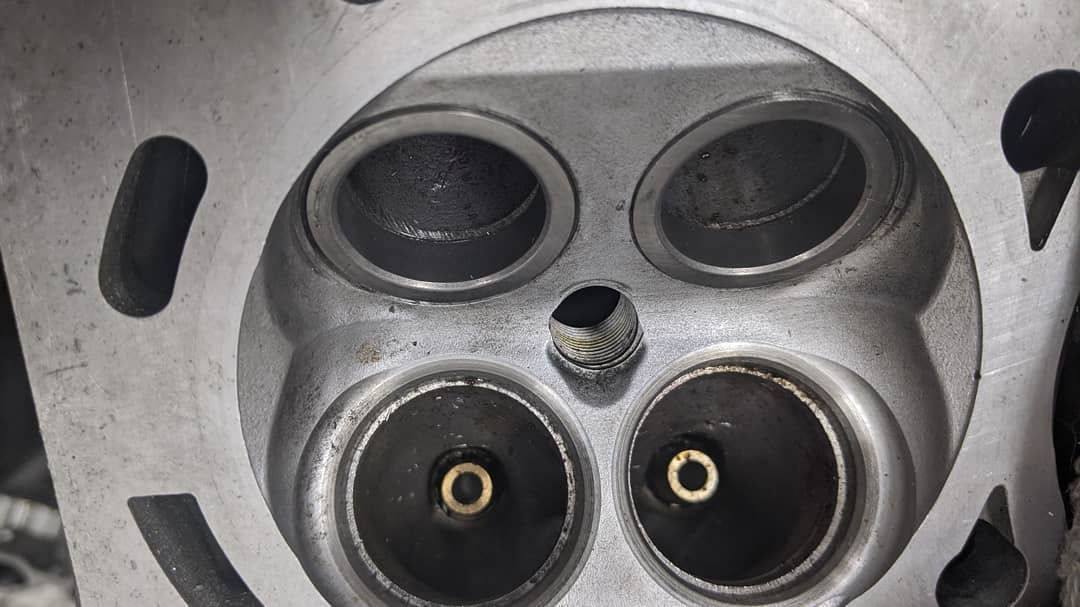
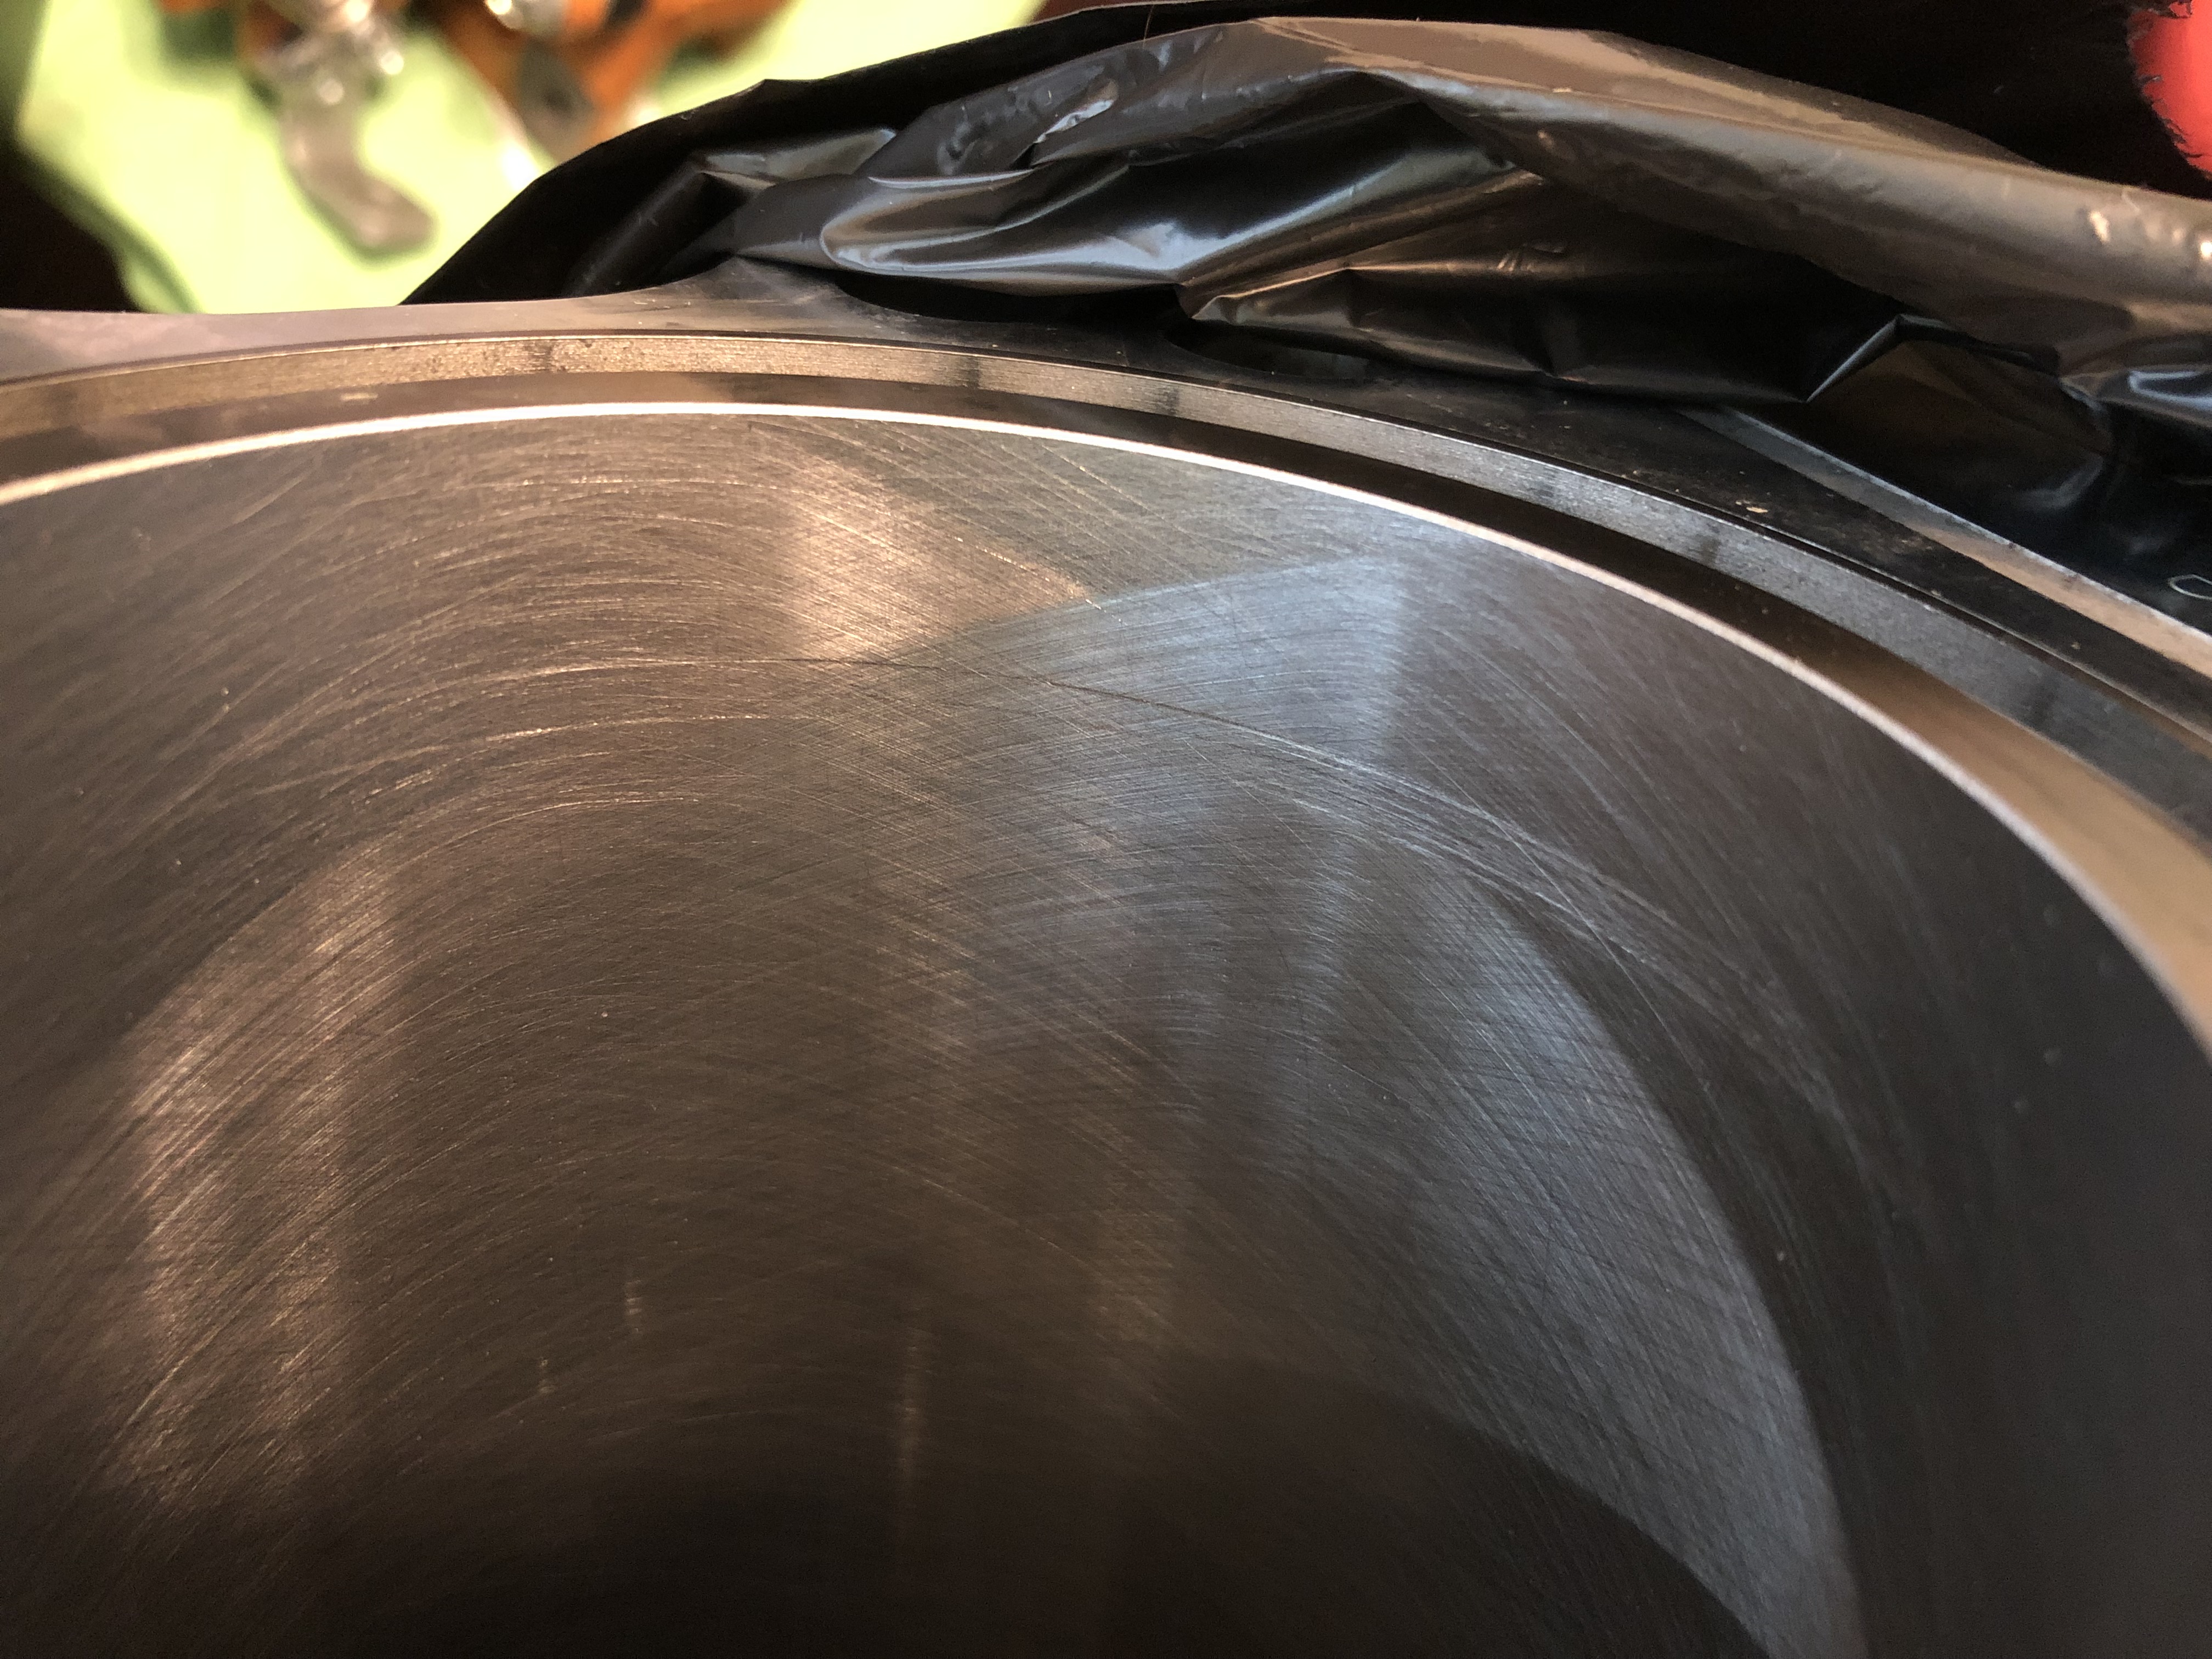
New seats in and ready to be cut. Fortunately the NSX uses a 30mm exhaust valve which is shared with a bunch of other Hondas, and since this shop works almost exclusively on old Honda heads he had the new seats on hand already. You can also see just how much the intake valve throats were widened for the 36mm valves (stock C30 is 35mm), during the porting and bowl blending process this will all be smoothed out and should flow a lot better than stock.

ch0004.jpg


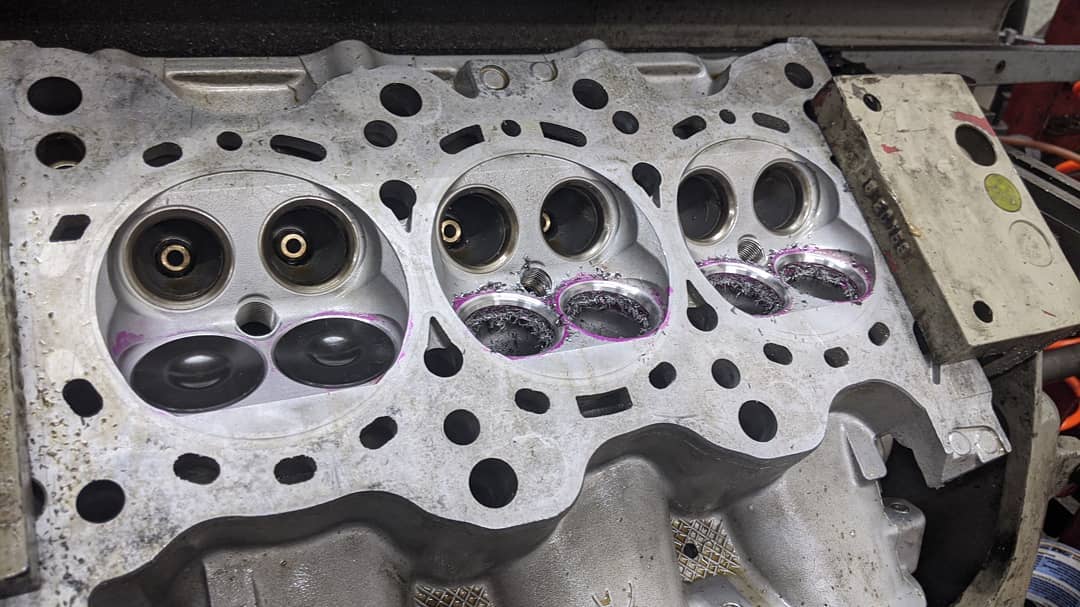
Cutting the seats for new Supertech intake valves.

ch0005.jpg


And now fitting Supertech inconel exhaust valves.

ch0006.jpg


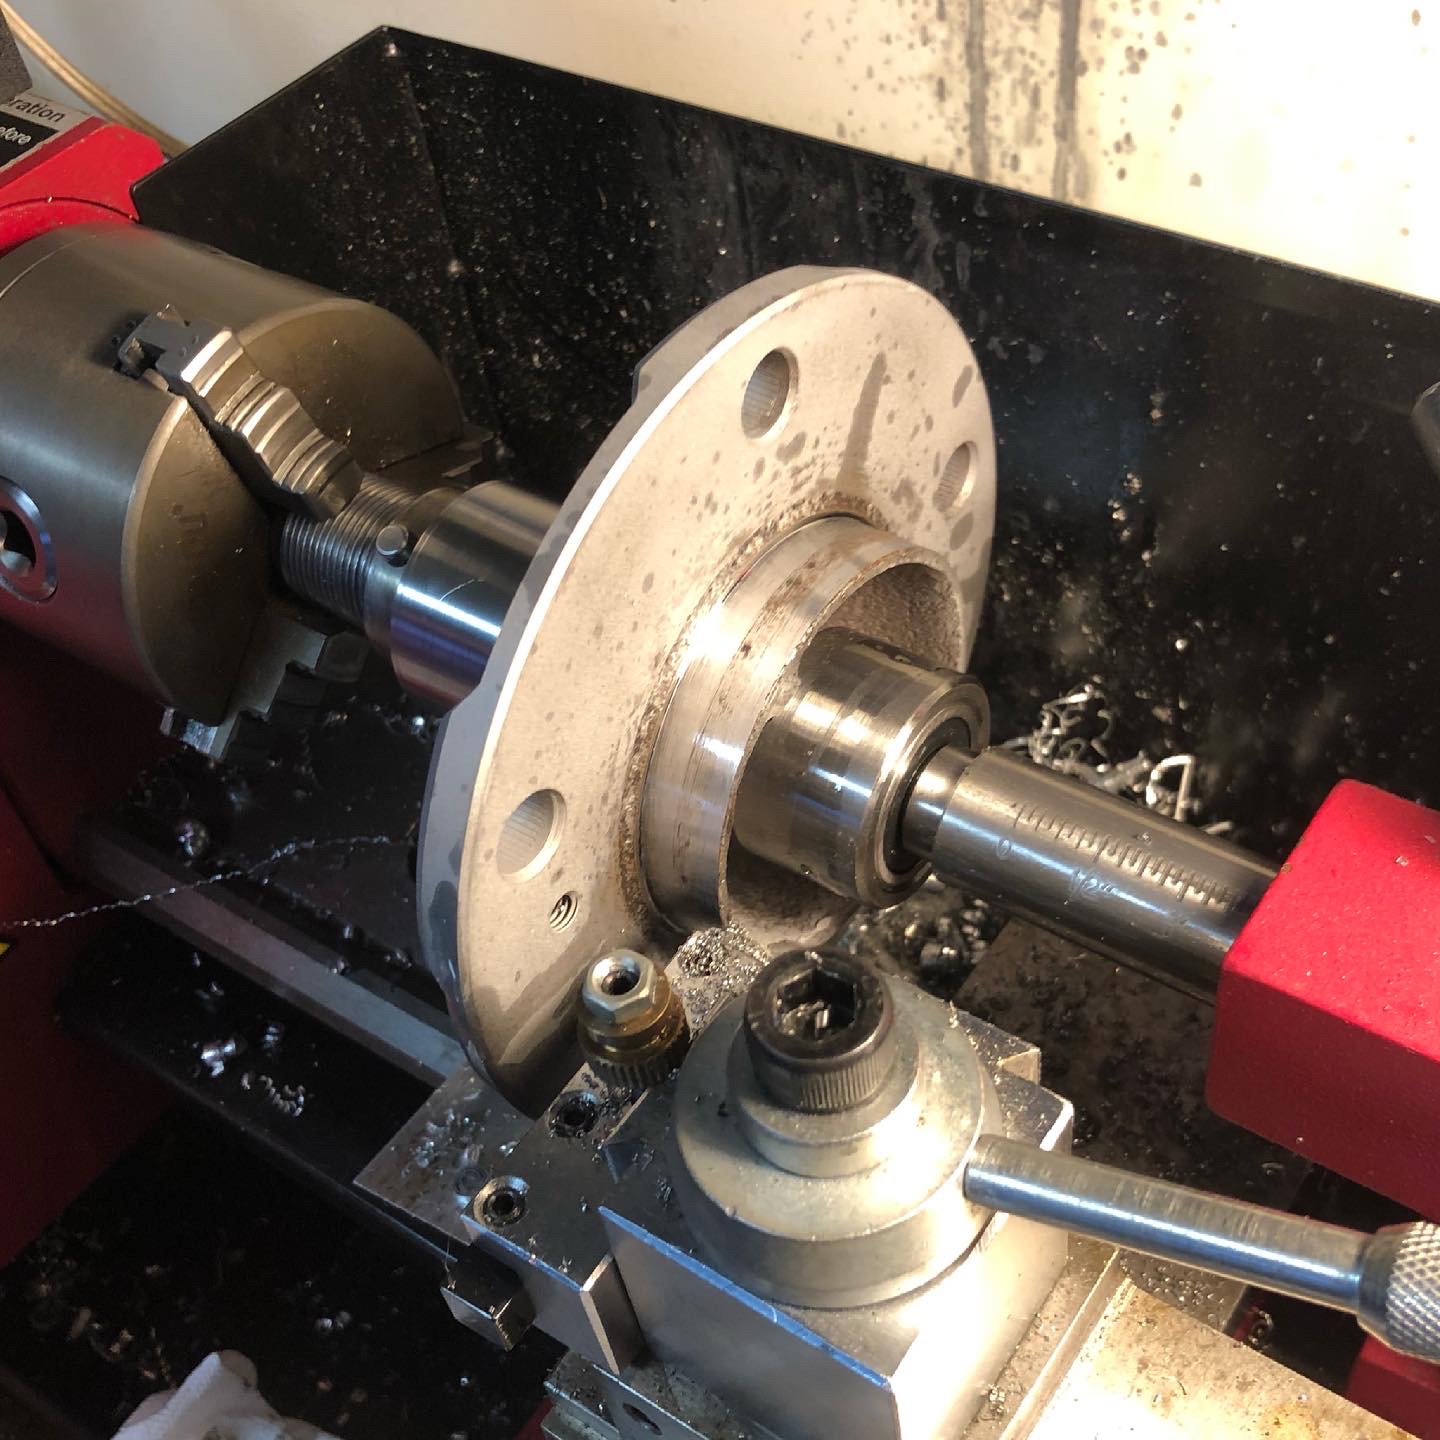
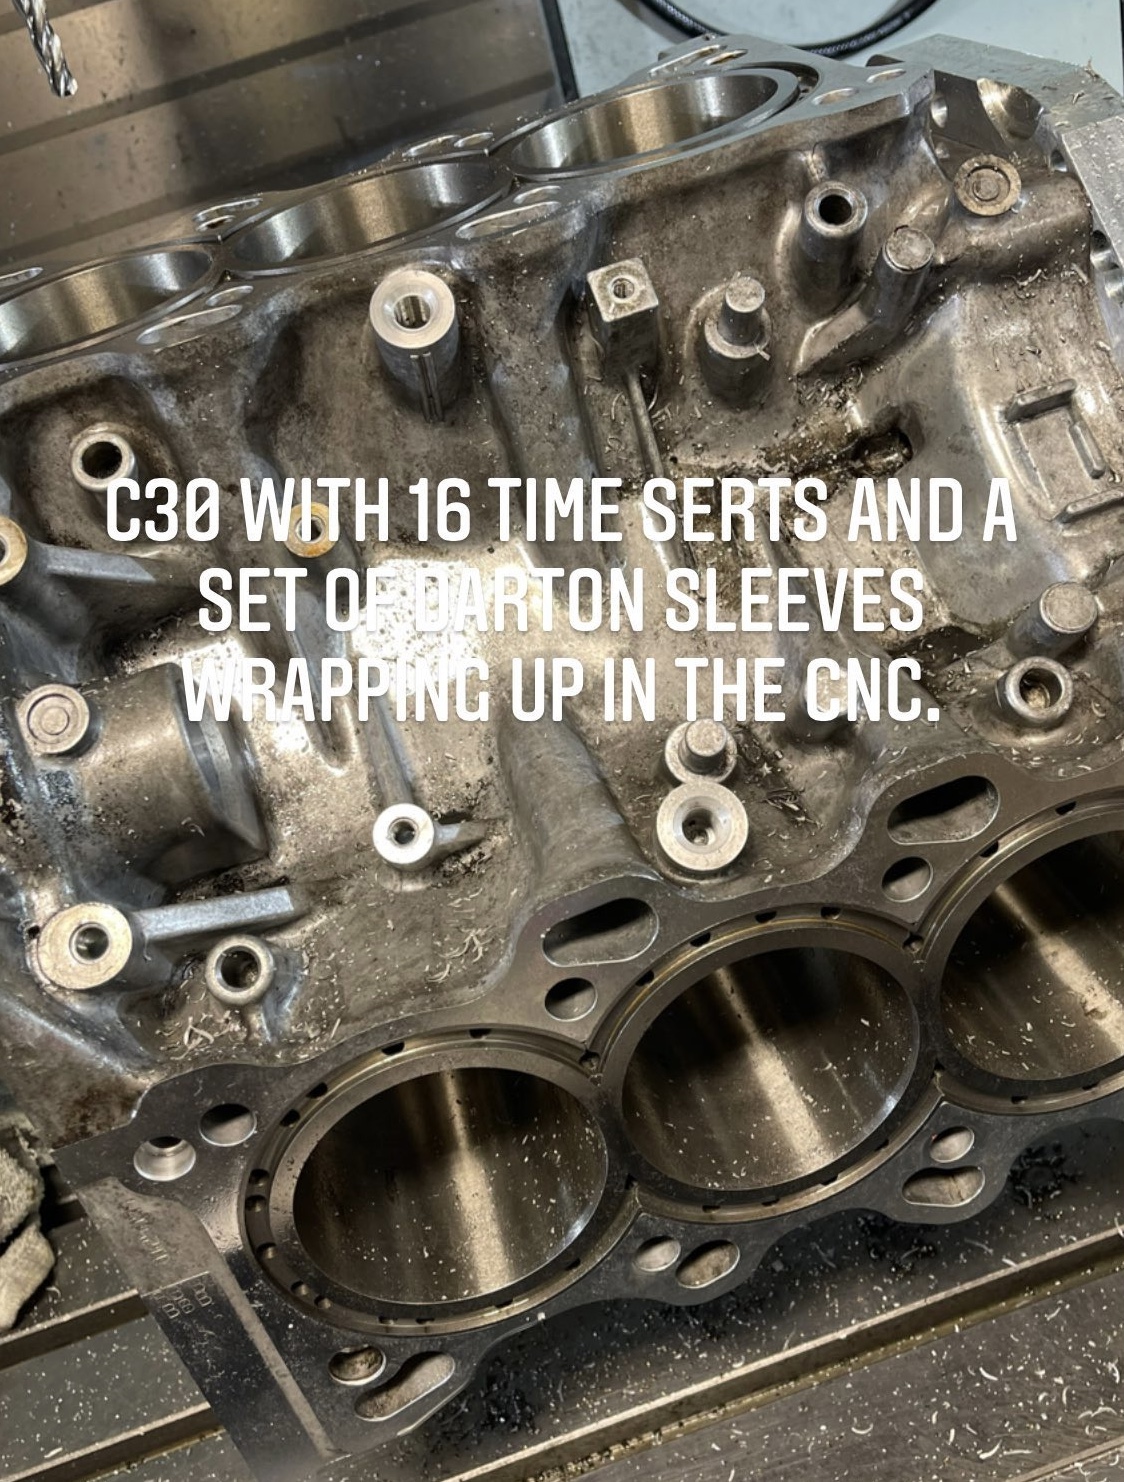
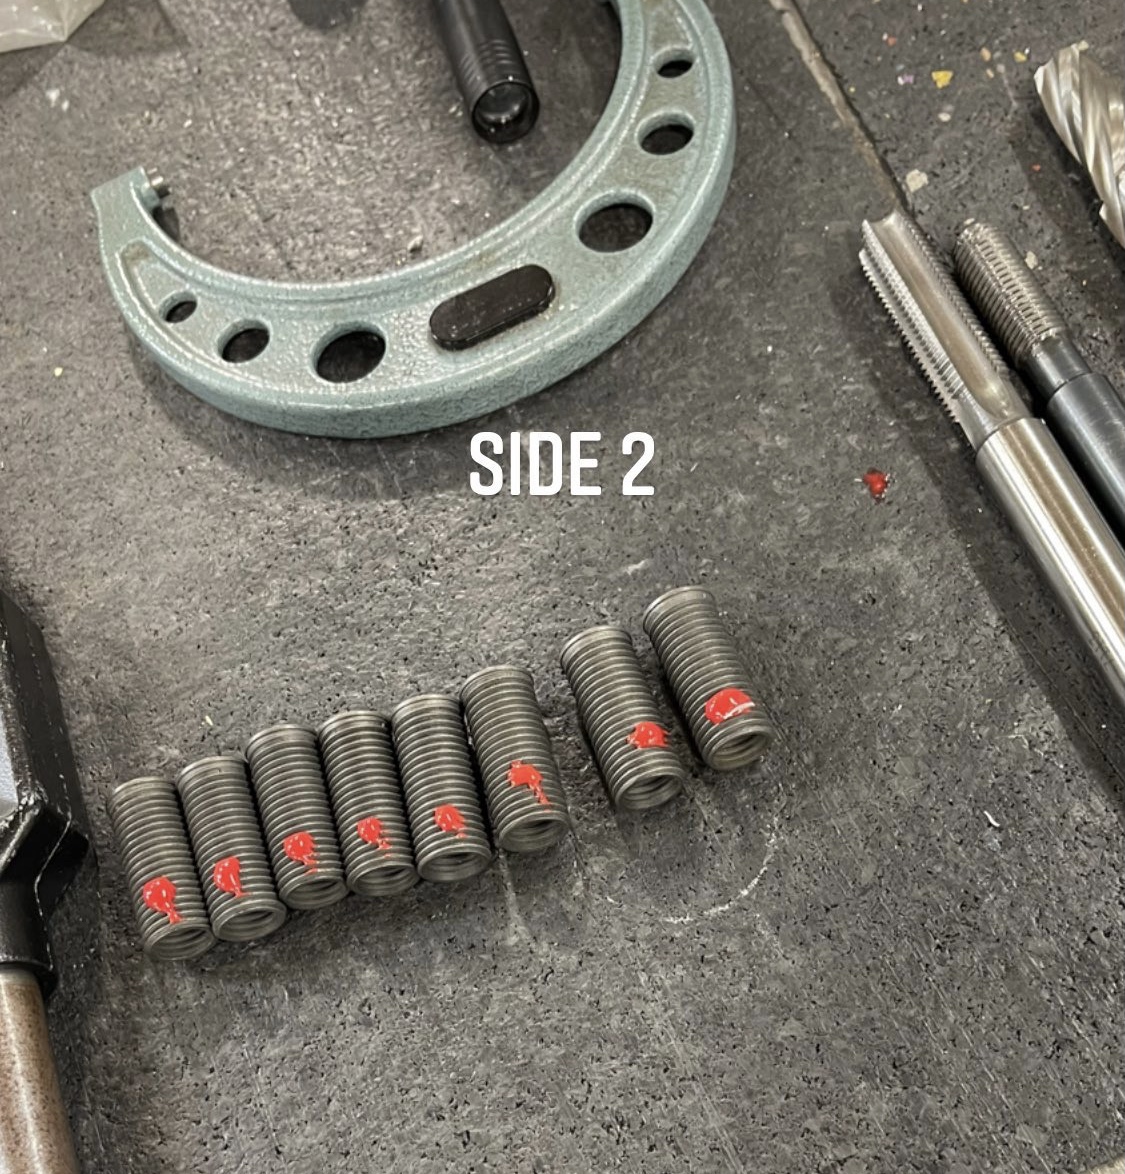
The heads should hopefully be back in my hands in a few weeks, and Darton also told me my block is "scheduled" to be started in about 2 weeks but I wouldn't be surprised if it gets delayed more, but either way I'm hoping to get my sleeved, bored, honed, timeserted, and line bored block back by mid July.
 
Last edited:
Another couple weeks and hopefully the headliner will be done, my drop off date isn't until early July but should only be a few days after that.

I got another few minor things done on brake upgrade project. I don't remember if I mentioned this but the 320x28mm Nissan Rogue rotors have a 68.1mm bore and the NSX hubs are 70.1mm. An alternate option would be to have the rotors bored out, but then I'd have to machine every set of rotors into eternity and this method allows for a fully bolt on solution. My solution was to purchase used front hubs on Ebay for about $100 each, blast them with crushed glass to remove all the rust and grime (except for on the bearing interface surfaces where I just cleaned them up with scotch brite), then put them in the good ol Harbor Freight/Hazard Fraught mini lathe, and turn them down to size. I got new Centric front wheel bearings on Rockauto for about $50 each, and they are NTN made in Japan bearings.

hub01.JPG


It went smoothly but slowly, the hubs are very hard steel and this little lathe is not particularly rigid and is lacking torque so I did cuts of about 0.015". I was able to get within 0.0002" of my target diameter though so the fit is spot on.

hub02.JPG


It slips into the rotor easily and has no play.

hub03.JPG


To make it look nice and prevent rust, I painted the back side of the hub (and center part of the front) with some caliper paint I found on the shelf in my garage. I think I bought this paint in 2014?

hub04.jpg


I can't find any more extended ARP studs, for some reason they are unobtainium right now, so I'll have to wait until the brake swap to knock the studs out of my other hubs and into these.

Moving on to the rear NA2 calipers, these reman calipers were, in typical reman fashion, junk. Fortunately they were cheap, far cheaper than I've ever seen a set of NA2 rear calipers for sale. There was blasting media stuck in the hand brake cam bearings and while I could probably clean it out with enough brake cleaner I opted to just replace the bearings instead. After much searching, I found that NTN makes an exact replacement for the Koyo bearing that Honda uses in their hand brake mechanism, I had to order from the UK but it still ended up being under $60 for both of them. Getting the old bearing out was tricky though, I started off with the slide hammer and a pilot bearing puller which just busted up the race. So I moved on to more destructive methods and destroyed the bearing to get it out.

bearing01.jpg


bearing02.jpg


I'll put the new bearing in once the calipers are powder coated. The part number is 7E-HKS15.80X20.60X19-1. Turns out the same part is used on the AE86 rear caliper.

bearing03.jpg


Also my turn signal cancel stopped working about 6 months ago and I finally pulled off the steering column plastic covers and fixed it. Turns out the cancel module had some bad solders, so I reflowed them and its back to working. If you zoom in you can see the solder is busted in the center of the photo.

cancel02.jpg
 
Last edited:
I bolted up my modified wheel hub and found that I overlooked the issue of where the lower ball joint sits in the knuckle. There's less than 1mm clearance between the rotor and the aluminum knuckle, to the point that if I ever got any real heat in this rotor I'd be concerned about the lower ball joint boots getting fried.


calipermockup01.jpg


I'm not sure if this is a deal breaker or not, the rotor is way too close so to make it work I need to space it out. I could gain a few mm clearance and put the heat shield back in by putting a 2 or 3mm spacer under the rotor. Or a cleaner solution would be fabricating a spacer ring to move the hub out of the wheel bearing by about 3mm which is probably what I'll try next. I put the hub back into the old wheel bearing for mockup purposes so I can experiment before mounting the hubs permanently in the new wheel bearings.


But continuing on, I made an adapter bracket out of aluminum square stock for testing fitment. The NSX calipers use the standard Honda 140mm spaced mount holes, and the Porsche calipers mount radially using bolts spaced out by 130mm, so the holes intersect. Since the bolts are M12, I need 12mm of thread engagement in steel and with the caliper mounted in the right place I have about 13mm before the bolt holes meet, so aluminum brackets are not an option. My plan is to make the final brackets out of 1" cubes of steel square stock to save weight.


calipermockup02.jpg


There will be a bit more material on the edge of the bracket where it looks thin here, this mock bracket I moved the hole a bit further out than it needed to be.


The 320mm rotors look beefy as hell next to the stock 280s. I really hope I can make the wheels fit over, talking to some people in the NSX FB groups seem to indicate that they will but I won't know for sure until I get them.


calipermockup03.jpg
 
Man, this is so much work to get bigger rotors. Looking at that clearance gives me anxiety. Do you really need such large rotors? (coming from someone who also has larger rotors!)
 
My name finally came up at the upholstery shop so I dropped the headliner off and 2 hours later got a call saying it was done. It turned out great, and I'm glad I didn't attempt it myself since he had to steam the material to get it to stretch into all the recesses. It looks amazing compared to the OEM grey vinyl, and overall I'm very happy with the results.

IMG_1422.jpg


IMG_1436.jpg


I'm debating whether I want to do the sunvisors in black leather or in the same alcantara as the headliner. I'm leaning towards using the same alcantara since it won't shrink like leather would over time and I don't touch the visors enough to ruin the alcantara quickly like might happen on a steering wheel or other common touch surface.

Darton East (AR Fabrication in VA) is finishing up my engine block now as well. I had them install MID sleeves bored and honed to 93mm, install timeserts in all head bolt holes, then line hone the mains after installing ARP main studs. This block core was higher mileage so I don't want to risk the head studs pulling out or anything like that and its just nice peace of mind.

Rather than do the timeserts myself like I did last time and spend hours fretting over whether or not the studs are straight enough (narrator: they were), I decided paying the shop the $400 fee was a better choice since since they could do it in their mill and get every stud 100% straight and true. Doing it with a hand drill will never get there, it will be good enough but the goal here is perfect, otherwise I can't sleep at night.

IMG_1434.jpg


IMG_1432.jpg


IMG_1433.jpg


Big stuff coming over the next couple months. ;)
 
Last edited:
That Alcantara work is amazing. Can you take some more photos of your entire cabin to share? I'm really liking the mult-tone scheme you have more than I thought I would. So I worked in custom car audio while in college. The biggest problem back then is the material lifting off in the heat. We used the best glue we could find - 3M, various rubber cements, and expensive boutiquey stuff as well.. you name it we tried it. Each had pros and cons. Some were strong but bled thru the fabric. Some would get tacky in the sun. Some would simply just lift off. It was a nightmare and we just stopped doing it. Granted Alcantara was just hitting the market back then. We were dealing with vinyl, BMW felt, and real leather. They all did not perform well in the heat or extreme cold.

Can you help us understand how good the new adhesives are? I've wanted to redo my interior for YEARS but haven't had the time to experiment with todays adhesives.
 
Last edited:
Are the photos not working for anyone else? It seems like my hosting service is down, I use GoDaddy for my personal site/photo hosting and I haven't been able to access them since yesterday. I'll post more photos once I get my interior fully back together, all the plastic tabs on the B pillars broke off so I need to repair those. I previously had red accents but I'm trying to get rid of them and go to an all black with titanium grey accents color scheme, all that's left is the red stitching on the seats so I wonder if I could dye the thread black? At some point I want to get Pole Position seats and have them done in black leather with matching alcantara inserts but that's a ways off.

From my research (corroborated by this upholstery guy) the 3m stuff and really anything that comes out of an aerosol can is largely crap and you want either Weldwood contact cement for applying by hand or Weldwood landau contact cement to apply with a spray gun. For large concave things like a headliner you really want a spray on product as applying by hand will result in too much product being applied and soaking into the foam backing and making it stick to itself which will result in a lot of dimpled areas. For convex or flat shaped parts such as armrests or pillars I like using the regular contact cement though and just folding the edges over and gluing them on the back side. I did my center armrest a couple years ago using regular weldwood contact cement and its shown no signs of peeling off in the Texas heat so far despite being leather.

Edit: So it seems that the photos work when connected to my corporate VPN, but they don't work from my home internet.
 
Last edited:
Due to the long wait time until I can have my visors professionally covered in matching alcantara (and since they're already splitting despite being replaced several years ago) I opted to just paint them black so they mostly match. I used satin black SEM paint and prepared the plastic by scuffing with a maroon scotch brite pad. This roughs up the surface in a way that won't remove the texture or be visible after painting but still gives the paint a bit more to bite onto. I took the visors apart and painted the 3 components separately, my expectations were low but frankly they turned out really well. The finish is a nice consistent satin black, the unevenness in the photos is just the crappy sunvisors not being smooth.

IMG_1450.jpg


IMG_1449.jpg


I also scuffed and painted the visible parts of the dome light fixture. I ordered an all black one from Honda Japan but I don't want to look at a grey light fixture for weeks or months while I wait.

IMG_1453.jpg


Then before I put my B pillar trim pieces back on I wanted to paint the grey seatbelt grommets black. This is tricky as those pieces can't be removed from the seatbelt, so I came up with this to paint the grommets without even removing the seatbelts from the car. I had a fan blowing from behind the cardboard to keep any paint from making it around to the car, then I taped off the seatbelt and held onto the grommet with a gloved hand while I painted one side, let it flash, then carefully held it to paint the other side. Fortunately the SEM paint dries quite quickly.

IMG_1456.jpg


This also turned out unexpectedly great.

IMG_1468.jpg


And of course the plastic tab shattered into a bunch of peices upon removal so that needed to be glued back together.

IMG_1458.jpg


It's really hard to get a good picture of the headliner in the car, but it looks great in person. An unintended side effect of painting the visors is that the giant airbag warnings are covered up. Removing the stickers before paint didn't seem worthwhile as they're just going to be wrapped later anyways and it still looks better than it did before. The paint seems to be adhered quite well, I can dig a fingernail into the surface and drag it without any visible damage.

IMG_1464.jpg


I also might have figured out a way to change the red stitching on these seats to black, we'll see.
 
Last edited:
Still having issues with Godaddy, so I'm sorry if the photos aren't showing up for everyone, for some reason I can't access any of the pictures through my AT&T home internet but I can see them on my phone connection or work VPN.

But I finished another small interior project. The door sill pads are that shiny vinyl material like the glove box, knee bolster, and shift boot so I ordered some leather from RedlineGoods that matches the shift boot, brake boot, and center console leather parts I got from them a few years back. It also matches the texture of the Type S steering wheel quite nicely for a cohesive look.

To start off I removed the end cap (remove the 2 push nuts underneath and it comes off easily), used scotch bright to remove the remaining adhesive and rough up the plastic for good glue adhesion, then used solvent cement to fix some cracks. After trimming the leather pieces to fit (I ordered pieces about 1/2" too large to account for mismeasuring and have a margin of safety) I applied contact cement and attached the new leather. Pretty simple process, I paid $40 shipped for the leather and it's a nice little detail.

IMG_1548.jpg


IMG_1550.jpg


IMG_1551.jpg


Then did the same thing on the passenger side. These pieces came out looking like factory so I'm pretty happy with that.

IMG_1539.jpg


I've also been trying to figure out what I'm doing with my brakes. I decided to try the G2 epoxy caliper paint since it has much better heat tolerance than powder coat and there is a non zero chance that I'll want to track this car at some point. They have a color match program where they'll mix up paint in any OEM color you want so I asked for imola orange since it's very close to the orange I tried out a while back.

The standard way to apply this paint is using a brush, but they also have some sort of disposable airbrush thing they sell so I decided to try it with my real airbrush. The results are pretty good, it honestly looks like powder coat but its a high temp 2 part epoxy paint that smells like it will kill you, so hopefully that means it will hold up. As far as ease of application goes, this was more of a pain in the butt than powder by a fairly substantial margin. The prep is the same, blast with crushed glass then mask off what I don't want covered. The crappy part is applying the paint, with powder coat you have the electric charge pulling the powder particles to the surface, but to get similar coverage with paint you have to be able to turn the parts all over and get at them from every angle which is why there's metal bars sticking out. I had a P100/organic vapor respirator on the whole time and I wouldn't mess with this stuff without it, I got a brief whiff when I took my respirator off after walking out of the garage and it smells a lot like catalyzed clear coat.

IMG_1552.jpg


IMG_1553.jpg


Here's a comparison next to an imola orange H. I'm surprised how well they were able to replicate the color with a single stage epoxy paint.

IMG_1555.jpg
 
Last edited:
Powder coat looks a bit better but isn’t as chemical or heat resistant as this epoxy based paint. If you spray powder coat with non-chlorinated brake cleaner it will etch it, for example. Also track use can get calipers hotter than powder coat can withstand, this isn’t usually an issue on street driven cars but if I ever want to track the car seriously the PC could have issues.
 
I did the final assembly of a brake caliper, finally. I ordered caliper seal kits, new pistons (since the ones that came with these reman calipers were junk), new pad shoes for the bracket, new bolts, and new slide pins since the reman parts were either plated with something or aftermarket. I really like how they turned out and the color looks great especially in the sun and its an incredible finish for a single stage metallic.

IMG_1676.jpg

IMG_1678.jpg

I also got a special delivery of magic billet bump sticks from @austrian type-R

They came covered in some sort cosmoline and wrapped in what look like very stiff condoms for protection. (side note, I would not recommend using them for that, 2/10)

IMG_1664.jpg

Once unwrapped and cleaned up though, they look quite nice. :biggrin:

IMG_1665.jpg

Always closely inspect any engine parts shortly after receiving them. After cleaning I was inspecting each cam and spraying with WD40 before wrapping them with saran wrap for storage until needed, and I found a tiny tiny burr on one of the VTEC lobes. Rather than risk it cutting a groove in the rocker pad and sending fine particles of extremely hard metal through the engine, I taped up the surounding area with electrical tape to prevent any accidents and attempted to gently file it down, but the steel of these billet camshafts is so hard that the file just bounced right off. So I held a dremel grinding stone between my fingers and gently rubbed at the burr which worked quite well.

IMG_1667.jpg

I also fired up an old AEM v1 standalone that I got for $300 using a bench power supply and it seems to be working. I'm still up in the air about how I want to tune this car once the ITBs go in, on one hand it could be an interesting experiment to try to modify the stock ECU code to do it, I can enable throttle angle load calculations on demand so I could make the car run I just don't know how well, then I'd have to program in a barometric pressure compensation routine and probably a few other compensations such as a MAP and road speed and I think I could make the car run okay but probably not that well since there's so much of the existing ECU programming that I don't understand that I would be fighting with, and I don't have the time to fully reverse engineer it. On the other hand, even an old standalone like this is so much more flexible, is fully documented, and would probably yield a better result overall.
 
Last edited:
In the latest episode of the tragic comedy that is my engine build, I got my sleeved engine block back! :biggrin:

IMG_1776_2.jpg


My happiness was short lived. :mad:

IMG_1779.jpg


This block is f*cked in what is possibly the most egregious screwup yet. As far as I can tell, they bored too close to the final hone diameter so there's still rough boring marks present in the cylinder that will catch a nail. I'm sure it's great for the piston rings to ride across those ridges millions of times! So back the block goes, at least I can set up my main clearances and get everything else in order in the meantime.

In other news though, I think I finally have an answer as to why the first build blew up. I posted a bunch of photos of the damage in a machinists forum and the general consensus was that it was a bore finish problem and the final hone operation was way too rough. The rough finish resulted in large amounts of hard iron particles being scraped away from the cylinder walls by the piston rings, and since the oil rings have drill holes to funnel oil into the wrist pins those particles caused the pins to seize in their bores (causing the messed up wrist pin bores we saw and spun wrist pin bushings) which didn't allow the pistons to freely rock which forced the skirts to drag up and down the bores causing the severe and very consistent bore scuffing. Those metal particles were then either caught in the oil filter but small enough to not really be visible or anything that made it through the filter just embedded in the soft bearing material and fortunately didn't kill the crankshaft.
 
Man, you can see it even in the pictures. How did they not see that?? Maybe ask for your money back and send it to Shad?
 
Interior looks fantastic, each improvement is subtle but the sum of everything makes it really impressive. I never liked the grey vinyl very much, this feels like how it should've been made (so I'll copy you eventually lol). If you're going to change the seat stitching, maybe white or silver would look good? I could buy your old covers ;)

Sorry to see how your engine saga is going. I'm sure having your plans scuttled like that all over again is frustrating. Can/does the machinist do a final surface roughness (Ra) measurement of the bores? And I'm assuming new sleeves would be needed too to get the same bore diameter you need?
 
your attention to detail is amazing. i'm sorry that dilegence has caused you to find that nasty bore condition though.

Also, on using the stock ECU... man... the ITB configuration that's needed for an ECU is so different than stock, you're going to save a sh*t ton of time by starting from scratch with a stand-alone. I recall the old days when I had a boosted car and using a FI/C. Even just playing with Ignition and Fueling it was constantly fighting with the stock ECU. Having ITBs seems like it would 10x worse but I don't know anything about the stock ECU programming.
 
Back
Top