• Protip: Profile posts are public! Use Conversations to message other members privately. Everyone can see the content of a profile post.

Honcho's Long Road to Imola Type-S Zero

Does Honda sell a replacement bearing for the alternator?

Yep, Honda sells them. They are standard Nippon-Denso bearings that fit dozens of different cars, so nothing special about them:

Front: 31114-PT0-013
Rear: 31111-PT0-003


But, I got them included in a complete rebuild kit, which also includes replacement brushes and all of the rubber seals. They are WBD bearings (double sealed) and fit perfectly. I had to buy the rectifier and regulator separately, since none of the kits included it.
 
Alternator 2

The low-clearance puller made short work of the rear bearing. Moving along.

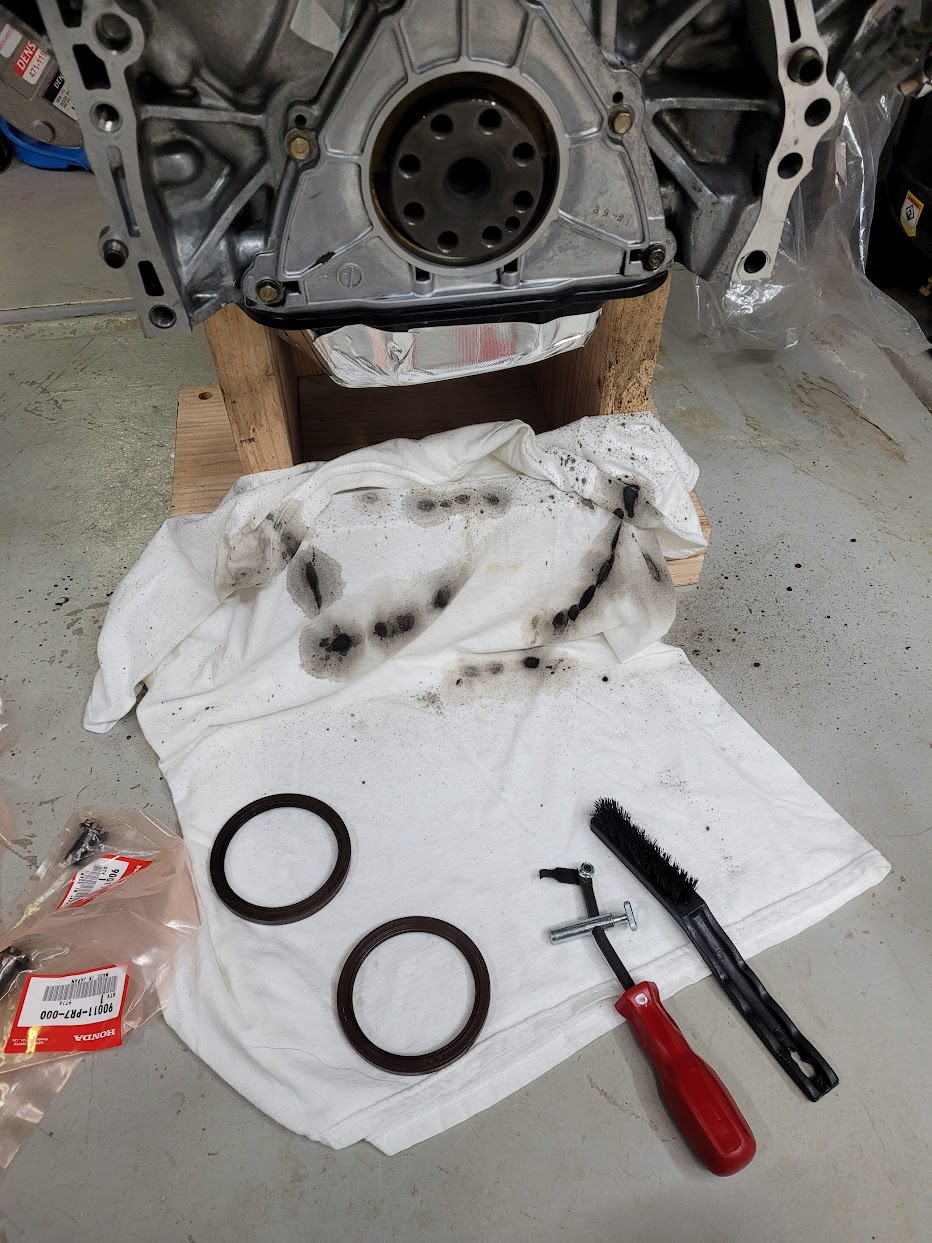
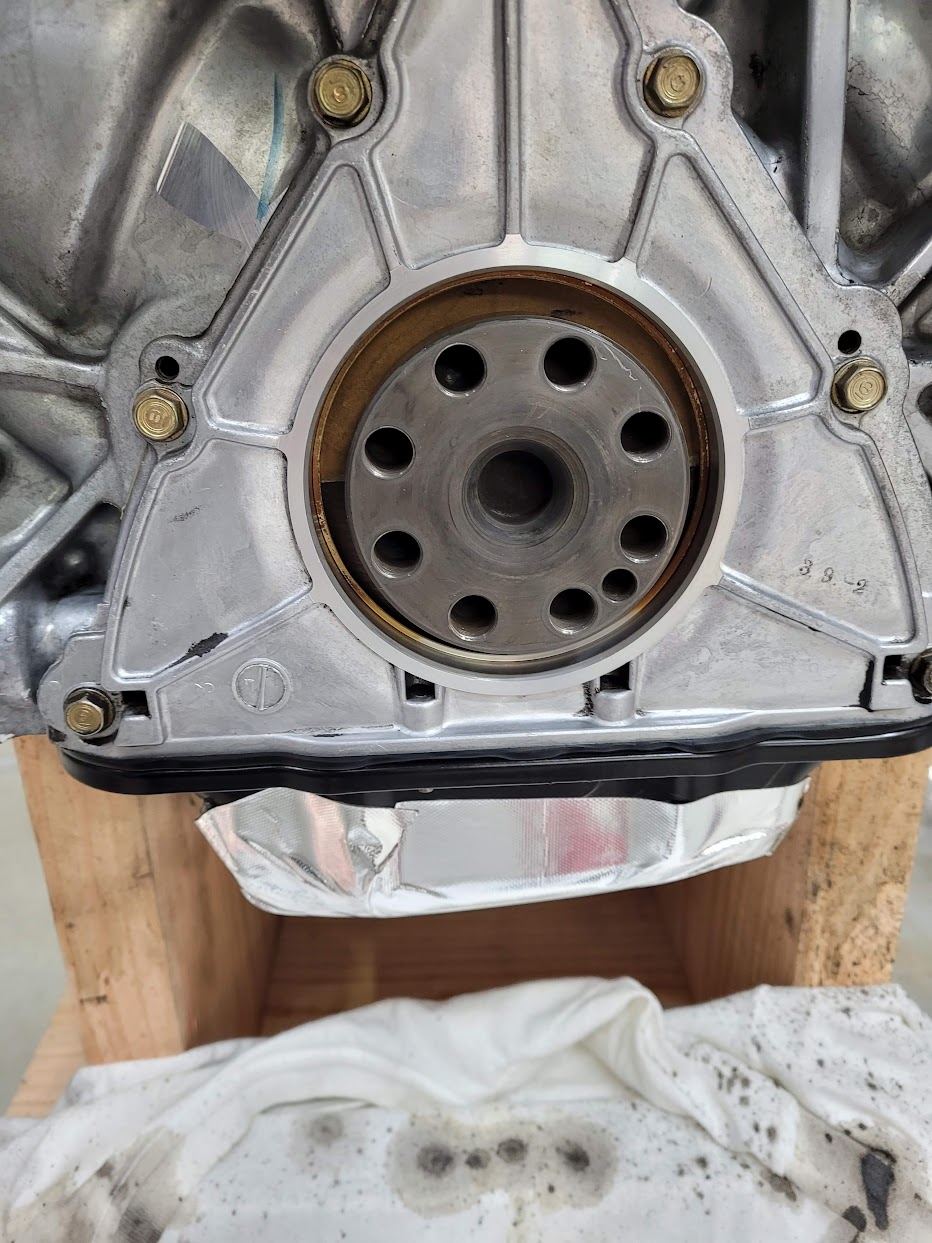
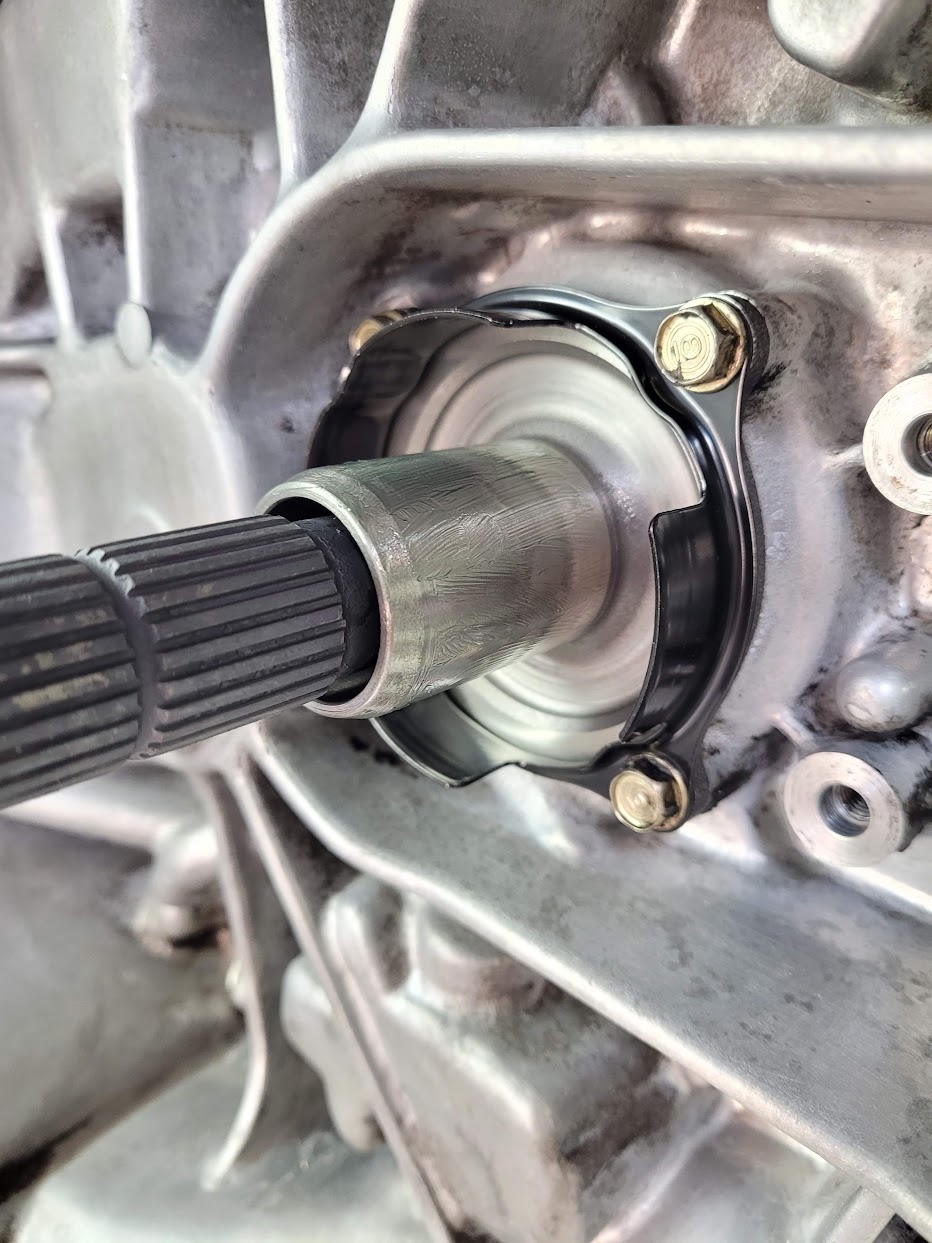
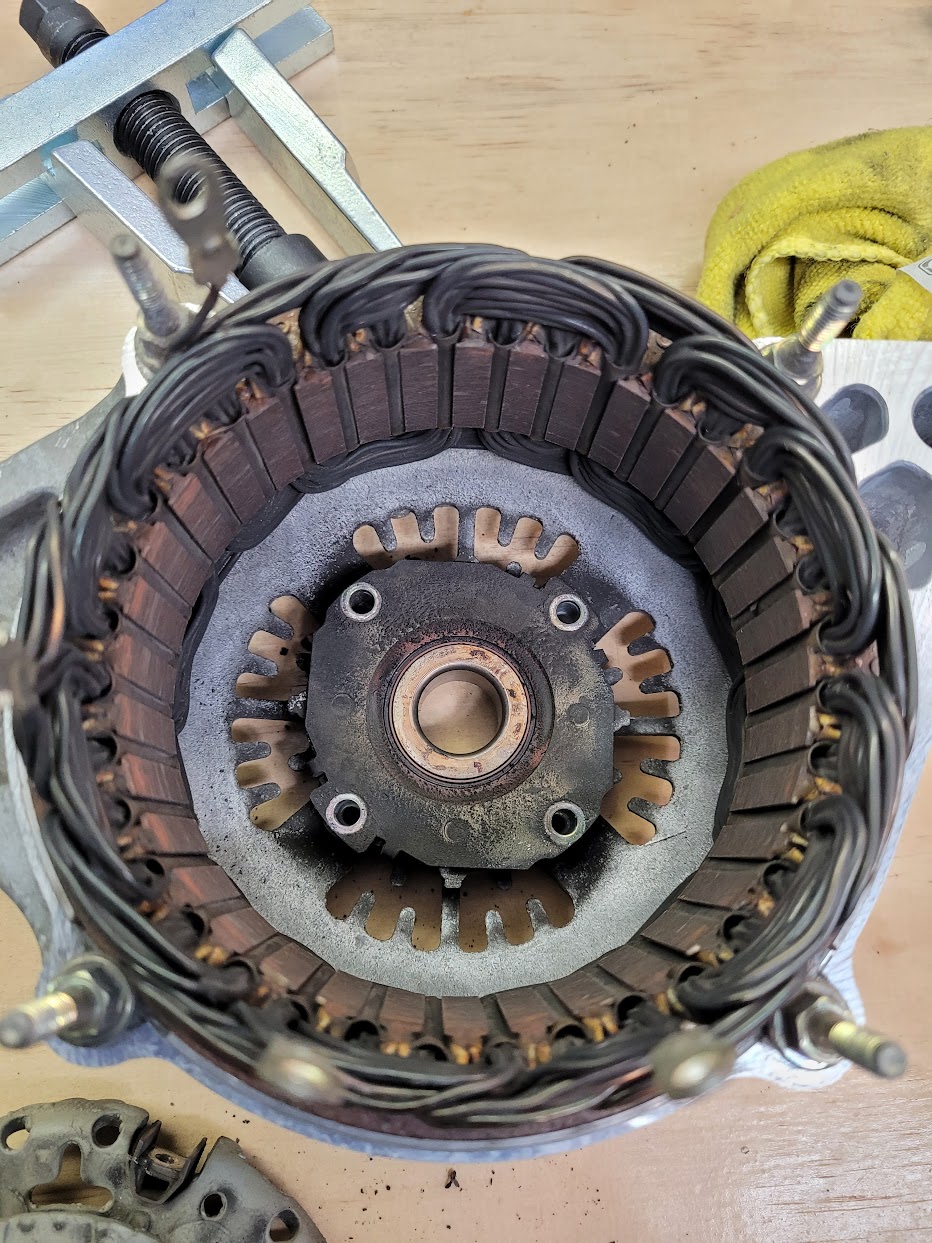
The front bearing and retainer.

AM-JKLVSF6CE-CTOM0-MJ2M2AGhf1ucF3O43y7w98qaDqJA9i9csewUe9OSJ6d9kxxRGB40twijUiBWKIXkJlGBSzAZFKPYC3Hym9Zckn99sXHjbPAlOgtKfHavOr6-B031eTohcoXY5IwqocQhJASu6zaQBRw=w933-h1243-no


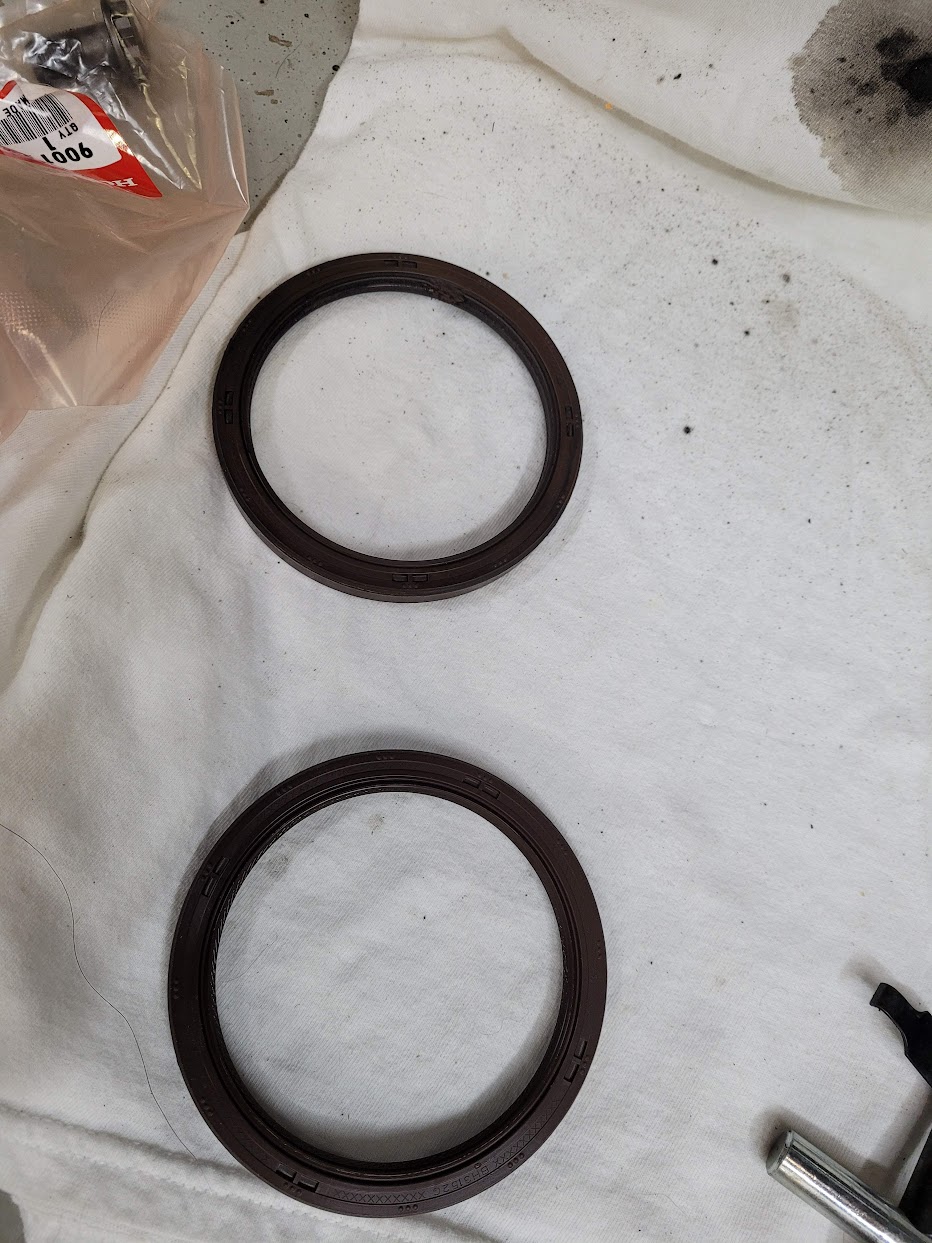
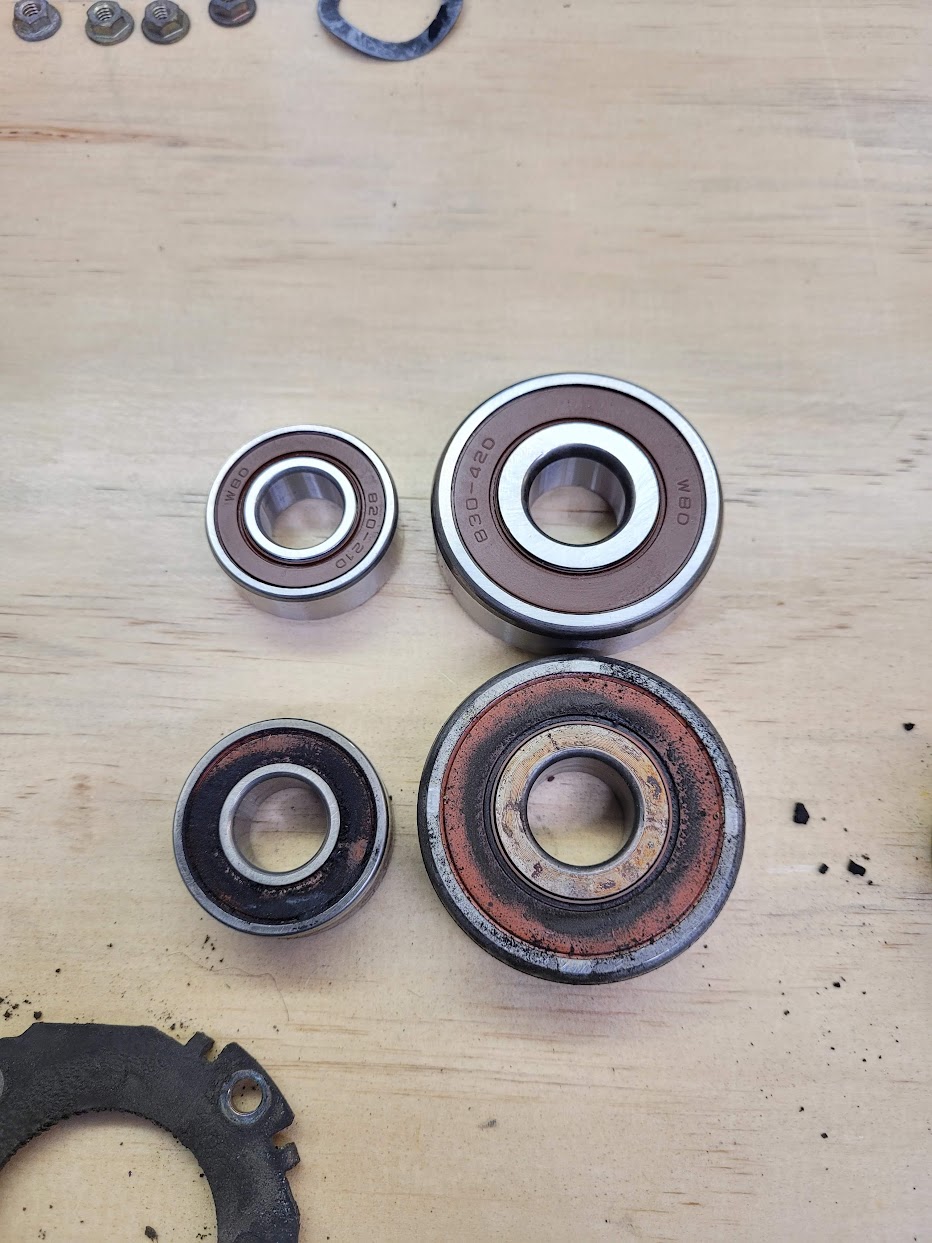
Old and new bearings.

AM-JKLU5CLixwmQIJL5fXvEvaxYmXMkYMjEJLh6ZFW620wP7E2a886peBOB5U1ML380eCaopyMWufxpsgQDqb9U9EpWY9qAtM3iB9jAZRfZoGPMLlsL8fjWOeinal0g8KZbleQCCBoa3CtNh9WpKcAGjKJmQ0g=w933-h1243-no


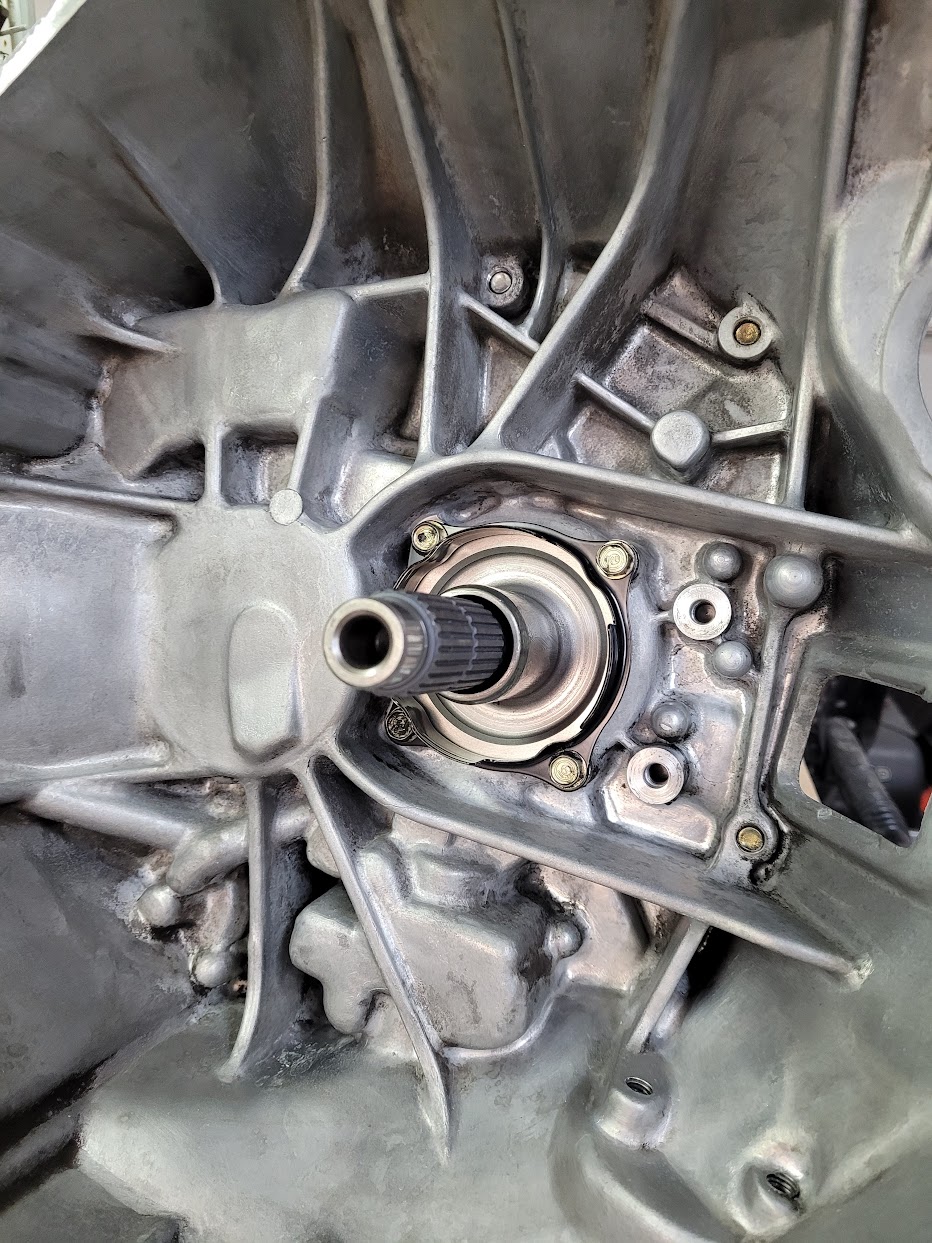
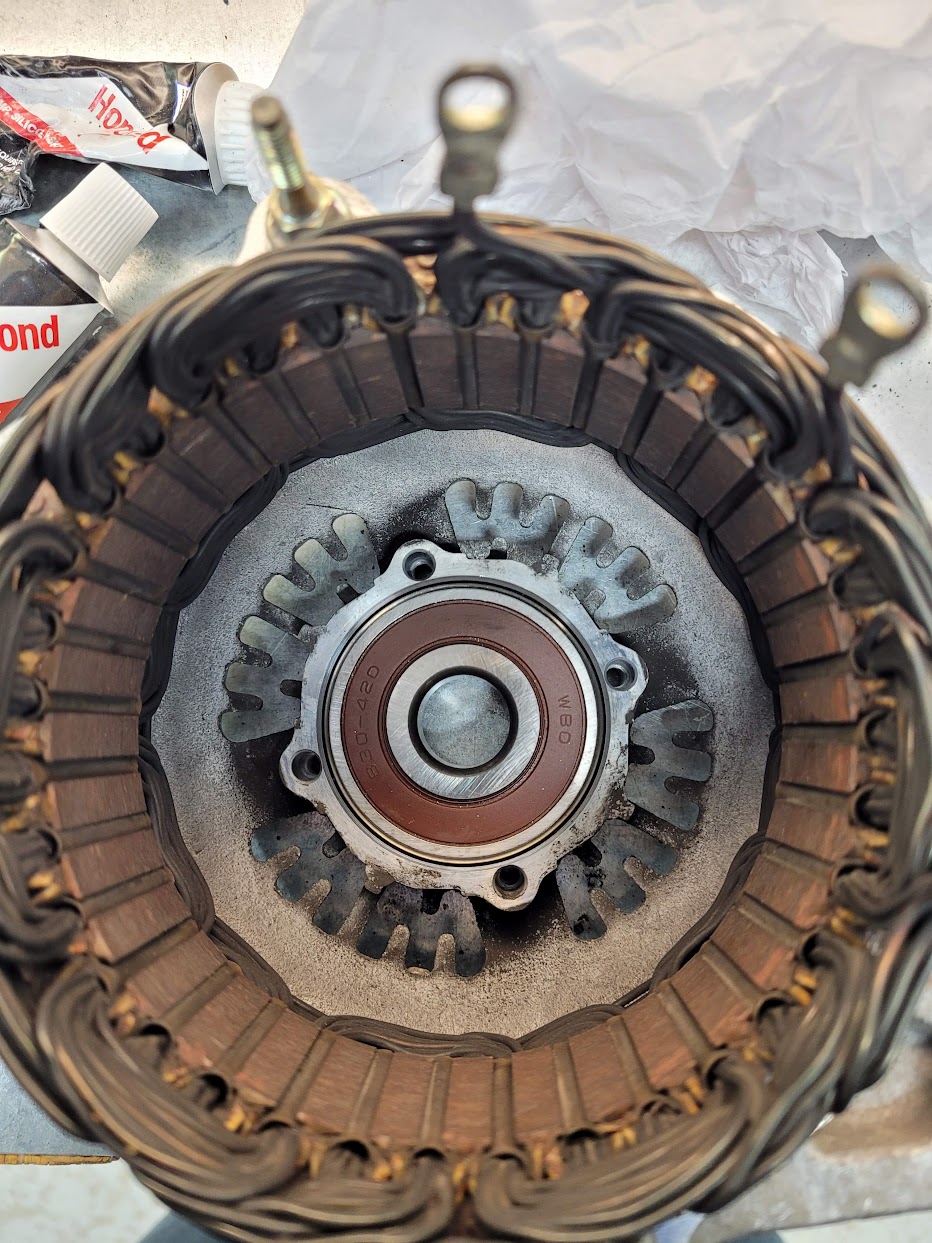
New front bearing driven into place. It is much larger than the rear bearing because it sees the most load from the belt pulley. Think about how hard the belt is pulling down on the shaft and then spinning at 10,000+ rpm. When your alternator starts moaning or screeching, it's almost always this bearing that is bad. Hopefully this is the last time I will have to do this!

AM-JKLV3X4WHEPRoZVcNBZI6vWxzGeEQrgSzwzVFznd_pef_FUmridw4aeaf_NYiEzzufzLMP21xlTnNUmvAfHQR4unmflHrpr1ds1ApxZ66HnrxidouvvXiNocUSfDasyqcKdhBkkVrPp1rY6x5qQ0DfnDPjw=w933-h1243-no


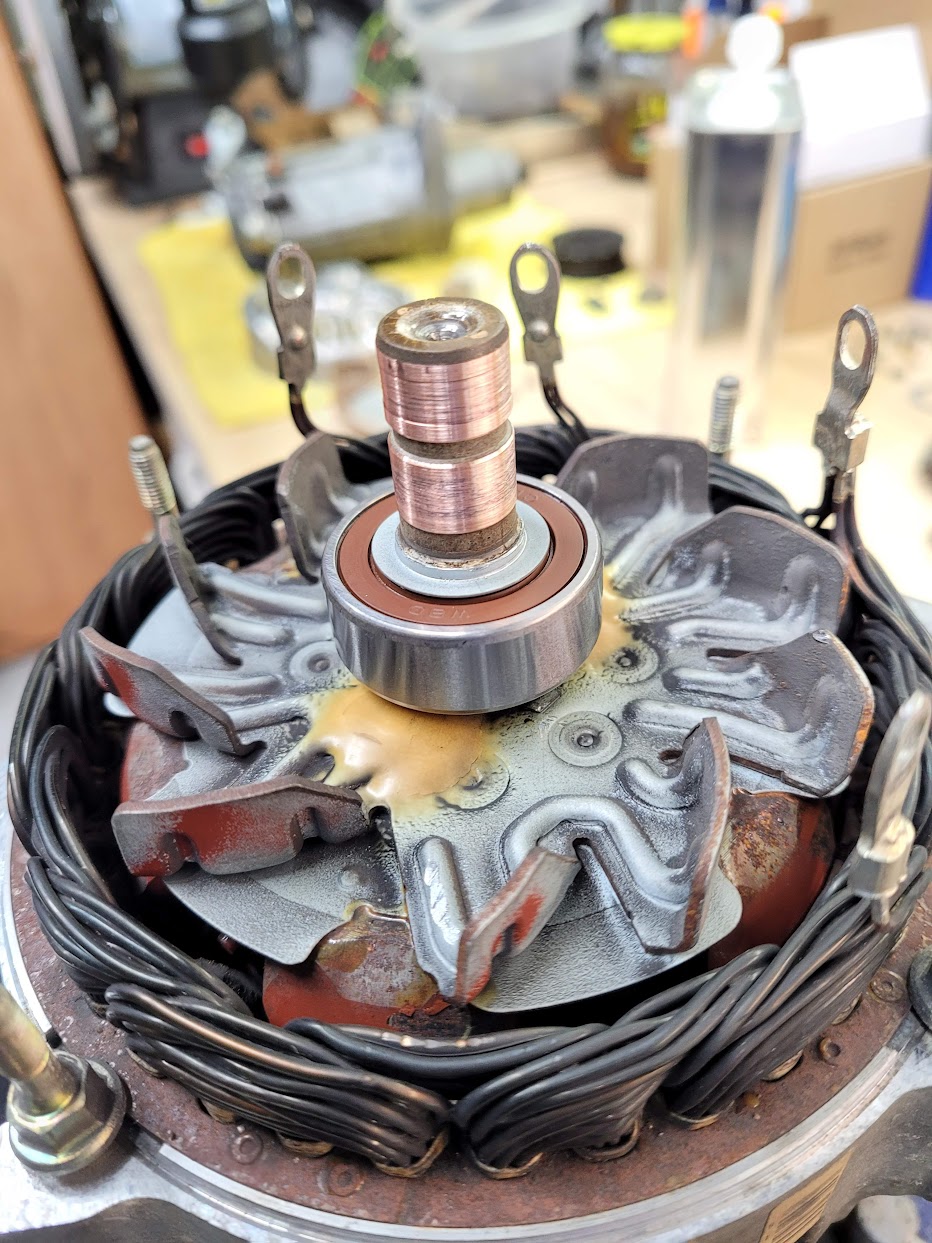
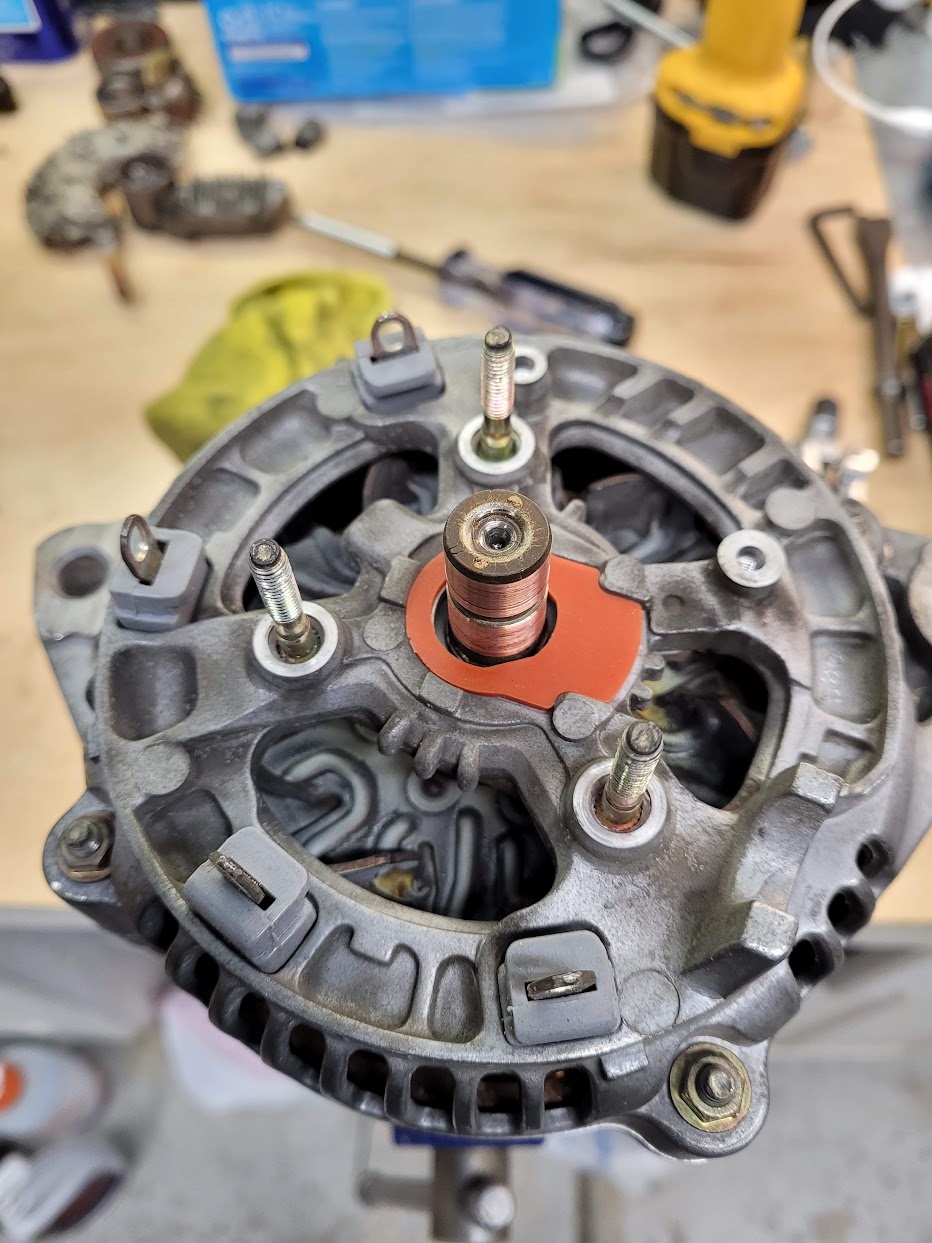
Rotor back in place and rear bearing driven into place with a 15mm deep socket. Note that this unit had a metal spacer under the original bearing, so I re-used it. I also cleaned up the slip rings back to nice, shiny copper.

AM-JKLU4GALNZgBT_0DuY1Xaeev2cIKeOmBX5LEmpSwY9m6ZVCYISLZTiejgGE9WpUdP6ZviH-74ZSXM6k4lRkWp4yqNYzgFMSweolSo6hDmQVJ8L_GTeRwy_IwcA-FyMt63KjIzub6__a01uppfLRH9-PyeZg=w933-h1243-no


Rear case pulled back into place. I was pleased that it slip-fit over the bearing. I cleaned off as much of the rust on the bearing holder as I could with some steel wool and this gave enough clearance for a nice slip fit. New brush holder gasket and rectifier lead insulators from the rebuild kit in place.

AM-JKLUbLVnRQwR0CeIhlmQd12RjvrHZIe14EJbUrMutWEUMIgNfcAR9J6xRB2JSYwEgzZxadVwXTEQ2dcWxHNmPDM_tWC7sNhIP0hA715ZmEObKDVjUU2BfmD2XcWeC3PY5hL1asflO_08j3dfs7bSrhNrf4Q=w933-h1243-no


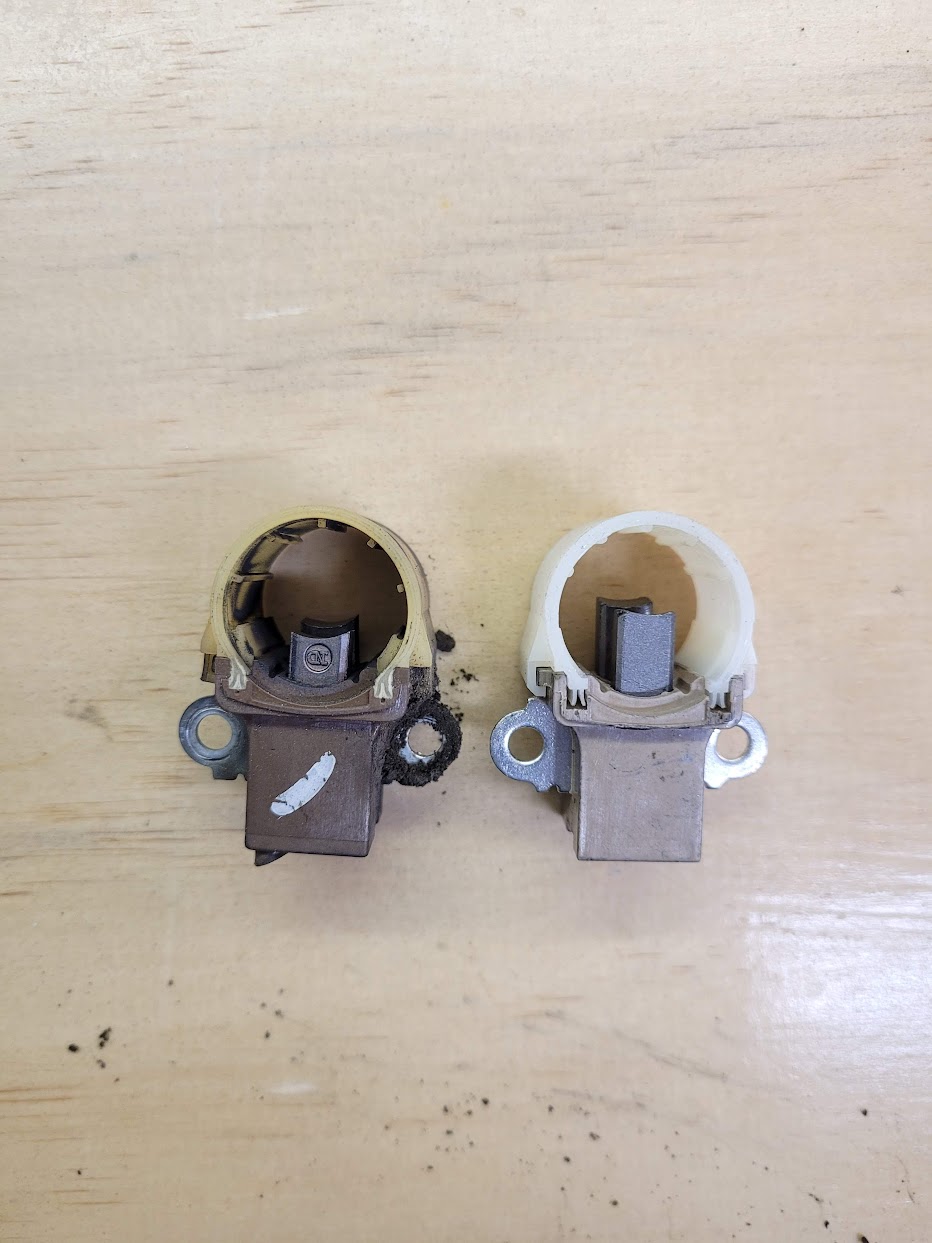
New and old brushes. There was a good amount of life left on the old ones, which speaks to the gentle life this car had, but no sense in re-using them if I have new ones. The new ones will last the remaining useful life of the car.

AM-JKLWO9XfpZgcB4J8uz17-KyUugfYpO0XAvZuxyRXiKkb-9FA6KqrGLh6l32x-76jbKCKfb-FEmSAJMszSBr4_RF7_CCgKOxHziKM558VTiL9G0GrImq53vHGX23y2WD7OSob5hNKs8Ap_lAZOnWR8VFZExA=w933-h1243-no


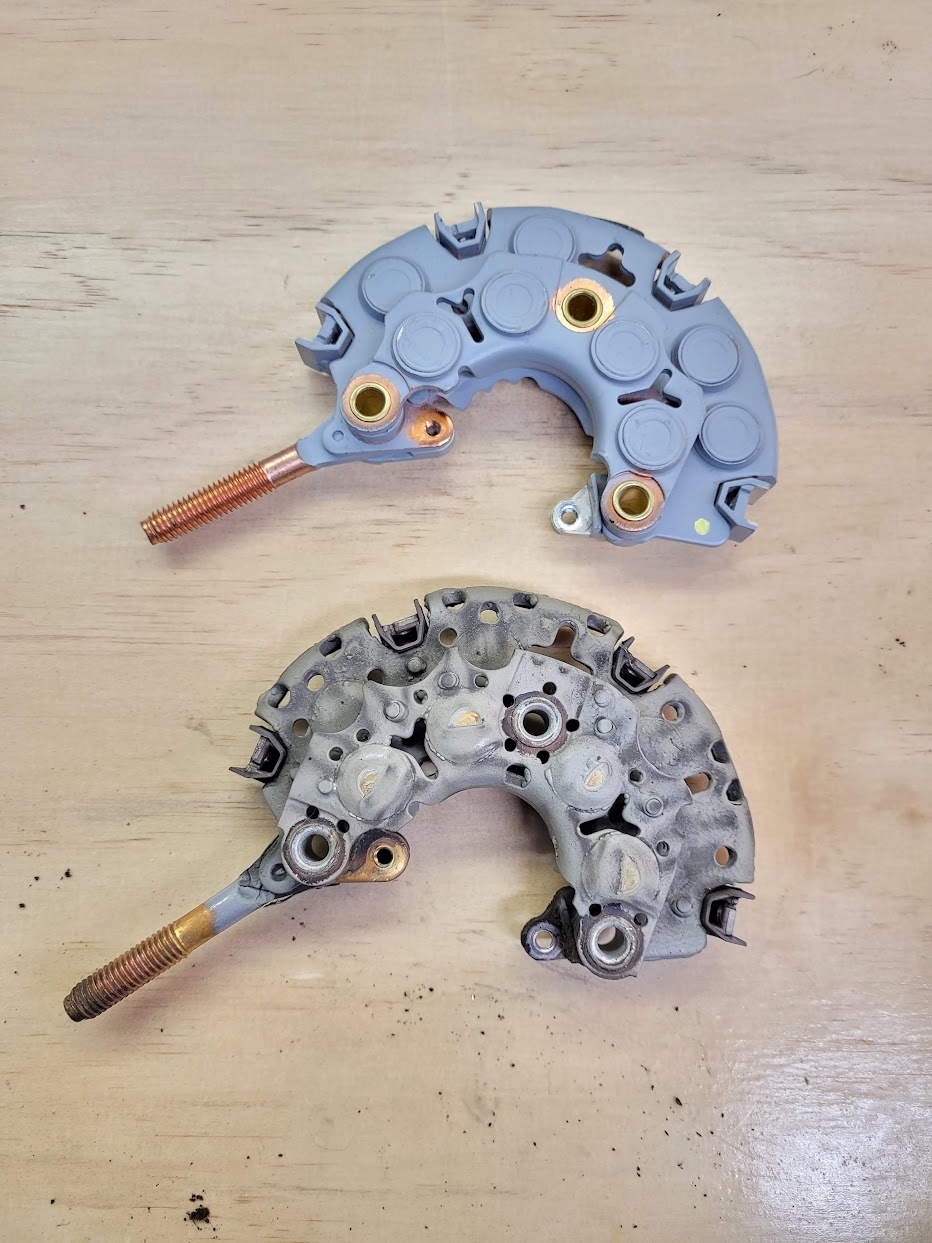
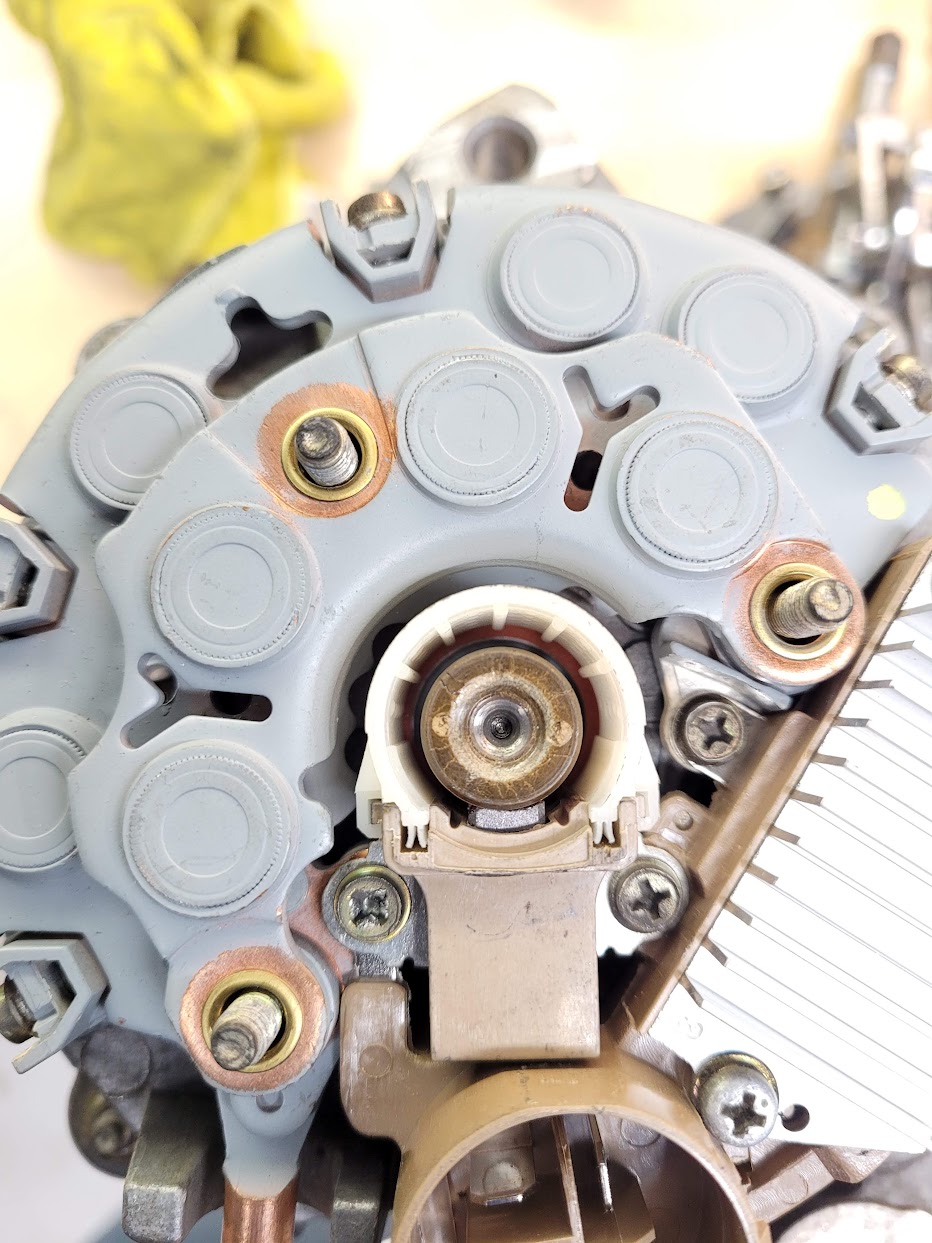
New and old rectifier. Again, the old rectifier was working fine, but who knows when those 30-year old diodes will pop?

AM-JKLXN833gfXOMFlrZ0fEX6WUB-KVlV0ITA-hZygnLvPN1EqgA2sbkz_O_34P11TGf5i1Q7anTbRtFWflcXp9_YMgDDgx-ZW3kdbyKfRbj5fPizU77ETtJBHxXgRYvPFCPQpO9lHnUQ28bg1GEzlli47IoTw=w933-h1243-no


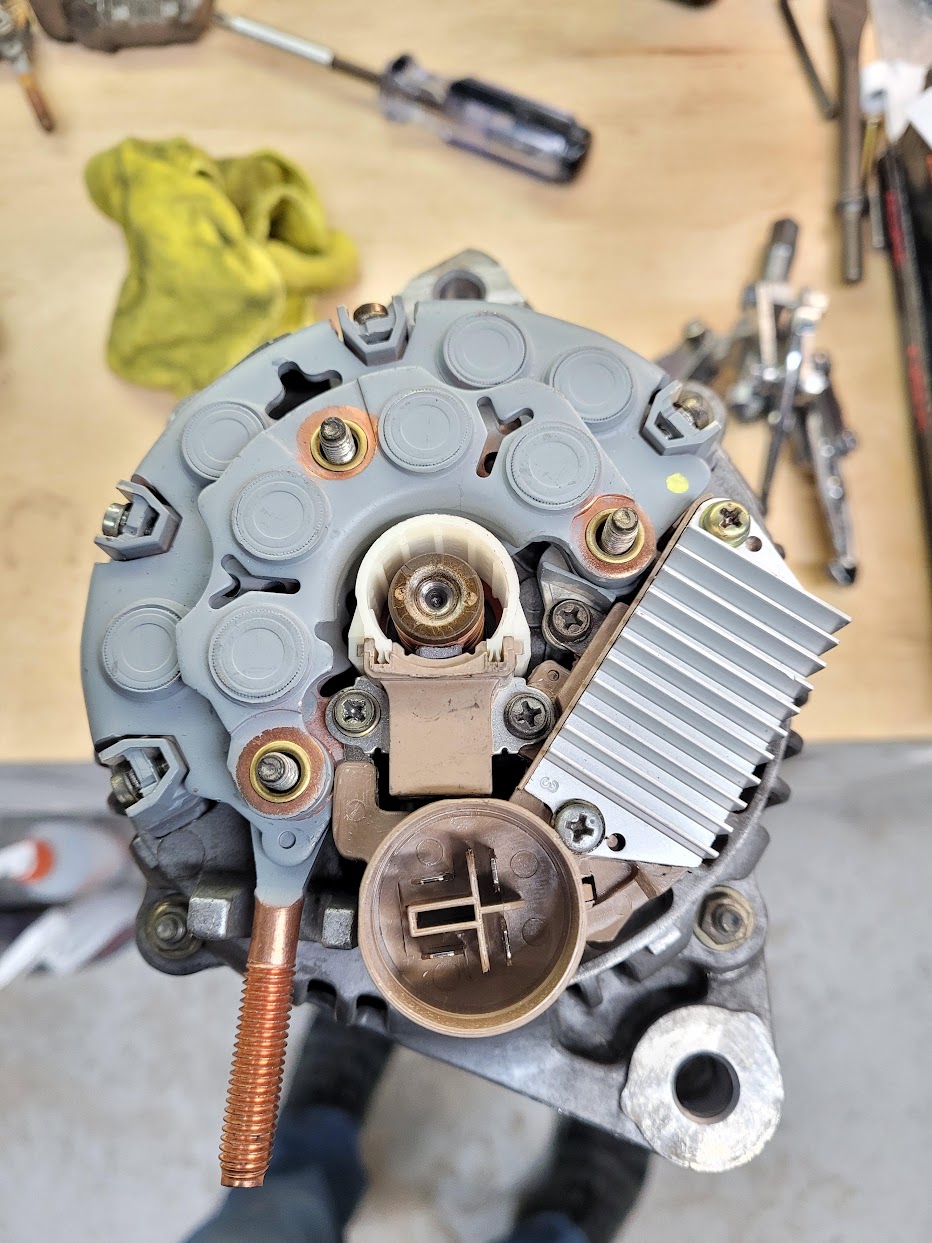
New components in place. I used a thin feeler gauge to hold the brushes down while I placed them over the slip rings.

AM-JKLXXpIr4fj4Yjlb9zRAtqLm0kkmhMyEIg-Oaivm6qQl5ZcPkYrmH69O0WfEUbB9Xp_e63rUfG0eT4eBPECka1whyw7IAc8J0TVVocRsLAjzKd5E_Zd7ibawR39kamlgHyUrnBvV2Qx4iy4le-qkxmzwV1A=w933-h1243-no


Checking the fit of the brushes. You can see I nearly stripped one of the holder screws!

AM-JKLUUTqixMRzYar_0nlPgLa0qVopOveSUuD4pfcd_66tzeK2RMf6KtMrsw0yRUjJdNNozLe7zyaXdsgyQtw8HcGdUl3b02mT54ipplPYjZPtInWXA4ggLfJjKriLNf13ndOGQ02ML0ucxdwtszaXpYcwBSA=w933-h1243-no


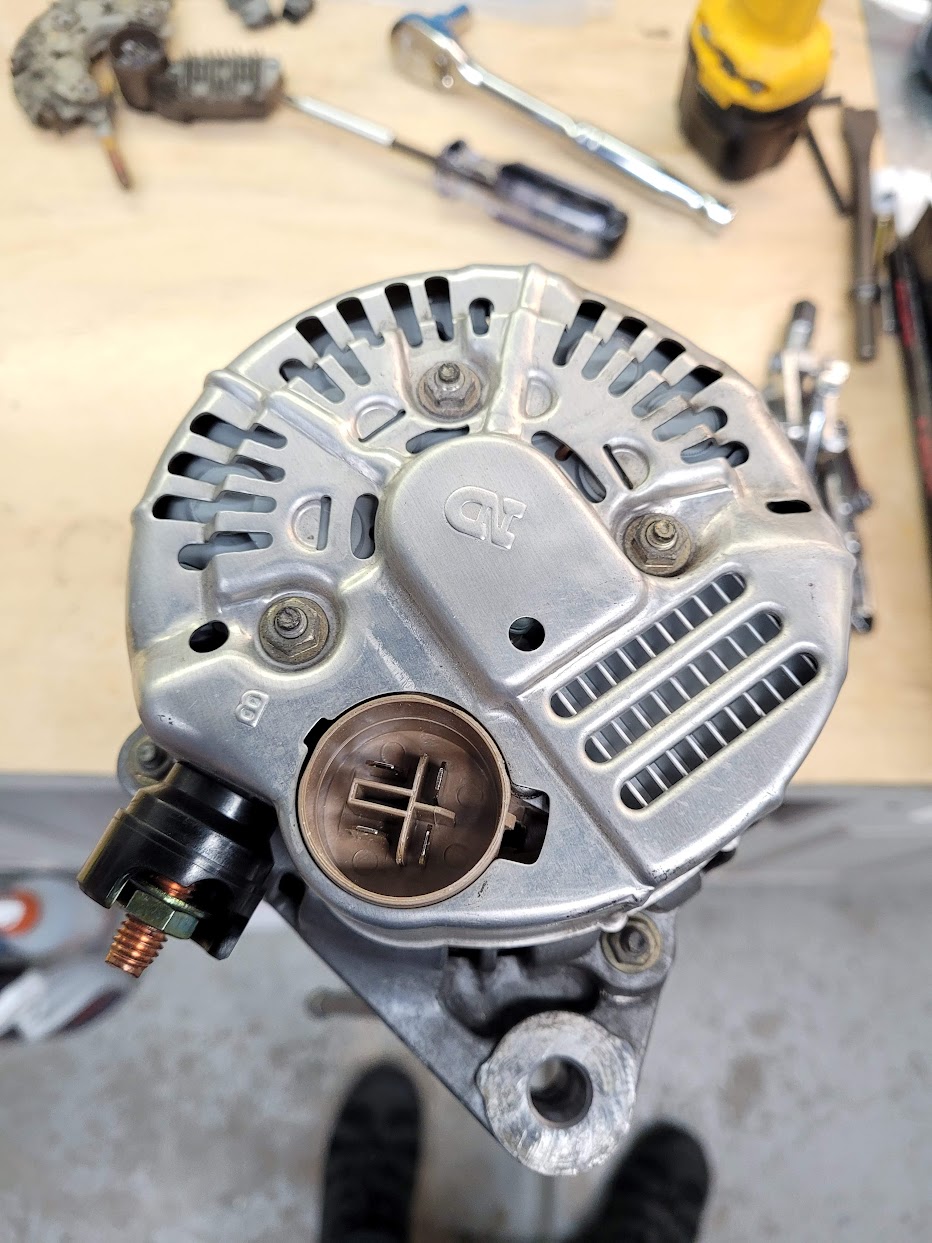
Rear cover back in place with a new gasket and battery lead insulator installed.

AM-JKLXOzefv6_lffL802bjBmSgp4CtSKTn0vhBQM_N_HXlSD4Sf3G_jmAn0HQF-PS6Y4iisG676ZSPjUHj5wyHMNf_WjAViS8tqQOfE9y9NG--e3E1SeX90BOHcyyrohOWE6jaNqgGgXPLBb6NhJ1-idMTbDg=w933-h1243-no


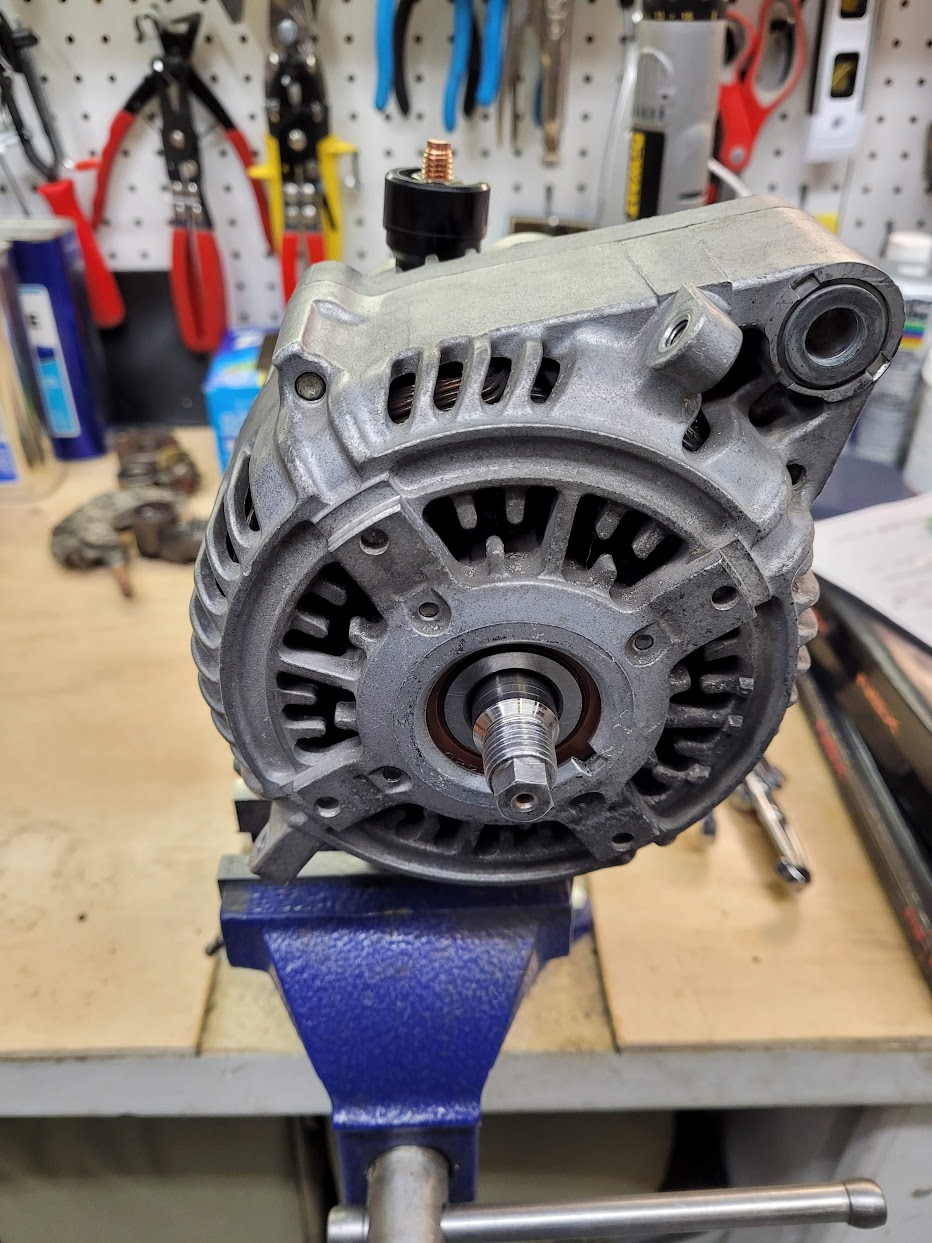
Did a quick spin check using my electric screwdriver and a 10mm socket on the end of the shaft. Only a few hundred rpm versus the 10,000+ it will do while running, but you are feeling for vibrations and listening for noise. In my case, it is as smooth as silk and silent. Job done!

AM-JKLW1s8sSOdv-2EWtGOngCCpK9SqAvYBtw3S3Y695X3Z_kyHzyrrCtNFYGwzlS27Y4FIGQc1xveAQVXjgccUs_3Z-T1QJ6Y8TrxwS-2PNcgE7pNtMvOeyPkpvAoKQ6XMeJ7yWBotEGEhYNcJ2raPoBGHA0A=w933-h1243-no


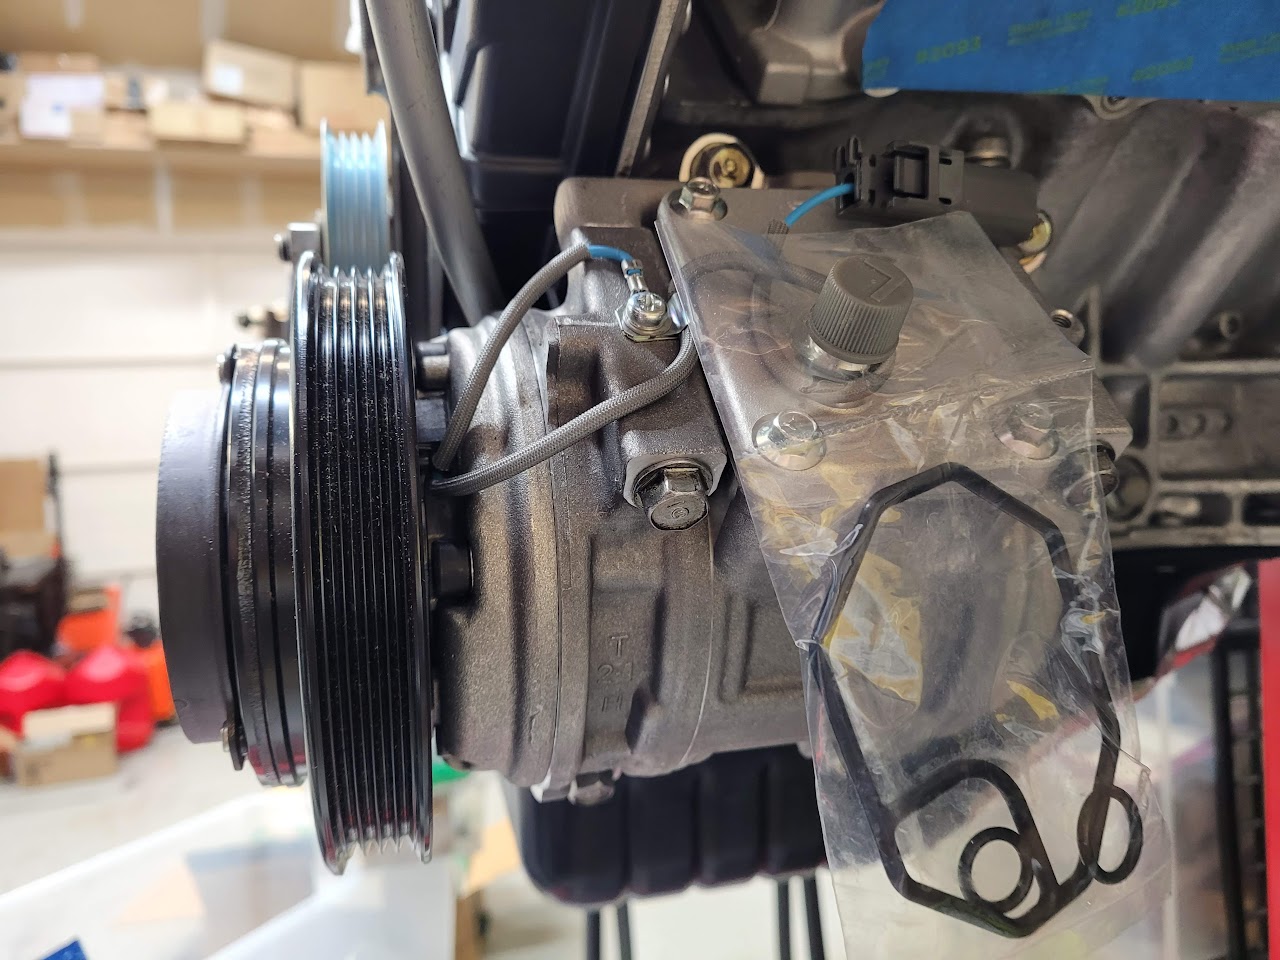
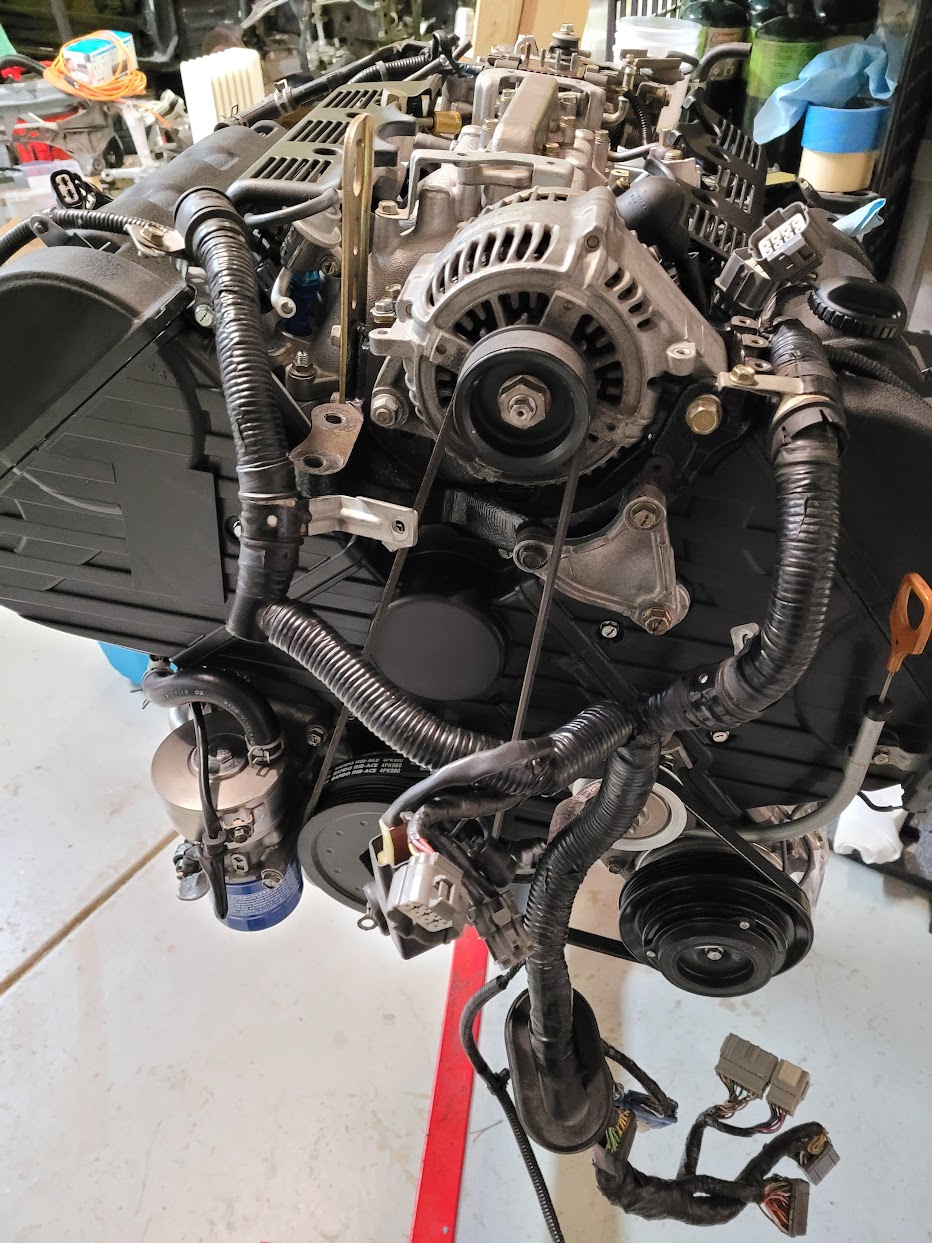
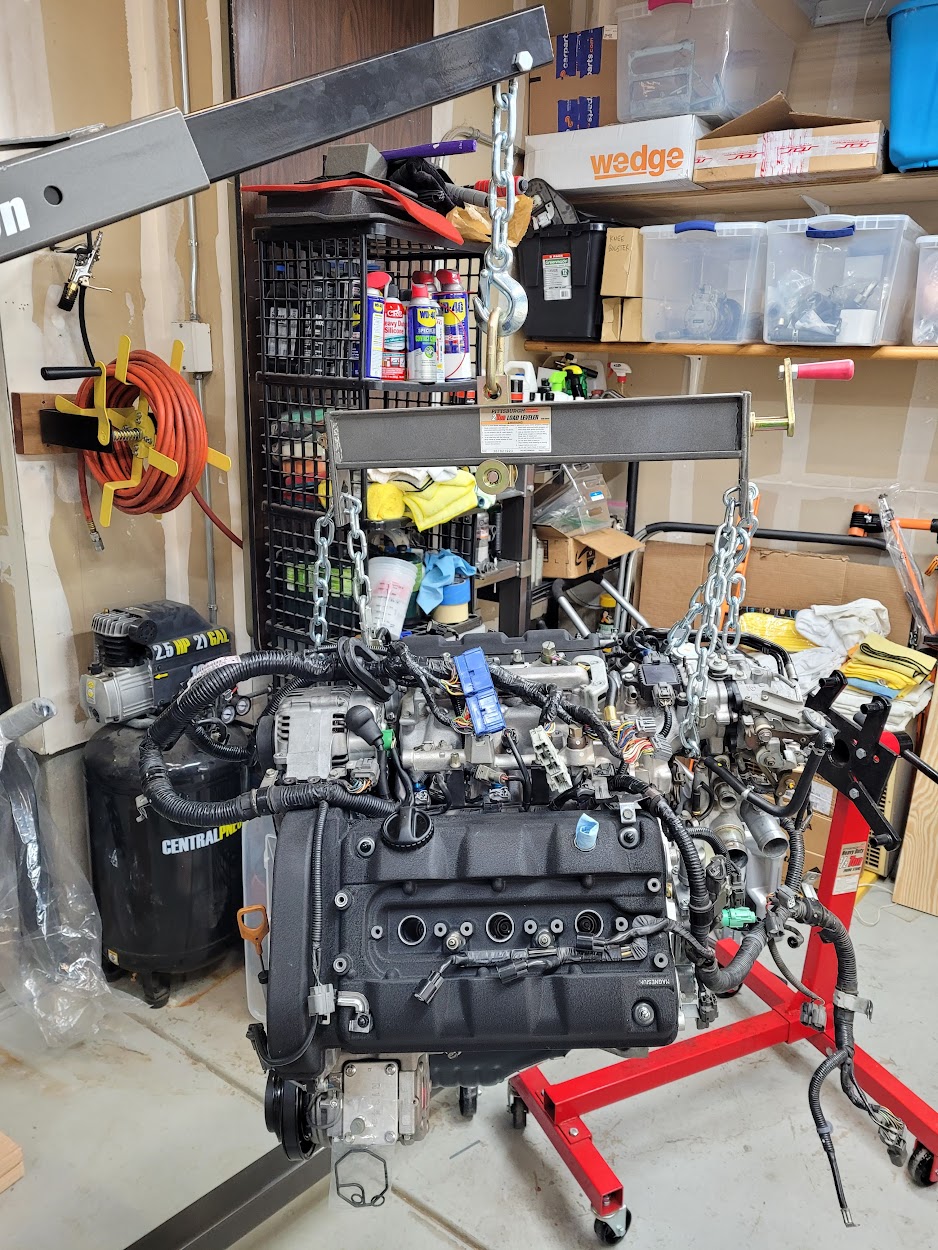
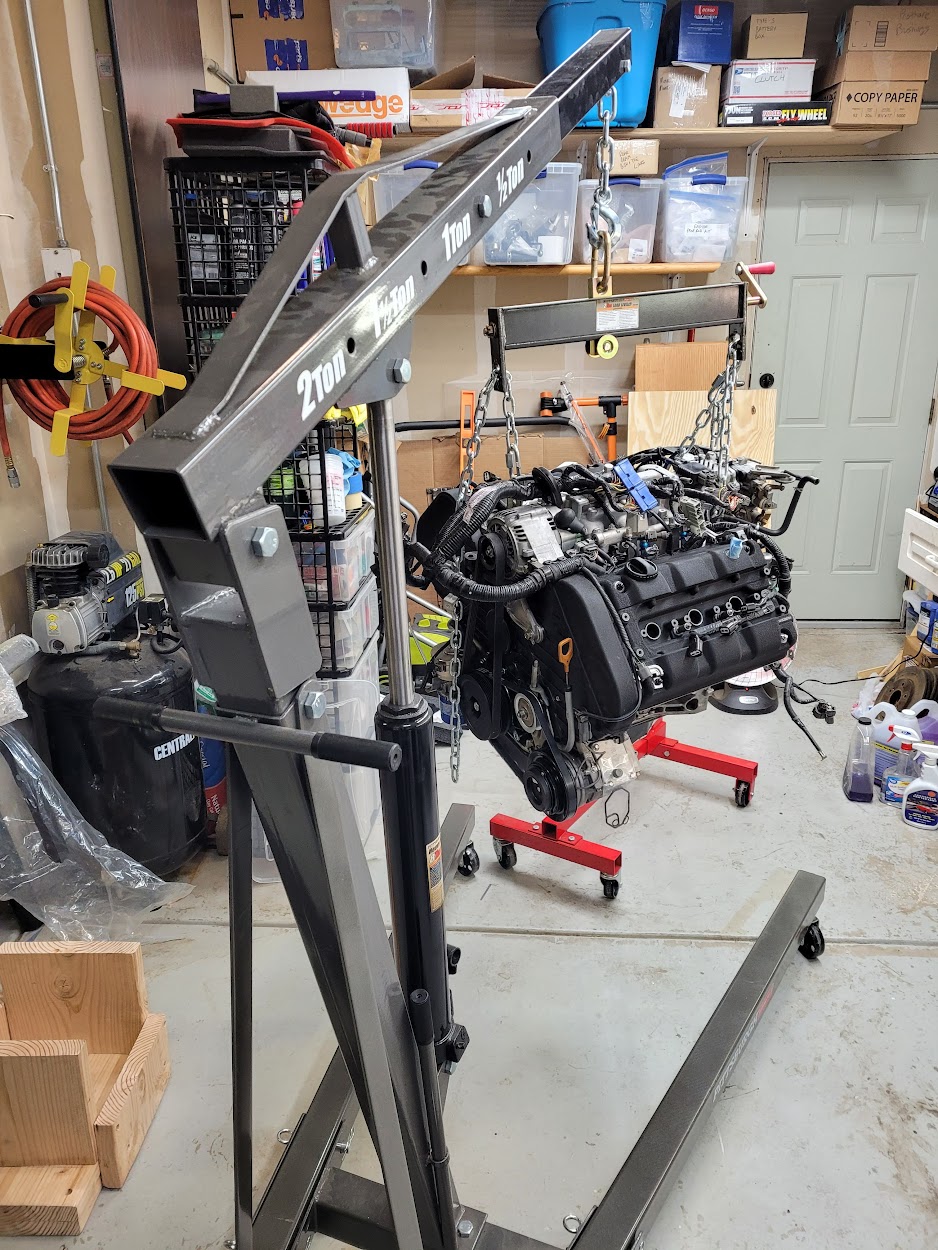
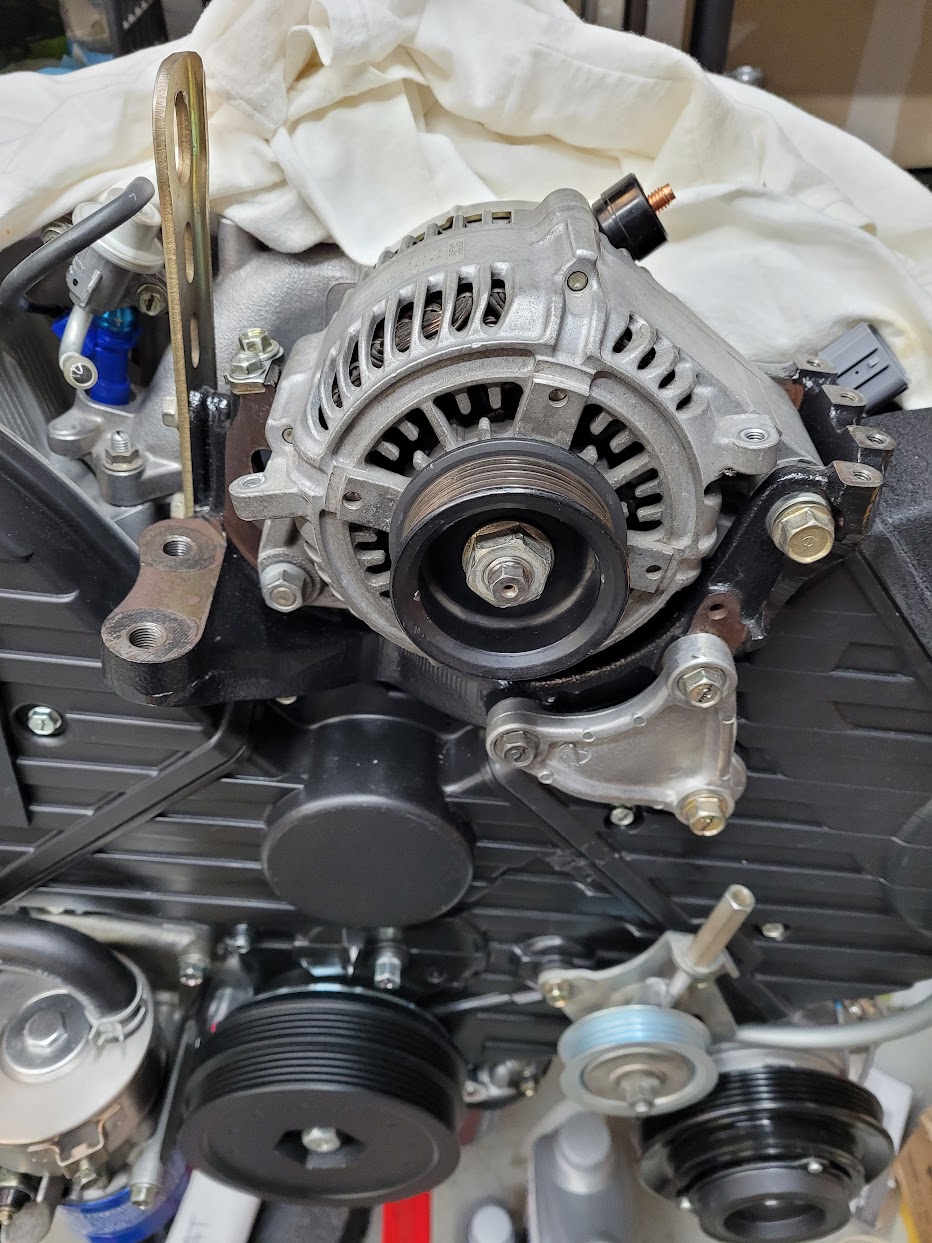
I was able to get the pulley nut torqued to about 50 Nm before my 22mm crescent slipped off the nut (with a lot of cursing). Thanks to [MENTION=25419]Valhalla[/MENTION], I will install it on the engine and use the belt tension to hold the shaft for the final torque to 115 Nm.
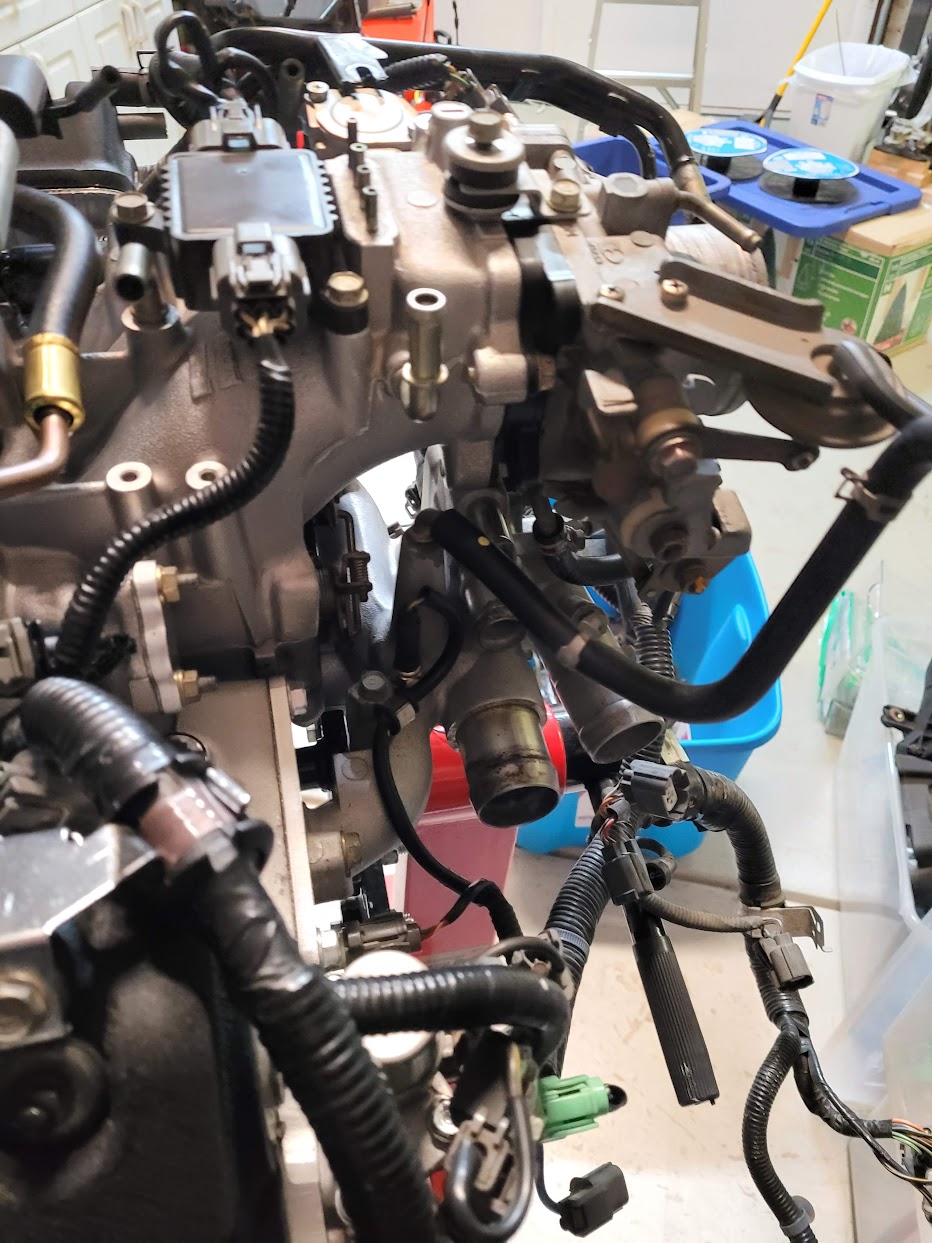
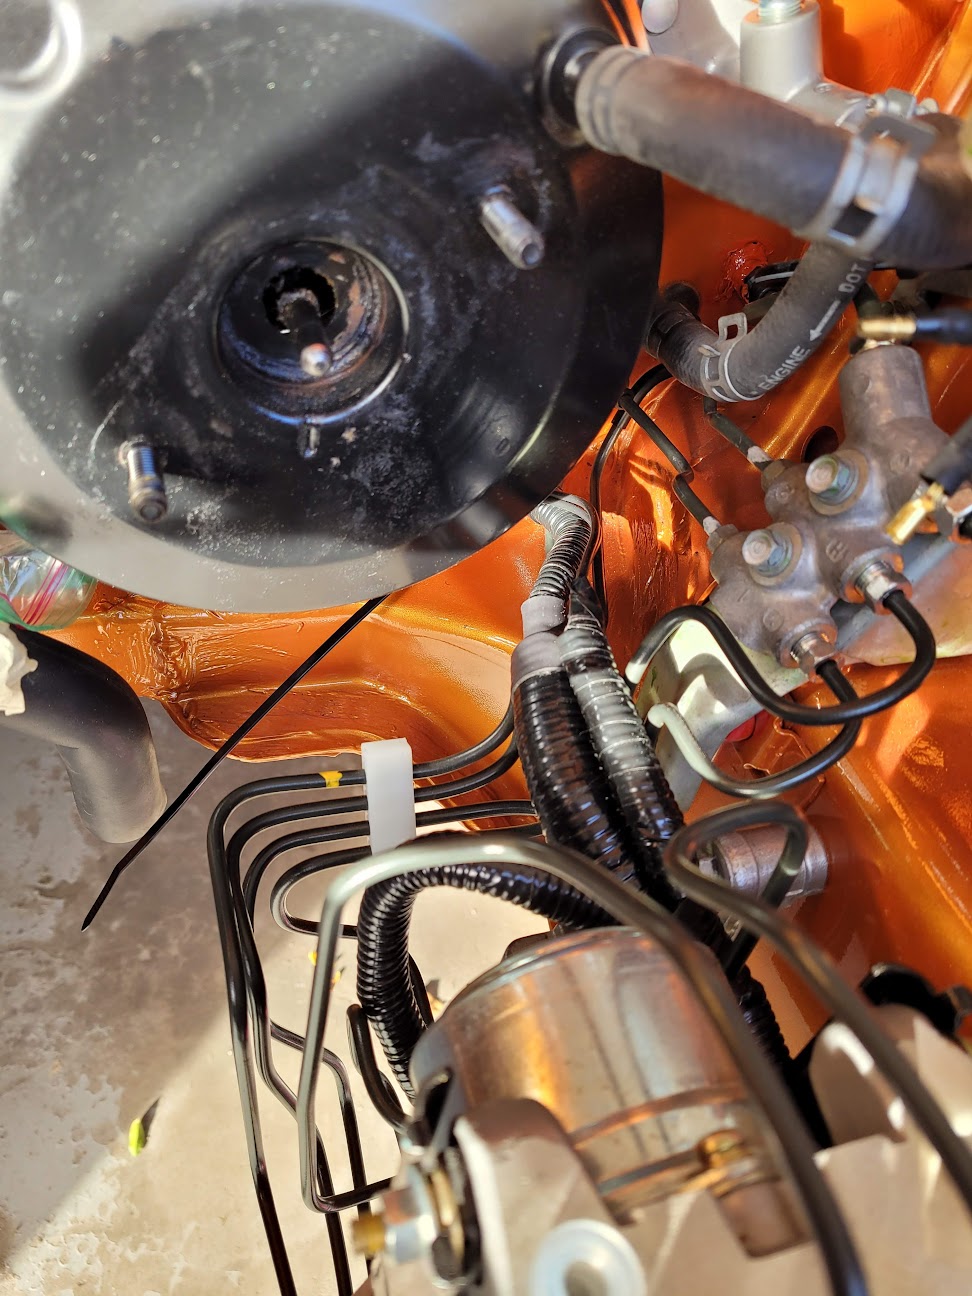
Starter is next.
 
Alternator 3

And she's back in place after 3 years. Note the nicks on the pulley from my torqueing attempts with the crescent wrench.

AM-JKLWIY-DHZxEhBUhn1V-P6Y_GtiN2-KPzl1xJgX_9FLzgG_qtMiKHOkd8AfUSZjo5IPbO57AbiAUskf-QamsK9IGCq3gtUYl7aczjX3MA4sttb3HDW72AgvTmo3KNoGOyzvG9S7s5yTCOFtziR2APheGwGA=w933-h1243-no


I cleaned up all of the old bolts with a wire wheel and treated them with CorrosionX. Should keep them looking shiny and clean.

AM-JKLUBSgFge3v97gvEooC99ojyfRU-RKvDIJyJ9lb_qv3bU5AlI3V-SDLmPUGJxIaP5x6OagEJCFCxGdgV1DI655T482-PfRYExcpD6FFSKwHXXfqCXRS7IWdAp89BvoYJ-bLvxZnJQXi_lpn_ArdMyxgBOg=w933-h1243-no


Then, the funny part. I have two alternator belts. I ordered these 3 years ago, but apparently either I or the parts catalog got this wrong. The A/C belt is 4PK980, not 5PK1100. :mad: 
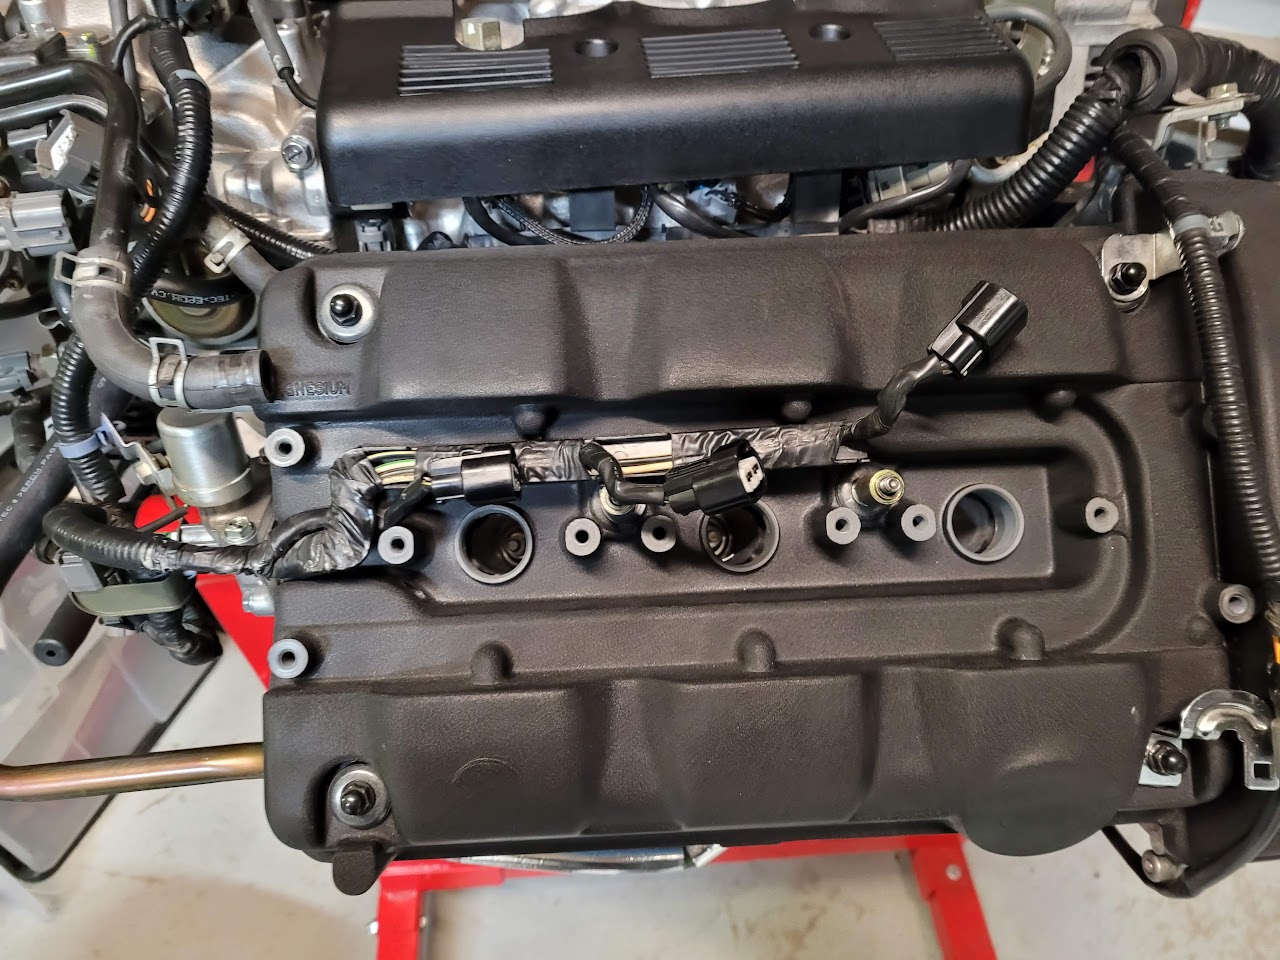
Probably should have checked that during the last three years...:rolleyes: Anyway, I ordered the correct A/C belt and it should be here on Sunday.

AM-JKLVEvm9XUkUbCTf0DuDn9LeymdJ9jM-gbYMAvmWyGfmIjlFo9nn06vkAs5max9SiyvVxotsac-btWzf5gP7DxctgKcA8E31MH0wKBKDjePT1nu4blCy_ixr3iPRAI4_G5-8WT4-cKGdRBPGPEeiLTZOTbg=w933-h1243-no


AM-JKLVxE1gwuzVIgCWimYzkhVB6Rde8rlv9uUOkYTzZTTSUG2qZN1MRzcovT51rv5KmueaEeTRlz8dRlCZxgUxd8kOYh_J3NnWCcTA7yDtAzBPIoYG4lHRX3p0KuW7sgQzwG3M52lRbsJ3KrCzhmrS3z8Kr8g=w933-h1243-no
 
Engine Refresh 84

A/C Compressor

Mounted the compressor. This is the Denso 1193 model, which uses the correct pulley size and requires the 97+ engine bracket. I will keep the suction/discharge cover in place until just before installation in the car to protect the compressor internals from debris and moisture. I'll install the lines and manifold right before we place the subframe back on the car.

AM-JKLVBO-WgLmcv6MkXJqvqr83xlB4Jdbm_PQ9IdNSoQ-cgNwP2CTVLDRbHU5vW2_OV-nVjk-9YaRbqoVXk071us43wYkYo5swtAHSHxsZYoTCxs32nTAOPDbF9fzgL-VCvChif5I1cN29Tu6J3LyhbgQ9hOA=w1280-h960-no


AM-JKLUXR4bZhLaXnel3ERiBiwC7E9e_hIbENk2rErNjqgIJAIzAPAcx8NNBJ25uHTDGyVDxGuaNqWFWb5qBEbWOJckzX5C1OquitPileutB8fsMNwMelDq6_h_Mwy1VmkjmW9A0ijZMWxf8kTchAciEZyZaJw=w933-h1243-no
 
Nice work.

Can you clarify the bearing part numbers?

they seem to be
WBD B20-21D
WBD B30-42D

Or 820-21D, or 820-210? The number seem corrupted by sellers too who are selling different named versions of the same thing

The B (bee) looks similar to an 8 (eight).

And the D (dee) looks similar to a 0 (zero)

Drew-

It's:

B20-21D
B30-42D


The "D" is for double-sealed.

***edit - took a closer look****
 
Last edited:
Engine Refresh 85

Throttle Body, Cooling Hose, etc.

Sorting the small coolant hoses around the throttle body. It turns out my Mita hose kit only included one small elbow instead of the two, so that's now on order.

AM-JKLXoocwf-6yap9FI6dWTYsSBDR7W33ftc0BNtp2EftSQl_Qh-5i5cxepMHmOjxguCjranoQLBdLjk5Zr3FbpKwVQkckmLWha_tkU1Vrt0RlLnLWoZ99b5s4uyvuj1PzEca8oTmkSwWqjtwQ3MfMW21F_2Q=w933-h1243-no


AM-JKLV194QF09dMSoX1g4A26Mlen733zbSv3cONtTaCU-p-8yQxe528FTRRKhXBvvOux7mJQNMbQEQ1y9W7qHNuTAvuEGWzz5qOriSD1iWI5n8TgUVB7V8fPYdFqArkpLV5atj3n7sPDxW8RUYQFSmedotQDg=w933-h1243-no
 
Engine Refresh 86

Wire Harness, Fuel Injectors, etc.

Spent the last few days wrestling with the wire harness octopus. It's been 3 years since I saw it on the engine, so it took a while to remember what goes where. Also, I cleaned the harness as I placed it, using a cloth soaked in 303 protectant. Final step will be to replace some of the crusty electrical tape with fresh tape.

AM-JKLUAGojc-MgaBxdmD1x5wSnm2f7gWP1nWmwXtpy5JX0adCYtI_7PUc-2hTgdDrZmXa3wCf-AL6tQUnbjpUAr-q2hT702dBJvOGVcFT8d9eZ1-SzpqtRuffD7MBBUjNAIy8n9tS3WE-cpQ4HFSrPOyahqiA=w933-h1243-no


AM-JKLVwOqXMqEgEwOxFzS0iGIDTeOCuRQC2QPGljALTRADcg5-ntdlhRtTzXQ1vWI4H_4SecGOEtnJmzoh5IfsW_gK0nCuogaaMhsOTF1FixnhGQffE0WmJhRvAvdq3bxLluhFHtcbK6zXljJR2brbL-Iy7nw=w933-h1243-no


AM-JKLXNRZyq1qlbTS0xTNZbKVrKH4thDPqgXJ8cYjrgzlhxt7egIlTaUsjgIyBLbHwUcXuttdNKcWI3wAwkK27KhNZwrbfx27ekRAe9PMo-VdpcfVIl6Lc4WLDLTezSM64a-WTKe701V08yijbLGwZ651xNNg=w933-h1243-no


AM-JKLWDhNaRLrsWoDUpMFBDsG3LHdDgbX47UXlBoOvW2lhpz1omtPcCfxgjh1hZyaTii0pdjhT7A6n2kqaQOqEcejdqwCX-atp-FJ7B0OXkivdHYSOcnyVHTZECegGe12ltjkm36TwA-DW-3mBzcNV_PY7tng=w1280-h960-no


AM-JKLWaz9dYiIVOgl5vtEWSGeVUFPKywzdeQxYjoPS0Sw8XKgTXthB9OxcNG6Y5tjgxRlED8Fgk8xrvRckzdNdagwOF6U8OT_sNXIYHjte_wLK8fFB8XsOJbCfDyYuBkRMSaTFxFgqbYTQz8WzqSD6hA48Gfg=w933-h1243-no


Got the fuel injector adapters installed.

AM-JKLVAbsdHU0W5k_S6a4ZgDbMqkcoX152K89aZb2nJd-PLrSEyc-J0pa_HDfz8obM6pv5mhkTx6t68Hb2Faba9CG8XPuPuIS77Y3E4pqKnbnHOZ4sQVslLtQ37-QiuWZBgQQA0aAz3Ka828uuzkKN9d44sqg=w1280-h960-no


Starting to replace the cracked blue zip ties with fresh ones from Honda.

AM-JKLVqYbdM6keeTbgV6d3Cju0ZaAe-tMtUpgtY7tUP7D1jGqd5p-dTFZB_QRSAZ3tk9FLXFf621DnMC9StQuLtjlg2y0sm2RHZCu73vAZZ7lTCNgI6JMtqMG44UfYUn9Udih77i2lZpSVmuHp9NVDvQOLlFg=w933-h1243-no


Also dug some of the plastic engine trim pieces out of the parts bin for a clean up and test fitting.

AM-JKLXTumt0FNdGIGkyVomQsLLaylybVtx37XJvTLYmbA93hZhHwL9-PHyagcet8qJ_t-p-rjL4BTw6kZ_obt73zHw_Tl9wA_YAZ_rNcKWGHI-P7kGw1f5te5Qzrg0MEOvUfANpInTtOGxiIBxLfWFAXRqlmw=w933-h1243-no


AM-JKLVWlzpmyFUJG2uamh4FJ_n1pbzCR4O3by6geN8O90C8Oa1mF1B9-YDkmxOWwh6tYoc8clIWbR-3dwglDw89hHIGn58g4Cu75oGN3lRDO3OSEYRgVAULORrYTK2eJ5zuXEOEreqPkkfRmrtBydLB5eDKGQ=w933-h1243-no
 
Re-assembly 48

Interior Wiring

Continued work on some of the interior wiring tasks that will power various modules. This is the aftermarket radio plug harness, which is a great source of switched and constant power.

AM-JKLVsv5Bk6foVtA1vxPdoNFBG3lWUl23c01dvWeagTM7Lwq4O9lmh3ZuOF0cbkj3hKyHzmi-Xm5Hn4RGnGc0t-As0Y8R8bxbkMu2oiI2QwHEes-RI2kiXEi7Mlki80bMlI823Dy90iWFhibHBzJ0QCasW7Q=w933-h1243-no


Note the green ground loop for the radio security circuit. This keeps the security system happy by thinking the radio is still there. S Zero problems, lol.

AM-JKLWCeXhUuBpFtwZUTJRUgGmwJR__q6bb0OjrguYp8nzocM8qQIR7uixGLPx7OOPD4HfC8KKiURYV3ajtmf0m-nRIfnqHTqNbBuogX6vWWblX_N5CwDGWNBOR4NMN_Ppf0xhikLfcHpuZKygHjLDK5k2jkQ=w933-h1243-no
 
Last edited:
Concourse restoration. Hope you'll have no reservations to drive and enjoy it. Fantastic job, Paul.

Thanks! I'm setting up a generous agreed value plan and I plan to drive it hard. However, this NSX will be a fair weather car. No more snow storms for me. :)
 
Re-Assembly 49

Gas Tank

Moving along. The refurbished gas tank is installed and all new hoses routed properly. With an empty tank, the task can be accomplished by one person.

All new hoses, including the fuel pump hose, which was "re-rubbered" with Parker Wavemaster Marine fuel hose and fresh crimps. Should last another 30 years no problem.

AM-JKLUtPM5GO3a2-hFCQ847j2Cl6gt418ABN9ntwb5iYBo-6QdW3ccdKvKZ7o_yL5IZ_G64FSewKPSpr8wHBmeue81BXLKapC32EMqTPOtEXpa3Qopd0uozcddhpoYmSzOWQF5s-Agwo21hWftk7I3bD_Qx2w=w1283-h963-no


Tank in place with fuel pump wire properly located on the rear firewall.

AM-JKLUnbecADgHPd_tzdVD2rOCk-q450iHe9KFFt02ZfPxgST9QCaKsRaDYWd2oyneiRwbb00cQyUTjvObwQXBFtqsfUhw1-qO80V05QK5UwzTNmiQTP2M9FFxplkkqydhdH5KiwvElHYmQgiR8fOivdGyiJw=w933-h1243-no


New fuel pump and return lines properly located. Note the Wavemaster hose is fully E10 compatible, which is an improvement over the Honda hose. Our 91 here in Colorado is all E10.

AM-JKLXQbikCtsEaSYnBzonFyksrxLKHeqmn--VaTlXSkJF9IjnzupNnAnv2JbEqyCUjMU4U5b_E9O3762tyRVFvTJy70s9cFC_bnZXs6ZpKe-zFA8SLFJihg-MKRCNzMYX2KEm_6PoTeSrY6zihpCjGnVve1g=w933-h1243-no


New fuel fill and vent hoses routed and clamped. You can also see the new NSX_R damperless clutch joint. Note the ground point in the bottom frame. It got painted over so I have to sand it off.

AM-JKLWc0AJekOxHX6jc3yjsv624-BtujnWoH060M1MbPgNx_No7qNpZNOFHwiFUU5apqoyHTCAGBe1STKllnLZz8oxXpvNONLD7OI2LvaiT5KT5U0dn3qG5JvMwHXtviBecbo7JO3rtrC54AgjZmiccHqHN2w=w933-h1243-no


AM-JKLUiNhBsgxcaINd_LSmymzoEdyvXYaZohjHu9Zxm_usJupp-3PFXekbM50kEKeHtjIMfZabxqGyL2Cs5fVIXJ7HIubjnAhErdKEDAxSM1eDajgkFzkscFqkHpAw_VvCUqSDRgYXWnMdm-ZzQjPb0f0f9Jg=w933-h1243-no


Slight fitment issue with the new vent hose. The hose protector sleeve doesn't quite line up with the firewall. Considering this is a fuel line, I want to ensure against any ruptures, so I wrapped the exposed section in felt tape to prevent any rubbing. Just an extra safety precaution.

AM-JKLWBLO4p_LA0oA0IicExVFhPdMeTow5mu9VKi1RxsQQflVkQouJa87JzQrGkuBA0OXJlc22mFEzBFWIlFpfj19-YlmJLnqfhXCDIz0BHRB5WztJwI3Tj16muwIo0UjRgNgUz3kpJ0ykFBfswVk-D5h1GpQ=w933-h1243-no


New purge canister vacuum hose. Interestingly, the new Honda part was about 100 mm too short. I confirmed the part number, but perhaps it is meant for the newer cars, which use a slightly different purge layout? Thankfully, Amayama shipped me about 20 feet of extra fuel hose, since the OEM cut parts are no longer available. I was able to cut the correct length and run it. Still have to set that clamp.

AM-JKLX8WelG2mLKFe-d5mrCKPnfhf8fBM4R5o4iF8-_dOIGRxwVgsiIYA5E4gL_n6xMe9219z7HuzUX4vSiJm-U3QP6Mcn6TesIMvwHA2mXLURAhA2T_MO_vDMqOq6-hBl5teaEeZPcPoGjcpV2jy2oSmstnQ=w933-h1243-no
 
Re-Assembly 50

Prothane Bushings

Fully dissassembled the subframe components to facilitate pressing the old bushings. Attempted to do the front knuckle, but I discovered I don't have the right socket and sleeve combo to do this correctly. My socket was about 0.5mm too big and started to gall the aluminum, so I stopped. The next smallest socket was too small by about 0.5 mm and deformed the edge of the bushing sleeve. You only get one chance to get these right, so I decided to take this pile to my local 4WD shop. These guys work on Jeep and bro-dozer rock crawling suspensions all day long (it's a huge industry here in Colroado), so they said it wouldn't be a problem. Sometimes you have to know your limits.

AM-JKLVYILZqi67OSj_zGiz5Ab6weWUmzJaXLX1DzgvZEbJOf5byEFrUhFpms7oeRwQUANyIi08L684DsOMIlOmg1DDDTWxhv3SQLkBa8fGuJddyM1NUcXhdyudXsH2DknWaSsabeItOou8BiOzEQEN0AMqktw=w933-h1243-no


Drop-off is next Thursday, so I'll turn to getting the engine on the cradle, clutch installation and mating the transmission.
 
General

Quick update- work is continuing. Suspension pieces are at the 4WD shop getting pressed. Work has continued in the garage- I completed the engine cradle- John Powell spec:

AM-JKLV2lmjUCKtQObPk_4wTf6g-s8jnnDy9I91fzs-_kAUKCAAqpfQrAHnK2733DJVuCb5q9TANntwD9iOm30YtmTTqHwSrNQjFjkZvq6DsCyue8ieHn1DrBl5KmgEfFPD9o2wVB99ctXqlLUWzBqt1Ep2lEg=w594-h1190-no


Now, I can get the engine off the engine stand and install the clutch.
 
General

After some assistance from Mrs. Honcho, the engine assembly is on the cradle. Now, I can remove the cover plate, replace the main seal, install the clutch and get the transmission mated back to the engine.

AM-JKLXCJgRro8_nZLfjgJn9DxJZ9z-Ezs3R42Gy4eSBM3Hhi0W7k8npBrZVrjPtywsH2p0JiE38hh6WDTnBG98WTV_aCyls8YDSdl8aczRgrs54PdnKrZKFTbovBBlMR6T7wIvKcxYS2shYuXE5gxFUsRCRUQ=w938-h1250-no


AM-JKLUvb6QclkCeUZyvkLnFIGPonWv9lv_-E6G6DS5Qa3dVHC-ZlMxkkv6j6ffPqIQ0K-b5TGRFWI1KC1iDDzWR924oSVTYiHfJ-F8yFBVDJ3m2VsKlspswbic6vvAo61K0l_lUXKhkCUe5YfLchm4mcVZUGA=w938-h1250-no


AM-JKLVw1SH2SDqenTFU75Cs438EQ8oy0hiuoH-aKvPgYvqbveyb0cmZrF4szXPjuSukCOdEE7QMtGbSFNtSEZRVWku4pyNLmIb4vVC8aIrqYJ0Us-gNbKeymOZmEwC34HB8cgHmM_3kLDrQFwTPC4IFEm6m9A=w938-h1250-no


I left the crane on the engine for the time being to prevent it from falling- just super paranoid about the stability. It's fine though- this is just for MY mental stability. :indecisiveness:

AM-JKLXvE6YfXmWckjlqnhTQX1gcXAbdJBR8LnUJARJSoViuNTHHHnlpyOLMshyzp_O7P4-o2Udkg9a7fN5dZ0eFzjPoEIvREHczgj-61UhLL9TsXQ_Cn1J2MDMgl44oxUAVXqKHNY6LP_i5N-YaCdO3D5S3lQ=w938-h1250-no


AM-JKLVWMH6amDJJPT5fGzxtCegvNrQbs0w0rZwGPDRv8SKu_qtI-Z5K_v9JqzTyUajqwS-9-oJK57wMI5LKRKI3VEBBPEL3Ydov1nckXJEDVdmz_Rcd4GEem5n-nH4iu595117yHKO5KdiRMN7wkSqqti-Uxw=w938-h1250-no
 
Looks great. Will you be mounting the subframe + engine to the chassis in the garage? Curious how high you’d need to get the chassis off the ground to do that

Pretty high. Basically the reverse of the below removal photos. First, raise the car as high as possible on the jack stands and then hoist the rear from there. Less tipping forward that way.

AM-JKLWt7b0yDAwhRuFYUkqucKuzNICiyrhFs1aXV3GUFPHf5TObXpPah1sJcNGuLlXrGBcmzRB8cslZXA3TFXEp5naXLPHEv6V2DG5UdxNP11hLw2PVefiCCDLgpYUOrsLCDetzm_vP_DaL91B6aHltTUaqlg=w1278-h959-no


Once the subframe is positioned, you lower the car to the lowest jack stand setting and then use the hoist to lower the rear down onto the dolly.

AM-JKLU5HSumcPNbGdu4-G5evzXASGq286SAMehYpLNNxt0zK4uHr2G4mmeS8NI4YH5Ly_m8NTaey1UfjHbSB63Di1IO9DYoPw7LnMtSUG9ZaQrrRFt4cPwd5yUzsk3sFOODS2JD9gfUQfFywlibiU0y8fvDjw=w1278-h1088-no
 
Engine Refresh 87

Rear Main Seal

With the engine on the custom cradle, I can now access the rear main seal. The current seal was not leaking, but I don't know the age, etc., so now is a good time to place a new seal. My original plan was to remove the cover plate, but [MENTION=33247]MotorMouth93[/MENTION] convinced me to just pull the seal.

Cleaned up all the old CV grease/oil drips, blew out the threaded holes with brake cleaner, wiped them with a microfiber and removed the seal with my handy Lisle seal puller. Really nice tool.

AM-JKLUnccnvhEgJ61av8ZX6BZi2xuFa9KkbD4MutT68jvPwEJ3Cjut5WlVbDJi1MGMC4L-GE760fhONXqqfFGKBZg88h64pyVvZs2QNLx2itXbDaYVaUsOi3-bZfmRXLpX9019vIAIBWnuDmZFON7W3yl0fuA=w933-h1243-no


Crank exposed. I cleaned the rotating surface with acetone and then applied a very thin coat of fresh Mobil 1 oil. I also applied an "anti-corrosion" coating of CorrosionX to the other metal surfaces. This means wipe a thin layer of the CorrosionX onto the surface and then wipe off the excess oil with a rag. This leaves a very thin amount on the metal surface that will displace water and preserve the steel.

AM-JKLUsWa94IruOkKgrG62I-ln1EvTUxxS_Y7Q3TFymXiQ7I8ICt5xOEnc80PQ94P4U3shNWvYWG1bS65kipdJKY0iuq1CAdbOaTzu3DnUStYSFylM552OFtg4nl3DYrn_b3Twt0DEbTy5X_-wI8AZouWhzig=w933-h1243-no


Old seal on top, new seal at bottom.

AM-JKLVlYoupOGpLgpzamyKj4Snv-ds6Ooz0vw9g36aWv-QXvdLNqA2pxDlu4_LLF-Ax5i2bmBL9k304eaHj3DQULK0wNtvQiOk4fHIAoR42xBhHmbxrXHYLWHi6KB2brIIndFjfiF8HXjiOqGKFs_GOm44Heg=w933-h1243-no


New seal installed- make sure to coat the inner lip of the seal with fresh engine oil too. I use the method I learned from my master (aka Dad), which is using the blunt end of a 3/8" drive extension to tap the seal into place. Checking with my finger as I work around the seal. It feels right, but I suppose we'll see. :)

AM-JKLUwaousG6541elj9R142ld_ZM7Q7PaVdhD_Jcvjw-O_tN5outxn2WDseP4nTXkGqBgXN5OmueVuKATJBVjBAIA_YdZOzgio7RAzQDpB9B9PshOu8zRK8aWwcIUODdwrUAcAc3RJ5dtWA1qxqQ0tbYx6BA=w933-h1243-no
 
Engine Refresh 88

Flywheel

With the main seal replaced, I can install the flywheel and clutch. I chose the Jun lightweight flywheel. This part is a single piece of machined chrome-moly steel, which I believe is a superior design to the types that use a combination of aluminum and steel friction surfaces fixed with screws/bolts. As a single piece of metal, this flywheel will expand and contract in a uniform fashion as the temperature changes- just like the genuine Honda flywheel, effectively eliminating any chance of a mechanical failure. This flywheel weighs 4.5 kg compared to 7 kg for the genuine part. There is an "ultra" version that weighs 4.3kg, but I chose this for better driveability.

AM-JKLWVc0wD6OwVsN0DtRL0aJ4H6WfWq3zuczPlRHIHYgFUcAxvIhS4NKLurodxePNbdNATSMrH4MtRHHuUZTw1Z4UJETegdQCgc-CrRaWaIpZTskx5x_ZuX22NJYmGPLpm_gmgm05478b63MT86Xi6MHTX2w=w933-h1243-no


First, I installed the genuine Honda pilot bearing. I heated the area with the heat gun and then tapped in the bearing with a socket. No drama here.

AM-JKLXVNgCTiode4VVIjyLo6LDlwsOr7k9KYnzEB8joQJhcqKHHVr2QNFh27aec3krDo2_37CS5S9Mq7SckYpsq-UuQeCDjfdJlmcoqvSvA2hzuPeWv463ster-z5dz5p9KDRjQK5QyBygBRGXzPL-Mnmz6uQ=w933-h1243-no


New MT flywheel bolts. For the AT-MT conversion, you must use these bolts because the AT version are too short, since they only have to fix the thinner torque plate.

AM-JKLW5LVEI1DAzEEuCuvgRm3u8ke6b_eysxEFDQnZq3-VH41iOmWSNuqJHOP43y88buFsvENqRgPyox3l2bfTL58oqDrQLSlgCLLkKwZgx1vS42nc2TpVXMwy5QJVqxA6HH61MKCgD9ulKmjItyPPQAbcytQ=w933-h1243-no


Installed and torqued to the spec. I used a 30-50-76 lb/ft progression, following the factory pattern. I have not marked them yet because I will wait a day and then re-check them. Often the metal crystalline structure will "relax" a bit and lose a small amount of tension. This happened on the head bolts, so for critical components, I always give the metal a chance to settle and then re-torque.

AM-JKLXy-qCzoIBwgeDK5AkyqwNziOSfUqD-f36E_ZbhlSQyk60iR8Ddfgd8tf_VIgDt0D87YVYjqKCOJ_V6ZIJ9dvRe9jX0ZrY87STCsMLbRU2zxKQx7f4jenJDbeduH0NgE9rWU9bZnepXPj34gh697eQJ1A=w933-h1243-no
 
AP1 Harness Routing

The exterior harness is routed. Now, I can resume installation of all the front bay components, including the hood!

Main lines routed cleanly.

AM-JKLW5H6GedB05FCEPGQBoszIR3I1jGK4-p8pXm8PLej9HzllBeWQrPZzByAUCIO-Wcb0CKoeXPPahmeeAq9UPM1-TpiBZy6o7uVXbhoUELQqj2ri7eJzKmQzMy2AJf03u6Sf8DYQz26hTm3Z6wOohHK-F=w973-h1296-no


Grounded to the ABS bracket.

AM-JKLUr78gpETW0UU6JLWanyhe3evcCjToofrXf-QUEf9_CzTMpliPbhDJuUHK1F8UYJs_62FjJfH5fjnfJdAb2KSWcfVfzmjezDtlo769FgWvl8znBTowRonY_-udZ_cCd-P5KyVbW2eS8uP4P_OvfoZoo=w966-h1287-no


The SCS check terminal. I need to find a way to make this a clean access point. Maybe zip tie to an existing harness?

AM-JKLUzDEbqHFQq9vDZYDK2JmBGjeUCRgGuFEqSbApHkeODx33C-5x7fEj7kKCDBHs8OkqIDS_YzE17zABVFpPfcR4rPzLeSfNW4NhRwUBHwvJ-n7xv0QA_Bc1p8KyaFLHdawpRQ1Iw542ygH1OqEABmgI4=w966-h1287-no


I follow the T3TEC method and use the FR brake hard line as an anchor point.

AM-JKLUv0N-z8mI9K-SxXpnwkKMSwtQYG0EgHgZBuh_YZS15ZiWnhpcXvShS3I7oypRVEOO1-t2fEJkttDALCmBxbeCBeP54B4NXn3GBw83nl2iu7LPRUtHSDpuMsEhSKTdKCcU5TGlXy2x5LiwsCIoP6XMA=w1280-h960-no


Routing into the main cabin through the firewall grommet. I did not seal this on my 91 (using the KSP harness) and never had an issue. Still, I might put some black RTV on there. Note the main power leads running toward the fuse box. You can also see the new washer hose. It's now clear pink instead of black.

AM-JKLWtX8pWRWLStXrPvuffULQSk_O97q1ejAP4Sb7IezAAirHAFaumJVqANsBv261FY_aAG4OX99bBLdSE6CbFy4Nqzv_tpTJS43rr2Ll-o9YEigJvHNIx5pX5ohQSfmKJNd25JI3HWhtZsDX9m2xrDWL4=w973-h1296-no


Main power leads routed to the fused power side of Fuse No. 30.

AM-JKLUUvWxdReFbb_ltd_BfK7UJsgFFwTUfm1GMdvVhDvr4r0LkL3s9MGGGz45jFxTsjDprGTVR_31oHsCg6o40PUJh8Vp9Tda9_MXINYK_FMg7ZKz253_478RFc0bAa-KxoDK67xSzeBxUWWpR1FGEn66R=w973-h1296-no


Main leads in the passenger footwell.

AM-JKLWo4JiXpEHkSPRggfVOI03eZzb5ES66fztodNLXh14xI9VJWkB95Dk4ov7Qtzt9S6-ta31XhQAQ-ZA2m-YrjcwTeVU27iKcqwoVhcdSSh_OnJziQ3ZhneN-9EuxQkqA2qlc1ZYrmr2QQhQBjCJbvYxV=w966-h1287-no
I'm also running the S2000 AP1 modulator with the cabling recommended by Kaz.
Works great both on the road and on track!
Most probably the best safety upgrade for the NSX
 
CB72 said:
I'm also running the S2000 AP1 modulator with the cabling recommended by Kaz.
Works great both on the road and on track!
Most probably the best safety upgrade for the NSX

Agree 100%. I'm glad to hear the circuit behavior is useable.
 
Engine Refresh 89

Transmission

Placing this here mostly for other members who do the AT-MT conversion. The bolts that differ from the AT are the three 65mm bolts, the 115mm starter bolt and the 10 x 45 mm bolt for the engine brace that is not on the AT. The others you can re-use from your AT.

AM-JKLW5Fjw3ize4p0HZbiU7jxkSaeuyvaWPE5YOfmNLL4PYwNkjGn8cQBaq5_g4tNDVCulsH2nzvUGuvIp4XBChmuTwBVYFGj1-NOXkVNpgz-80HFKVxMNXqjEHK1GuhAzq-s6dXU-AUcFoC4X-t5JI_E9sEw=w1283-h963-no
 
Transmission Refresh 30

Release Bearing Guide, Clutch Fork, etc.

With the flywheel task complete, it's time to assemble the clutch side of the transmission. Following Kaz's advice (and the fact that several were missing from this transmission), I used all new components.

AM-JKLXmFRuoV1xcDOUin5QGw_7BzVWJX3k2GwOz4u7Duuwh6vQF9jv6W436Fz83FwyyN_0IOvMYL1Ub4jC0qU9tUAG_-ARtNWU0JSuSaHe2MSm_-M4o-LhNOiKppsZDSWEMvFpdeTYU2ZwlOoOzV34DgA-V9A=w1283-h963-no


Cleaned and prepped the mating surface for the bearing guide. You can see the new mainshaft seal here.

AM-JKLUlB16ZgP6QnUxQUoz9Brc0N1XZMBh6HBwz54VP0P7kH8NUIxwVWalRB2pLDn-NsmN5OiIVnKcy9rhcdaZCfdO_5DdTVjc2tDpt0Dr-MKg0kdaCyEHHMYZUtiN90yh0BijrbJGGWDpGJP2LqAa29jor3g=w933-h1243-no


Installed the guide and guard.

AM-JKLUg0pKKID8pFdQFcC6BIwnfnPP5EnRxHmybWUB0tdFj2rG9T46OlTAeuP6URkERymsHjvEYhUmwZFebqx0P7u6AMTGw-E6VFw-5bc5ni8wic3PNQNA4oMMEgep5oiab5y4wxbYZIBRruamyBK1ycC4qCQ=w933-h1243-no


Just a light coat of Urea grease here.

AM-JKLWys8Yk6iUHeZD_v8qj0tW5Y5BsNTdJsG5W2x4BYbb-nsugiC7dS-SEQNpdskZGvYZP4aogo9B-DjVBvES68mM1R5nERsCZi-gN51R1SV3m1p1G3uuhACE63XQ5fSyuNS83PaSp8B_BmCM4DDo_hrInVQ=w933-h1243-no


Ready for the clutch fork.

AM-JKLVc2aEzO0r4v3hdgLUgoyBnxqH3T0QJmCGNJwFeVUcW_RvPqgZagd0bwVy-CQYrA94Ji1dngmWxMT1FC2K2ypXIoJ2kafWRRCupOr6Cy7W9vRvxi--OXhl8VoMGVYoWb1GIFrbSm6eesrEjkbQyu8-BGQ=w933-h1243-no


Fork in place with fresh Urea grease at the hinge and bearing contact surfaces. Important to prevent squeaking and for good clutch feel.

AM-JKLW61GCxTfBv5S5uWqJV6H66jfAf5ClP3gRMpJcviAJ-5Q54QDnADjgzchClAeNj2pw0skMSYSOBvEgCzVeP75F8Ft_DZmSCE4UnVnJAxW2_ePwGsGG_mqfXIaHOz6qatDkmwnYfDi7RHHtrvCw7pQj3pw=w933-h1243-no


AM-JKLWgDNCNVQANTVmWa_f7CIgv85id4-HUXmK6gAjReDWuUrI95V1s5UtasPDY-R7SK_GND8oWq7WQGrr_qH9hSE14jozM9EoYBKaHK6r7SzBg3KCjVIbXTLaw7G-_l27gJlj4n0nMcYldwjxjclonr-1tSg=w933-h1243-no
 
Back
Top