• Protip: Profile posts are public! Use Conversations to message other members privately. Everyone can see the content of a profile post.

MotorMouth93's 1994 Berlina Black NSX Thread

I actually made them myself using my Harbor Freight mini lathe and some 3/8” titanium rod stock turned down to size. Then applied the blasted finish using 20 micron glass beads and a (you guessed it) Harbor Freight blasting gun.

They ended up a bit trickier than I expected due to the weird threads on the original buttons. They are some random sheet metal screw thread so I dug around in the garage and was able to find a self tapping screw that perfectly matched it in a box of assorted leftover screws I got from my grandfathers garage years ago. But you can’t run a self tapping screw half an inch into titanium even if it’s pre drilled or you’ll just rip the threads right off the screw, so I made aluminum inserts which I pressed into the base of each titanium button then used the lathe to drill it out then run the self tapping screw in so it could thread onto the factory lock rod just like the original plastic button.

If other people were interested I could make some more though.
 
Last edited:
Sorry to see all the trouble you have gone through with the engine lately. Glad to see it is up and running with the temporary engine now.

Really like those door locks you made. Those would go great with a pair of the titanium silver door handles from SOS which I plan to do. So I would be interested in a set of them as well.
 
From the back you can barely tell I haven't wrapped the front bumper yet.

Next up is installing my wideband O2 sensor and street tuning it. I've finally got my tuning and datalogging solution for the factory ECU working in a satisfactory manner so before I switch to RDX injectors I'm going to practice just tweaking the stock tune. I'm not expecting any huge gains but from what I've seen of peoples AFR charts there's definitely some torque on the table especially in the mid range.

IMG_4662_edit.jpg


IMG_4671_edit.jpg


IMG_4665_edit.jpg


Might soon be time to do the door cards. I liked the gathered leather at first, but now that the seats aren't gathered as well it just looks a bit out of place. I'd probably just use the same black leather I used for the center console upholstery.
 
Last edited:
From the back you can barely tell I haven't wrapped the front bumper yet.

Next up is installing my wideband O2 sensor and street tuning it. I've finally got my tuning and datalogging solution for the factory ECU working in a satisfactory manner so before I switch to RDX injectors I'm going to practice just tweaking the stock tune. I'm not expecting any huge gains but from what I've seen of peoples AFR charts there's definitely some torque on the table especially in the mid range.

IMG_4662_edit.jpg


IMG_4671_edit.jpg


IMG_4665_edit.jpg


Might soon be time to do the door cards. I liked the gathered leather at first, but now that the seats aren't gathered as well it just looks a bit out of place. I'd probably just use the same black leather I used for the center console upholstery.

Nah just go orange ultra suede on the door cards like [MENTION=18194]Honcho[/MENTION]


Sent from my iPhone using Tapatalk
 
Before wrapping the car I thought maybe I'd decide to do a permanent color change at some point, but after wrapping I've decided that ultimately this car will be black, so no orange interior accents. I like the orange but its definitely a temporary thing, at this point it's just a cheap way to hold me over for a few years before I do other more expensive aesthetic modifications.
 
Black is the easiest color to wrap. The paint blends in with any color at the edges so it doesn't look off. Just be careful when taking it off. You may realize that the original paint isn't as easy to retain.
 
Yeah when it comes time to pull the wrap off there's no guarantee that 25 year old paint will hold on. With the car being as old as it is though and a couple of panels being poorly resprayed already (the dealer I bought the car from had their guy respray the B pillars and rear bumper due to clear coat failure before listing the car for sale) I was kind of anticipating a full respray at some point so maybe it will be then, who knows.
 
I've been meaning to wire up a wideband O2 sensor so I can start tweaking the maps so I finally got around to doing that. A couple years ago I made a wire harness to plug into the auxiliary power ports in the driver footwell for both constant +12V and the accessory +12V power for my dash cam, this harness was kind of crappy and I needed a way to power the wideband controller so I remade it but made it longer and overall much higher quality using OEM connectors (except for the camera power connection). I love making wire harnesses, so satisfying.

I used 18AWG tefzel wire, OEM plugs from Cycle Terminal, then wrapped it in braided nylon sleeving and adhesive lined shrink tubing.

IMG_4722.jpg


Done, turned out very nice. For interior harnesses I like using the nylon sleeving since it looks nice but if I ever make an engine harness, which I'd like to so I can incorporate built in wiring for K series coils, RDX injector plugs, additional sensors, etc, it will be fully encased in Raychem. (The red wire hanging loose is a currently unused constant +12V source that is capped off, but there in case I ever need it for anything in the future)

IMG_4725.jpg


I have my dash cam set up to turn on when the car is on with a switch down by my feet to keep it running when the car is off if I need to. Rarely used since I don't take the car sketchy places but nice to have on occasion. I had an ugly toggle switch thing for a while so I replaced it with this metal pushbutton.

IMG_4727.jpg


IMG_4726.jpg


The harness starts at the power ports in the footwell, goes across the top of the footwell with a pigtail hanging down to connect to the switch, then to the back of the radio, then runs down the center console up to the wideband controller which sits just above the middle speaker near the ECU. I used Diodes to isolate the two circuits when the switch is pressed, otherwise the constant power would feed back into the accessory power circuit which wouldn't be good. The Moates Demon ROM emulator daughter board I installed in my ECU has 4 additional analog inputs on it, so the wideband controller signal wire is connected to one of those which makes it very easy to access the signal in TunerPro and display it alongside various other engine parameters for logging and tuning.

The sensor itself is in one of the bungs I had welded into my headers many moons ago before they were ceramic coated, then I just used zip ties to route the wires like a true Honda owner.

IMG_4730.jpg


Once I got the wideband set up and configured Tunerpro to read it, I went for a few drives and logged the results and played around with different ways to plot the data. What I found is that the ECU is running a full point or 2 leaner than I'd like in open loop mode, under heavy acceleration the ECU stops applying fuel trims and reads from the open loop power enrichment fuel tables and I'm not sure if Honda set them up lean from the factory or if my headers and exhaust are causing it to lean out a bit but there is definitely some improvement to be made here and probably some torque to be gained by richening the mixture. As a baseline I experimented with just scaling the open loop tables and found that just multiplying the full open loop tables by 1.08 resulted in much better AFRs of around 13 for the most part but there's still a few peaks and valleys to smooth out.

The blue line is load %, the red line is throttle position, the yellow line is AFR, pink is RPM, light pink is injector duty cycle, and the green indicates that the ECU is operating in open loop mode. You can see here that with load at 92 (load maxes out in the low-mid 90s at WoT so this is for all intents and purposes a wide open throttle pull even though TPS is at 85%) and you can see the AFR is right around 14.7 give or take a few 0.1s which is not good at all. Maximum torque is created at around 12.5-13 so adding fuel here could result in some mild gains.

IMG_4738.jpg


I made some other fun plots too. In this one the ECU is operating in closed loop and you can clearly see the short term fuel trims in action constantly adjusting around 14.7 AFR regardless of load or throttle.

log1.jpg


This one is interesting because it spikes lean as I hit the throttle, then the ECU throttle tip in corrections apply and it goes rich, then the ECU switches to open loop fueling (green line) and holds a steady AFR from there on out.

log2.jpg


But anyways, I'm abandoning my forced induction plans and changing direction completely.

After spending a year or so intermittently building on sr5guys original XDF from 2014 and reverse engineering the ECU code I believe it should be simple (ha ha) to patch it to run an ITB motor in a hybrid speed density (map vs rpm)/alpha n (tps vs rpm) control scheme. The code paths to do it already exist, they just aren't used under normal circumstances. What I plan to do is use the map sensor for low load and cruising, then switch to TPS based load calculation above 25-30% throttle since with ITBs the MAP signal becomes unusable above that. This works out nicely since the ECU already has separate fuel maps for open and closed loop, so I will essentially just use the map sensor for closed loop fueling then the TPS value for open loop fueling. There's a lot of work to be done here, the first thing I plan to do is run the car this way with a standard manifold. I don't expect it to work amazingly well it just needs to be able to hold safe AFRs, then once I prove that the idea is sound I'll start moving towards ITBs....

The ITBs I'm planning to build myself using Ducati motorcycle throttle bodies and cutting the flanges off of a stock manifold. Homemade ITBs are nothing new and can work quite well, I'm currently researching various things like runner length, cone size, throttle body bore, etc. Lots of things have to be right in order to get a good result. I'm going to try to get them running on the engine thats in the car now, then move the ITB setup over to the rebuilt motor later.

Rather than mailing my block back to Benson and playing that game again I got 93mm pistons and am having a localish machinist bore it out, he says he can hold tolerances to 0.0002" or so on the cylinder bores which should be more than good enough. I'm having the larger 36mm intake valves put in the heads along with the rest of the work so I'll essentially have a forged internals C32. The goal is 100hp/liter to the wheels so 320whp, which I think should be doable with ITBs and MUCH cheaper than any sort of forced induction and probably more fun. I might need cams to get that high but for now I'm sticking with the standard C30 M/T cams. Hopefully I'll have the block back in a couple weeks then can start picking bearings and hope Amayama can get them to me in a reasonable amount of time. With the vastly strengthened rotating assembly and billet oil pump I wonder how high it could rev and still make power?

Should be an interesting few months, and there's a non-zero chance I've bitten off more than I can chew.

I had my bead blaster set up for other reasons and my original monel key was looking a bit worse for wear so I cleaned it up as best I could with some high grit sandpaper and blasted it with fine glass beads, then used a bit of red nail polish in the lettering. There are still some deeper imperfections visible but those can't really be fixed without removing too much material and affecting the shape of the key but overall I'm really happy with how it turned out.

IMG_4767.jpg


And then I pulled the wrap off because I decided I didn't like it lol. This picture does a decent job of showing why, the gloss just wasn't very good. I thought I could get used to it but it just irked me more and more, that along with the generally unpolished feel of having unmatched door jambs and it just went sour really quickly. It photographed well but that's about it, overall I like the black much better. Fortunately it came off fairly easily with no drama, and left the underlying PPF/paint completely intact.

IMG_4746.JPG
 
Last edited:
Amazing work as usual. I'm really glad you decided to stay NA- it's part of what the NSX is all about.
 
Oh wow, you removed your wrap! It looked great the photos and was excited to see more photos. Did you eventually finished all the panels? I think you had the bumper left to do right?

I fully wrapped one of my cars before. I know exactly what you are saying about the finish. It will never be as glossy as a painted surface.
I did not have problems with color matching. Maybe you were pulling too hard? I saw that it is overly stretch, the color would get lighter. Similar to you, I eventually removed the wrap, but my goal was to sell the car. (did not want to buyer to think I was hiding something)

Anyways, I hope you had fun with the project and it is great that it's reversible. No harm done. On to your next project.

Now your car matches the title of your thread again. :)
 
When I say unmatched door jambs I mean the door jamb areas were left black while the exterior of the car was orange. I didn't have any issues with the orange panels matching though. I never actually finished the wrap, I decided I was done with it before I got around to doing the front bumper.

I suppose I could have tried to wrap the jambs but then I would have had to worry about the factory stickers getting pulled off with the wrap.
 
Ahh...I see what you mean. Yes, inside the door jams is tough to wrap. I have seen some videos from the professional where they remove the door just to get into the door jam. I did not bother with the door jams.

For what it is worth, your DIY looked great from the rear. :)
 
Yes I had them do the valve stem seals. I'd assume they hooked up shop air through the spark plug holes to keep the valves from dropping down while the springs were off.

As for the ground, the relay harness bolts straight to the battery with ring terminals. There is a short run of 12AWG silicone wire from the positive terminal to a fuse holder mounted on the firewall, then from there it splits into two 16AWG wires one running to each relay/ballast, then back again the same way to the negative terminal. All wires are encased in wire loom, joints are protected with adhesive-lined shrink tubing, and all connections are either soldered or crimped, I ended up buying a crimper specifically for this project. All connectors and relays are waterproof OEM spec (not necessarily Honda, but from other makers), and I was able to source the 6-pin headlight connectors to my harness seamlessly connects to the factory wiring. The factory NSX wiring is fairly high resistance so I bypassed it completely. :)

The control arm issues were on the driver side so I'm assuming it had something to do with the clutch change. They only needed to separate the lower ball joint to get the axle out I presume but apparently it's threads had been torn up pretty badly by someone else before I got the car so the joint needed to be replaced as it was deemed a hazard to drive on. Then the replacement joint they sourced wouldn't fit (aftermarket part, not available from Honda) so the whole hub needed to be replaced. To get the hub off required separation from the UCA joint, which was seized and broke. So I had to buy a new hub and UCA. I still have the old parts so I might have them rebuilt by Carbon6Composites then try to sell them or something.

Might be a long shot.

Not sure if you’re still active here but where did you source the headlight connectors from? I’m looking to build my own harness right now but am having trouble finding an oem style connector to start with?
 
Haven't done too much with the car lately besides just driving it and slowly collecting parts. Oh and the driver wide window regulator started making bad noises so I pulled it out and fixed it, I think the teeth between the two pulleys inside are slipping and causing the cable to lose tension, so I'll probably have to do it again and figure out a way to screw them together or something. I also finally removed my power antenna which has been unplugged since the day I got the car home and plugged it, along with some other minor weight reduction tasks.

After about two months I got my block and rotating assembly back from the machinist, it took a while but its a small low volume shop and I told them I wasn't in a hurry so no issue there. The bores are about as close to perfect as I could hope for, they held everything to within a few tenths so it's good to go for reassembly. To balance the rotating assembly they had to add more heavy metal slugs to the counterweights to account for the heavier steel H beam rods and larger pistons, they have a very nice modern computer balancer and they got it as close to perfect as a V6 can be. They weren't happy with how well the Wiseco pistons were weight matched so they milled out small amounts of material until they were all within half a gram, it wasn't really necessary but I told them I was planning on revving this engine past 8500 so they wanted to get it perfect. The shop is called Texas Engine Machine in Llano, TX and I have nothing but good things to say about them.

I had them pull the ball plugs on the crankshaft just to be safe, since the last guy just threw it in an ultrasonic cleaner and called it good. Spoiler: it wasn't, there was 25 years worth of crap trapped behind the crank plugs. If anything, the ultrasonic cleaner just loosened it all up.

crankplug.jpg


Block back in my office where it belongs.

IMG_5059.JPG


I made some delrin cylinder head installation aids on my lathe to make it easier to install the heads. The dowels are sharp so if you're even off by a little bit they can gouge the head surface easily, it happened last time, fortunately not in a place that mattered, but I don't want to do that again.

IMG_5060.JPG


Also cleaned the oil pump and installed a Toda billet oil pump gear and checked all clearances. Everything is perfectly within factory spec and ready to go.

IMG_4800.JPG


I'll probably just make a separate thread in the naturally aspirated performance section for this engine build. I also shipped my cylinder heads off to Bad Guys Worldwide in CA to have +1mm NA2 intake valves installed (thanks Marc for sourcing these), Supertech bronze guides, supertech springs/retainers(steel not TI)/bases, and some light blending and port work. He has a flow bench in house and said he'd do before and after numbers which I'll share whenever he does it. If you aren't familiar with Bad Guys, they're a fairly small shop that specializes in 90s Honda heads and have done a lot of crazy stuff with SOHC D-series heads in addition to the typical H and B builds.

And finally...

IMG_5062.JPG
 
Last edited:
Which wrap did you go with that you ended up pulling off? True beauty is found in paint, but yes wraps always look special in pictures. I always wonder how good gloss wraps look in person. The thing is to any other observer they think it looks great but as an owner you know the small mistakes and mismatches and it just bugs you.
 
Oh man.. I started this thread from the beginning ever since you turned me on to it from the stock ECU threads. I seriously thought nothing happened on prime anymore but i'm so glad to be proven wrong. It's damn time I update my thread. So much has happened and still yet to happen with mine. Anyway, while reading here, one thing led to another and towards the end on pg 8, i'm like... IS THIS GUY READING MY MIND!!!??? I've been working on my ITB NA motor for about 1yr now (but it's really been several years of casual planning). I can share my somewhat useful data with tuning the ITBs thus far. You're right on about using a combination of MAP and Alpha N (i'm also consider MAF maybe...). On the stock motor I can get up to 12 inches of useful vacuum at partial throttle and it's actually more than enough to operate the stock brake booster but I have a Hella Volvo vacuum pump on standby (side note!), but it's still a finicky thing to tune at 100% - it's hard to explain to someone who doesn't have a basic understanding of ECU tuning - i'm just glad that now if a lay person drove my car in partial throttle tooting around town, i'm not sure they'd know it was ITB. For example, I've observed that I can still pull vacuum at 55% TPS and reach 0 vacuum way before 30% TPS in partial throttle. The last 60% of the throttle is a bit untunable. There's so little useful MAP in that range to work with. I've basically tuned anything past 75% as if it was WOT so in some parts she's running a tad richer than i'd want because I lack the resolution at moderate-high throttle and she's goes from -12 vacuum to -1 in a blink of an eye. Still some dyno work to do there but I think my street tune is pretty good. Let's compare notes!!! I could go on for days about this. I've learned so much.

btw.. thanks the car gods for providing an ECU with compensation tables. My main fuel and timing maps are Alpha N but I use a MAP and Car Speed compensation table A LOT. So my Alpha N table is a bit of gas guzzler and basically assumes a base case of low to no vacuum condition. This is pretty much at 12.8-13.5 everywhere. It's in the high vacuum areas i'm adding some timing and pulling back fuel to get pretty darn good FWY mpg. This is of course on top of the basic tables like Engine Temp, Air Temp, compensations. I can definitely see why OEMs go with a plenum at the end of the day though. I still have a lot to learn but again, let's compare notes!

btw on our ITBs.. Adnan and I have spent an unreasonable amount of time tuning the sweep radius', progressivity, and spring pressure of the throttle linkages. That stuff can get annoying but I've been able to 3D print a few things and make quick adjustments before CNC'ing in metal. I'm really curious what your plan is for that. The initial layout I found with an off-the-shelf ITB kit was the initial throttle tip-in from idle was just too damn abrupt. It was almost untunable. We're also using a manifold that has OEM injector placement for the primaries but i'm making provisions for a secondary injector way up top. The injectors so close to the valves is proving to have pretty darn good driveability (my primary goal) but I think some top end power can be added with secondary smaller injectors up early in the air flow. More testing to do here. ITBs really make a great case for DBW IMO. I wouldn't have need to screw around with the linkages so much if I had DBW capability.

Also, are you going to use the factory IACV? I've found ~2 inches more vacuum w/o it out but I may put it back on for improved idle performance. There's so little vacuum as it is.. i'm not sure i'll miss that -2 inches. W/o the IACV.. when cold.. she's just a tad bit finicky. Nothing annoying I haven't been able to tune out but noticeably smoother with it there. You might want to find the triggers to control the IACV with the factory ECU from your TunerPro..

What size ITBs did you go with?

Also, yes, i'd like those Ti door lock thingys too! haha

This is a great thread. How did it miss it for so long!!!

I'm going to stop now before I write a novel.

EDIT: Lastly!!! In the beginning.. those worn out cam journals... I would not be surprised if some loose Hondabond floated their way into small orifices and clogged up some oil passages. There was a shit ton of Hondabond there
 
Last edited:
I can't see any pictures, but cleanliness is one of the most important things.

Specifically for my build, I bought a package of varying diameter pipe cleaners and a steamer. Even when parts were returned to me "hot-tanked and cleaned," I still used the pipe cleaners, steamer, Dawn, pressure washer https://best-pressure-washers.co.uk/a-few-tips-on-how-to-use-your-power-pressure-washer-cleaner-safely-and-effectively/, and air compressor to blast out anything I could. Twice each for the block, crank, and heads. Then, I used a gallon of WD40 to blast it through with the air compressor to displace any water.

It's hard for me to believe though that something could have made its way through the oil passageways in the crank, through the bearings, and up near the pistons to get trapped around a ring and start wearing into the cylinder wall.

You may have had an issue like my Wiseco pistons. See here:
http://www.nsxprime.com/forum/showthread.php/154927-Semi-DIY-Mild-Engine-Build-for-FI/page18?p=1718798&viewfull=1#post1718798

IIRC, there was some residual machining flashing trapped inside one of the piston oil holes so it wasn't obvious from first inspection. Yes, while aluminum is softer than the steel cylinder wall, given a big enough piece, it can still wear away the steel before its ground away. Especially since it wasn't in the combustion chamber where it would have just burned up.

Second, what ring gaps did you go with? If you used the XX Wiseco piston ring package, are you sure you placed the second ring correctly (the Napier ring)? The piston gap offset isn't that big of a deal (pros and cons for doing it Honda's way and Wiseco's way) - Certainly not enough to lead to your oil burning issue.

Finally, if there's an issue with the rods (small ends and wrist pins) and holding the piston correctly, or the cylinder bore having taper, the rings would not be able to seal correctly causing blowby or consumption.

Sorry man. Don't give up on this engine. You'll get it. Think of all this experience and wisdom you've gained!


Agree with you about the cleanliness as it reduces a lot of problems in future. If you car is often dirty, you probably must wait for diffenret issues. I understand that this thread is not about car cleanign but maybe you can recommend a good pressure washer to use. I ahve read a lot of materials tht they are not so effective adn can damage a car but there are a lso a lot of positive results. But which one it is better to choose.
 
Dang it's been a while.

I haven't really done anything too interesting recently but I didn't realize how long it'd been since I'd posted here.


[MENTION=20915]RYU[/MENTION] I don't remember what the diameter of the throttles is off the top of my head, that project has been placed on the back burner for the time being, I discovered that I don't have a viable method of chopping up the intake manifold and dropping $2k on ITB manifolds from AS isn't something I want to do when I have so many other things I want to buy at the moment. I will also need to write and test my own compensation subroutines for things like you mentioned such as MAP, atmospheric pressure, and road speed if I want to use the factory ECU. In theory it's simple to write that sort of code but if you add too many computations for each injection event the ECU won't be able to keep up at high RPM. Realistically, if I go ITB I'll probably end up using a standalone once the stock setup proves inadequate for the application. I'll PM you about the door locks.

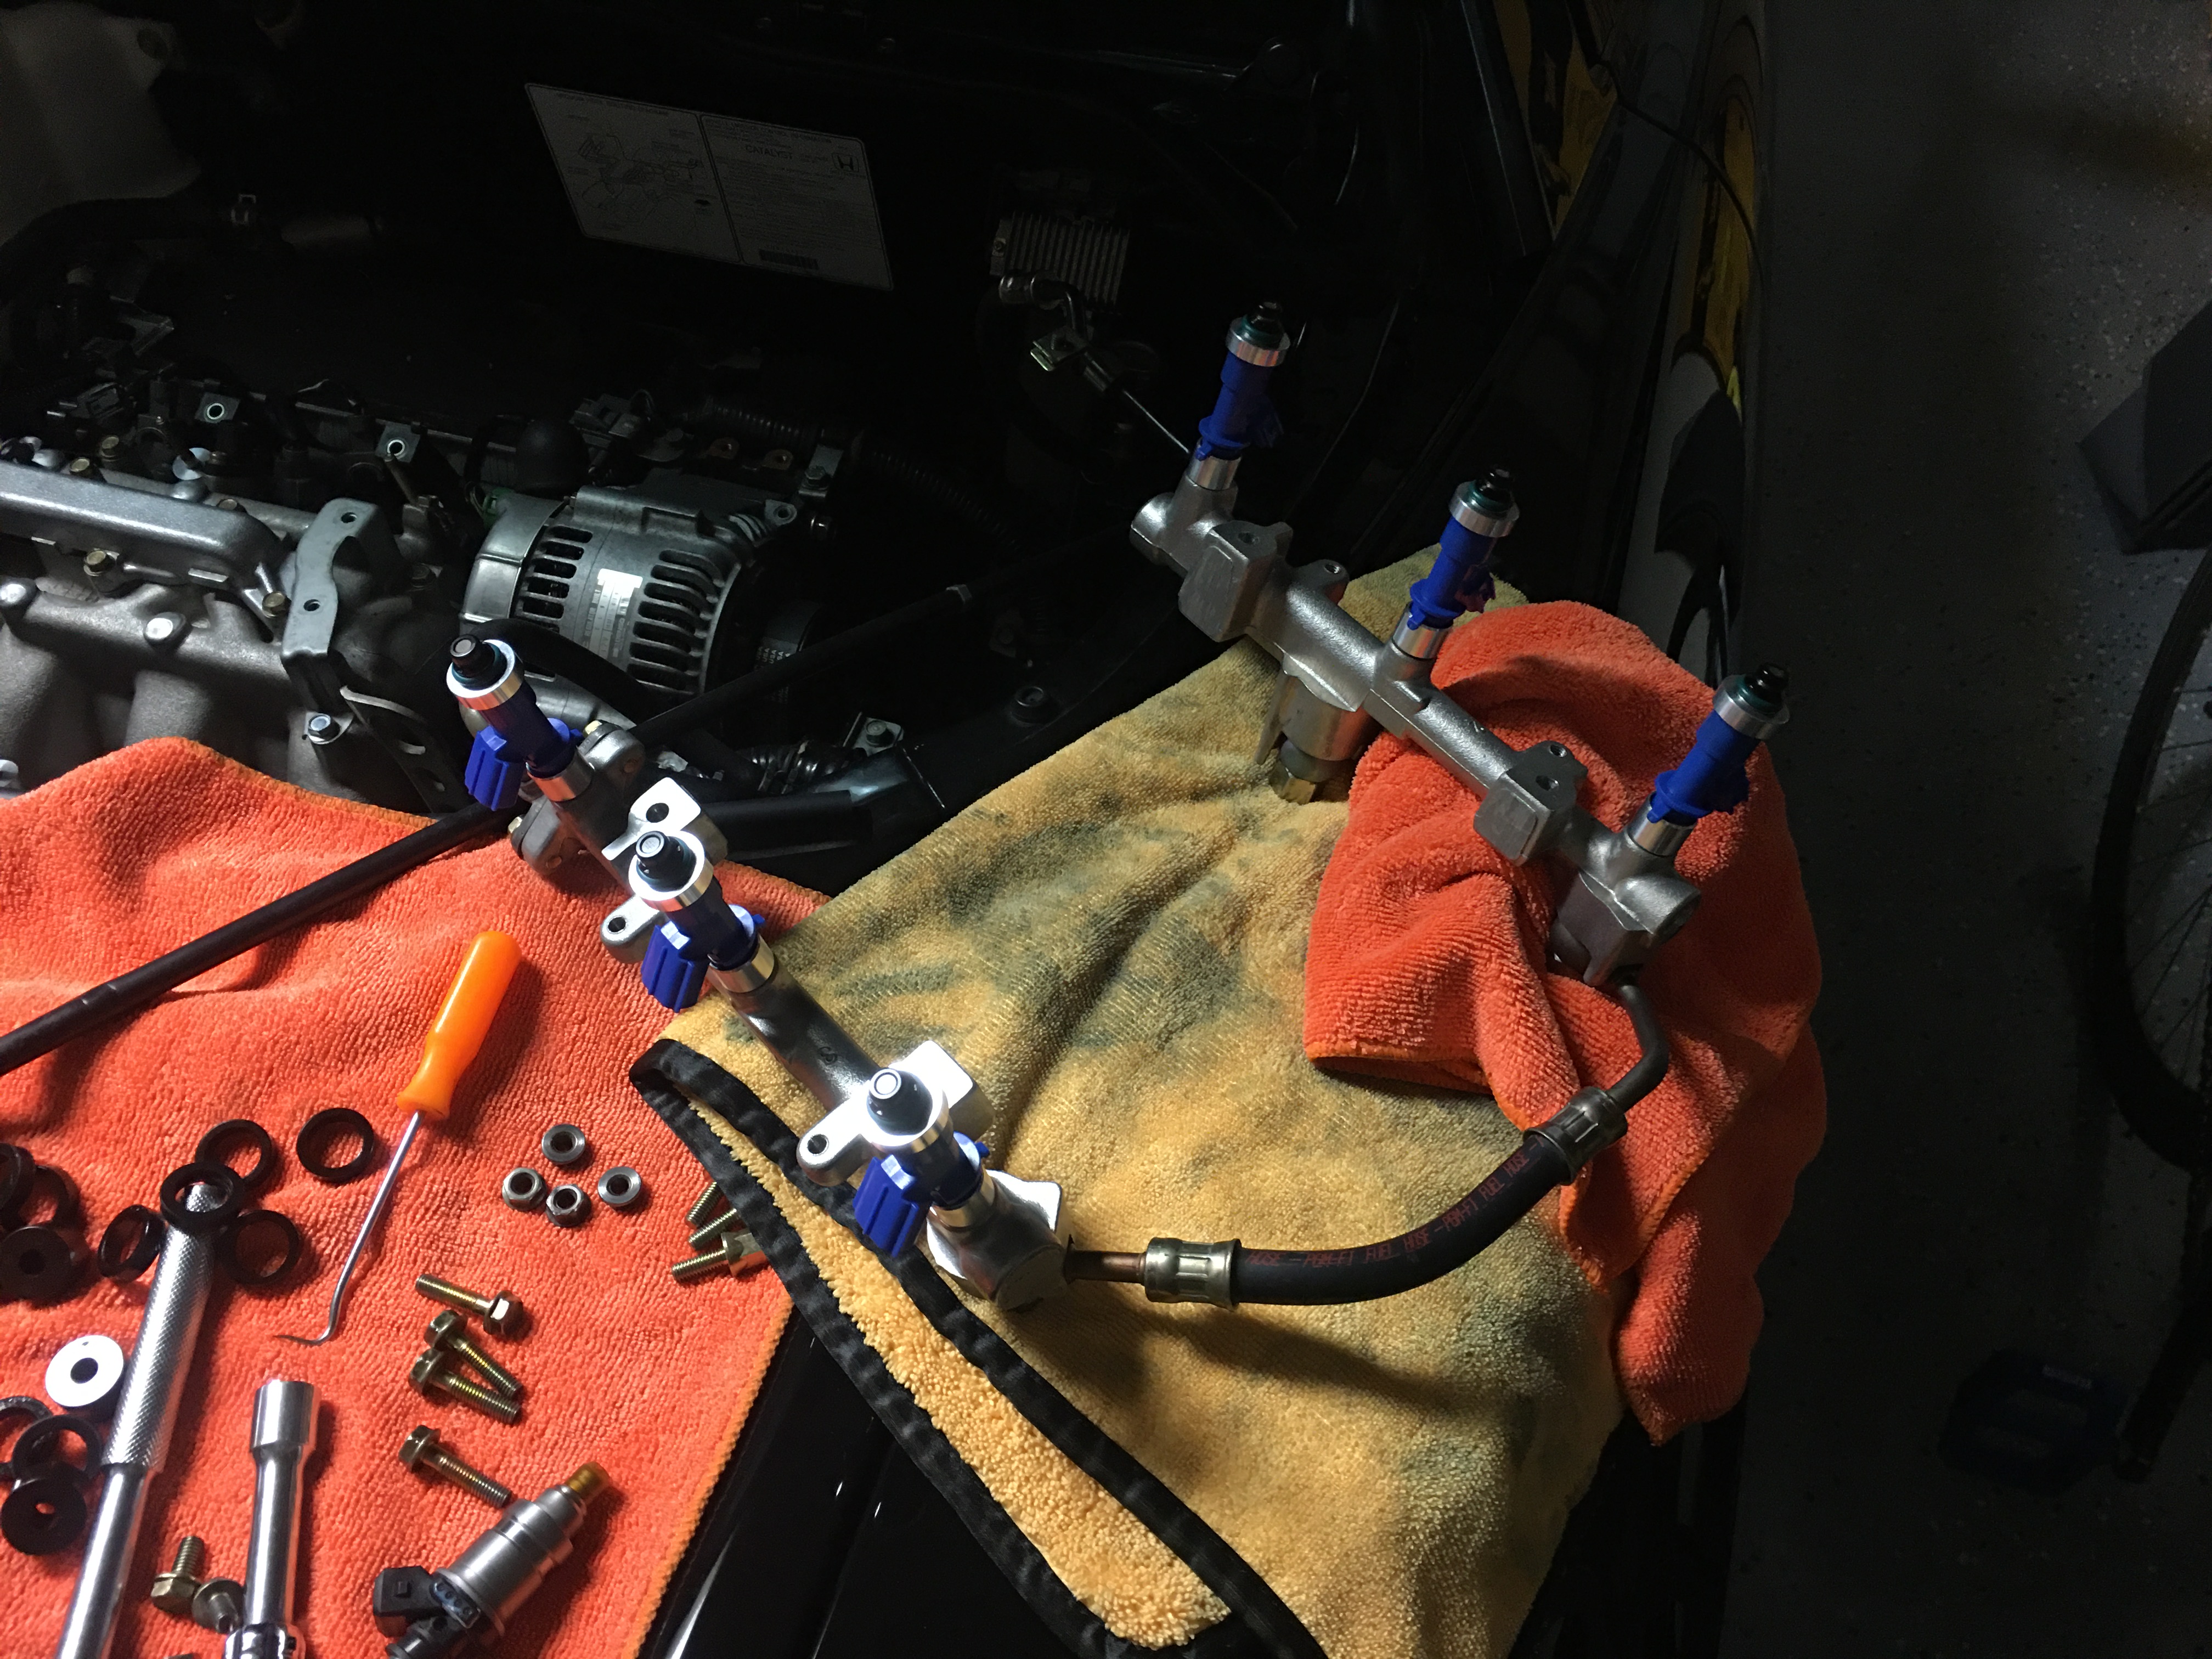
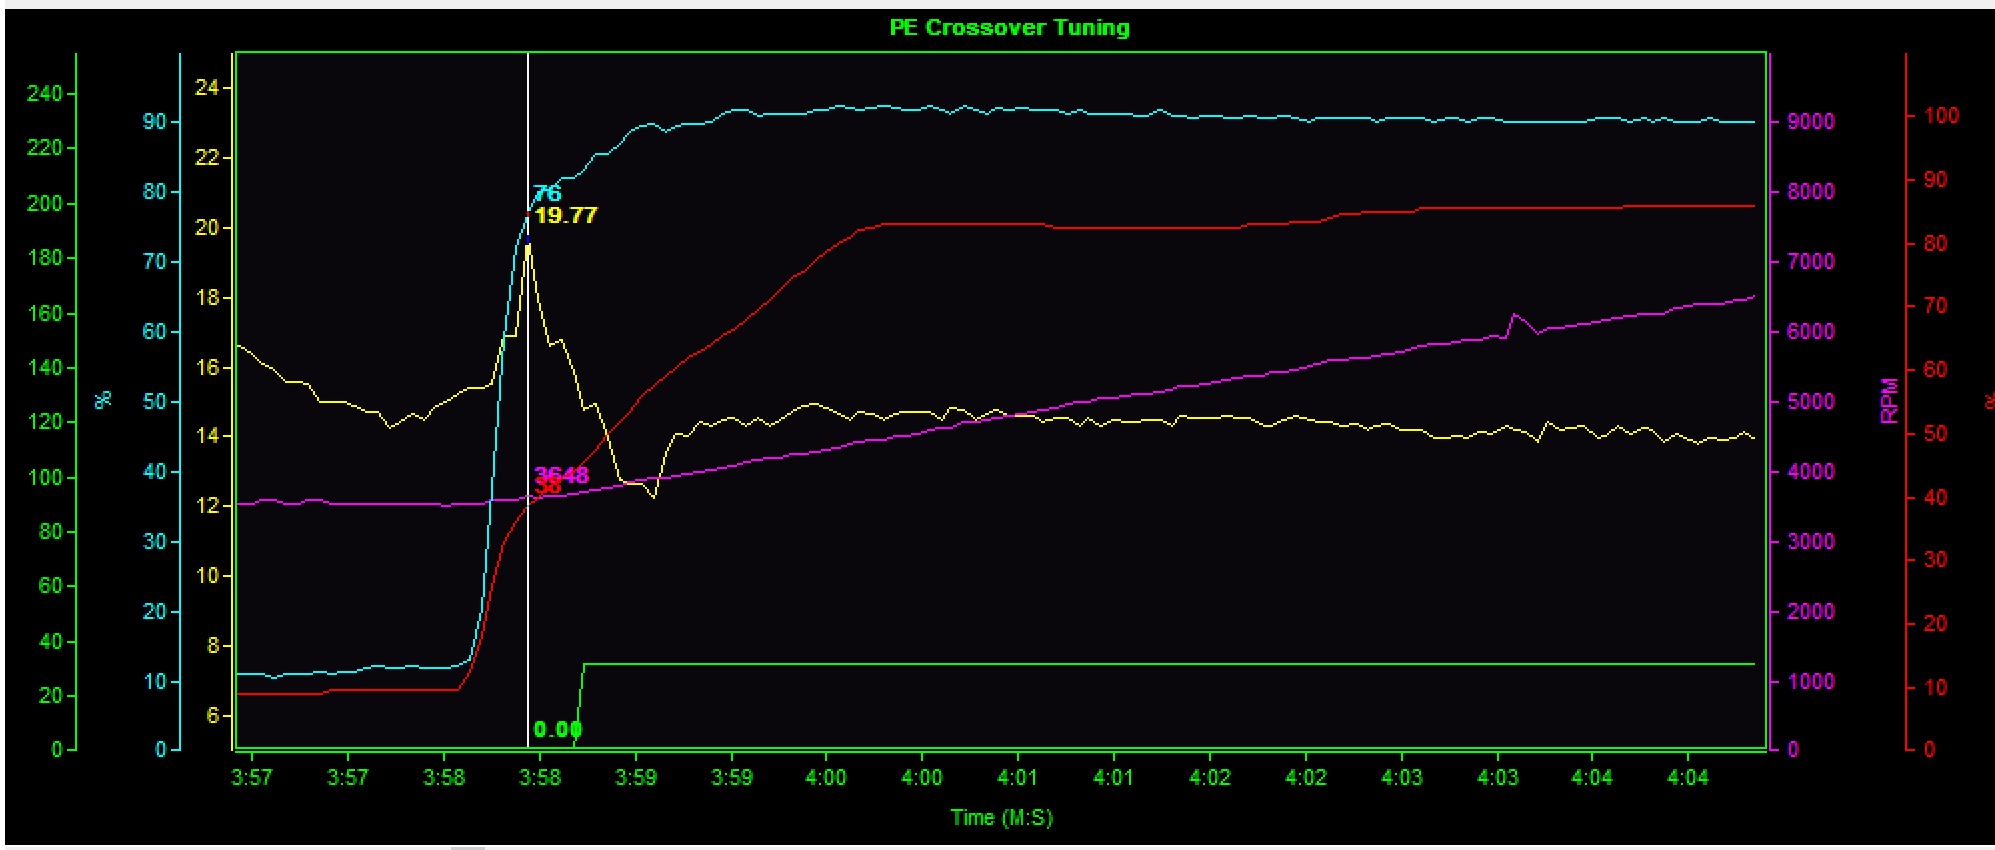
I converted to RDX injectors and have been too lazy to tune it myself and have instead just been running the crappy off the shelf tune offered by a certain shop that I won't name here because I got the tune for free. The car drives noticeably worse with that tune than the stock injector/tune setup but AFRs are safe so it's not a huge priority lol.

IMG_5092.JPG


I sourced RDX injector plugs, cut the stock ones off, and then crimped the RDX pins on so its as close to a factory install as you can get.

IMG_5093.jpg


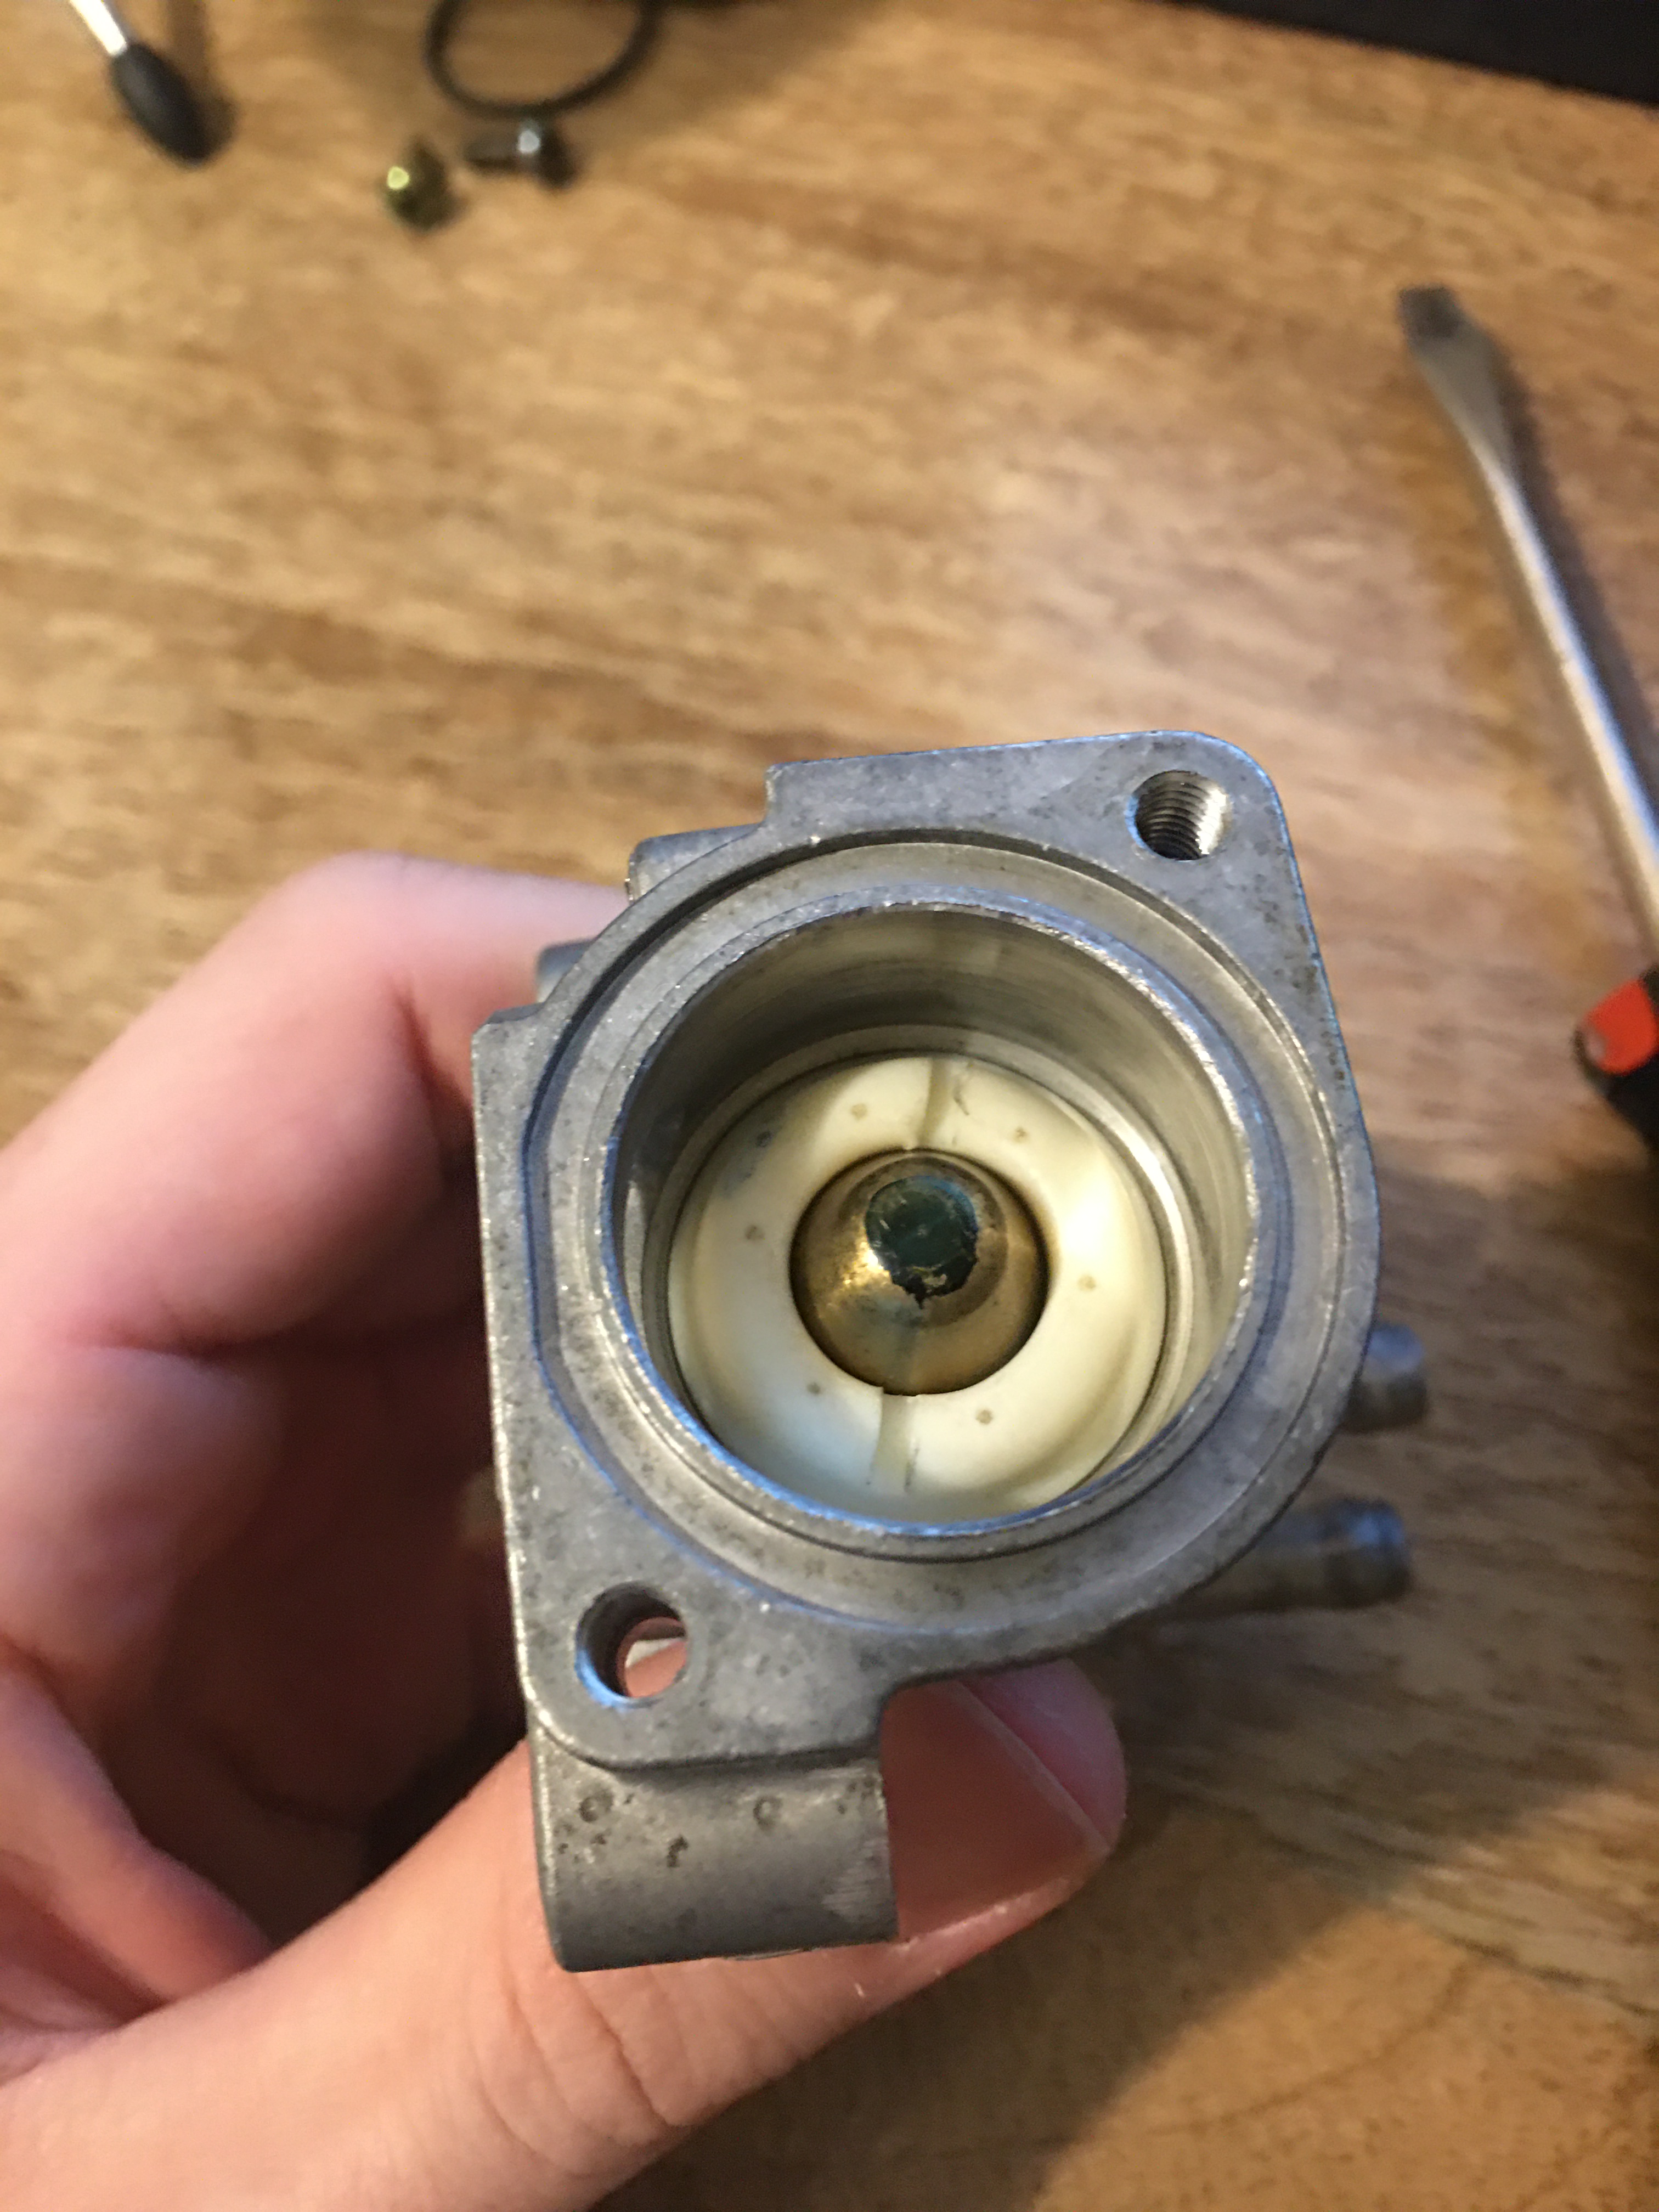
I was also having some really weird idle issues in cooler weather and I tracked it down to the fast idle thermo valve. The plastic donut thing had backed out on its threads enough to where the car would idle anywhere from 1500-2500rpm in weather under about 75F and idle just fine when warmer, but since cleaning and tightening it's idled perfectly.

IMG_5221.JPG


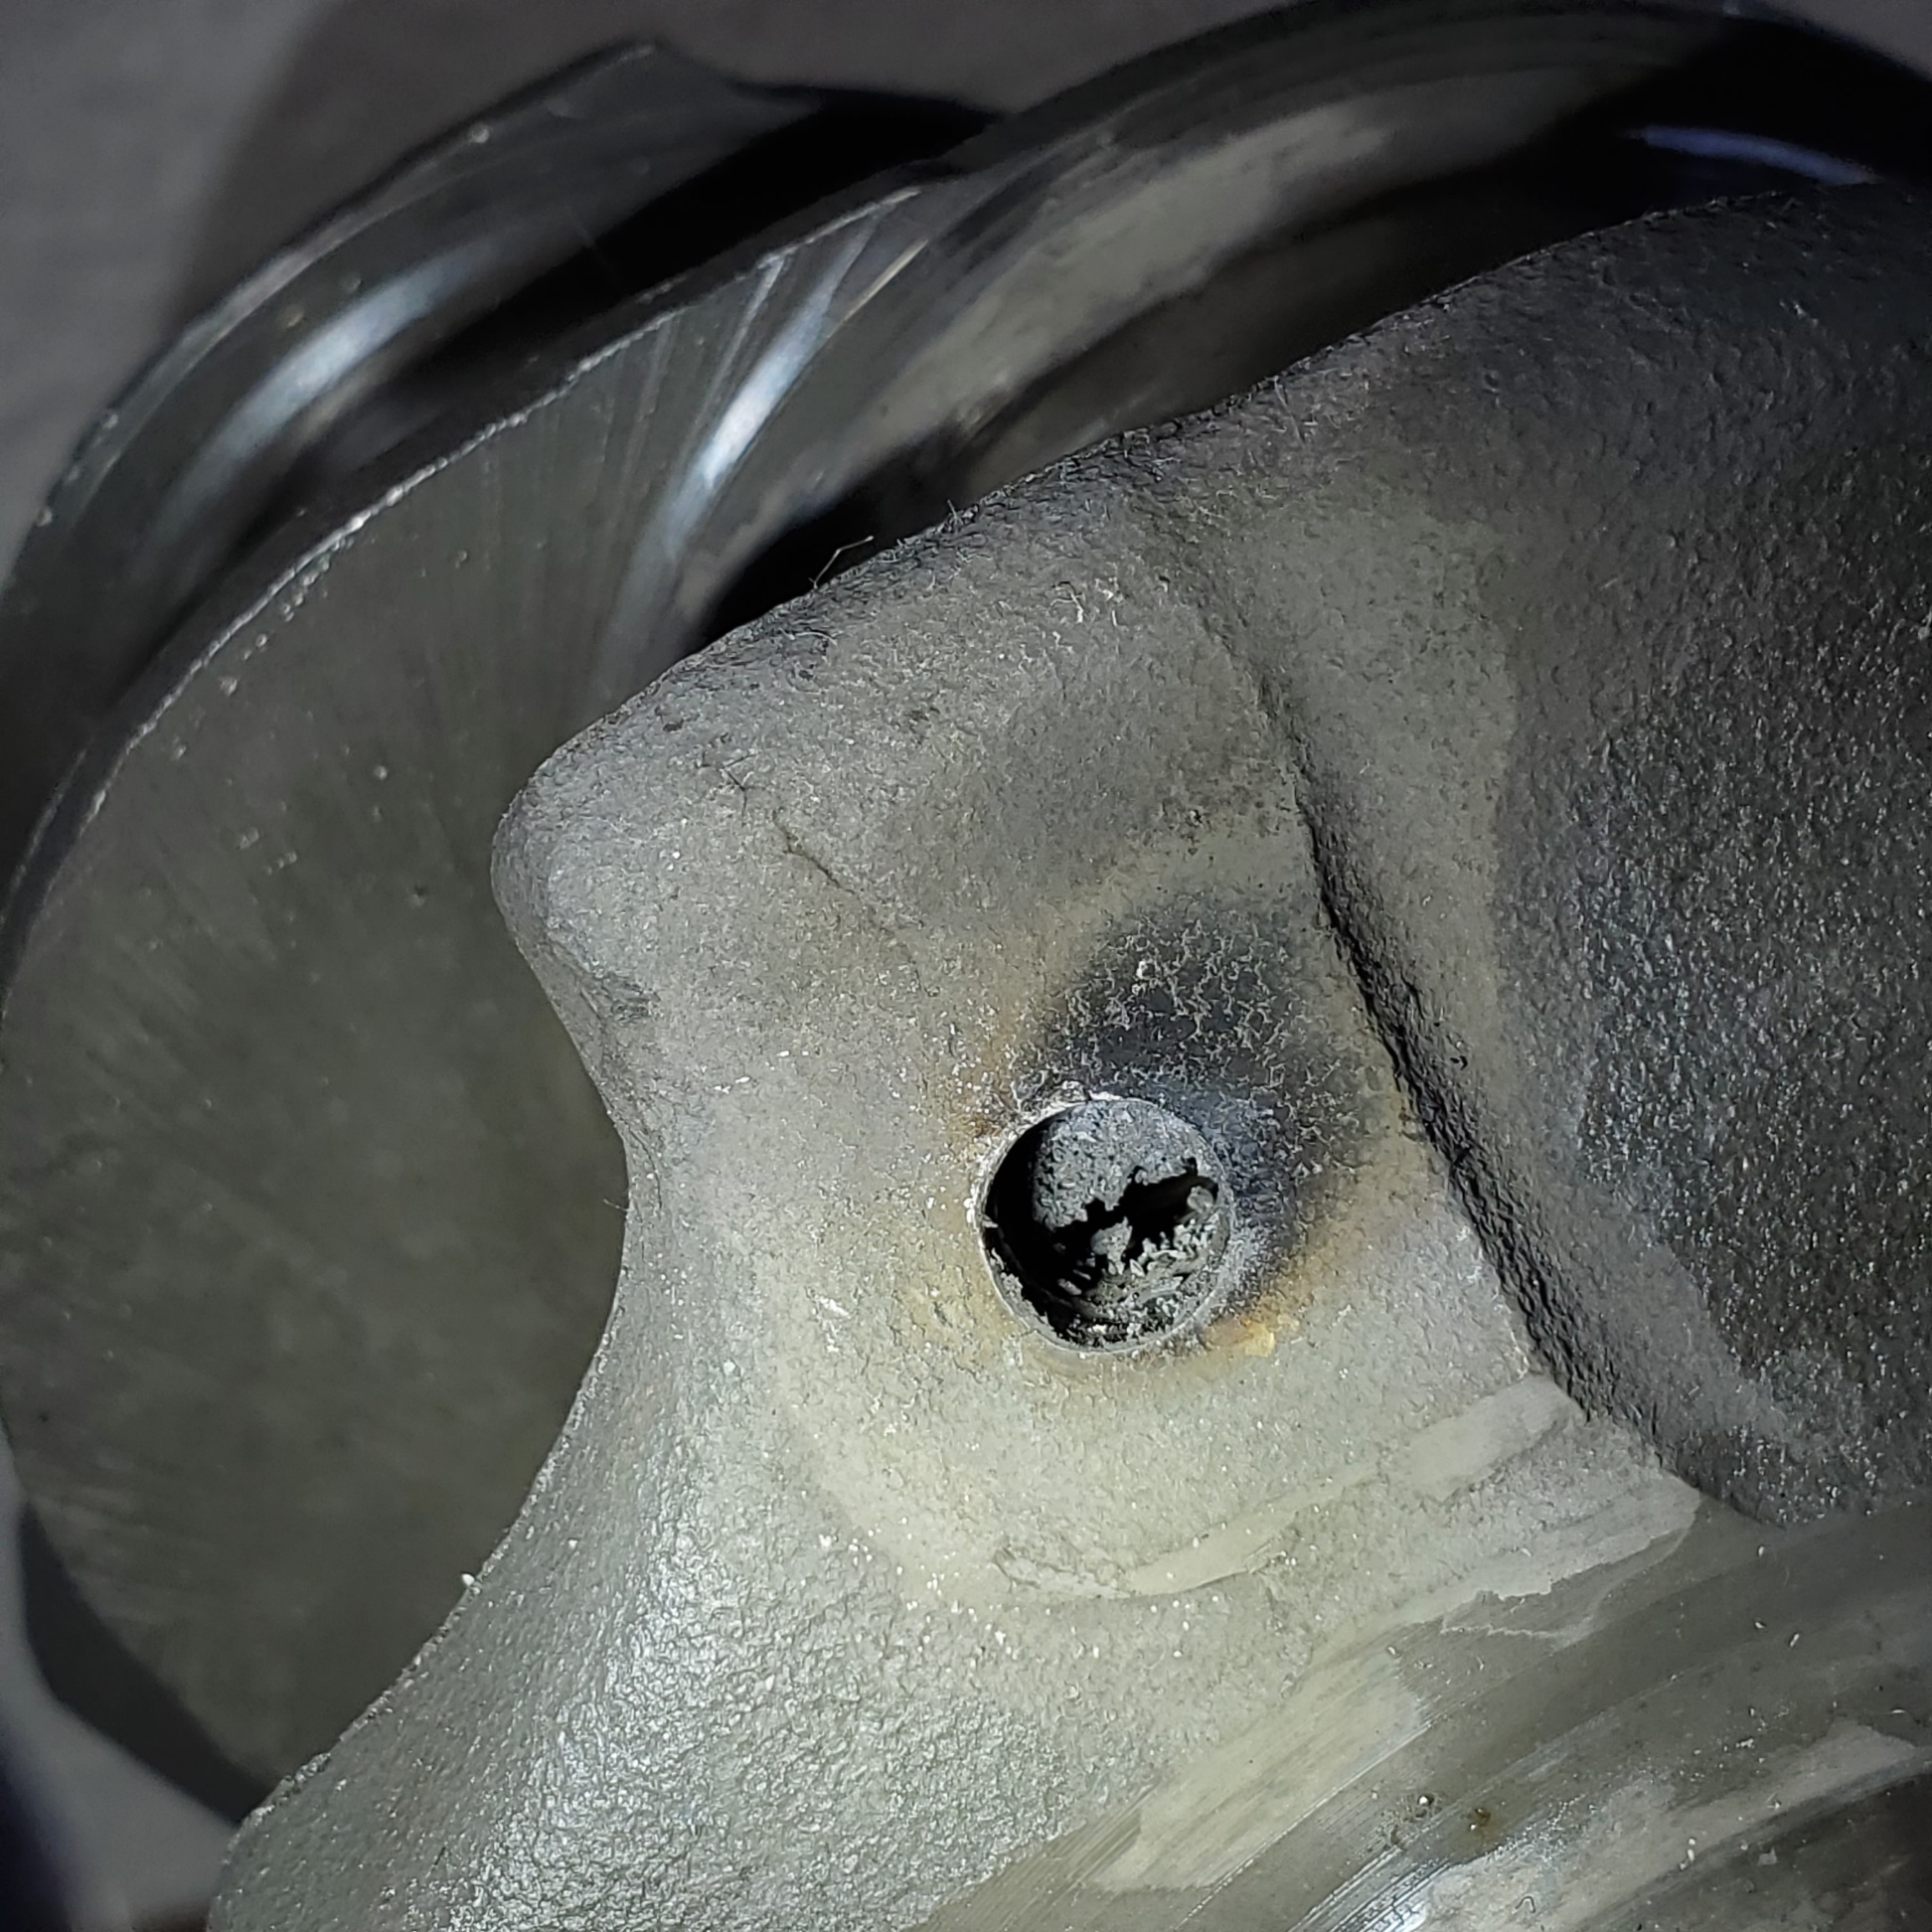
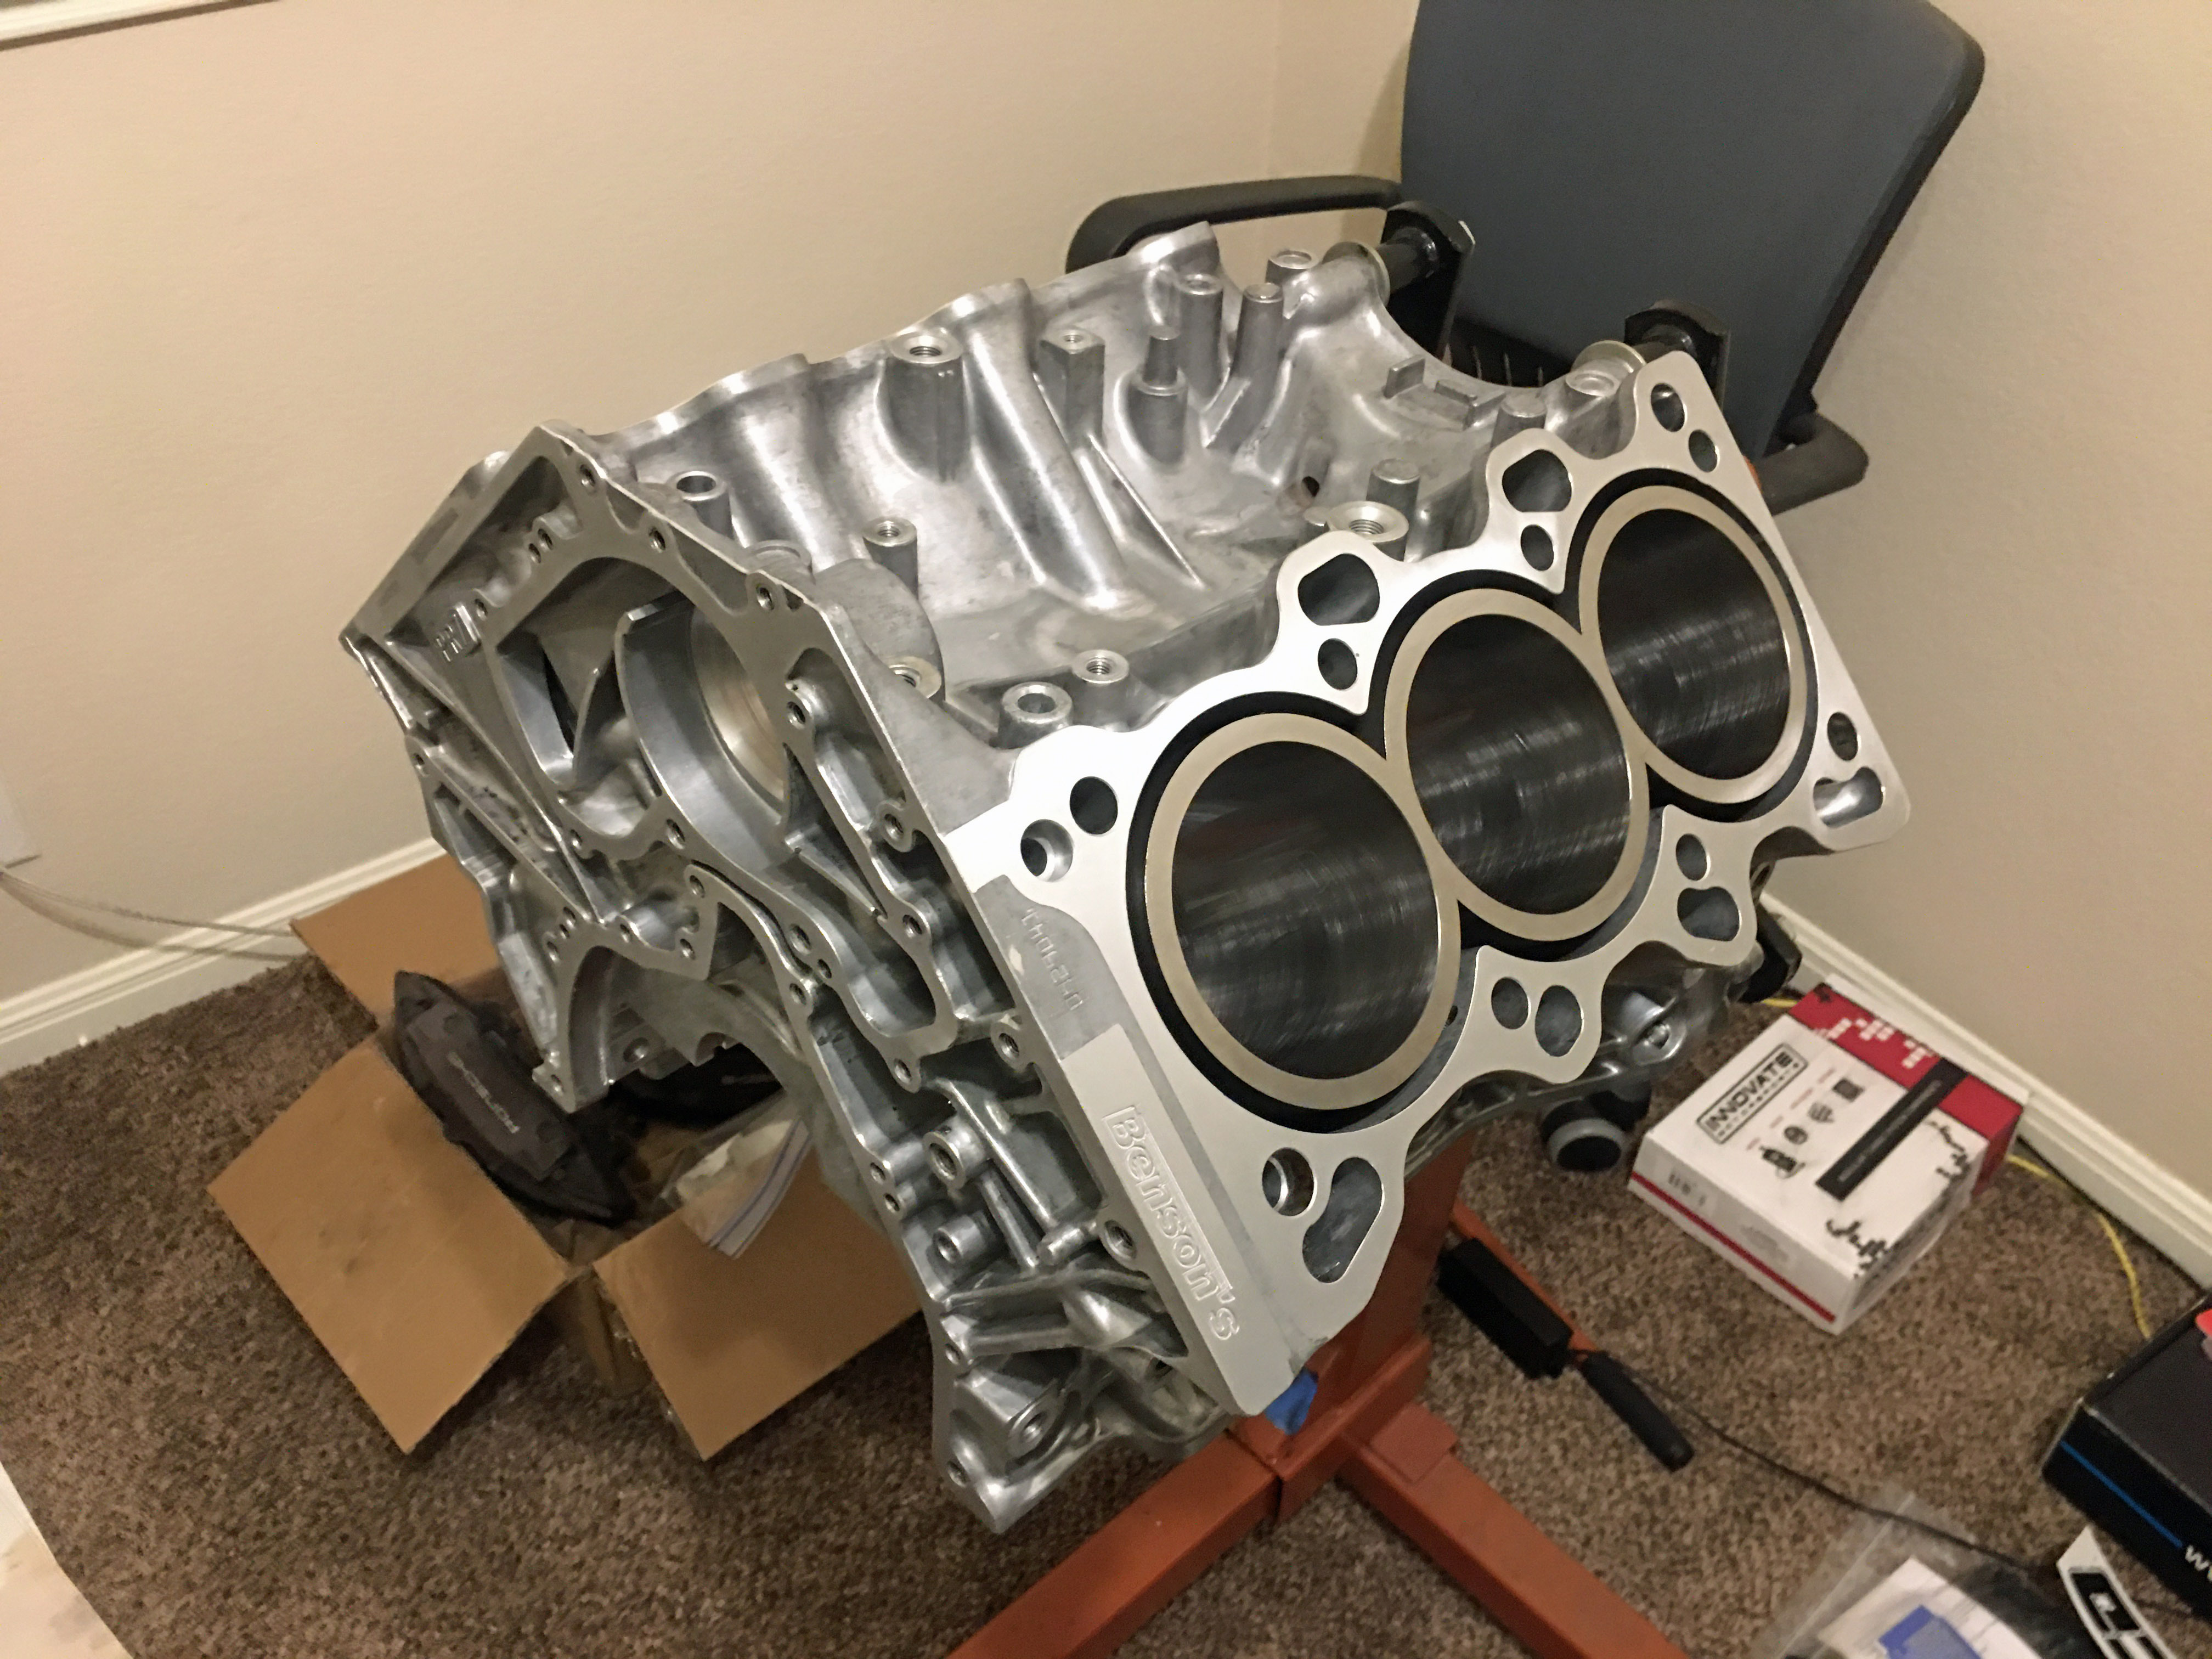
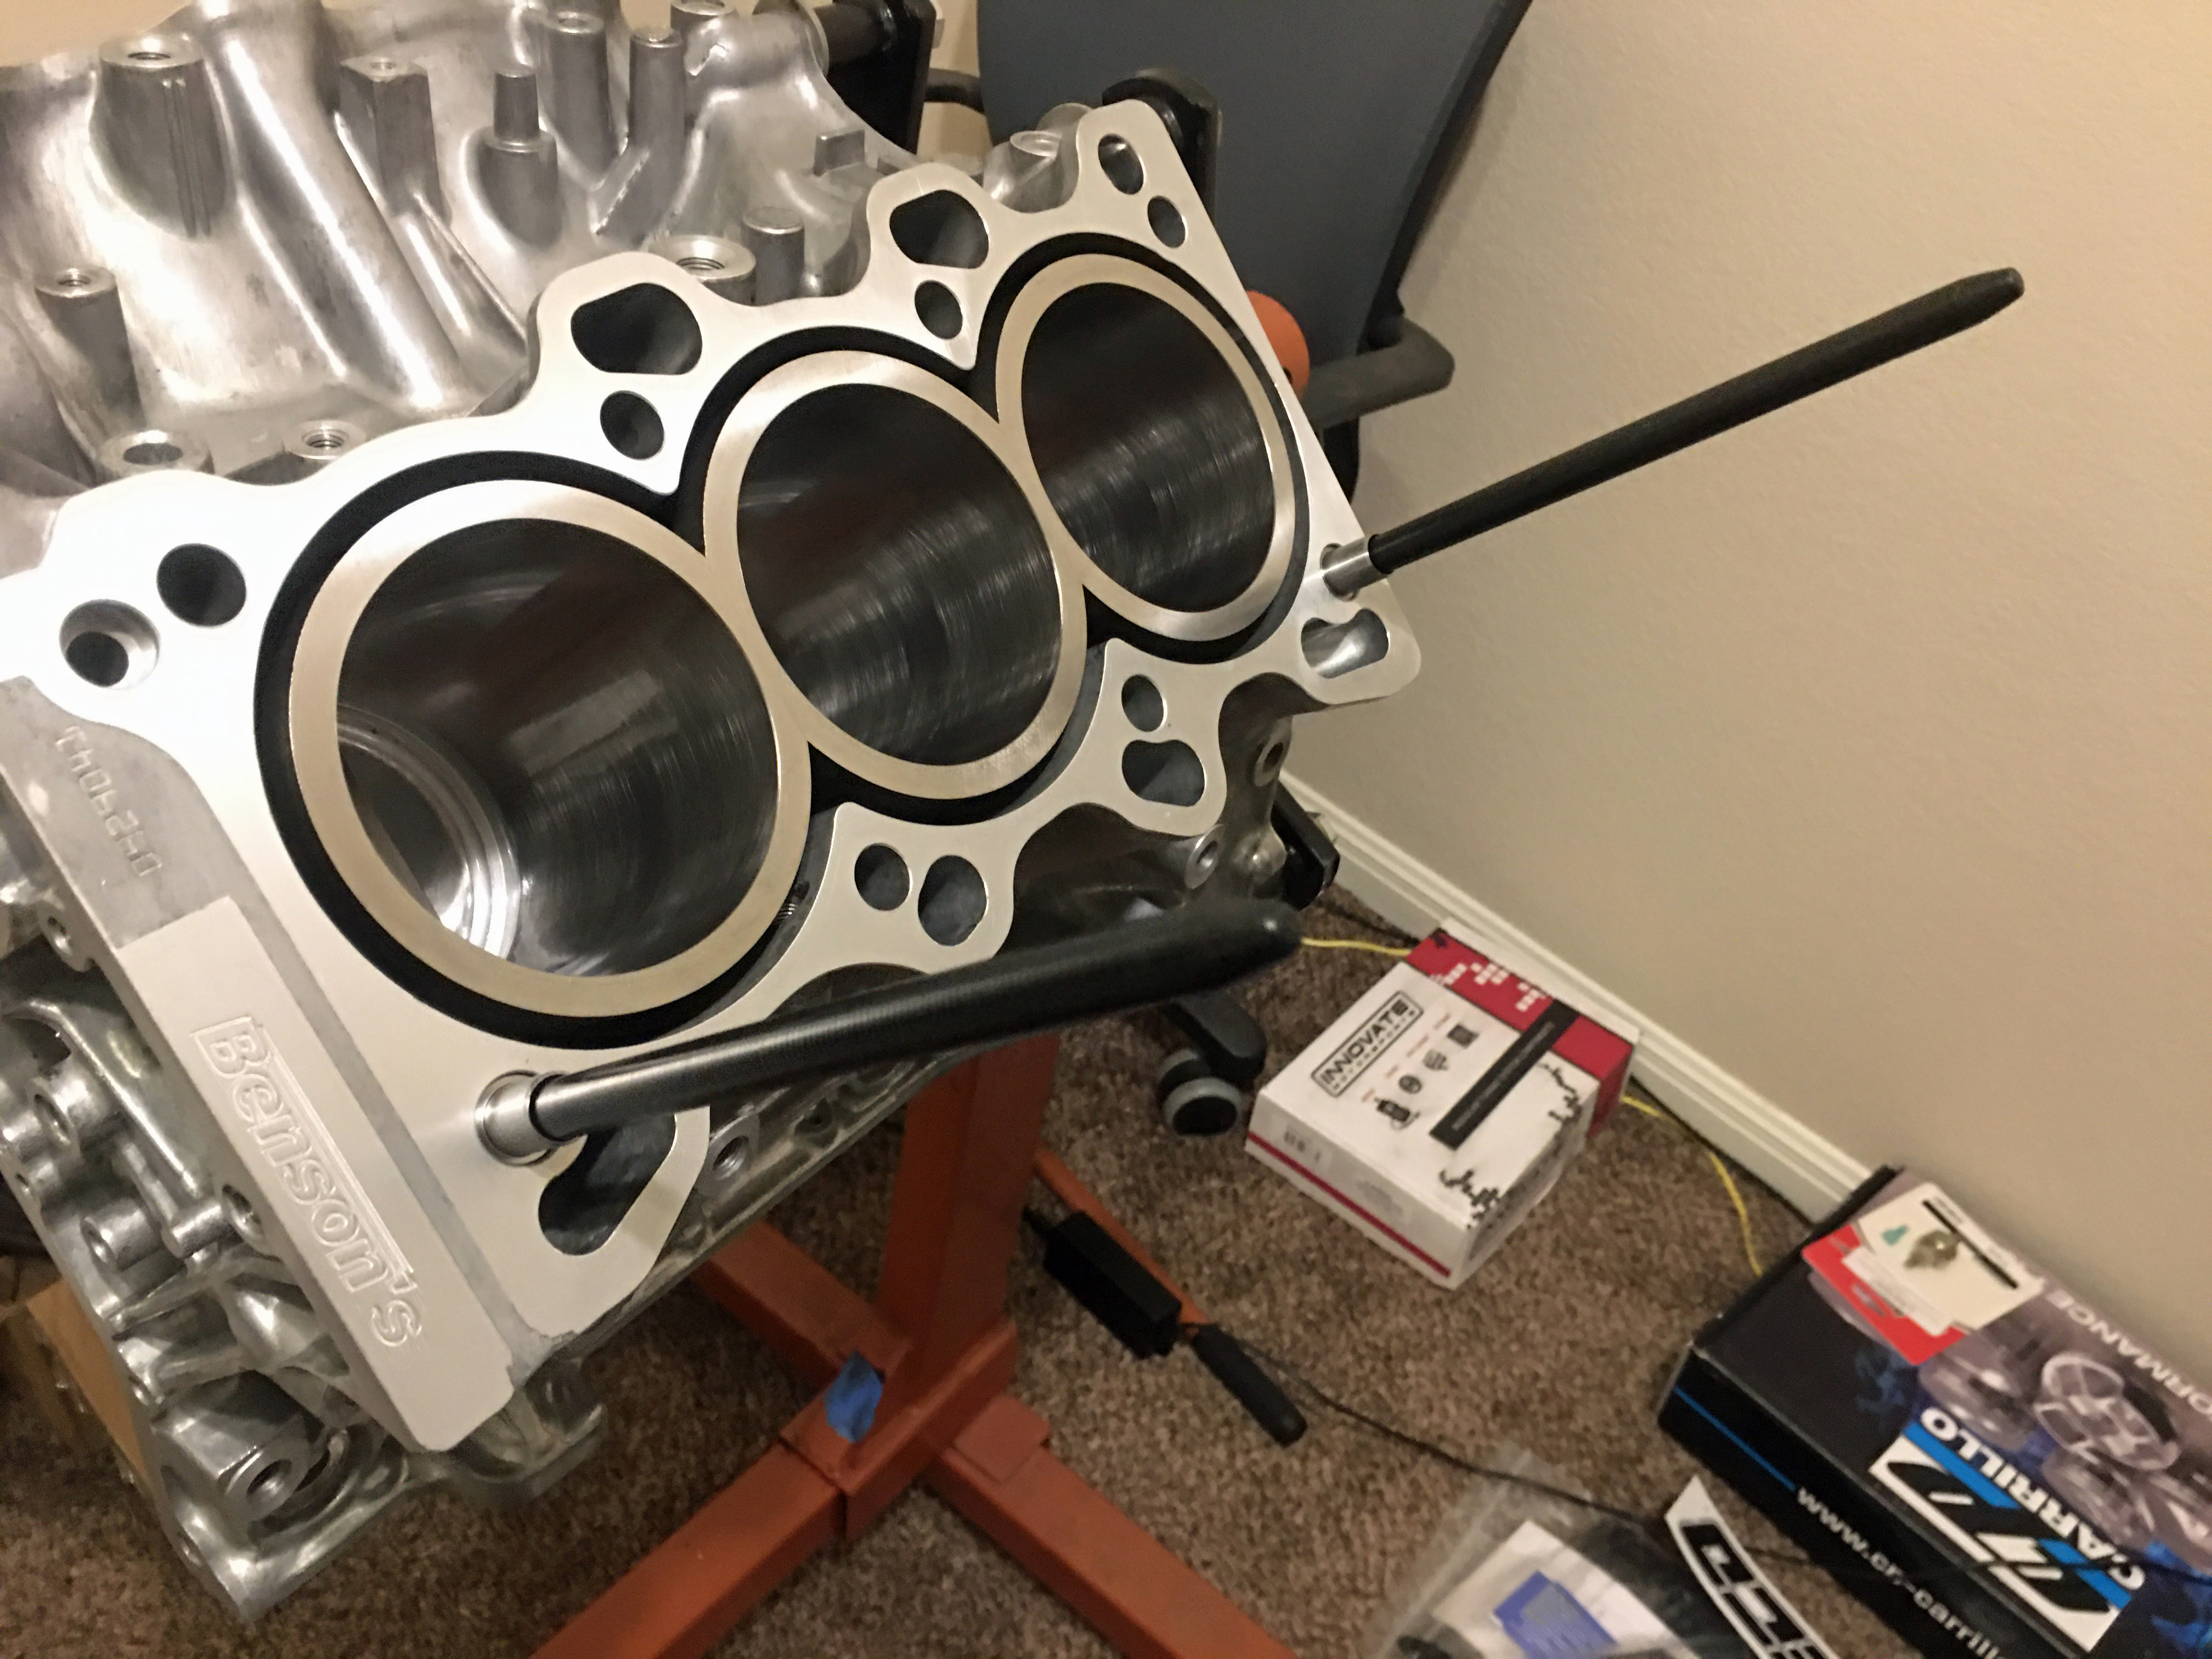
I got the block back from the most recent machinist and he fucked it up too. Honed out of round by more than 0.0010" in 2 cylinders. He said run it, everyone else including Wiseco said hell no, so he gave me the runaround and I cut my losses and I ended up selling the block to a guy who bored it out to 93.5mm and was trying to make 700hp on it, then bought a used block from the classifieds here and sent it off to Darton for MID sleeves, ARP main studs, head bolt timeserts, and a line hone, and as far as I know it's just been sitting for the past 6-8 months since they're so backed up.


I sent the heads off to Bad Guys Worldwide in CA for supertech bronze guides, supertech springs, +1mm intake valves, and some port work. He's had them for about 6 months now, and is also crazy busy. He wanted to vapor blast and flow test before and after upsized valves and porting and such so I'm happy to let him take all the time he needs, especially since no one has really done any sort of development on C30 heads since the 90s and he seemed excited to do it and has all the equipment in house. No one has even posted flow numbers for these heads that I'm aware of so if he can get good improvements in flow with porting it could open up another option for other people in the future.


I looked into having Web Cams regrind or hard weld my cams and after seeing the specs on their regrind (barely any additional lift) and the hard weld (cost as much as Toda cams) I decided that was a waste of time and money. So I'm running stock cams for now and will go to either Toda A or Comptech cams down the road.


I've given up hope of any machining getting done any time soon.


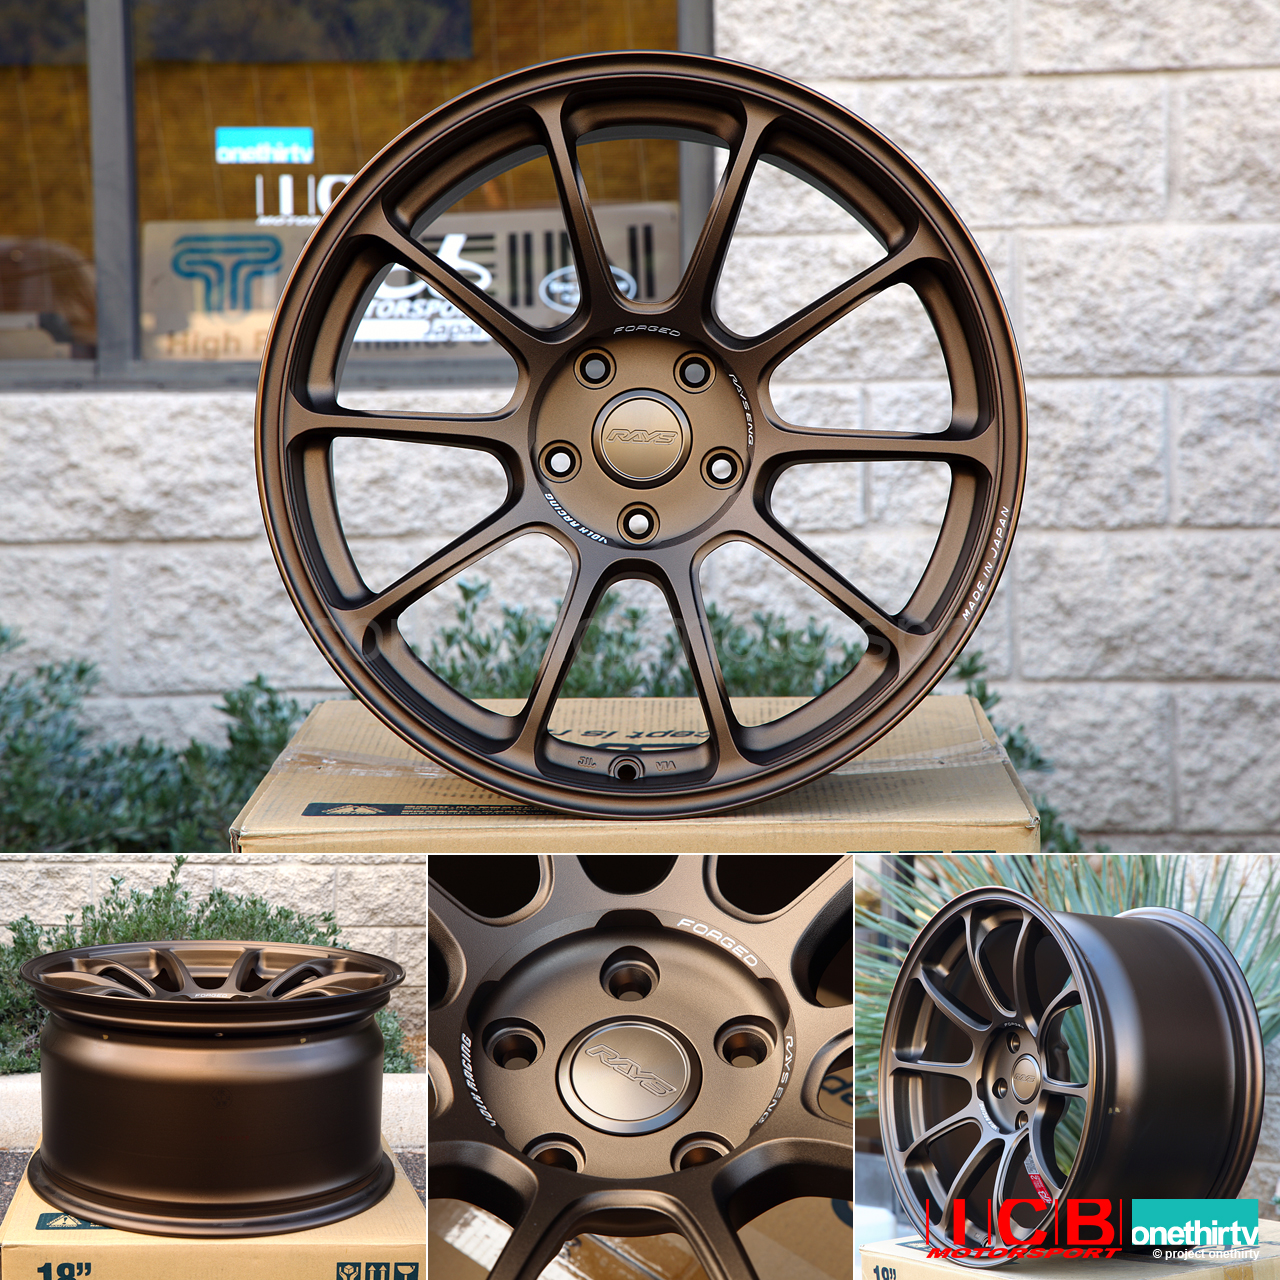
I also placed an order for a set of Volk ZE40s in anodized bronze in January. 17x8.5 in the front and 18x10 in the rear, 275s should look pretty nice in the rear compared to the measily stock 245s. Depending on the fitment I might get BC coilovers or maybe swift lowering springs if I can find them. I've wanted these wheels pretty much since I got the car so the 6-8 month wait is a bit disappointing but I suppose that will just make it sweeter when they finally arrive lol.

Rays_Engineering_Volk_Racing_ZE40_Bronze_18X10_39offset_5X1143_Concave_1.jpg


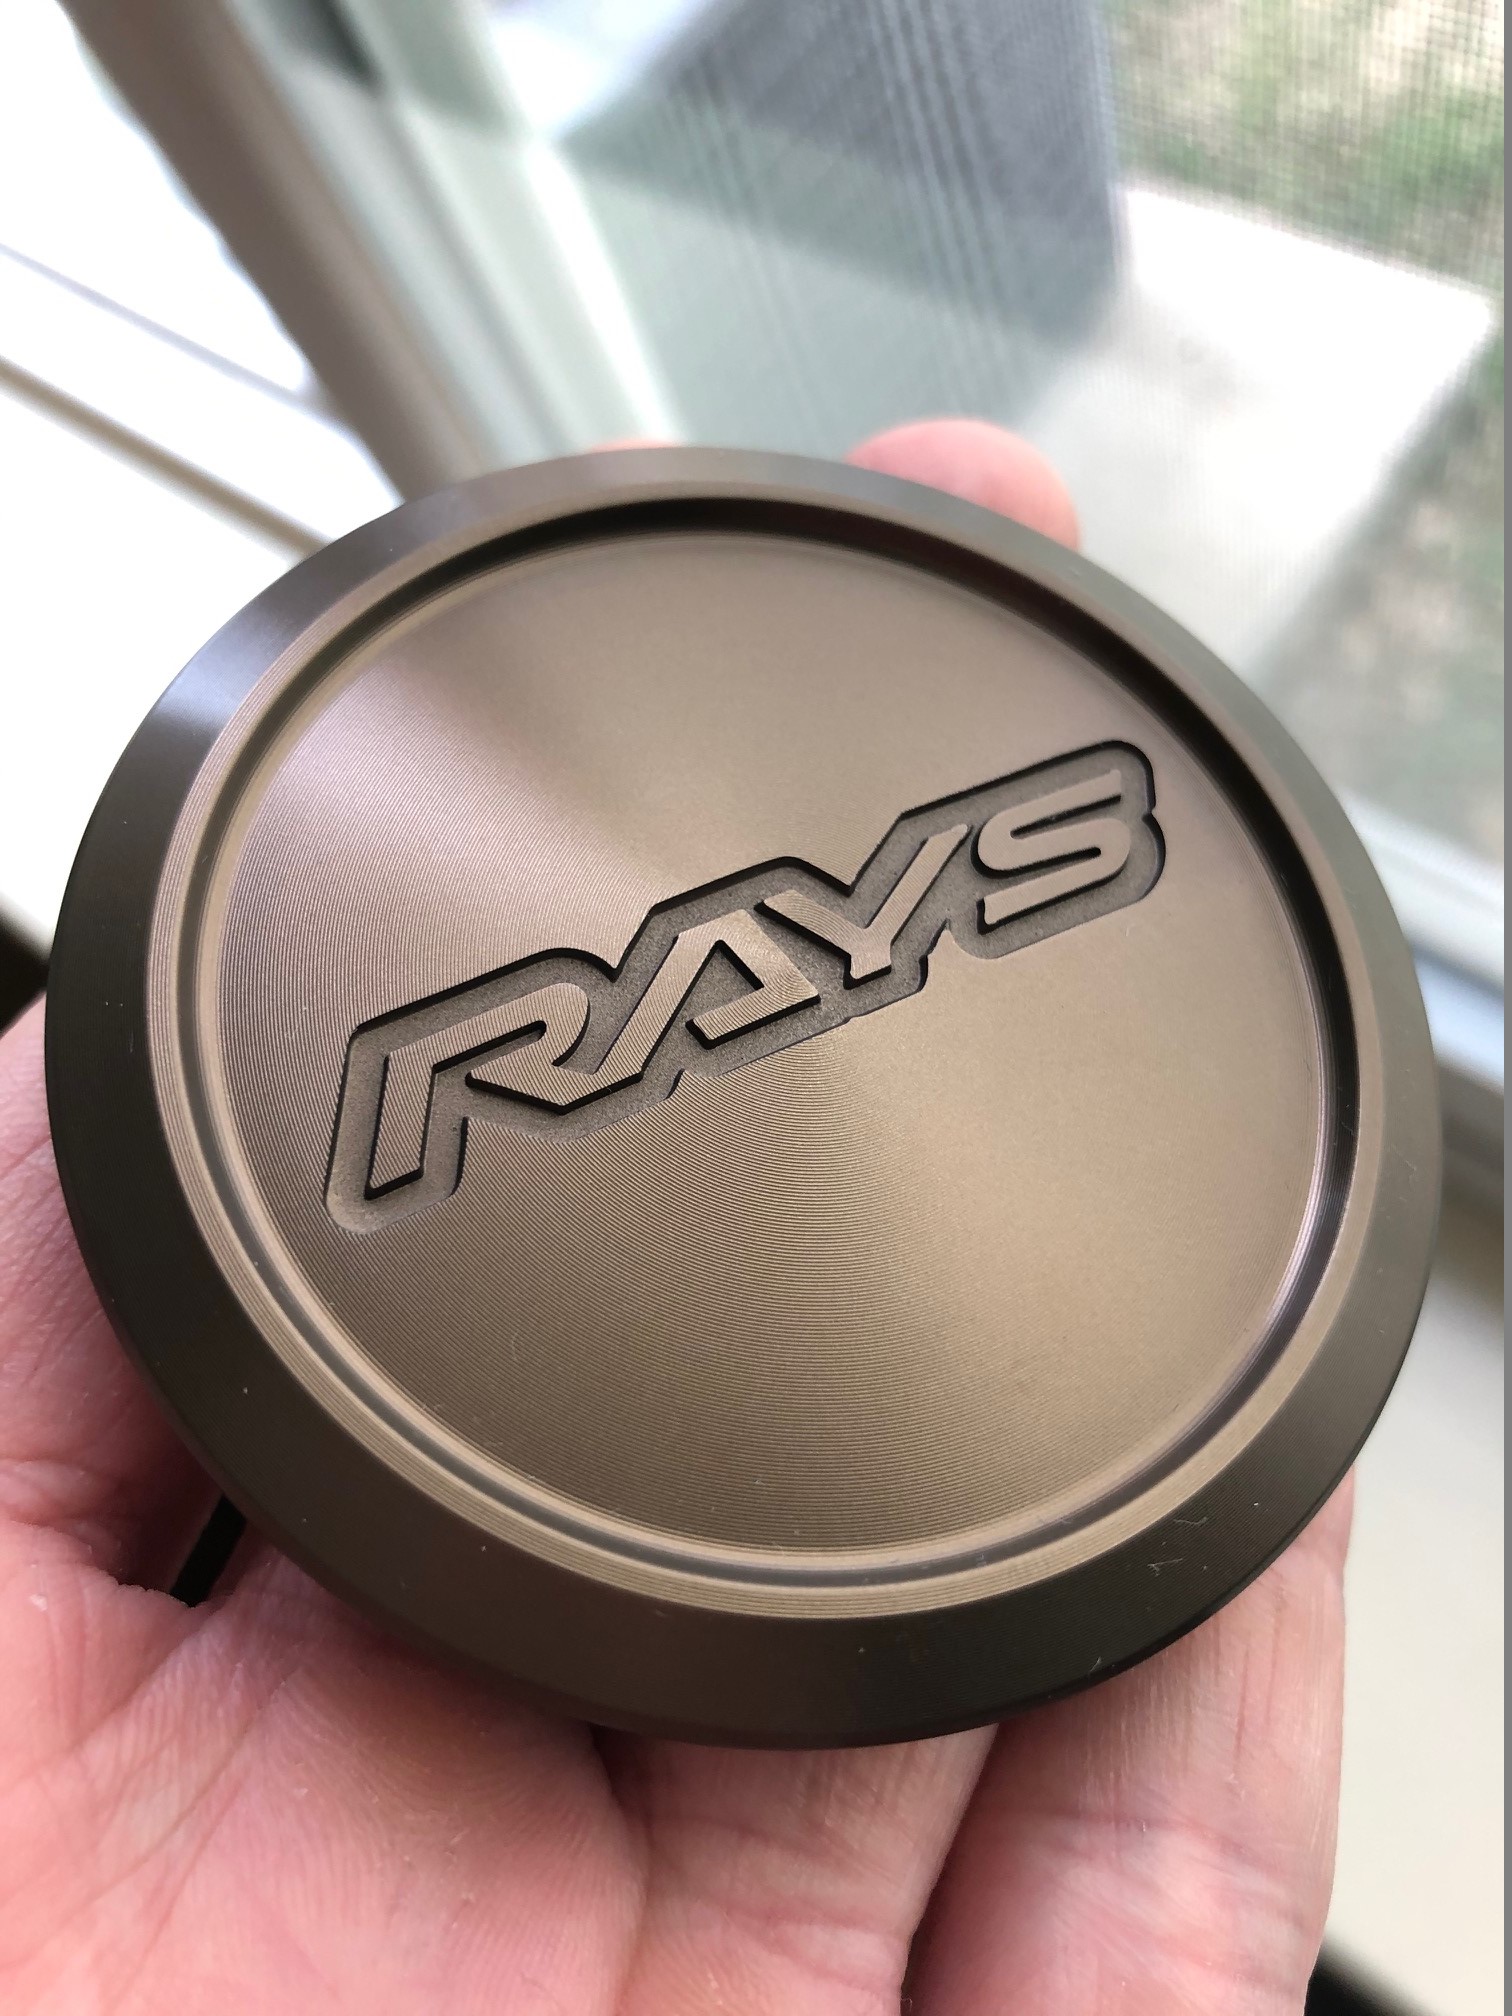
At least the center caps showed up quickly.

IMG_0538.jpg


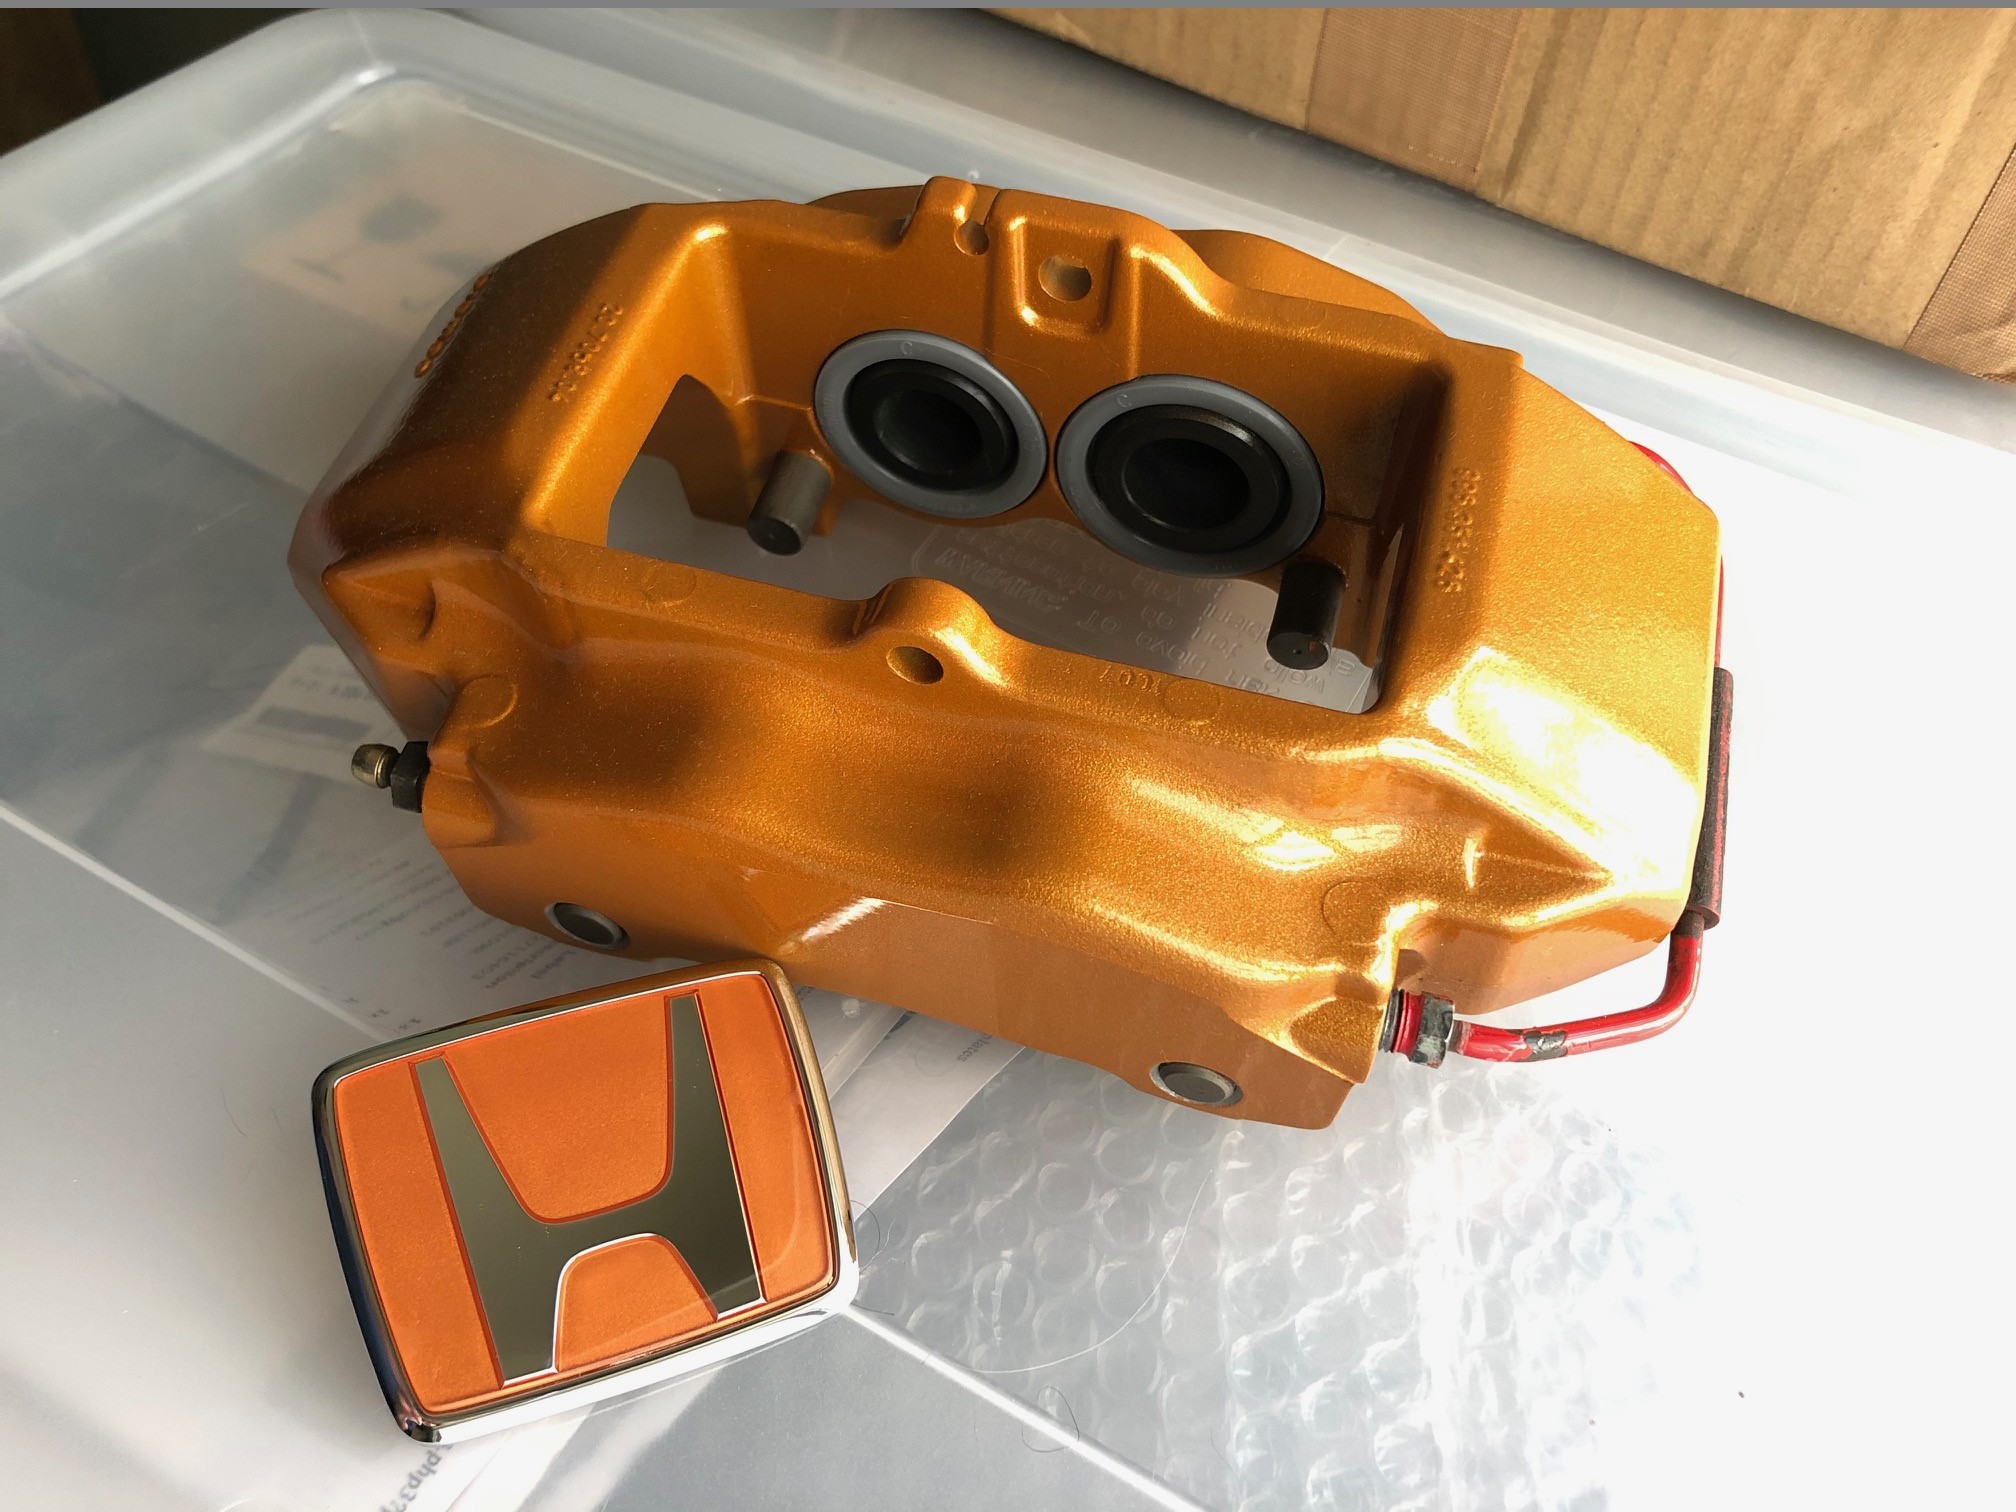
I've also been working on cobbling together a budget BBK using Porsche 996 911 calipers from Ebay. They have the same pistons sizes as the stock NSX calipers so can be used without ruining the bias like some guys used to do with the RL calipers, then just NA2 calipers and rotors in the rear. I don't like the silly little parking brake calipers people run with BBKs and that would also ruin the budget nature of this so I'm not going to mess with getting 4 pots in the rear, and for my naturally aspirated ambitions this should work just fine. For front rotors, I dug through the Raybestos parametric rotor search and found that late model Nissan Rogue 320x28 rotors will fit pretty much perfectly once the center bore is widened to NSX spec - the lug pattern is the same just the center bore is a few mm too small, and its a simple/cheap job for a machine shop to bore it out a bit more - so that gives me a huge number of very cheap rotor options to choose from that will be easily accessible for the next few decades. I bought the cheapest one on Rockauto for mock up purposes and it fits without even removing the heat shield and also moves the caliper inboard a bit allowing more clearance between the caliper and wheel.

caliper1.jpg


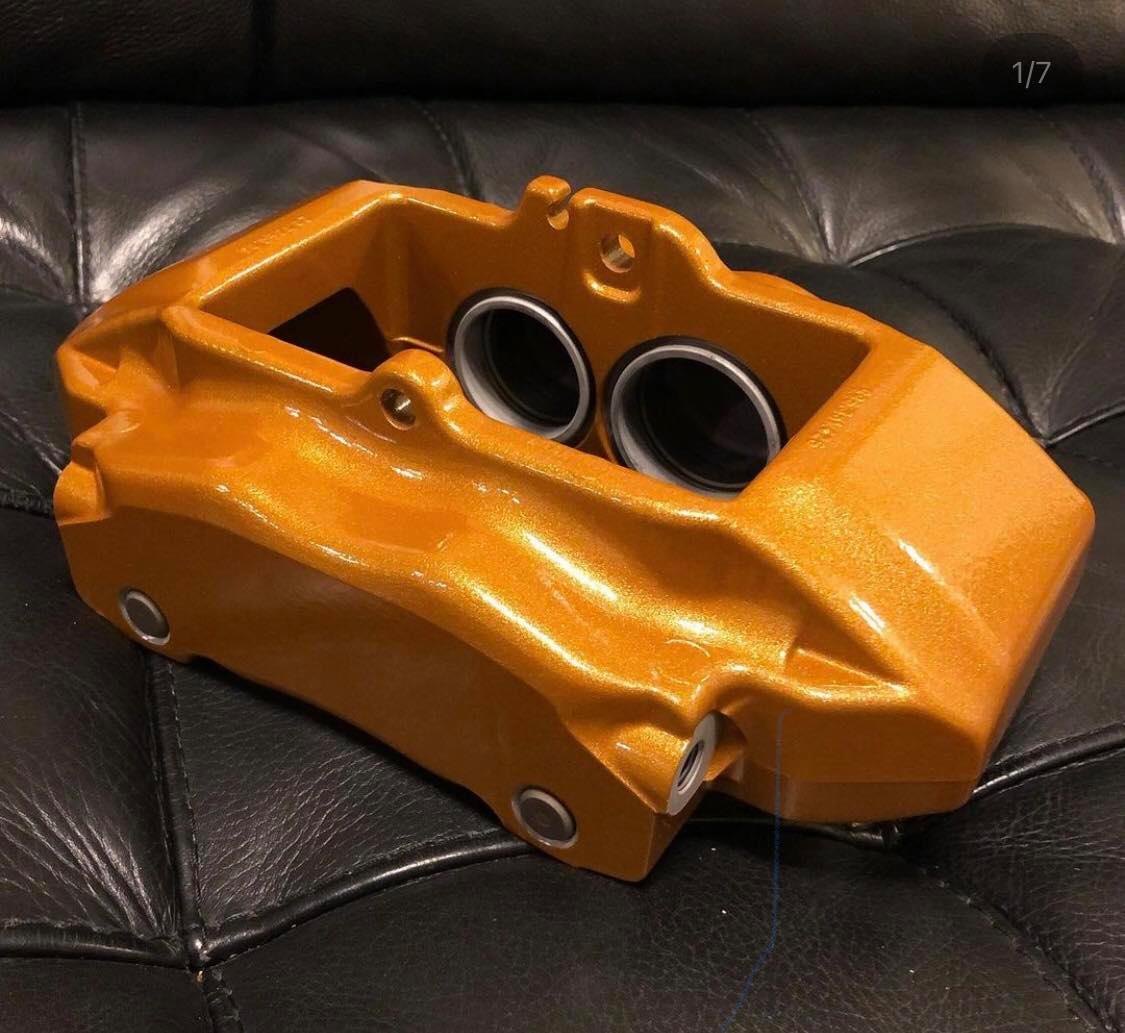
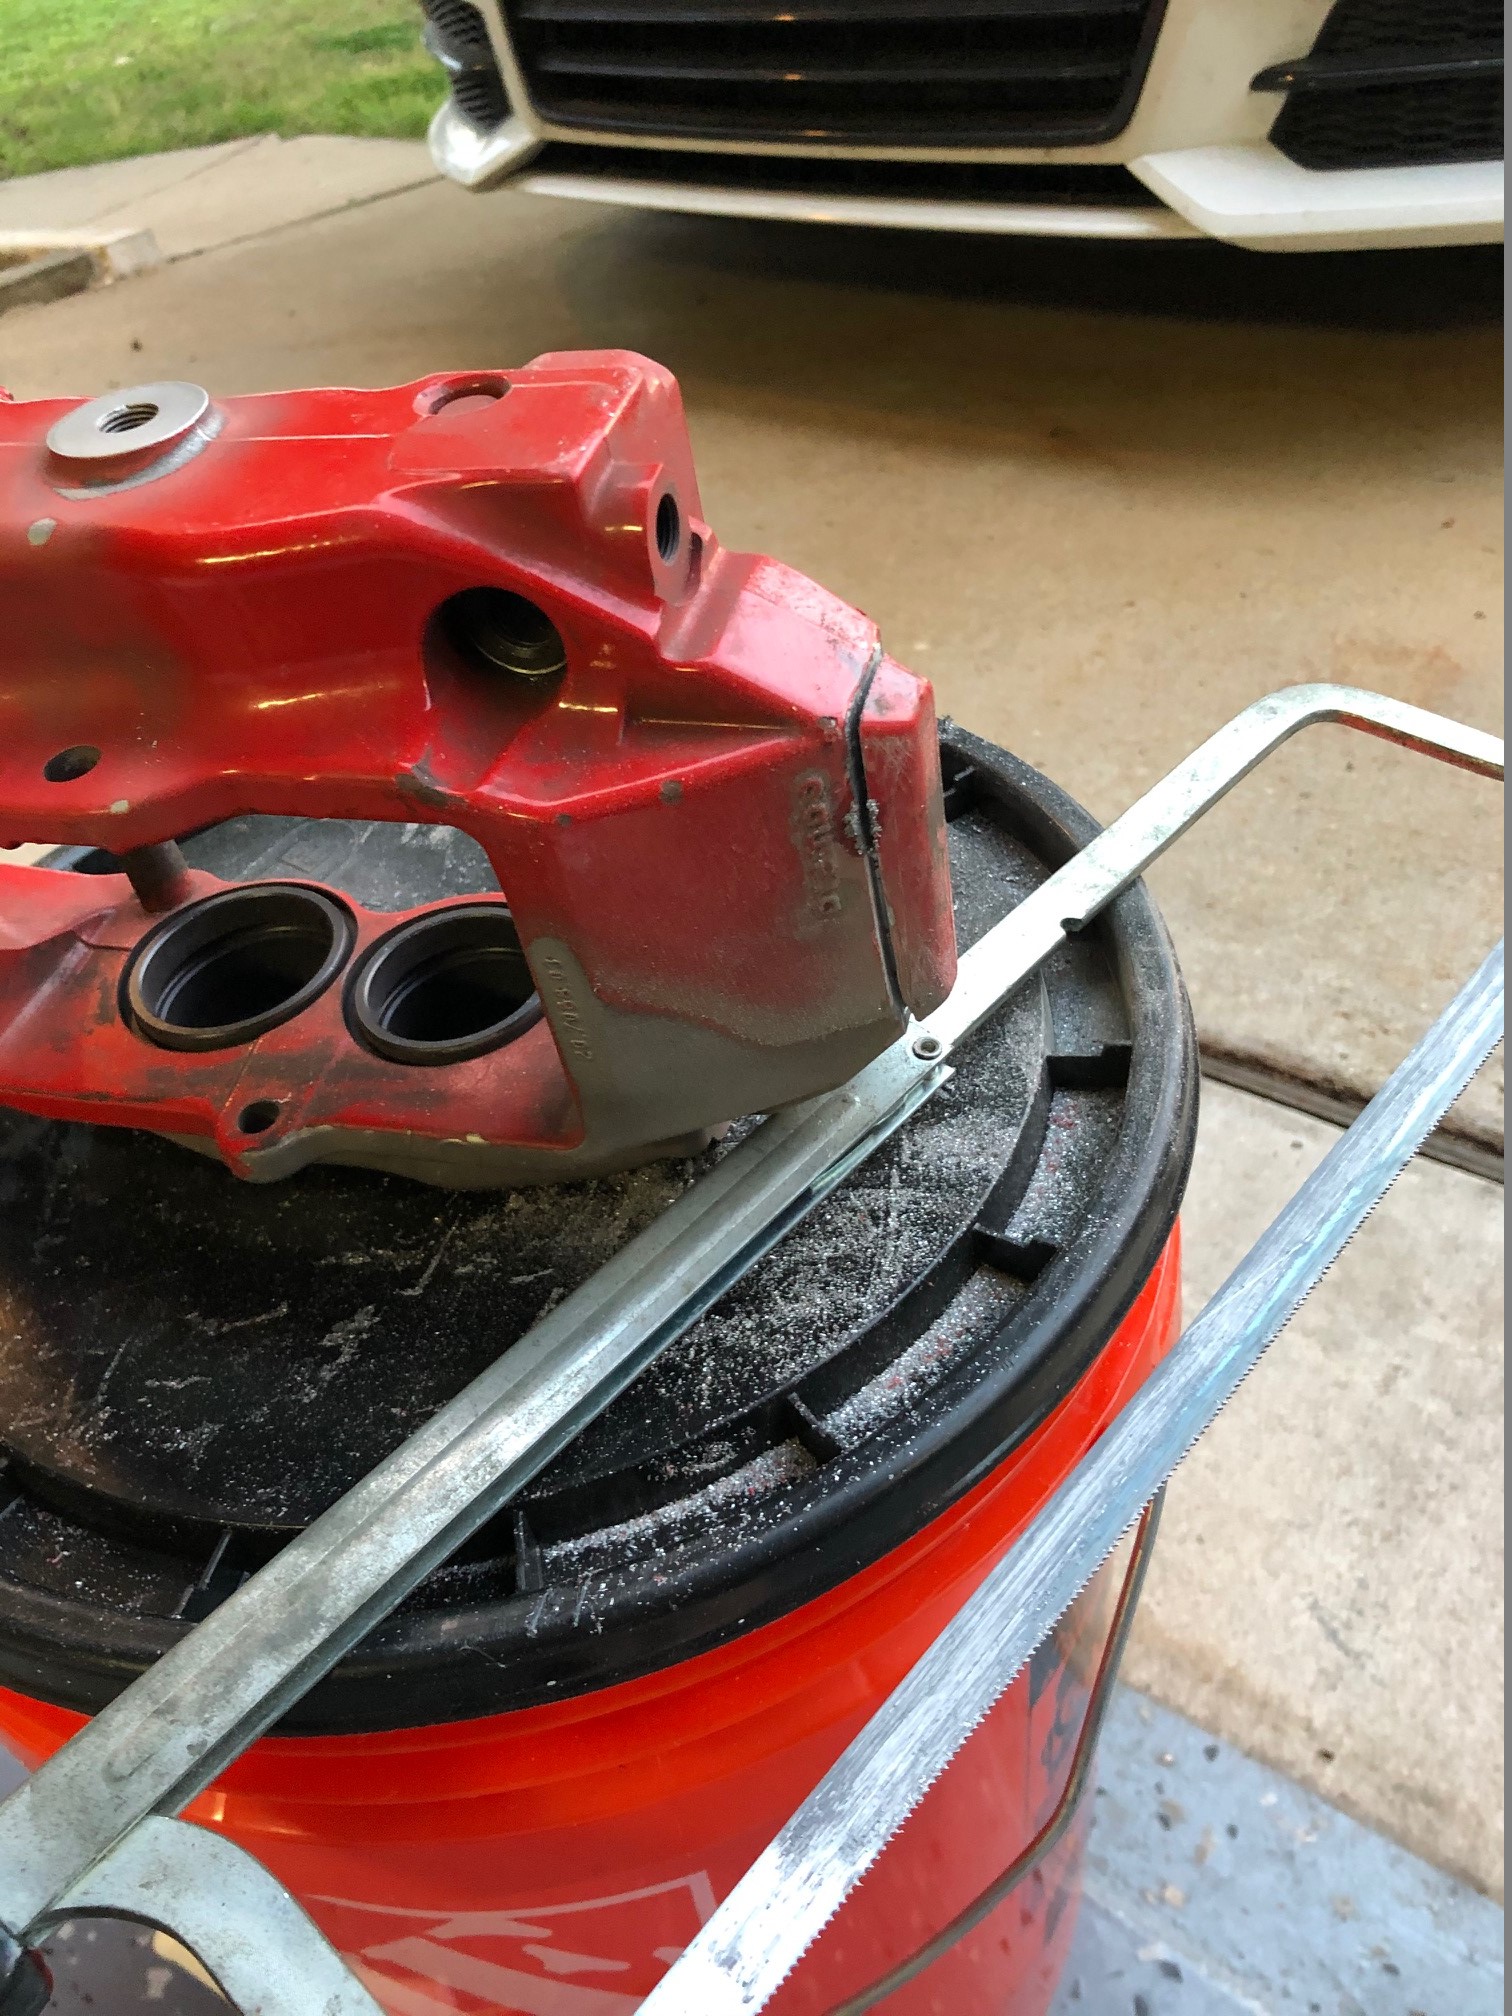
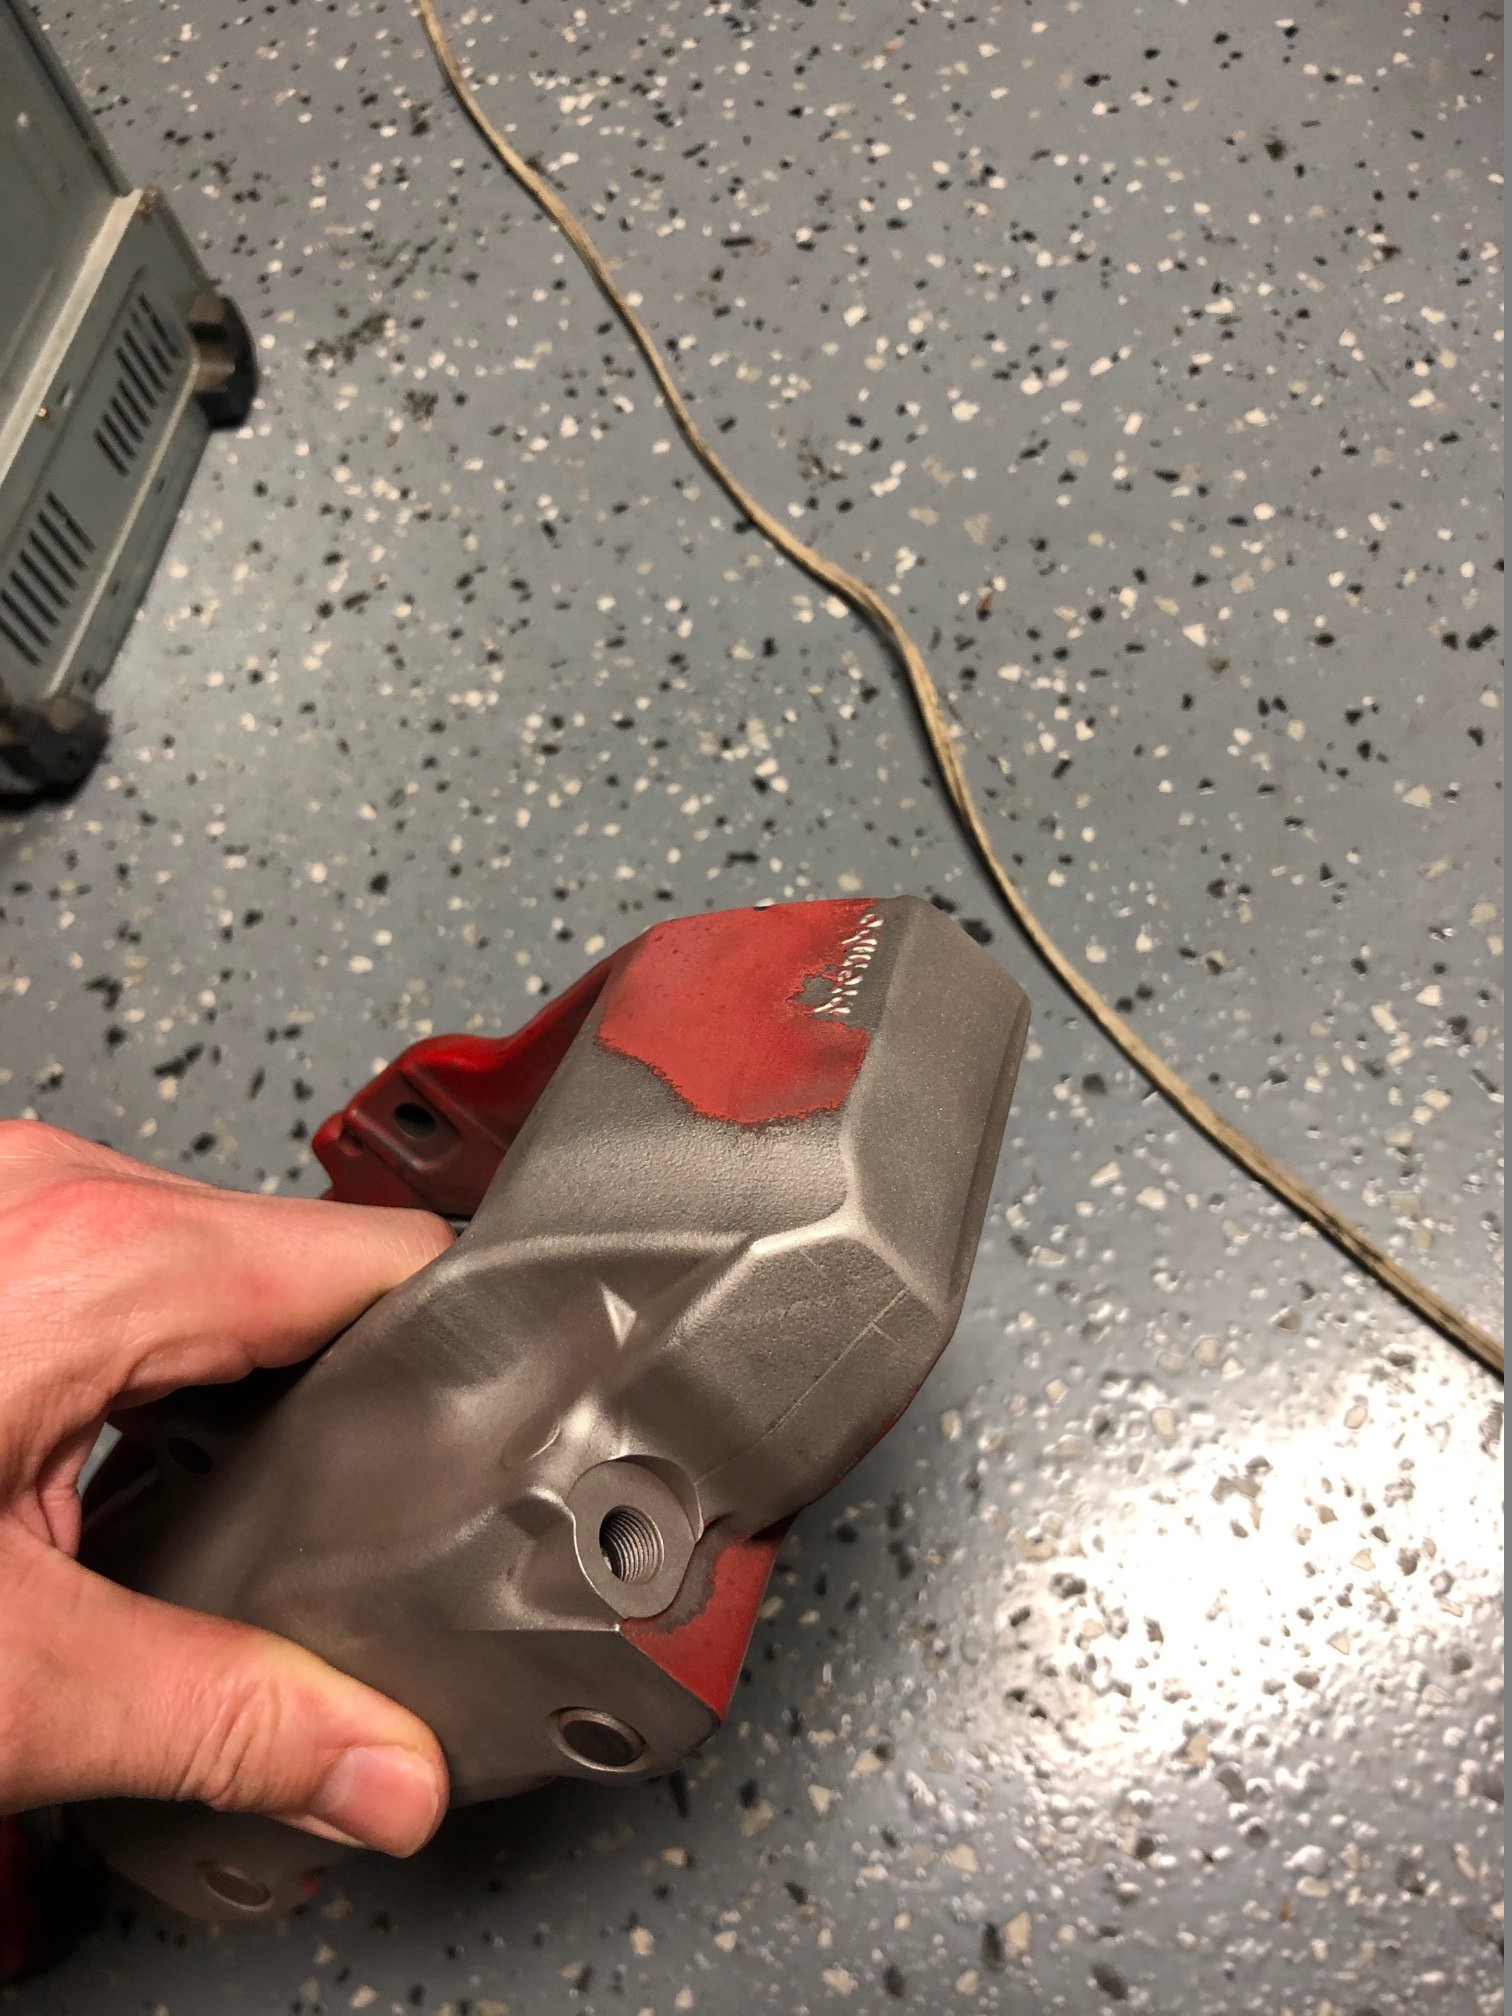
As far as actually fitting these calipers to the NSX, the NSX has the calipers on the front side of the knuckle and the Porsche Boxster/911 that these calipers came from have it on the rear, the solution is simple enough just turn the calipers upside down and move the crossover pipe to match so you keep the correct big little piston orientation. However, these calipers have a small protrusion in the casting to offer a bit of protection for the crossover pipe and that is no longer in front of the pipe in this configuration, so I'm chopping it off to make the calipers perfectly symmetric.

IMG_0766.jpg


Filed and blasted, ready for powder.

IMG_0768.jpg


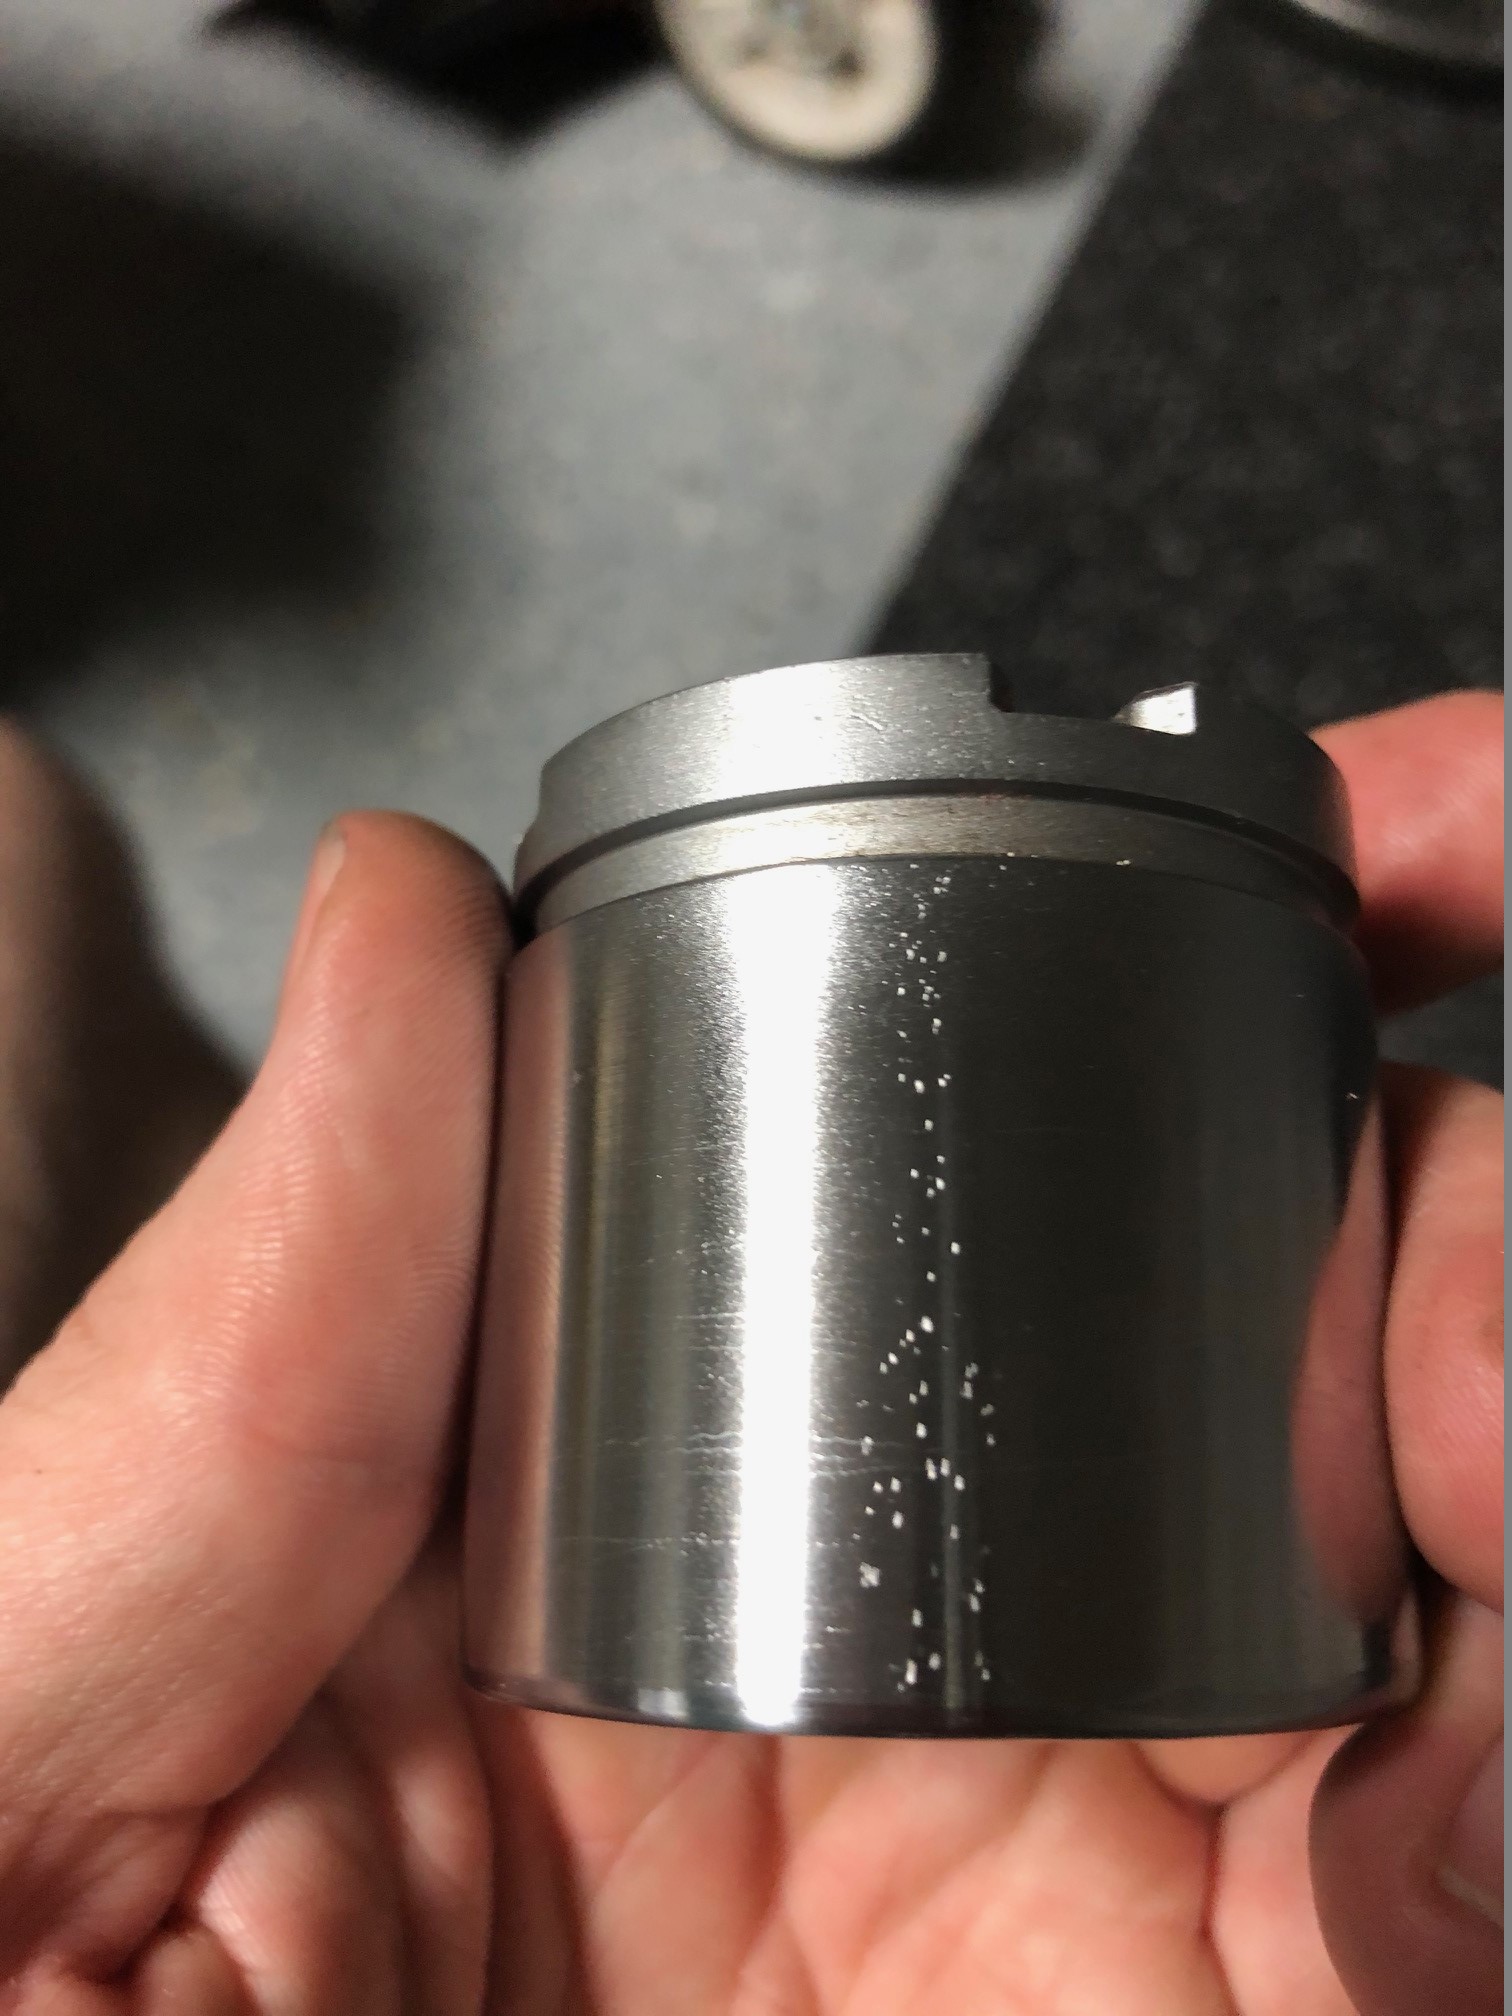
I got lucky and scored a set of reman NA2 calipers on Rockauto so I pulled them apart immediately (after learning my lesson with remans on the Integra) and found one of the pistons completely trashed. It's about par for the course for a reman and they were cheap enough that I'd rather just buy new pistons than deal with sending it back and trying to get another one, they rarely come in stock and most guys want $500 each for used ones, and these were less than that for the pair. They didn't properly mask the piston before media blasting it so the surface is rough, and it also looks like it was dropped on concrete or something based on all the little knicks. New ones are about $30 so not bad so I just added them to my pending Amayama order.

IMG_0807.jpg


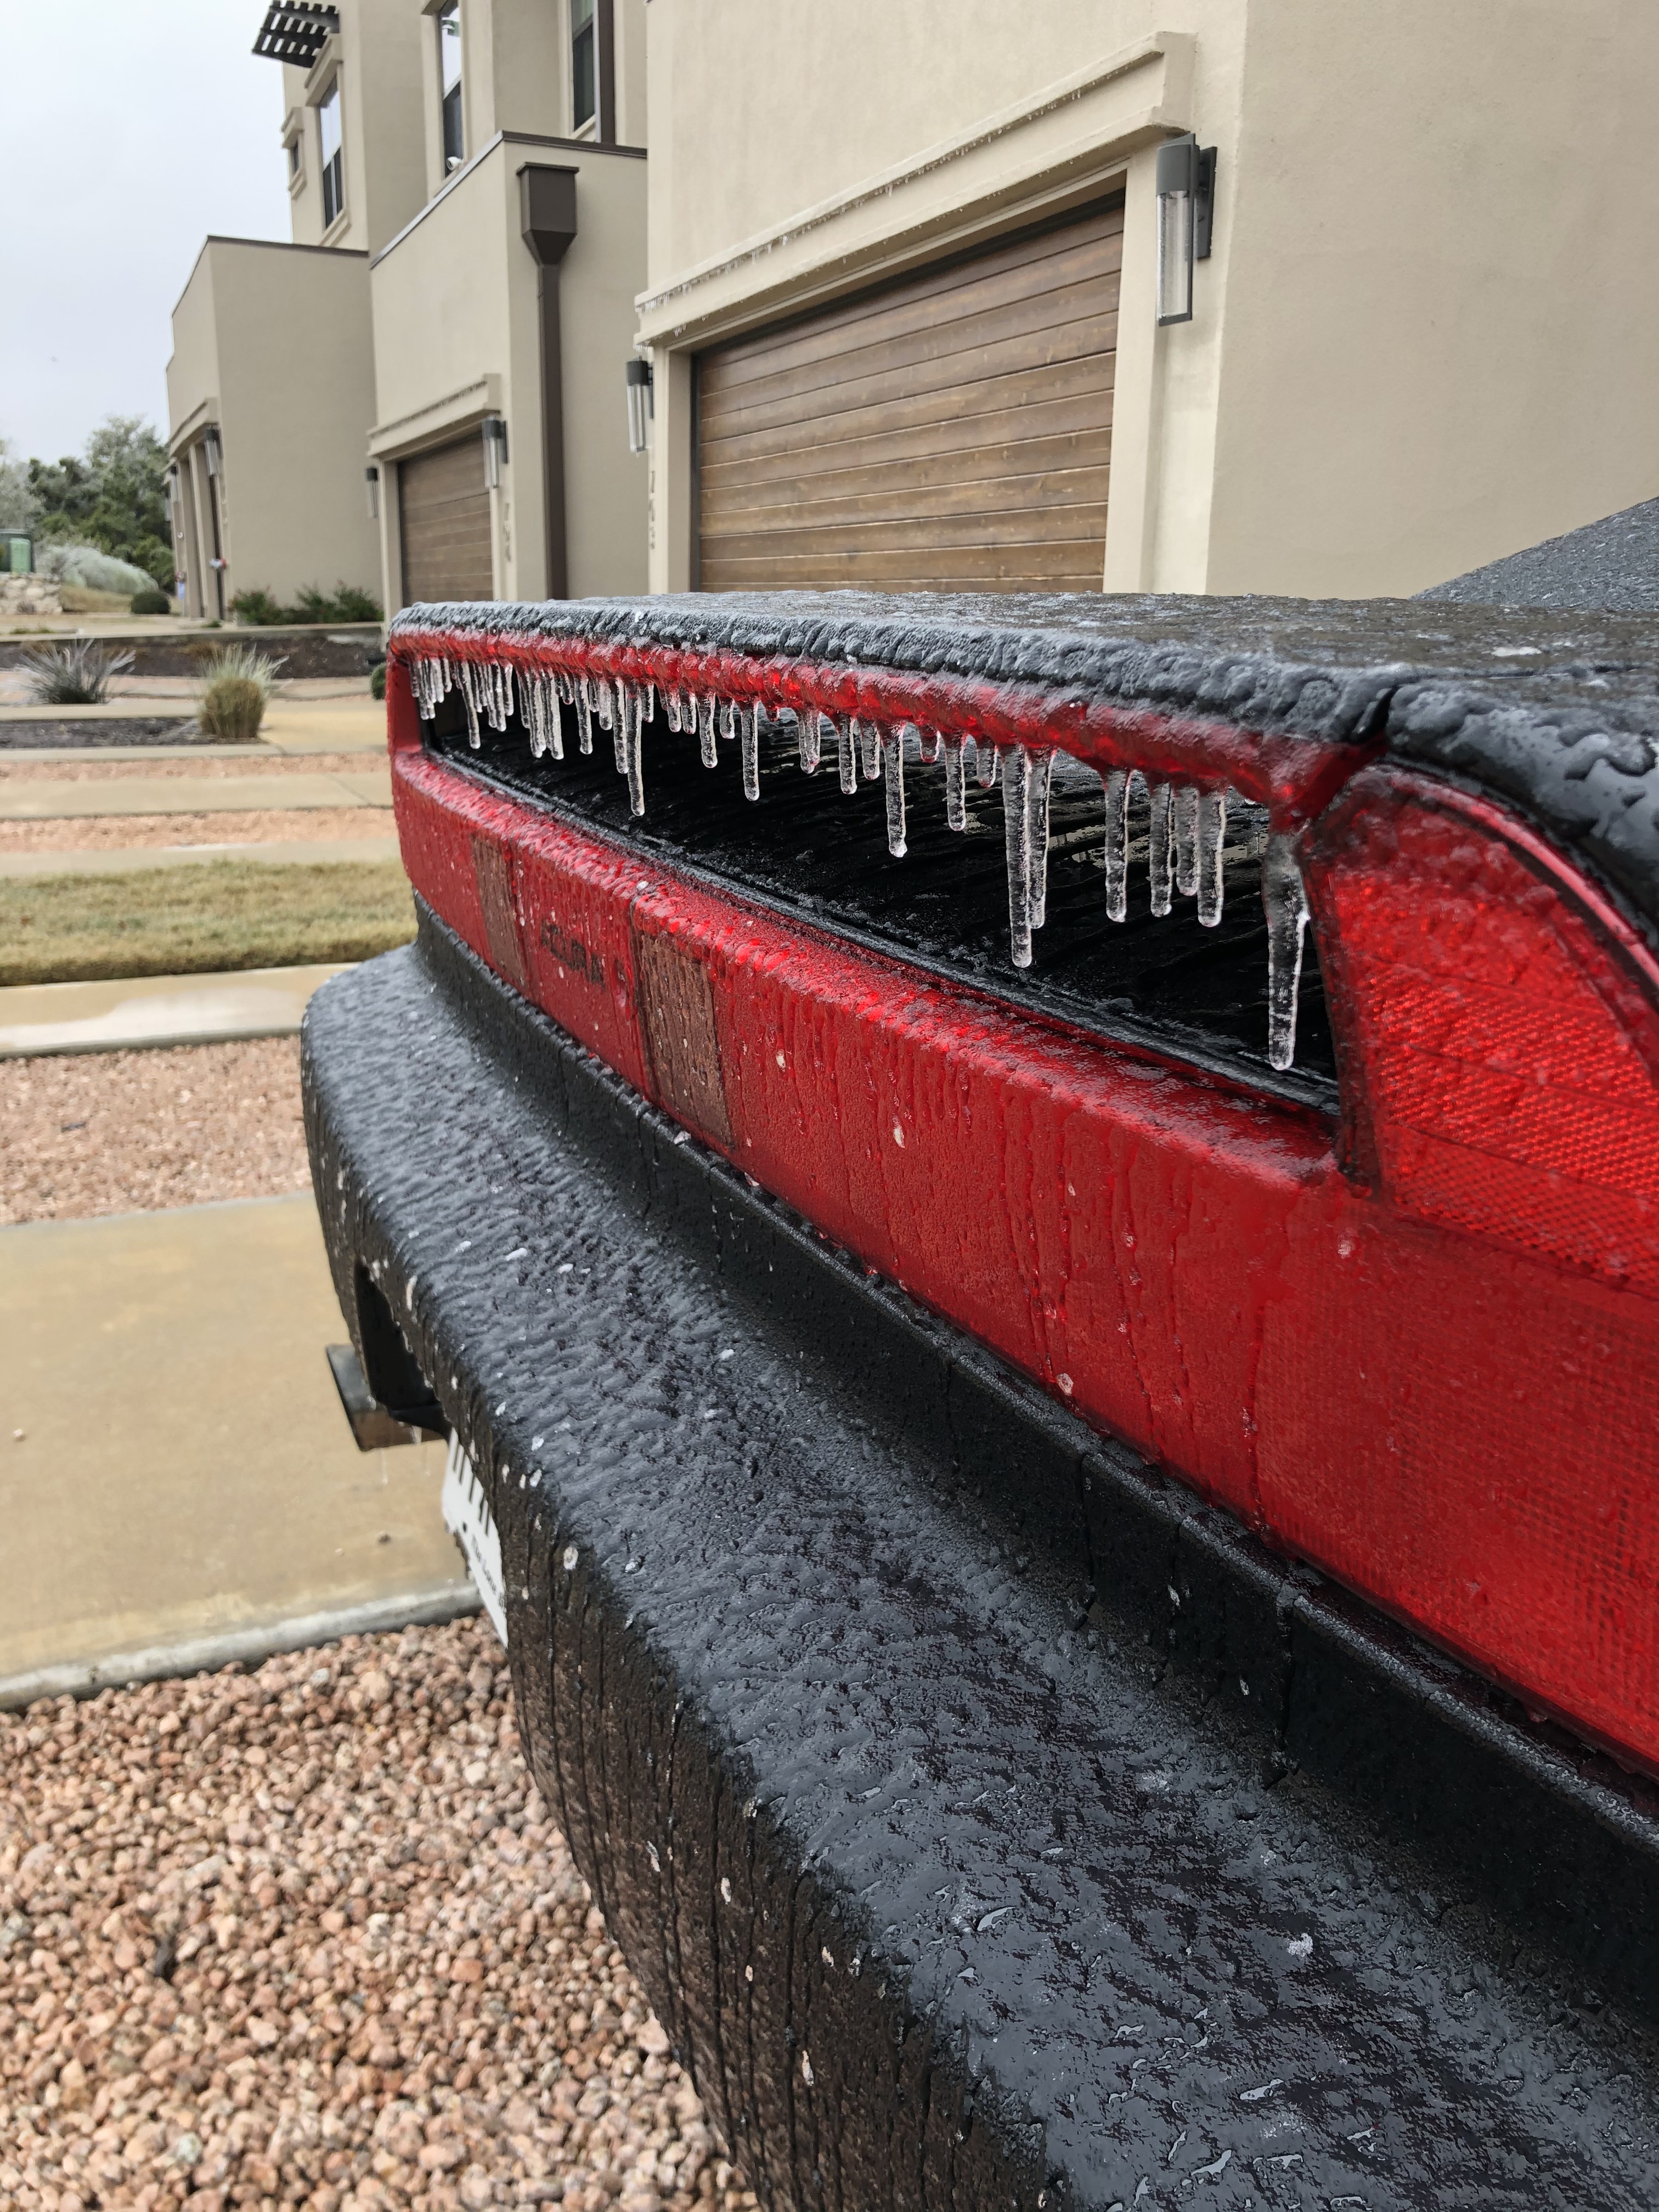
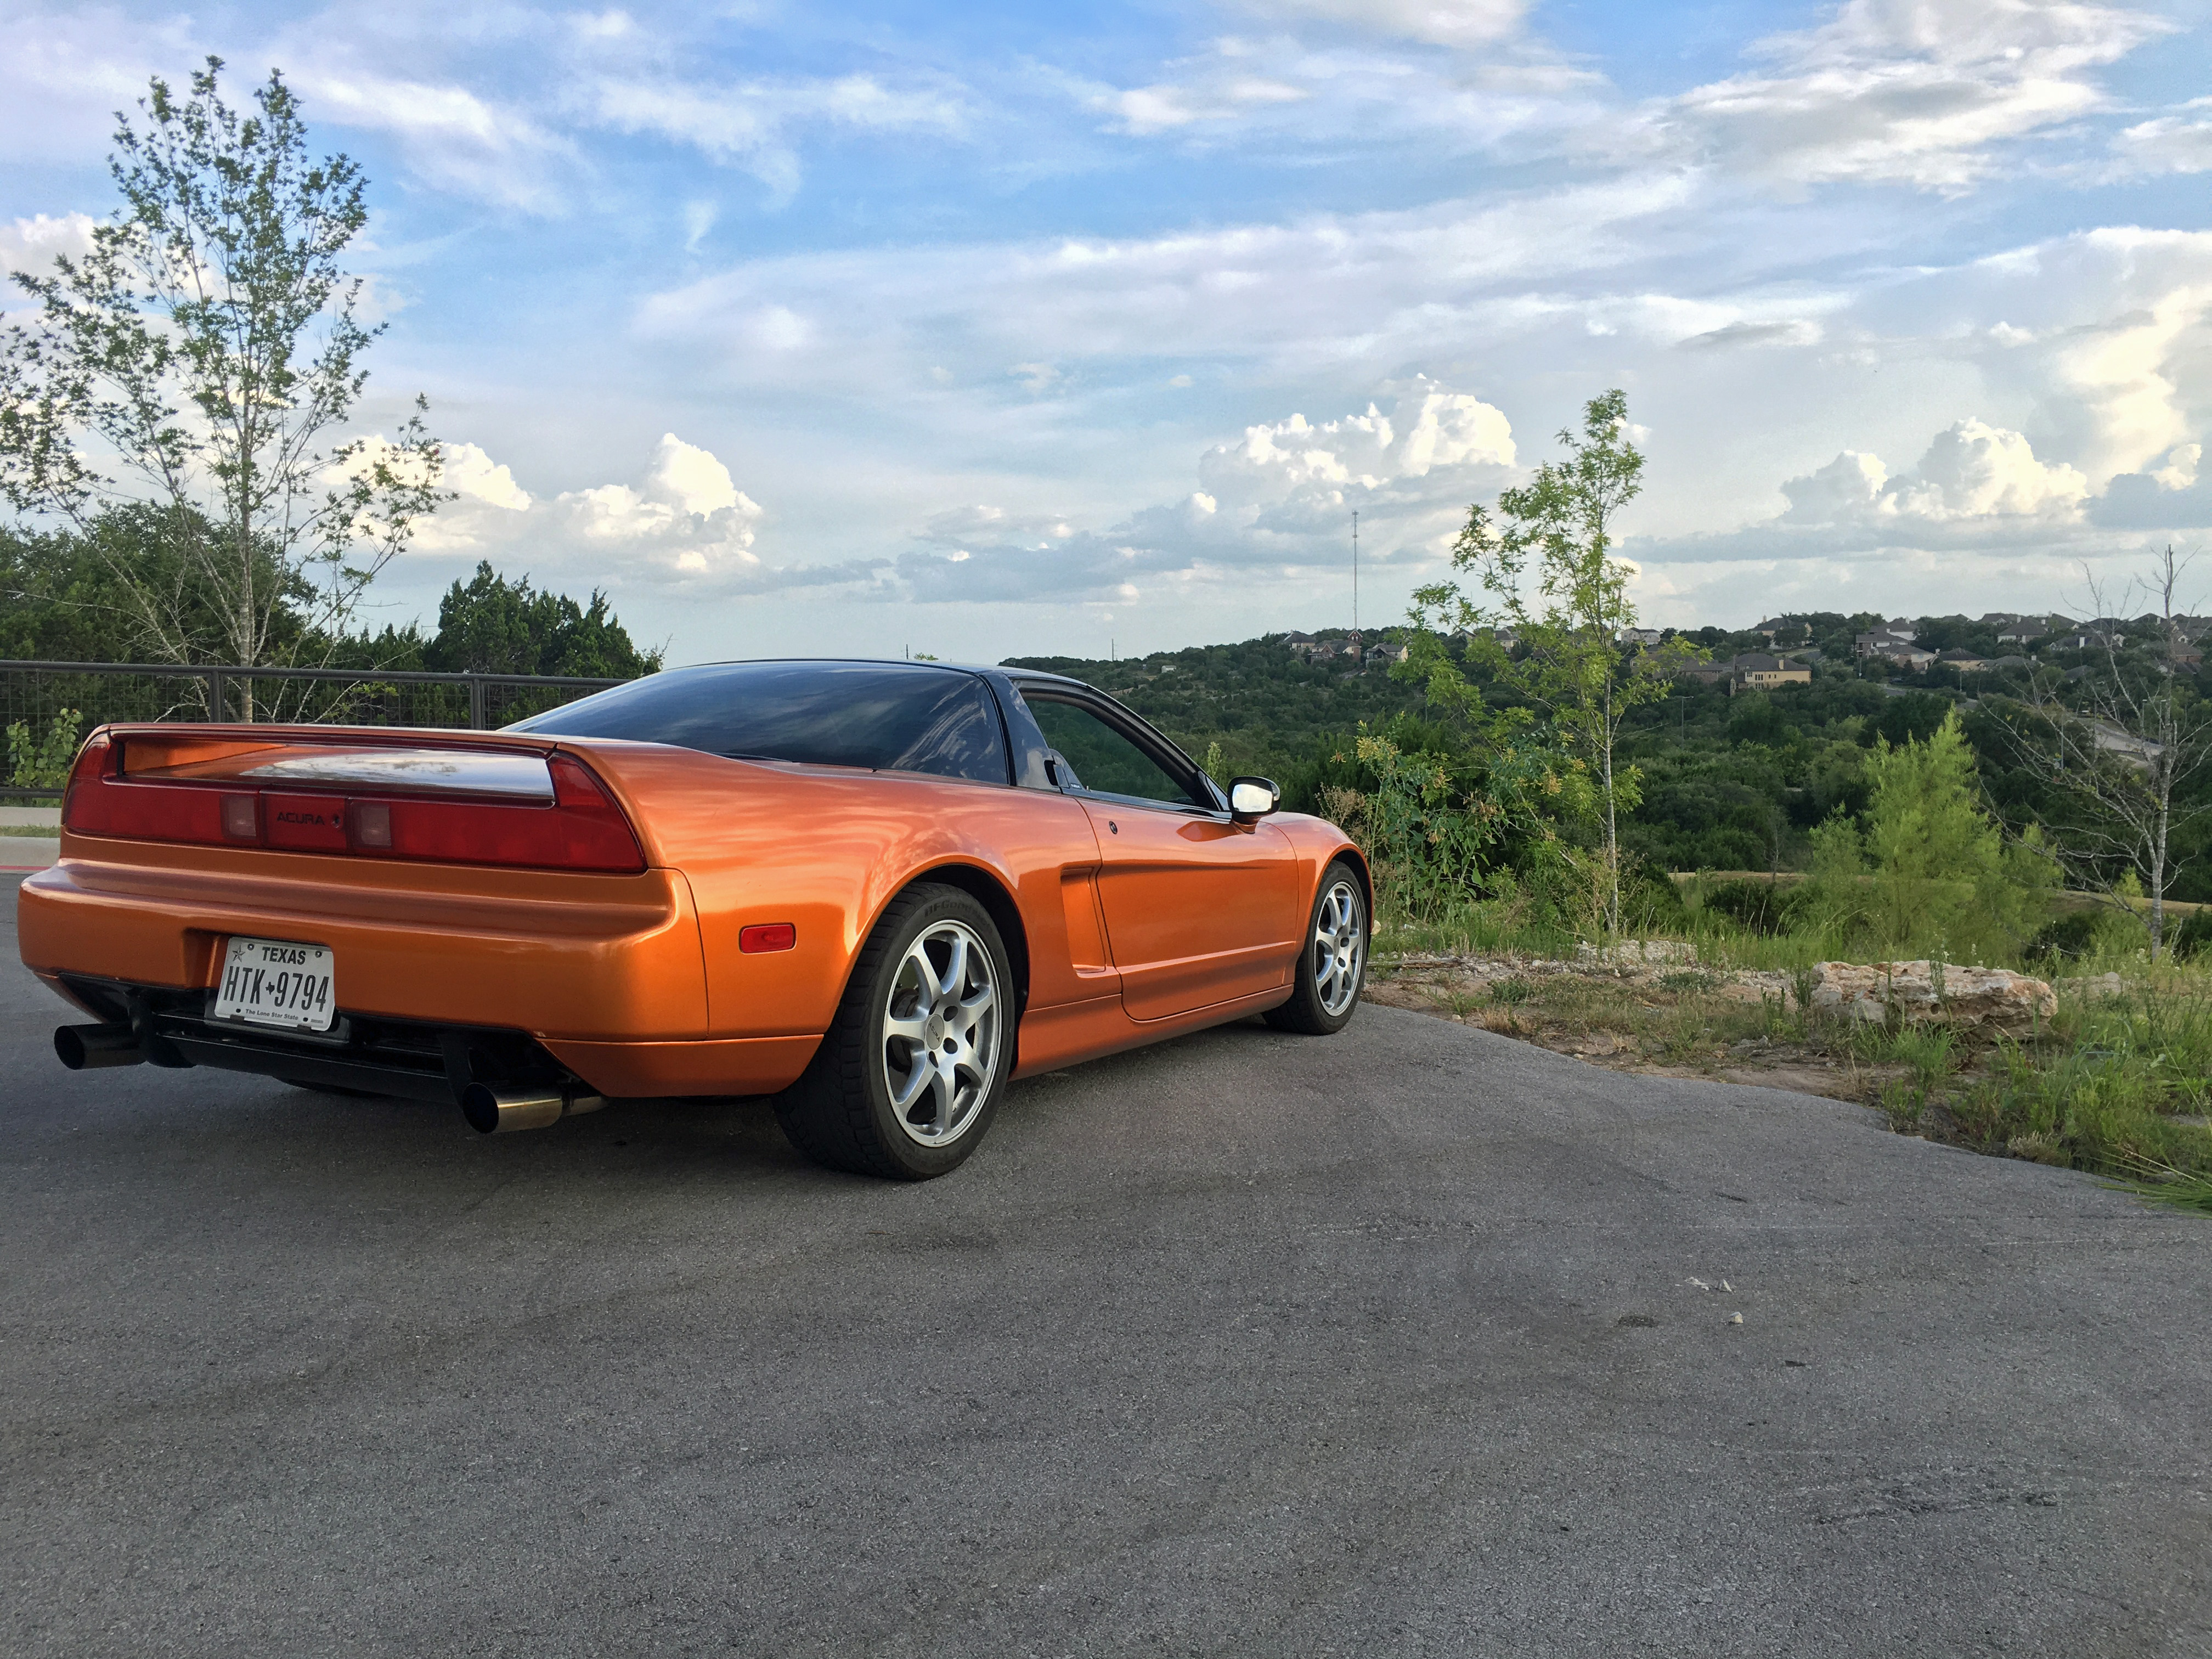
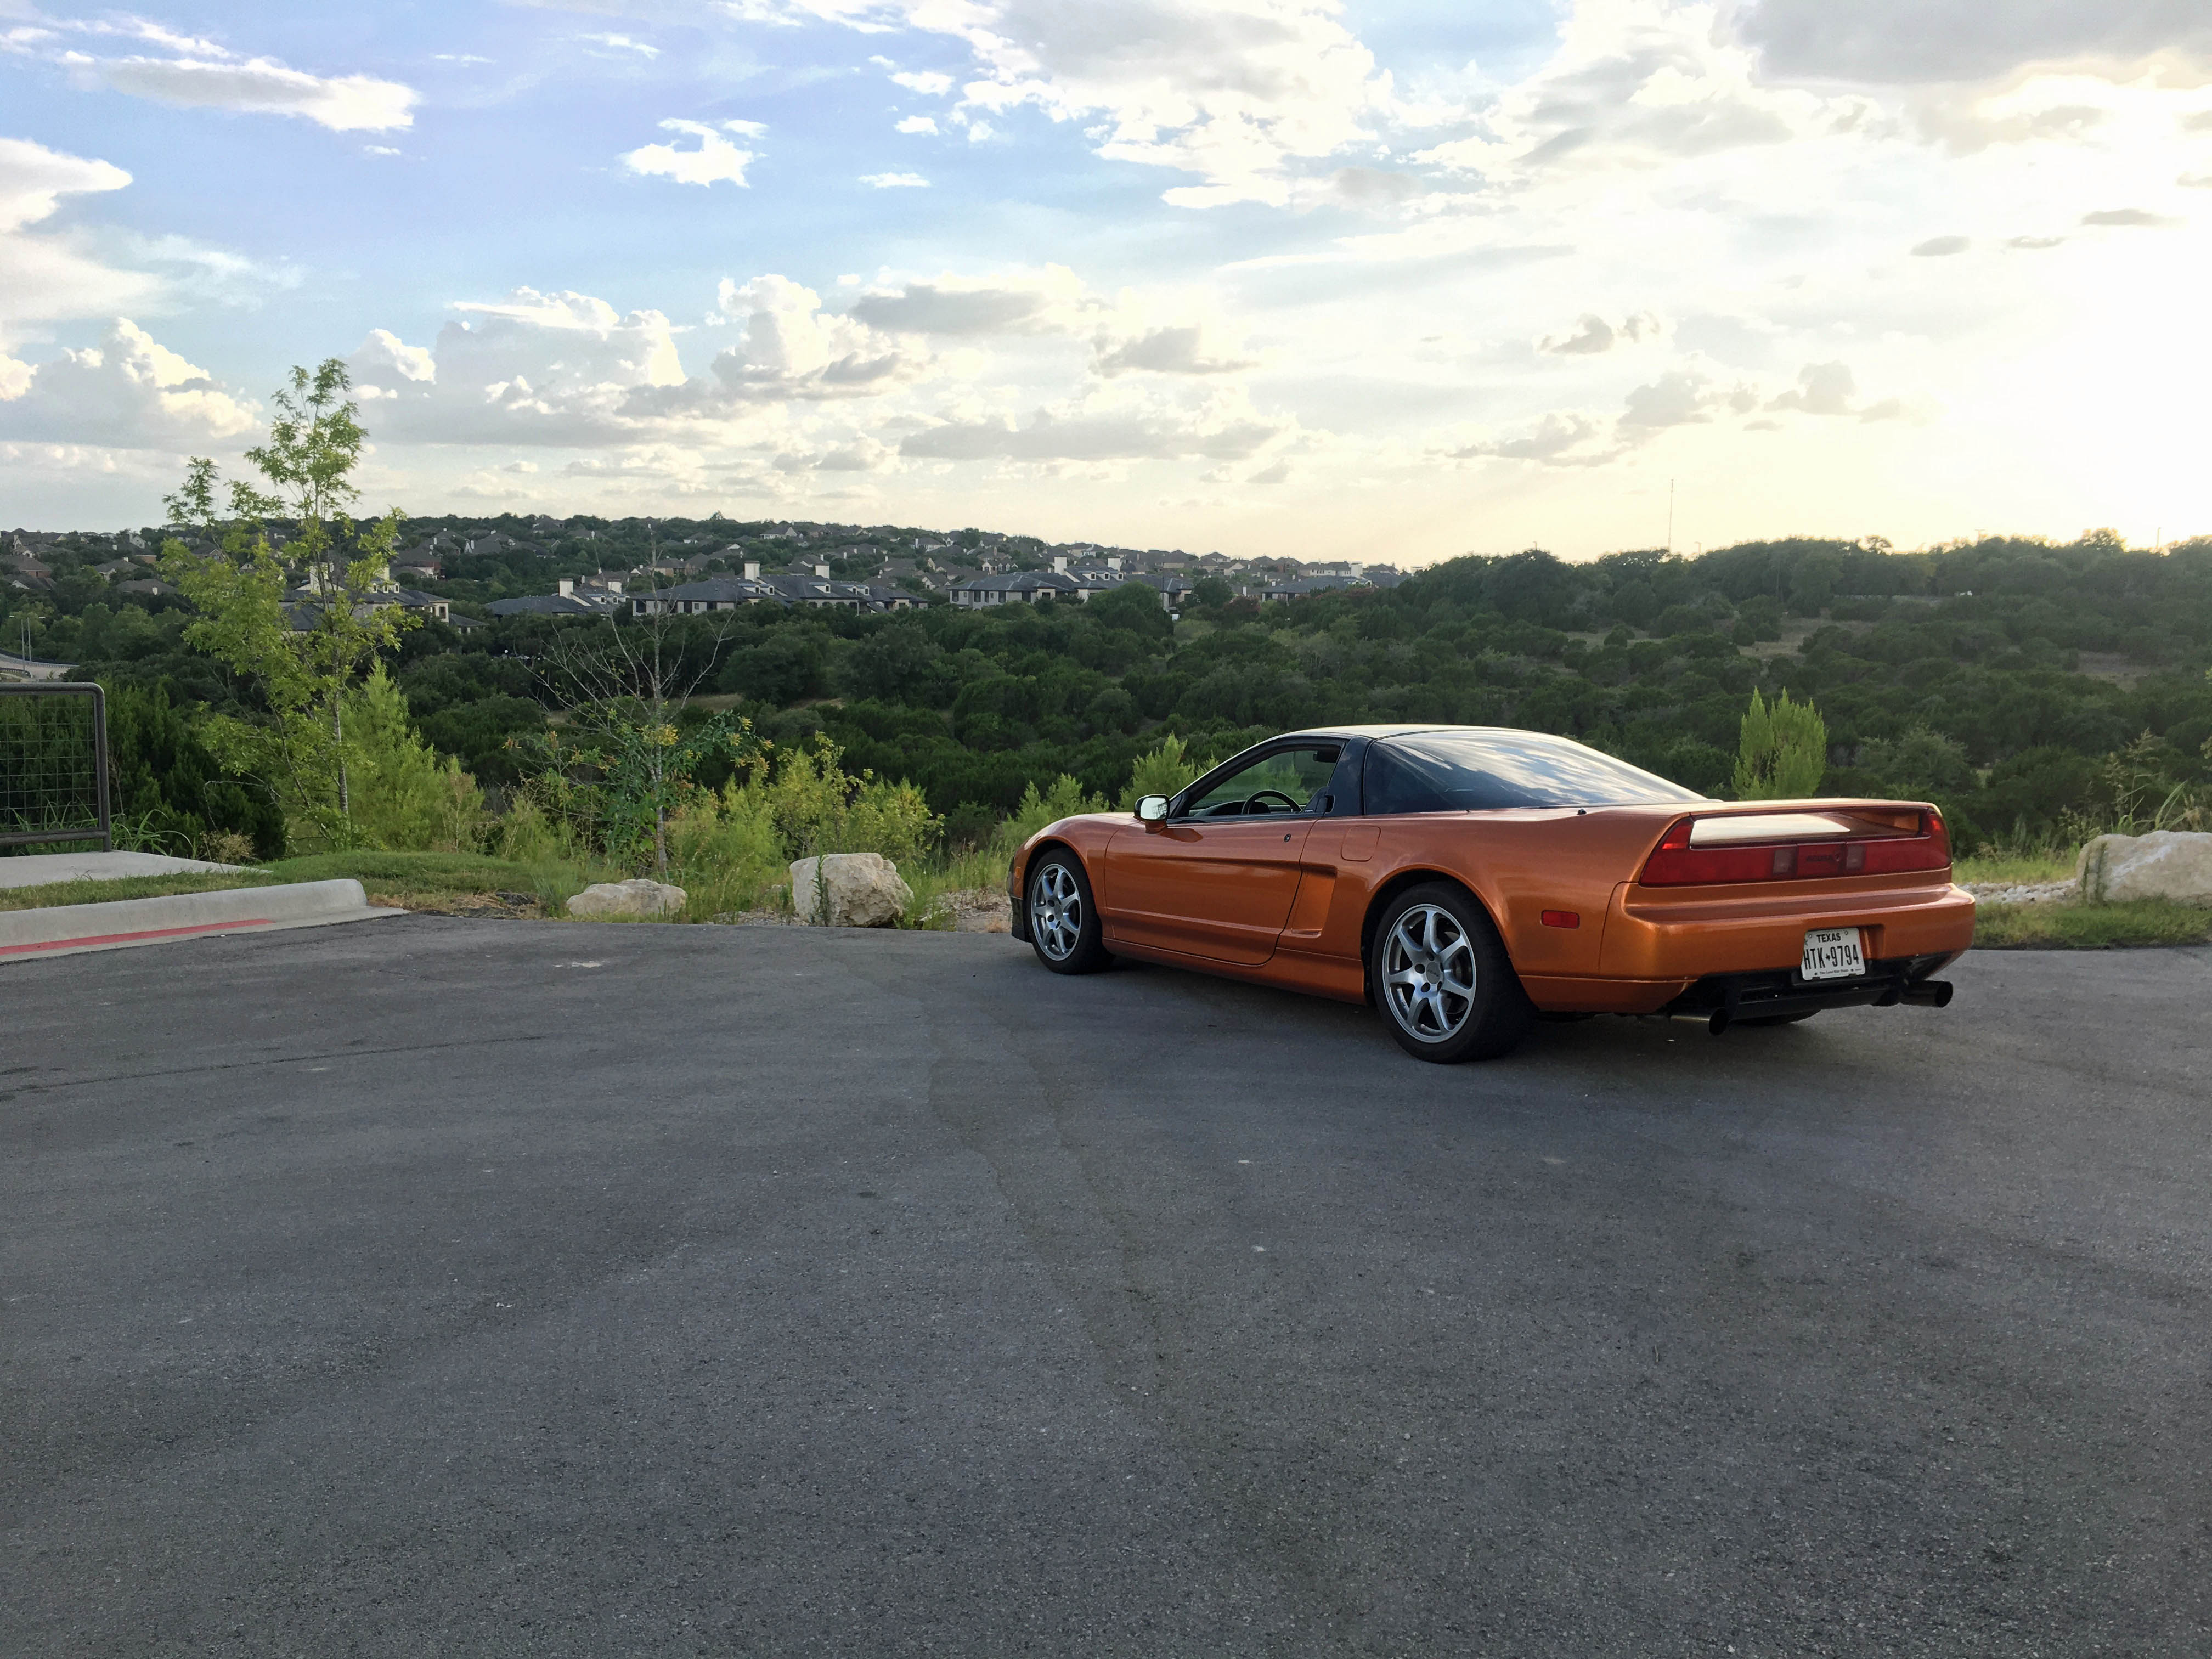
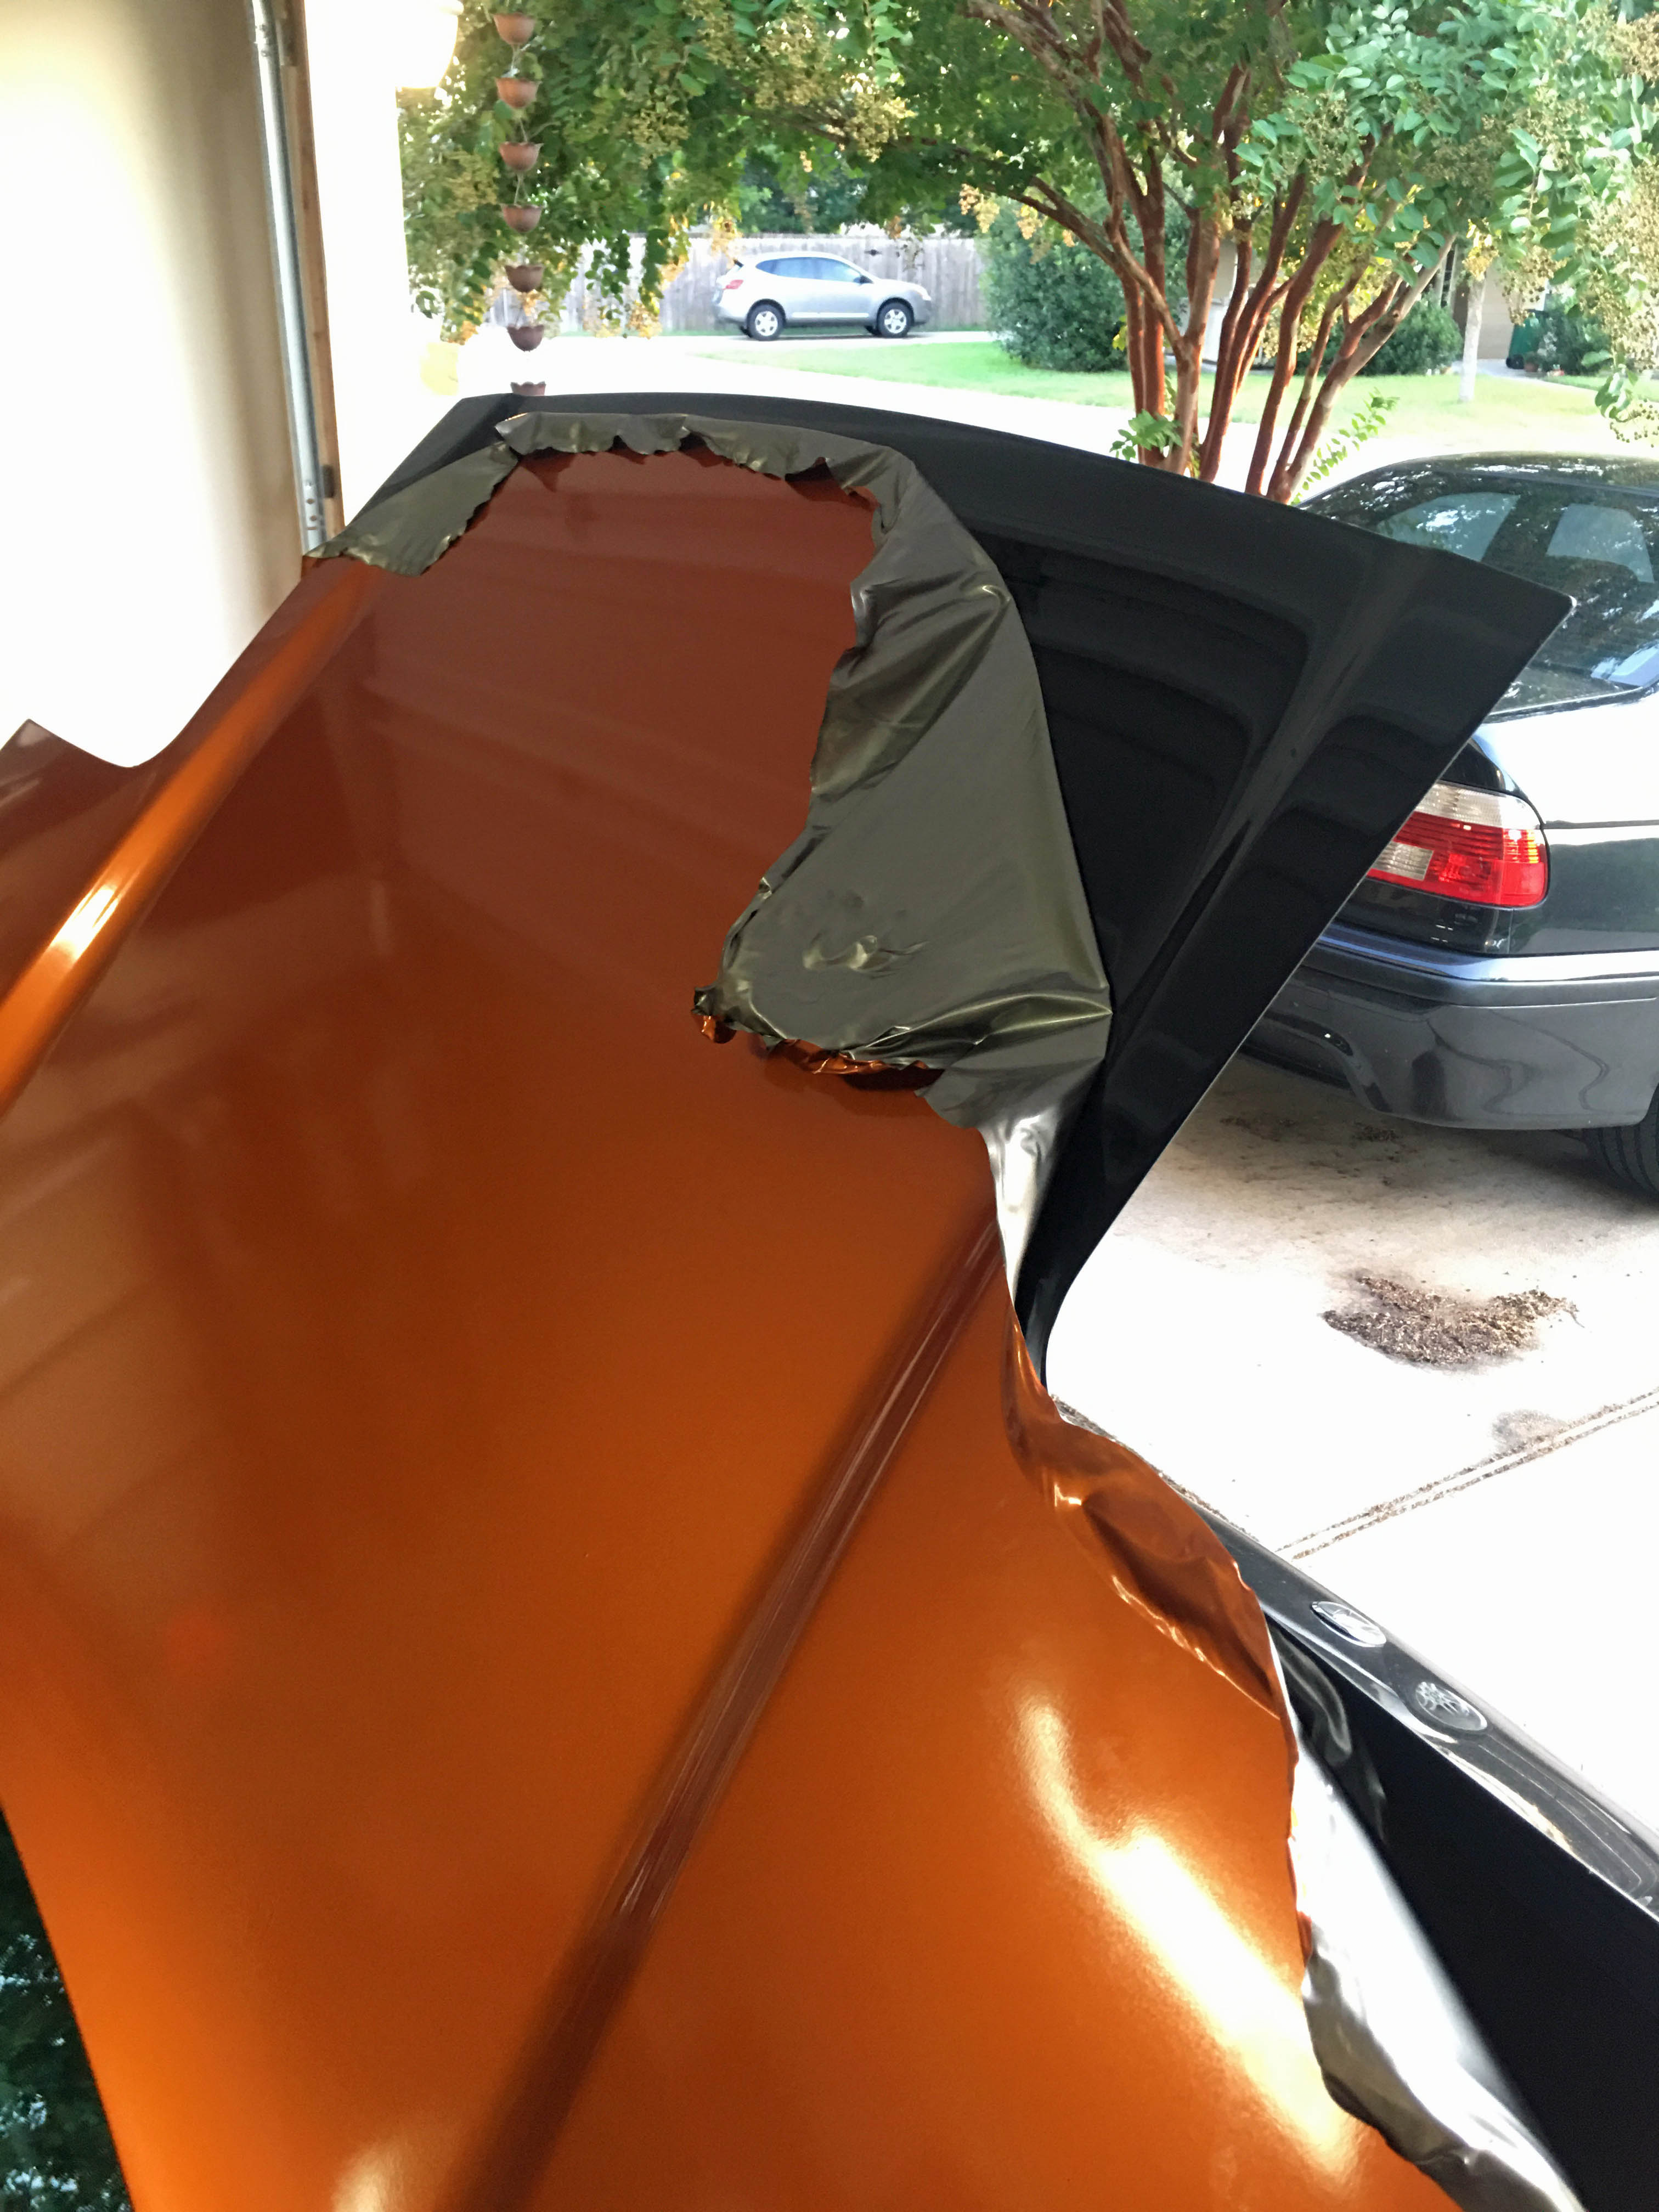
The NSX was on daily duty and living outside when Texas froze over. Shortly after taking this picture I reorganized my GFs garage so I could fit my car in it, which turned out to be a good idea as it got down to 7F a day or so later.

IMG_0444.jpg


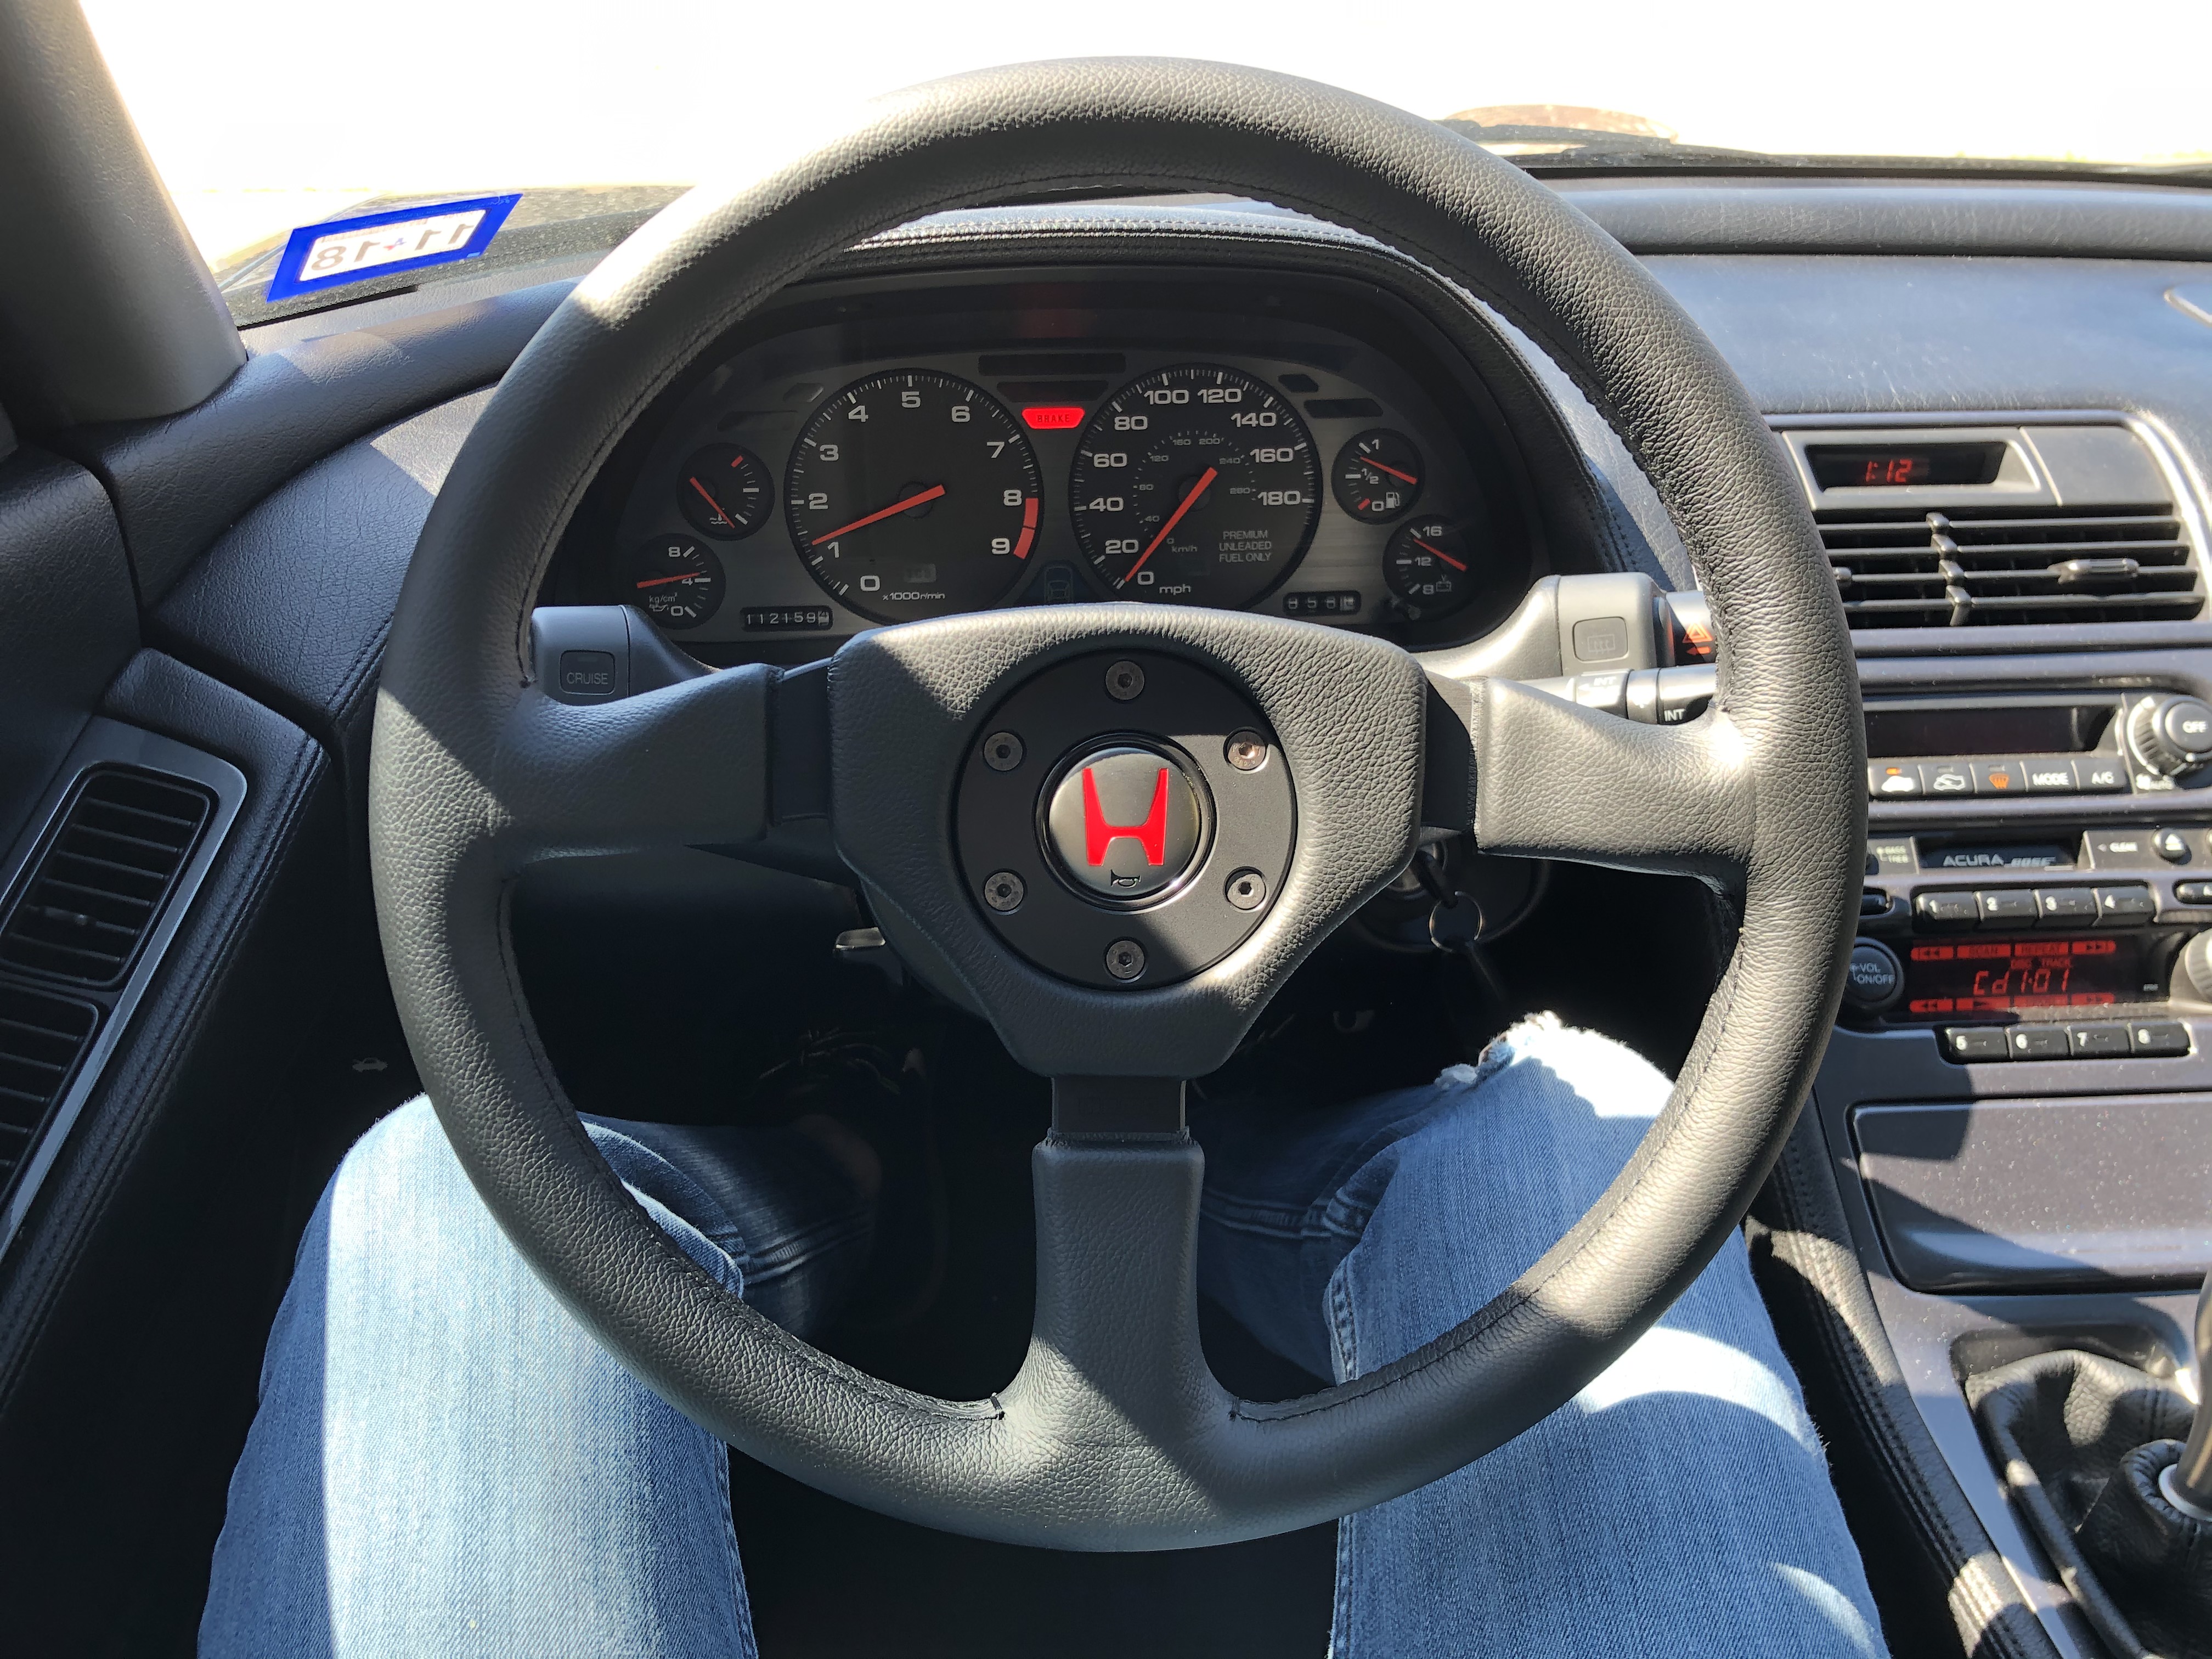
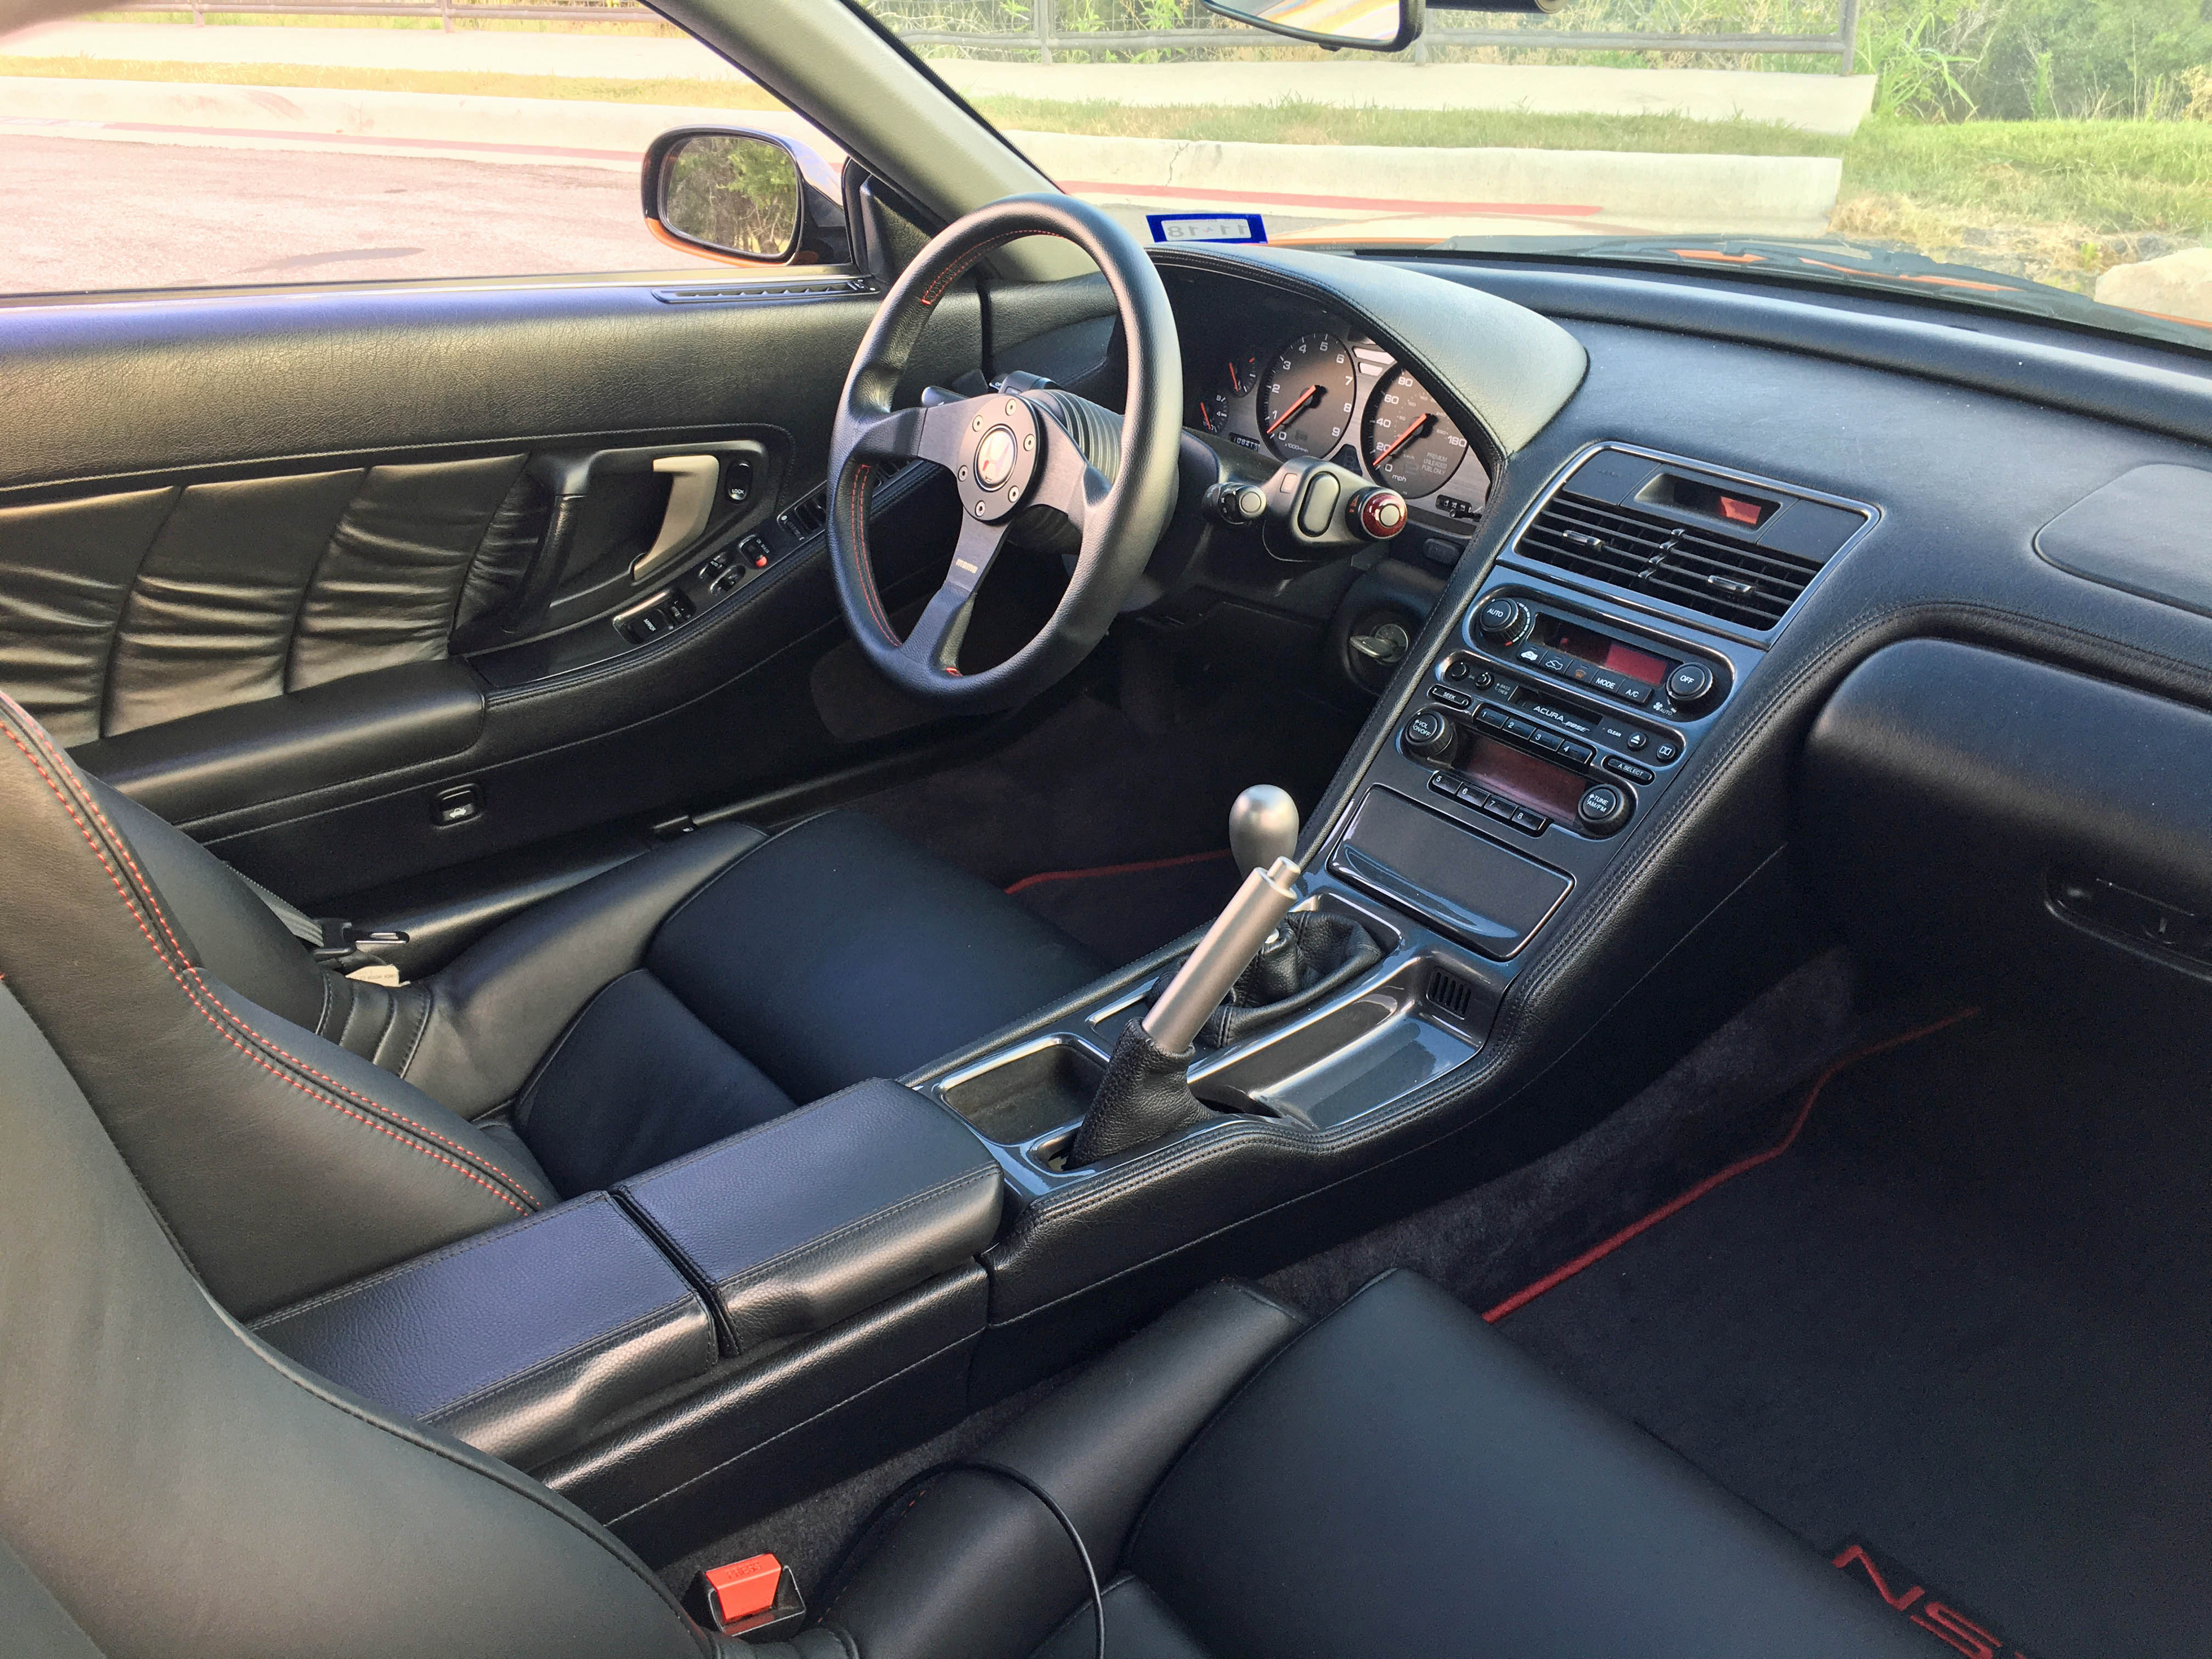
I decided to change up the steering wheel too and swapped out the Momo Tuner for a Momo Zagato/NSX Type S wheel. I ordered a black H horn button from Amayama to replace the red one since I'm working on removing all of the red accents from my interior for a black/titanium grey color scheme.

IMG_0510.jpg


Post wash.

frontend.jpg


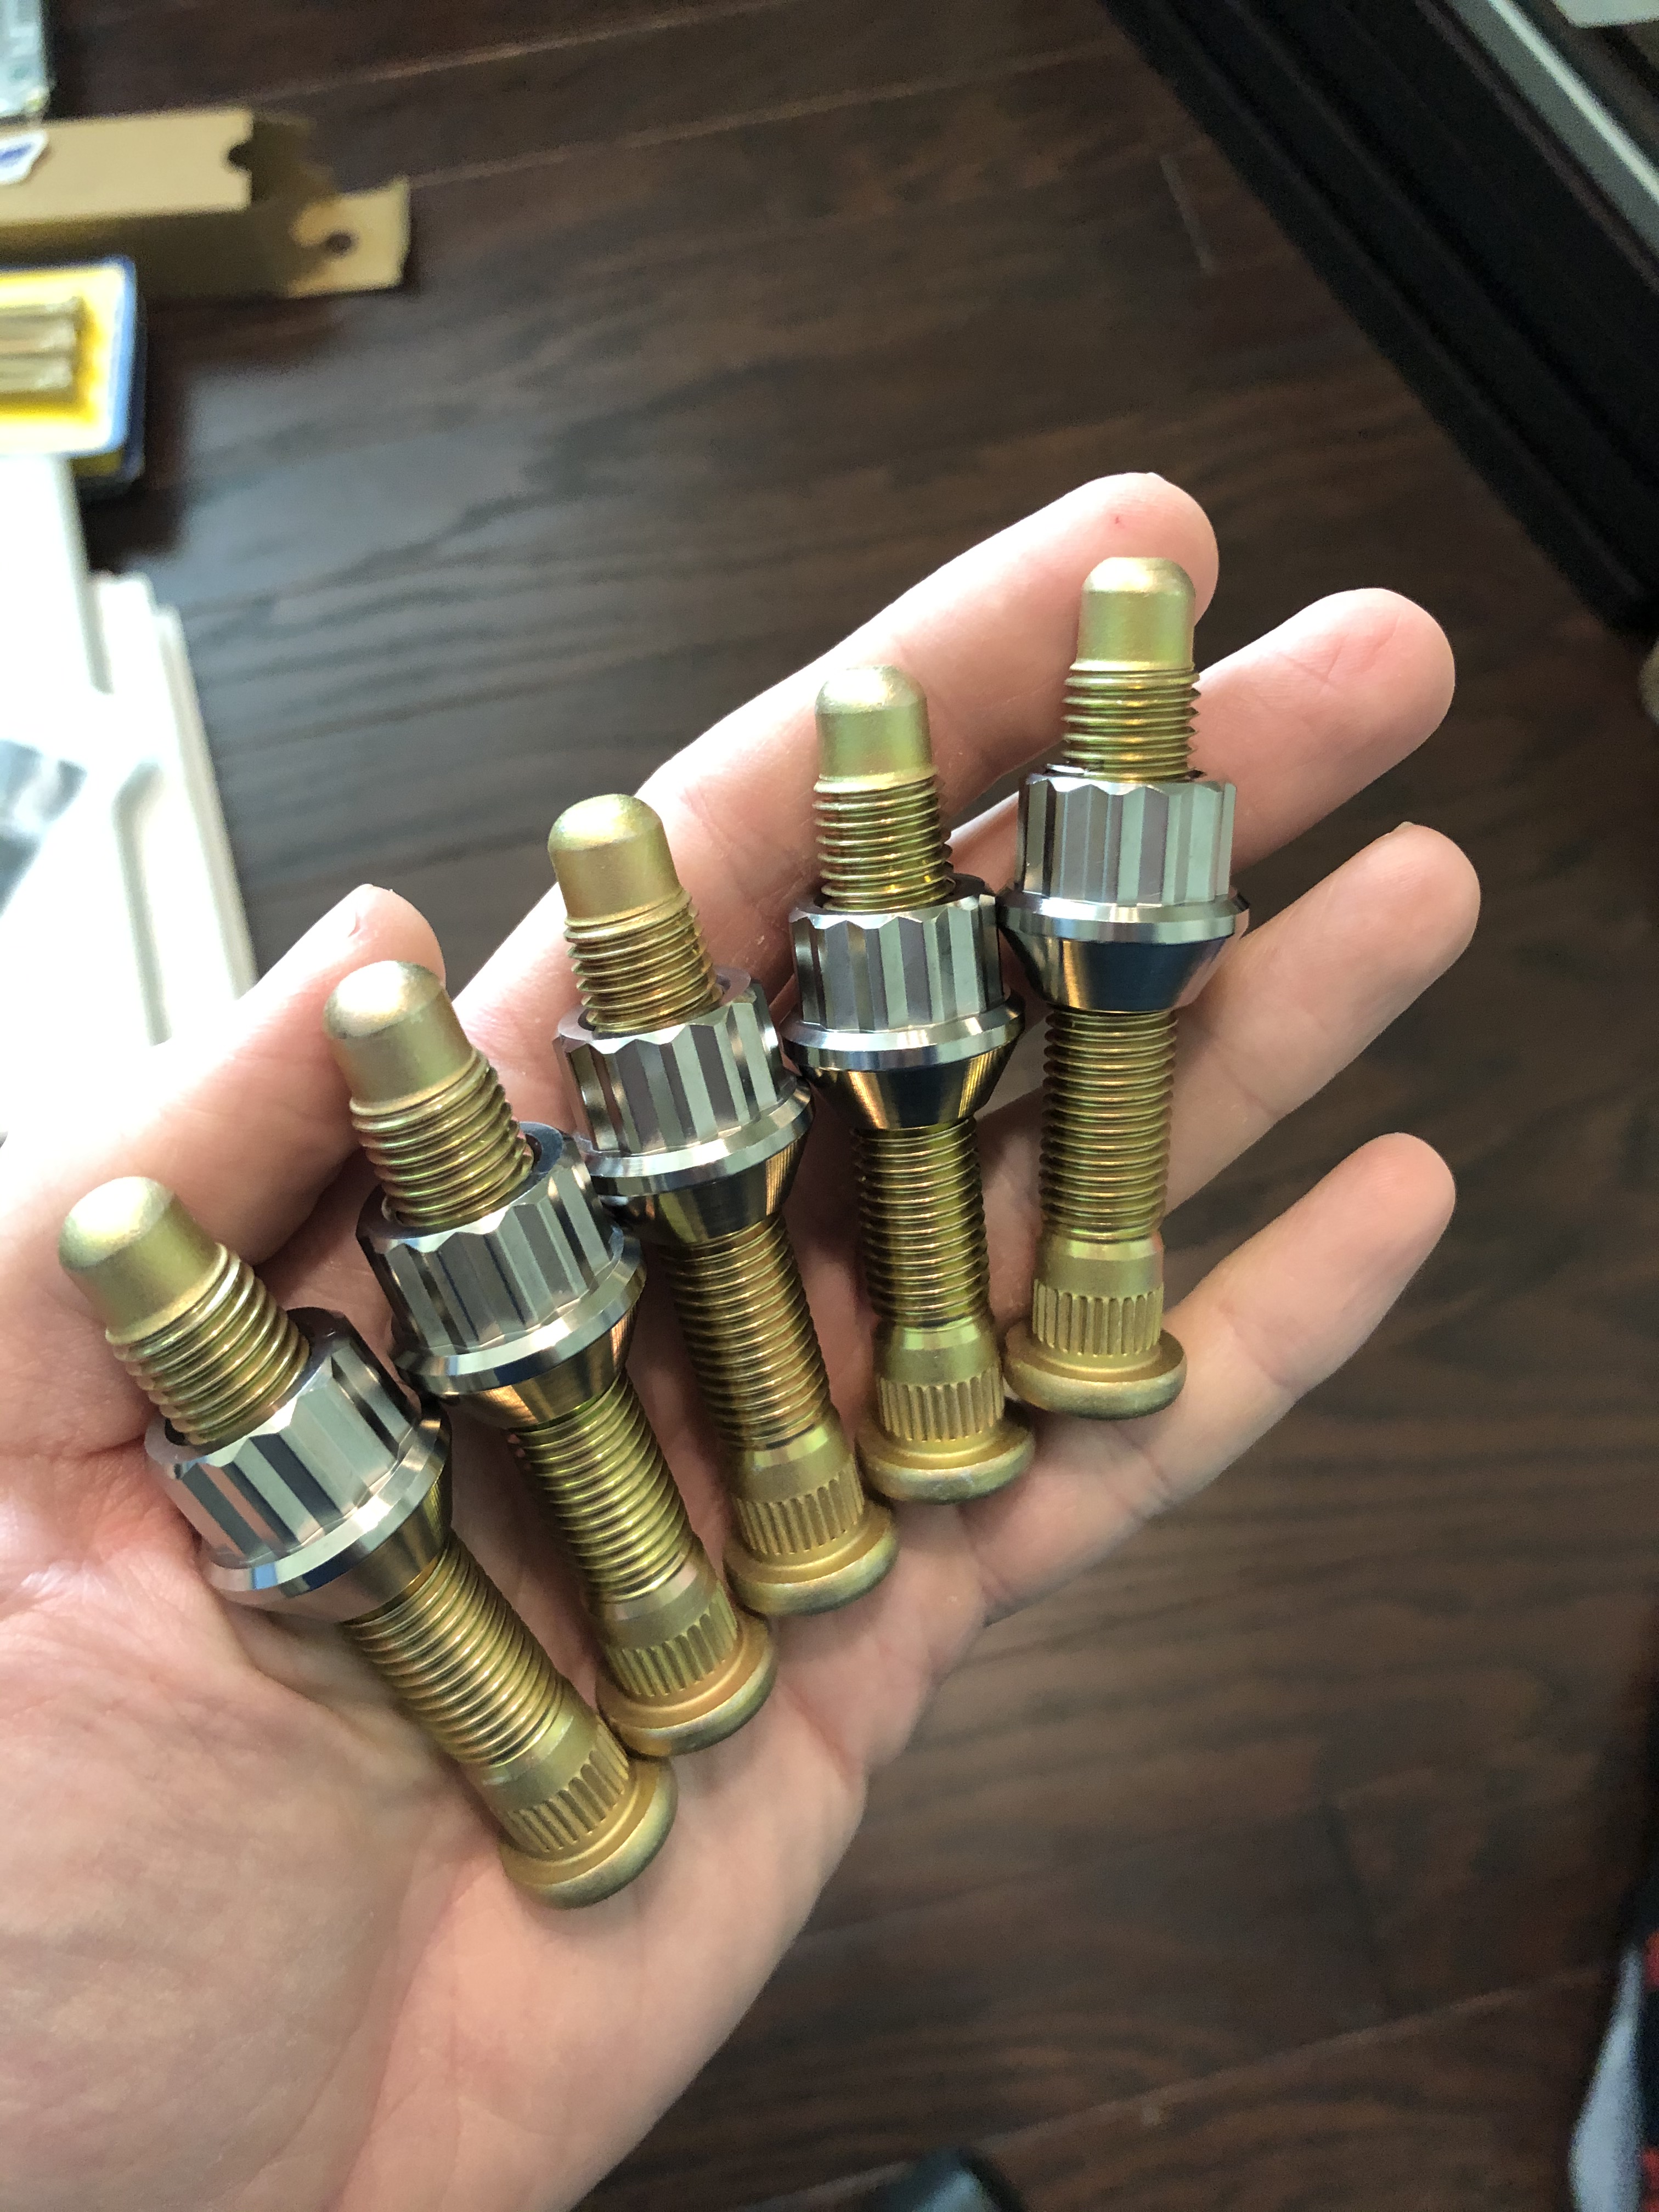
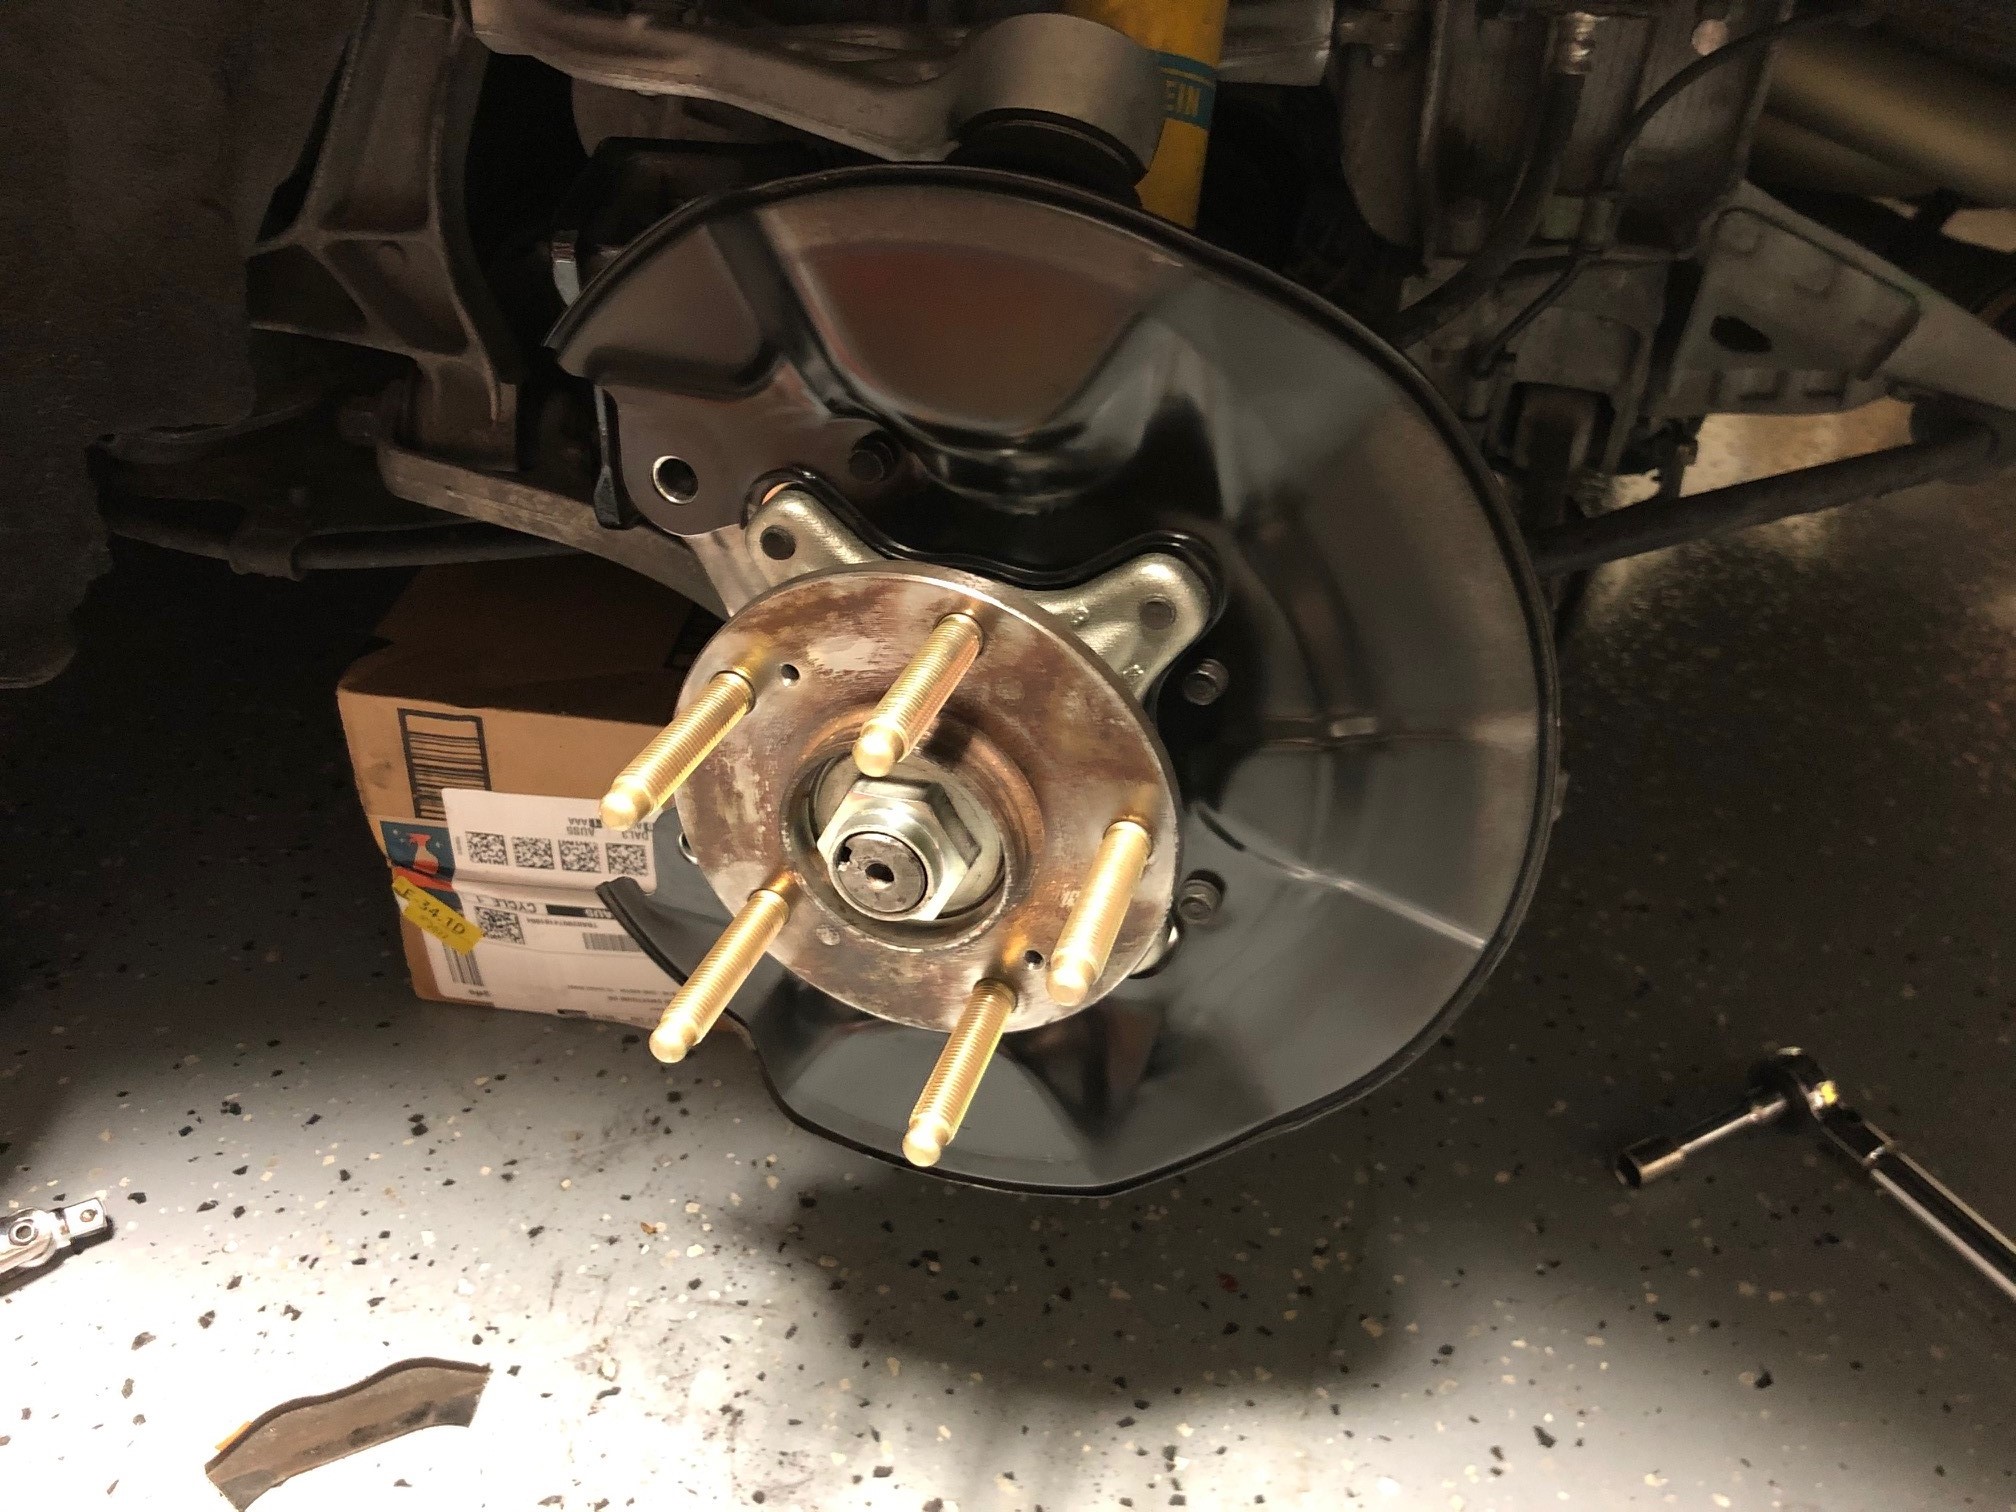
But anyways, since the spacers required extended studs in the front, I'll have to replace the studs again for the Volk wheels, so I'm going to try the extended lugs and open ended nuts look for a while. I'm going with ARP studs and titanium lug nuts which I think should look pretty good.

IMG_0482.jpg


IMG_0751.jpg


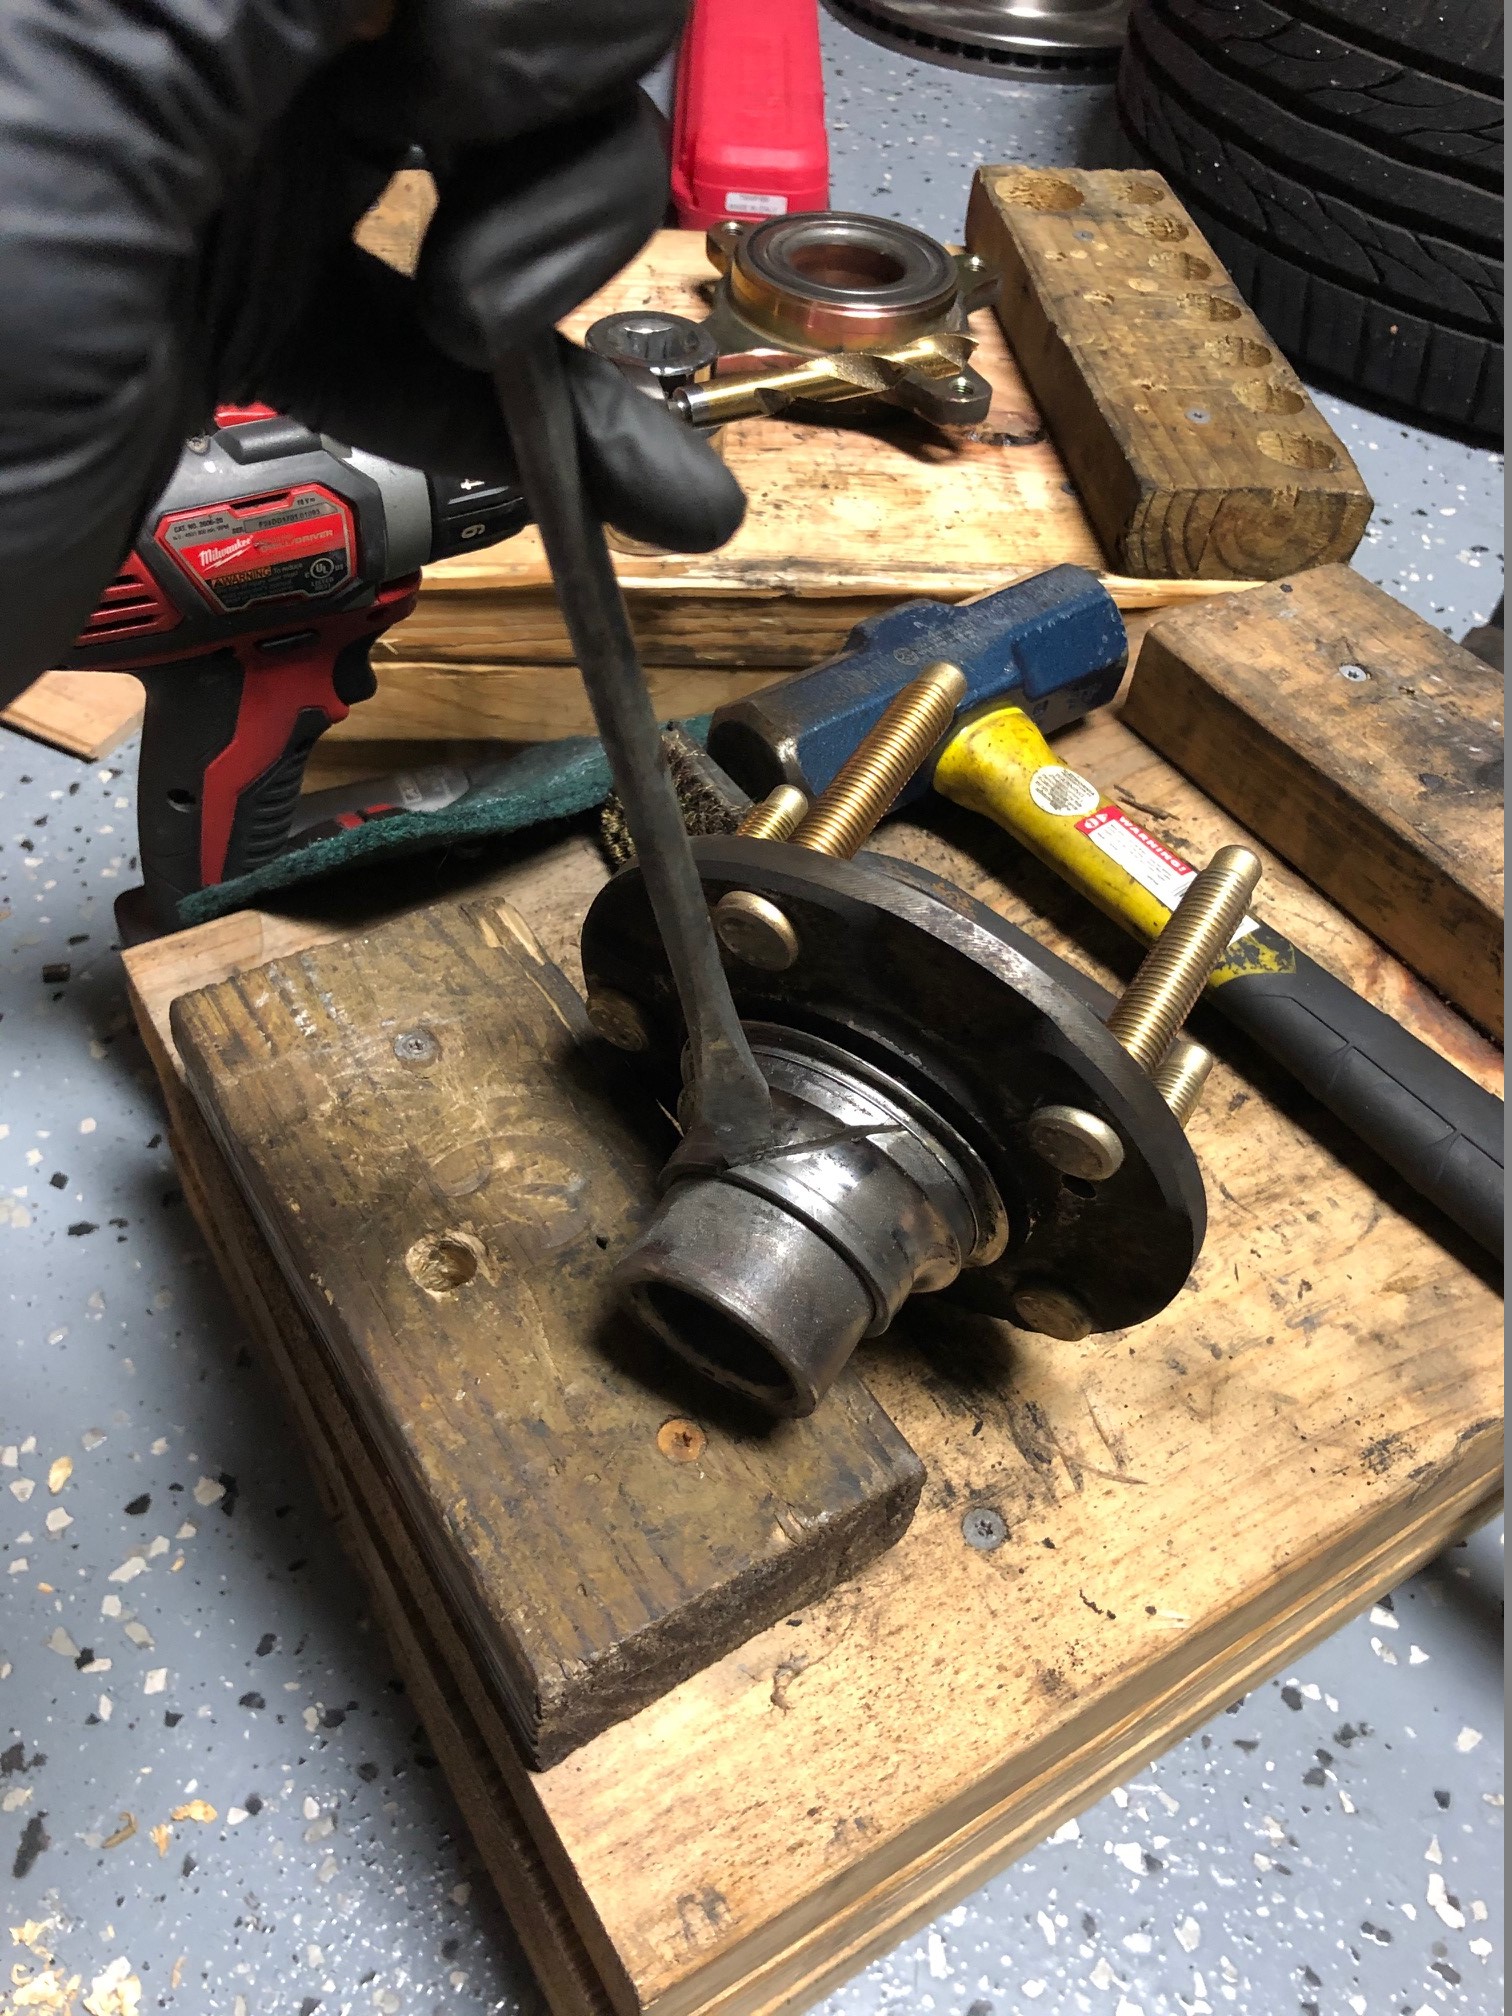
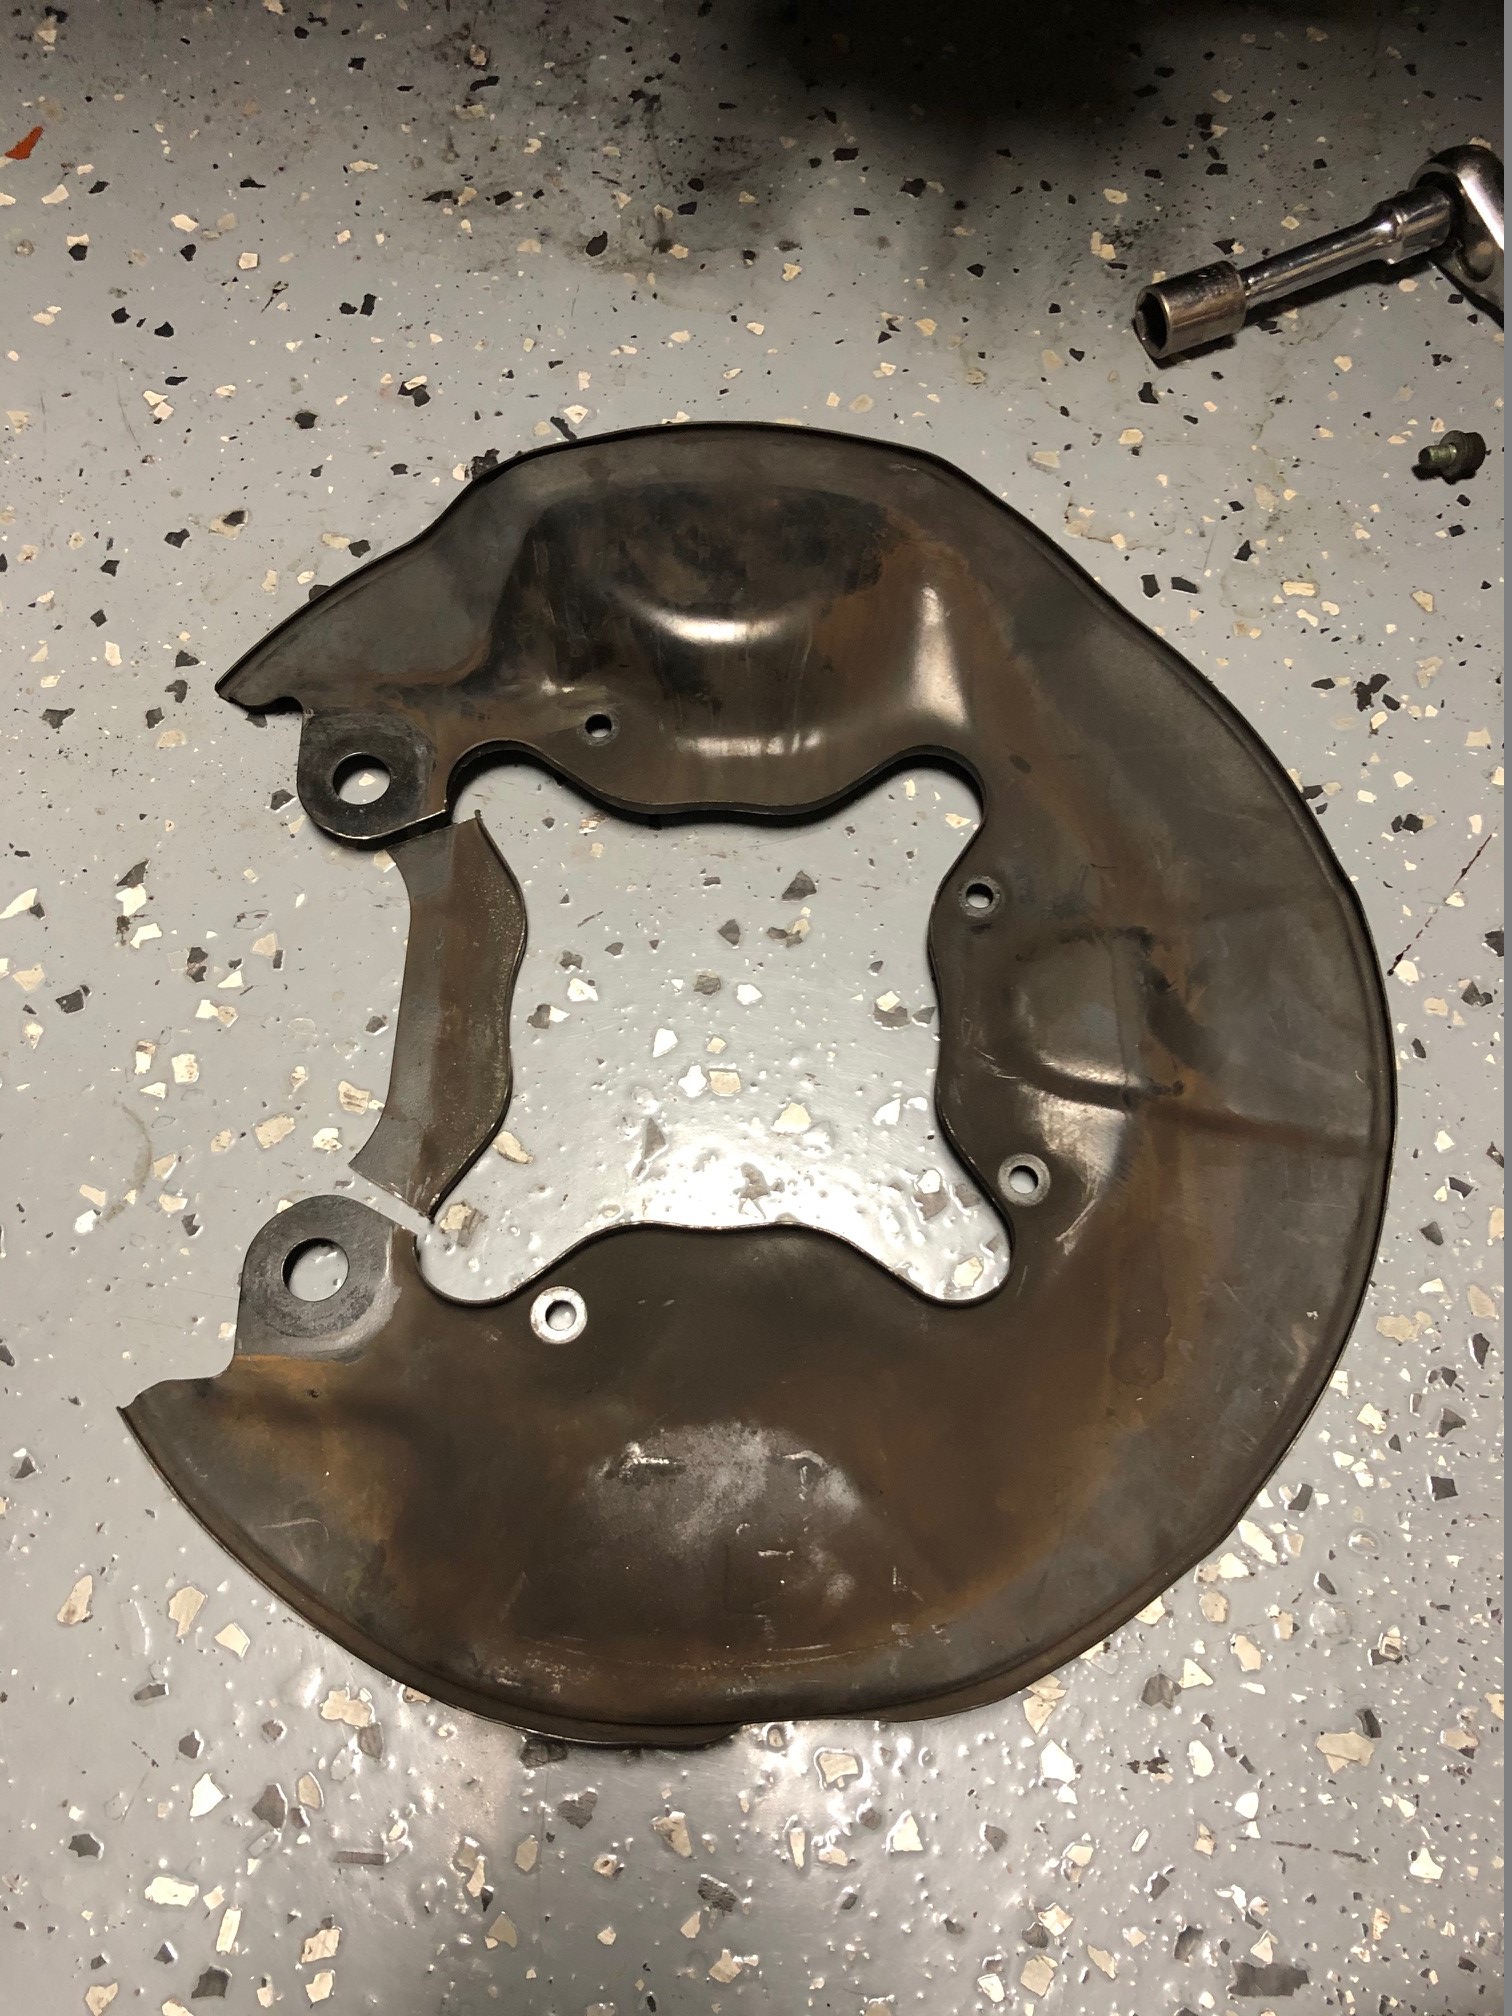
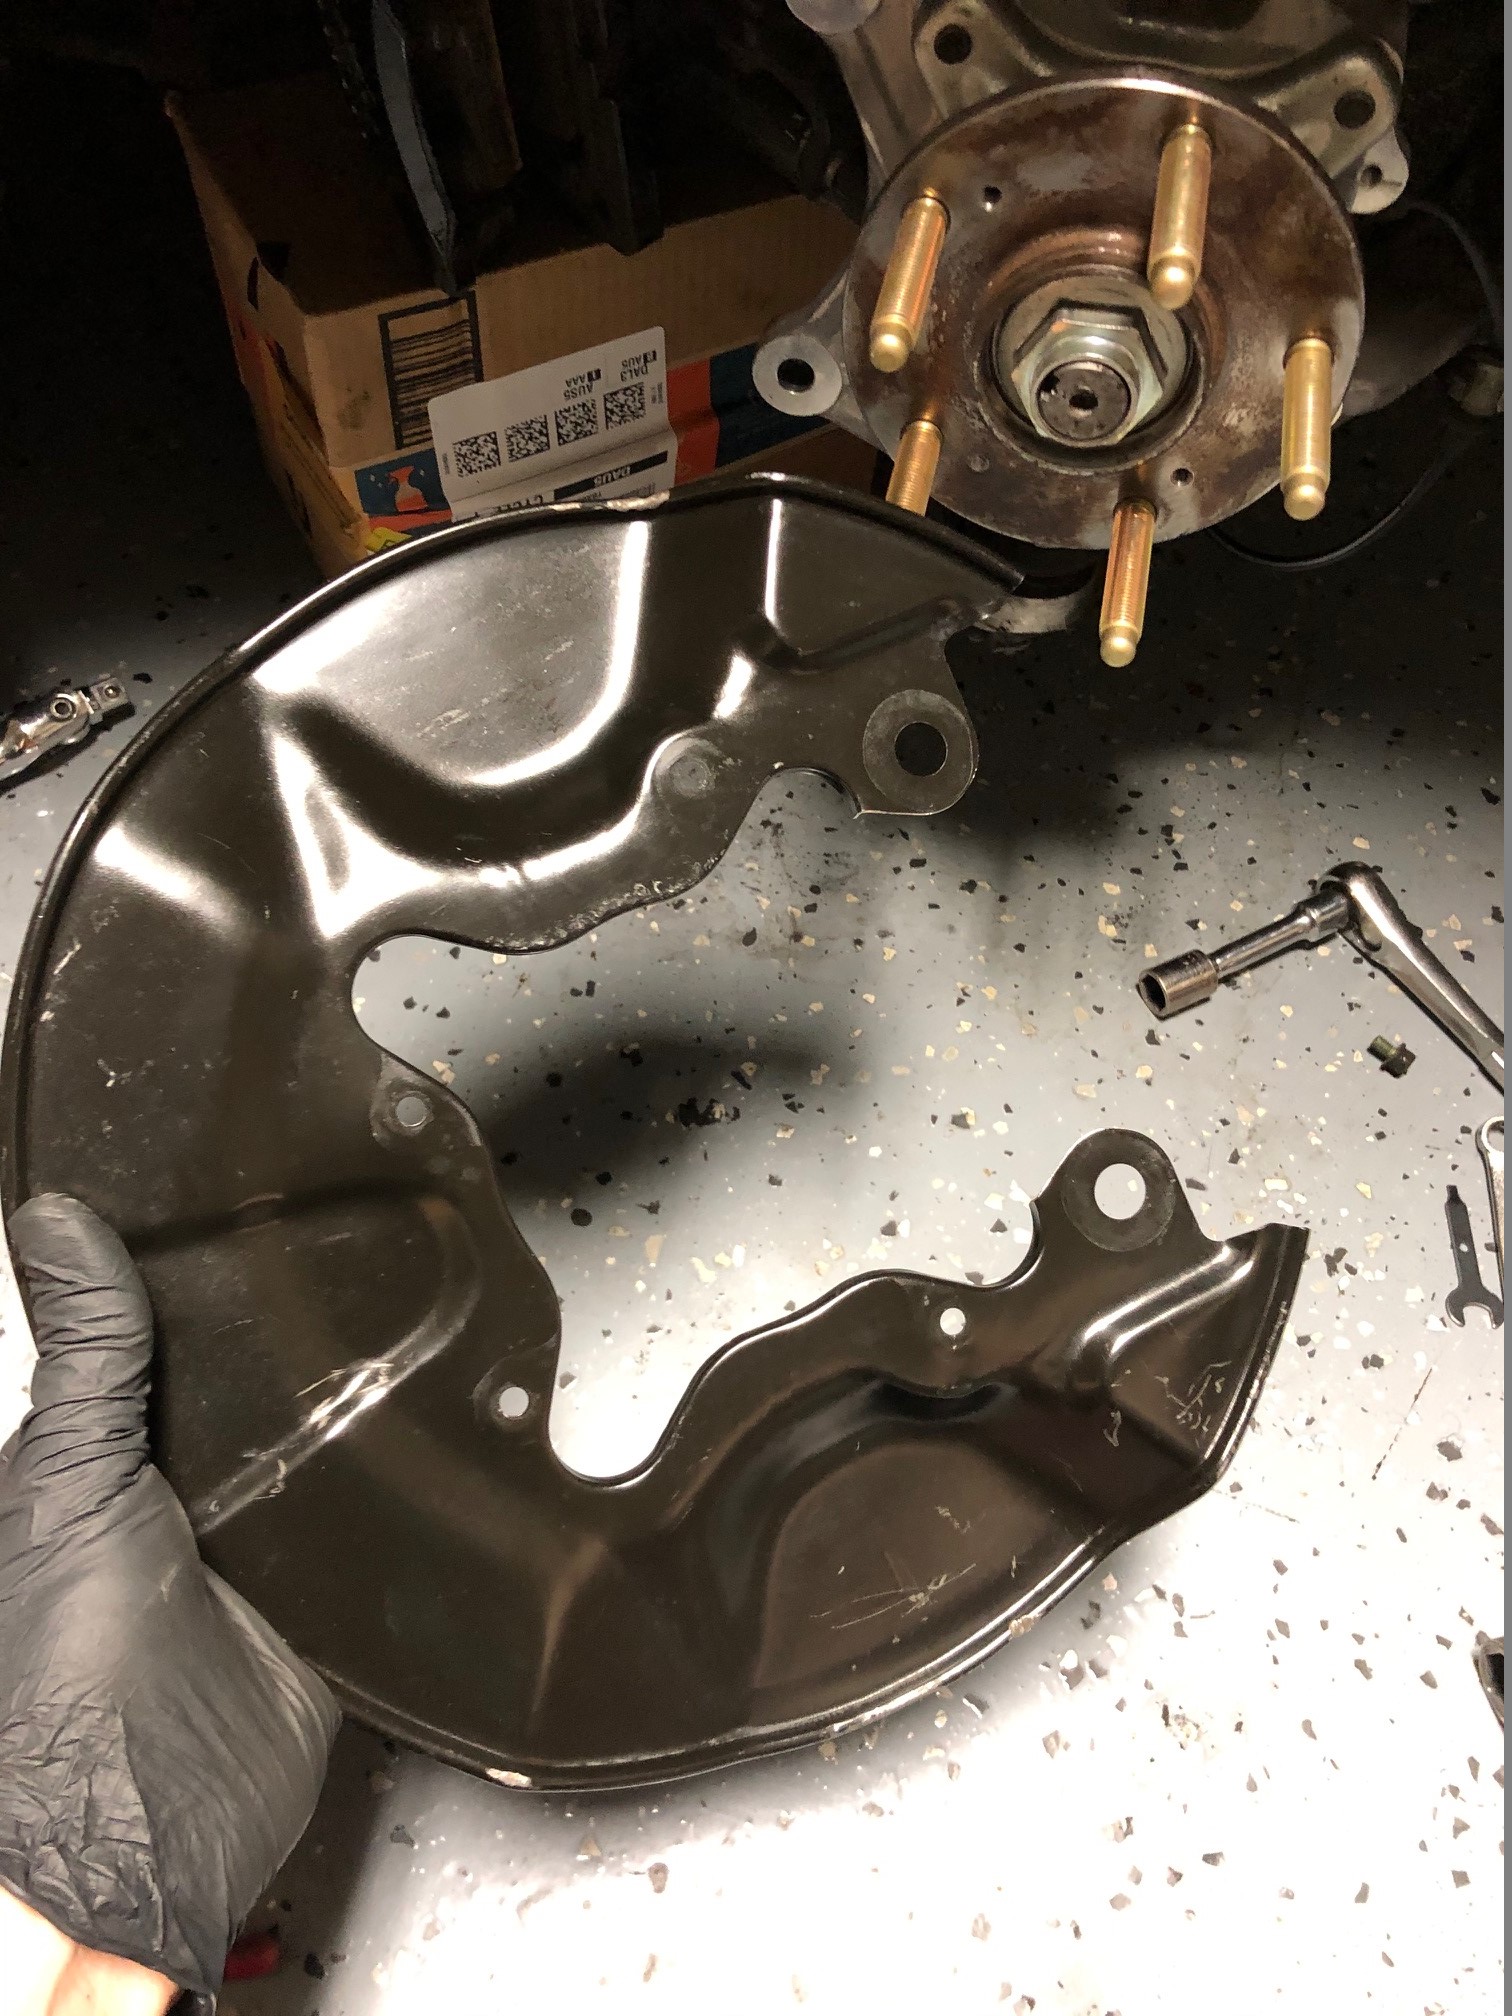
I dremeled the brake heat shields to make them removable with the hubs on the car for ease of future service, then cleaned them. I had to clay bar them to get all the stuck crap off but they came out very nice.

IMG_0734.jpg


IMG_0736.jpg


IMG_0738.jpg


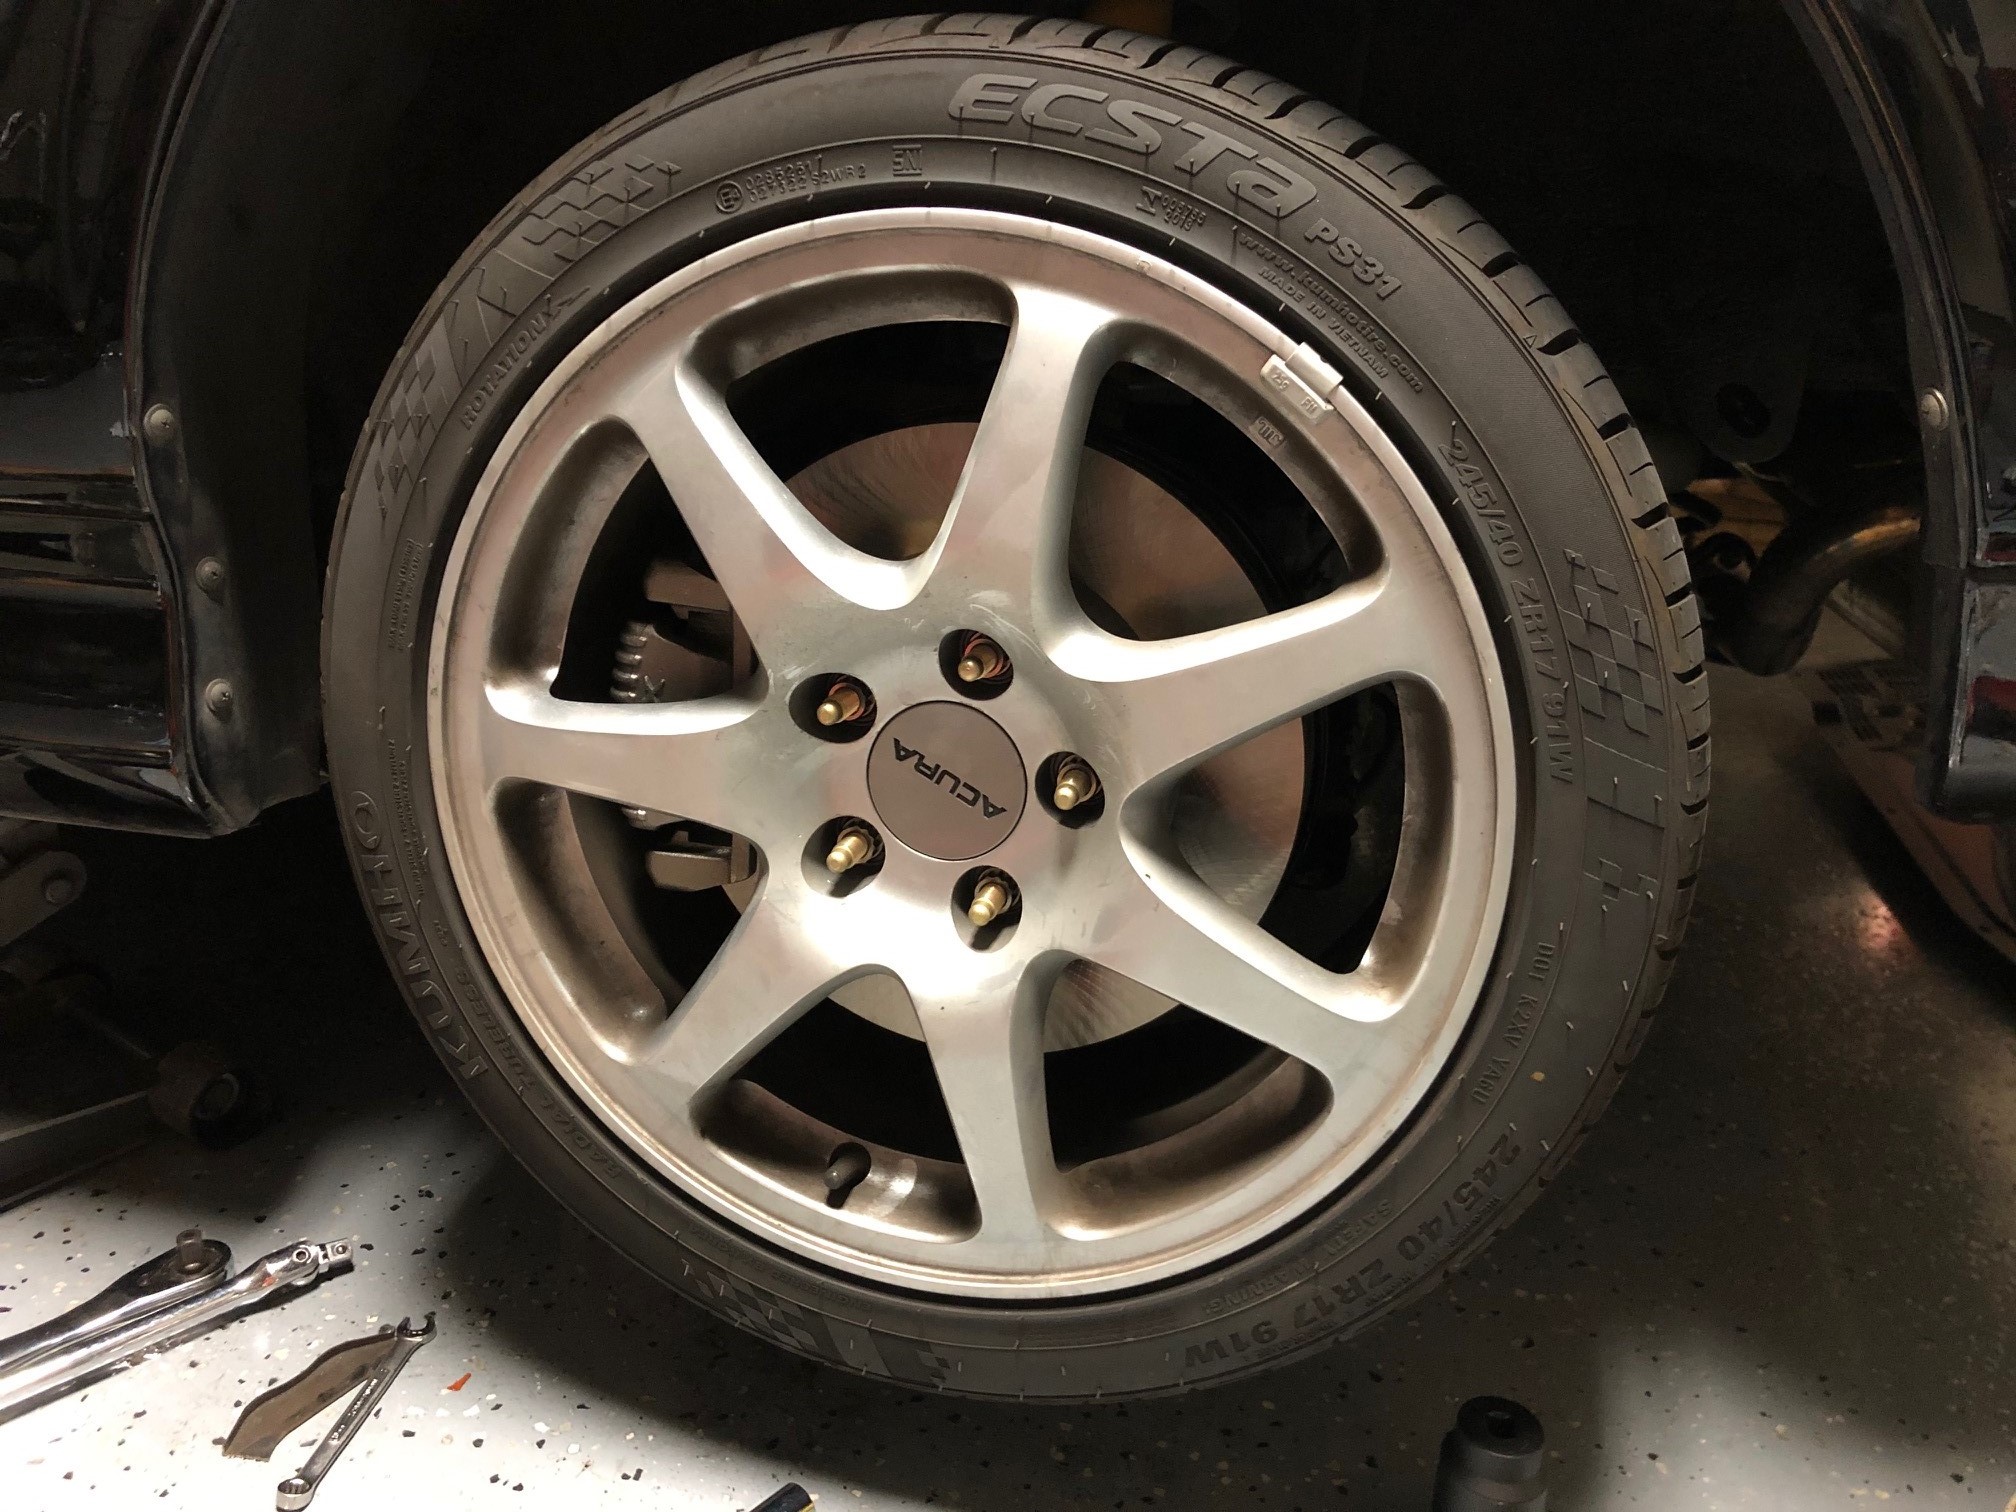
Wheel on, mocking up the NA2 calipers. The NA2 caliper pistons are much larger, moving the brake bias rearwards, and the rotors are 303mm instead of 280mm. I had to have the rear tires replaced when I found out how long the wait for the Rays wheels is so I bought some cheap PS31 tires to hold me over, the guy who installed them didn't bother with getting the rotation right and I don't care enough to take it back.

IMG_0740.jpg


Spacers gone, wheels hellasunk, and reattached with titanium lug nuts for the bling. These lug nuts are taper seat for aftermarket wheels so I got some adapter rings to make them work with the stock ball seat wheels for the time being.

IMG_0739.jpg


Some more engine parts showed up as well. After a discussion with my machinist we decided to go with Supertech valves instead of OEM, and diamond-like carbon coated wrist pins came back from Calico coatings. This is a relatively inexpensive service I had performed on the wrist pins that came with my pistons and is probably not necessary but just extra insurance, aftermarket rods don't have oil squirters so there's less lubrication on the wrist pin.

IMG_0558.jpg


IMG_0583.jpg


And here's a bit of whats planned for later on down the road, I'm planning on converting to all Honda badging and the imola orange H badge matches my caliper accent color pretty well. (please ignore the ugly red crossover pipe, those are getting replaced with new black ones)

IMG_0720.jpg


Recently I've found that my turn signals aren't cancelling anymore so the next thing will be to figure out whats going on there.
 
Last edited:
Nice updates, glad you came back ;). With all the trouble you've had with machine shops I kinda don't want to get my block prepped for an MLS head gasket like I was considering.

Great choice on the wheels too. I feel your pain on the wait time, I should be receiving my 2nd set of RGIII's soon since I found the exact set in the US right after I placed a 5 month lead time order lol. Have you asked around for a set on FB/etc.?
 
Back
Top