• Protip: Profile posts are public! Use Conversations to message other members privately. Everyone can see the content of a profile post.

Big McLargeHuge’s 1990 JDM NSX Adventure Thread

Thanks again Paul :). I've had my eye on their stuff for a few months, and actually after seeing how bad the rust on my cat flanges were yesterday I decided to get their V2 exhaust and resonated test pipes too...I was gonna get them later this year anyways after my trans swap but I figured now made more sense from a practicality standpoint, one of the flanges is just a rust lump so I think it's mostly rust sealing the gases inside. I like their design and the higher pitched tone. Hopefully it's not *too* loud.

Good advice on the scotchbrite pads, I knew they were polymer based but didn't know they had aluminum/titanium oxide hardeners. I'll just use a brass brush and sealant remover as you suggested. I have an electric pressure washer that would do well for the clutch side, good point. I'll try that out.

Here's some more happenings in the last few days, things keep breaking and I keep fixin'....

I found these plastic pieces on my floorboard the other day, and noticed my brake lights were staying on even with the car off. You might be able to guess the issue but after some forum searching I learned this was my brake pedal stopper, which pushes against the brake light switch on the pedal box to turn *off* the brake lights (normally closed switch?).
SrFZdNx.jpg


Some contortionist work later, I replaced the stopper with a more permanent short 10mm bolt and nut that works just fine and should last longer than the 30 year old stopper.
sODWMCF.jpg


A friend also noticed my left brake light was dim (but only sometimes, so I didn't notice) so that probably explains why my brake warning lamp still came on seemingly at random. I went to Advance and got 4 new brake bulbs to replace, and pulling out the socket on my right taillight I found some pretty bad corrosion. This is the light that's slightly warped so the water that gets in certainly did a number here. I'd like to splice in new sockets in the future, but for now I just brushed off as much rust as I could and cleaned them out to improve the contacts.
bZi0gYG.jpg


The bulbs didn't look too good either. They were replaced and my lights all work with no brake warning lamp anymore, so at least I know I didn't botch my earlier gauge cluster repair. I'm sure I can find some sockets from another junkyard Honda that I can splice in when I go to re-seal my taillights during a future project.
4nYkYcq.jpg


If that wasn't enough, my EPS light also came on the other day and my speedo started jumping around occasionally, codes 31 and 33 for power & speed sensor inputs. Some other Prime threads suggest VSS1 on the transmission can go bad, and since my speedo acts up as well (also implying VSS1 issues) I ordered a new sensor from Rockauto to replace it. The M/T VSS1 is the large heat-shielded sensor, the A/T just has two of the smaller style sensors. I looked at how to replace it on the lift yesterday and it's pretty buried below the starter but looks like it's just 1 bolt from below and 1 plug to undo from above with the airbox off. I reset the codes and EPS works again for now but hopefully this prevents future issues. When will the nickel-and-dime-ing end :rolleyes:?
 
I did the exact same fix to our purple NSX when the brake lights stayed on, and agree that should last a whole lot longer than a cheap plastic part.
 
>I went to Advance and got 4 new brake bulbs to replace

Why not just go LED? The brake light sensor is easily shunted, the flasher is a simple modification, LEDs give of less heat, and have a higher reaction time. The incandescent heat is significant as the tail light housings will have signs of heat fatigue and the heat is unwanted at all levels

As for a safety issue: LED's reaction time is about 2x as fast as an incandescent light, this is actually significant as human reaction time is 3/4 of a second. The reduction by 150-200ms cuts a 1/3 off the reaction time; it can be a big deal.

LEDs: faster, cheaper and better.
 
For now I have enough projects going on that I just wanted an easy fix for the time being. One of the original projects I was planning before I got the car was a custom addressable RGB LED (like Adafruit Neopixels) taillight inspired by the Car Shop GLOW design which I think looks super cool. I bought an Arduino MEGA and some addressable strips to do some testing a while back and I think it will be a fun future project. Being able to control each individual LED's color and brightness with some simple code will allow for plenty of cool designs, plus there are some companies that make custom backing plates with translucent light dispersion acrylics that can blend the individual lights into a bar for a more modern look.

The Arduino should be able to take in the factory signals for brakes, turns, reverse, DRLs, etc. and it's just a single signal wire to the LED strip and you can do whatever you want with some pre-loaded code to take in the factory signals and spit out a combo of light displays. You can even do chasing turn signals very easily vs. standard LEDs that usually need separate modules. I'm not big on circuit design but it's really just capacitors and resistors for the power/data lines from the Arduino and maybe some signal conditioning for the factory wires. One problem is the potential power usage of the LEDs, at max brightness & white color on every LED I calculated worst-case amp draw was like ~20A which is ridiculous. Of course the real "worse-case" is more like brake lights + DRL + turn signals + reverse lights all on half brightness which is probably 1/4 of that amp draw anyways so I don't think it'll be any worse than an aftermarket speaker amp.

Anyways, I just don't have the time right now with the several major repairs/upgrades going on but once those are done then I'll start prototyping and testing again. I really thought about this a lot already but there's more important things to do first :biggrin:
 
Trans Rebuild pt4

Differential time. With all the parts and tools I need in hand, I can finally tackle this part of the project.

Thanks to this old video (https://www.youtube.com/watch?v=tn2oF8rT6io), swapping the NSX-R spring plate & stopper was actually very easy, especially with a press. I used one of my seal drivers and my 40mm socket as press tools to compress the one spring plate in the diff hat and allow the stopper clip in the pic to be removed easily with a small flathead. Much easier to remove like this than when the clip is under tension.
aCpLaYJ.jpg


New and old spring parts. The NSX-R stopper plate has a helpful little "J" on it for Japan so you know it's authentic. The top spring plate is the new one from Acura (backordered in JP for some reason), I just re-used the old spring plate on bottom because why not. Essentially, the NSX-R diff uses two spring plates instead of one (necessitating the other stopper plate designed to hold both spring plates under it) to compress the clutch pack more and increase breakaway torque.
6sdIs5L.jpg


One more trip to the press and we have a happy little NSX-R differential hat.
WI8xDDQ.jpg


Ring gears! I followed the FSM for removal of the old ring gear from the housing cover, easy with threading the two diff housing bolts in from the backside to push the two away from each other like a brake rotor. The NSX-R 4.23 ring gear is on top, old on the bottom. Hopefully I don't put my foot in my mouth here, but I think you can see that the 4.23 has closer spacing between the teeth so more teeth for the same diameter ring, which increases the gear ratio. Hard to tell from this pic but I think the 4.23 is supposed to be slightly larger in diameter, so I'll have to test fit the diff and VSS2 for the EPS to see what kind of washer spacer I need for the sensor.

Putting the housing cover back on the 4.23 ring was a bigger pain than I expected, it's a tight press fit. I ended up threading in all the housing bolts backwards and alternating tapping/"gentle" hammering on each bolt to seat the housing back on the ring. There is no FSM procedure, maybe you could use a press and just press the housing cover back on the ring, but the cover is quite large and relatively thin so I didn't want to potentially crack it by pressing on the very center while all the stress was on the edges. Who knows, maybe it wouldn't have mattered, but I chose the safer method in my eyes.

The FSM says that there is a marking on the housing cover to match up with a marking on the ring gear, but I could see no marking on either the original or 4.23 gear after looking for a solid 20 minutes. I just marked the old gear before removal and installed the new gear in the same orientation so hopefully that's enough. I really tried looking for any differences at all but didn't see anything out of place.
aZdVbzS.jpg


I also soaked the clutch pack in new Redline MTL before reassembly and for clutch pack measurements. I didn't want to destroy my clutch discs by using any cleaners on them, so I just gave them a fluid bath instead. The oil turned quite a bit darker so I figured it did okay at "flushing" the old oil and debris out.
2AZHhie.jpg


Time for my new dial indicator to shine. I bought it just for this purpose, I needed a depth indicator of a specific geometry to measure the clutch pack thickness per the FSM and this did the job. It is a 1" travel indicator with the included 2" tip, so the calculation was 2" - (indicated measurement) = (total thickness, 41.7-41.9mm desired). I wouldn't say this was an ideal setup because I had to support the indicator only from one end, so if I applied too much finger pressure downwards I could affect the measurement by up to 0.01".

I did a bunch of measurements all around the ring and experimented with the best way to get repeatable & accurate measurements, and I averaged ~41.6-41.7mm total distance. I measured the 112mm thrust shim with a caliper and it measured anywhere from 2.15-2.18mm making it shim "F", so the variations in distance I got at different parts of the ring (sometimes +/- 0.08") were therefore mostly due to the slight variations in shim thickness. Since the desired range is 41.7-41.9mm, moving up a shim to "G" at 2.4mm should get me right in the correct range, but I did some extra work to be sure as you'll see below.
a439UlD.jpg


Note that since I replaced the ring gear and had to remove the housing cover, I thought that it might not be evenly seated on the new ring since a hammer/press is an imperfect method. I ended up fully reassembling the differential with the bolts fully torqued to "pull" the cover closer to the ring and make sure it was sitting where it should be. Since the cover holds the carrier assembly and thus the clutch pack, I figured it would affect the thickness measurement I just did. Since I don't have the "differential inspection tool" to hold the diff in a vice, I had to bear hug it to torque the bolts correctly which was fairly painful. Having someone else to hold it for you with leather gloves would be much more pleasant.

I took it apart again and measured the same way with the dial indicator, and now get 41.5-41.6mm versus the 41.6-41.7mm I got before, so it appears to have made a ~0.1mm difference. Either way, moving up to shim G from F should still put me right in the correct range, so I ordered the new shim and will put off final assembly until I install and measure it again.

I'm not sure if I will bother measuring breakway torque on the bench after this, I would assume since I'm doing all this work now that it might be redundant to try and apply 110+ lb-ft on the bench. If only I had the inspection tools....
LbcTqn4.jpg


If that wasn't fun enough, now I wanted to try my luck at replacing both the taper bearings. I was ready to take the whole thing to a shop and have them take off both bearings like Motormouth did in his rebuild thread, but I had bought some cheap-ish Amazon bearing splitters and haven't used them yet so I wanted to give it a shot.

The smaller taper bearing on the underside was actually pretty easy, I used my largest bearing splitter (meant for 75-105mm bearings) and just tightened the parallel bolts down until the needle cage started distorting. This actually started to pull the inner race with it and left enough room for my medium splitter (50-70mm) to fit under the bearing and pull everything up and off. This should go without saying, but the old bearing will be completely destroyed by this process, but who re-uses them in this case anyways? The only non-destructive way I could see working is by heating the bearing up enough to expand it and allow it to slip off the diff, but I didn't bother trying.
208aepK.jpg


Success! With the puller assembled, I used another cheap Amazon seal driver kit with the correct driver size as a press tool and the bearing came off easily. You can see a bit of red vinyl tape peeking out from under the bearing, I wrapped the diff with it before pulling so that the bearing splitter didn't gouge the machined diff surface when I tightened the splitter down.
ksQRDQW.jpg


I wish I could say the same for the larger top taper bearing, but this took me like 2.5 hours to figure out because my largest bearing splitter didn't come with its own puller set so I tried to make my own with some 1/2" all-thread rod which turned out to be pointless. I couldn't use my medium splitter because the parallel bolts were too short and the bearing was too large to thread both nuts on the ends, so what I ended up doing was using a big C-clamp to hold both ends of the splitter together enough for me to pull the bearing off like I did before....this would've taken me 10 minutes if my large splitter came with the puller assembly but whatever.

This one was a tighter press fit, but with the same setup as before, the puller made fairly quick work of it. I was quite proud of myself. Is anyone in the market for slightly distorted taper bearings?
L5NGKnU.jpg


Thanks again to @MotorMouth93 and this thread here (http://www.nsxprime.com/forum/showthread.php/212444-NA1-5-speed-Transmission-Rebuild-Thread) for saving me another few hours for what should be a simple job of pressing on the two new taper bearings. Due to the geometry of the needle bearings and their inner races, it's difficult to press them on without destroying the outer needle race cage so some ingenuity is needed. I followed his example and got some 1"x48", 1/8" thick aluminum bar stock from Home Depot to form into my own press tools. With my 40mm socket and some ~34mm rental socket, I beat the bar stock into the proper shape. My rotary tool with metal cut-off wheel is seriously paying for itself.
SOvBdtG.jpg


Two new OEM press tools. These are really the perfect thickness to fit against the inner races of both bearings for optimal pressing and the aluminum is easy to bend & shape by hand.

These are the old bearings by the way, don't mind the dirty workbench. I even cleaned off the press to minimize the chance of getting something in the new bearings.
nnTJaAR.jpg


More trips to the press and the new bearings are looking happy in their new homes without a mark on them. This whole process probably took me like 6 hours or so which is laughable compared to an actual mechanic, but I'm happy that I was able to make do with my limited tools & equipment (& experience). I'll just have to take extra care to not damage these new bearings while I wait for my new clutch shim to come in early next week; once I install that, then I can finally reassemble everything for the final time and have the new NSX-R differential ready to drop in. I'll still need to check the bearing pre-load with all these new parts, but that's dependent on the 75mm thrust shim in the trans housing and doesn't require work on the diff itself.
6NGRA5k.jpg


Next time on Episode 5, my order of replacement sleeve sets & JDM drive gears arrives on Monday which will allow me to begin reassembly in earnest after a bit more cleaning. I'll probably have to put it on hold one or two more times to get some different mainshaft/diff shims but it feels like I'm finally past the halfway point. I've always liked taking stuff apart, so this is like a big Lego set but 20x as expensive and much harder to do and made of metal, but I'm at least having a relatively good time learning.
 
Last edited:
Headers & Exhaust pt1

I couldn't resist posting this already, I'm legitimately excited about putting fun parts on rather than belts & O-rings. Here's my big order of Pride's V2 headers, exhaust, and resonated test pipes.

Uh oh, big boxes.
cytQ4K5.jpg


I will say, their packaging leaves something to be desired. The exhaust tips punched through the box, and both flanges on the other side punched their own holes in the box. I inspected the box as much as I could before signing for the UPS delivery (UPS sucks and I hate them by the way), but there was fortunately no visible damage to the exhaust. They can do better than this though.
UMTgXZQ.jpg


Headers unboxed. They look pretty nice at first blush and for most of the subsequent blushes.
GbzqtJw.jpg


The insides of the headers that mate with the block are continuously lap welded and polished which is nice to see. The other connections are only externally welded but this is probably the most important place to have smooth flow without the extra bit of turbulence from gases getting trapped in the flange gaps, plus it would guess it makes the welds less prone to failing from heat cycling.
OFPZyJb.jpg


One of the collectors. I wouldn't say this is quite on the level of a Fujitsubo header but the price & quality are certainly right for me.
Rz3Eg7h.jpg


Here's the other collector. The welds are really quite nice, good spacing, no real porosity, and looks like good penetration to the inside.
3hS0yqw.jpg


The only thing besides the packaging I really don't like are the spring bolts and the manifold gaskets. Richard Graves of LOTW posted a review of his Pride headers from a few years back and he also had issue with these, namely that the M10 washers on the spring bolts are too small and the gaskets don't look all that great. They haven't really improved on these items since then unfortunately. I will be painting the springs with some high-heat paint to lessen the amount of rust (they look to be carbon steel) and got some larger stainless washers to hold the springs on properly. Since I only got one NA2 manifold gasket, I will probably end up having to use one of these gaskets on the other side so hopefully they also have the larger openings. Their store page didn't even mention the gaskets were included so that's another thing.
X5V66qP.jpg


The headers do come with exhaust adapters for the early NA1's. The welds on the right ends could've been executed & cleaned a bit better but not a big deal.
jpecboq.jpg


Test pipes looking pretty nice. Whether or not these will remain on the car is TBD, I've never had any aftermarket exhausts on my cars so the extra smell & noise might turn out to be too much for me, but I felt it was worth a try. I can re-use my original cats but they're pretty grubby on the outside as you'll see in a future post. The insides of the flanges are not lap welded but I don't think it'll really matter.
dZ9yjsf.jpg


That's the good stuff right there. I appreciate the tube stiffeners on the corners but you can see they weren't quite enough to keep the box intact.
xRmwHD8.jpg


This thing is real purdy. All the welds are very nice looking, almost as if some of them had been done with an orbital welder. Maybe they were?

There are some minor scratches and one or two small dents but most of it will not be visible on the car. I really like the design of this, I could stare at it for at least 3.7 seconds without getting bored.
IDjmzQa.jpg


Their V2's are supposed to have a higher pitch sound than the earlier version which I think I will like, I'm more of a fan of the F1-style exhausts on these cars vs. the lower pitched ones. I found this video a few months ago and I think it's a fun watch for some JDM exhaust brand comparisons. (https://www.youtube.com/watch?v=0PrXFF9TGOg&list=LL&index=89&t=0s)

I got the thick-walled tip version. I think it gives a good balance of looks and functionality, the thin walled tips are a bit too plain looking for me and the quad tips don't make much sense personally since they share the same inlet pipe, but that's just my opinion.
0ZjntFY.jpg


I had to get a full layout picture to admire. The cat was not included with the exhaust but did enjoy the boxes they came in.

I really was not planning on doing this before my transmission swap but you know how it goes. First I broke off my O2 sensor, can't remove it without dropping the header, can't remove the header without dropping the cats, no luck getting an OEM replacement header in the meantime, flanges and hardware are all rusted out, V2 headers for auto transmission came back in stock, so I finally decided to just send it and get the whole damn thing now. I was going to do it later this year anyways.
q8x0pns.jpg


I'm still trying to get some quotes for ceramic coating of the headers and am waiting for one or two more misc. items to arrive, but I plan to do this whole job & replace my speed sensor too next weekend (haha, not). It will be quite hot in GA but decent enough outside, unlike right now which feels like living in a swamp.

I concede that it might sound a bit odd with an automatic and full exhaust. A big part of why I like the NSX exhaust is the over-rev sound when letting off the gas without downshifting, which the automatic will sorta kill unless I force it into 2nd/3rd. Either way, this will fix my CEL and make it much more fun to drive in the meantime (plus adds like 20-30 WHP), it will be interesting to see how bearable the sound is at cruising speeds. One of the reasons I liked driving behind the rental NSX and got interested in them during my trip to Japan was how good it sounded ;^)

Plenty of updates to come with the rest of my transmission rebuild and the process of replacing all this stuff & a driving video :biggrin:

EDIT: Pride sent out an email saying some of their V2 headers didn't have the rear O2 sensor bung installed; I didn't even notice mine was missing until now. They sent a new bung by mail and are paying for the labor for a shop to weld it on. It's been a little difficult to find a shop that can weld stainless, and there's a 2 week backlog for ceramic coating so I'll have to wait for longer than I wanted.

EDIT 2: Thanks to Remi for pointing this out, not only do the 4 spring bolts they sent have springs that are too large in diameter, but the bolts are also too large to fit inside the holes on the header side flanges. They're paying for the shop I choose to also bore out the holes a bit bigger which is appreciated.
 
Last edited:
very good work!! :smile: I have received this week the same V2 Pride Headers ,they look perfect I'm looking forward to installing them
 
very good work!! :smile: I have received this week the same V2 Pride Headers ,they look perfect I'm looking forward to installing them

Appreciate it :^). Just made sure yours have the rear O2 sensor bung actually welded on, they sent out an email that some or all of the first orders didn't have one so I'm having to wait for a bung from them and take my rear headers to a muffler shop for the welding. That plus the 2 wk lead time for ceramic coating means I'll have to wait longer to put them on :frown:


I'll upload a rebuild pt. 5 this afternoon, finally at the home stretch but waiting on some diff preload shims and mainshaft thrust shims after measuring them. The bearing preload was so loose that I almost couldn't read my torque wrench, was like 2-4 lb-in or so which might only be because of the inertia of the heavy diff itself and not the shims. I'll likely have to use a shim from the A/T table since the M/T's only go up to 2.27mm and my current shim is 2.09mm. Didn't think I'd be spending $80 on a few shims...

Oh, and all the shims are now discontinued or backordered so who knows when I'll be able to get them.

I think pt. 6 will finally be the last one, should be final assembly and gluing the cases back together.
 
Last edited:
Trans Rebuild pt 5

This is the bulk of the reassembly and final prep before putting the gears back in for good. Original plan was to finish up this weekend, but I need some shims and they are apparently hard to come by.

I used a whole can of Permatex gasket remover on the flanges and left it on for 20 minutes or so. Once that sat, I used my Eastwood plastic scrapers and went around to remove all the caked on sealant. The Permatex seemed to soften things up a little but wasn't amazing, but the combo of the two along with some brass brushing of the tougher spots got everything looking good.

I also tried pressure washing the clutch case side but it didn't seem to do much, so I accepted it as is.
0rYR3no.jpg


Here's a happy little NSX-R differential for your viewing pleasure. After I put in the new clutch pack shim, I had a spare human to hold the diff for me as I torqued in many stages. I used a bit of blue threadlocker just for kicks. This does take quite a while because the bolts pull the entire top housing down a few mils. Instead of fleshy hands, I could've used my spare intermediate shaft in a vice to hold the diff up, but the whole assembly is very heavy and I didn't trust my small vice enough to hold everything.
964vkdo.jpg


Finally time to start assembling my shafts. I got a pilot bearing prematurely to test the fit on the end of the mainshaft to simulate shoving the gearbox onto the engine, and it slipped on perfectly fine.
i7h55kH.jpg


Comparison of an old gear and the new replacement. I think this was 5th but not sure. The old one would've been fine to re-use but I didn't want to skimp on this big of a job.
Mjal0E8.jpg


New and old (3rd?) JDM gears. This was was a bit more worn and gets hammered a lot during spirited driving, and will continue to be :wink:
iOv0j1q.jpg


And one (1) new JDM countershaft 2nd gear. This should do nicely.
6NWX8a3.jpg


Now to clean the JDM mainshaft. The fluid is some WD40 degreaser, scrubbed mostly with a nylon brush and the longer brushes for inside the shaft. Plenty of sediment and blackened schmutz came out, so I emptied the tub and filled with clean fluid about three times, and blasted the inside of the shafts with cleaner until the fluid came out clear, then a quick blast with brakeleen to remove degreaser residue, wipe off, blast with air, and a thin coat of oil.
hMNnQmU.jpg


Now it's a happy mainshaft. I forgot to check the orientation of the clutch side ball bearing when I first installed it, the manufacturer/size stampings are supposed to face away from the clutch side. This particular bearing didn't seem to be directional, so it probably wouldn't have mattered but it wasn't too hard to use my bearing puller and press it on the other way around (without pulling/pushing the outer race :wink:).

You can also see my very useful PVC pipe press tool and starting to arrange the new gears & synchro sets. The red stuff is Redline assembly lube, which is probably unnecessary but it says it's good for transmissions on the bottle, so it can't be wrong, right? It was quite low viscosity but not enough to drip much under gravity.
NdTatGt.jpg


And just like magic, a new shaft is born. Almost everything but the shaft itself is a new Honda part. Everything was a fairly tight slip fit like disassembly, the hubs took a little bit of light tapping to seat correctly. Note the orientation of the sleeves & hubs. The engagement gears rotate smoothly and it's easy to engage the slider into 3/4 and 5th gears.
lyfwiLI.jpg


Can't forget about reverse gear. The only annoying part of this was pulling the little spring pin out of the shaft and punching it back in, other than that it was just cleaning and putting the new thrust bearings, washers, and needle bearings on.
agGUpyC.jpg


Assembled. Note the spring washer on the bottom is concave side down. And don't forget to put everything back on the shaft before punching in the new spring pin like I almost did.
yQkRCX2.jpg


For some reason I didn't take any pics of the countershaft reassembly, but uhhhhhhhhh, here it is. It was actually pretty easy. Everything but the splined 3/4/5 gears were slip fits, just have to make sure the 1/2 dual cone synchro has all its tabs lined up before pressing onto it so you don't break anything. The two top bearings slipped on or required light tapping to seat. The 1 1/2" and 1 1/4" ID PVC pipes I used made pressing all of this on trivial.

Once that all was on, the new spring washer and locknut are put on by hand, again, reverse threaded. Tapping once again to seat everything, I checked that the engagement gears all rotate freely and the 1/2 slider works like it should, and check the clearances between reverse/1 and 2/3 like the FSM says. They were within spec, but there's only one other spacer collar on 2/3 to use so not like I could've changed it if I wanted to. Everything on this shaft is new besides the reverse, 1st, 3rd, and 4th gears.
noXTCmc.jpg


Off to the mini vice. A maxi vice would be more secure, but this is what I had. I bought some nylon guards for the clamps, you really have to bear down quite hard on the vice so the pinion teeth will dig in quite a bit. Note that I did use a large beam wrench to do the torquing since I didn't think the clicker wrench measured torque in reverse, but it turned out my large clicker wrench actually did just fine. I checked with both anyways. Once I torqued the first time, I zipped off the nut again with my impact, then torqued again to the same spec per the FSM.
8QQ3yEK.jpg


One torqued shaft. You can see the pinion teeth dug quite a bit into the vice guards. Wouldn't want metal on metal contact there for sure, and that's really the only place to grip onto. I'm leaving staking the locknut until later in case I need to disassemble it again for some reason.
BcNMxcD.jpg


Now there's two of them! Everything seems to spin and slide as it should and my clearances look good.
SCG5ZdJ.jpg


Time to measure things. The differential bearing races and washers were installed (with the new bearing races). They were both a tight enough slip fit that I thought I needed to hammer them in, but if you get them perfectly square then they will likely slide in by hand and can be tapped lightly into place. If you're lucky.
5KXznUM.jpg


Then, the case halves were bolted back together with all 16 bolts torqued in sequence, and I inserted the 1 1/4" rubber expansion plug into the diff to allow me to put my lb-in beam torque wrench on. Once the bearings were greased and seated, I spun the diff and encountered nearly no resistance, maybe 2-4 lb-in on the wrench but it was almost too small to measure and probably was mostly due to the inertia of the diff itself...not even close to the factory spec.

I had put the original shim N back in, but it looks like I need to move at least 6 or 7 shims or more up to get in the factory range of 17-26 lb-in. That puts me in the automatic transmission shim table, which goes from shims A to Y instead of stopping at shim T. After some napkin calculations, I figured I'd order shims T, U, and V to try and land in the correct range and avoid multiple trips to the dealer.

Well, turns out most of these shims are discontinued or are on indefinite backorder, so I had to cancel my initial order. After messaging multiple parts sites, OEM Acura Parts said they had one shim "W" available somehow, which is one step above what I wanted to try, but I ordered it anyways and will see how it works out.

If it doesn't work, I'll probably have to either cross-reference with another car that uses the same style of 75mm diff shim or order my shims from Japan. Hopefully it doesn't come to that, it seems ridiculous to me to have to wait another few weeks for a single shim that might not even be the one I need. You're not supposed to double up on shims, so this might end up taking a lot longer than I wanted.
tz15zgC.jpg


Now the last shims are for the mainshaft thrust clearance, so I put the newly assembled shaft in the clutch housing without the spring washer installed. The old spring washer was ~0.84mm thick, I bought a new one that also happened to measure the same at 0.84mm thick, so I will use the new one though you might be able to reuse the old.
8n8KaZI.jpg


Put the oil guide plate and both original shims K and E back in the trans housing (total 1.00+0.70 = 1.70mm shim) before bolting the cases back together.
EHtSQeZ.jpg


While I was torquing the cases together again, I noticed the very last bolt wasn't getting tight and started having that unpleasant "mushy" feeling...I left it alone until I disassembled the cases again. The bolt was necking and would've snapped if I had kept going. I'm guessing this was some errant oil that got in the threads and made it so that I couldn't get to the right torque but not sure. Luckily I had ordered one of the four long bolts for the dowels since for some reason a short one was used previously, so I had an extra short one to use right away. I cleaned the bolts and threads and haven't had the same problem yet.
JJTFIFQ.jpg


With that done and all 16 bolts torqued down again, I flipped the trans over and set up my dial gauge. I used a steel press plate and some 1/2" all thread lying around to bolt the plate to the clutch side flange and give my magnetic dial indicator base somewhere to stick on to. Then I aligned the arm and dial, tightened them down, and zero'd the gauge on the end of the mainshaft. Note the splines protected with vinyl tape, transmission oriented vertically, and everything was at room temperature.

Since this method leaves the spring washer out, you can push and pull up and down on the shaft to check the clearance, which would not be possible with the spring installed without the OEM Honda tool. Doing this several times gave me ~6 ticks on the dial, which equals 0.006" of end play since the gauge has a 1" travel.
cXSPsfB.jpg


If you do some quick maths to figure out if this 0.006"/0.15mm end play is appropriate, it is very clearly not :rolleyes:. Here's the math. Please point out any mistakes if you see one.

(0.15mm measured play - 0.84mm spring washer thickness) = (-0.69mm final play). Obviously your end play is not supposed to be negative, we're aiming for 0.14-0.21mm, so the total 1.70mm old shims are much too thick to use.

To get the new shim thickness, I added the 1.70mm back to the measurement to simulate removing both old shims (new play would be -0.69mm + 1.70mm = 1.01mm). To hit the middle of the desired range (0.175mm), use (1.01mm play - X shim = 0.175mm final), where X = 0.84mm. So I'd need a shim of 0.84mm thickness, which is either shim G (0.80mm) or H (0.85mm).

Well, both of those shims are also discontinued, whould've thunk it. Fortunately, it looks like some of them were superseded to the 6 speed trannies, and the same single dealer site happened to only have a single 6-speed shim "I" (23939-PR8-F00, 0.84mm) available to order. I messaged 3 or 4 dealers and most had exactly zero shims since they are also all discontinued or backordered, so I guess finding a single shim in the perfect size is somewhat lucky. Now, I have to wait another week for these two new shims to arrive and take both measurements again.

I have more faith in the mainshaft being correct, the diff preload not so much. If either one doesn't test right, I'll either have to cross reference with another car, order shims from Japan, or get a custom one machined. So much for finishing this weekend I guess, plus I can't even do my exhaust yet :miserable:. I'll find some other things to keep me busy.
 
Last edited:
Hi!,
yes I have the same problem, they forgot to install O2 sensor bung in one of the heads I have been sent one, I will weld it quietly because this time I am not in a hurry.

Good Luck :smile:


Appreciate it :^). Just made sure yours have the rear O2 sensor bung actually welded on, they sent out an email that some or all of the first orders didn't have one so I'm having to wait for a bung from them and take my rear headers to a muffler shop for the welding. That plus the 2 wk lead time for ceramic coating means I'll have to wait longer to put them on :frown:


I'll upload a rebuild pt. 5 this afternoon, finally at the home stretch but waiting on some diff preload shims and mainshaft thrust shims after measuring them. The bearing preload was so loose that I almost couldn't read my torque wrench, was like 2-4 lb-in or so which might only be because of the inertia of the heavy diff itself and not the shims. I'll likely have to use a shim from the A/T table since the M/T's only go up to 2.27mm and my current shim is 2.09mm. Didn't think I'd be spending $80 on a few shims...

Oh, and all the shims are now discontinued or backordered so who knows when I'll be able to get them.

I think pt. 6 will finally be the last one, should be final assembly and gluing the cases back together.
 
I don’t believe the car will start without the instrument cluster connected

After our purple car had the gauge cluster fire I sent a replacement (used) units' circuit boards to BrianK to have new caps installed.

I had to move the car for some reason (it was many years ago) so warmed it up, and for fun drove it around our subdivision with NO cluster installed.....and it ran just fine.

So to quote Ronald Reagan, "It CAN be done" :cool:
 
Last edited:
Big McLargeHuge said:
Time to measure things. The differential bearing races and washers were installed (with the new bearing races). They were both a tight enough slip fit that I thought I needed to hammer them in, but if you get them perfectly square then they will likely slide in by hand and can be tapped lightly into place. If you're lucky.
5KXznUM.jpg


Then, the case halves were bolted back together with all 16 bolts torqued in sequence, and I inserted the 1 1/4" rubber expansion plug into the diff to allow me to put my lb-in beam torque wrench on. Once the bearings were greased and seated, I spun the diff and encountered nearly no resistance, maybe 2-4 lb-in on the wrench but it was almost too small to measure and probably was mostly due to the inertia of the diff itself...not even close to the factory spec.

I had put the original shim N back in, but it looks like I need to move at least 6 or 7 shims or more up to get in the factory range of 17-26 lb-in. That puts me in the automatic transmission shim table, which goes from shims A to Y instead of stopping at shim T. After some napkin calculations, I figured I'd order shims T, U, and V to try and land in the correct range and avoid multiple trips to the dealer.

Well, turns out most of these shims are discontinued or are on indefinite backorder, so I had to cancel my initial order. After messaging multiple parts sites, OEM Acura Parts said they had one shim "W" available somehow, which is one step above what I wanted to try, but I ordered it anyways and will see how it works out.

If it doesn't work, I'll probably have to either cross-reference with another car that uses the same style of 75mm diff shim or order my shims from Japan. Hopefully it doesn't come to that, it seems ridiculous to me to have to wait another few weeks for a single shim that might not even be the one I need. You're not supposed to double up on shims, so this might end up taking a lot longer than I wanted.
tz15zgC.jpg


Now the last shims are for the mainshaft thrust clearance, so I put the newly assembled shaft in the clutch housing without the spring washer installed. The old spring washer was ~0.84mm thick, I bought a new one that also happened to measure the same at 0.84mm thick, so I will use the new one though you might be able to reuse the old.
Since this method leaves the spring washer out, you can push and pull up and down on the shaft to check the clearance, which would not be possible with the spring installed without the OEM Honda tool. Doing this several times gave me ~6 ticks on the dial, which equals 0.006" of end play since the gauge has a 1" travel.
cXSPsfB.jpg


If you do some quick maths to figure out if this 0.006"/0.15mm end play is appropriate, it is very clearly not :rolleyes:. Here's the math. Please point out any mistakes if you see one.

(0.15mm measured play - 0.84mm spring washer thickness) = (-0.69mm final play). Obviously your end play is not supposed to be negative, we're aiming for 0.14-0.21mm, so the total 1.70mm old shims are much too thick to use.

To get the new shim thickness, I added the 1.70mm back to the measurement to simulate removing both old shims (new play would be -0.69mm + 1.70mm = 1.01mm). To hit the middle of the desired range (0.175mm), use (1.01mm play - X shim = 0.175mm final), where X = 0.84mm. So I'd need a shim of 0.84mm thickness, which is either shim G (0.80mm) or H (0.85mm).

Well, both of those shims are also discontinued, whould've thunk it. Fortunately, it looks like some of them were superseded to the 6 speed trannies, and the same single dealer site happened to only have a single 6-speed shim "I" (23939-PR8-F00, 0.84mm) available to order. I messaged 3 or 4 dealers and most had exactly zero shims since they are also all discontinued or backordered, so I guess finding a single shim in the perfect size is somewhat lucky. Now, I have to wait another week for these two new shims to arrive and take both measurements again.

I have more faith in the mainshaft being correct, the diff preload not so much. If either one doesn't test right, I'll either have to cross reference with another car, order shims from Japan, or get a custom one machined. So much for finishing this weekend I guess, plus I can't even do my exhaust yet :miserable:. I'll find some other things to keep me busy.
Amazing work as always! One question- did you consider any additional space that using Hondabond on the case half could create? Since we are dealing with thousandths here, I've been wondering if that very thin layer of HB between the cases that is not used when measuring the end play adds a thousandth or two to the final play number...
 
Last edited:
Of the few write-ups I've read, I haven't seen one mention adding in the layer of sealant used as extra thickness for mainshaft play. Doesn't mean it might not be a factor to consider but I don't personally think it's important. (or rather, if it is, Honda might have already included it in the range provided)

I'm just aiming for the middle of the 0.14-0.21mm range or slightly higher. I think that things like making sure the dial indicator setup is sturdy and zeroed correctly, ensuring the flanges don't have burrs that protrude up and prevent the two halves from mating right, having things at room temp, and cleaning off the mainshaft components & washers will reduce most of the measurement error.

What I should've done is installed one of my old shims (the 0.70 mm or 1.00 mm) and tried the measurement again to see if the thrust play increased by the same amount as the shim I didn't install to give me another data point for the correct size. I did try a measurement with all the shims and oil guide out of the case, but the number I got didn't make sense with my calculations above maybe because I didn't include the thickness of the oil guide plate.

I've read that LarryB said he's never assembled a trans with less than two shims, so my plan to use just the 0.84 mm doesn't mesh with that but I'll see what the new number is once the new shim gets here. Hopefully I can find some combo that works to avoid waiting another few weeks for expensive shims, but due to my diff preload issue that might become true anyways.


Here's some pics from this weekend. It's not all sweaty workshop time ;).
I was invited out to a weekend cruise in the southern Appalachians and it was great outside. The Porsche club just happened to show up too and I almost blended in.
sJBbMw2.jpg


This is the only other pic I took of my car. The roads and views in this area are fantastic, and was mentioned in a past Vinwiki episode as a great North GA driving spot. There were two other basically track-prepped Lotus(es? Loti?) in our group so suffice to say I was playing catch up most of the day :biggrin:.
It's the first time I've driven her "harder than my morning commute" I'll say, and I knew it would expose some areas to improve on. Better tires are an obvious one, smaller wheels, lowering on coilovers, getting an alignment, putting on my full exhaust w/ new O2's, brake system refresh, shifting my own gears, and my speedo started jumping around again for the 2nd time which I think is likely an intermittent heat related sensor issue with VSS1. I'm sure I'll blow a coolant line if I go too long without replacing the radiator & hoses so that's on the short list too. Still very much a work in progress, but I've been able to enjoy driving in between the projects :).
4fAyG9r.jpg
 
Last edited:
To bide more time until my transmission shims get here, I got new VTEC solenoid gaskets, fuel filter, and some other items that have been collecting dust for a while.

Since I think my new oil pan & gasket were still leaking, I wanted to drop it again to fix before I put on the new headers since they would make accessing it even worse. While it was off, I had the SoS baffles I bought a few weeks ago welded in by a local performance shop for some peace of mind when I drive spiritedly on sweeping right-hand corners. They painted the outside but left the inside bare since it would be covered in oil anyways. The rest of the black paint is from the factory.

New oil pan gasket as well, and I used some Permatex Permashield on both sides of the gasket to make sure I wouldn't have any leaks. It's different than a Hondabond or another RTV in that you let the solvent carrier flash off before assembling the parts, and it dries to a kind of silly putty consistency and can be taken off easily if needed. Newer service manuals say to use HB on the four seams of the engine block, I think this will be a good substitute.

The Mahle gasket I got was shipped in a flat shrink wrapped package unlike the OEM Honda one before, so it laid perfectly flat without any issues and the Permashield was a great glue to hold it in place for install.
MlLxgZV.jpg


While I was there, I also replaced the O-ring on the oil pickup as a preventative maintenance item.
AXxUhs1.jpg


Reinstalled again, hopefully for a long time this time. I went around and torqued the bolts multiple times after the sealant dry time to make sure they were all good. Probably used 8-10 lb-ft this time. I had the car on jacks instead of a lift for the first time in a while so I forgot how fun it is to lie on one's back with only a foot clearance under the car.
G2YtpWb.jpg


The same shop also welded on the O2 bung that Pride sent me. I left the headers with them to get ceramic coated, so it'll be another 2-3 weeks until I get them back and can put everything on the car. Worth the wait, I suppose.
HoFb3AM.jpg


Spent most of the day Saturday doing a couple of miscellaneous maintenance items. The only remaining oil leaks I could see were from the VTEC solenoids, the cam caps were perfectly clean and look to have been replaced before. I would get oil dripping down onto the front mount onto the shift cable cover and blowing onto the bottom of the oil pan, so I got all new OEM gaskets and O-rings for a princely sum. Also removed the oil pressure switch right below the front solenoid. I had new O-rings for the switch connections but decided to leave them alone since they looked perfectly fine.
ZPdVPaN.jpg


Front bank all removed. It's a real pain in the ass trying to get access to the bolts on the main housings, the top solenoids were not too bad. I tied off the coolant tank away but it would've been nice to remove it entirely, though you'd probably lose a bunch of coolant. Spent a bit of time cleaning everything off and wiping the mating surfaces with acetone to clean off any oil and schmoo to prevent new leaks.

The spring/piston/cap on the main VTEC solenoid housing liked to fall out by themselves so I left the cap off until the housing was bolted to the engine so that it didn't fall down into the engine bay. Pushing down on the piston confirmed that they were moving freely and springing back like they should be.
SE6YIzo.jpg


The old filters on the gaskets were very clean, so oil changes don't seem to have ever been a problem, or they might've been replaced in the past. The rear small gasket also had a bunch of black goop-like RTV stuff on it, not sure what the deal was but I scraped it off to make sure it was oil-free and flat.
up2rrCJ.jpg


Not fun to do with the coolant tank in the way. The rear bank was just as bad, I had to remove some hardlines to the throttle body (one line held coolant but can be kept facing up) and disconnect several sensors to get enough access. Even then I could barely fit a wrench in to torque the bolts on. Dropped several bolts down and they seemed to find the perfect place to sit on top of braces and mounts instead of the ground so that added an hour to the job.
Z9pKhsW.jpg


Since I had the air box off and was in the area, I went about replacing the NM/VSS1 speed sensor as well to solve my intermittent speedo/EPS issues. This is for an automatic transmission by the way, the manuals have a different VSS1 that's on the right instead of the left. These two connectors are tucked under the throttle body but aren't too bad to get to. VSS1 is connected to the 3P connector on the right, I think the 2P on the left is another A/T solenoid or something.
MkJAcqx.jpg


It was quite easy removing the connector and bolt from the sensor, the real problem turned out to be popping the sensor out of the transmission. That was a nice half hour of pulling and prying and swearing. The old sensor didn't fare too well, I'm sure it's never been touched before so the little bit of corrosion around the O-ring manage to make it a real bitch to get out. I ended up using a long screwdriver and hammer from the bottom to smack the sensor body and loosen it up. You can just barely see it from below the car, it's buried right under the starter motor.

Not fun, but putting the new one on was easy and everything works now so I'm happy at least. The sensor was a cheaper $50 one from Rockauto, the body is a slightly different shape but everything else worked fine and no speedo/EPS/TCS issues. I'll see how it works during longer drives when it heat soaks like the old one did. This is not the sensor I need for my EPS on the 5-speed, I'd need to steal the VSS2 from the auto trans and transfer it over to the manual or buy a new one, though it's twice the price of VSS1 even on Rockauto.
6Mgeckc.jpg


I wasn't having enough fun so I also decided to put on the new fuel filter I got. Everything was super easy except for the one stupid bolt holding the bracket on, it's right under a piece of bodywork and too close to the edge of the bracket to fit most sockets on. Another 20 minutes to remove it for what should be a 5 second zip-off. It went on a lot easier than it came off at least.
Rb3x7Mk.jpg


New filter on with new crush washers. The old fuel didn't look too bad. I relieved fuel pressure per the FSM but nothing came out when I loosened the service bolt, just a bunch of fuel sitting inside the canister. I primed the system a few times before cranking the engine and didn't have any issues starting. Another nice PM item off the list, it always feels good to have new parts on the car.
xP2fVPp.jpg


Both solenoids re-installed. Camera flash always makes things look uglier than in-person, trust me ; ). After driving and hitting VTEC (yo) a few times, I'll check to see if I still have oil drippings but I don't expect any now. The car still runs great so I didn't forget to re-connect anything at least. Hopefully this solves all my oil leak issues, my valve covers and the timing belt side of the engine all look perfect so at least my previous work is holding up.
6NKyIHE.jpg


Both my arms make it look like I've been through a competitive boxing tournament trying to get to all these buried bolts, but the more I fix now the less work I have in the future, hopefully.

My transmission shims should arrive in a few days, so I'll put those in and take the new measurements. I'm sure one of the two will still be slightly off, so I'll probably have to wait another 2 weeks or so for the final shim from Japan or elsewhere. Then and only then can I finally put the whole thing back together after a month+ of sitting around waiting for new parts. Still a good learning experience so I don't regret it quite yet.

Once my headers come back from ceramic coating in ~2 weeks, I should be set to do my whole exhaust job which I'm actually looking forward to. I'll just get my drill bits & dremel wheels ready for when I inevitably have to cut or drill out a lump of rust that was once a bolt.

I'm close to being able to actually start the transmission swap, though I still need to find some engine mounts (still waiting for the foundry3's to come back in stock, but I ended up getting some used OEM's in good condition instead) and replace the parts that USPS lost. Honcho's been very helpful with the wiring work so I should be able to get OEM connectors and make my own patch harnesses. I've been planning & collecting parts for months so I'm ready to have it done and dusted.
 
Last edited:
Bad news sports fans, both my shims weren't quite the right sizes.

For the mainshaft thrust with the new shim "I", I got 1.60mm play - 0.84mm spring washer = 0.76mm play, which is still way too much. I'm not sure why my first measurement pointed to using this one, but it looks like Larry is right and I need two shims. Either I+A (both from 6-speed trans, total = 1.44mm), 5-speed E+6-speed E, or 5-speed E+6-speed D.

Yes, the shims between the 5-spd and 6-spd transmissions are the same design but they shifted the lettering around so the thicknesses aren't the same. I think these can be cross-referenced with the S2000 6-speeds as well.

For the diff preload, my shim W was a lot closer at ~12-15 lb-in but not high enough for me. To get comfortably in the right range I'd need to move two more shims up to Y (2.42mm), which should give me 18.1-21.1 lb-in. That's the largest shim Honda makes so I hope that (A), I can actually get one and (B), it's the right size.

Easier said than done, I think my dusty shelf theory was right for the W shim, that's the old Honda parts packaging. Not sure how old but might be older than me.
xBS6lfW
xBS6lfW.jpg


Cool though I guess.
foq3ccU.jpg


Shims E & D are available, neither A or Y are in the US as far as I know. I'll call a local trans shop to see if they might be able to help, but otherwise I'll be importing shims. Take a drink for every time I say shim in this thread.
I cannot be held responsible for alcohol-related deaths resulting from this
 
Last edited:
Have you considered just buying shim stock and cutting your own additional shim to put underneath the OEM shim to get to the correct clearances? Just get the piece of stock you need, trace out the oem shim, and cut it out.

https://www.zoro.com/precision-brand-shim-stock-assortment-steel-15-pc-16685/i/G1585297/#description

Years ago when I rebuilt my Integra transmission I needed a thicker shim for the diff clearance so rather than wait for the right part I just cut up a Dr. Pepper can made a shim to go underneath the one that was already there. Clearances were perfect and that trans is still going strong today 50k+ miles later in somebodies turbo Civic hatch.
 
I've thought about it a bit, but it would be difficult to cut stock to shape properly with the tools I have. I'd need .095" thick stock for the differential one and I can't find something that thick at the few suppliers I looked at, and the FSM says not to double up on those for whatever reason.

I just placed another Amayama order for my lost shifter & clutch pedal parts for the conversion anyways so I added the shims I need to that. If they're actually available I don't mind waiting for them to get here. It's been like a month and a half already since I started so what's another two weeks.
 
Misc Stuff

I put on the whole exhaust this past July 4th weekend, but I'll post that right after this to try and push the pics to the next thread page since this one is getting really long.

One, my Amayama order is ready to ship except for the '02 Type R "short" clutch pedal, which turned out to be on a 0.5-1.5 month back-order. The other short-throw pedals are all DC'd or on longer back-orders so I gotta wait for this one before I can get my shifter & shims that are in the same package. The Type S pedals seem to be available, but I have no idea if those are short-throws like the Type R's.
yd3Ivd8.png


Usually waiting for back-ordered parts only adds ~1 week to the delivery time so hopefully that's the case here. I'm considering my order way back in Feb (which had these items already) to be lost by USPS forever to the void, otherwise this wouldn't be an issue.

Two, my S2000 cluster is somewhere else in the USPS international clusterfuck, but they finally called me and updated my claim inquiry after 2.5 months and said it's on a boat to Sweden. The last boat should've arrive on June 23 so I'm not sure how much I trust that at this point, I might just have to send another cluster and wait for them to give me back the insurance money. Thanks once-in-a-lifetime global pandemic. Johan's been very patient with me ;).
RjwNsdu.png


Three, I got a replacement 02-R mesh shift boot thing from ICB Motorsports, was only $112 with shipping which is quite a bit less than other vendors. They have mixed reviews but went just fine for me.
FHiC222.jpg


Four, I went ahead and just bought a set of used OEM M/T mounts and the engine stiffener for a good price off the Prime FB group. They're a little dirty but have zero cracks or marks on the rubber parts, so I'm just going to drop them in on my car. My front & rear mounts look much worse than this as you'll see in the next post. If I have problems with these in the future, I can just fill them with a polyurethane kit or get SoS to mod them since I have the M/T cores now.
T1iUXZT.jpg


Made a parking deck friend after I came back from finding a secluded spot in the DFZ (Dent Free Zone).
TCazpgi.jpg


Had some oxidation start coming back under where the front license plate bracket was & on some upper surfaces, so I did a light polish and re-ceramic coating of some panels before the first big car show in a few months this past July 5th. There was a huge turnout as always, some people wore masks but it was real summer hours so a bunch weren't...it was nice going back after so long without any shows, but with the way things are going in GA and the rest of the US they might be shutting down again.
b2sAUcC.jpg


Headers & Exhaust pt2 incoming.
 
Last edited:
Headers & Exhaust pt2

Have you ever wanted to be the most obnoxious person in your neighborhood? To have people in fart-canned Civics rev at you at stoplights? I've found the solution!

Thanks again for Primers putting together this write-up which was my main resource (http://nsxprime.com/wiki/Installing_Headers). Total time it took me was about 20 hours over two days, give or take. I would give it a "pretty okay" rating on the scale of timing belt being the worst to a lightbulb change being the best/easiest.

This will be a classic blend of semi-DIY and just documentation of the bulk of my exhaust project. There are some fitment related issues yet to resolve as I'll elaborate on at the end.

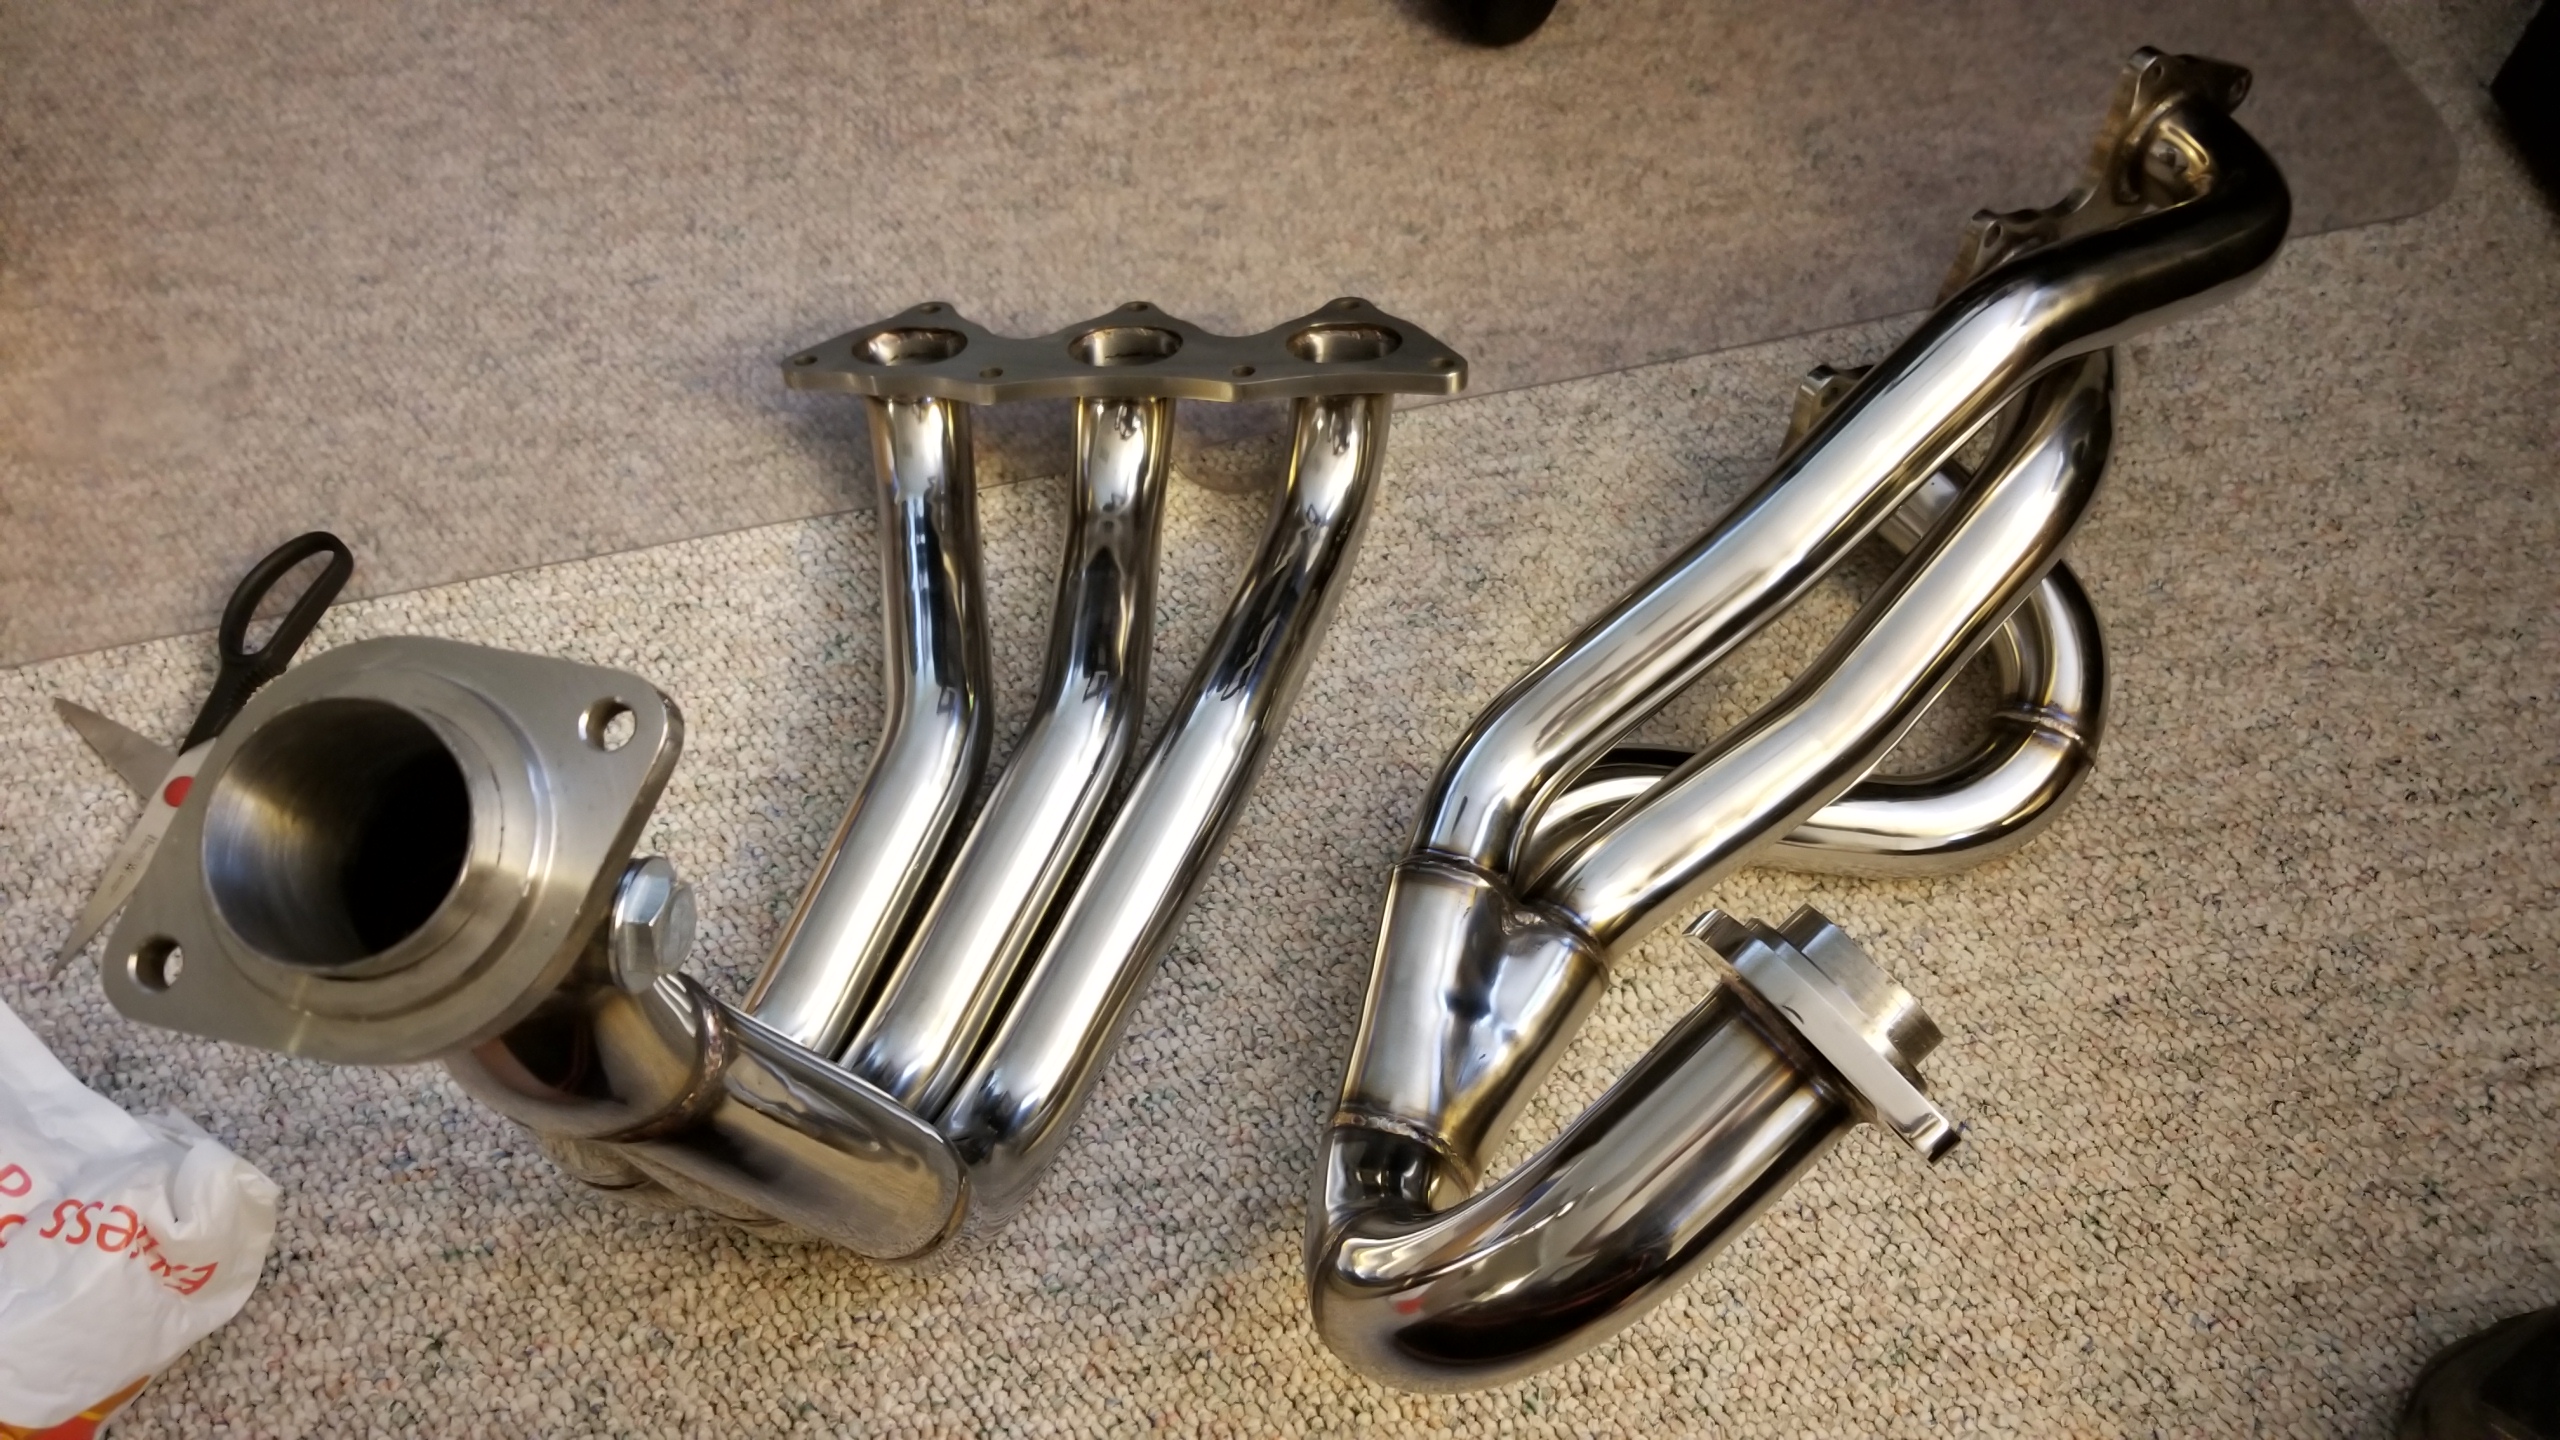
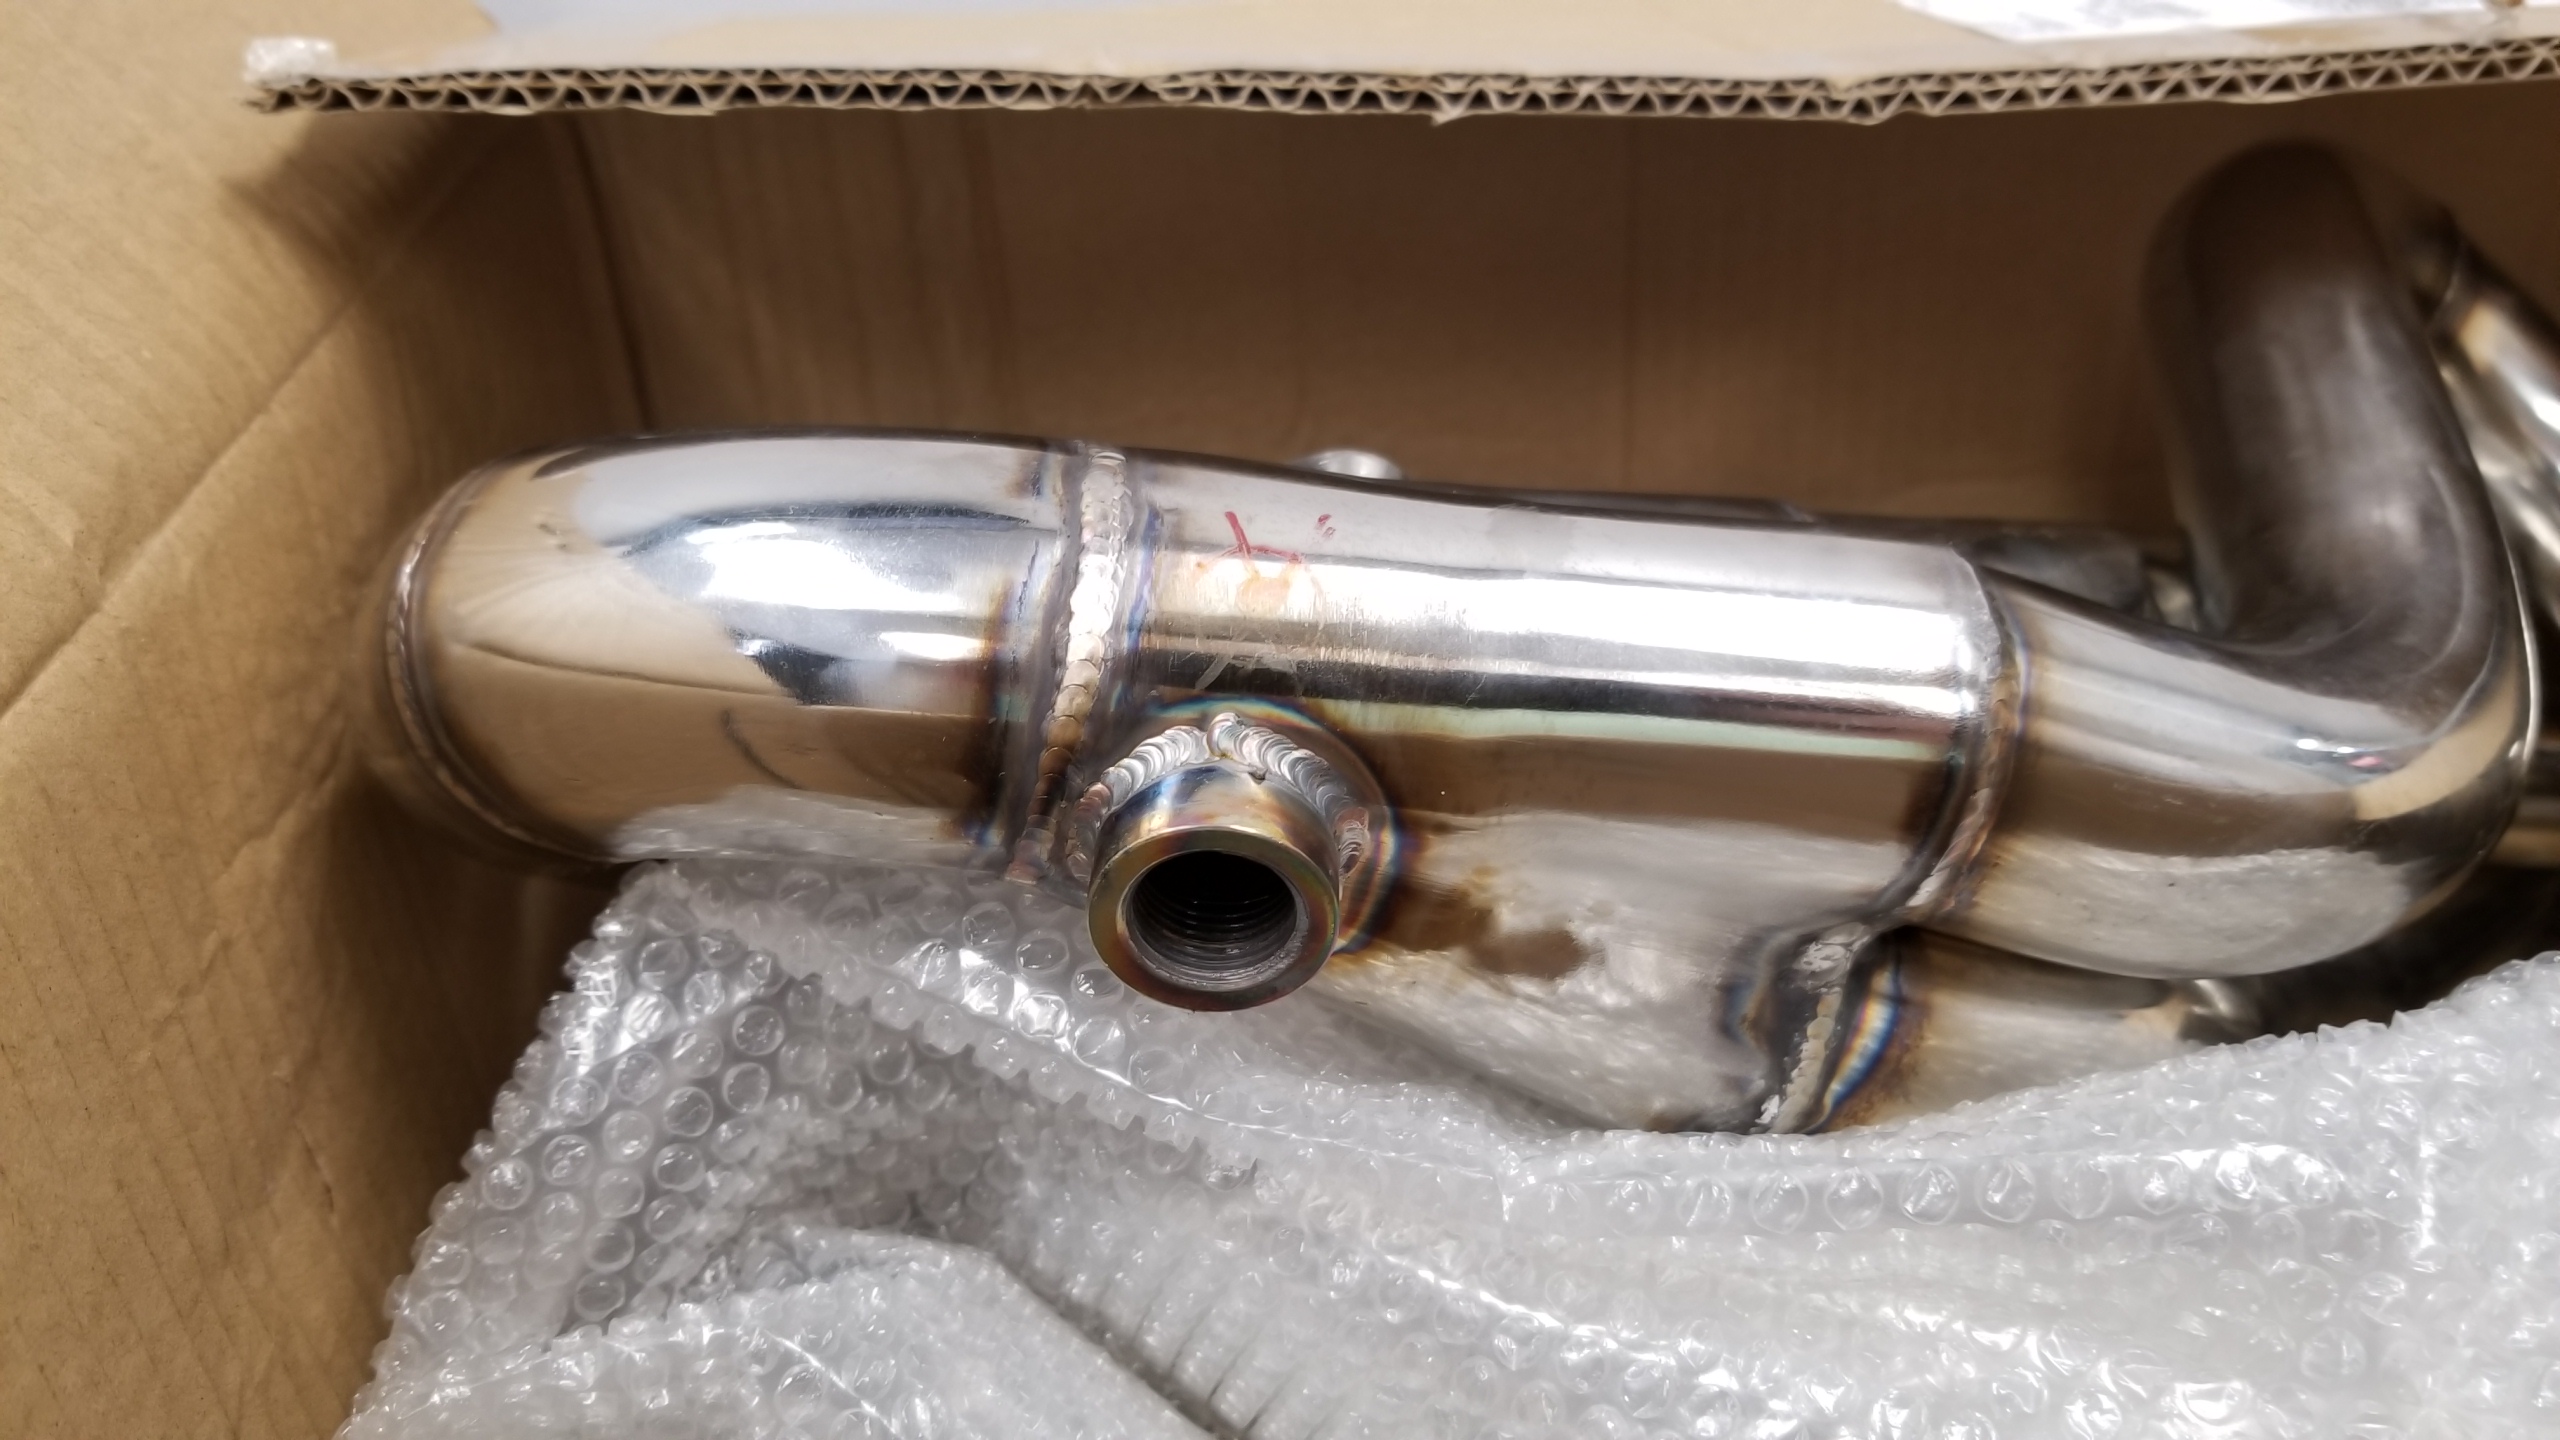
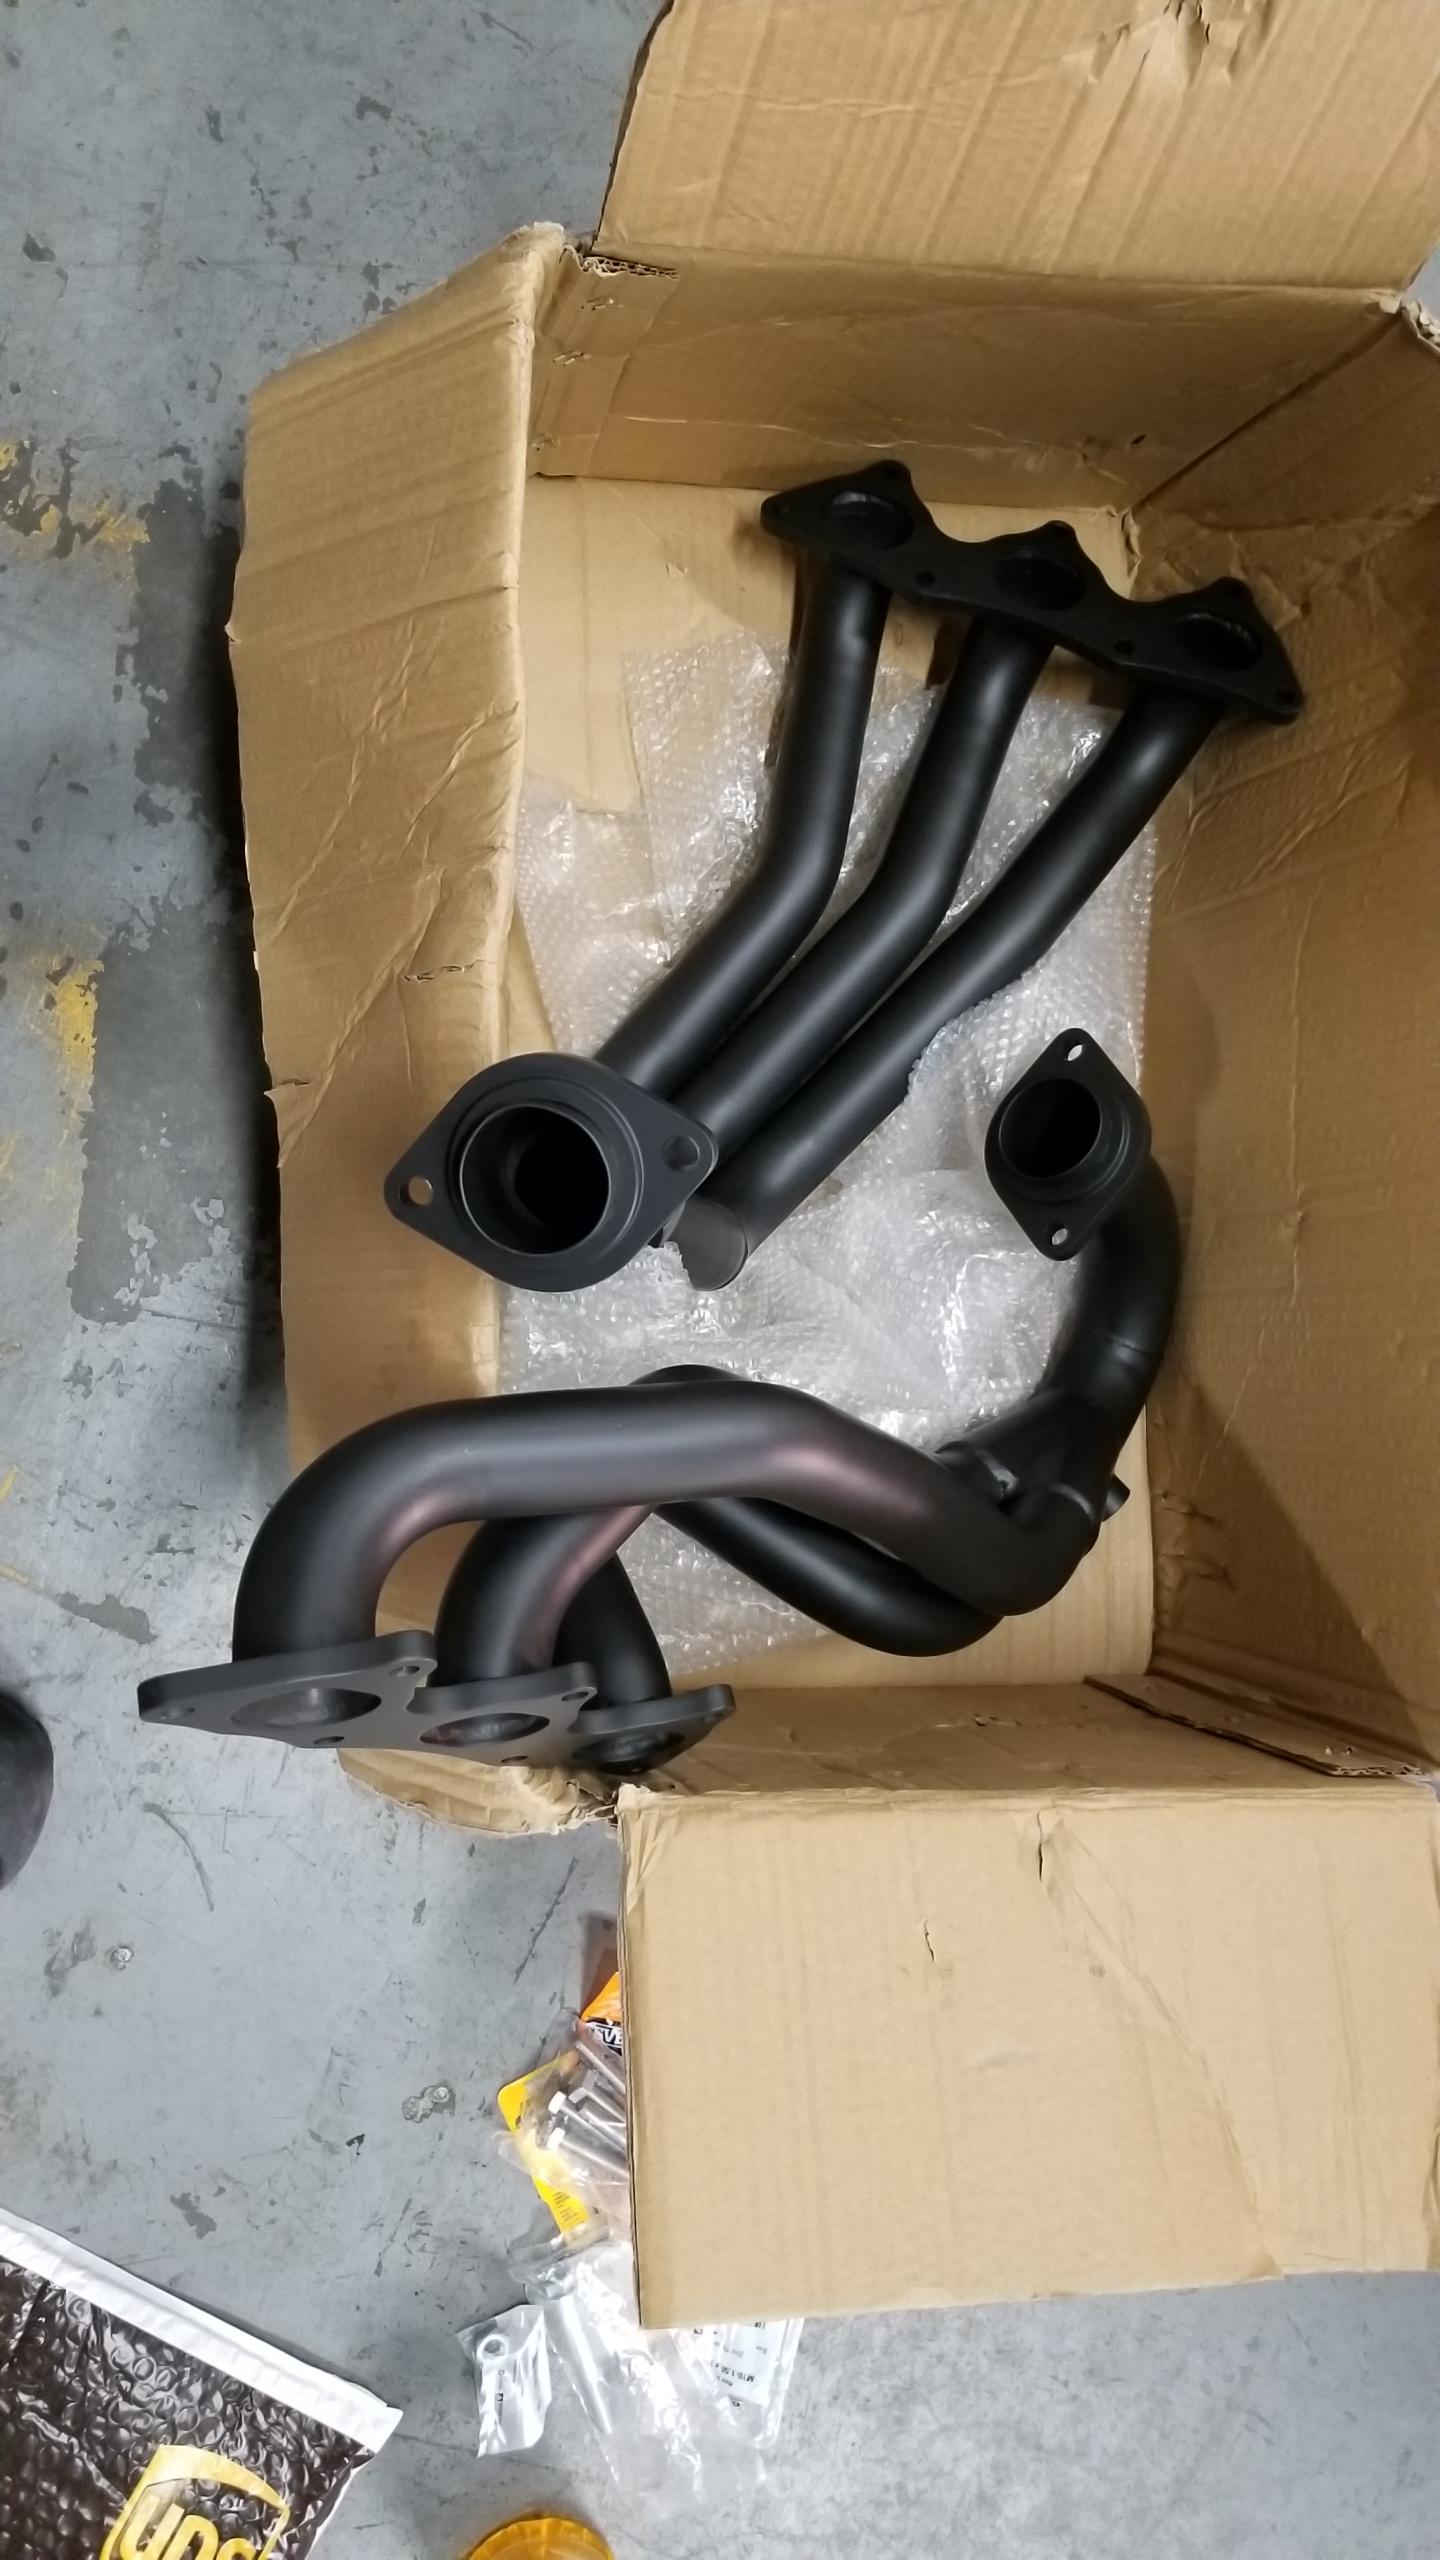
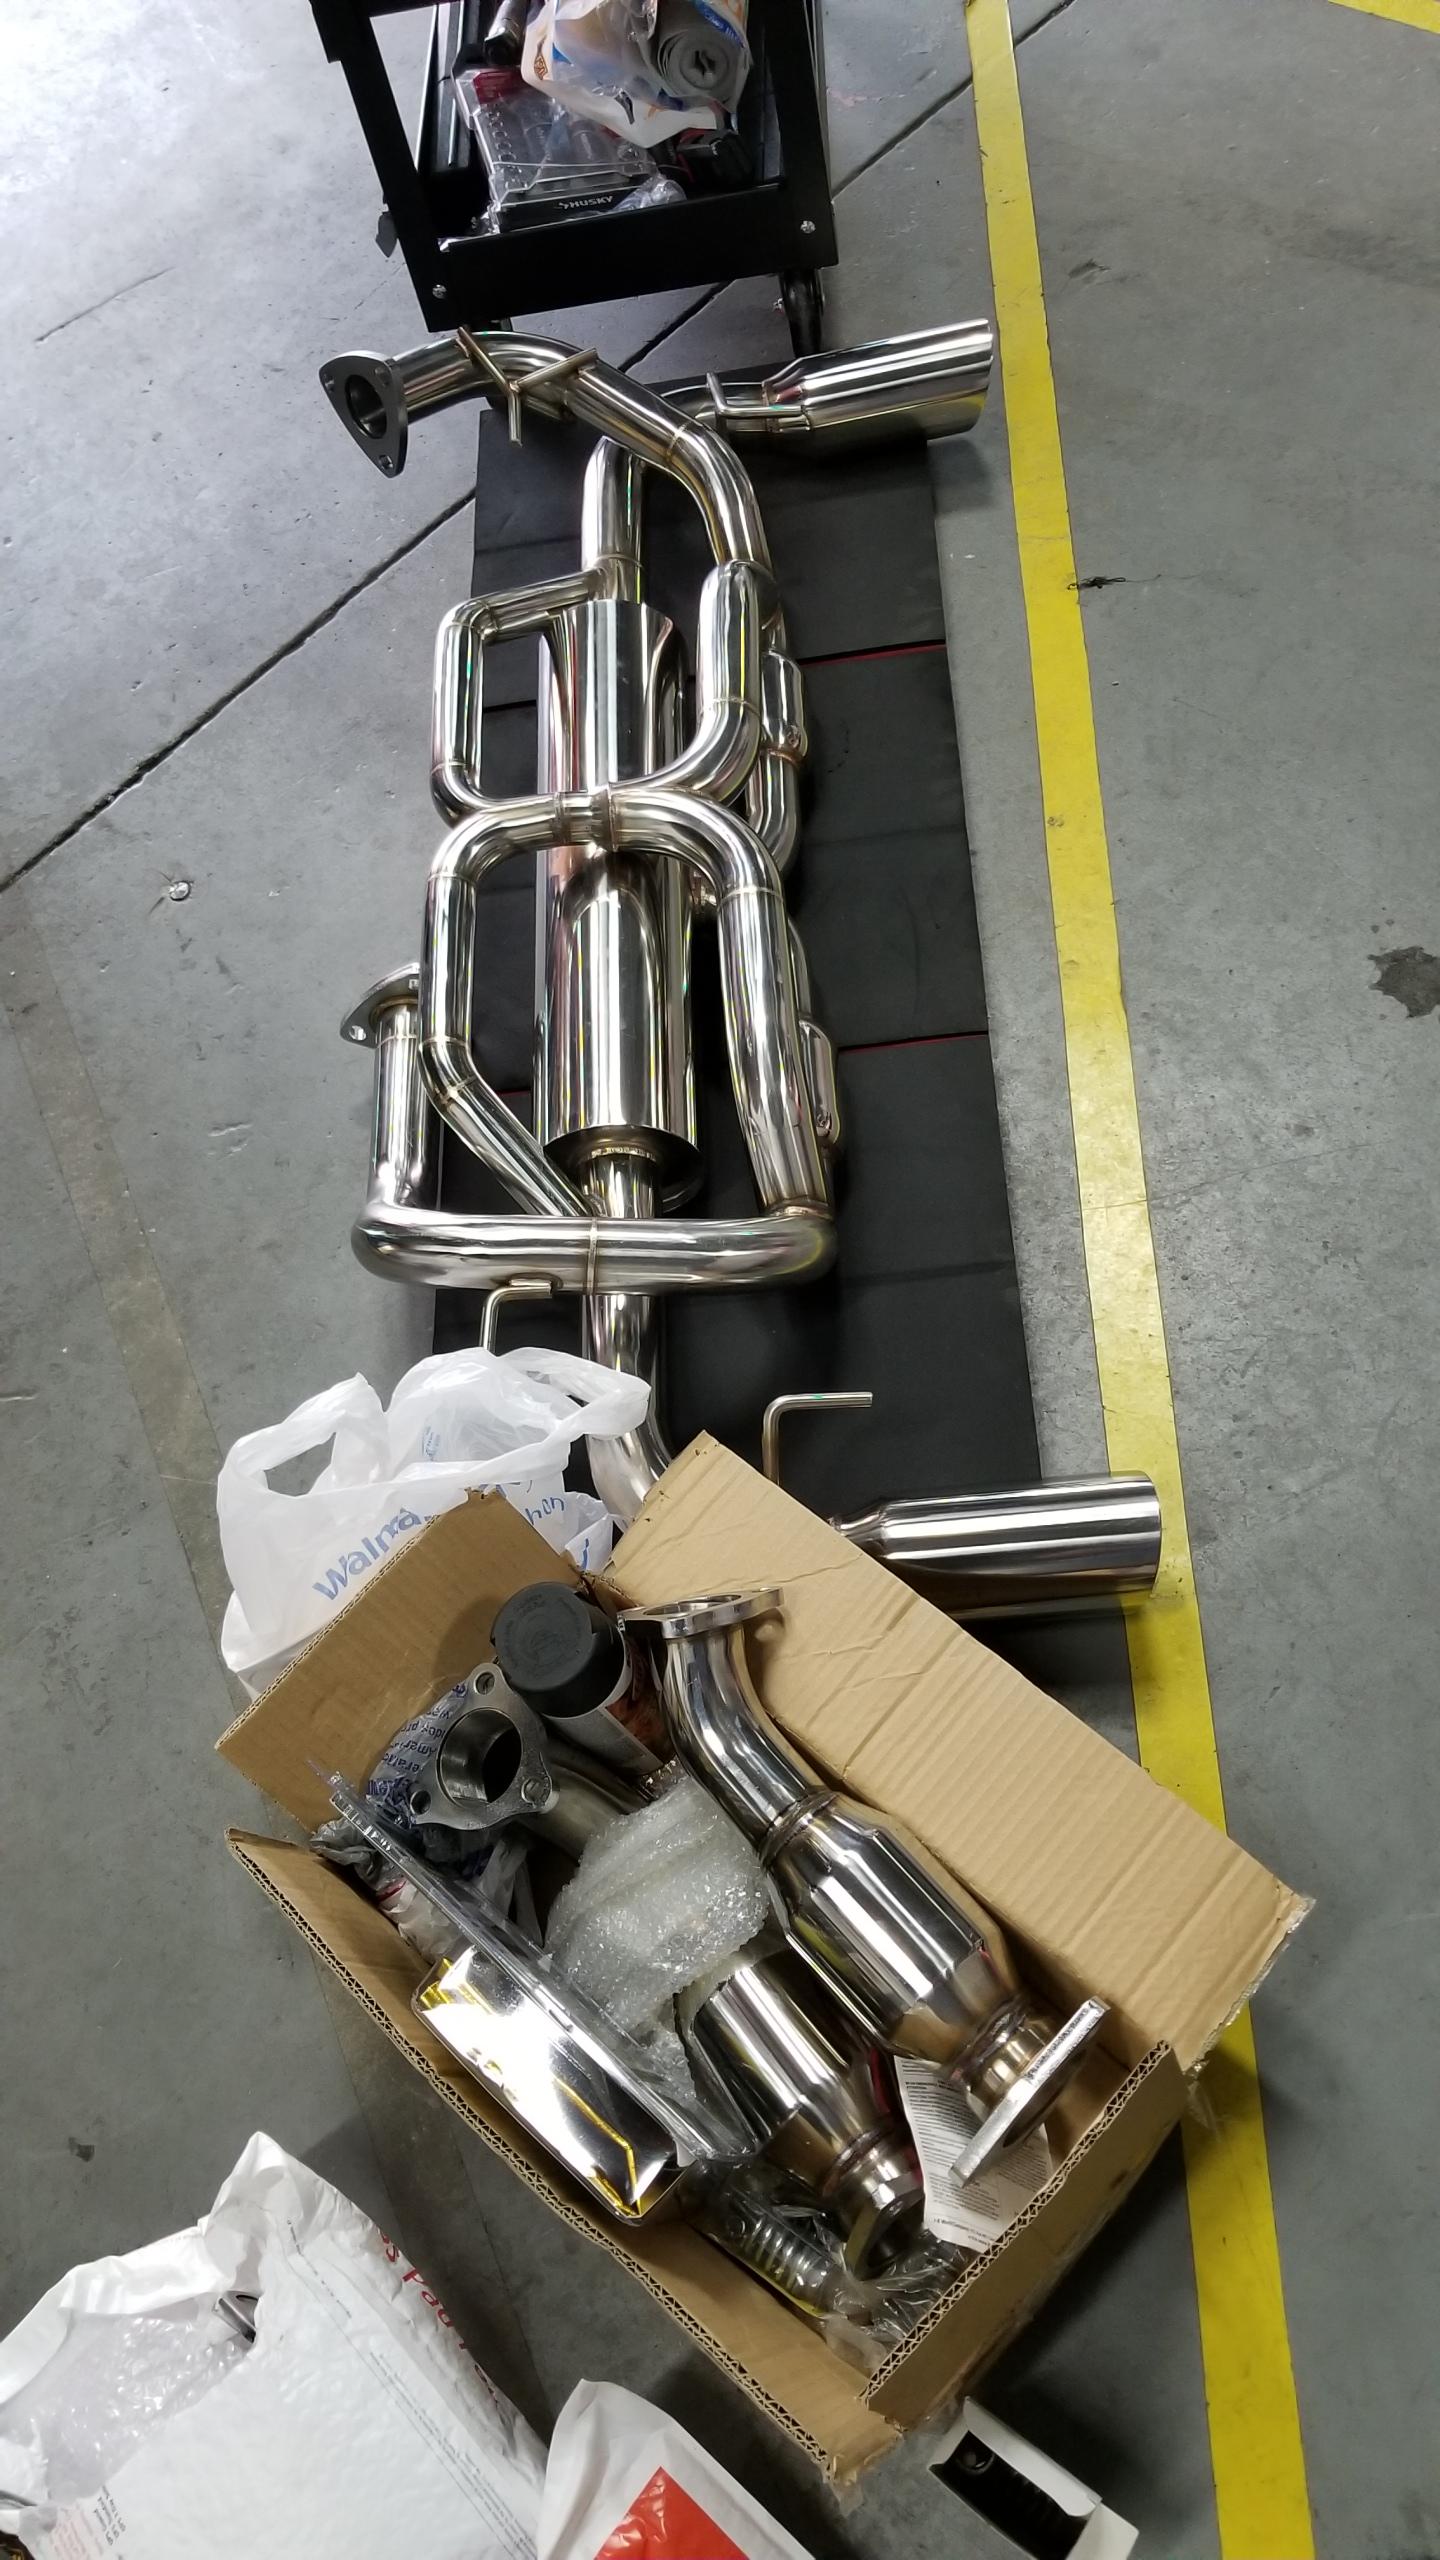
Headers came back from ceramic coating. I never gave the color I wanted but I think black looks cool enough.
Z9r1PW0.jpg


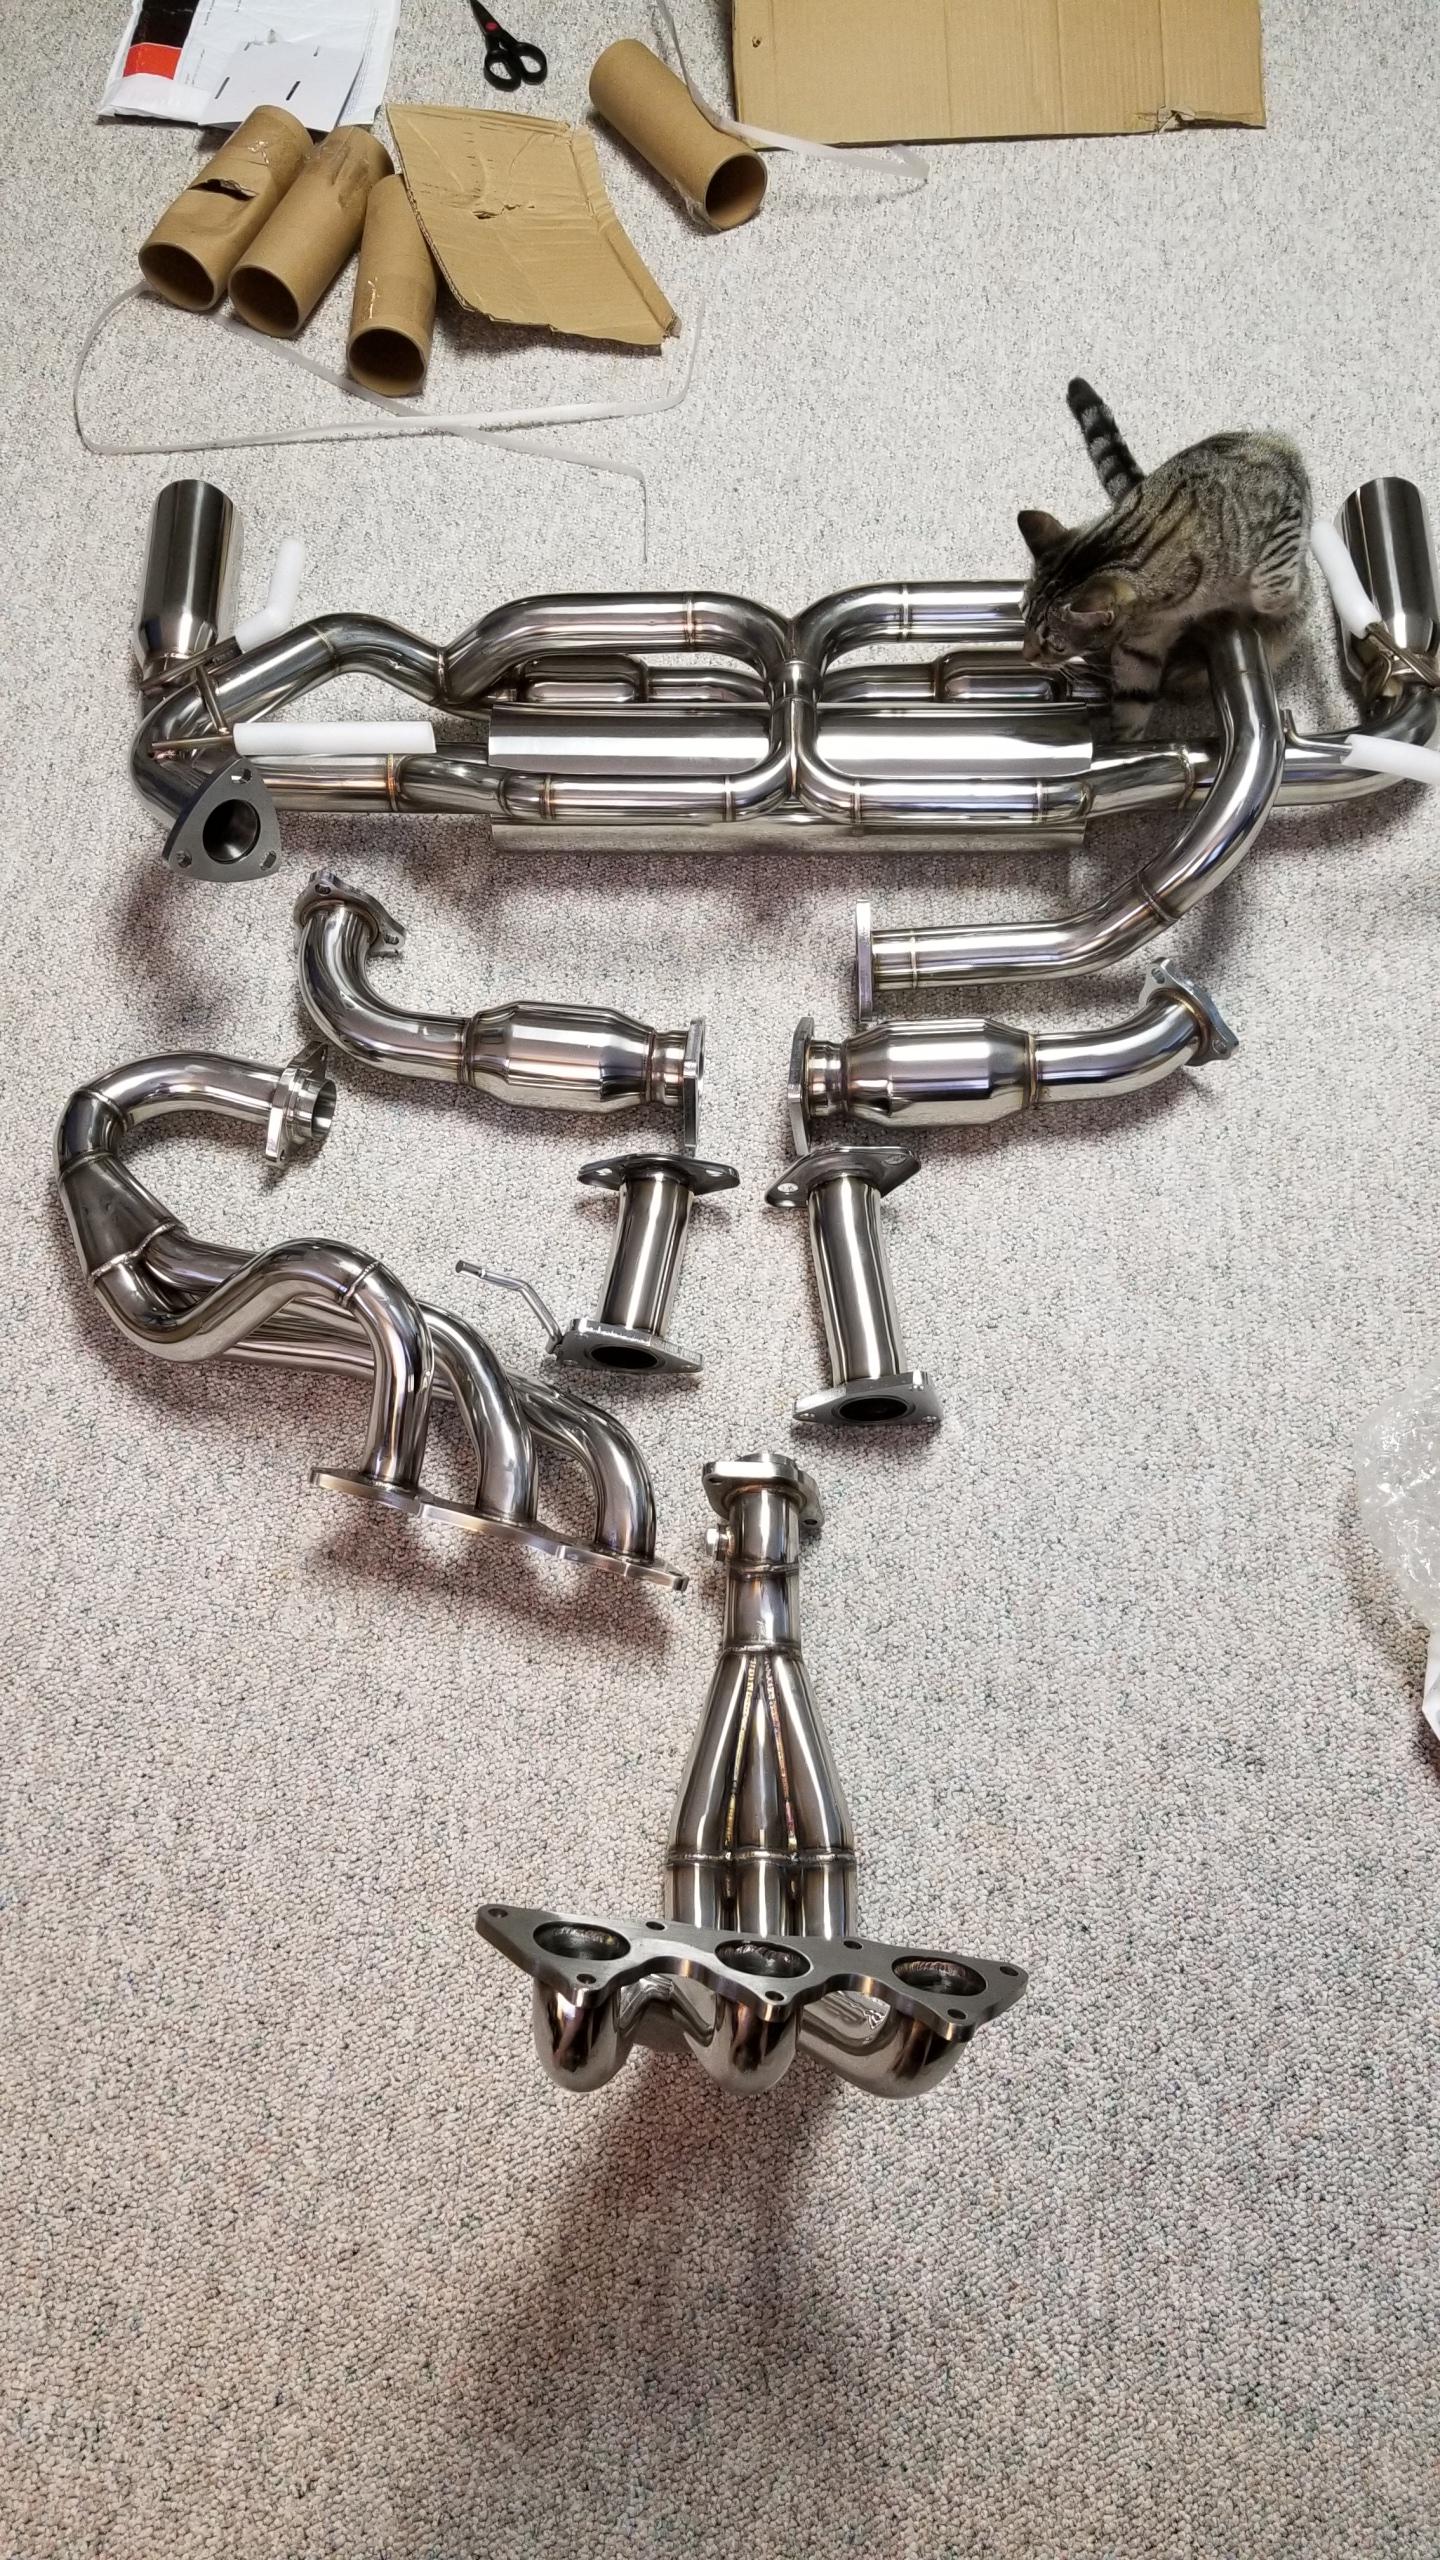
Finally, after all these years, all of the dragon balls have been collected and I'm ready to summon the dragon of loud pipes.
z6mRaCz.jpg


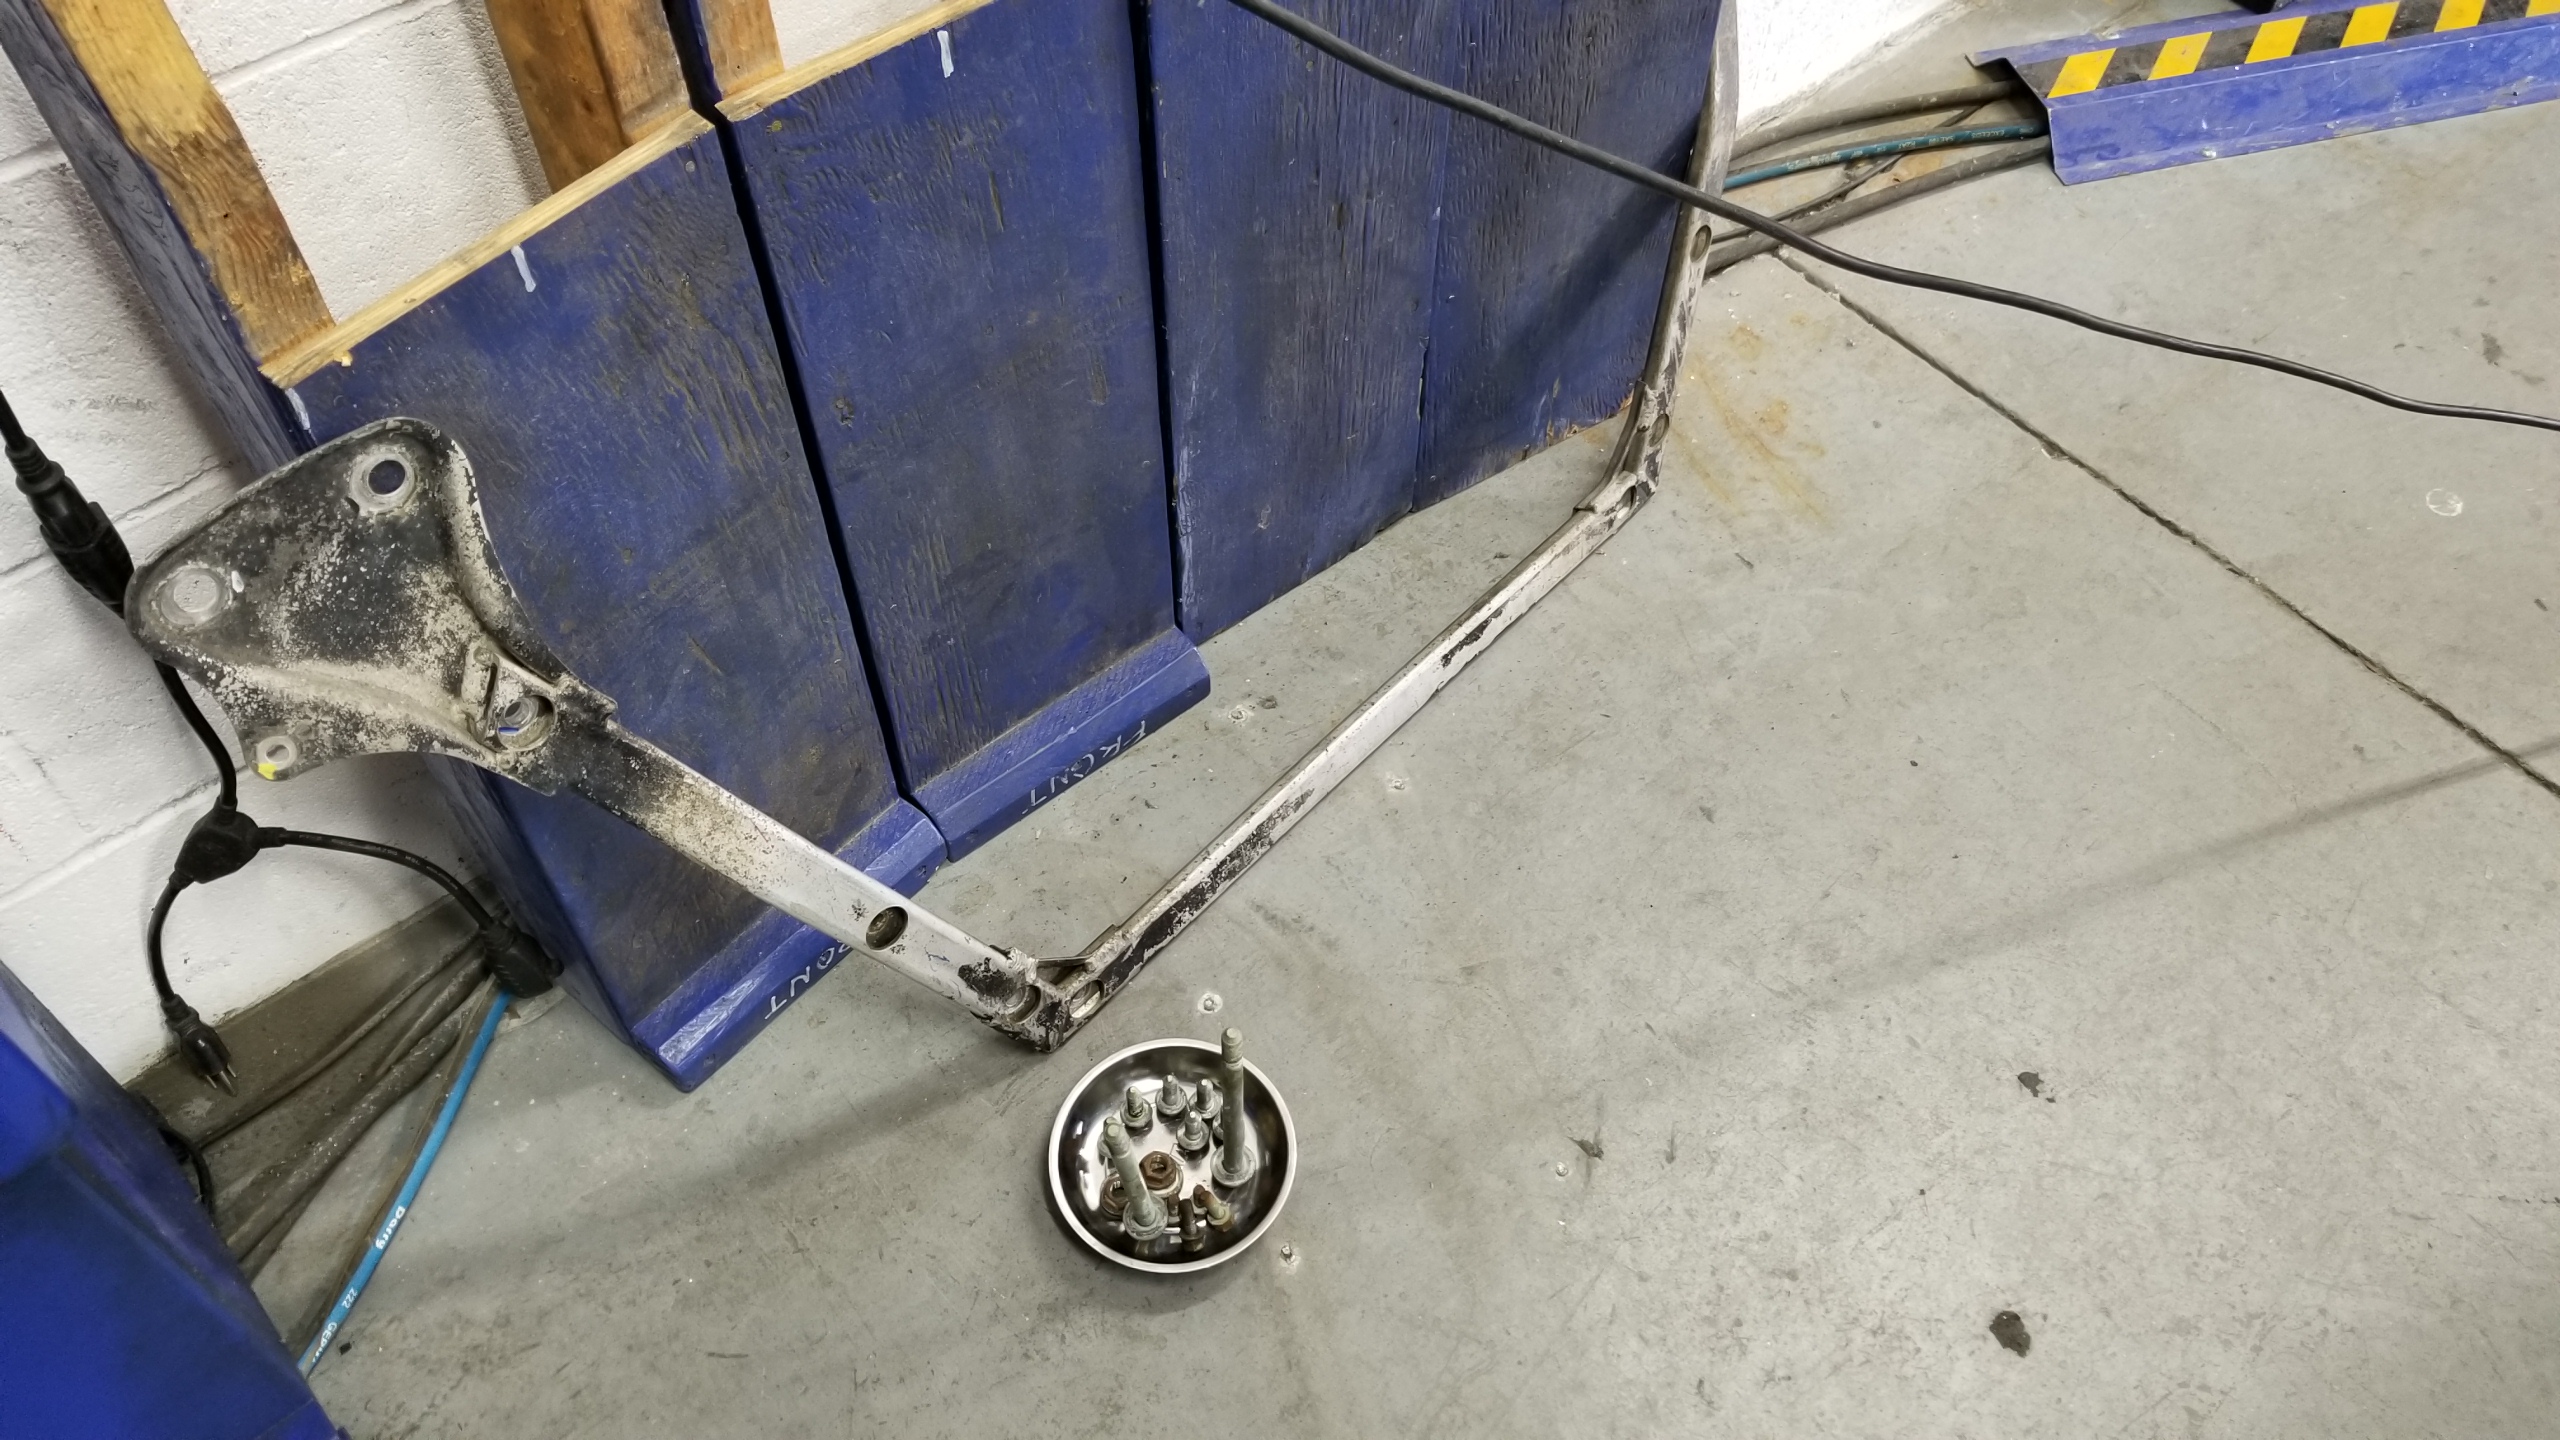
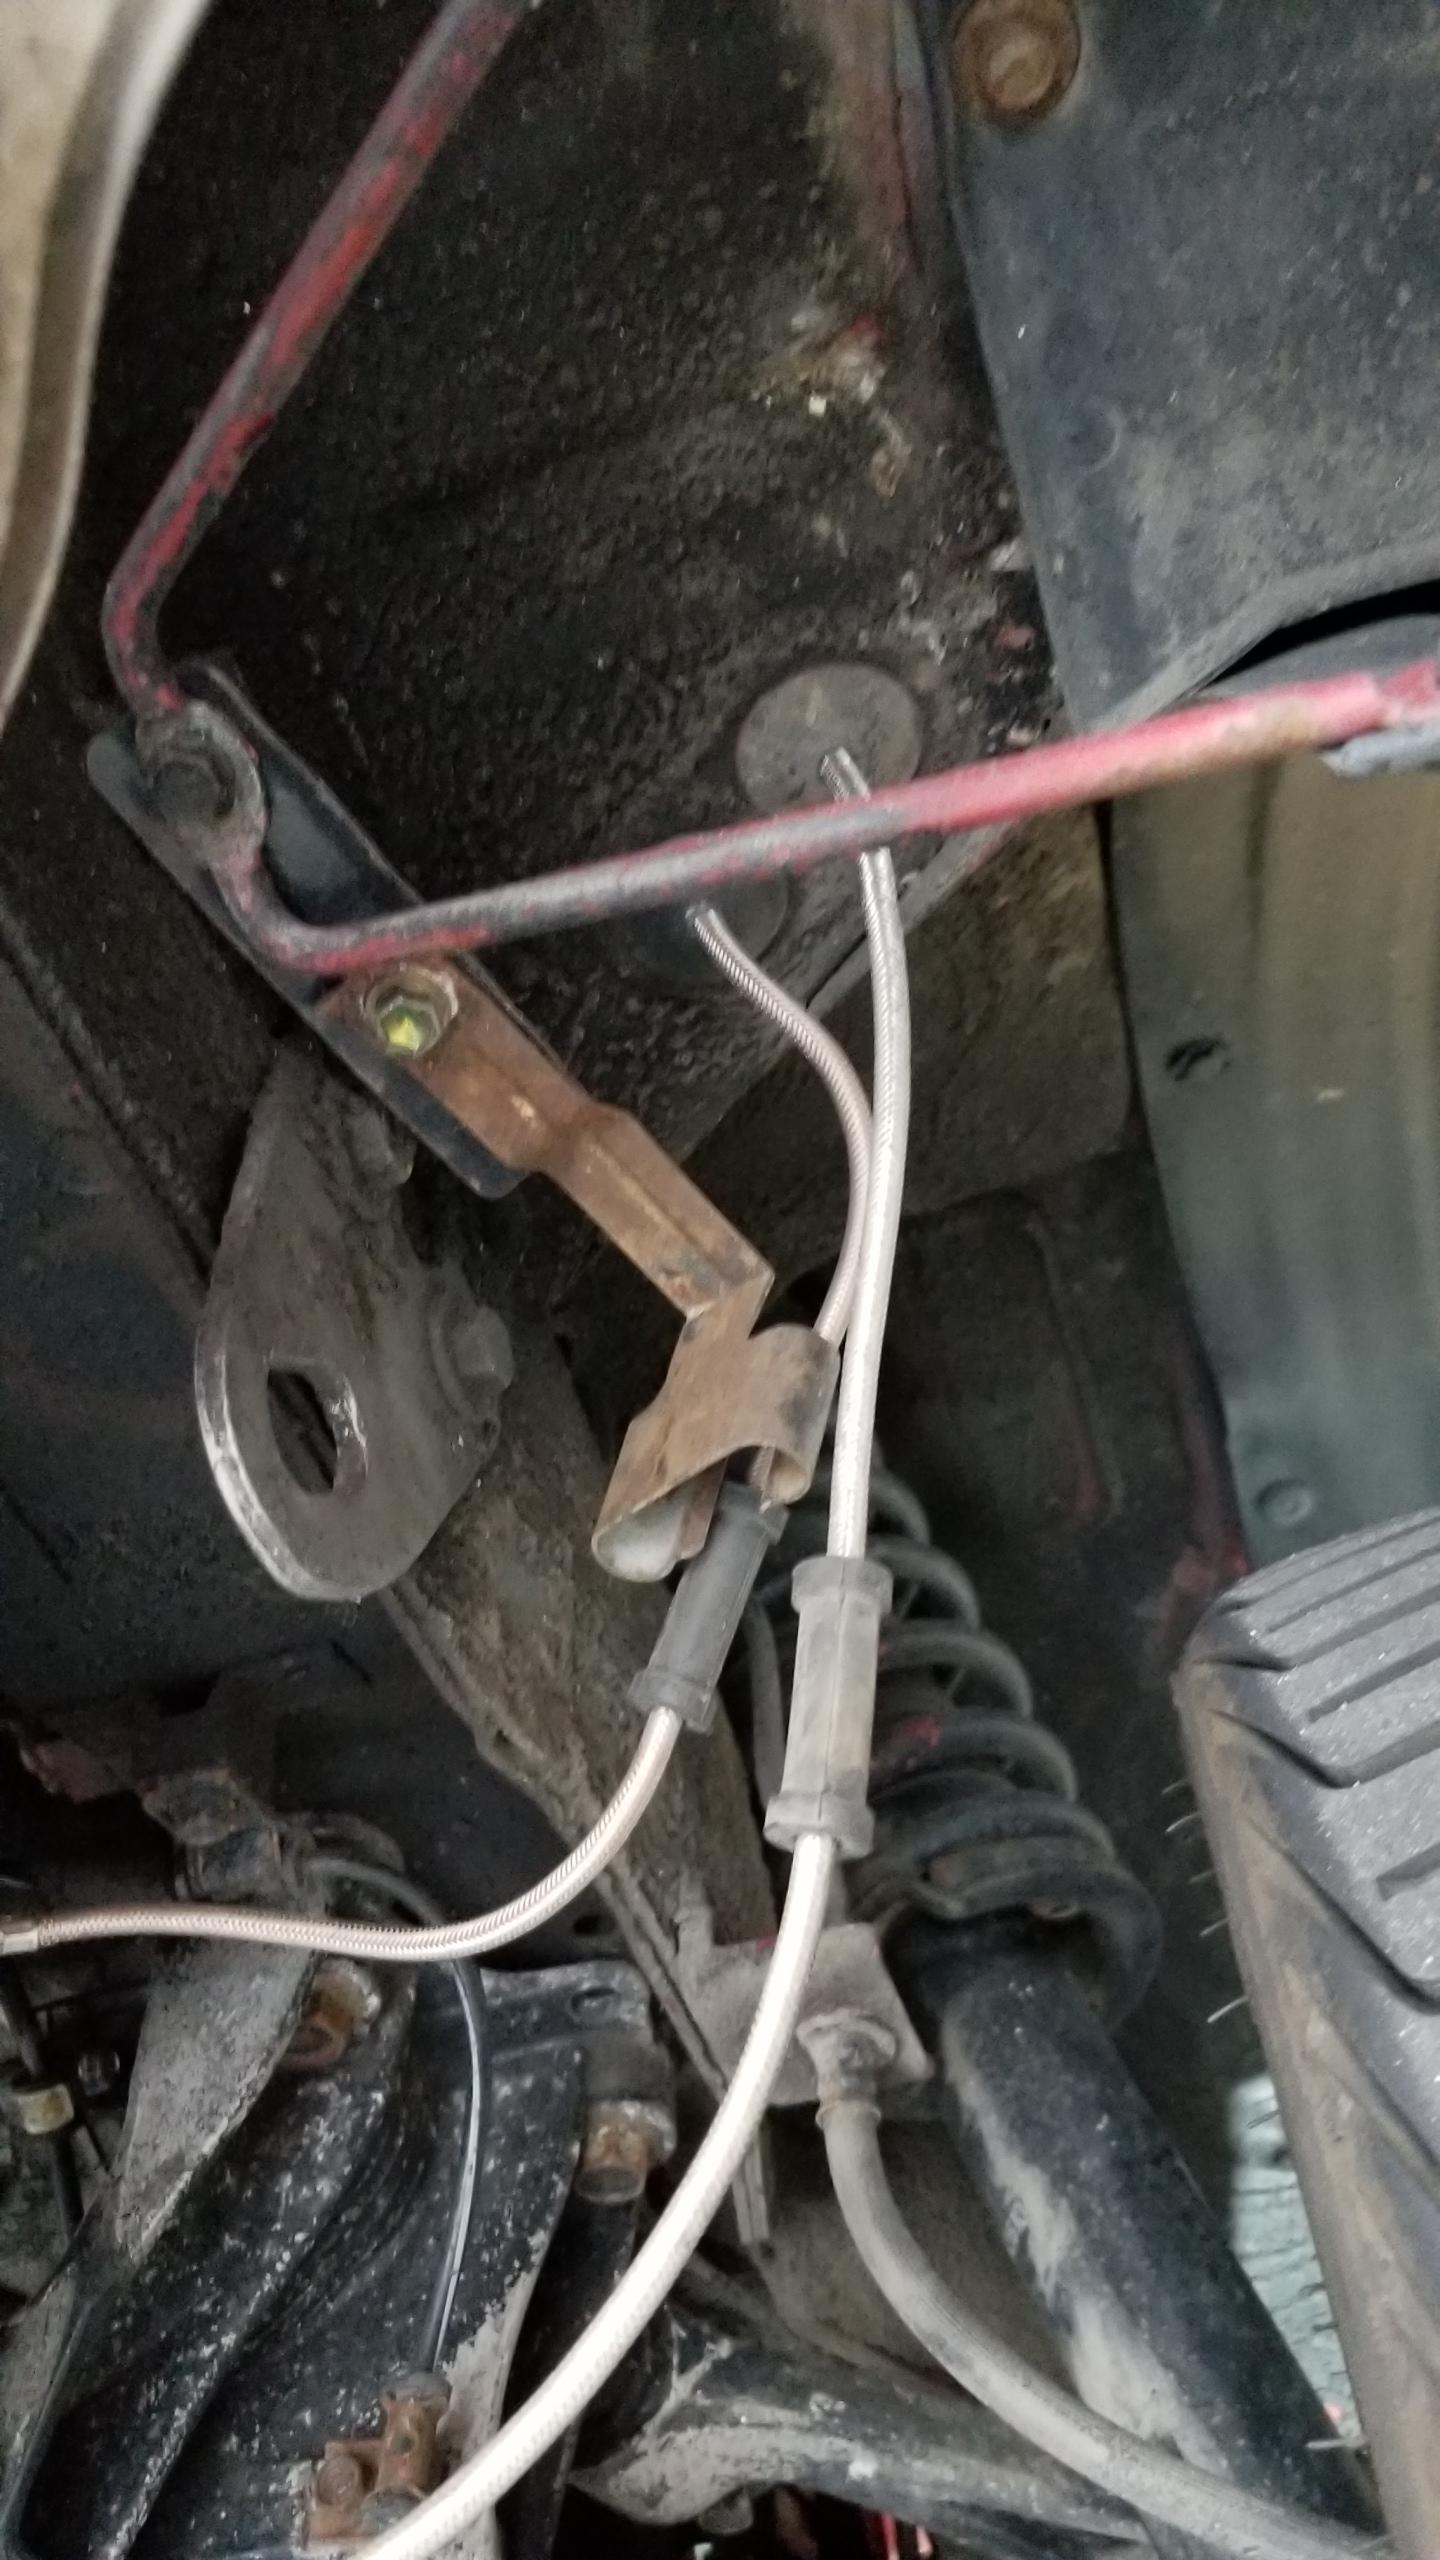
First was removing "rod A", which is easy with an impact gun. I'll clean this thing up and the other major underbody pieces & hardware during a future project.
czYi5Qa.jpg


Removing the heat shields on the rear cats required drilling out the bolts & rivets, which I had already done a while back. The front cats might have been touched beforehand because the bolts were easy to get out and less corrosion on the hardware.

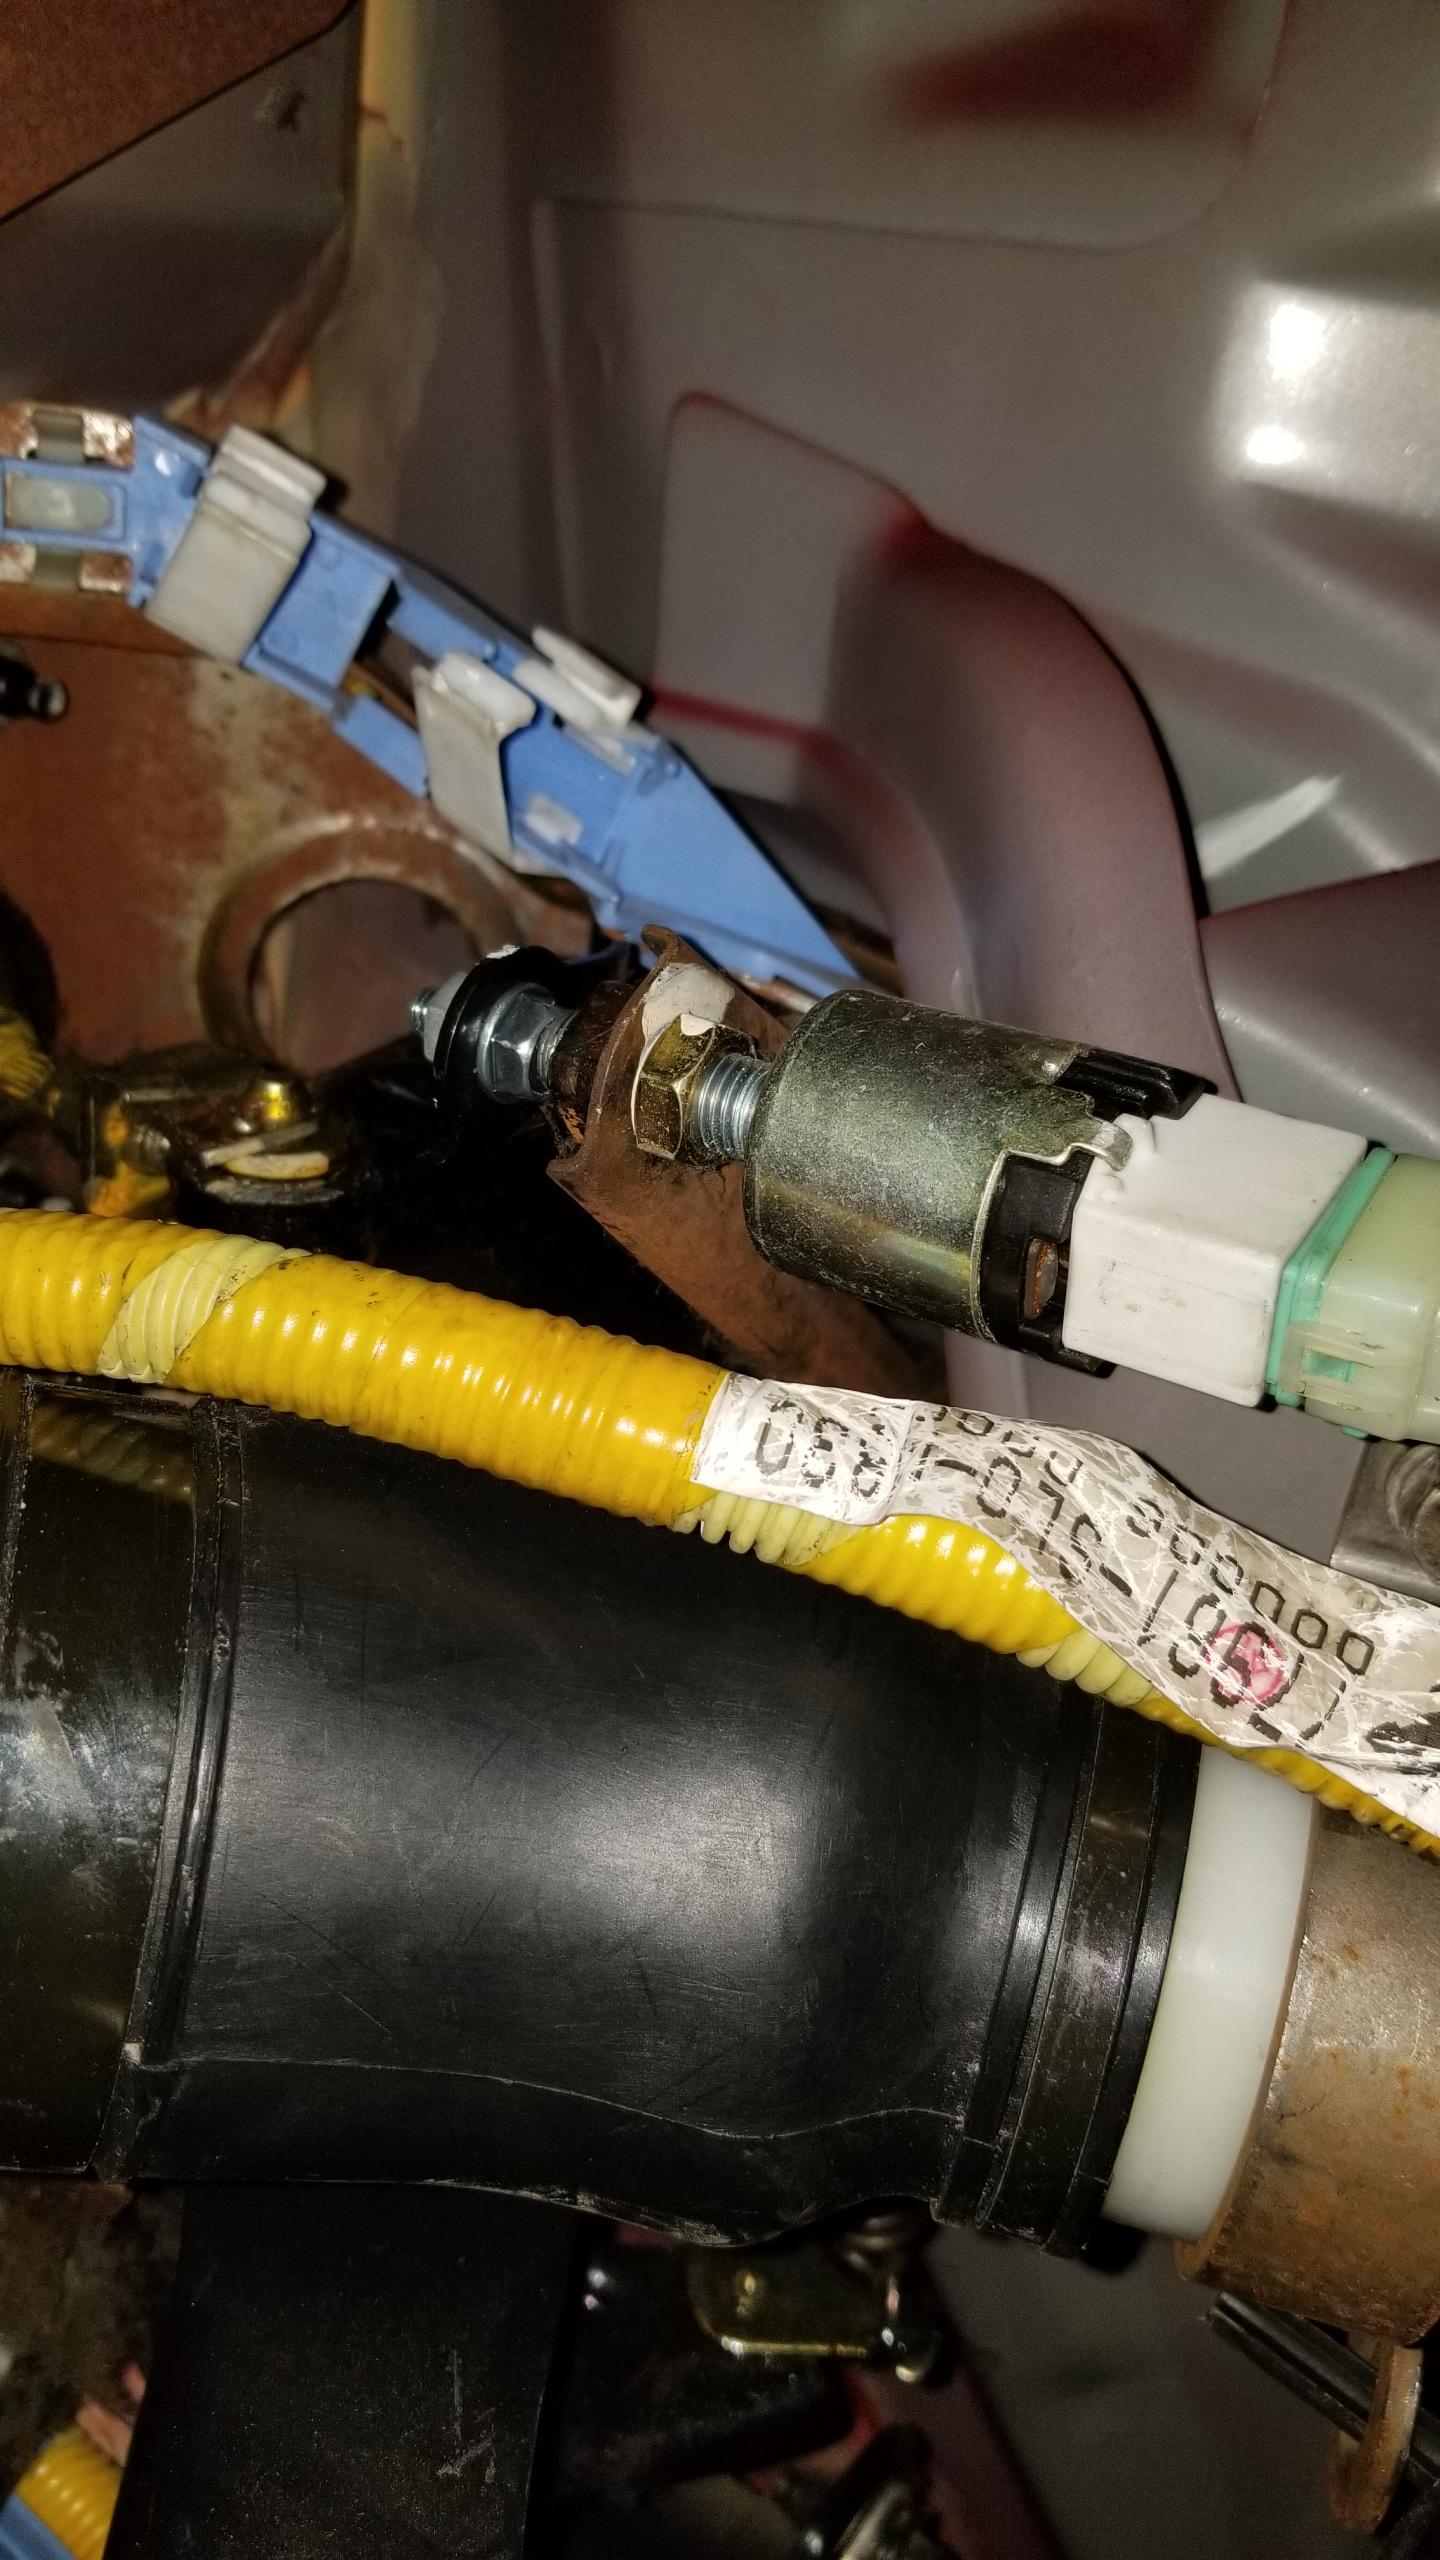
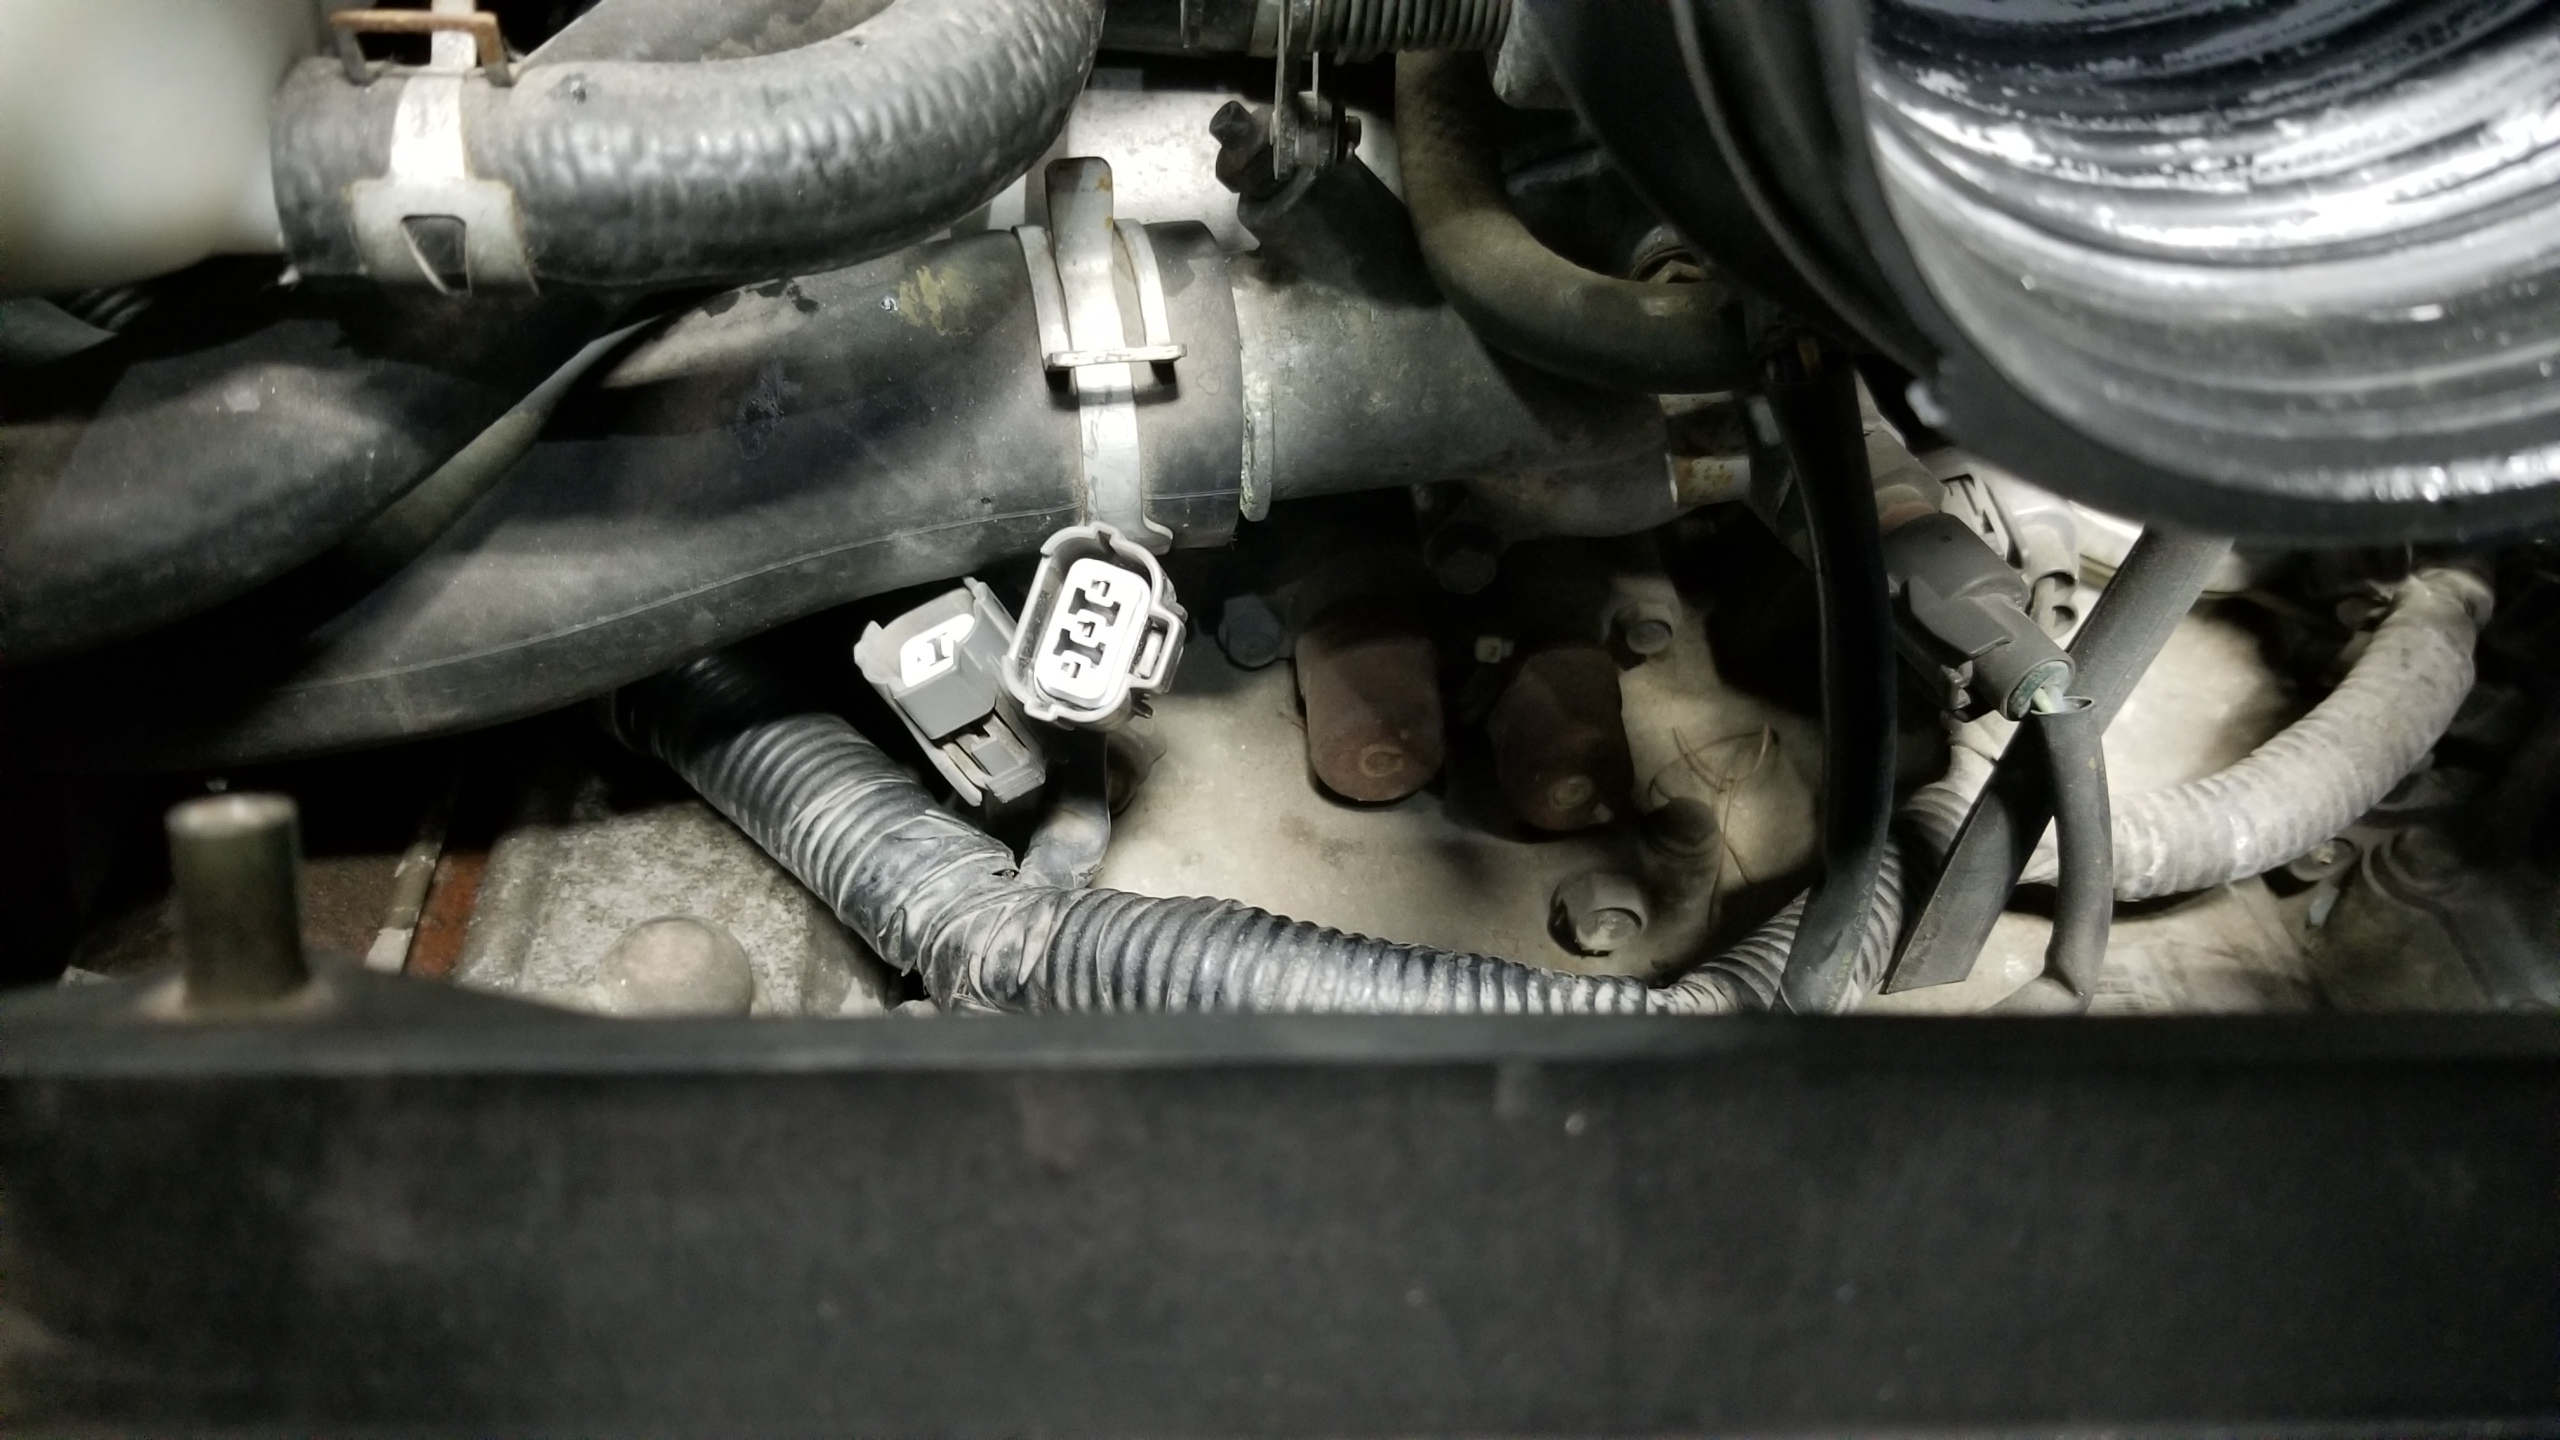
Here is the JDM-only cat temp sensors which I believe are used to give an indicator on the dash that the cats are overheated. I believe this is because of past Japanese law that required them, I don't think they come on later years.
v841Noq.jpg


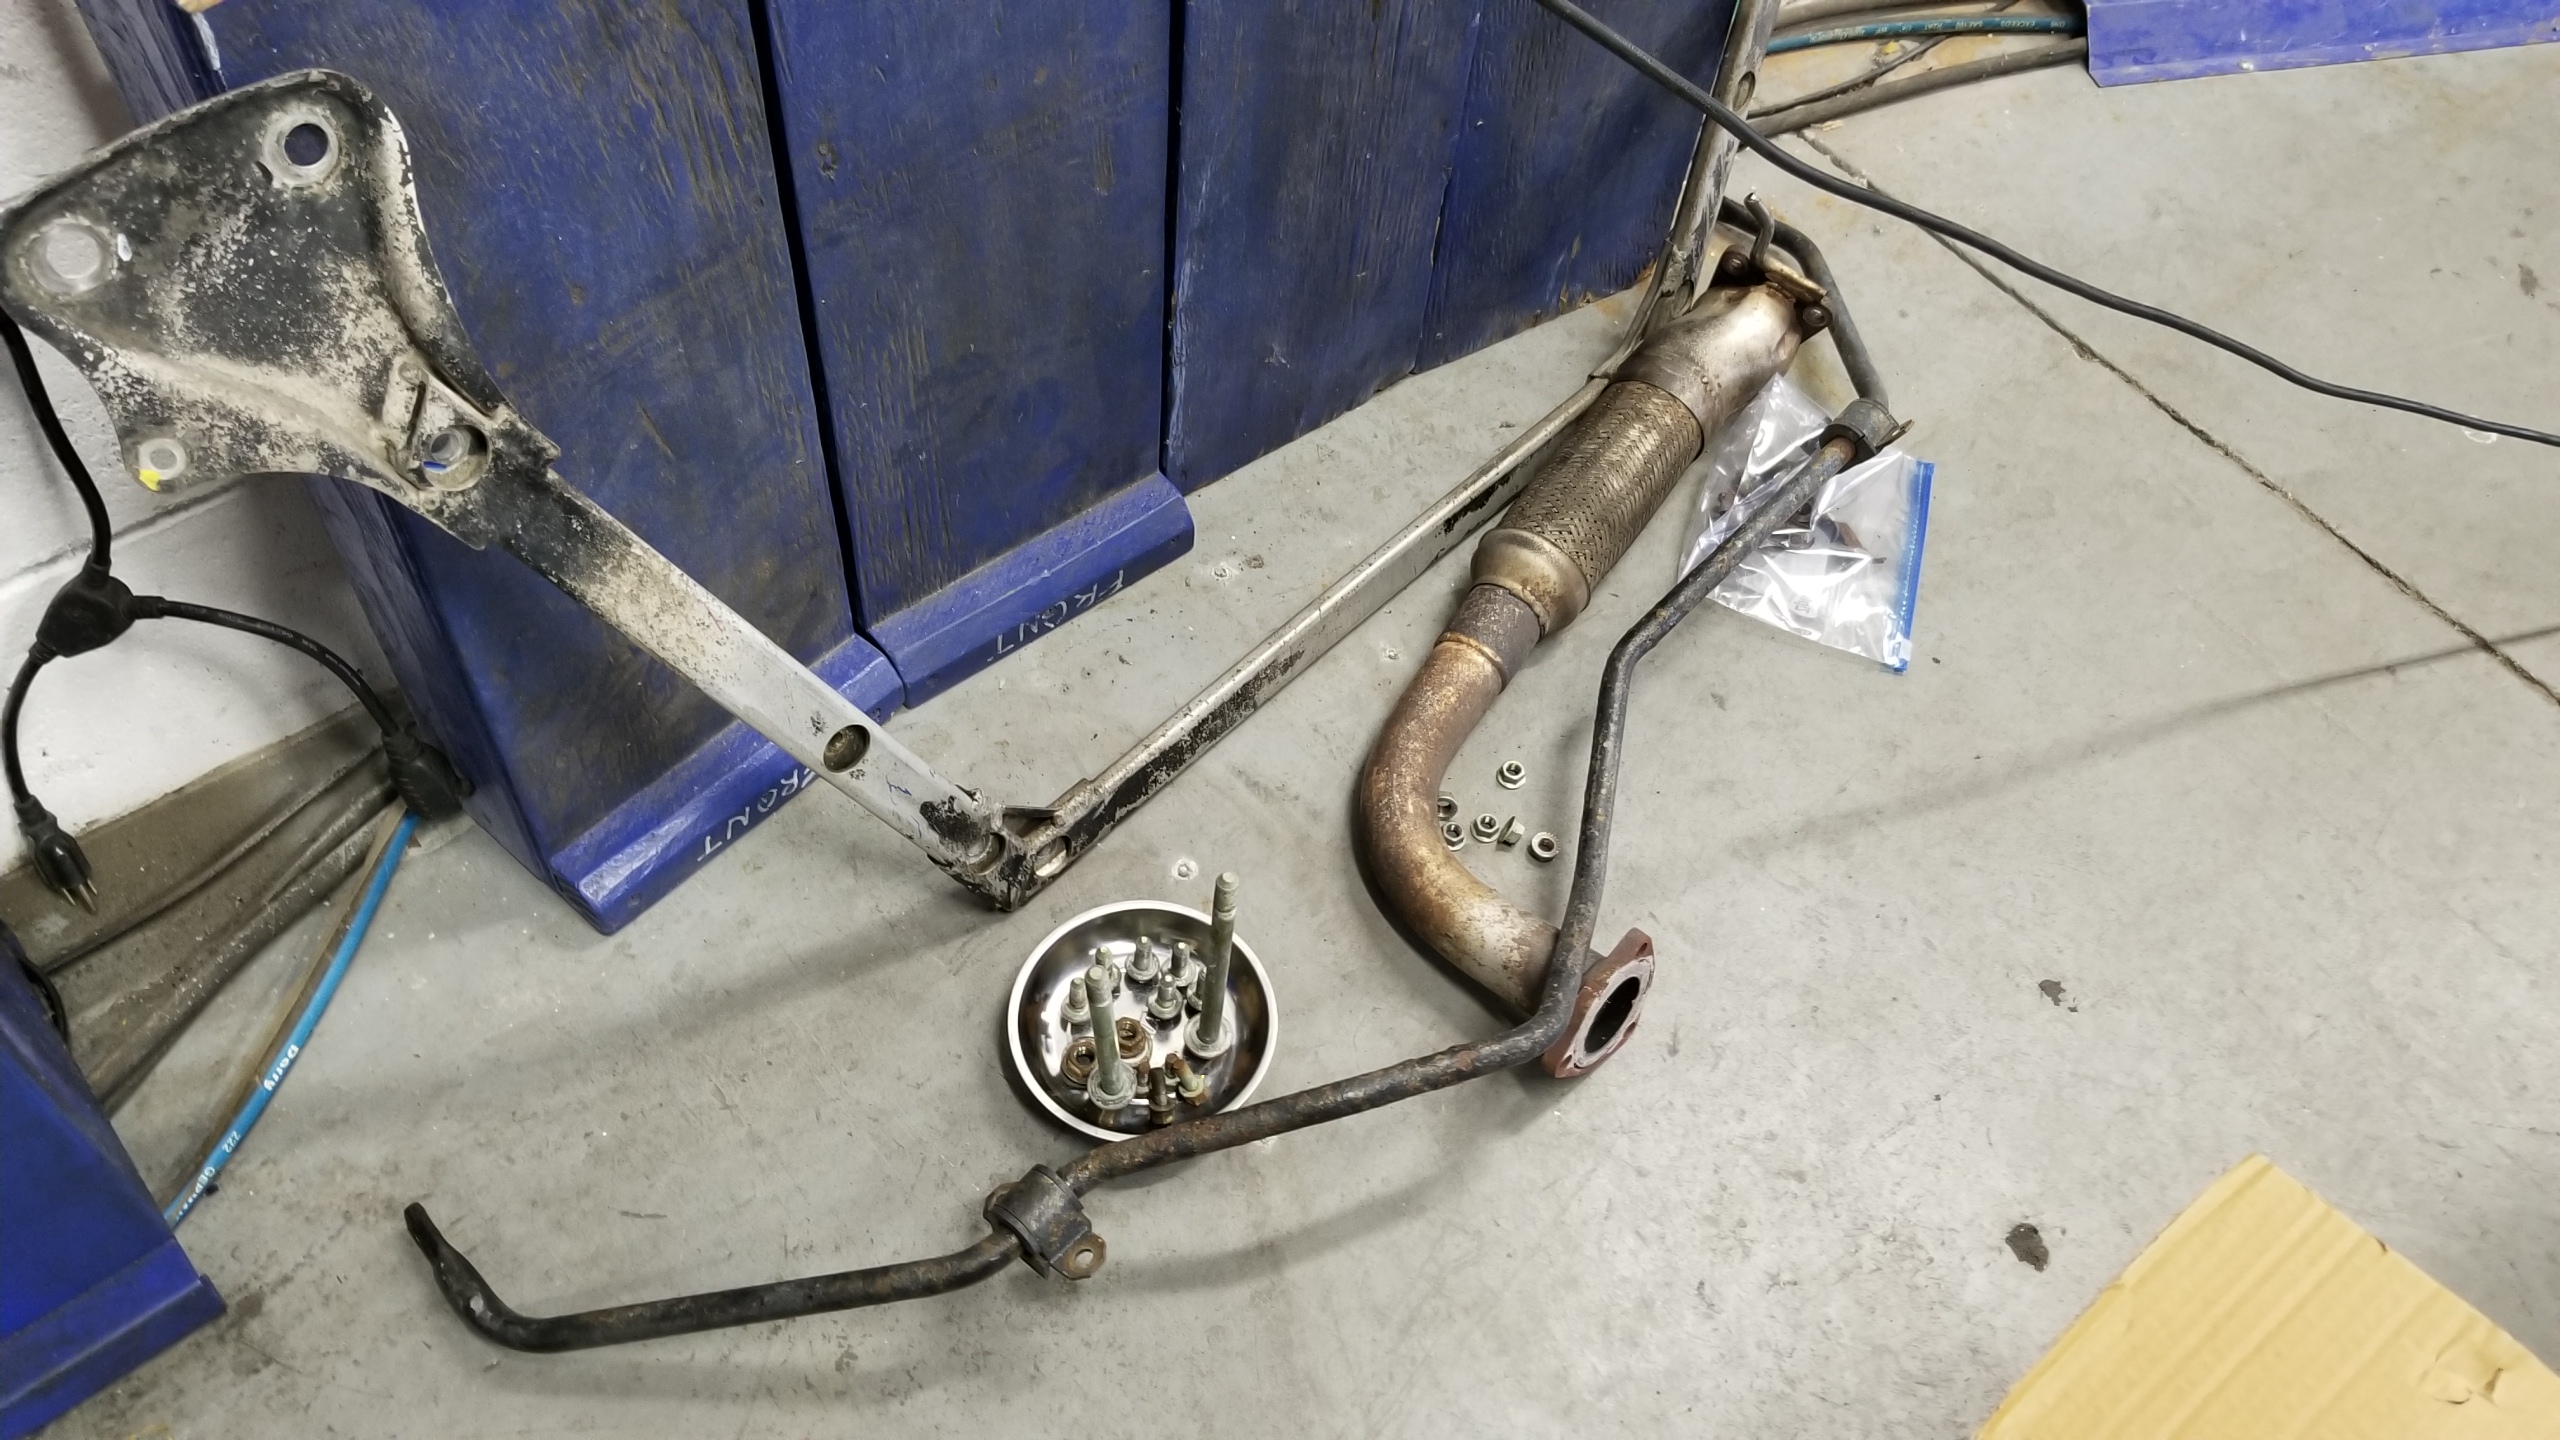
More stuff comes off. I've removed the downpipe several times before so it was easy. The anti-roll bar was only annoying because the large bolts that hold the bar to the sway bar links were difficult to get off without stripping the allen key hole or getting the bolt stuck like I did on the front links and had to cut one off. You don't actually have to fully remove the anti-roll bar but it gave me more space to roll around under the car.
V4qlPa6.jpg


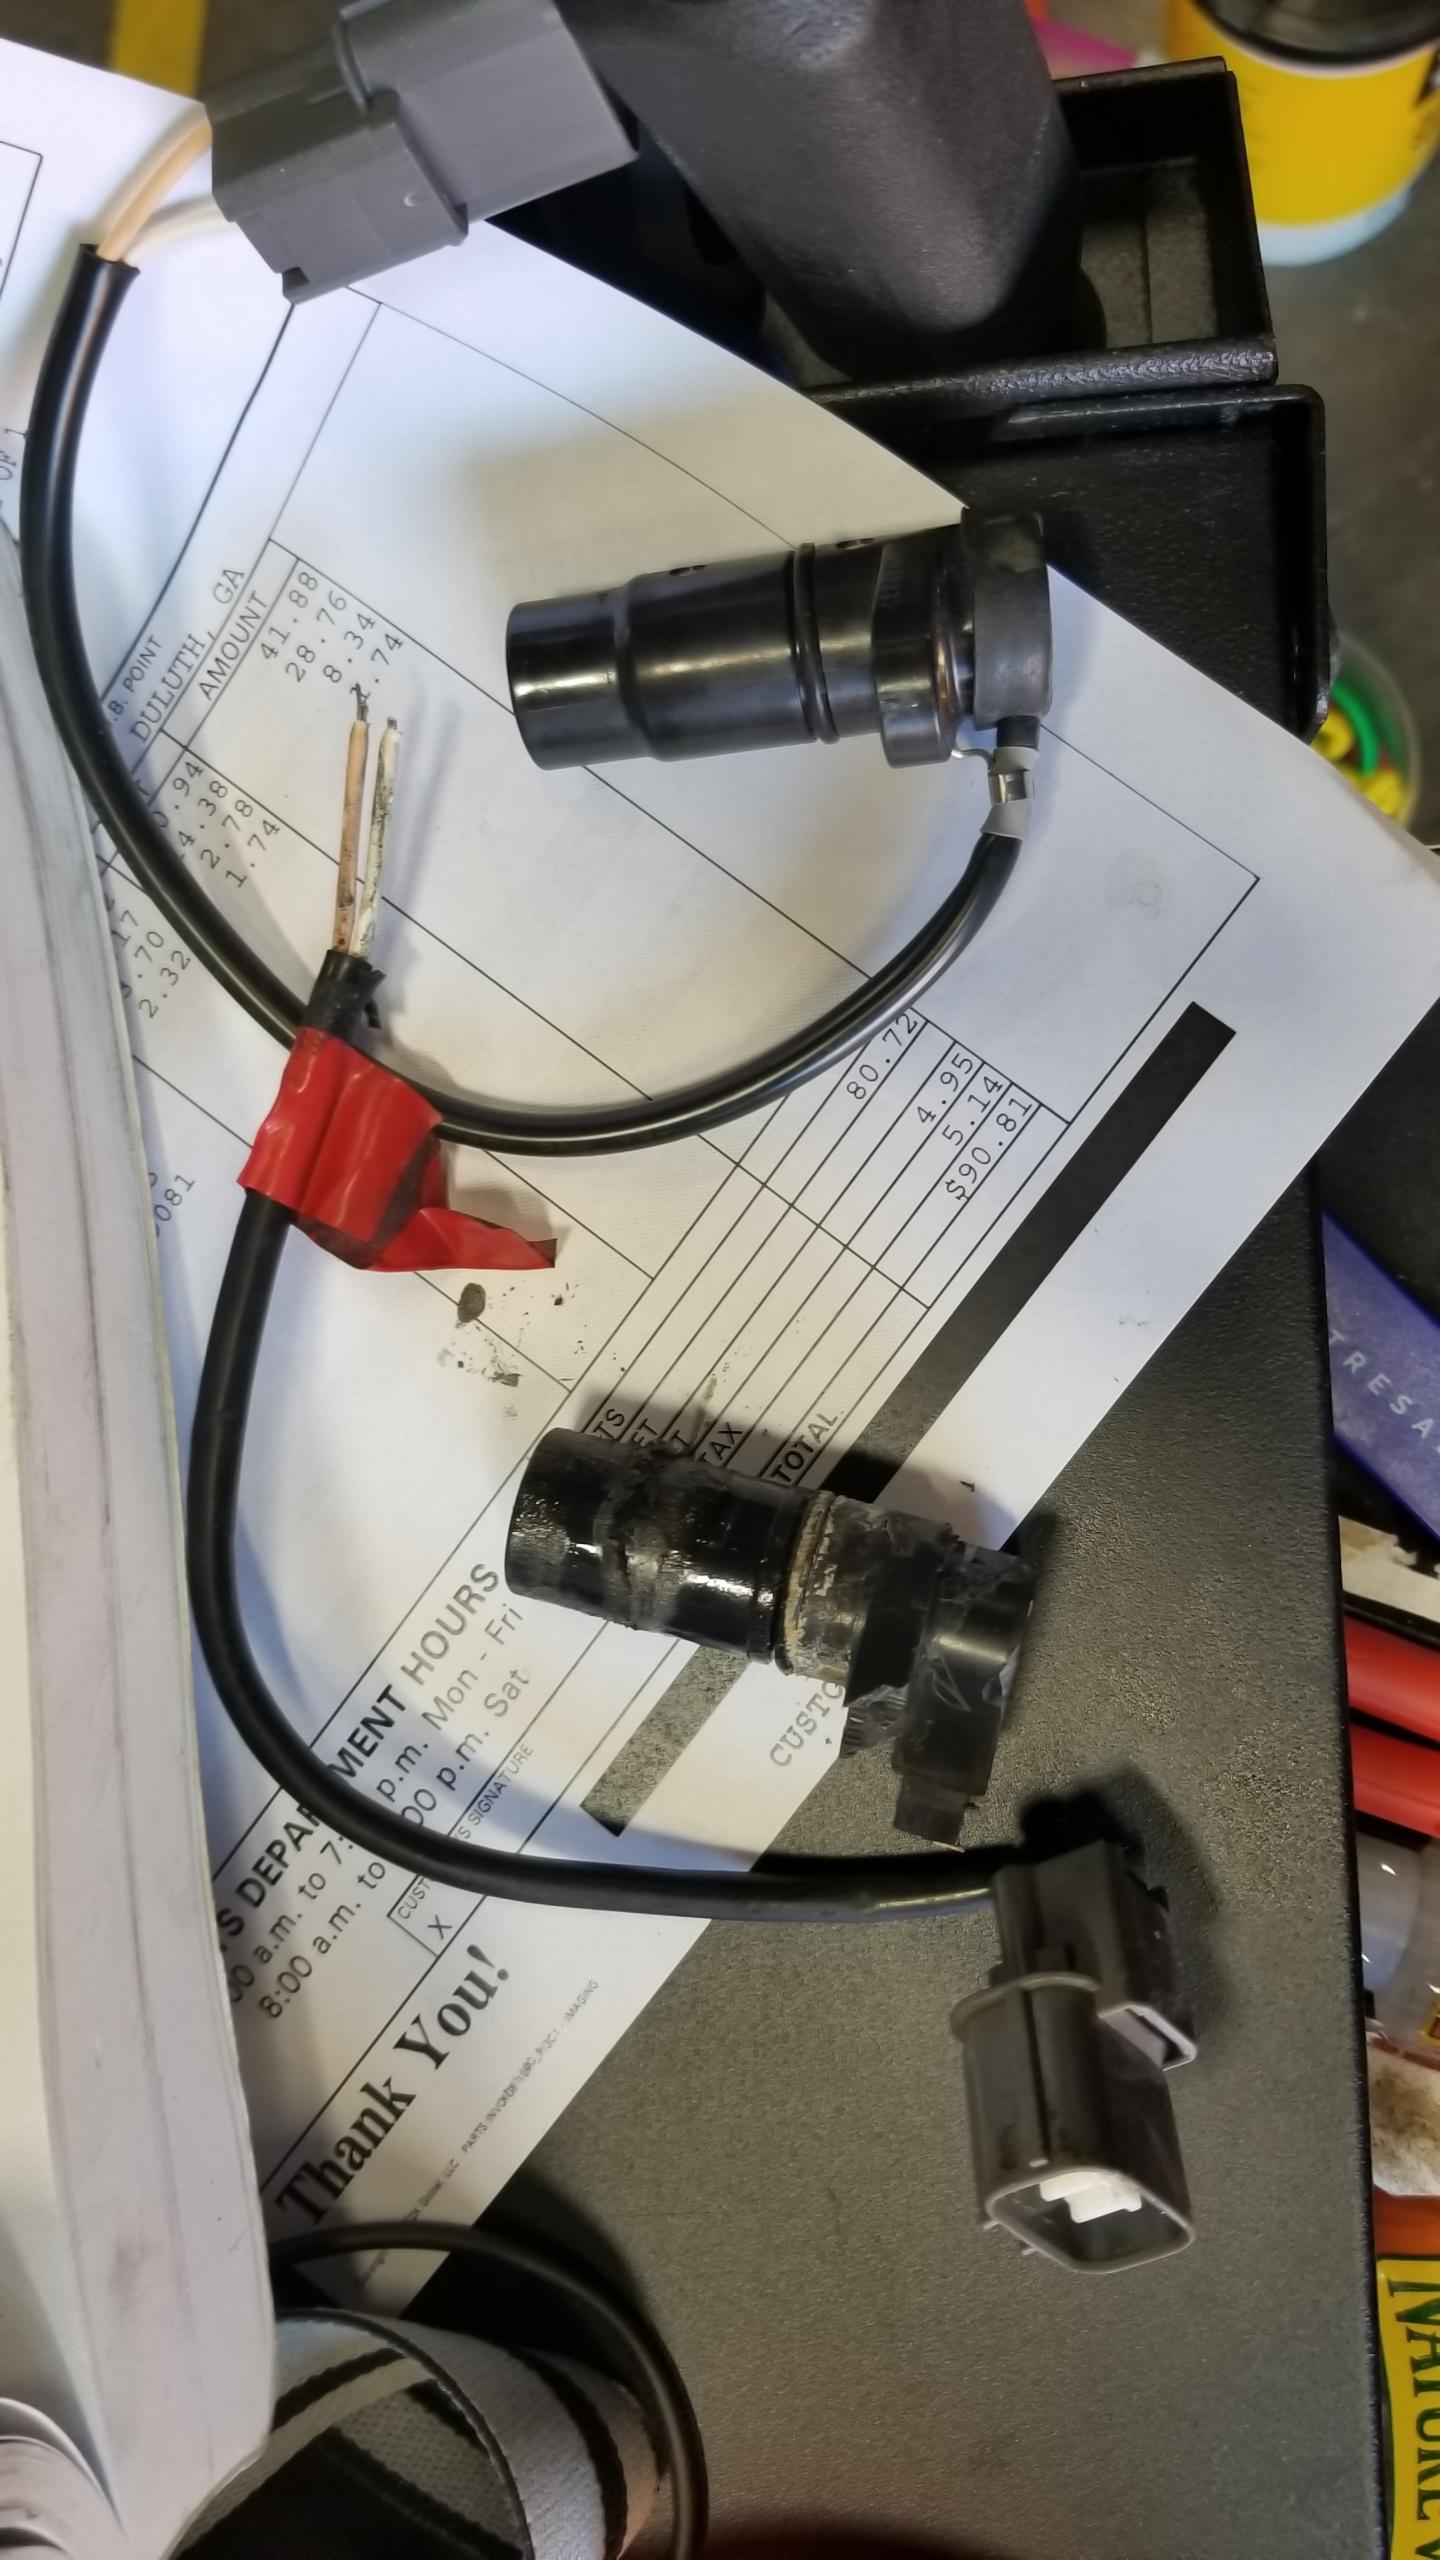
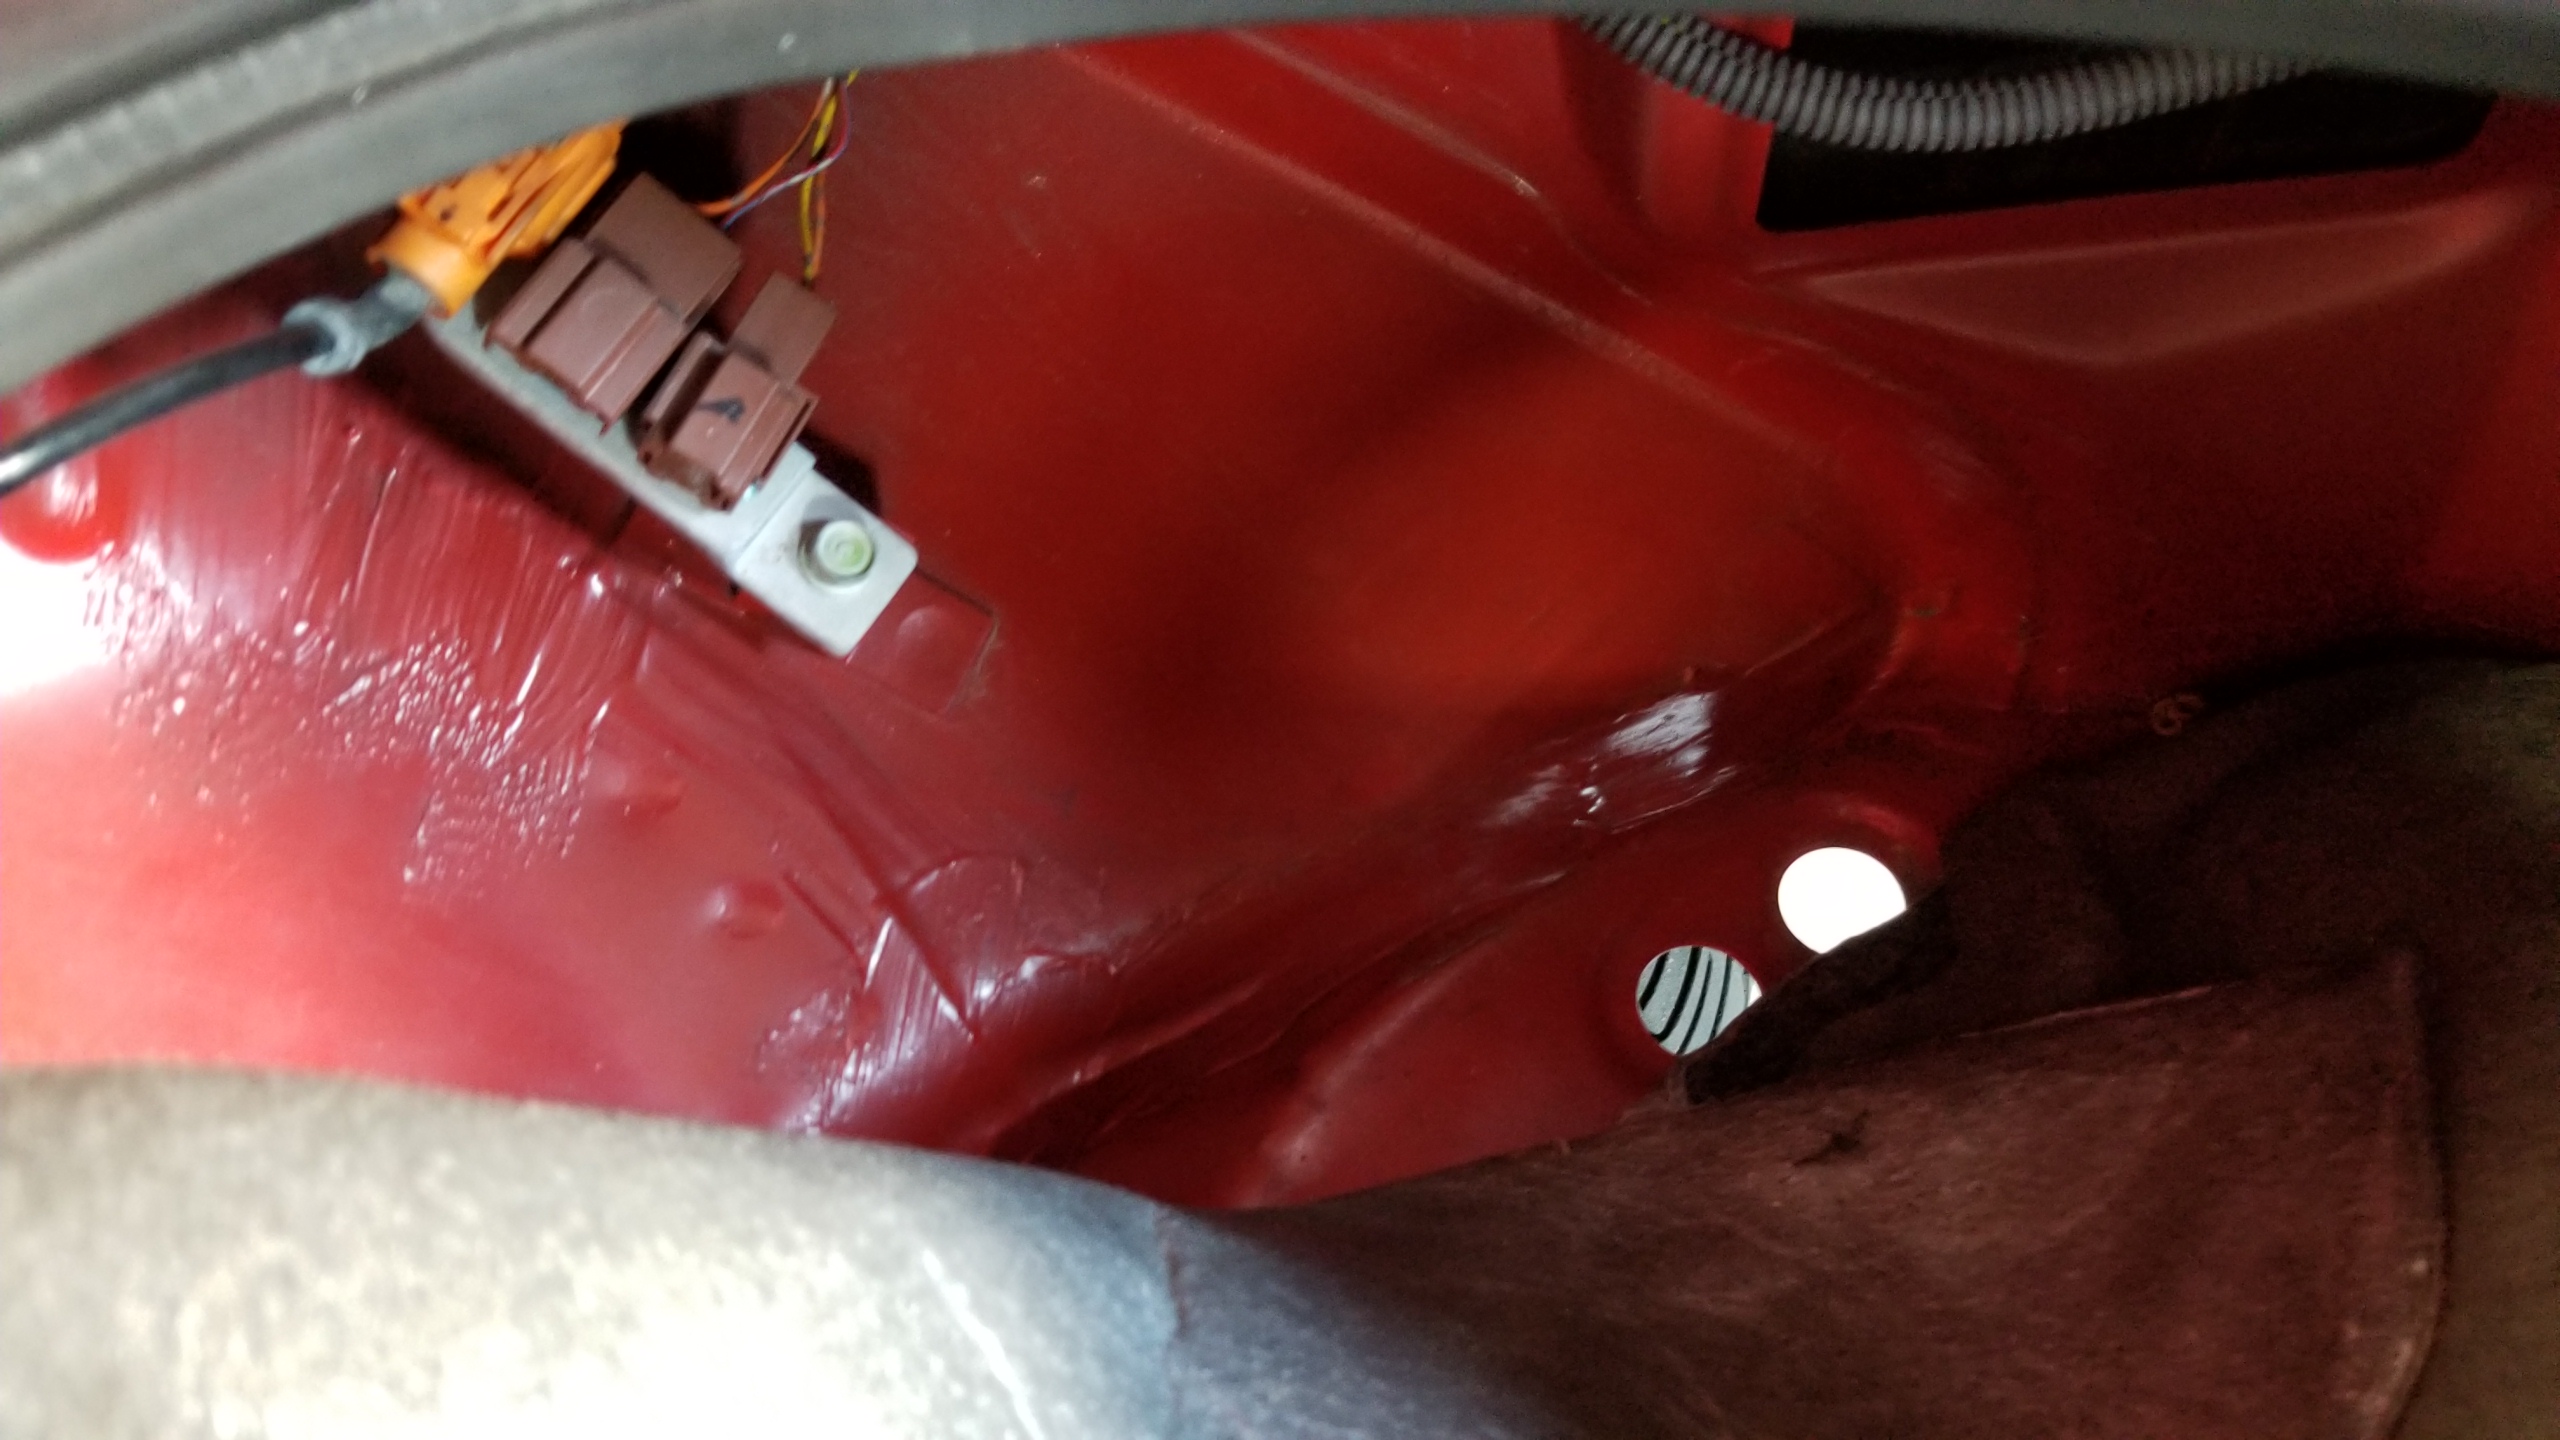
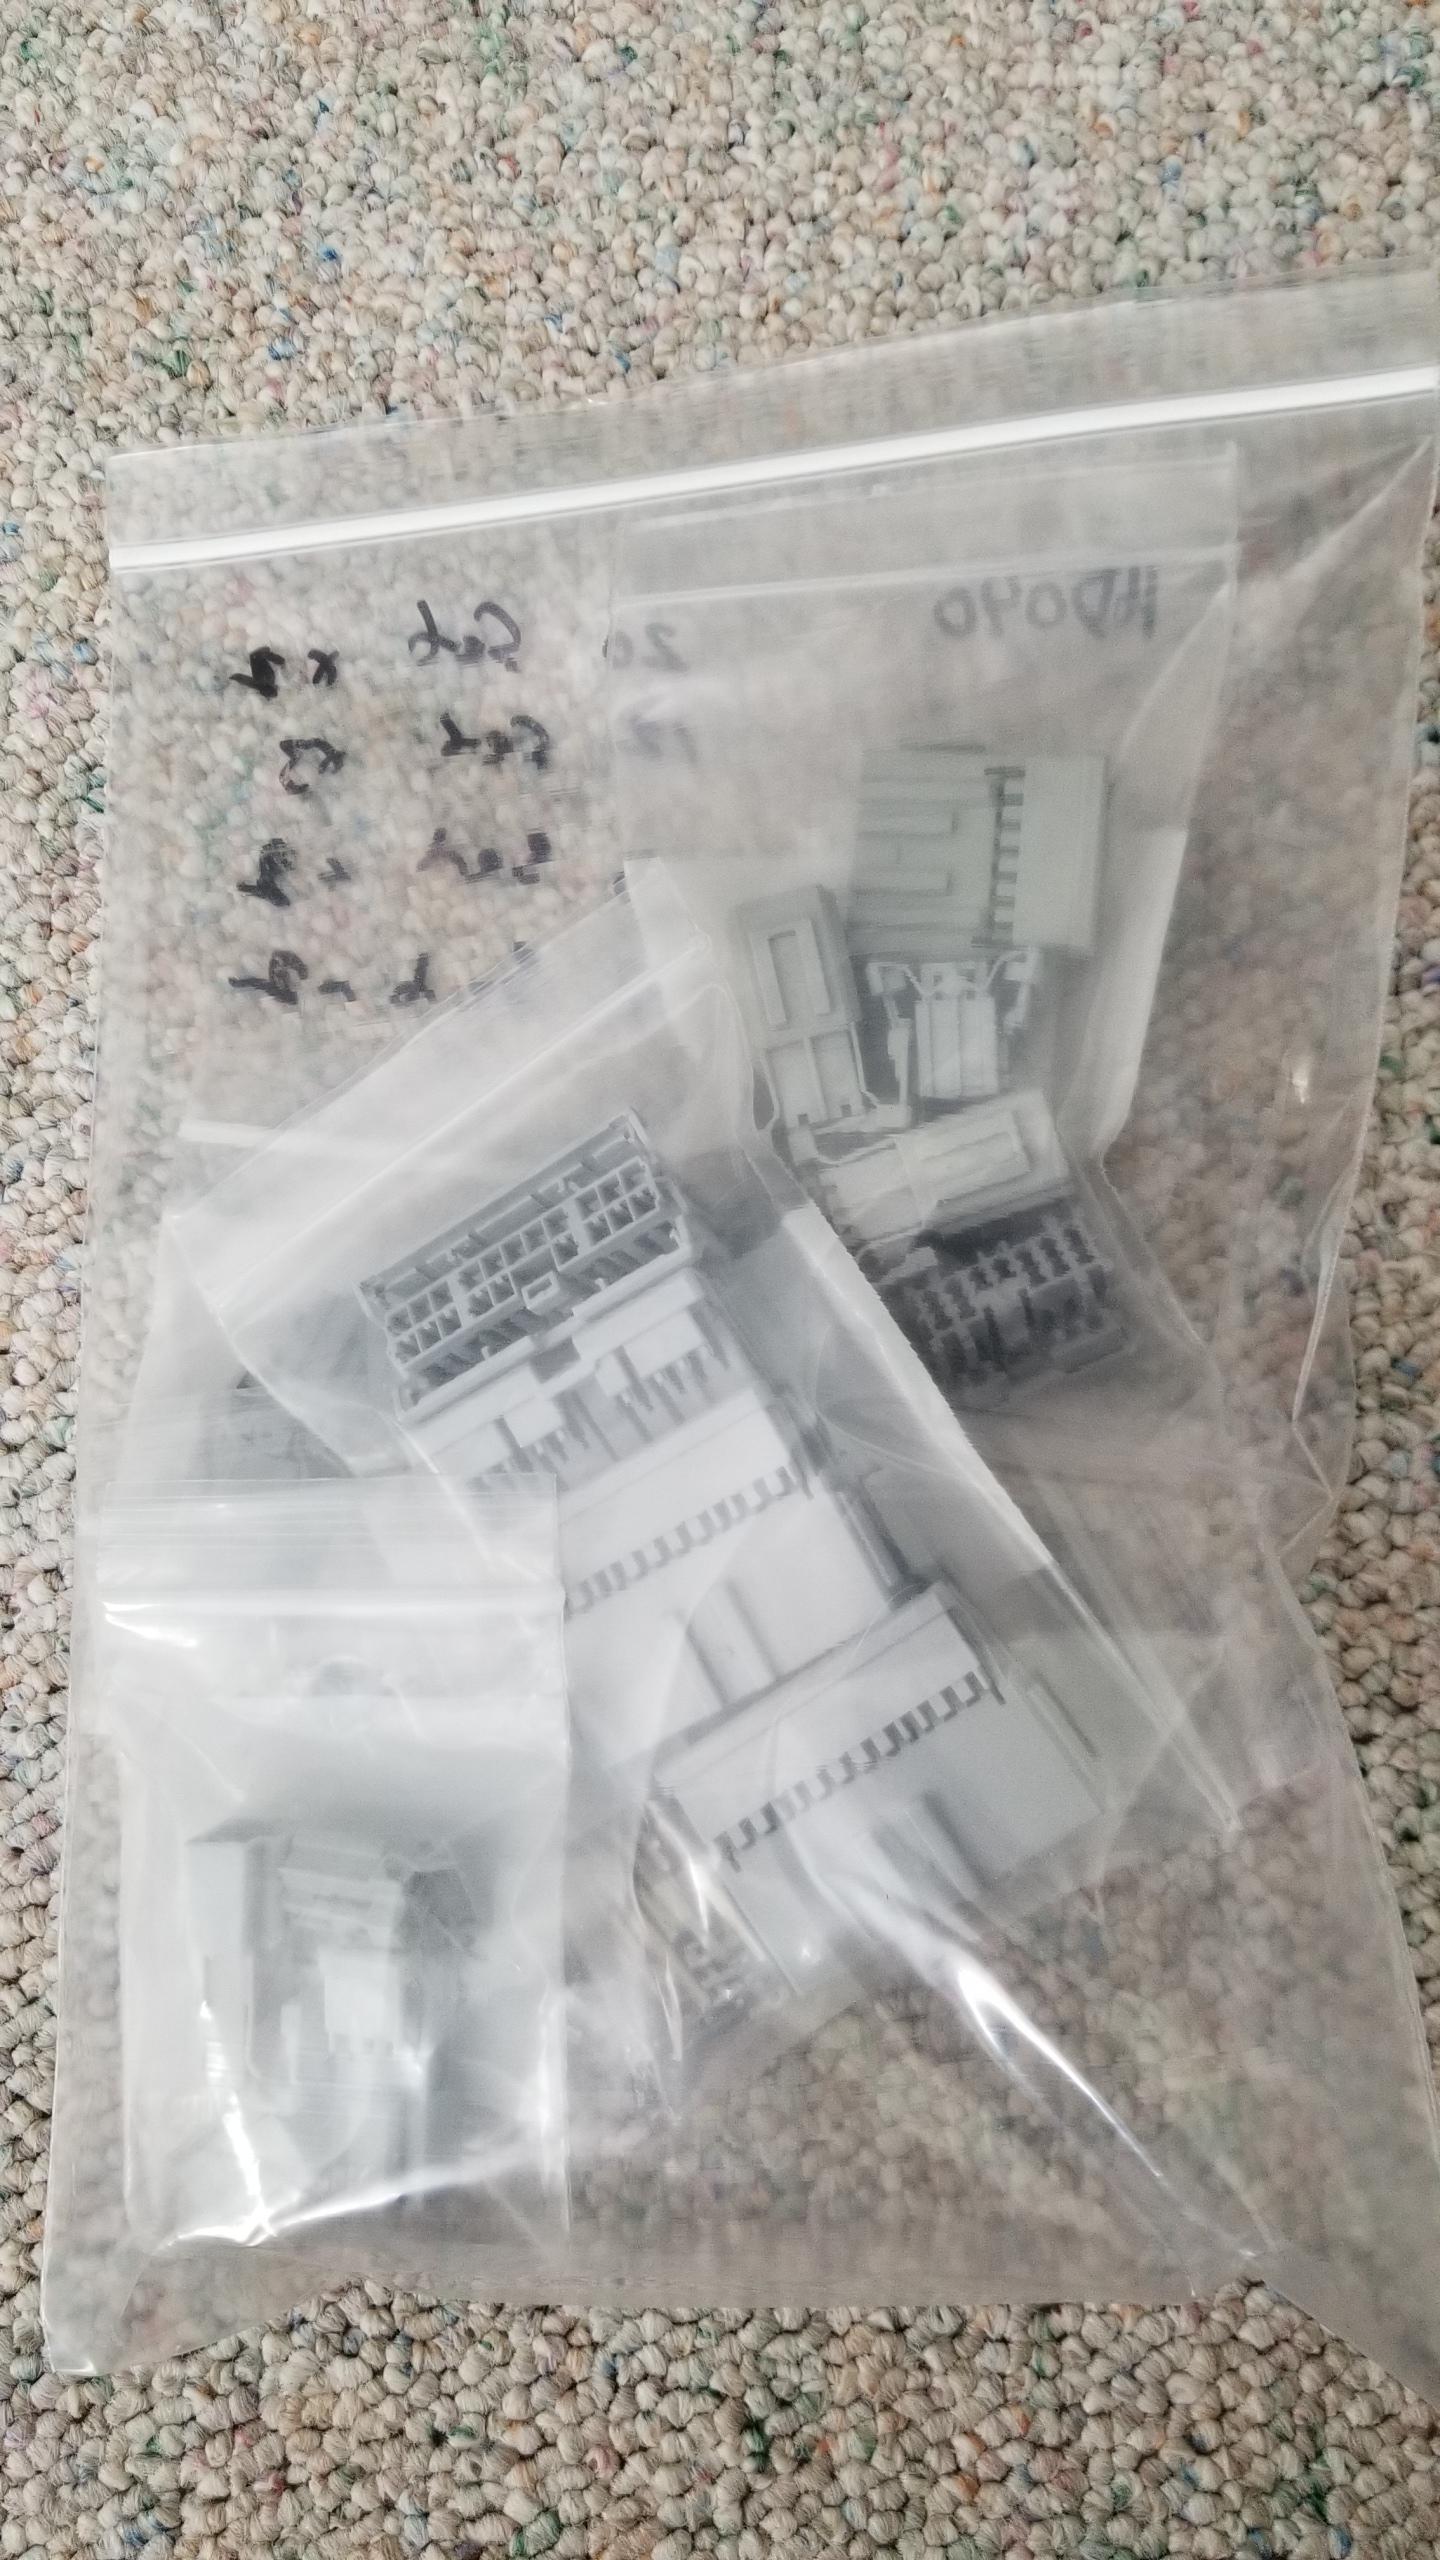
The two temperature sensors come up through grommets in the underside of the trunk. I removed them and the brackets since they wouldn't be needed anymore.
lzorMzg.jpg


The two brown connectors receive the temperature signals. Taking the grommets out left two nice holes in my trunk to the outside, I left them for now but I'm planning on using the old grommets and filling the cable holes with RTV to seal them up to put them back in place.
5IvBOTf.jpg


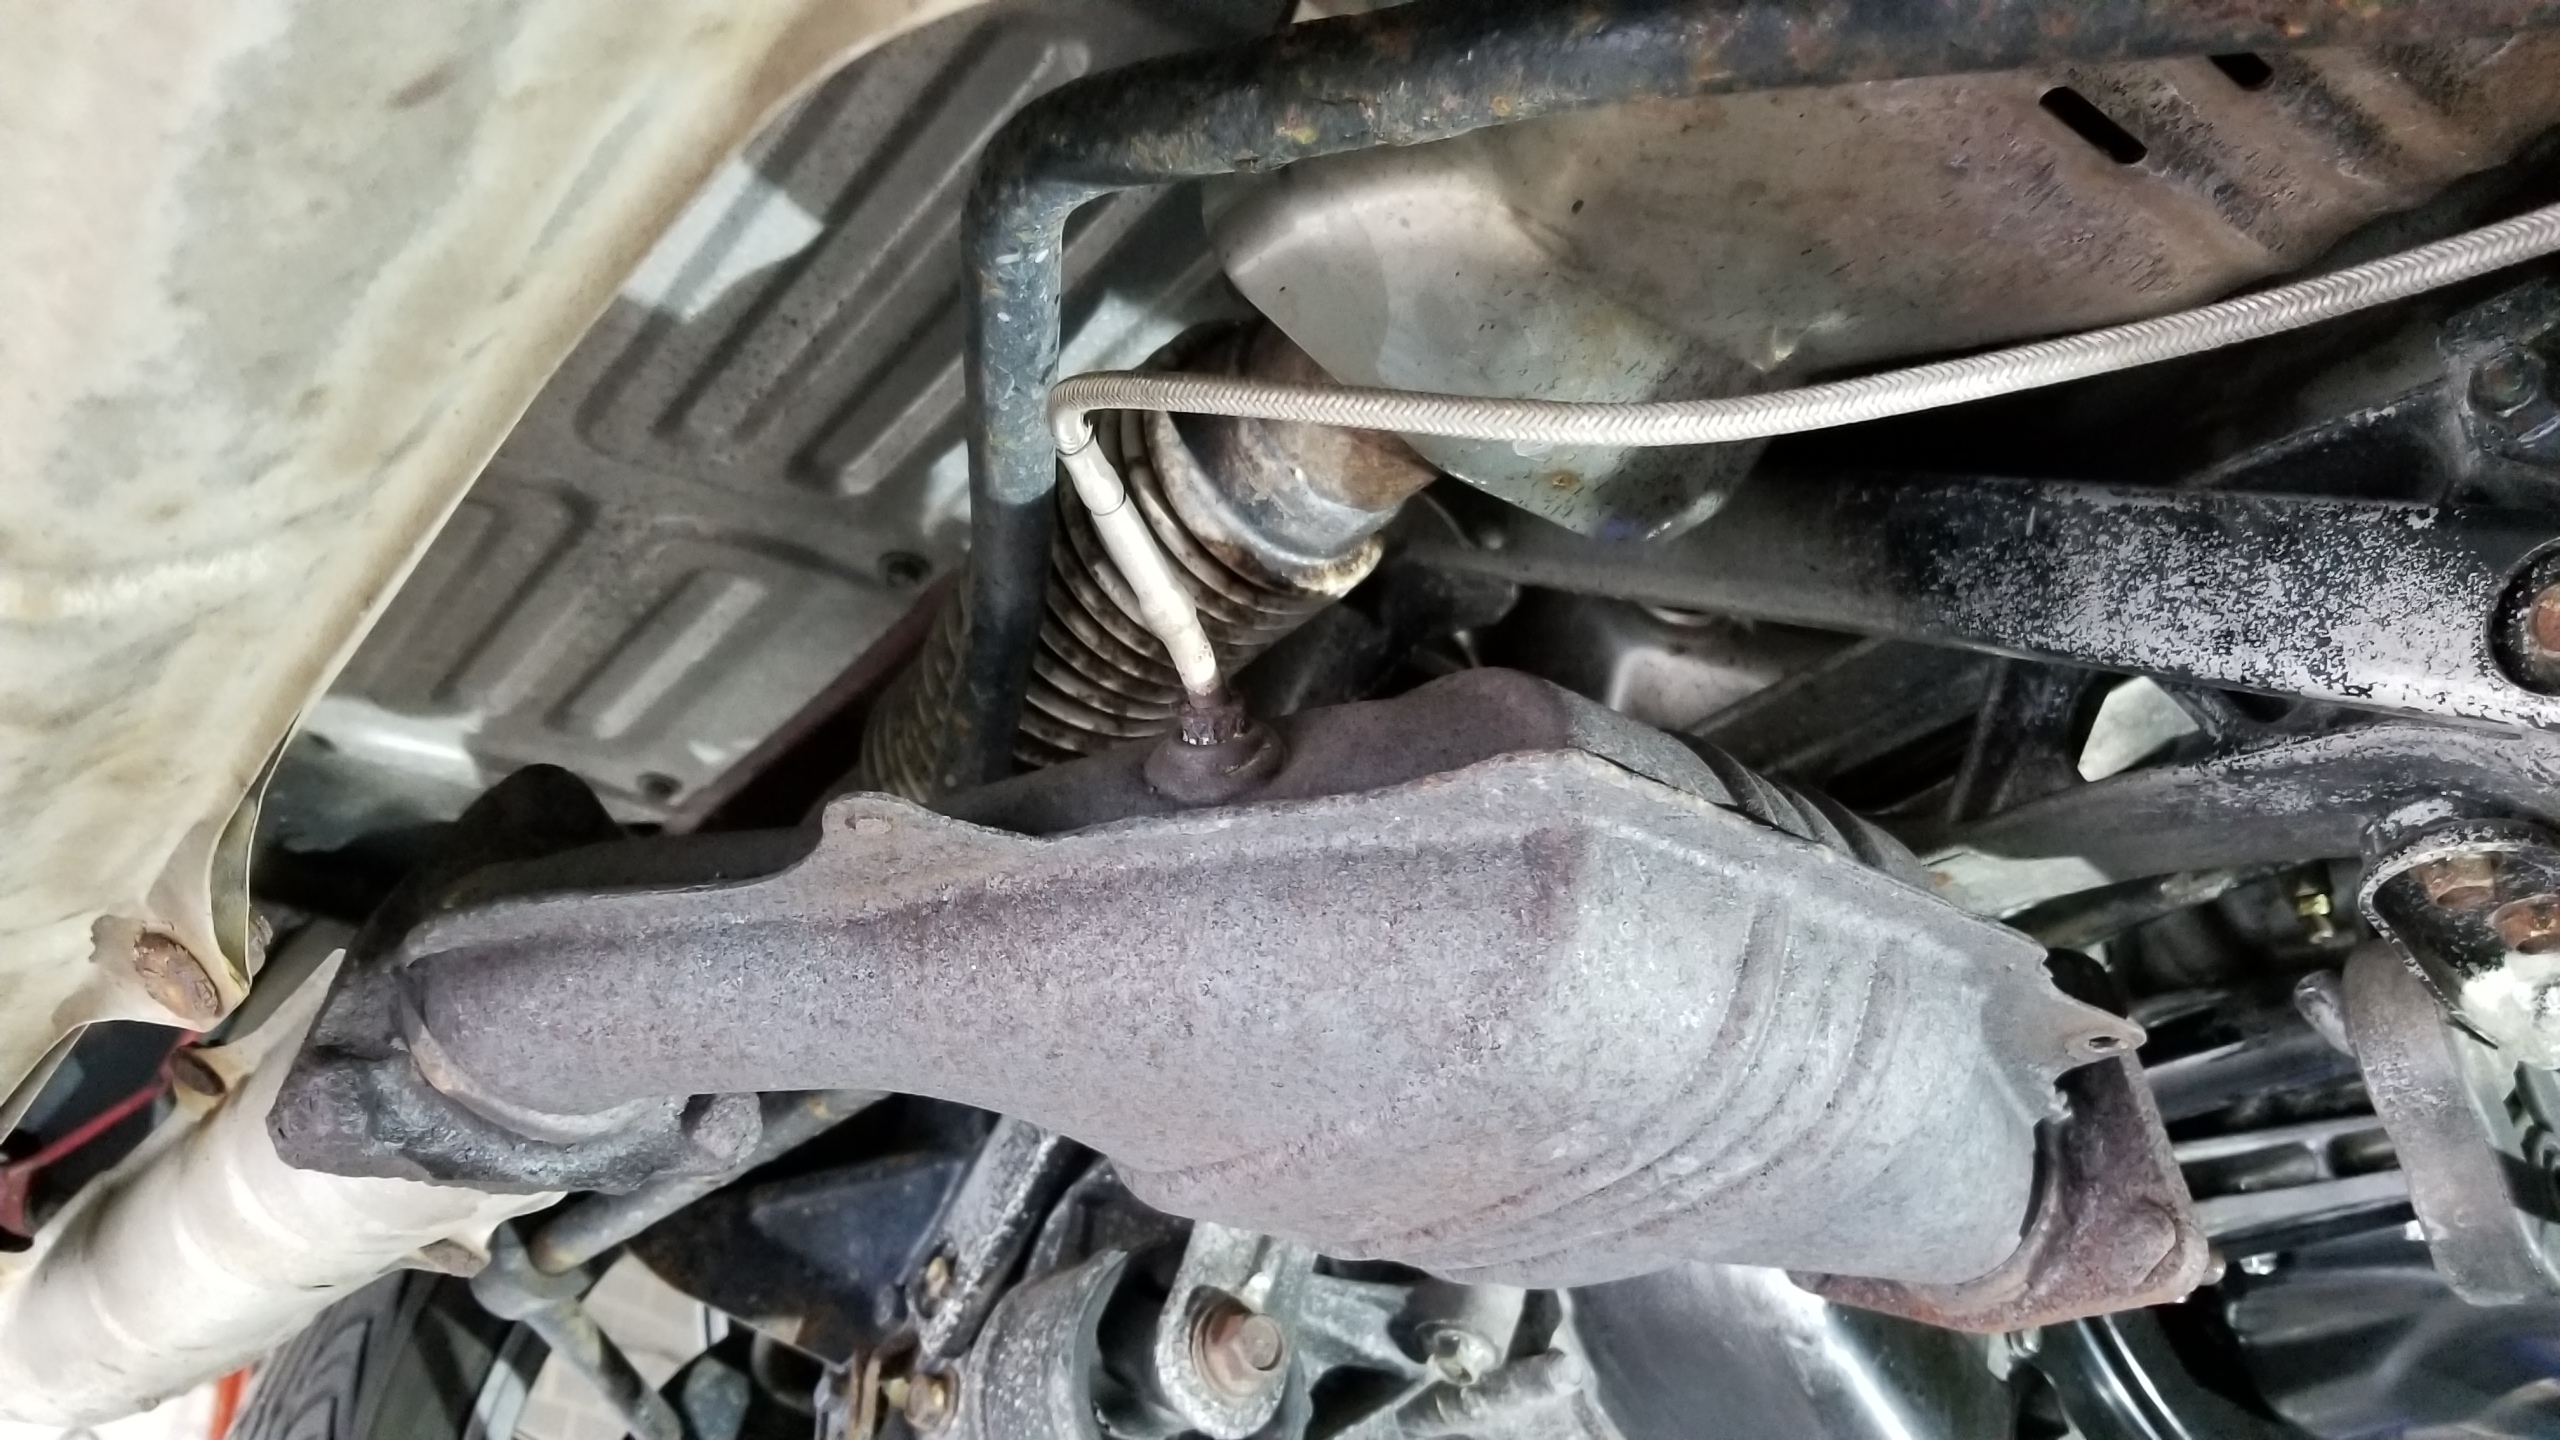
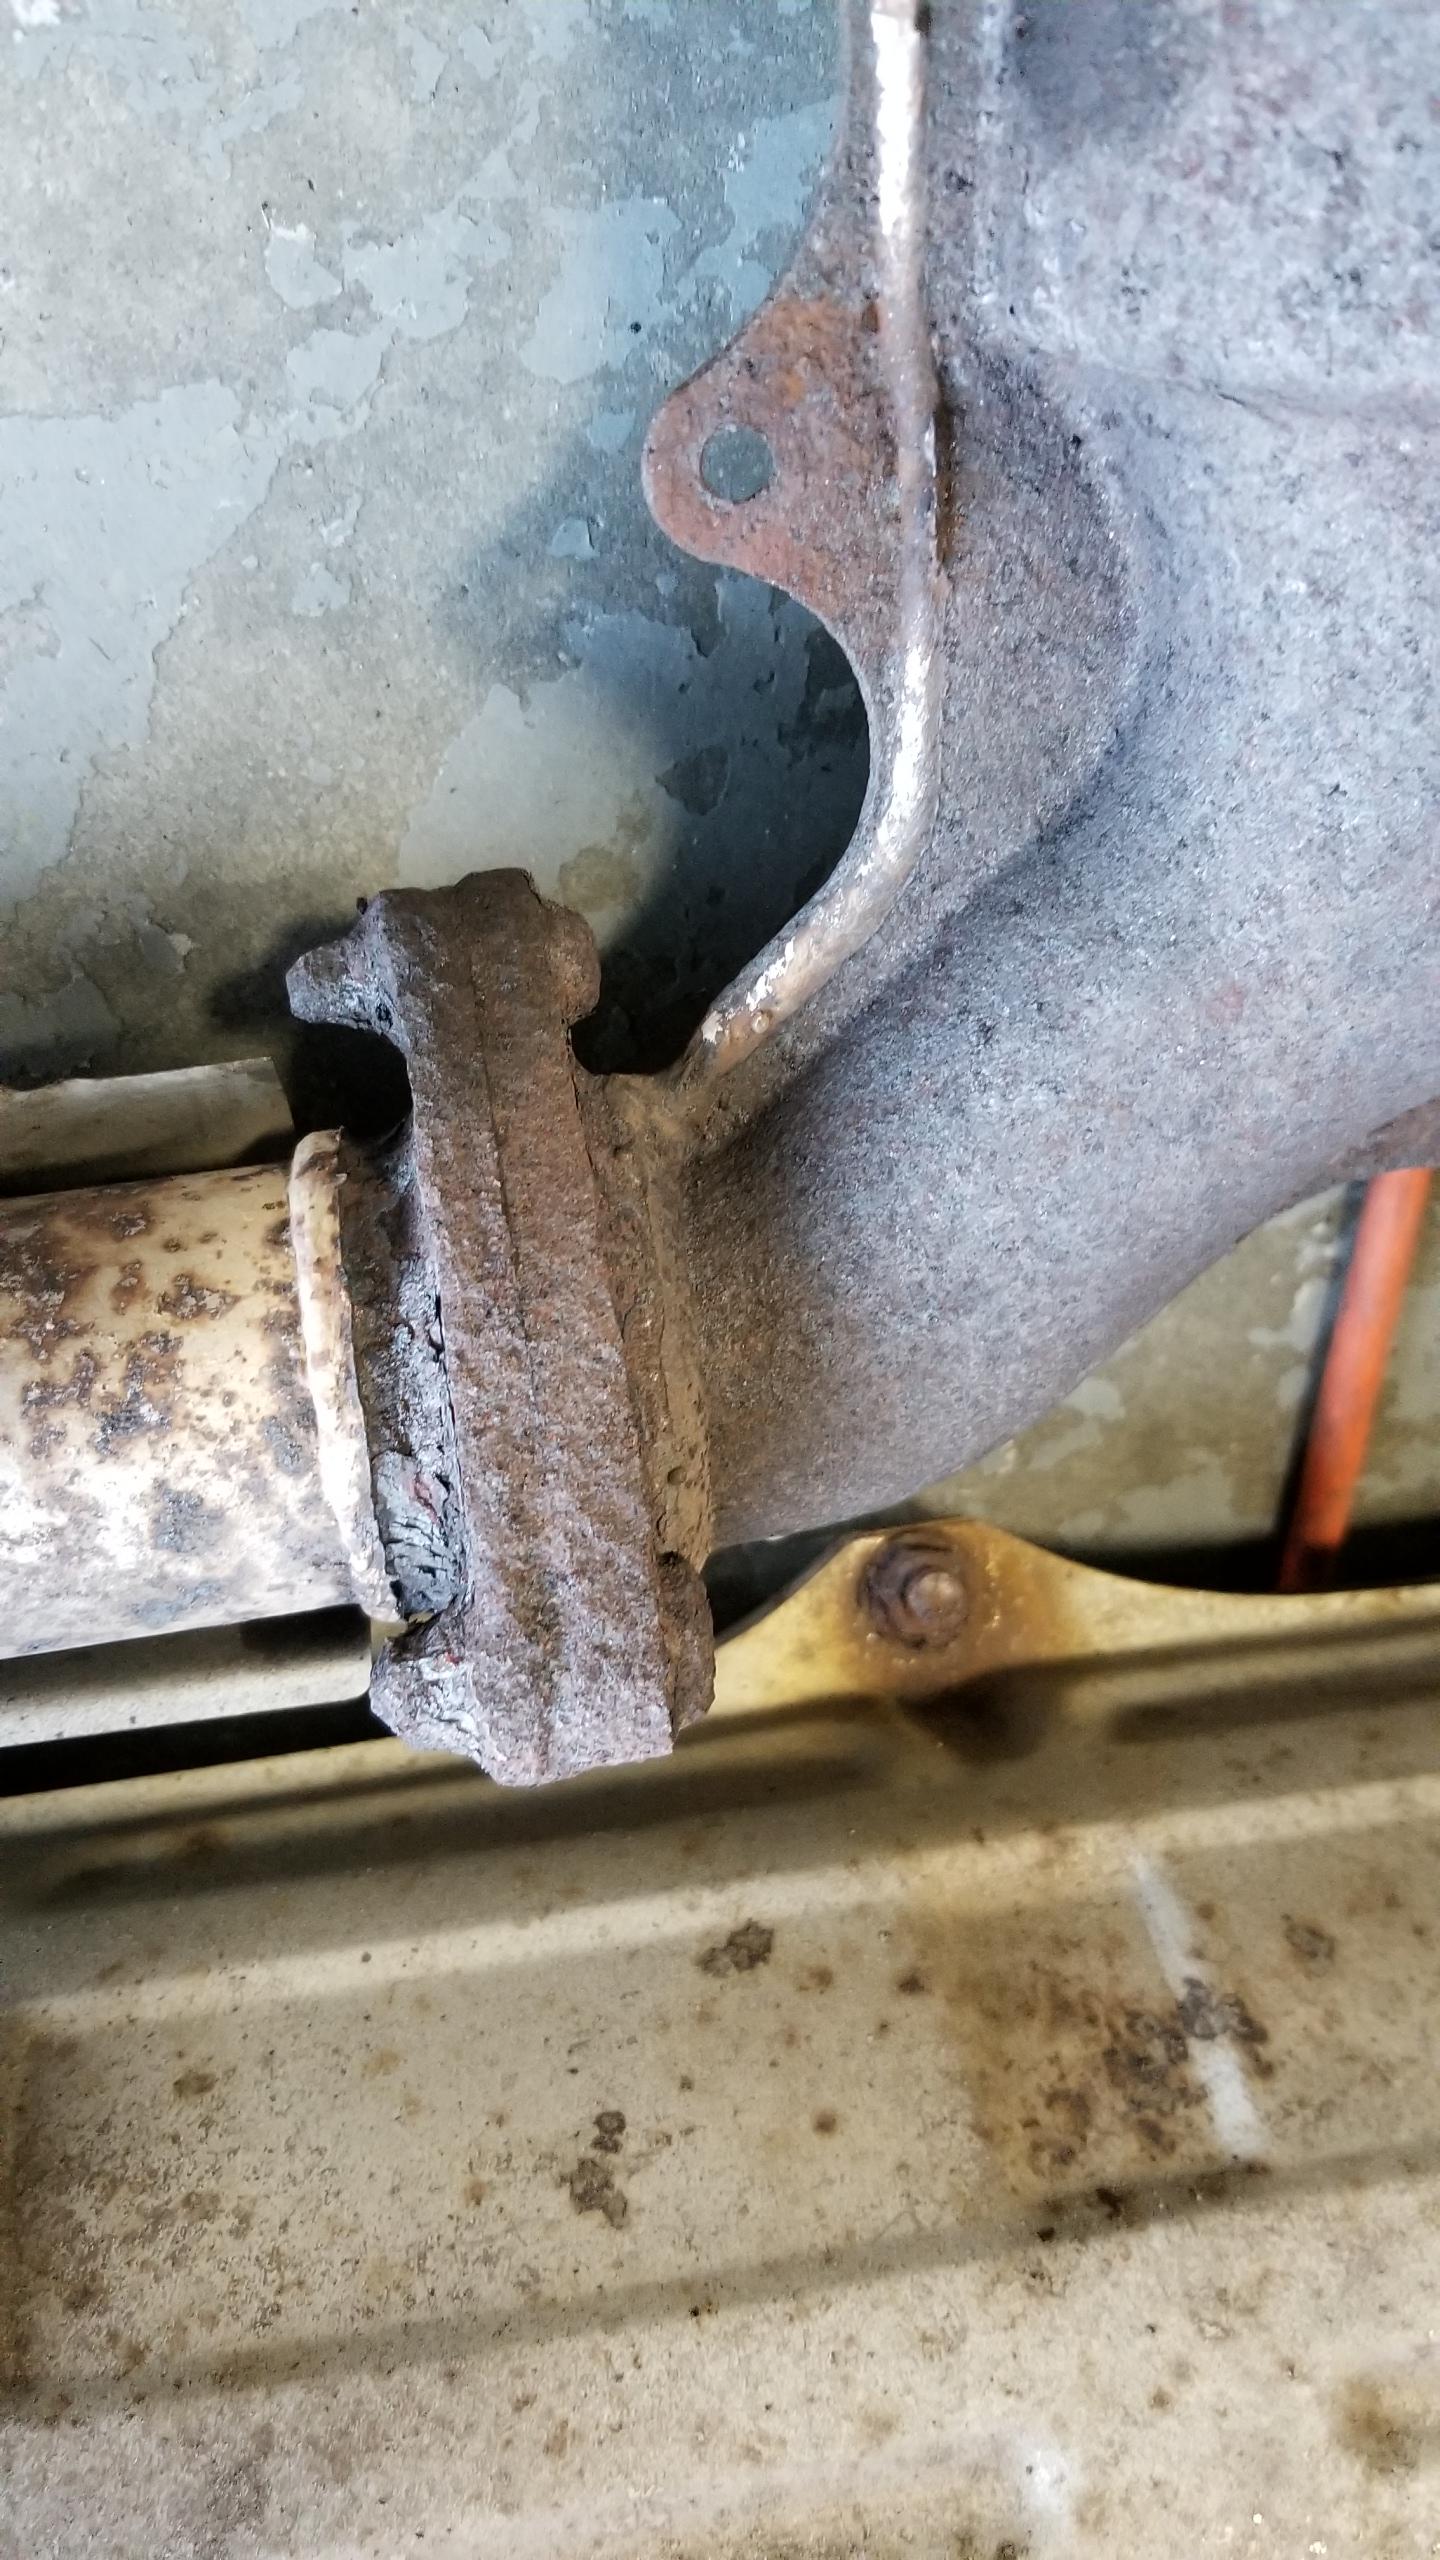
Rear cat was able to be removed from the car without too much trouble. Yes, there is a screw extractor in the old snapped-off O2 sensor threads, I'd say it did a great job of sealing in the exhaust while I was gathering parts for this :biggrin:.
EaWvcVf.jpg


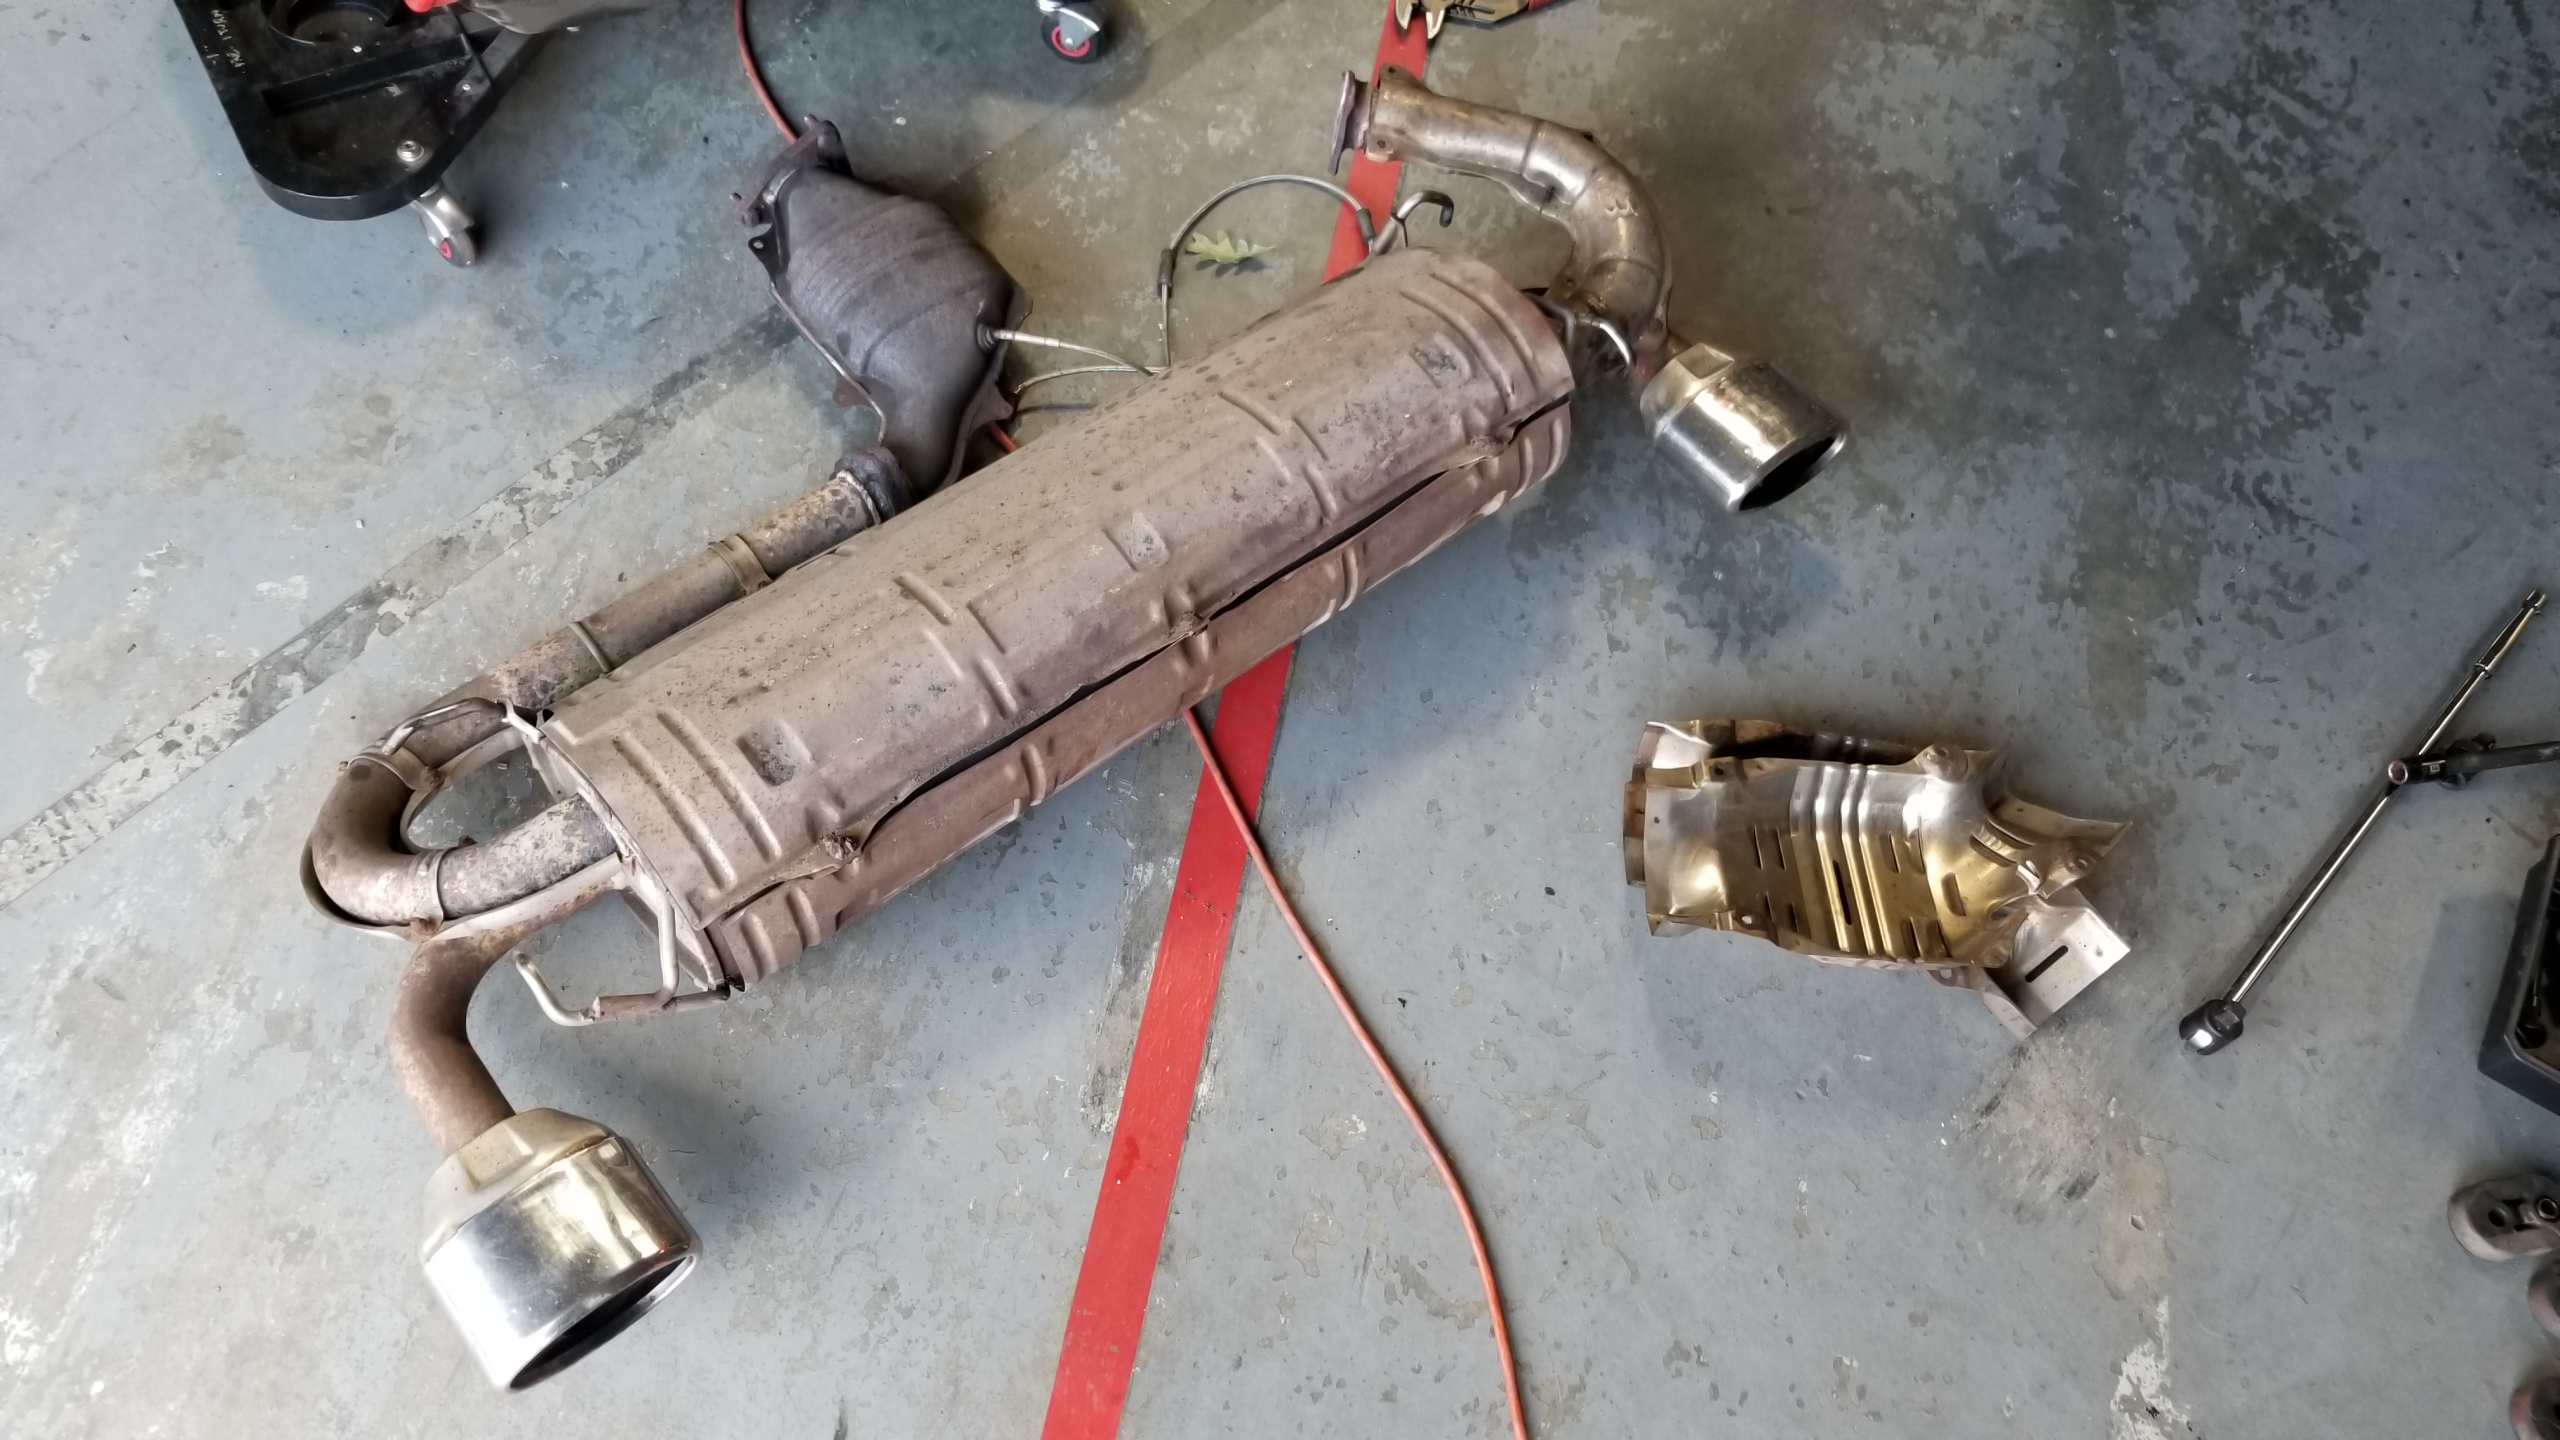
Once the rear cat and front downpipe were disconnected, the muffler assembly is only held on by four exhaust hangers. I slipped those off with some silicone spray to help and another person to help lower it to the ground. The whole thing is rusty, heavy, and unwieldy. I know people sell these or keep them but I can't see someone wanting to re-use this.
SqUfVbB.jpg


If you were wondering why I waited so long to do this until I had all the parts, this is why. I would have to cut off all the "studs" and basically chisel away at the flanges to separate these, and they would probably not go back together again. Doing everything at once reduced the amount of rust I had to deal with by about 50%.
SfGR0p2.jpg


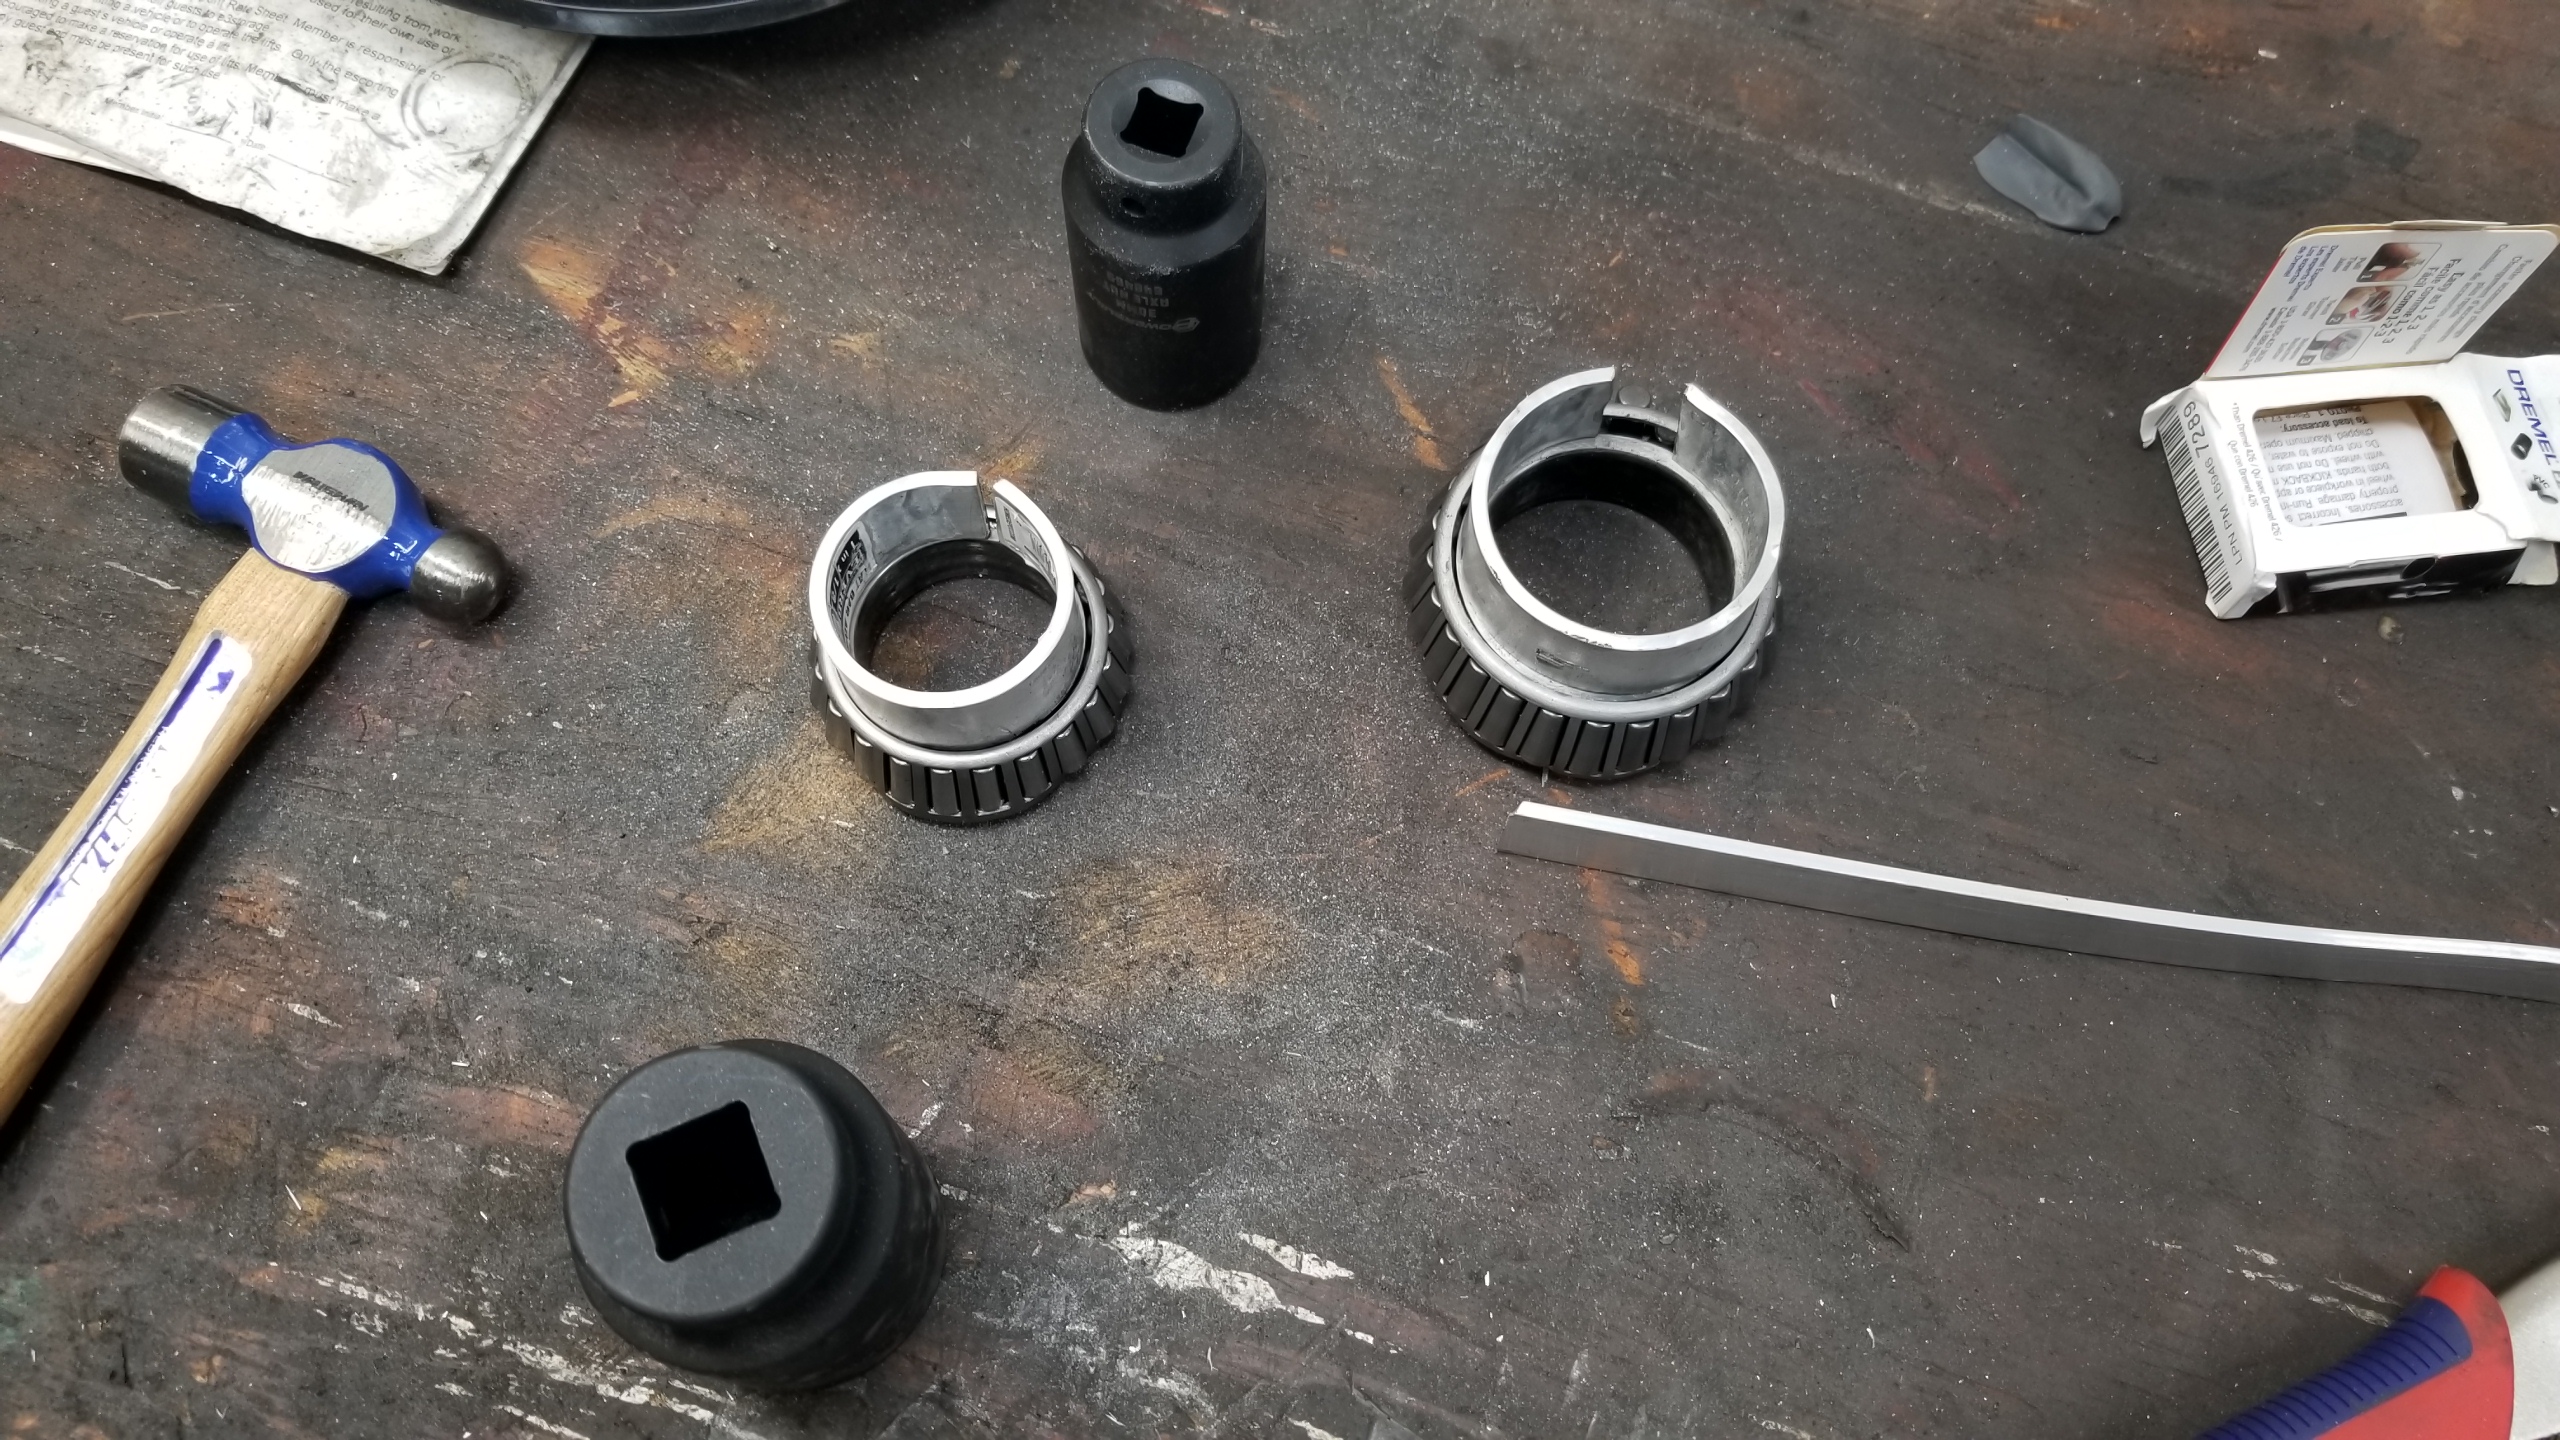
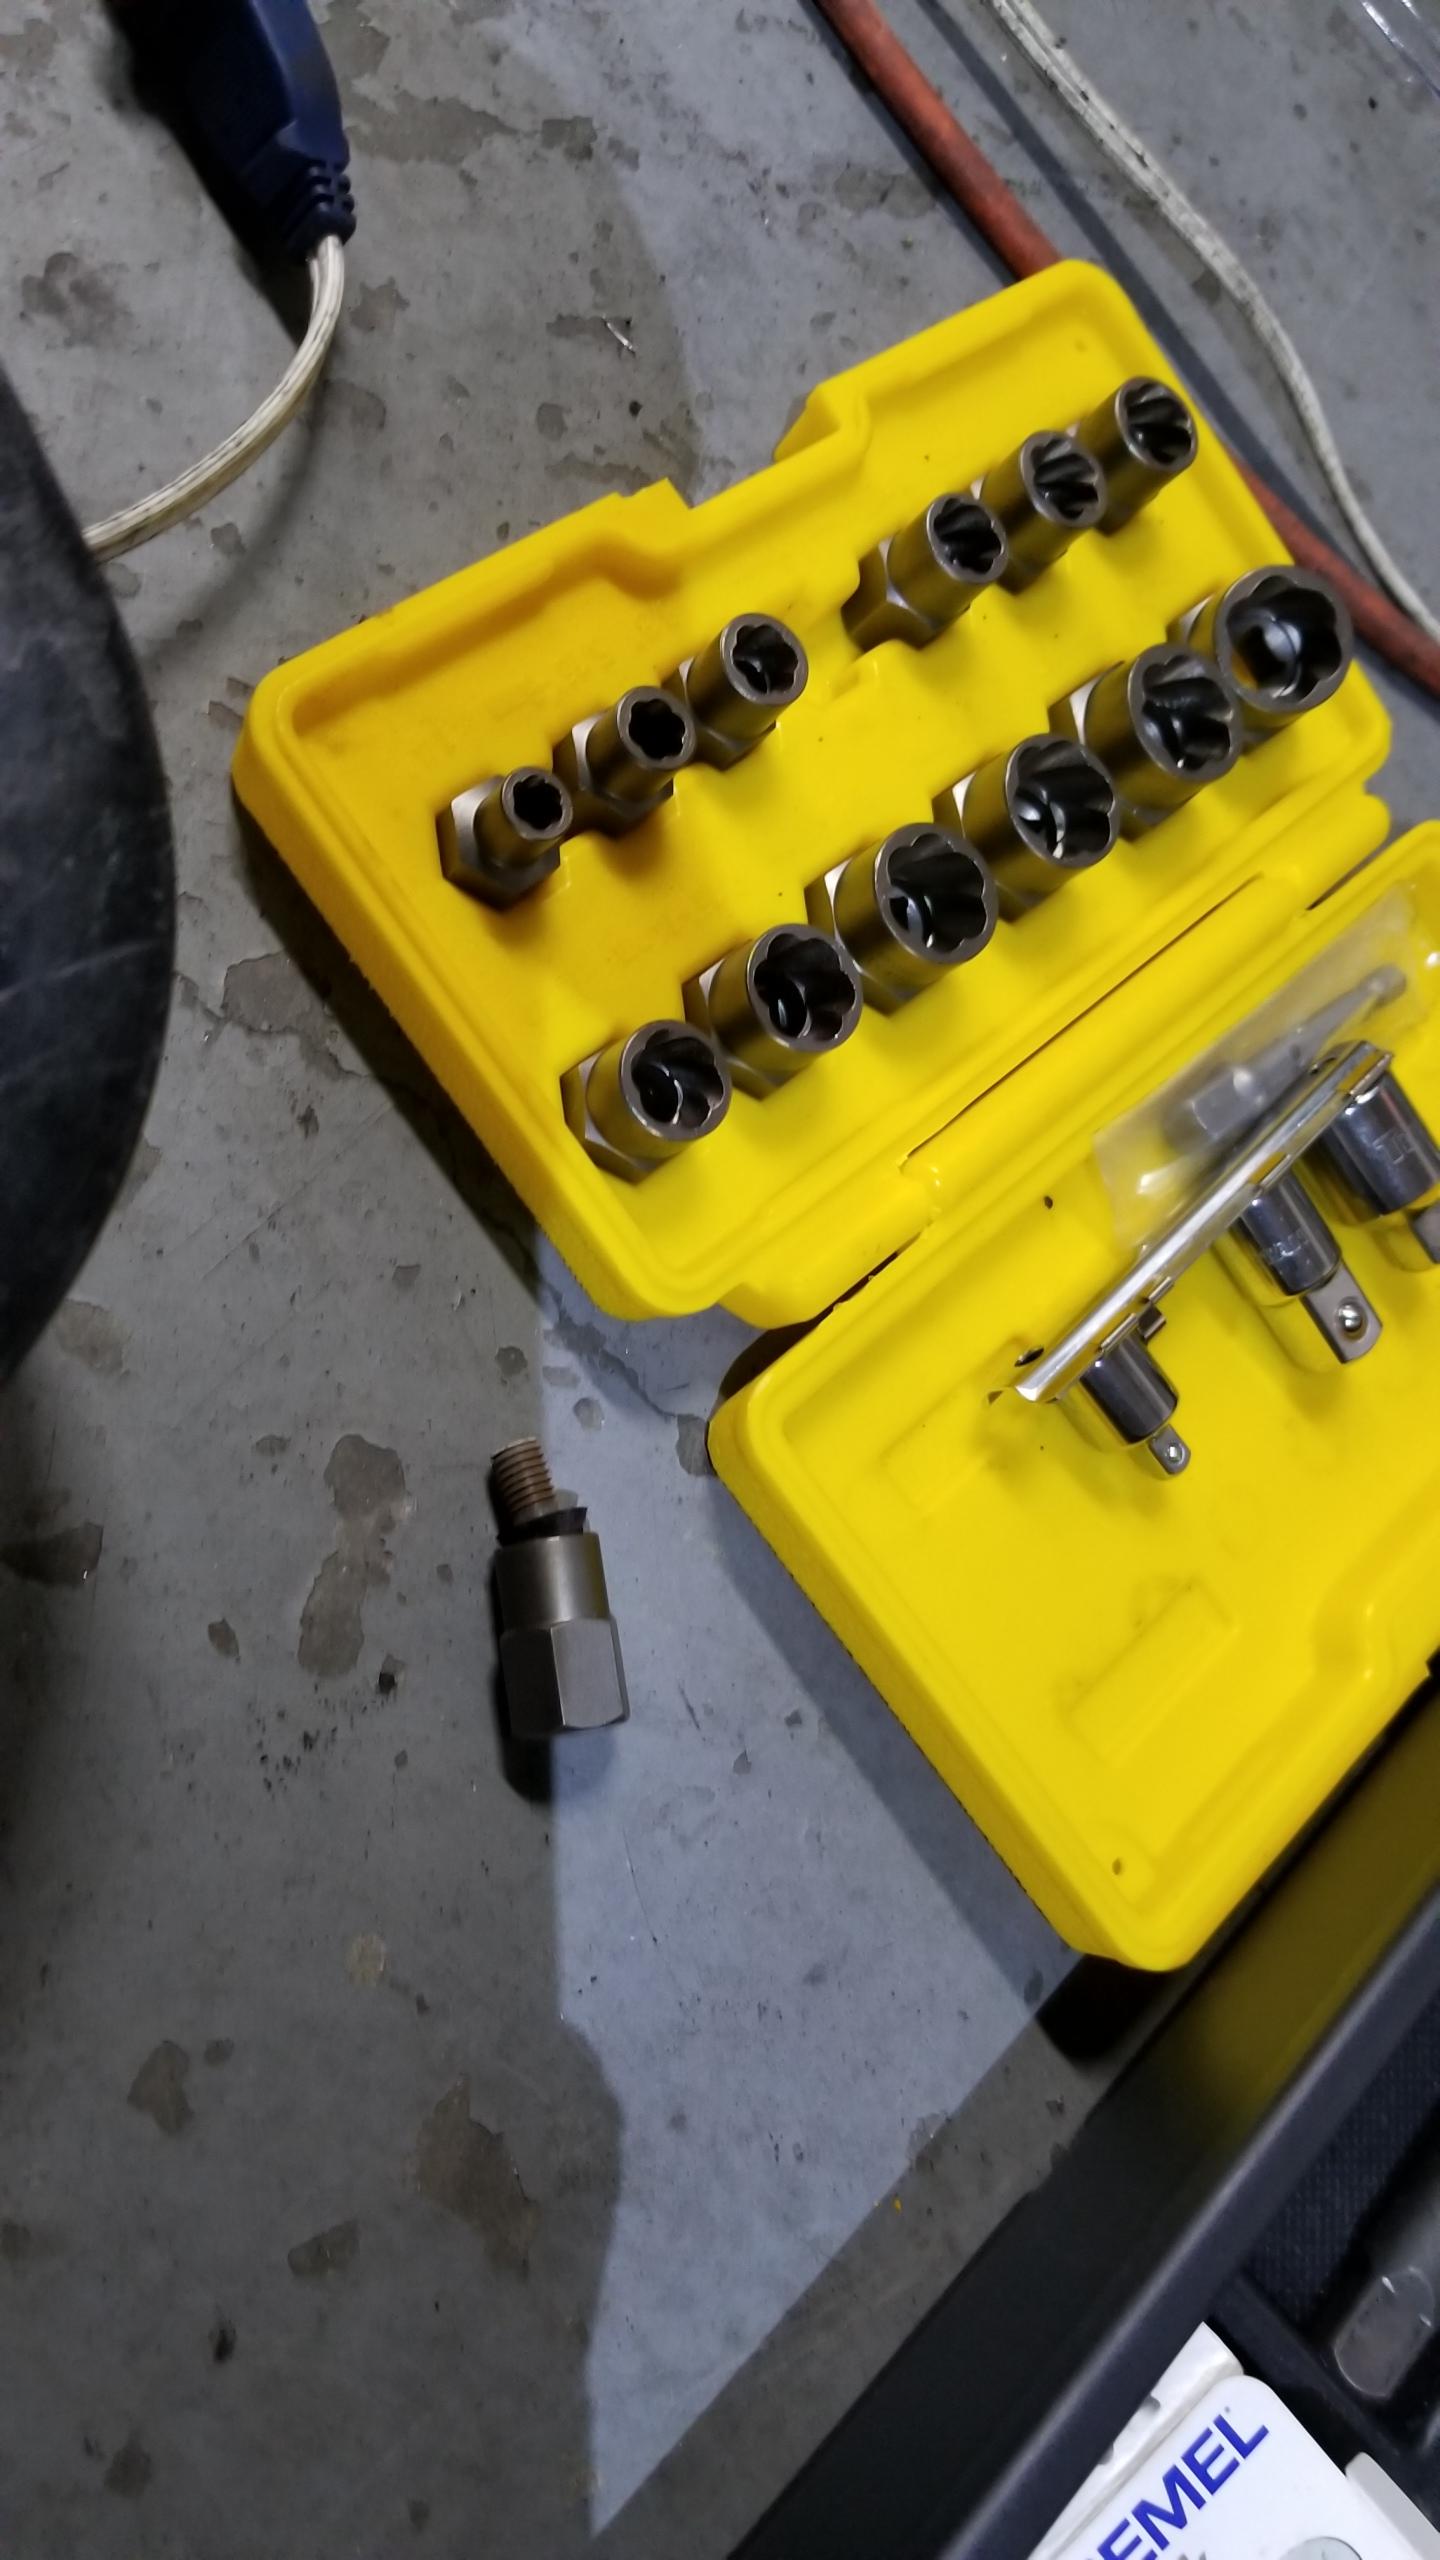
This nut extractor set was super handy. For bolts that were not hex-shaped anymore and you can't fit a normal socket to, just find a tightly-fitting extractor bit and hammer it on to the bolt. It'll either break it loose for removal or snap the head off the threads, either way it'll separate the parts. For the heat shield bolts this was pivotal.
3TbdwBe.jpg


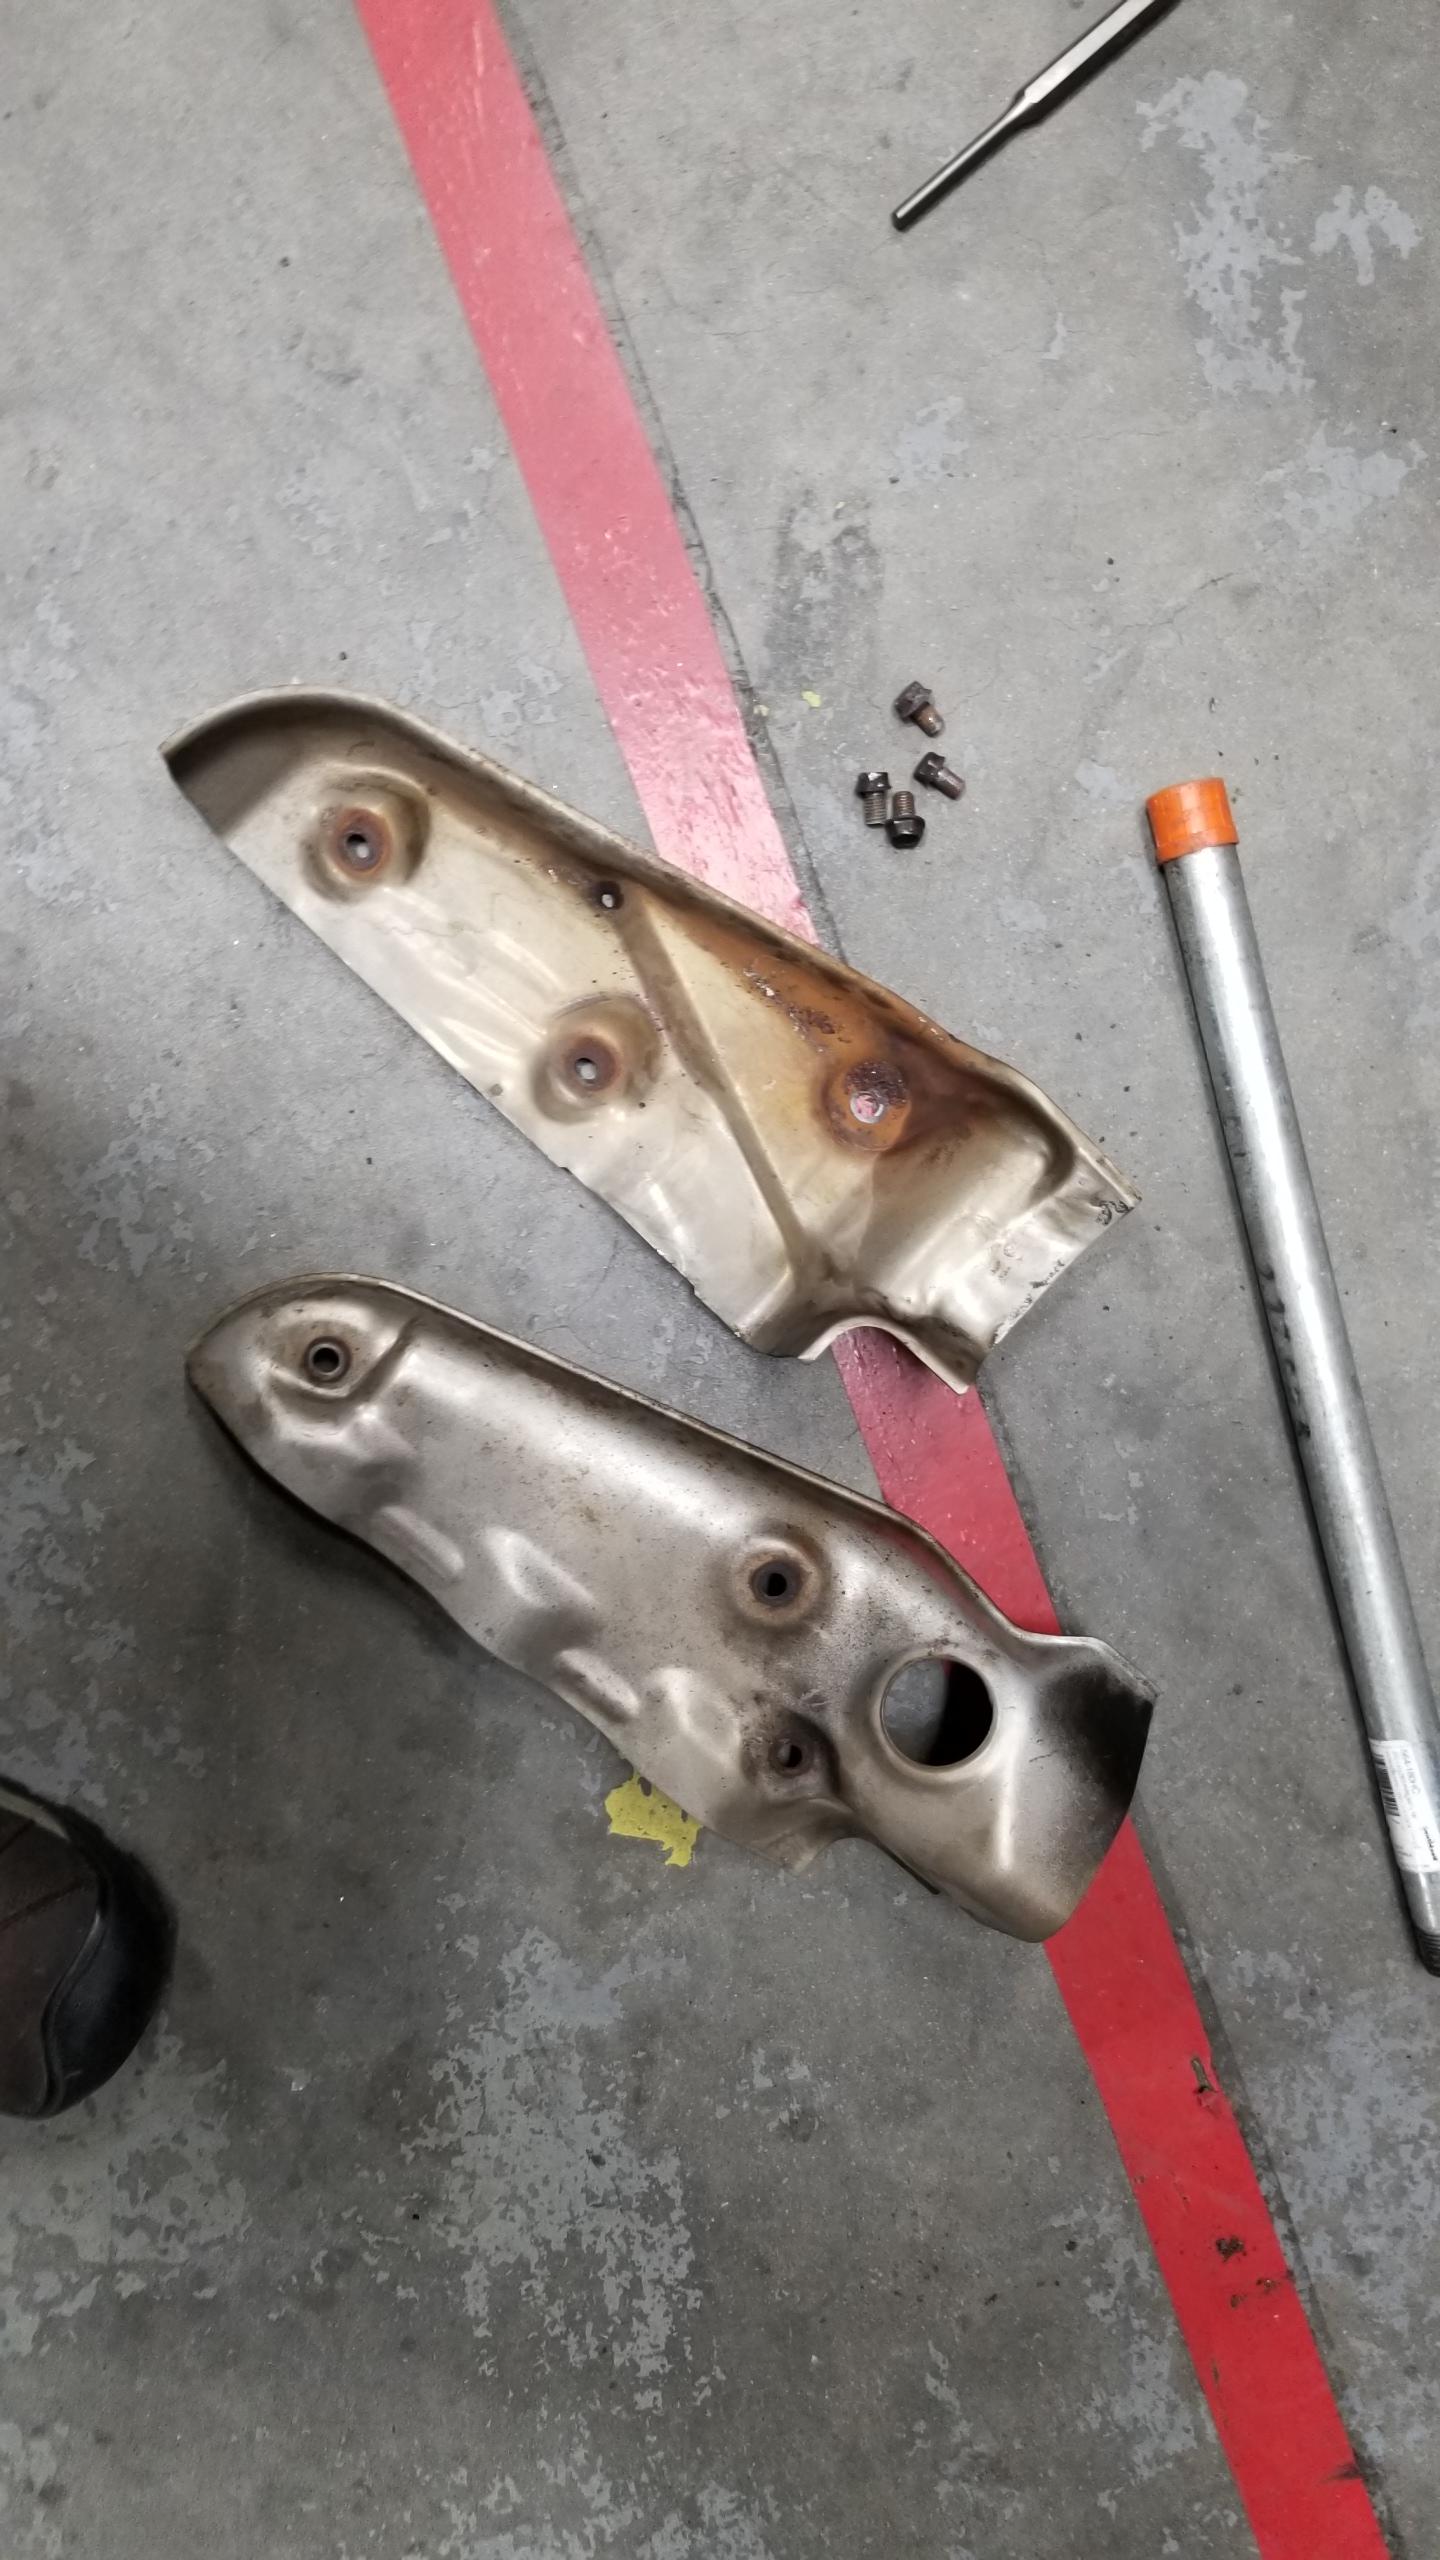
Rear heat shields came off. The fronts were actually fairly easy, the rears have less access and the bolts were more corroded. There was one bolt on the top that was basically a circle and it took a couple of tries with a dremel and extractor to grip it enough to buzz off.
o7XtRMG.jpg


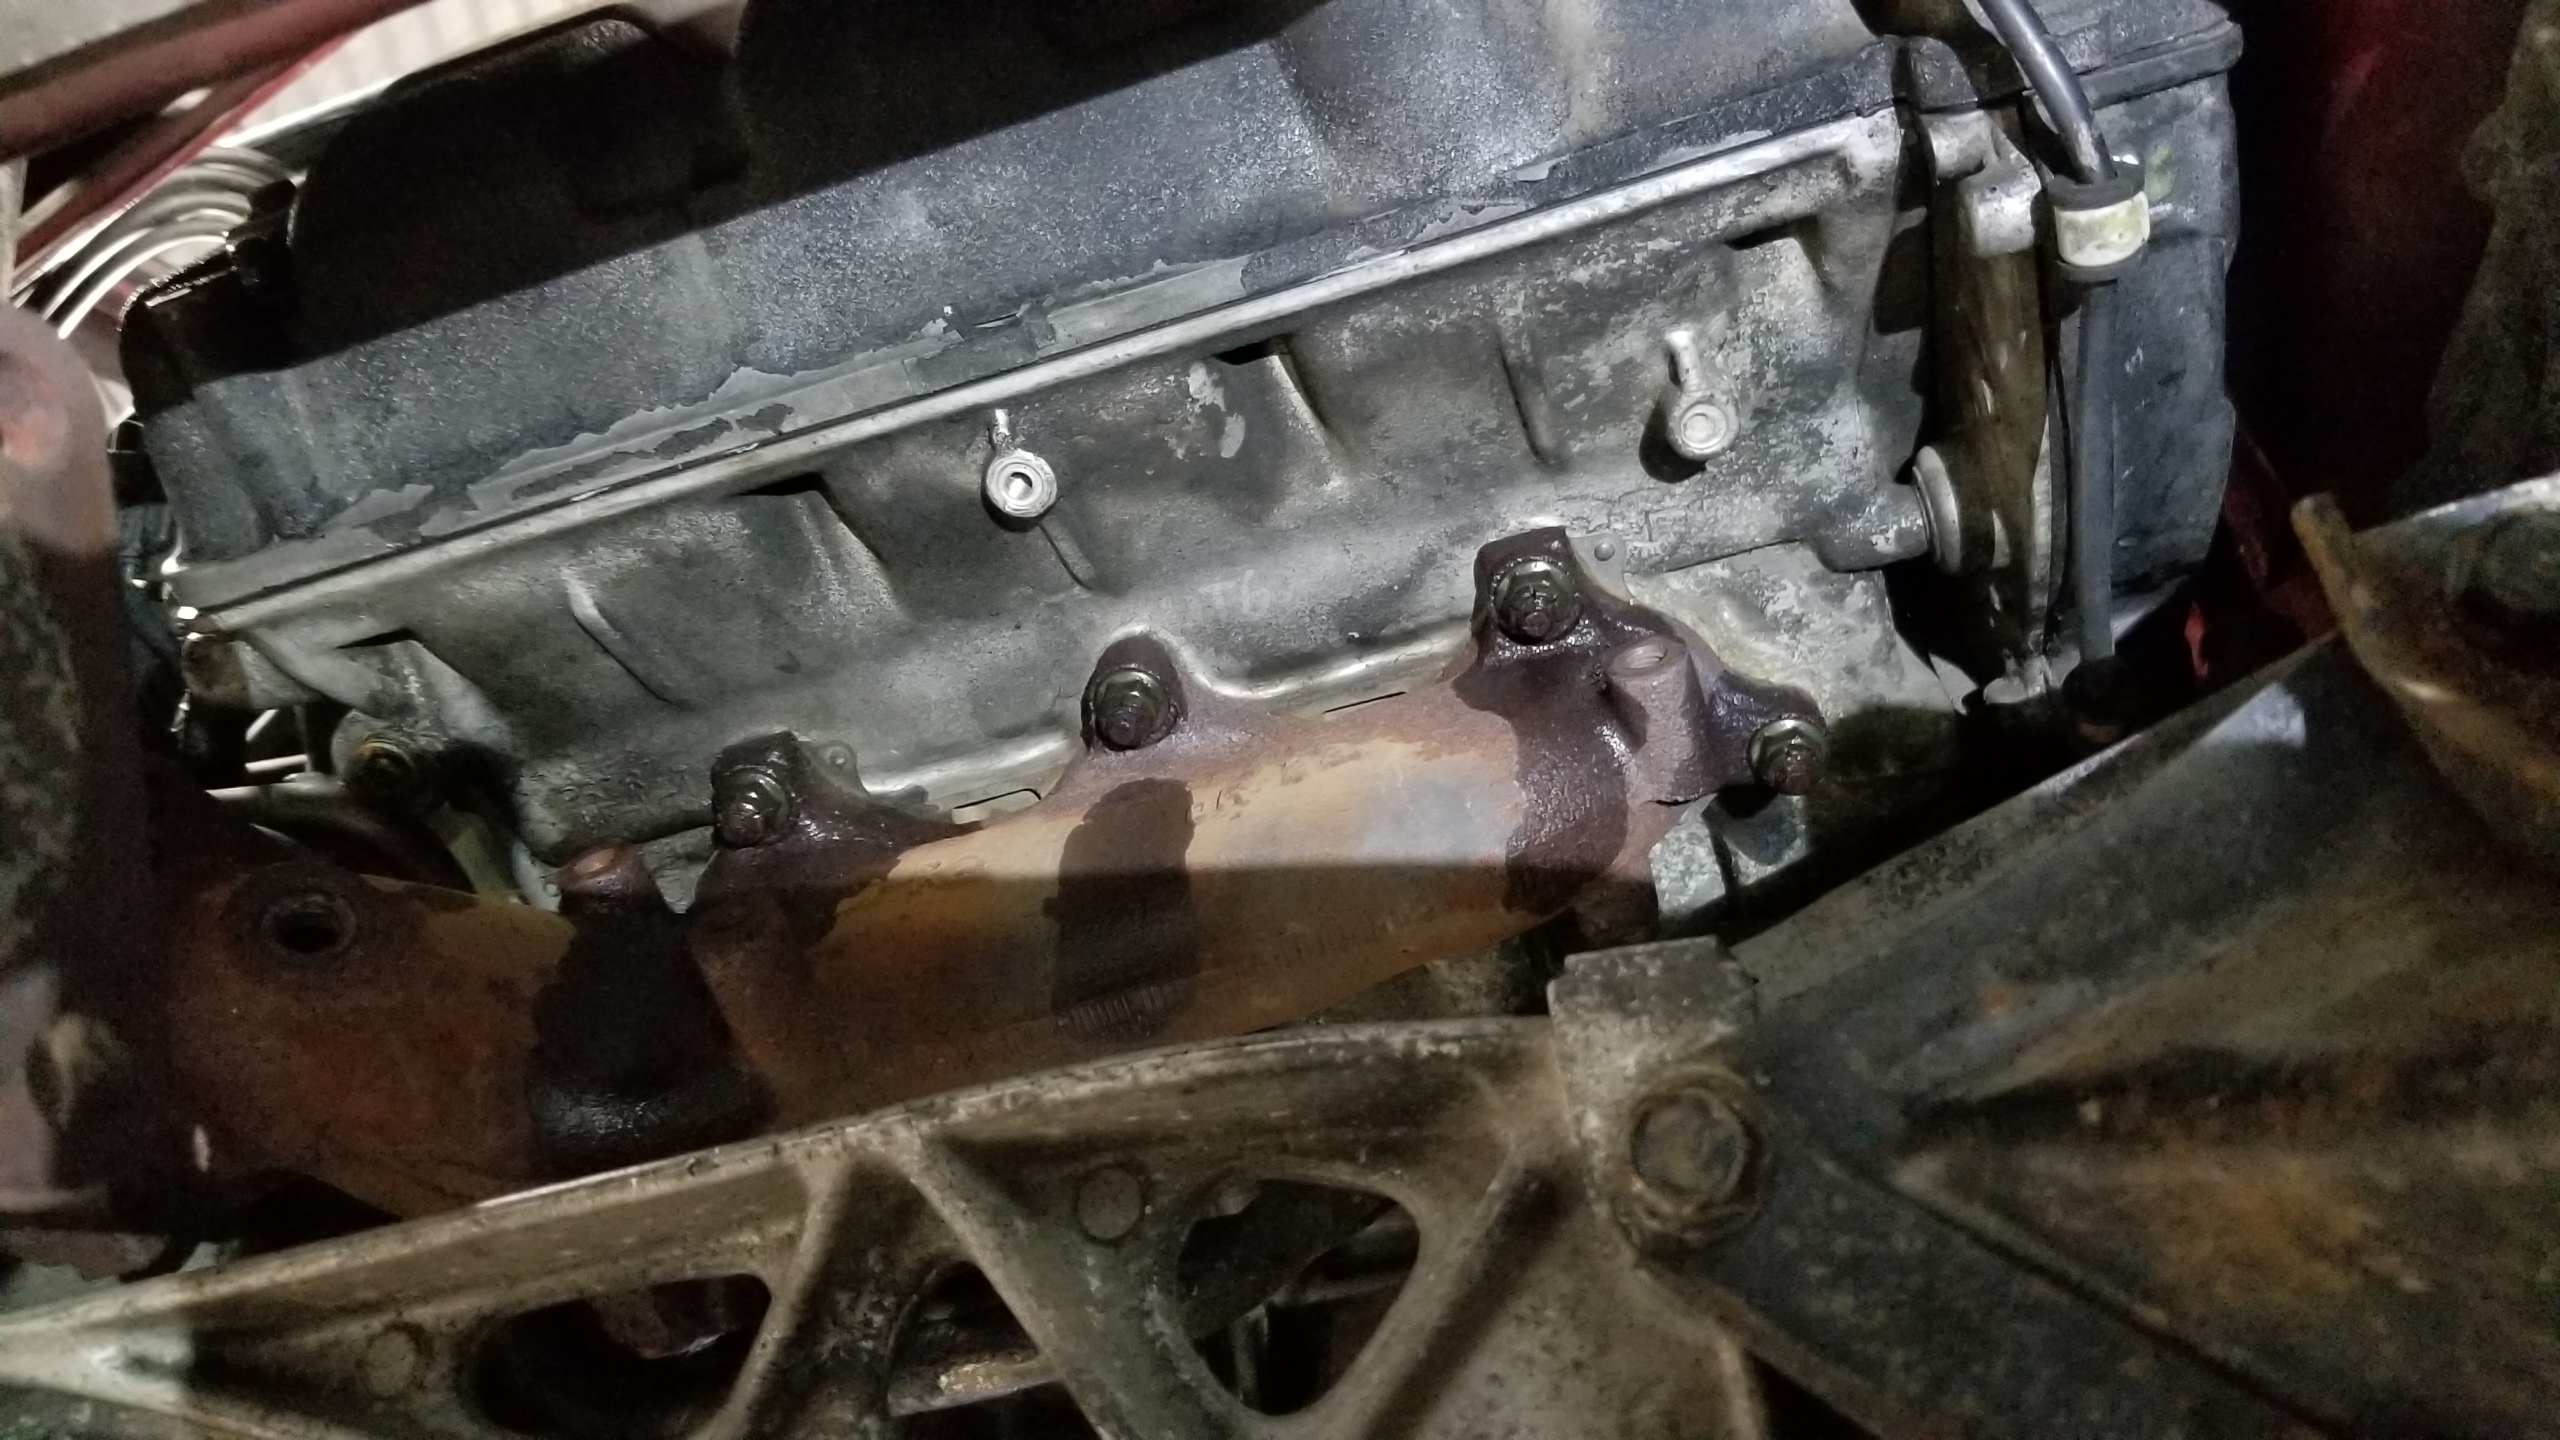
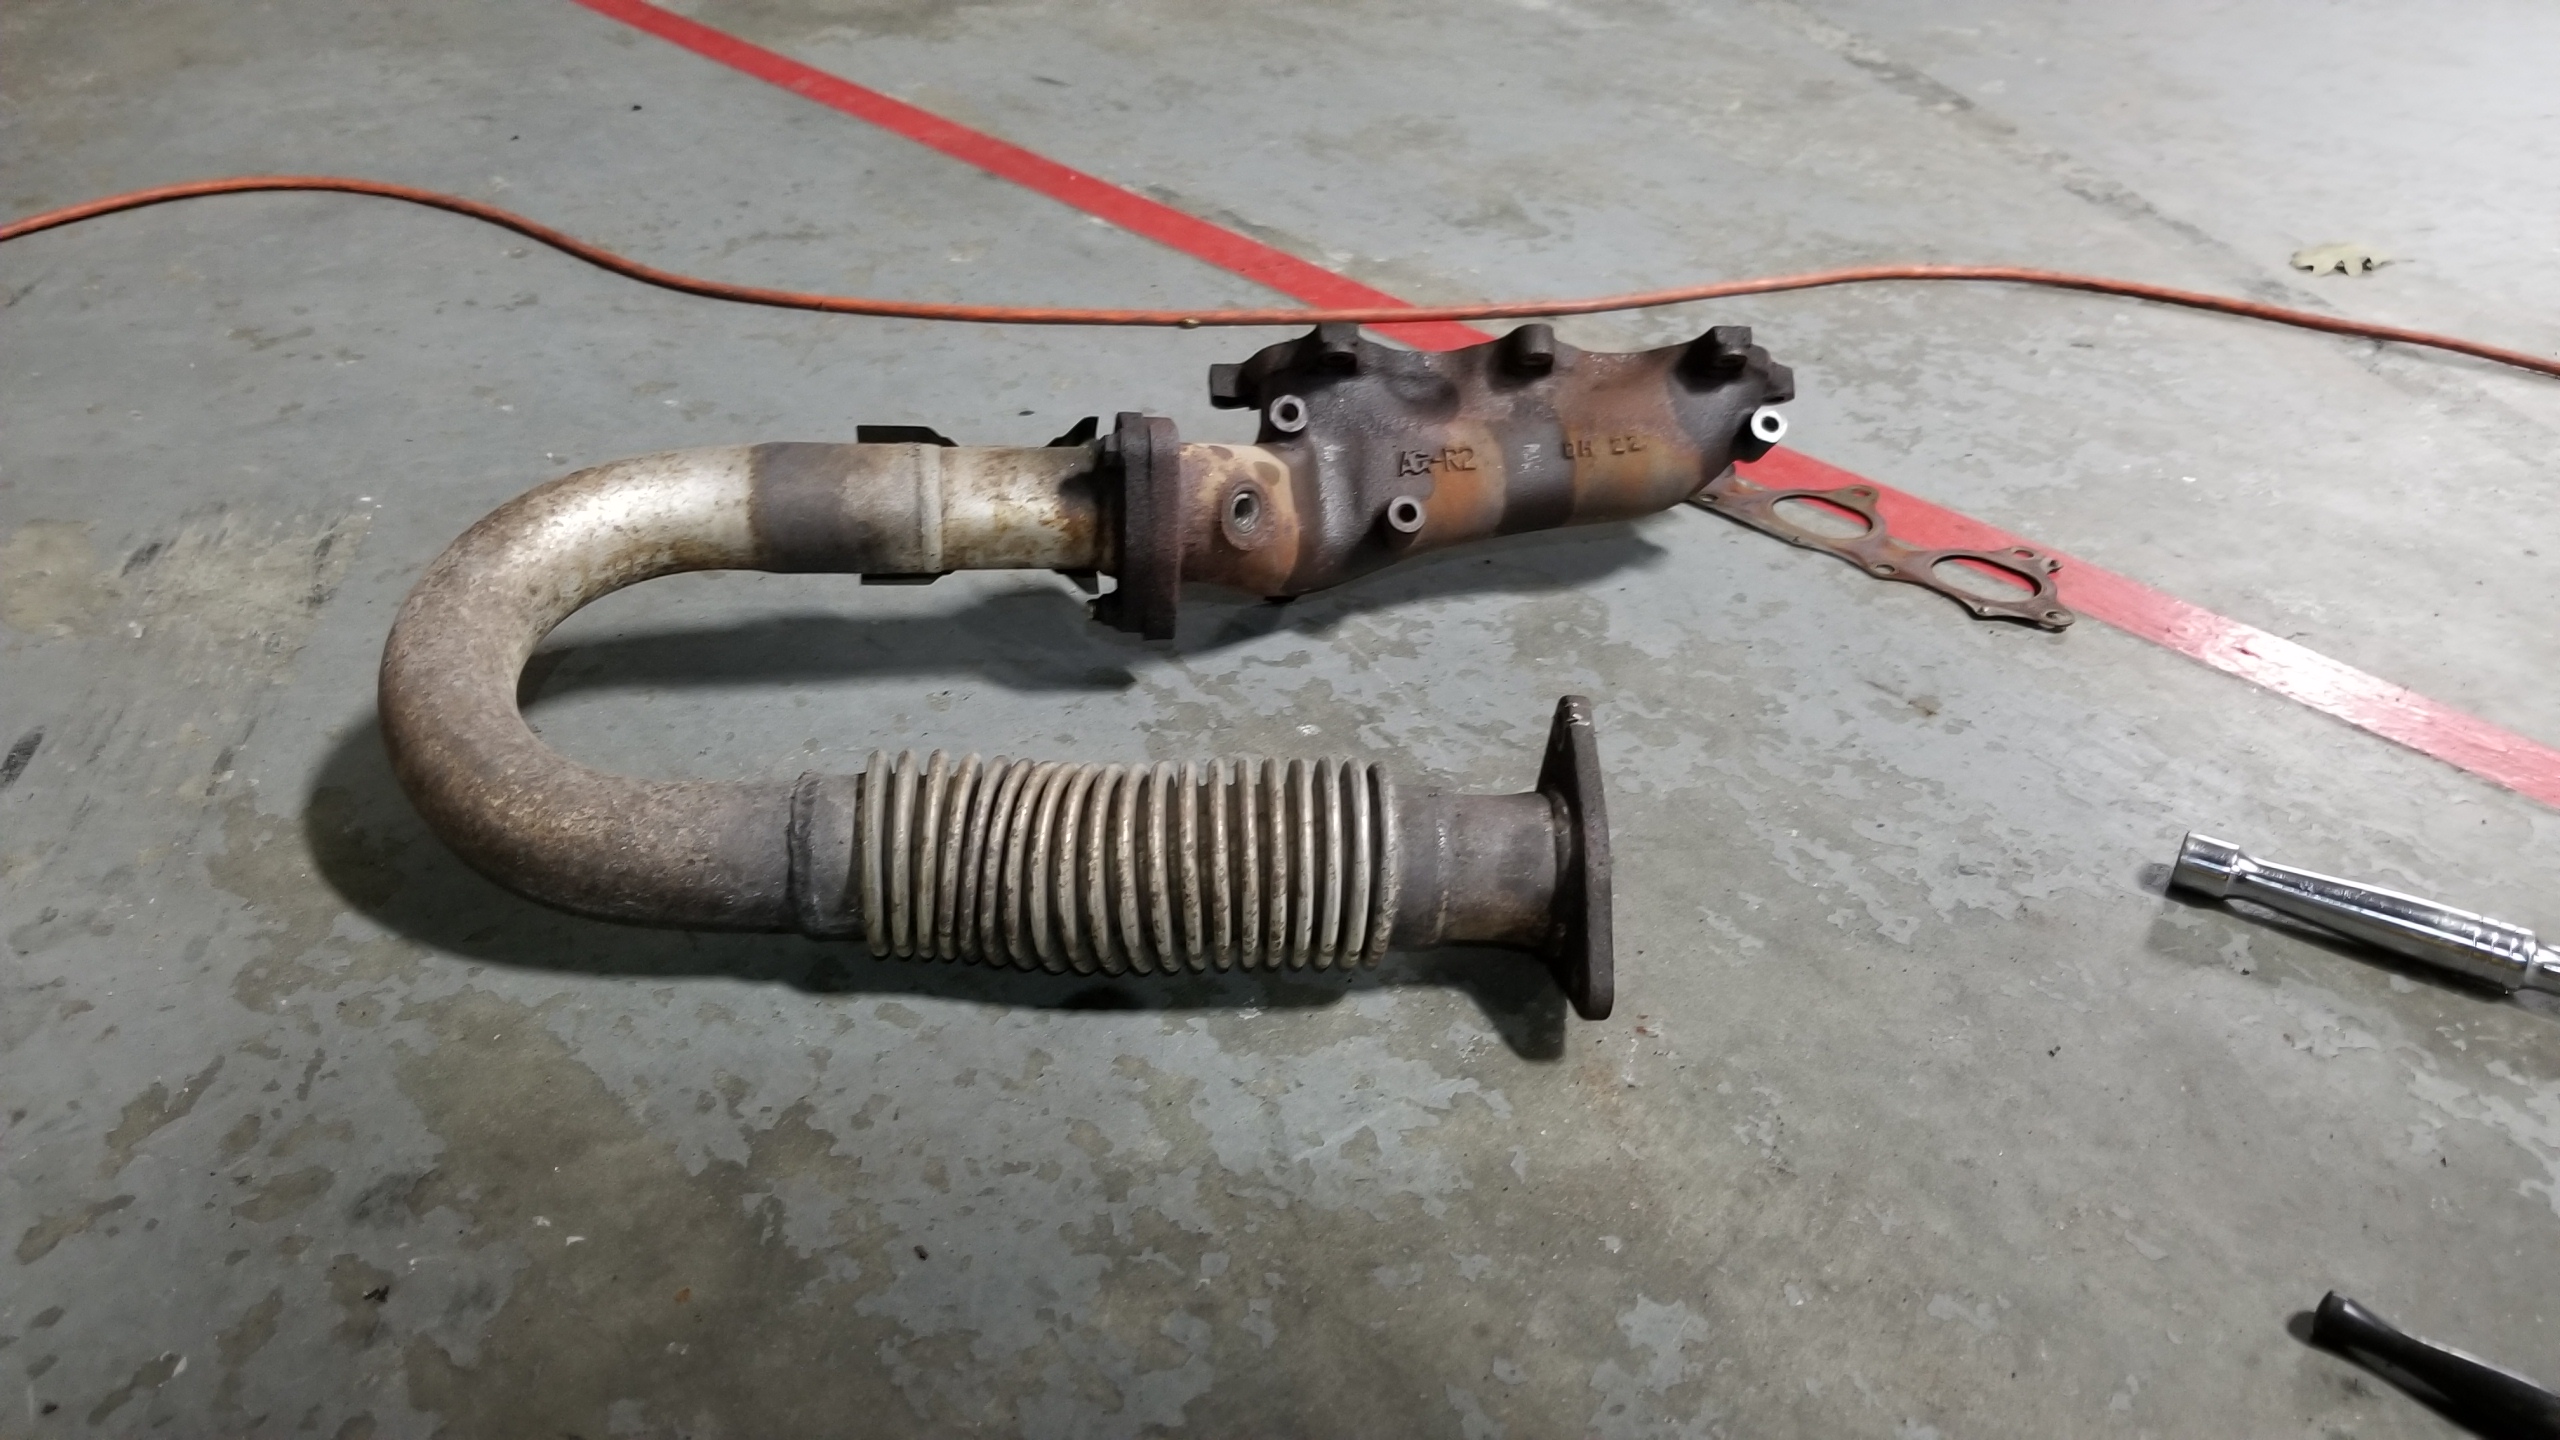
Sprayed the 7 manifold bolts with Aero-Kroil and let it sit for a bit. This was an important part and fortunately the studs and nuts looked pretty good. It really only took maybe 5 minutes to zip off all the nuts with a 12mm 6-pt socket and my impact and take the whole thing off.
32jt13m.jpg


Bada-bing.
K6eo7YH.jpg


Rear bank looked okay but has plenty of 30 year old grime around. One of the studs came out with the nut, I actually would have preferred if all 7 of them had came out since I was replacing them, so I double-nutted them and used a socket & wrench to remove the studs one by one.
TPDhH7i.jpg


The tops cleaned up really nicely. Ready for the new hardware and headers, but I'll move to the front.
qArVuya.jpg


The front crossmember has to come down, which is the sole reason that the front headers are much more annoying of a job. I ended up removing the A/T shift cable to put the crossmember back on, it only took 10 minutes to remove & replace.

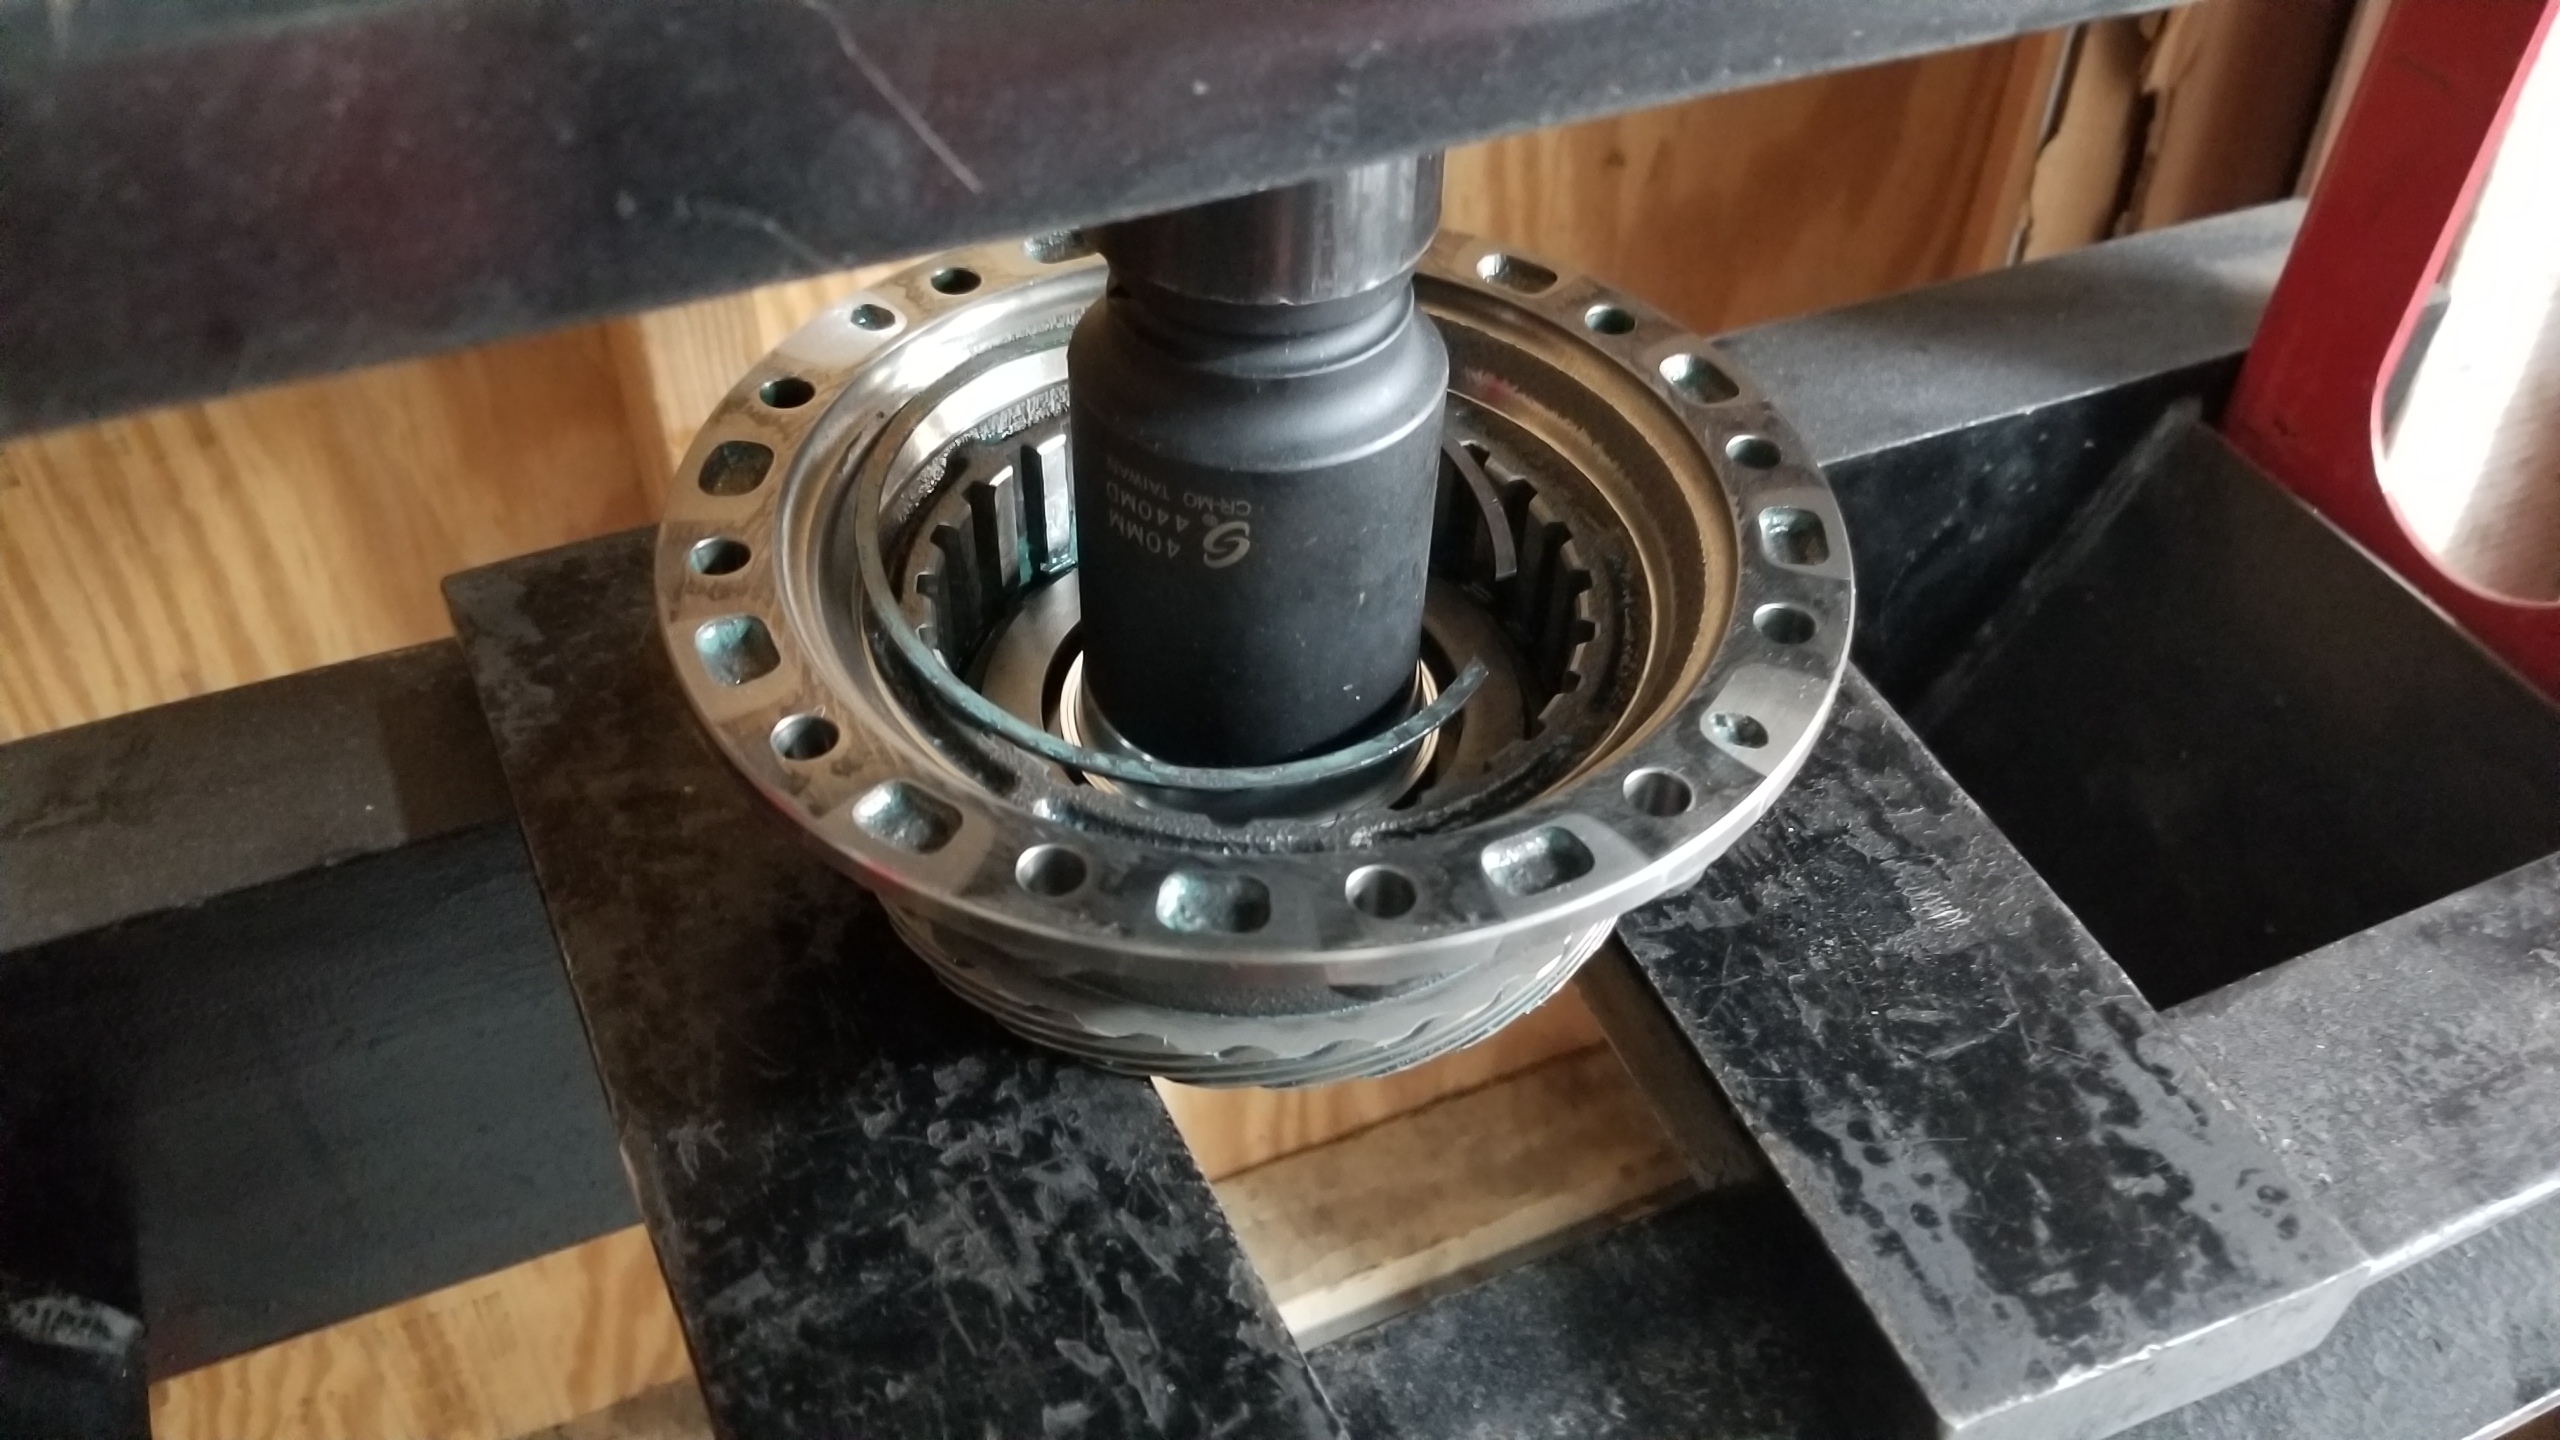
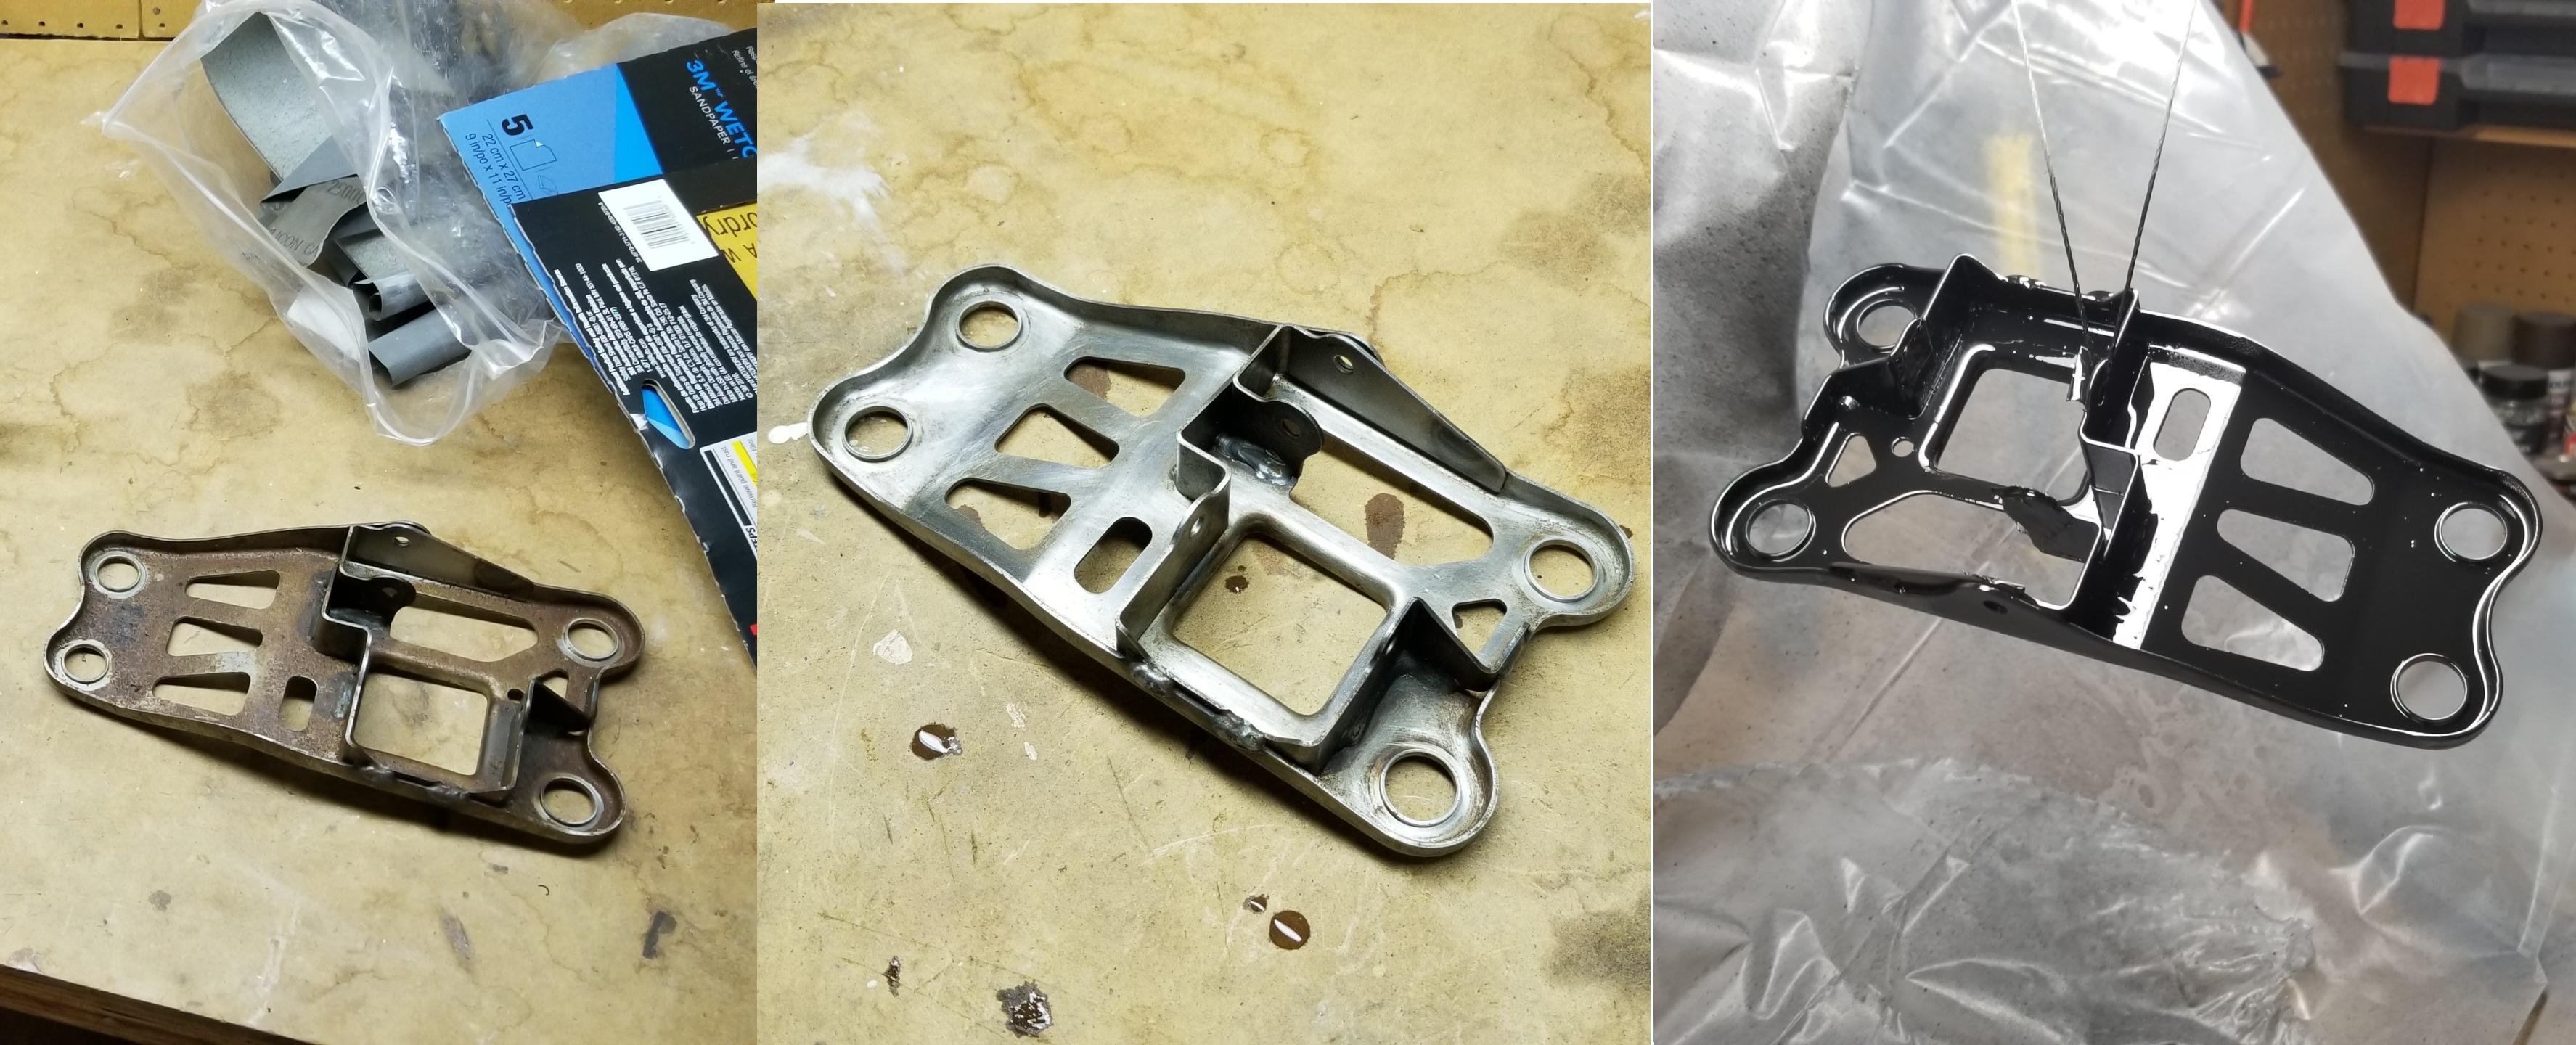
It took me a while to figure out how to remove the through-bolt from the front engine mount, I think the best way is to remove all of the other cross-member bolts first and leave the mount bolt for last to give you enough room to get a socket & wrench on both sides of the mount. Fairly easy off, but I knew putting it back on would be the biggest annoyance.
T9OVnyK.jpg


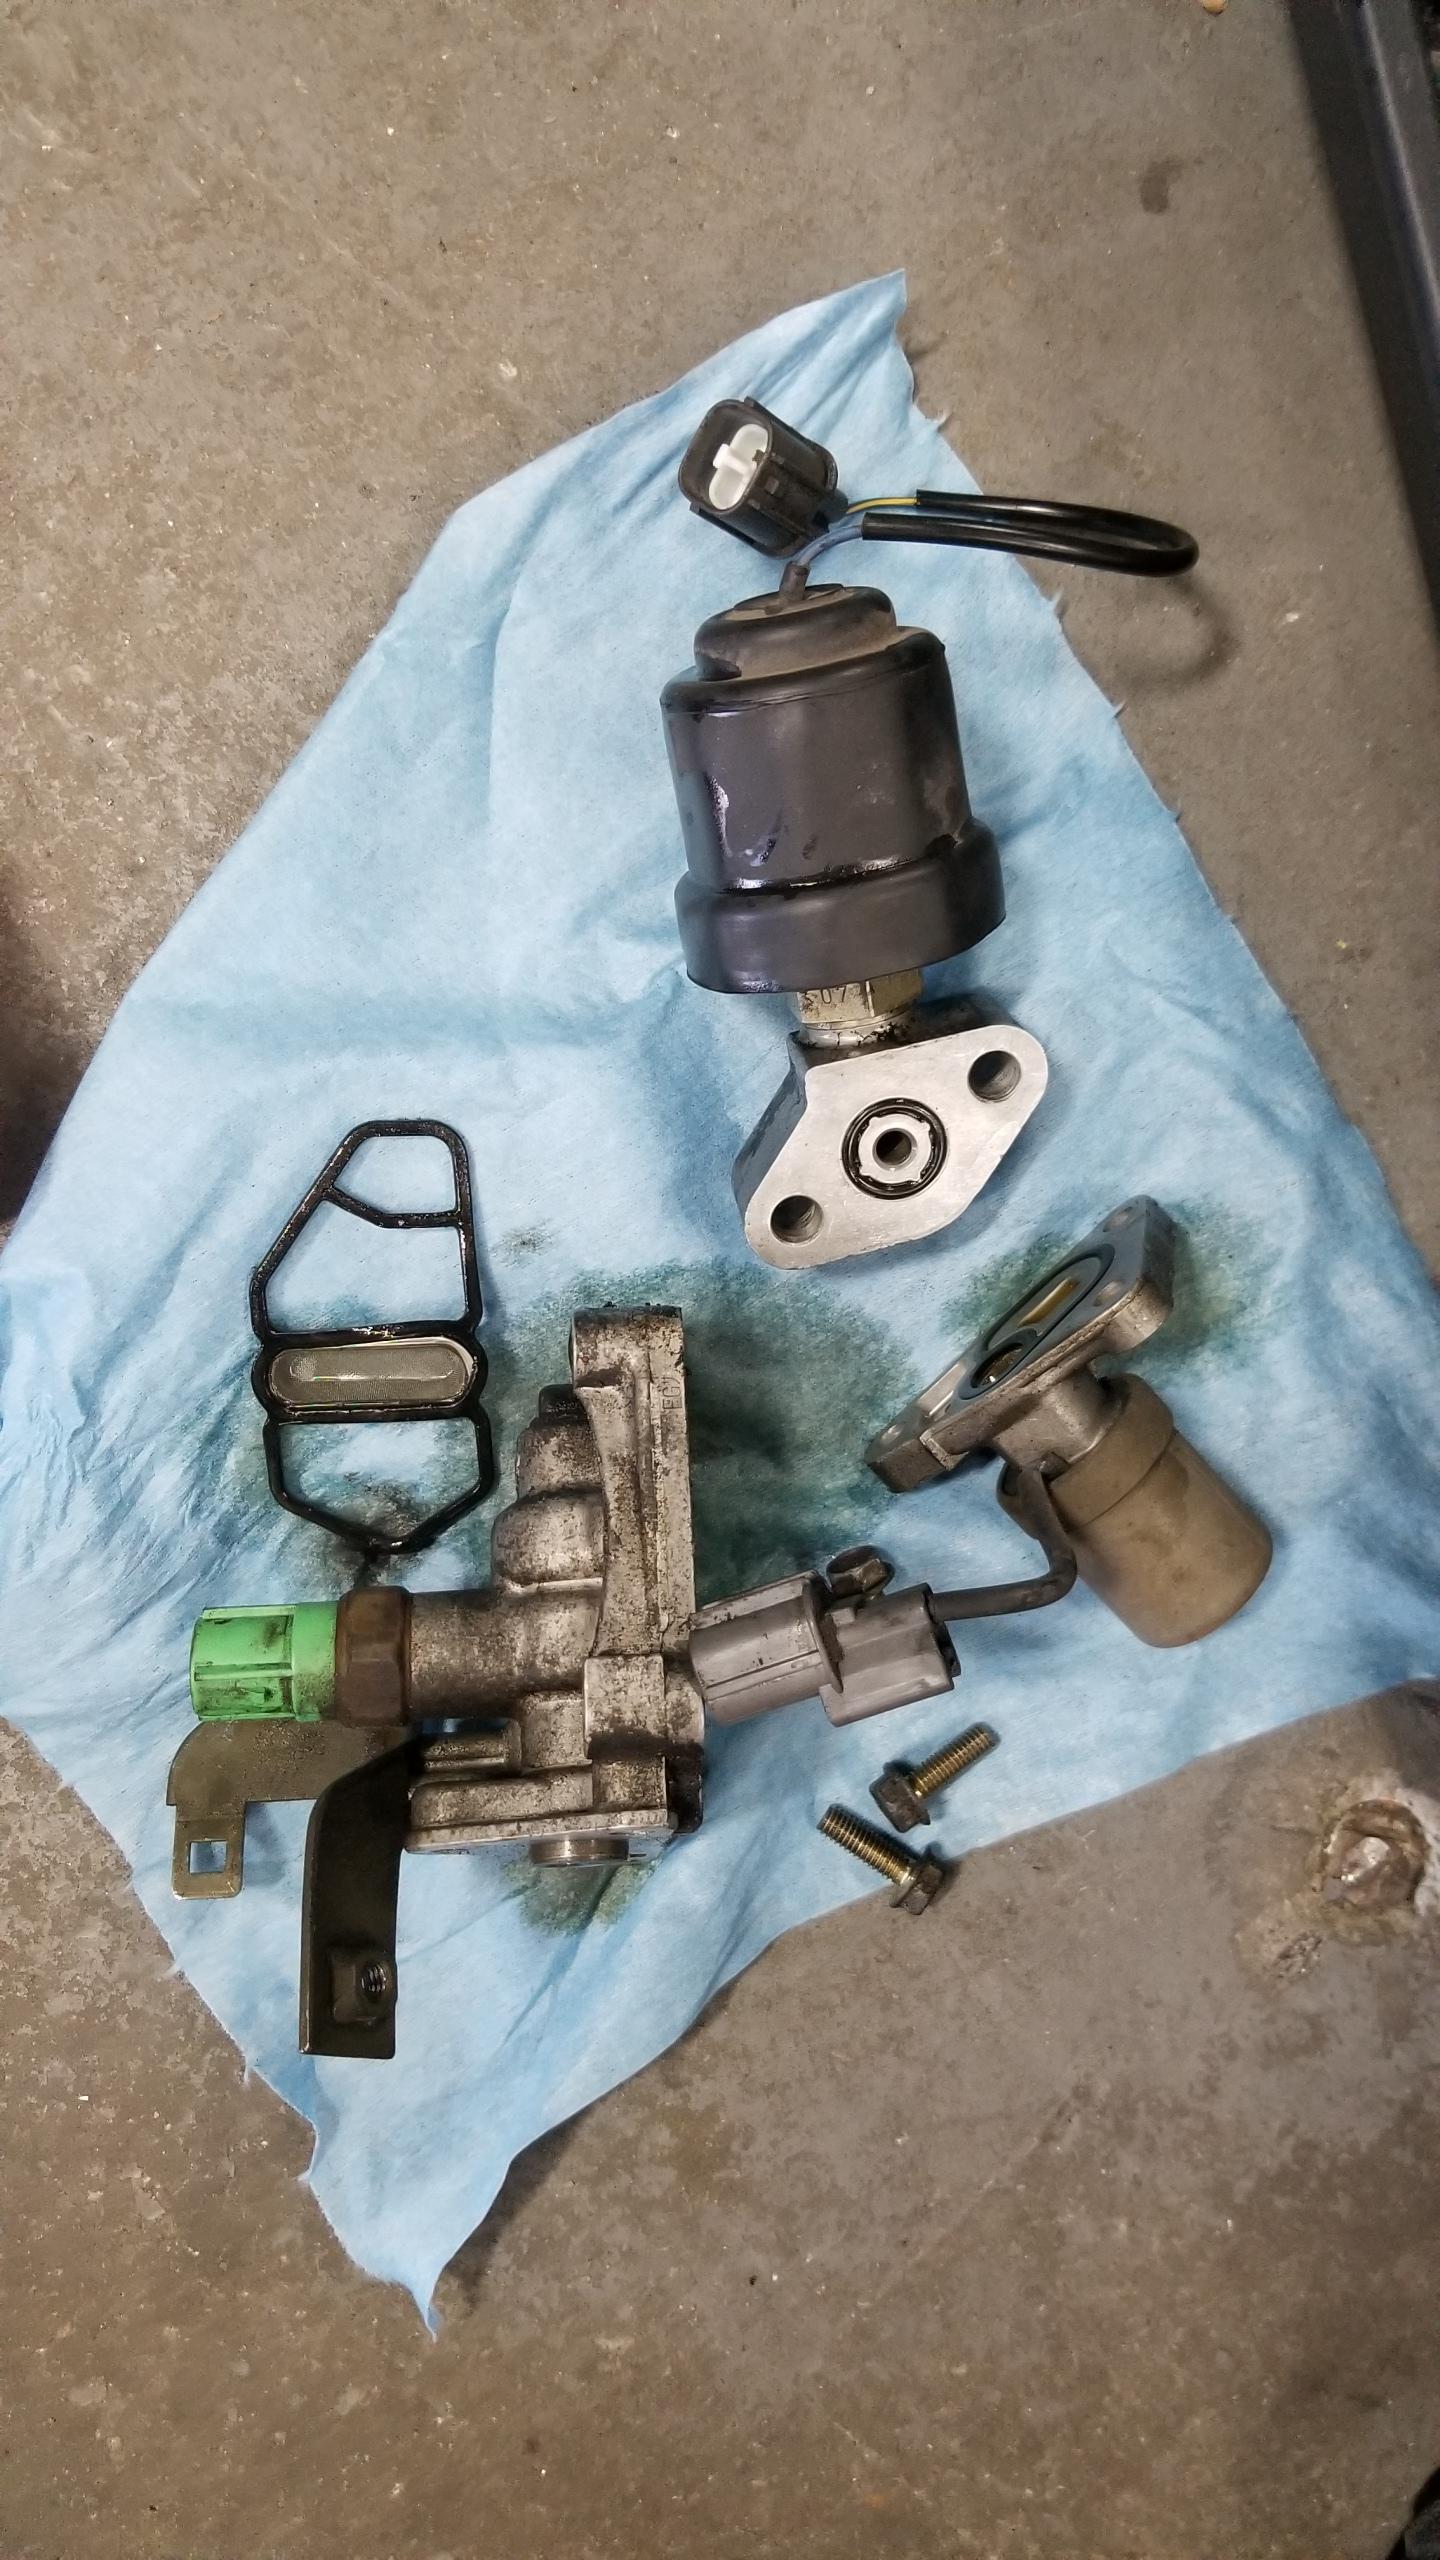
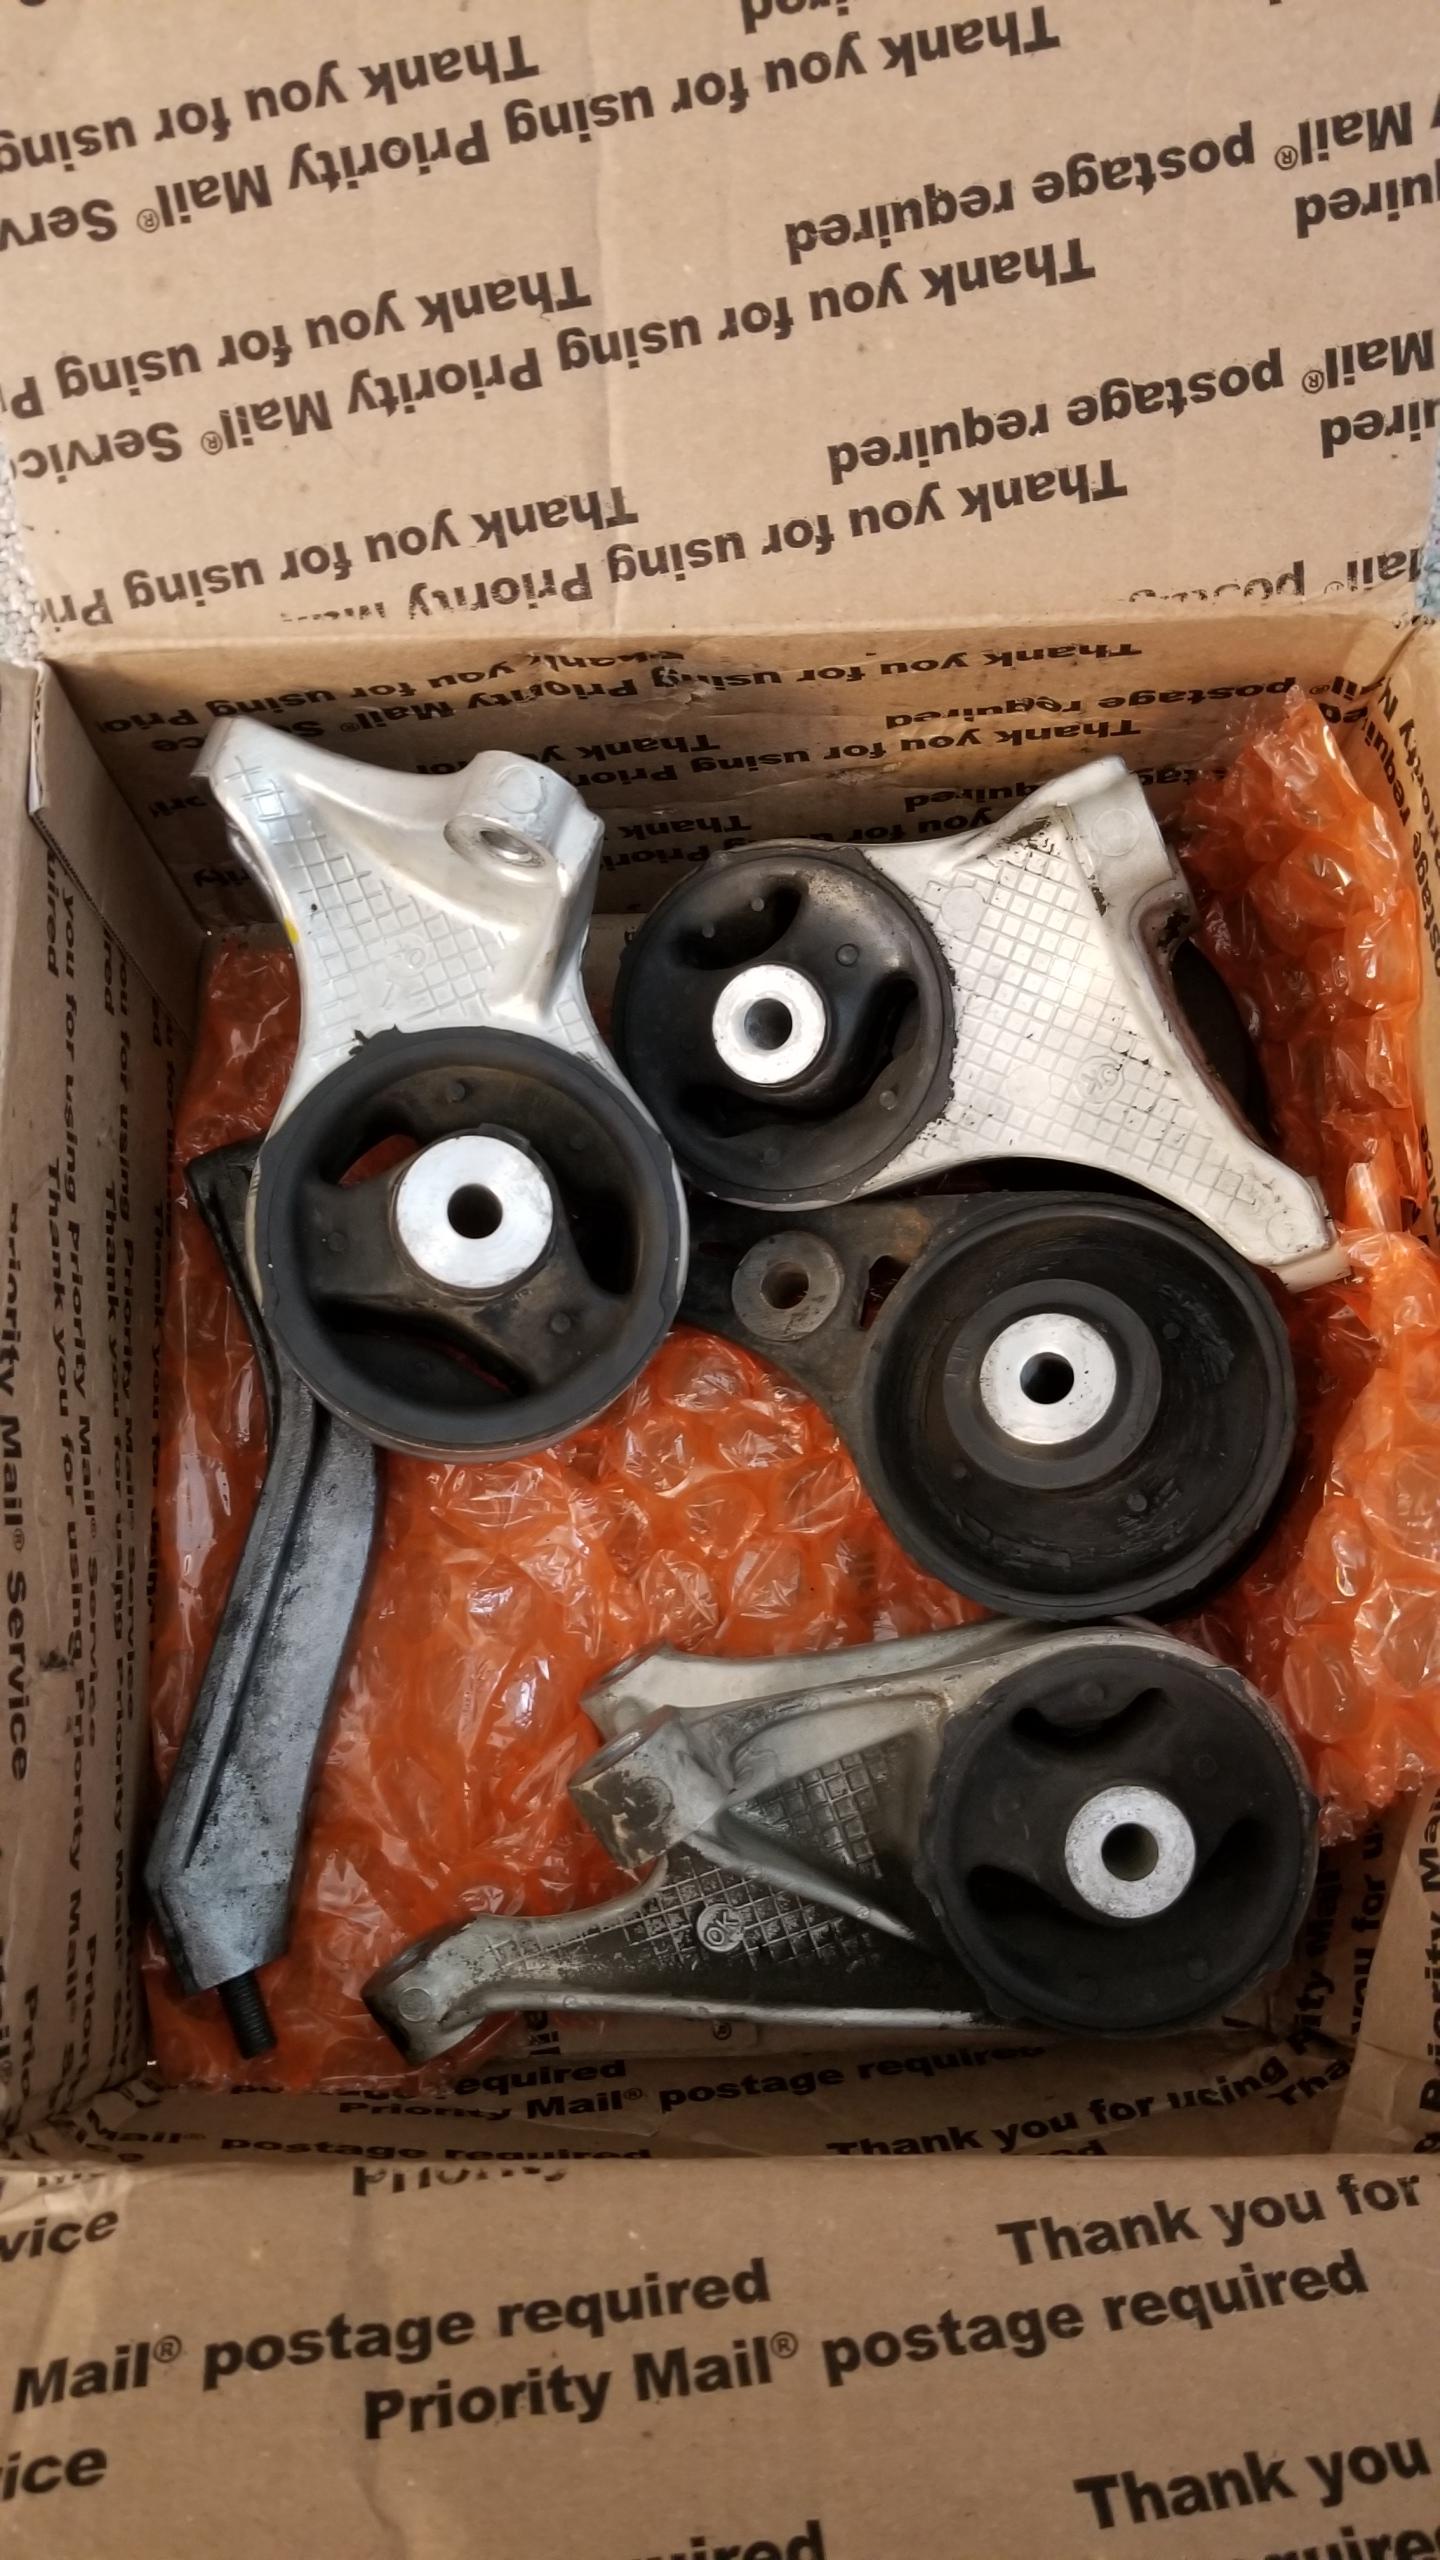
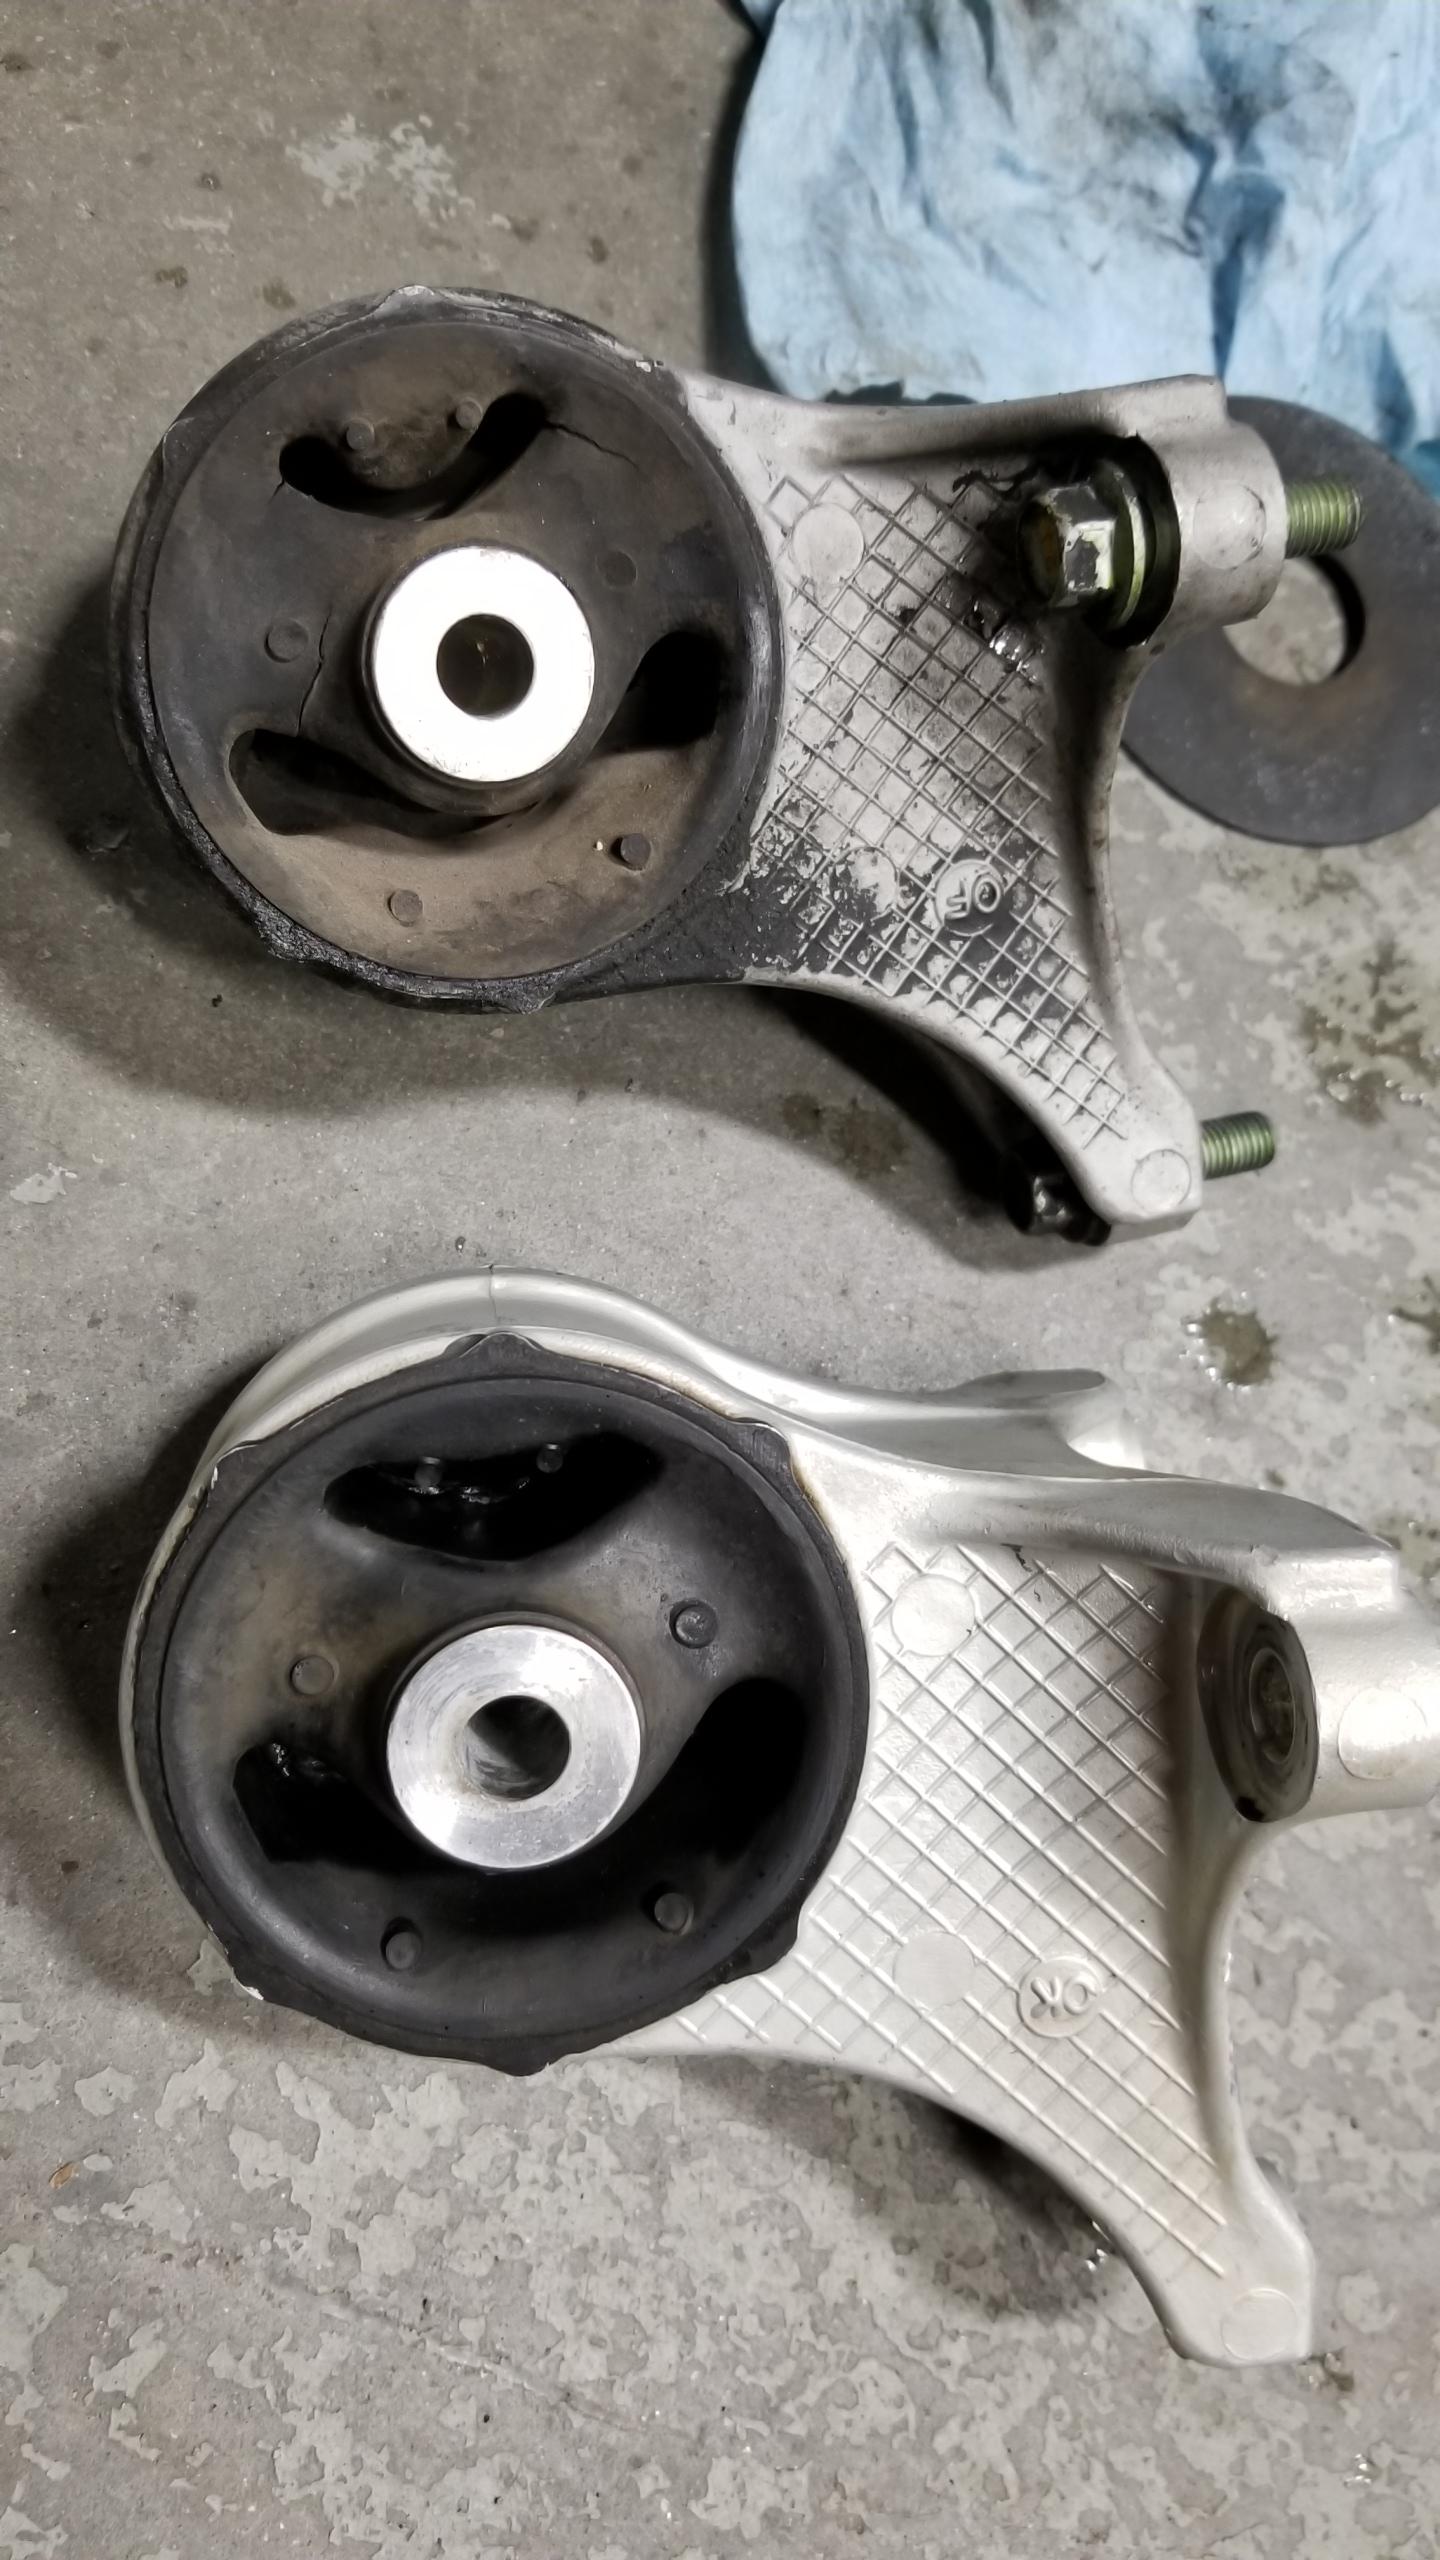
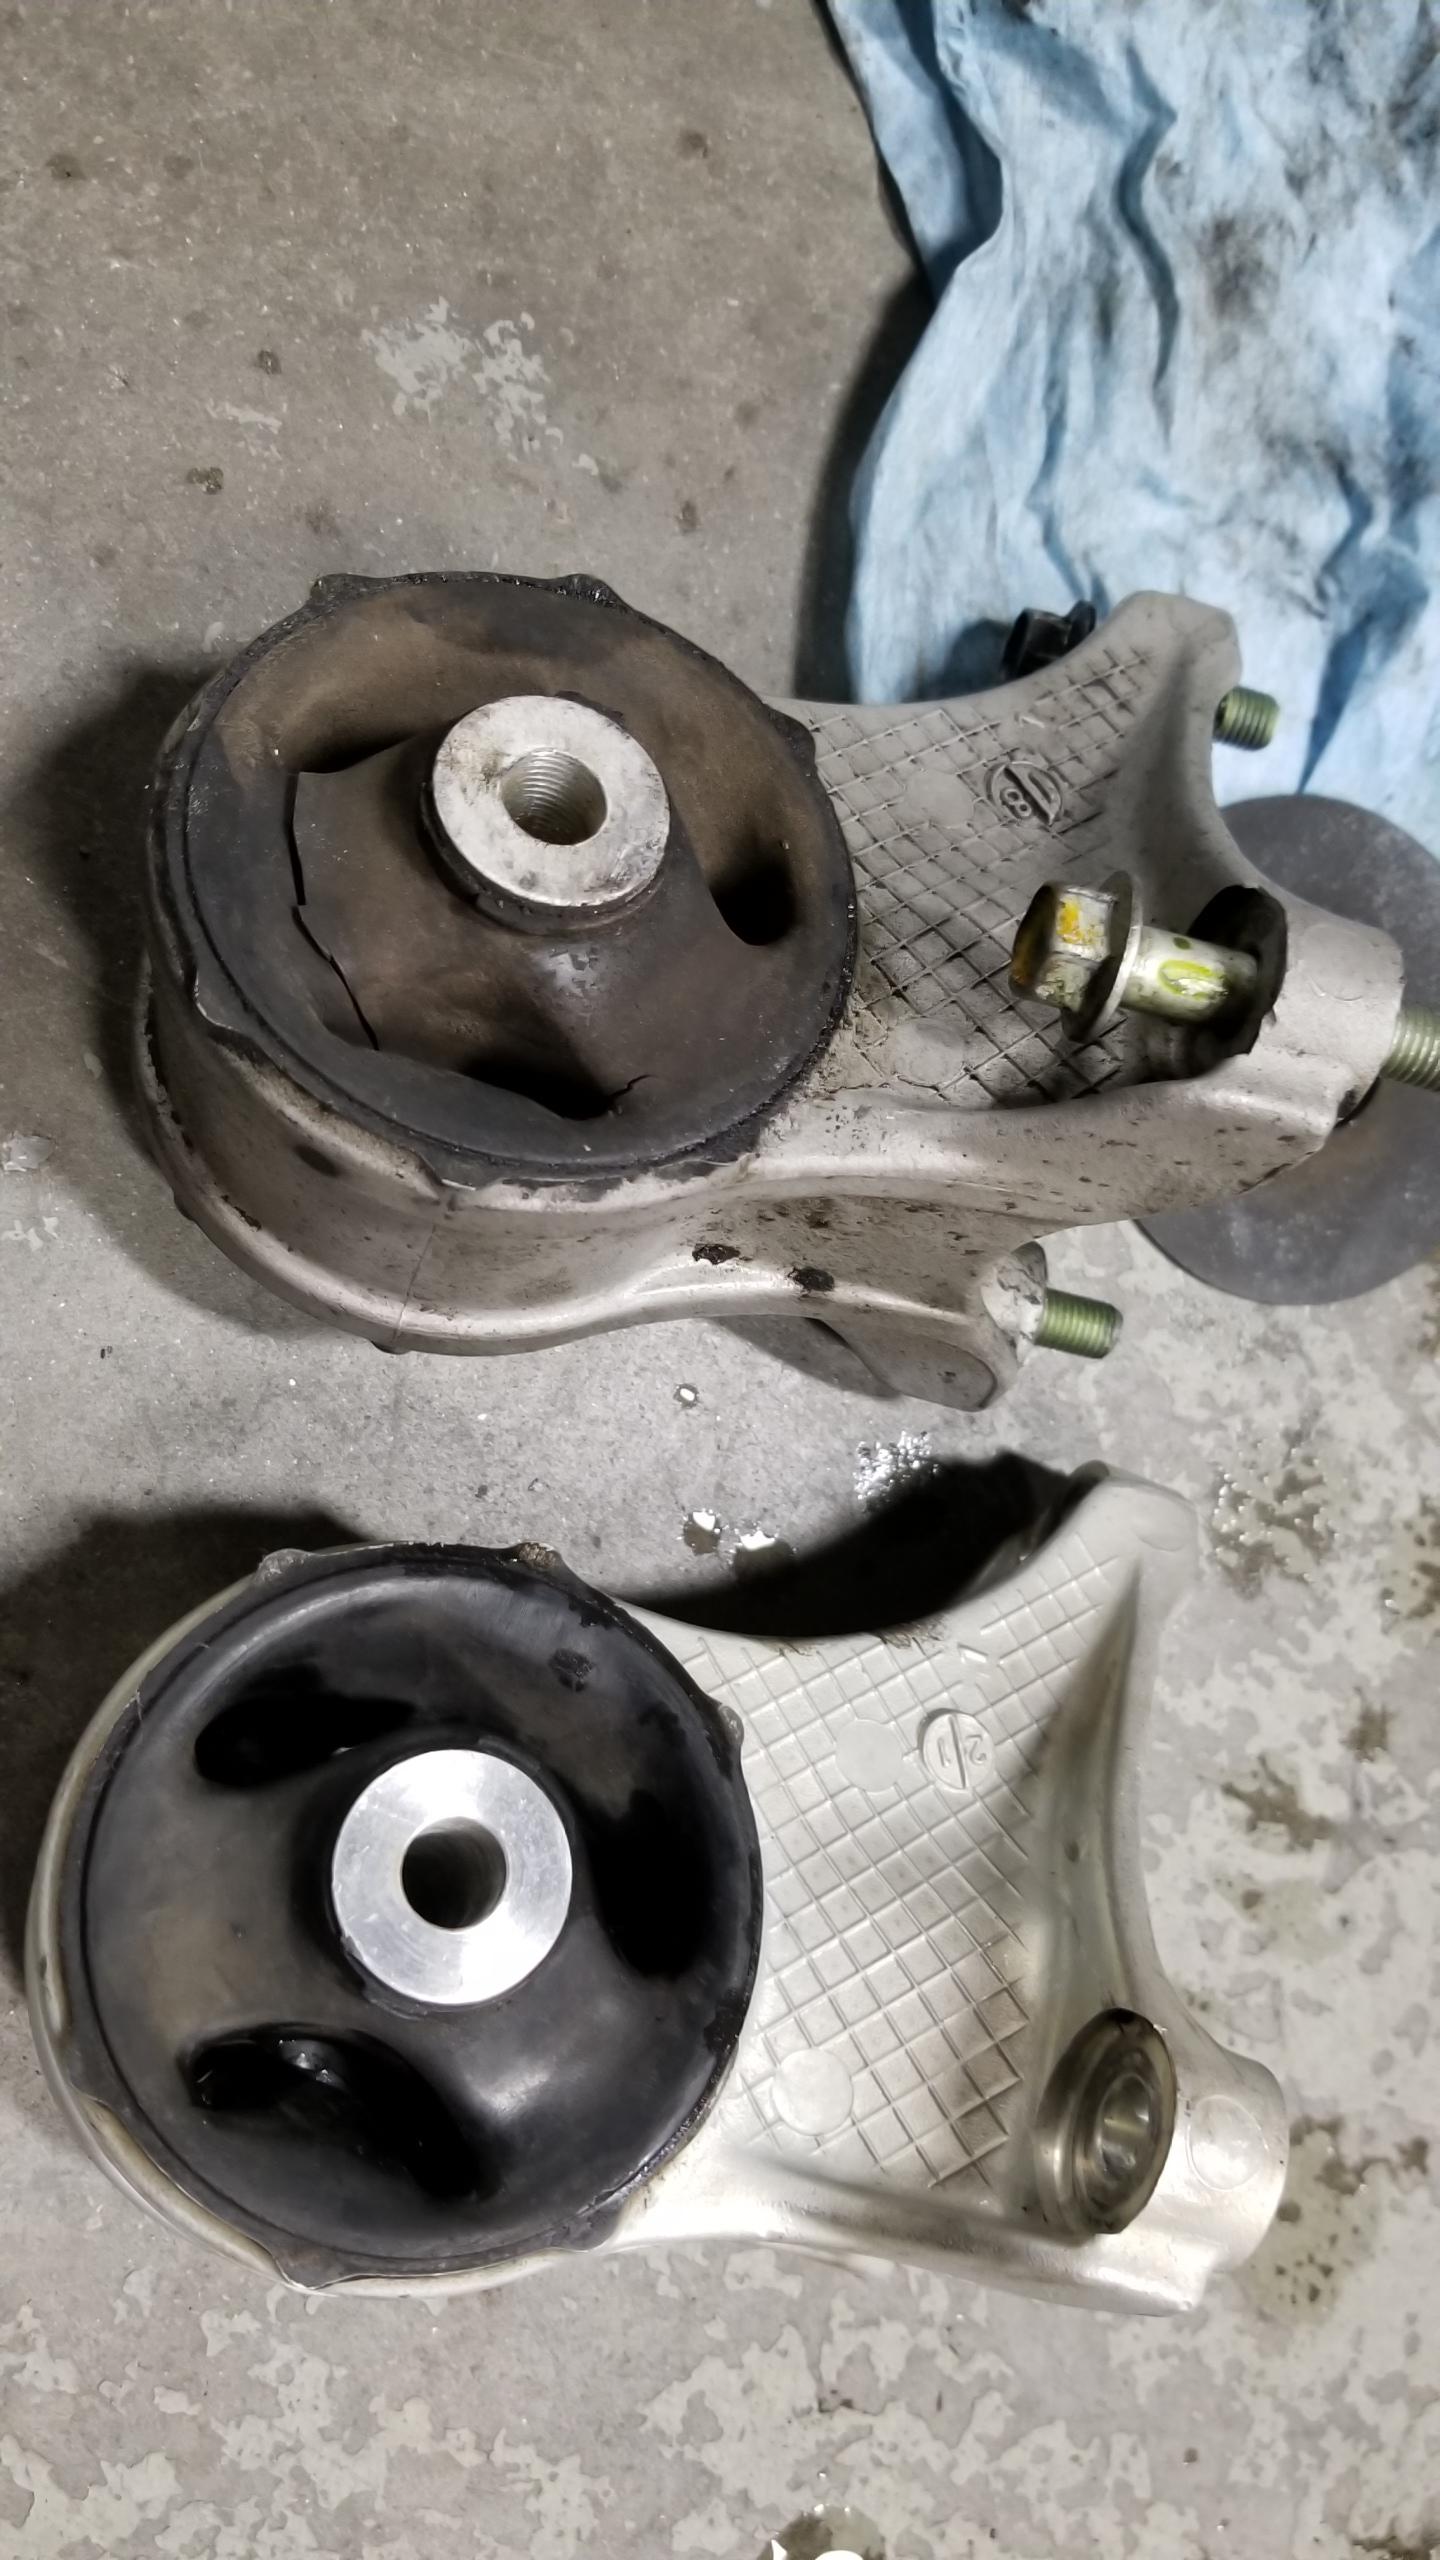
Three bolts later and the front mount came out. Top old, bottom "new" after some clean-up.
H1bD59C.jpg


Lucky that I got all 4 mounts instead of just the A/T specific ones. The old mount rubber was almost completely separated from the bracket.
pnyUXoH.jpg


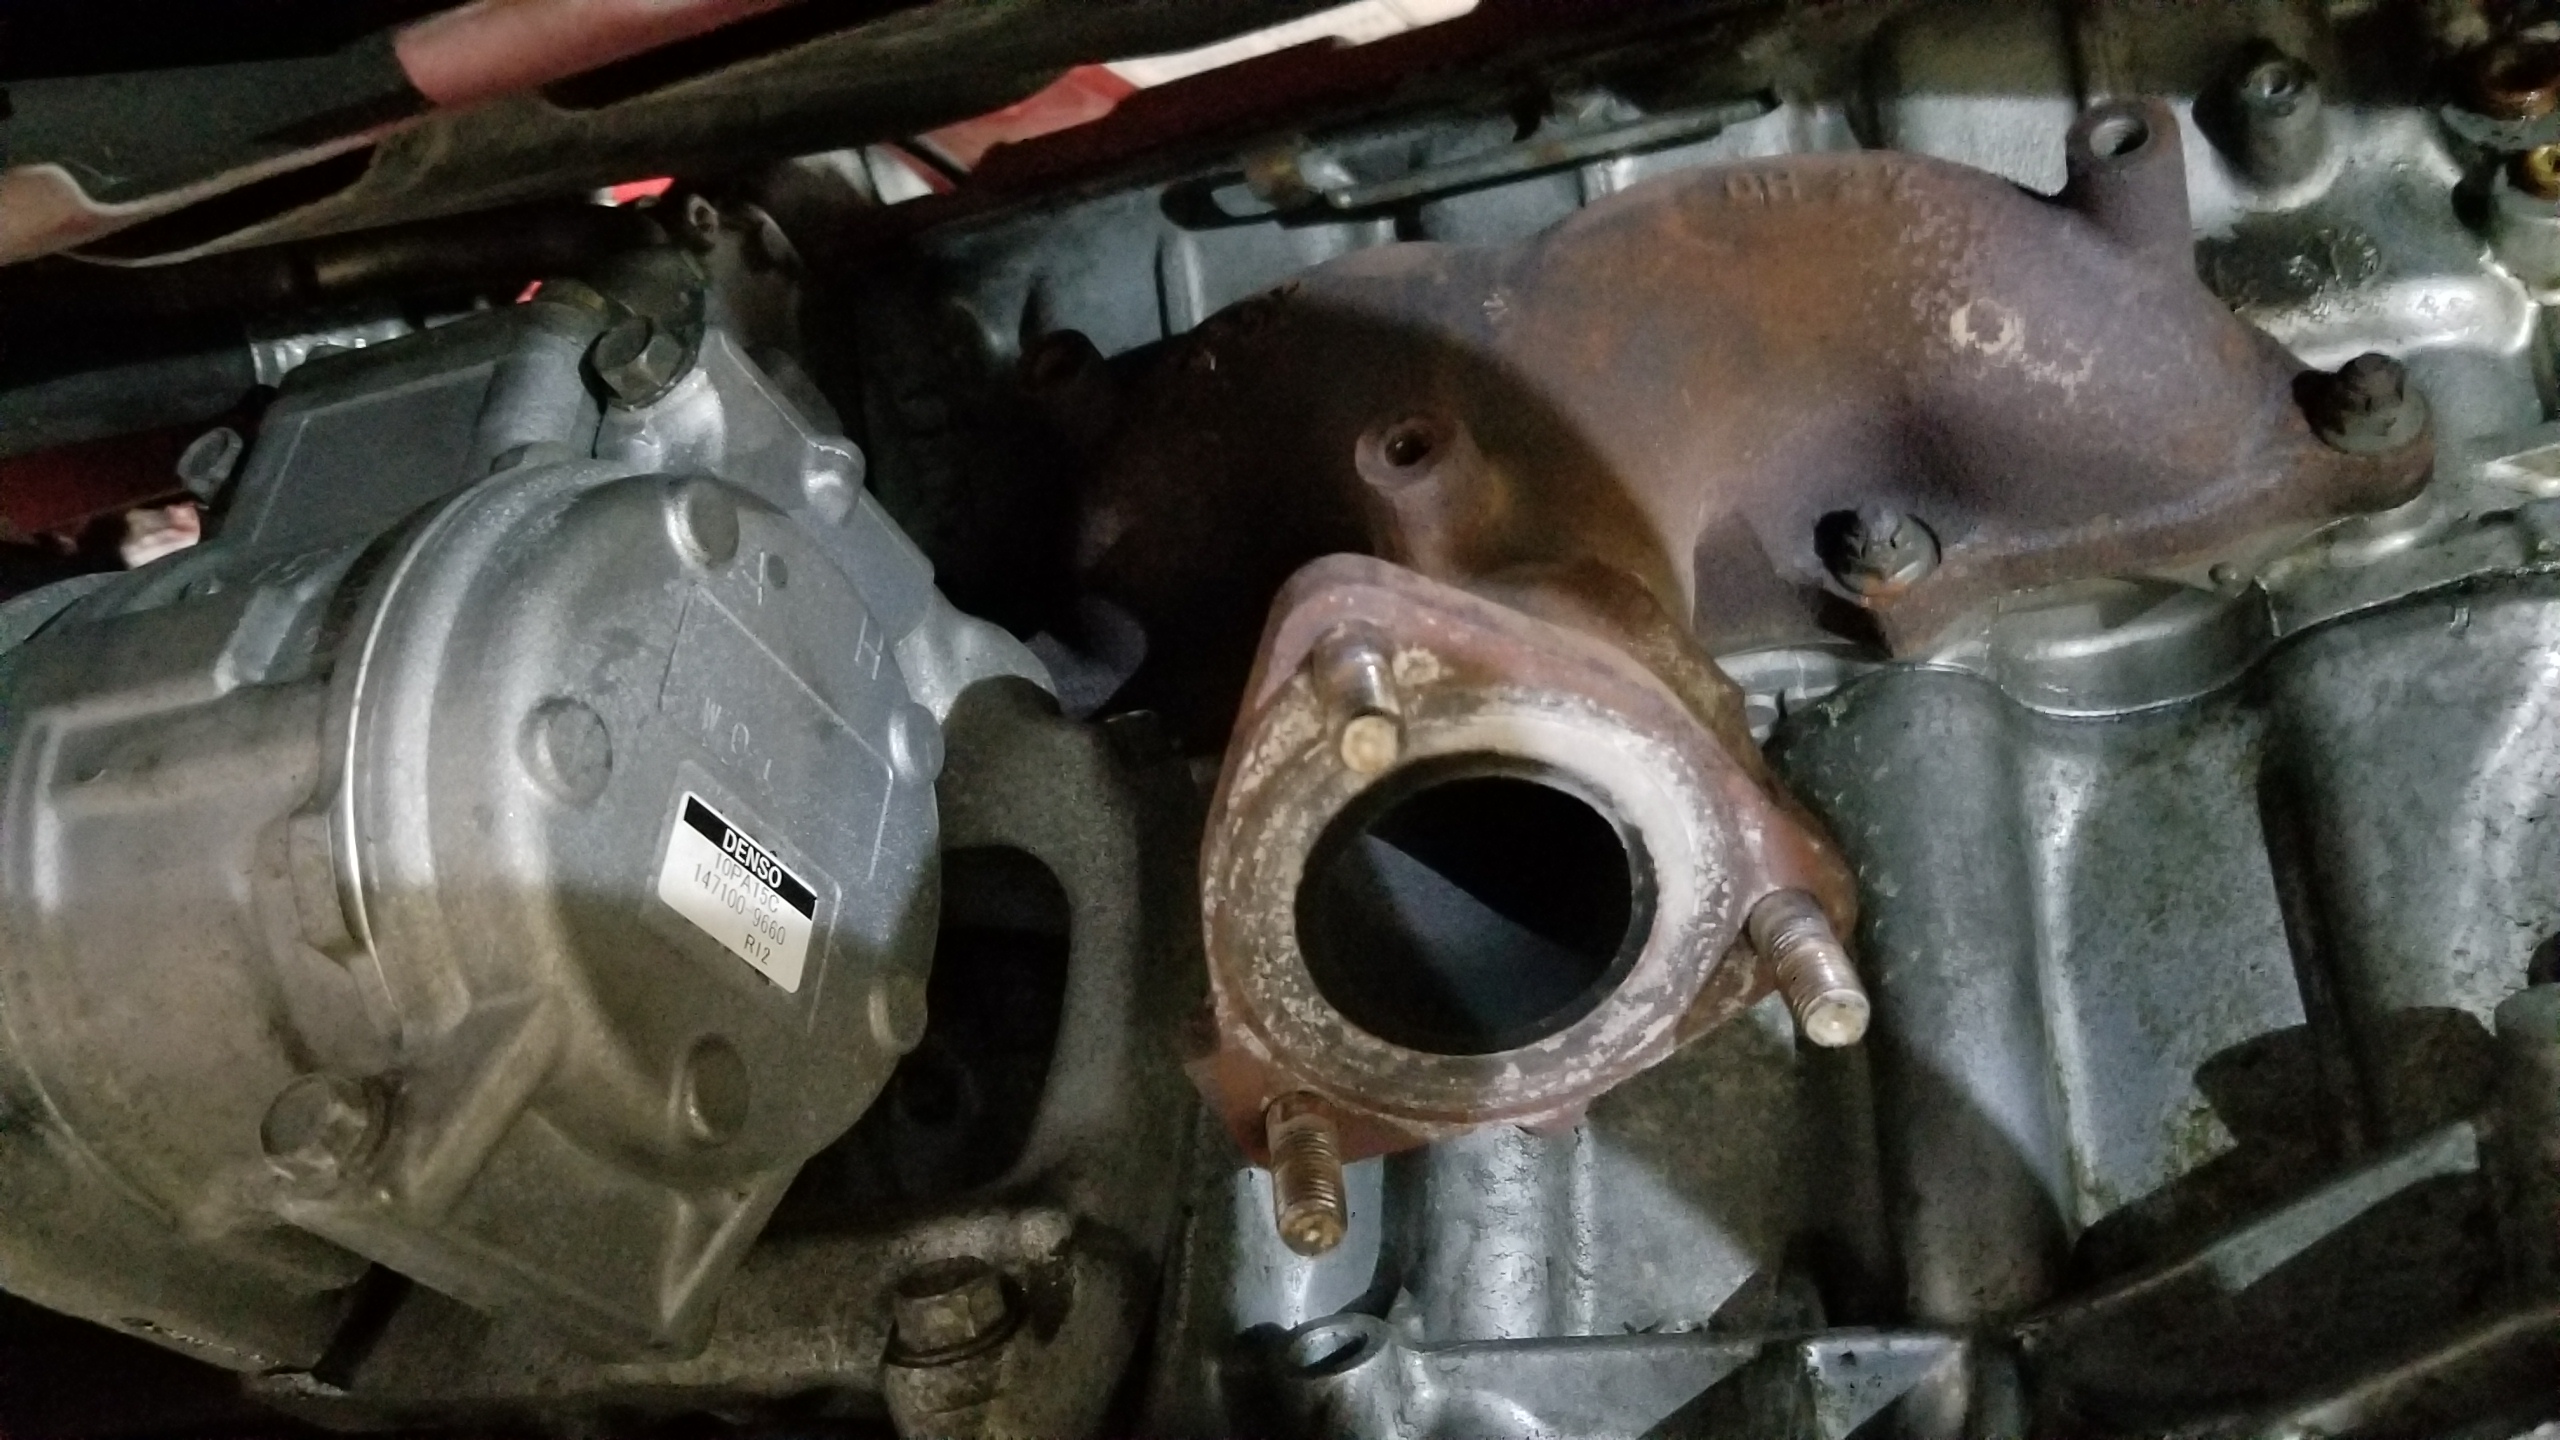
Front heat shields taken off. As you can see, still living that R-12 CFC lifestyle. That'll be a fun day when my A/C eventually goes out.
H9Z5Vft.jpg


Once again, after some penetrating oil and a few combinations of sockets, wrenches, and an impact, the front header came off. Note that I left the A/C compressor alone, a few write-ups say to remove the compressor from the block to get room to access the left-most manifold bolt but I found it unnecessary. You can't really see that stud from the bottom but it's easy enough to remove with a ratcheting wrench or medium length socket & swivel.

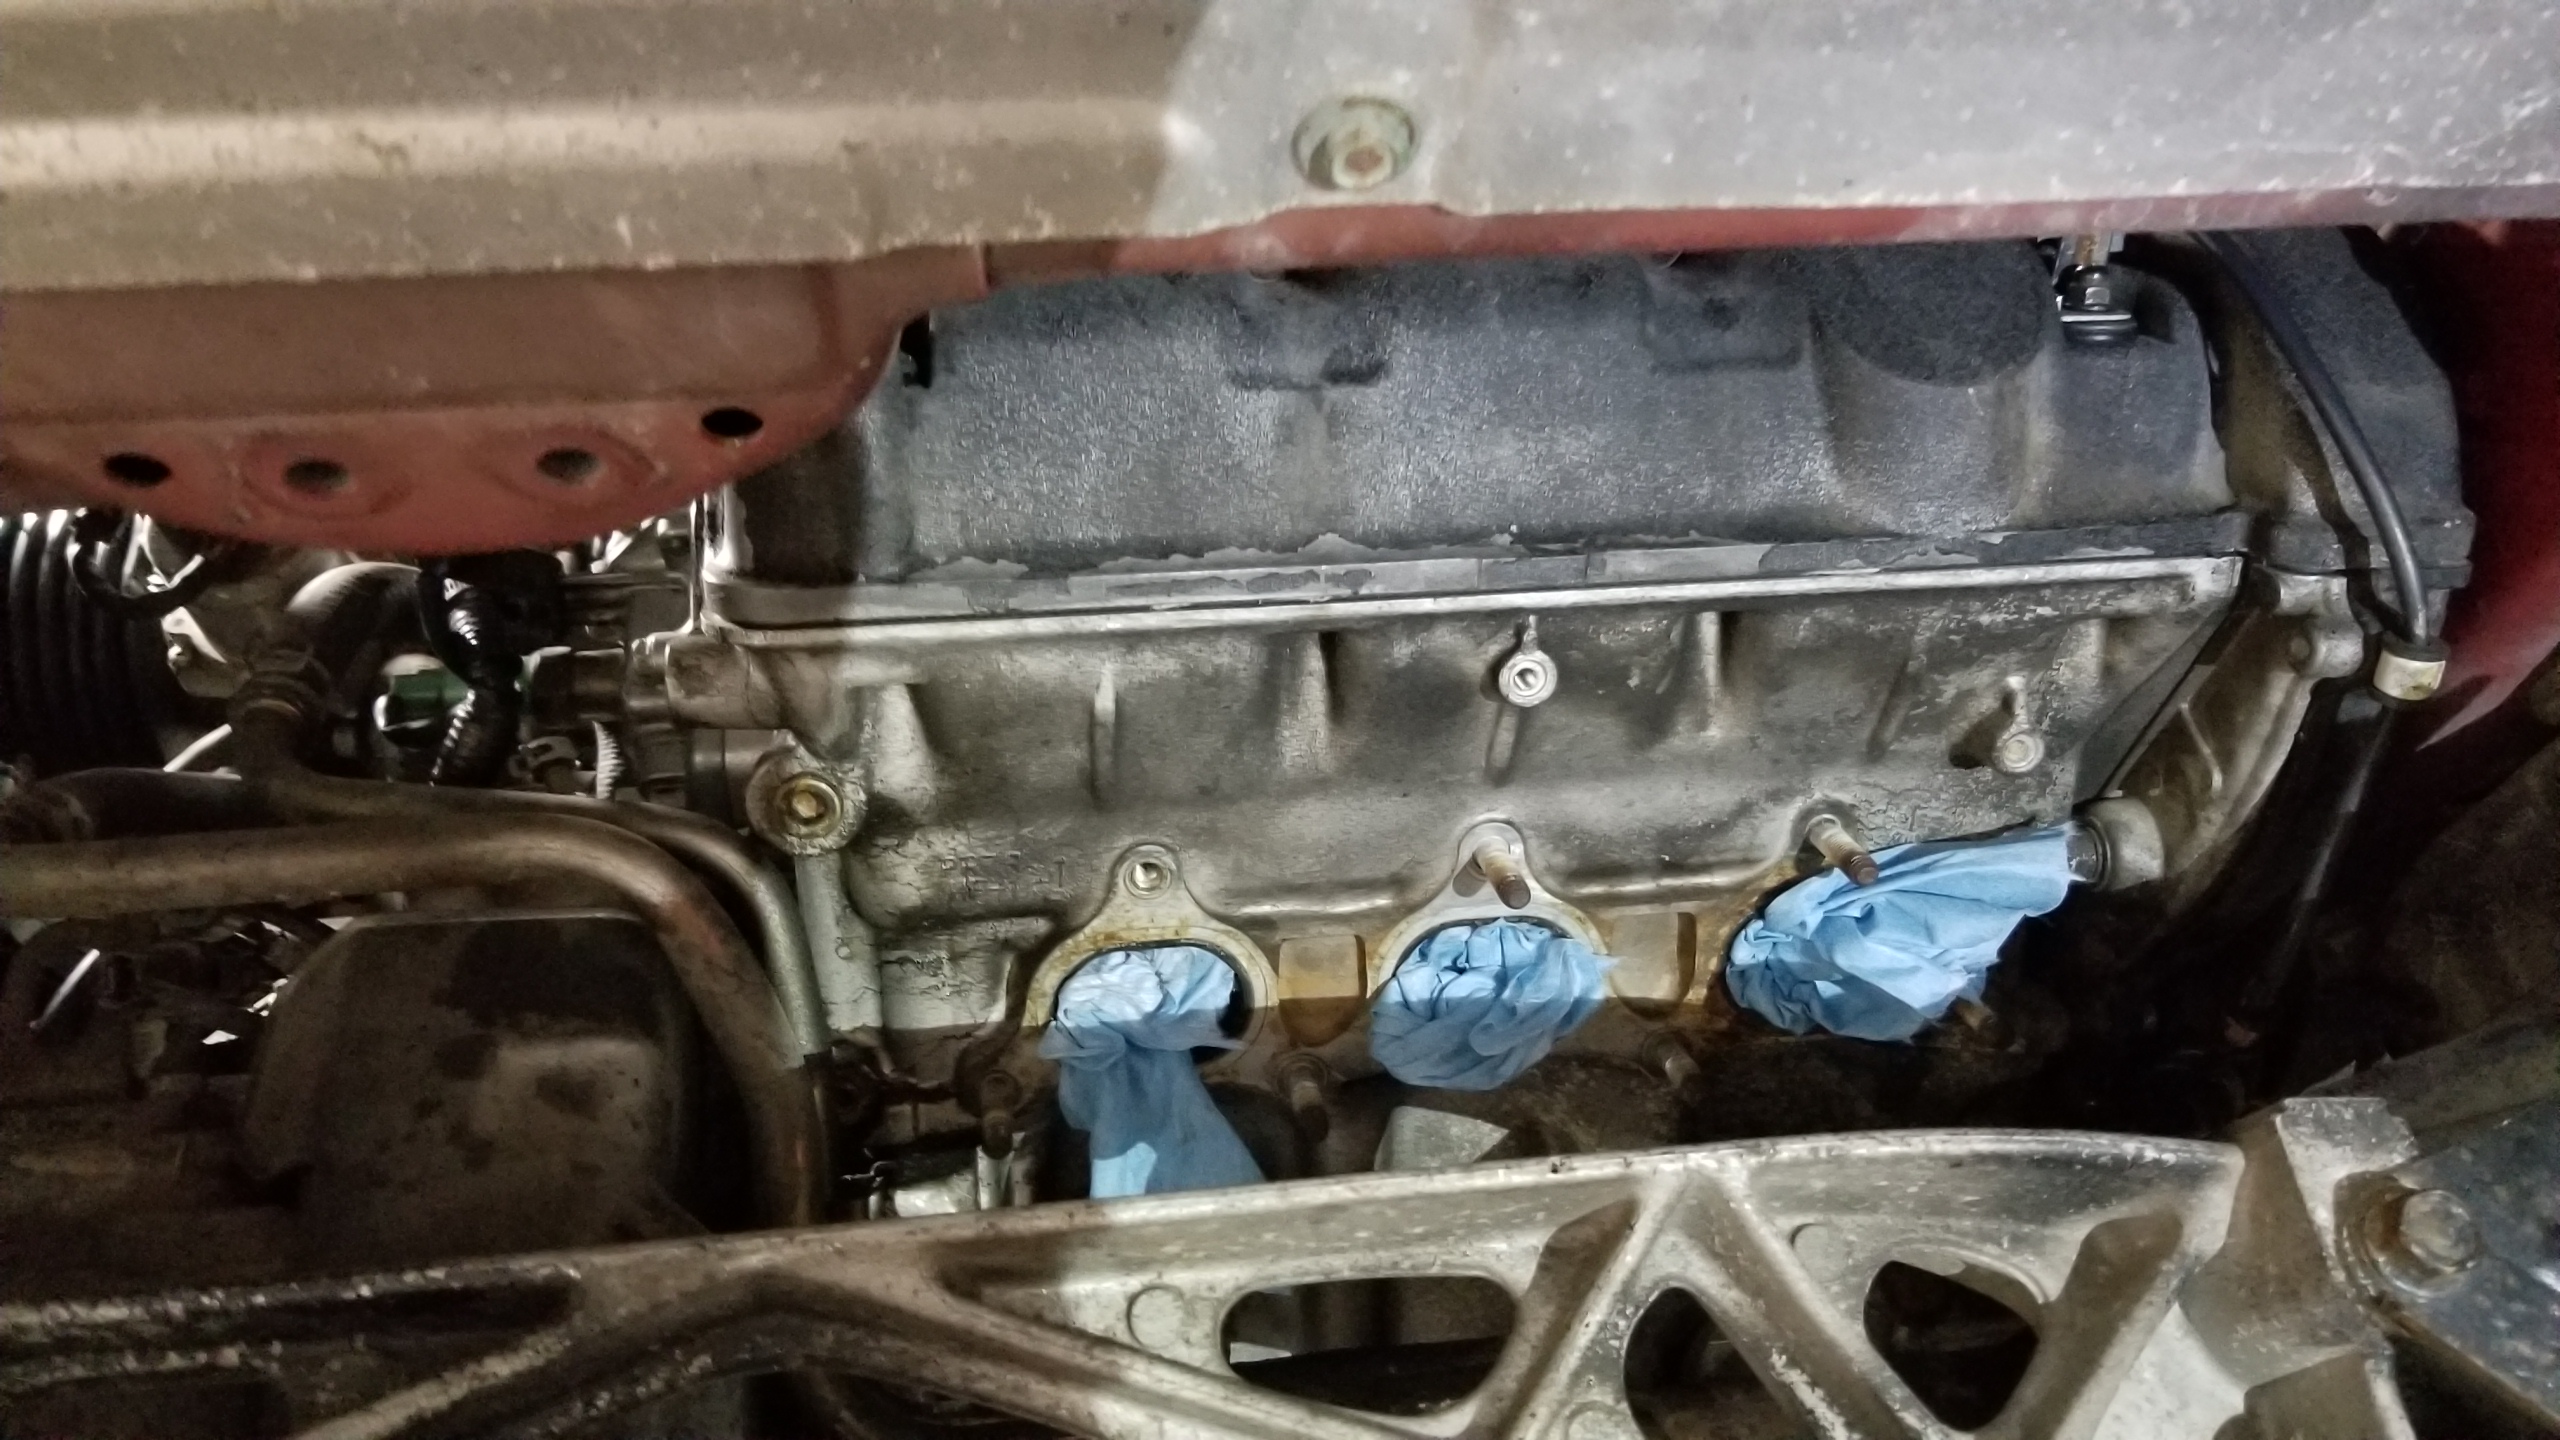
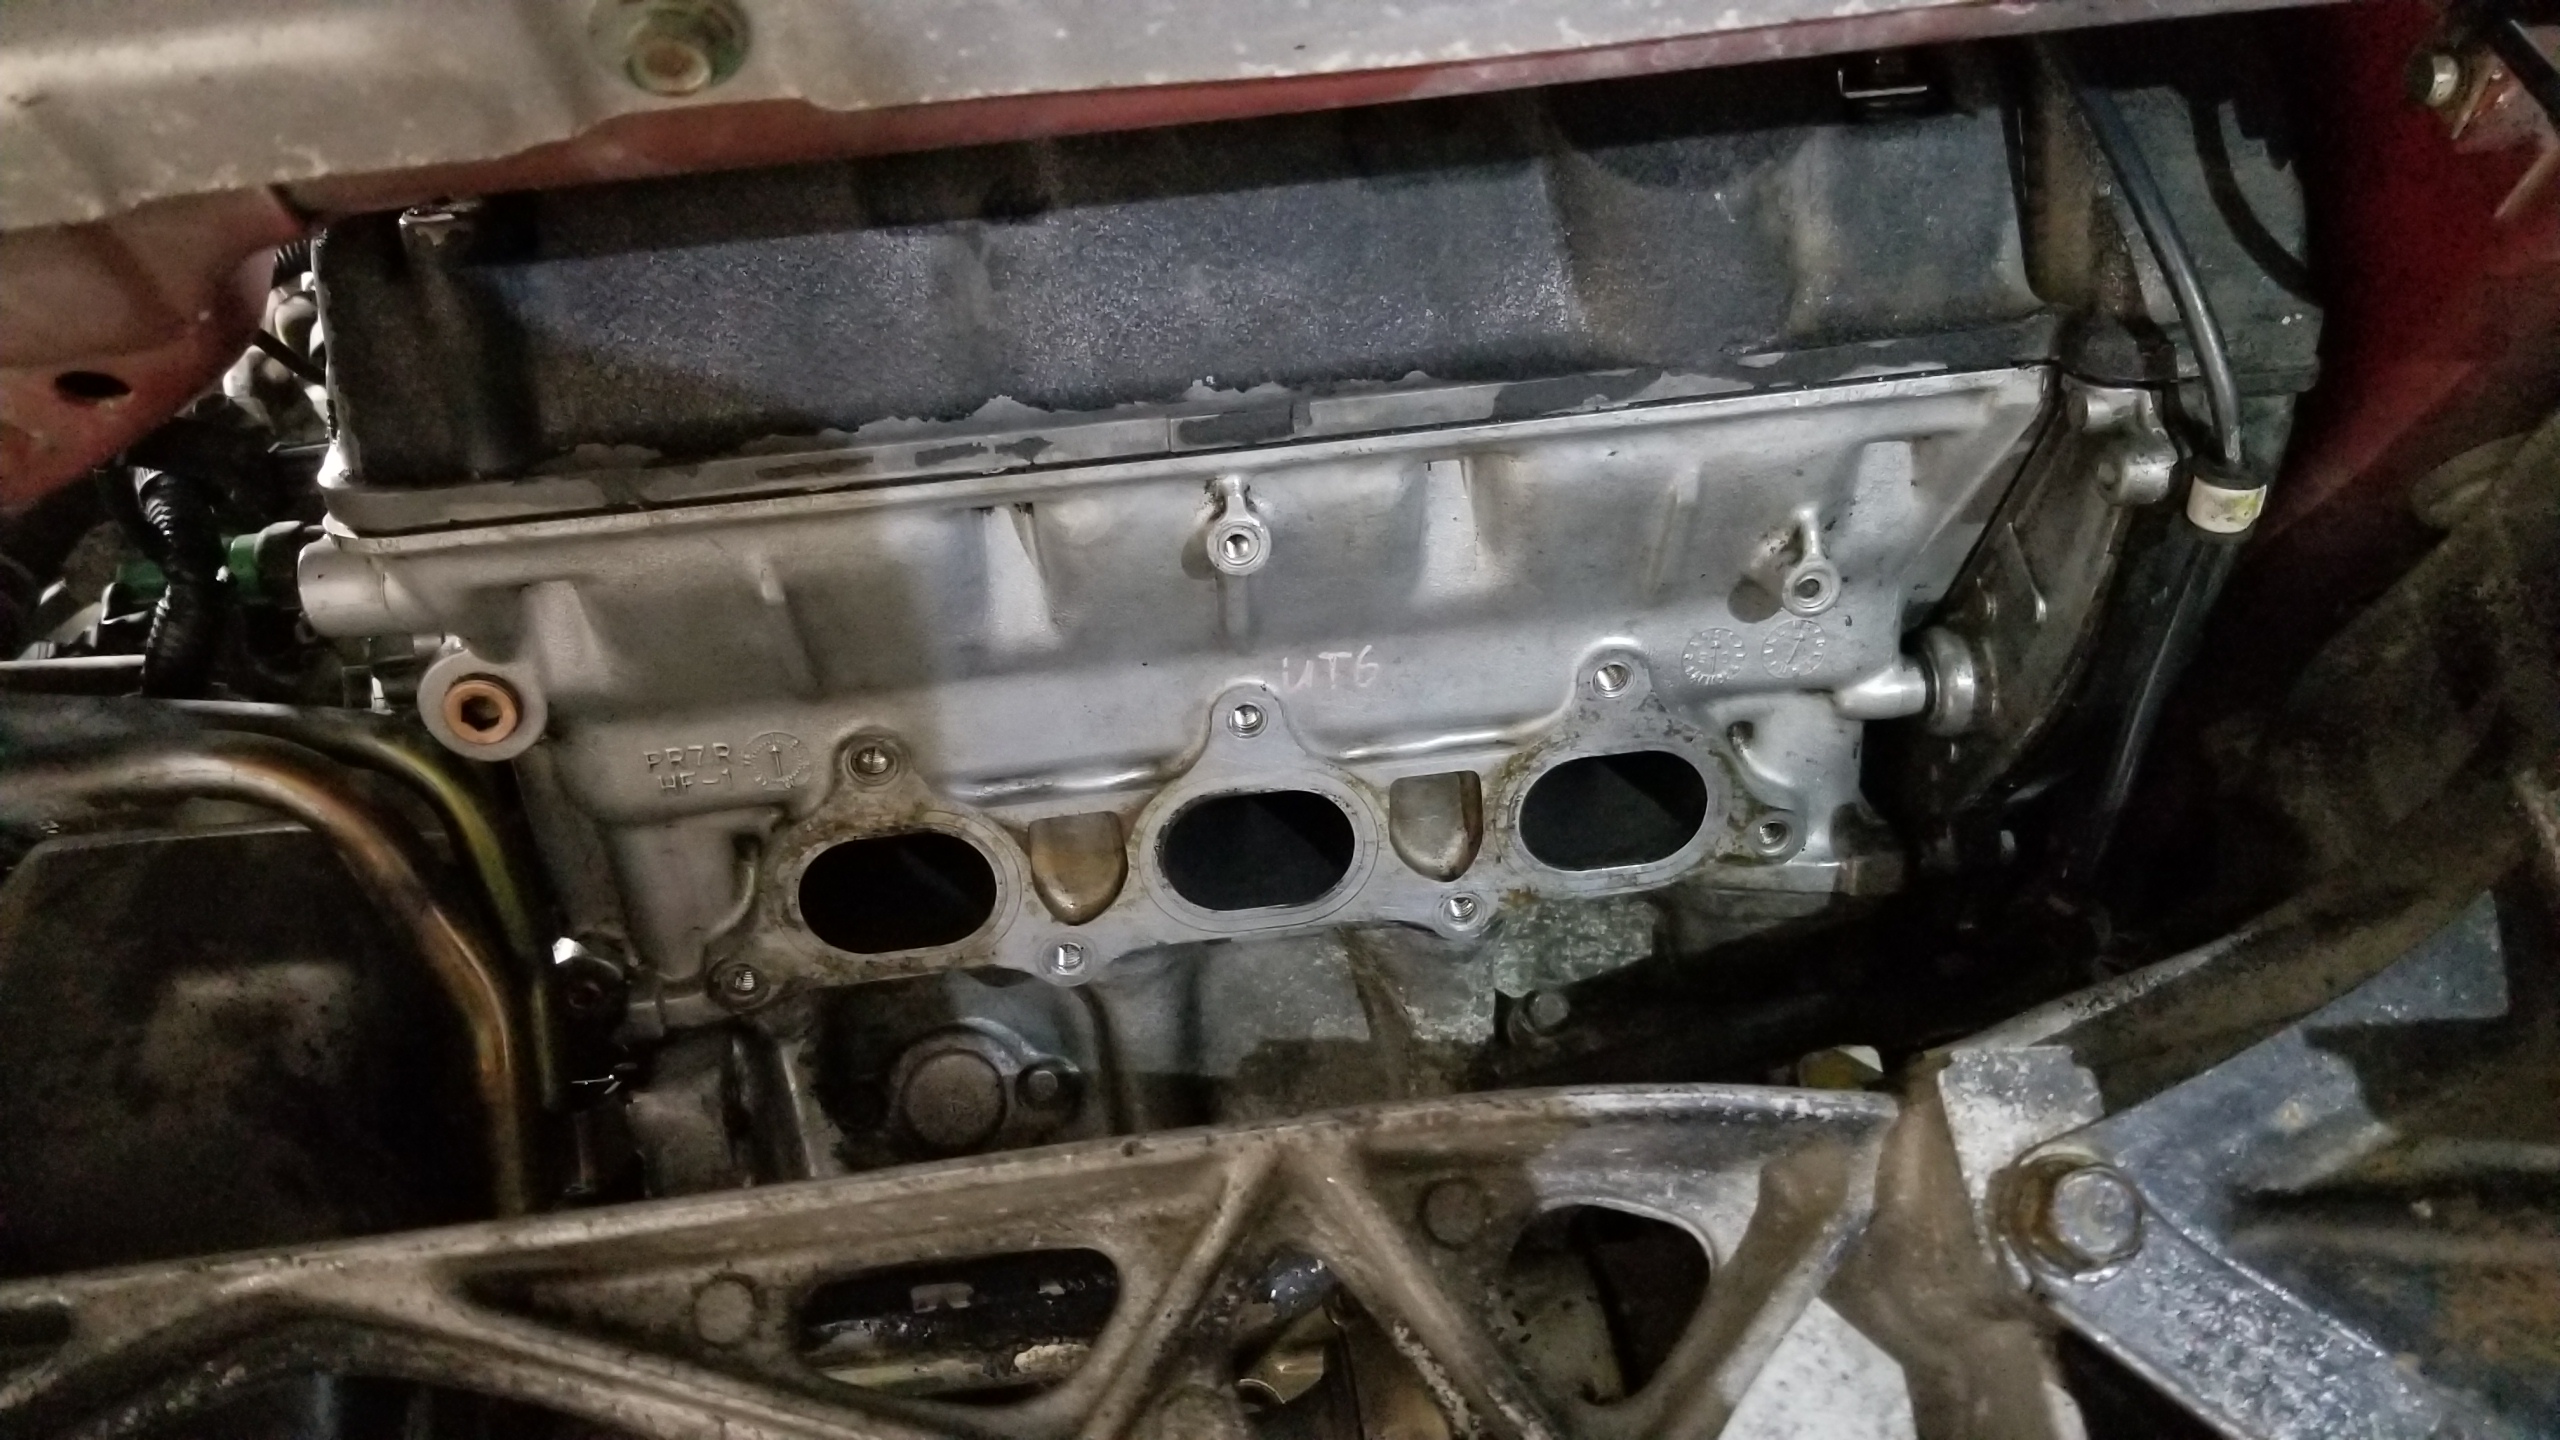
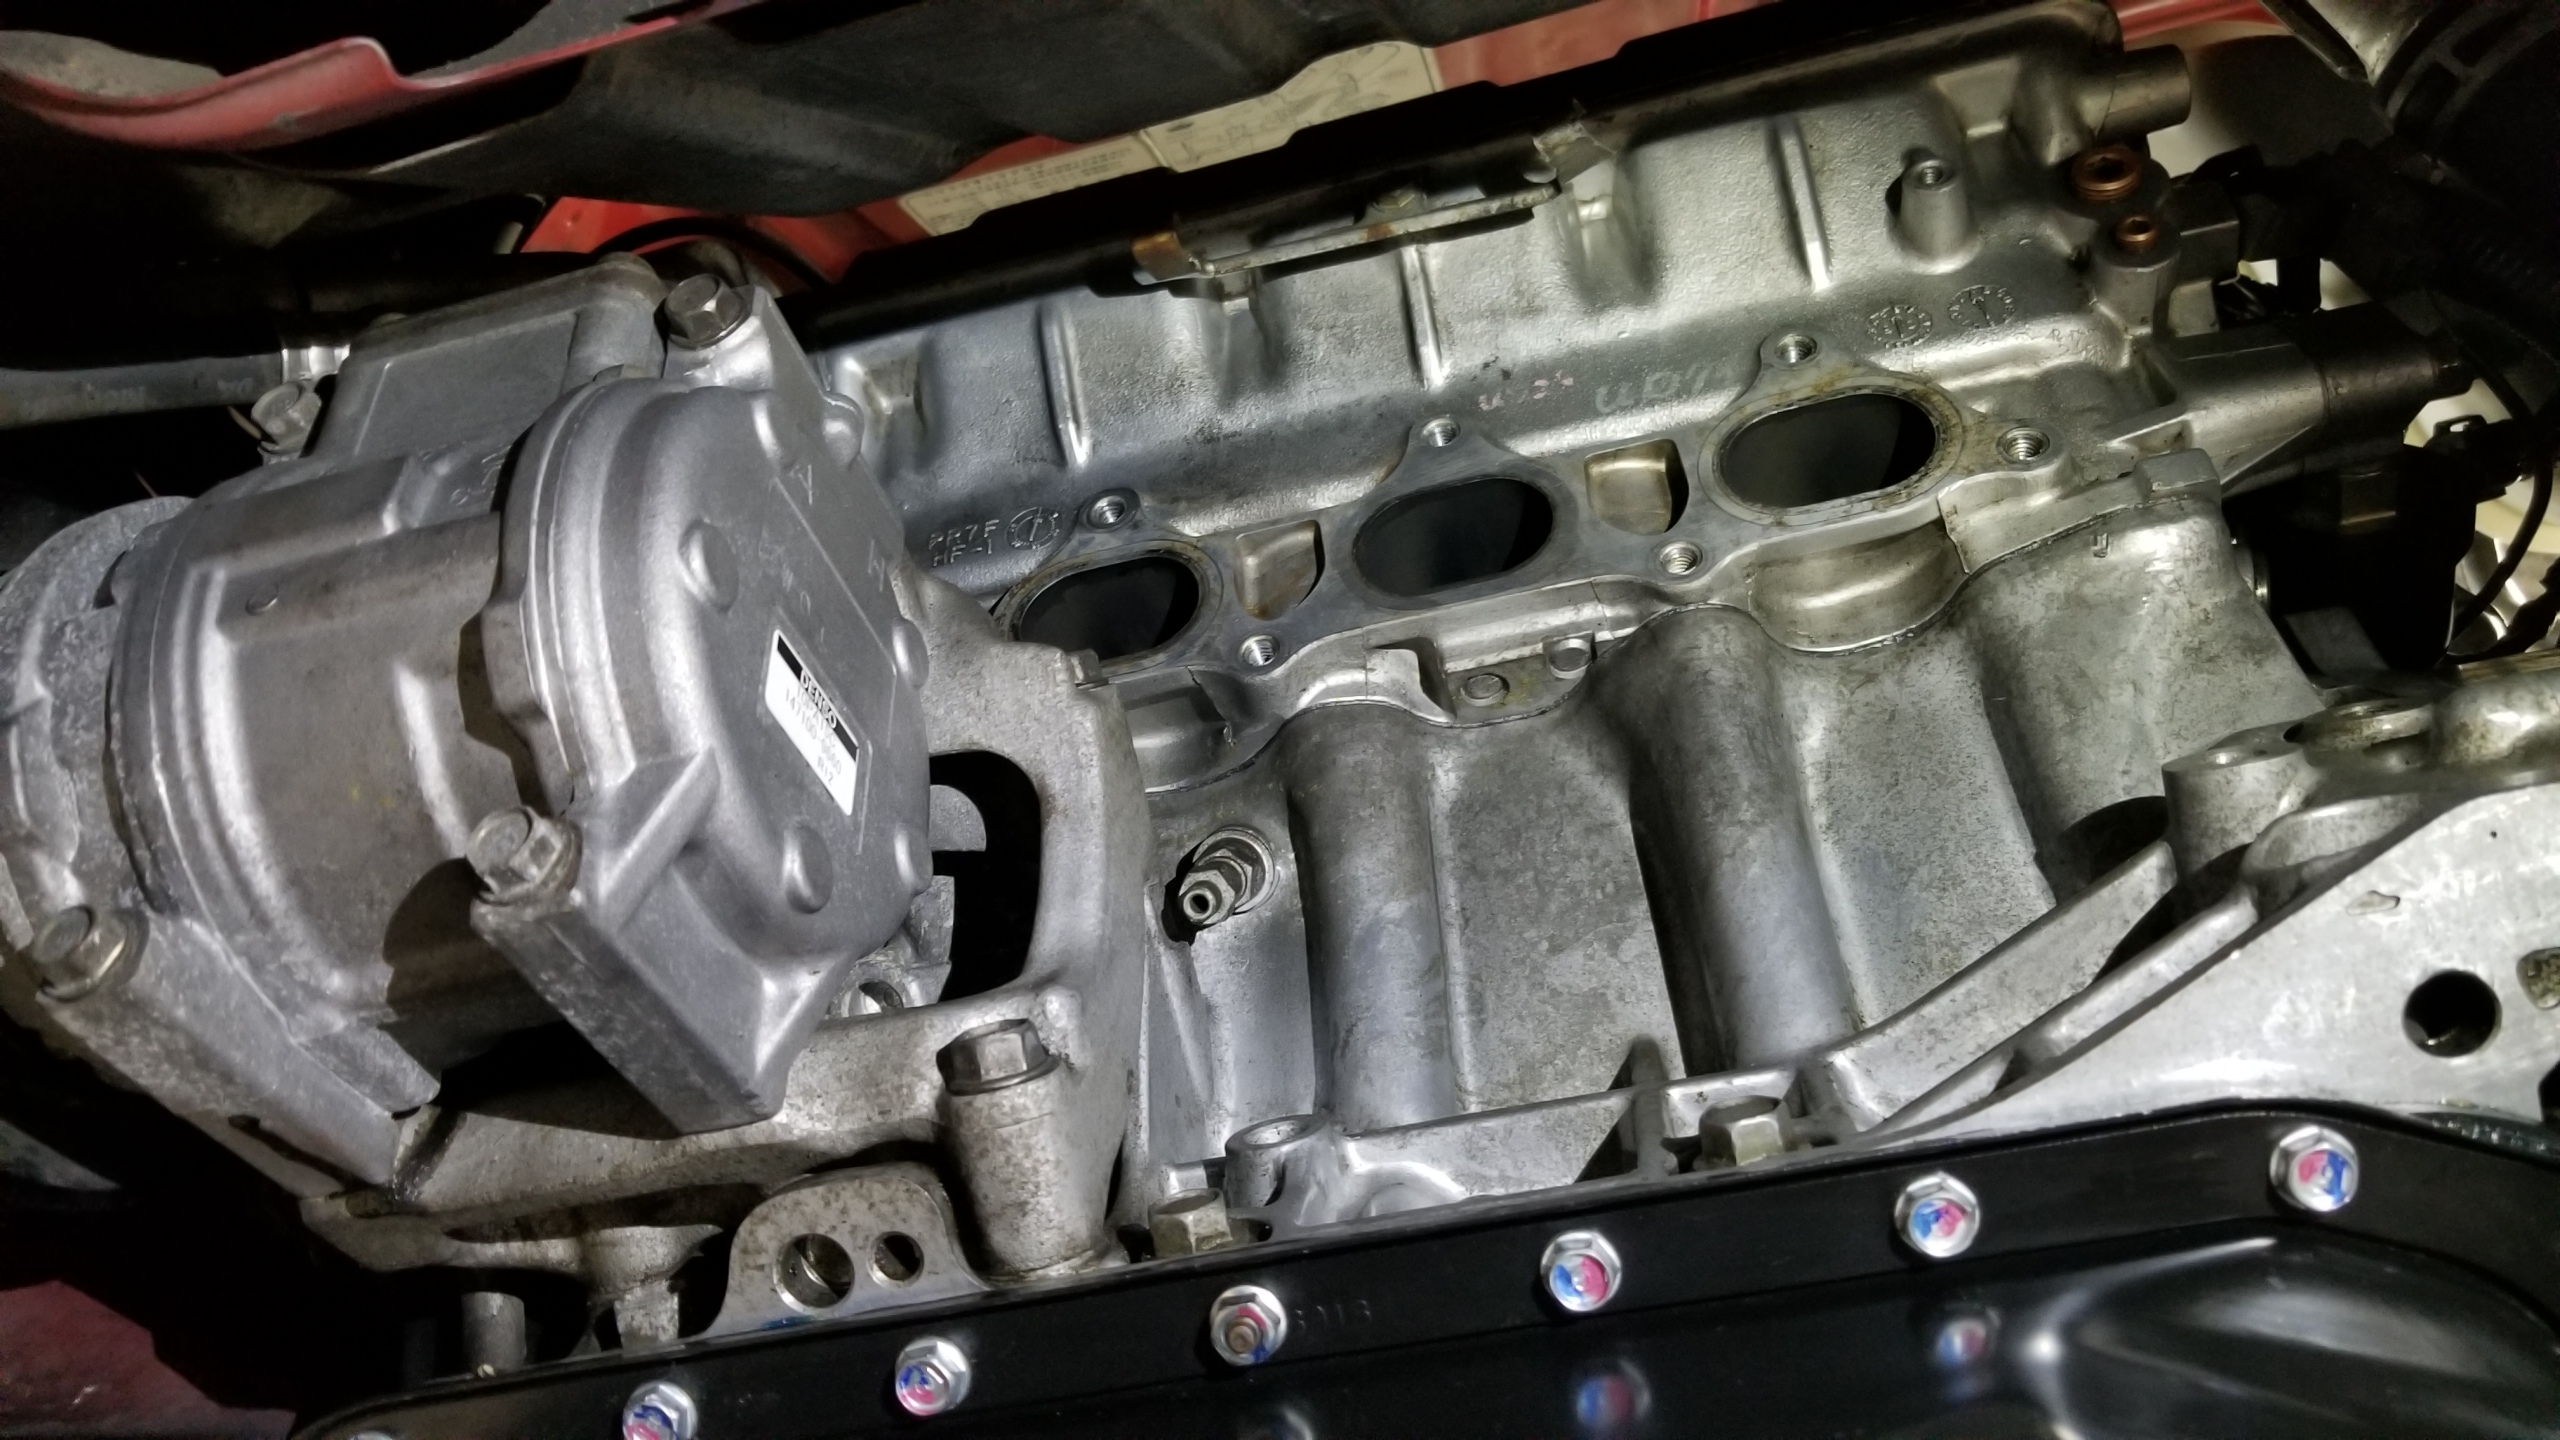
Did the same trick to remove the studs and spent some time cleaning off the block to remove grime from past oil leaks and general schmoo.
e3U7xUY.jpg


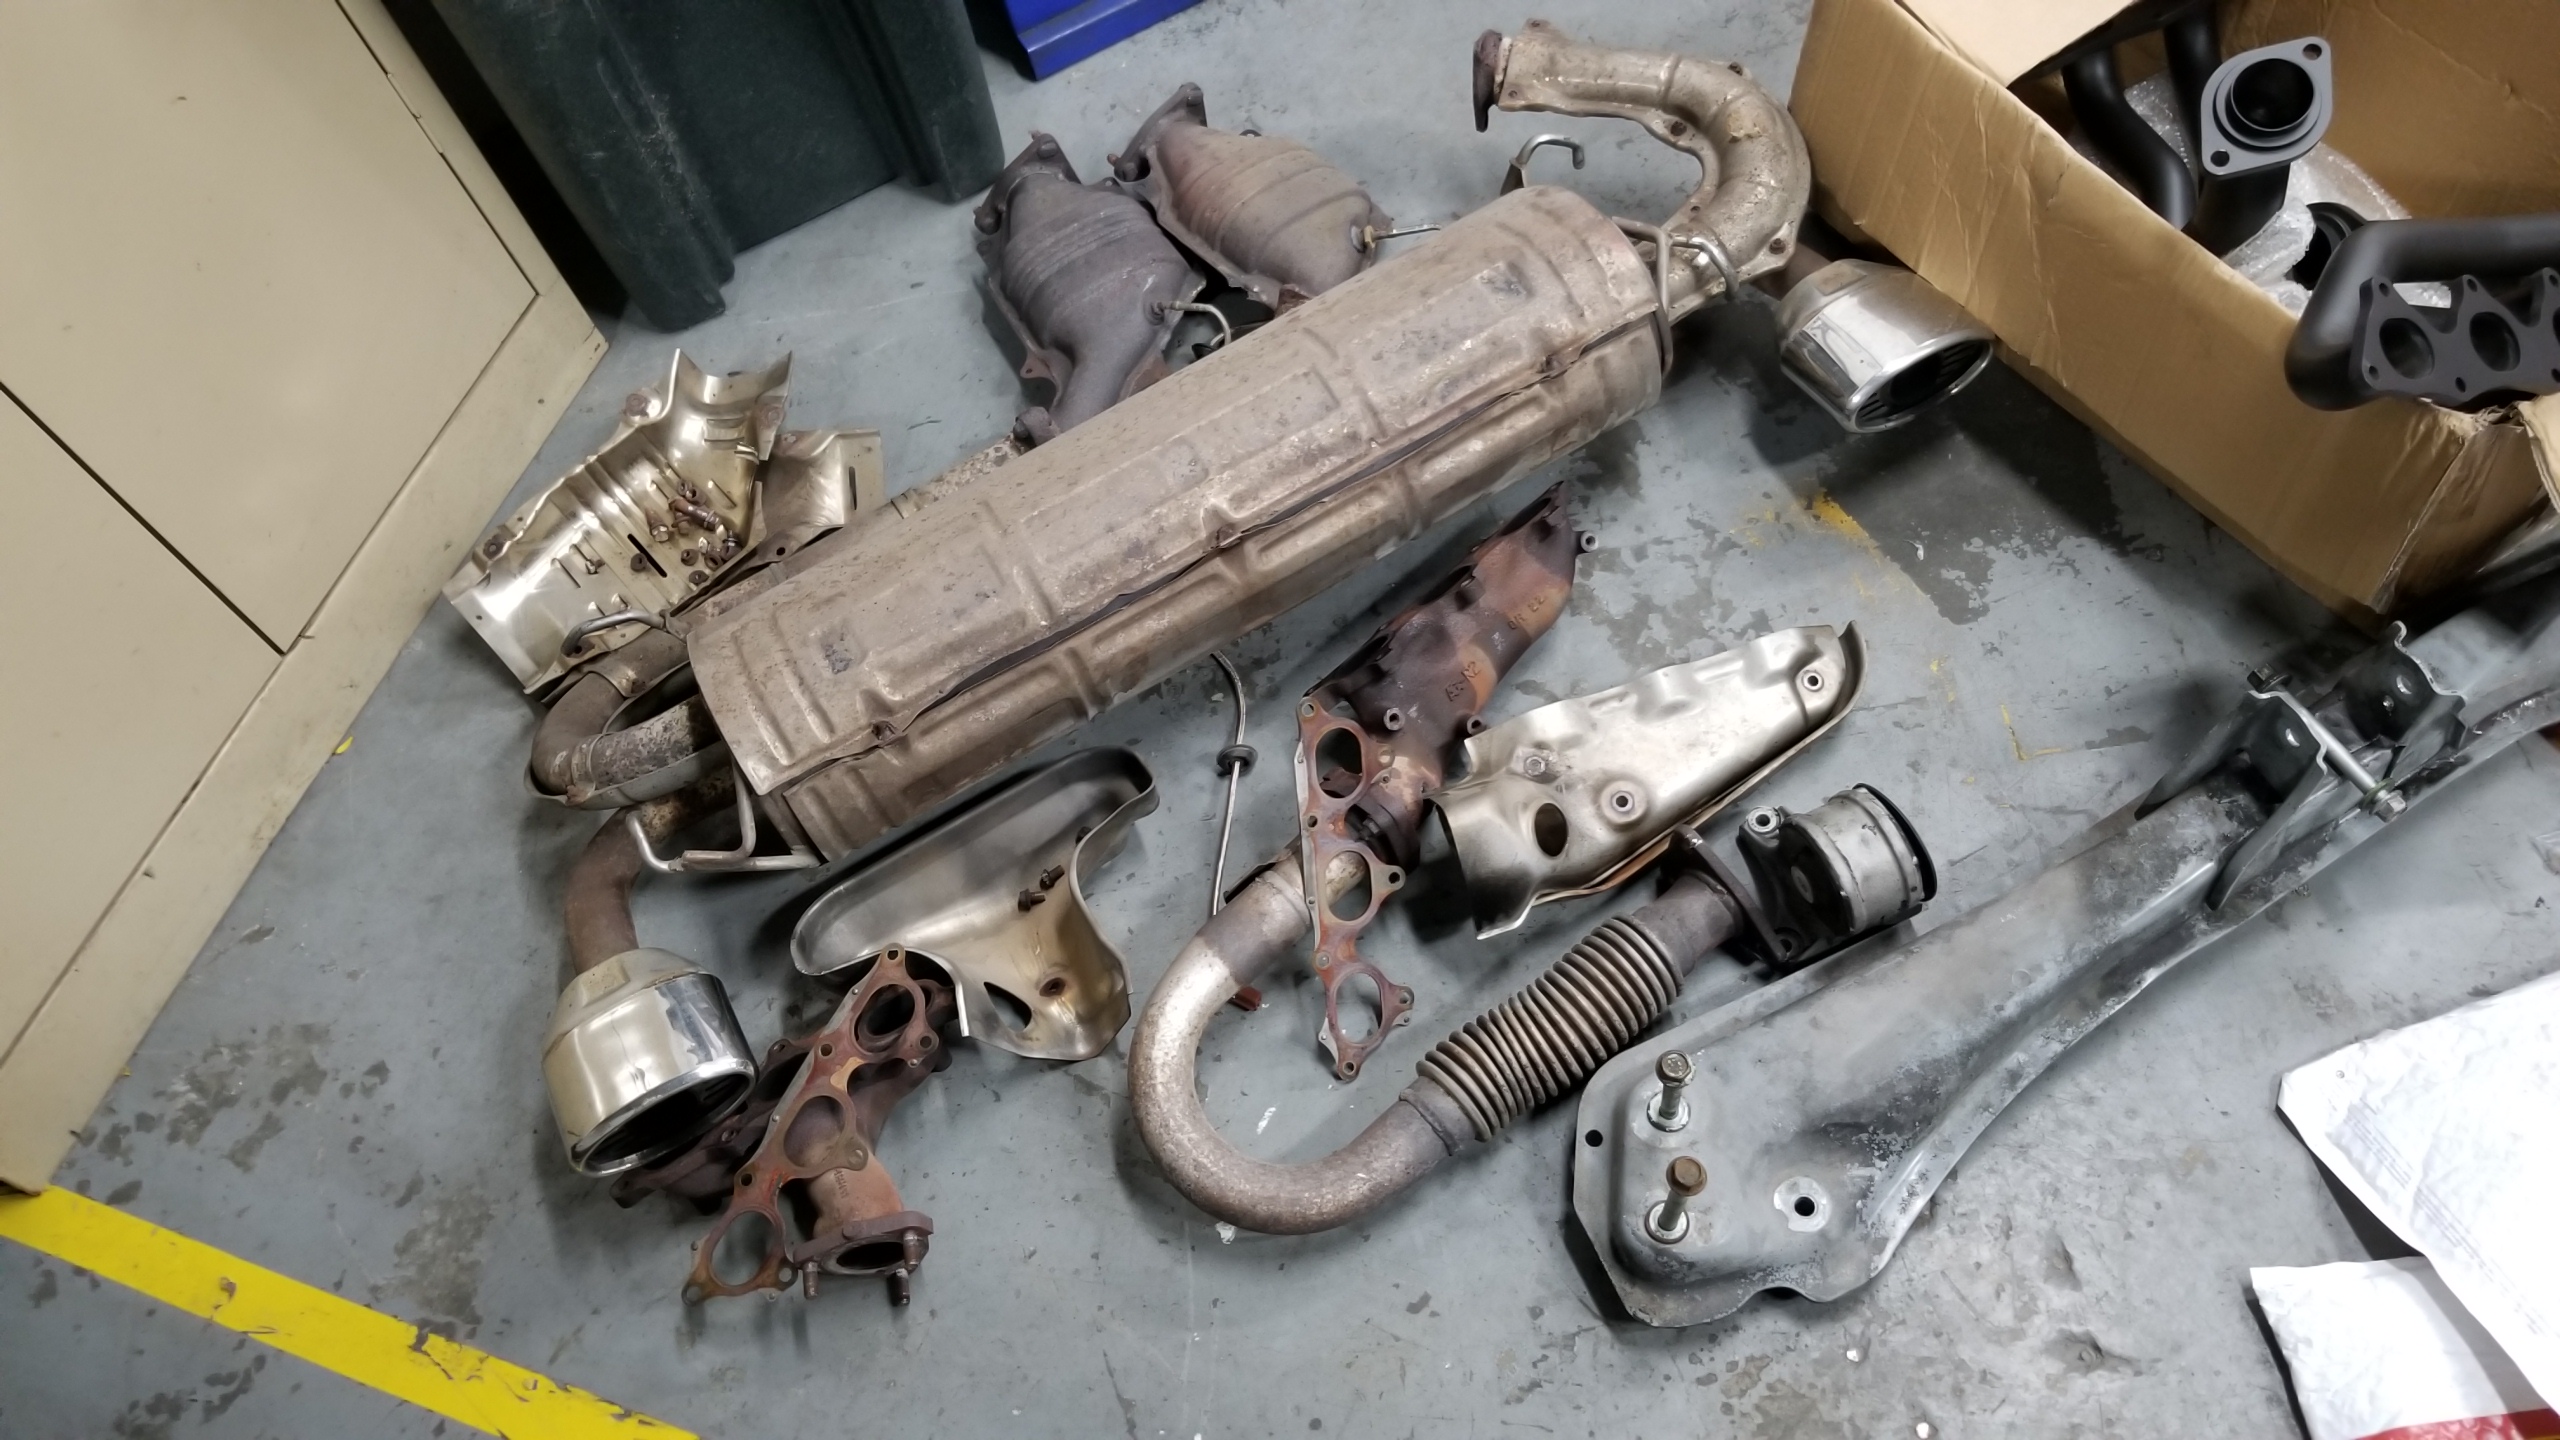
The pile of crap keeps growing. Most of this is fortunately not going back on.
CEYFVaR.jpg


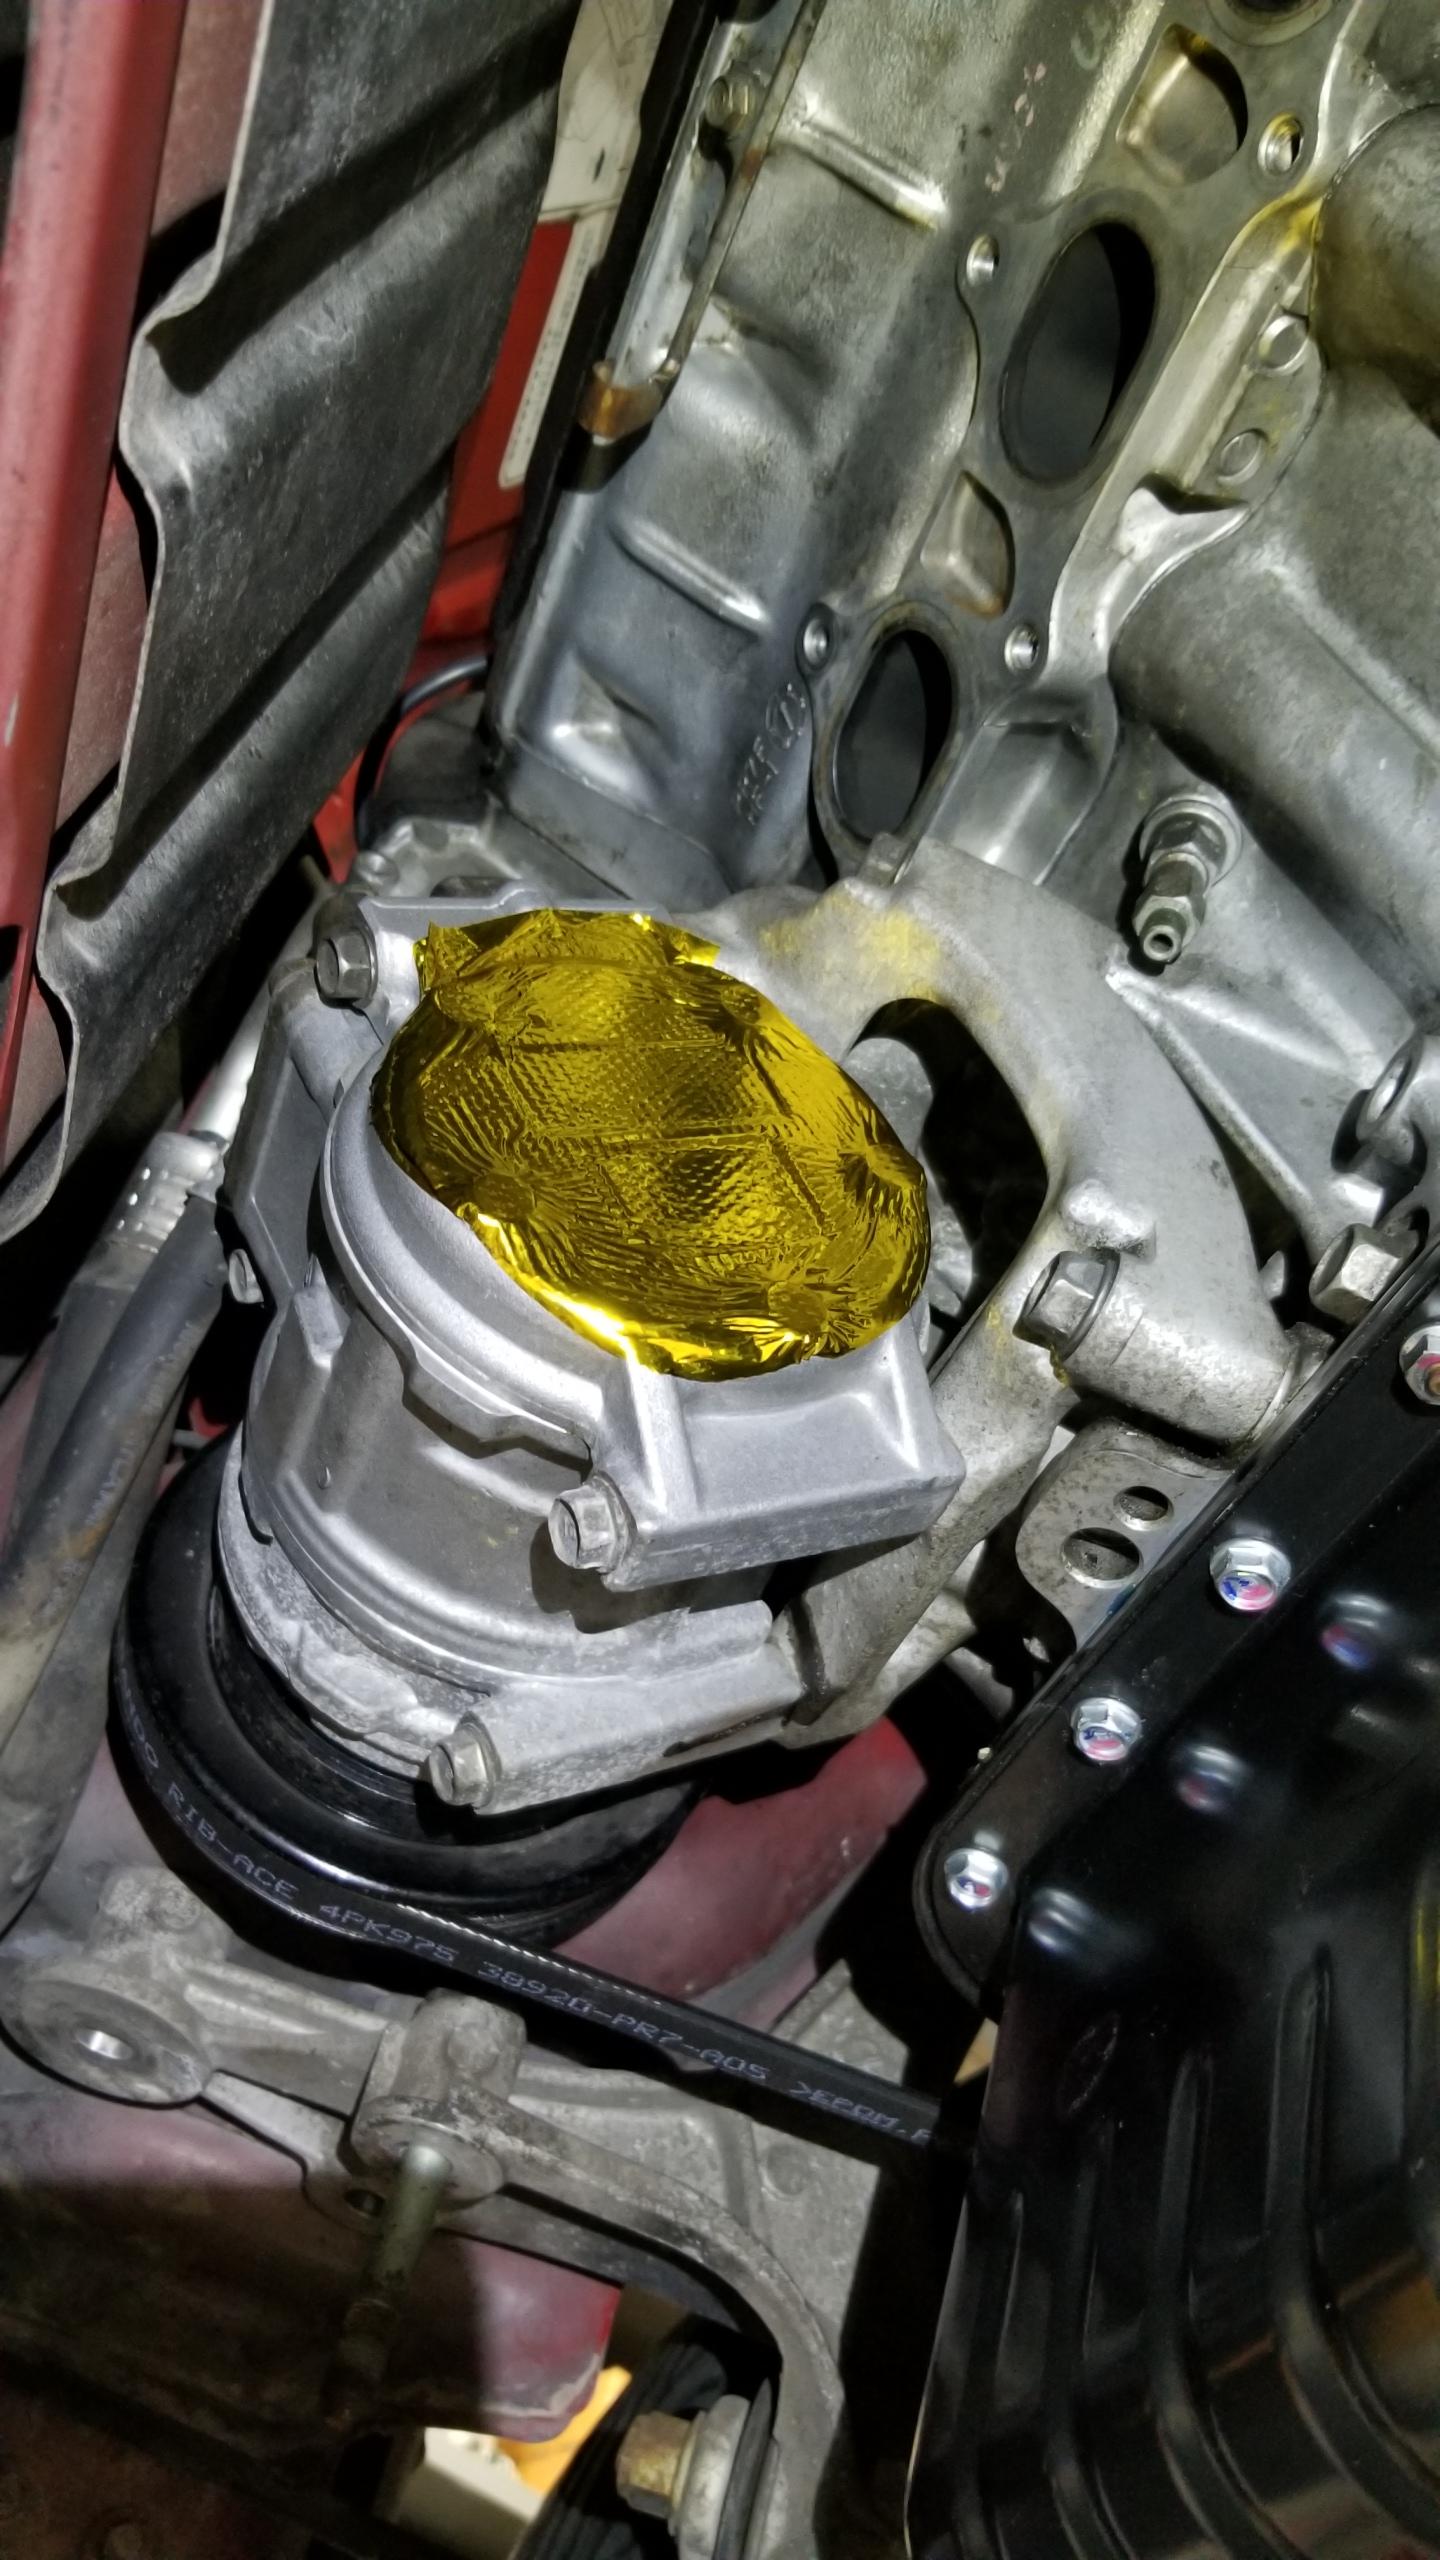
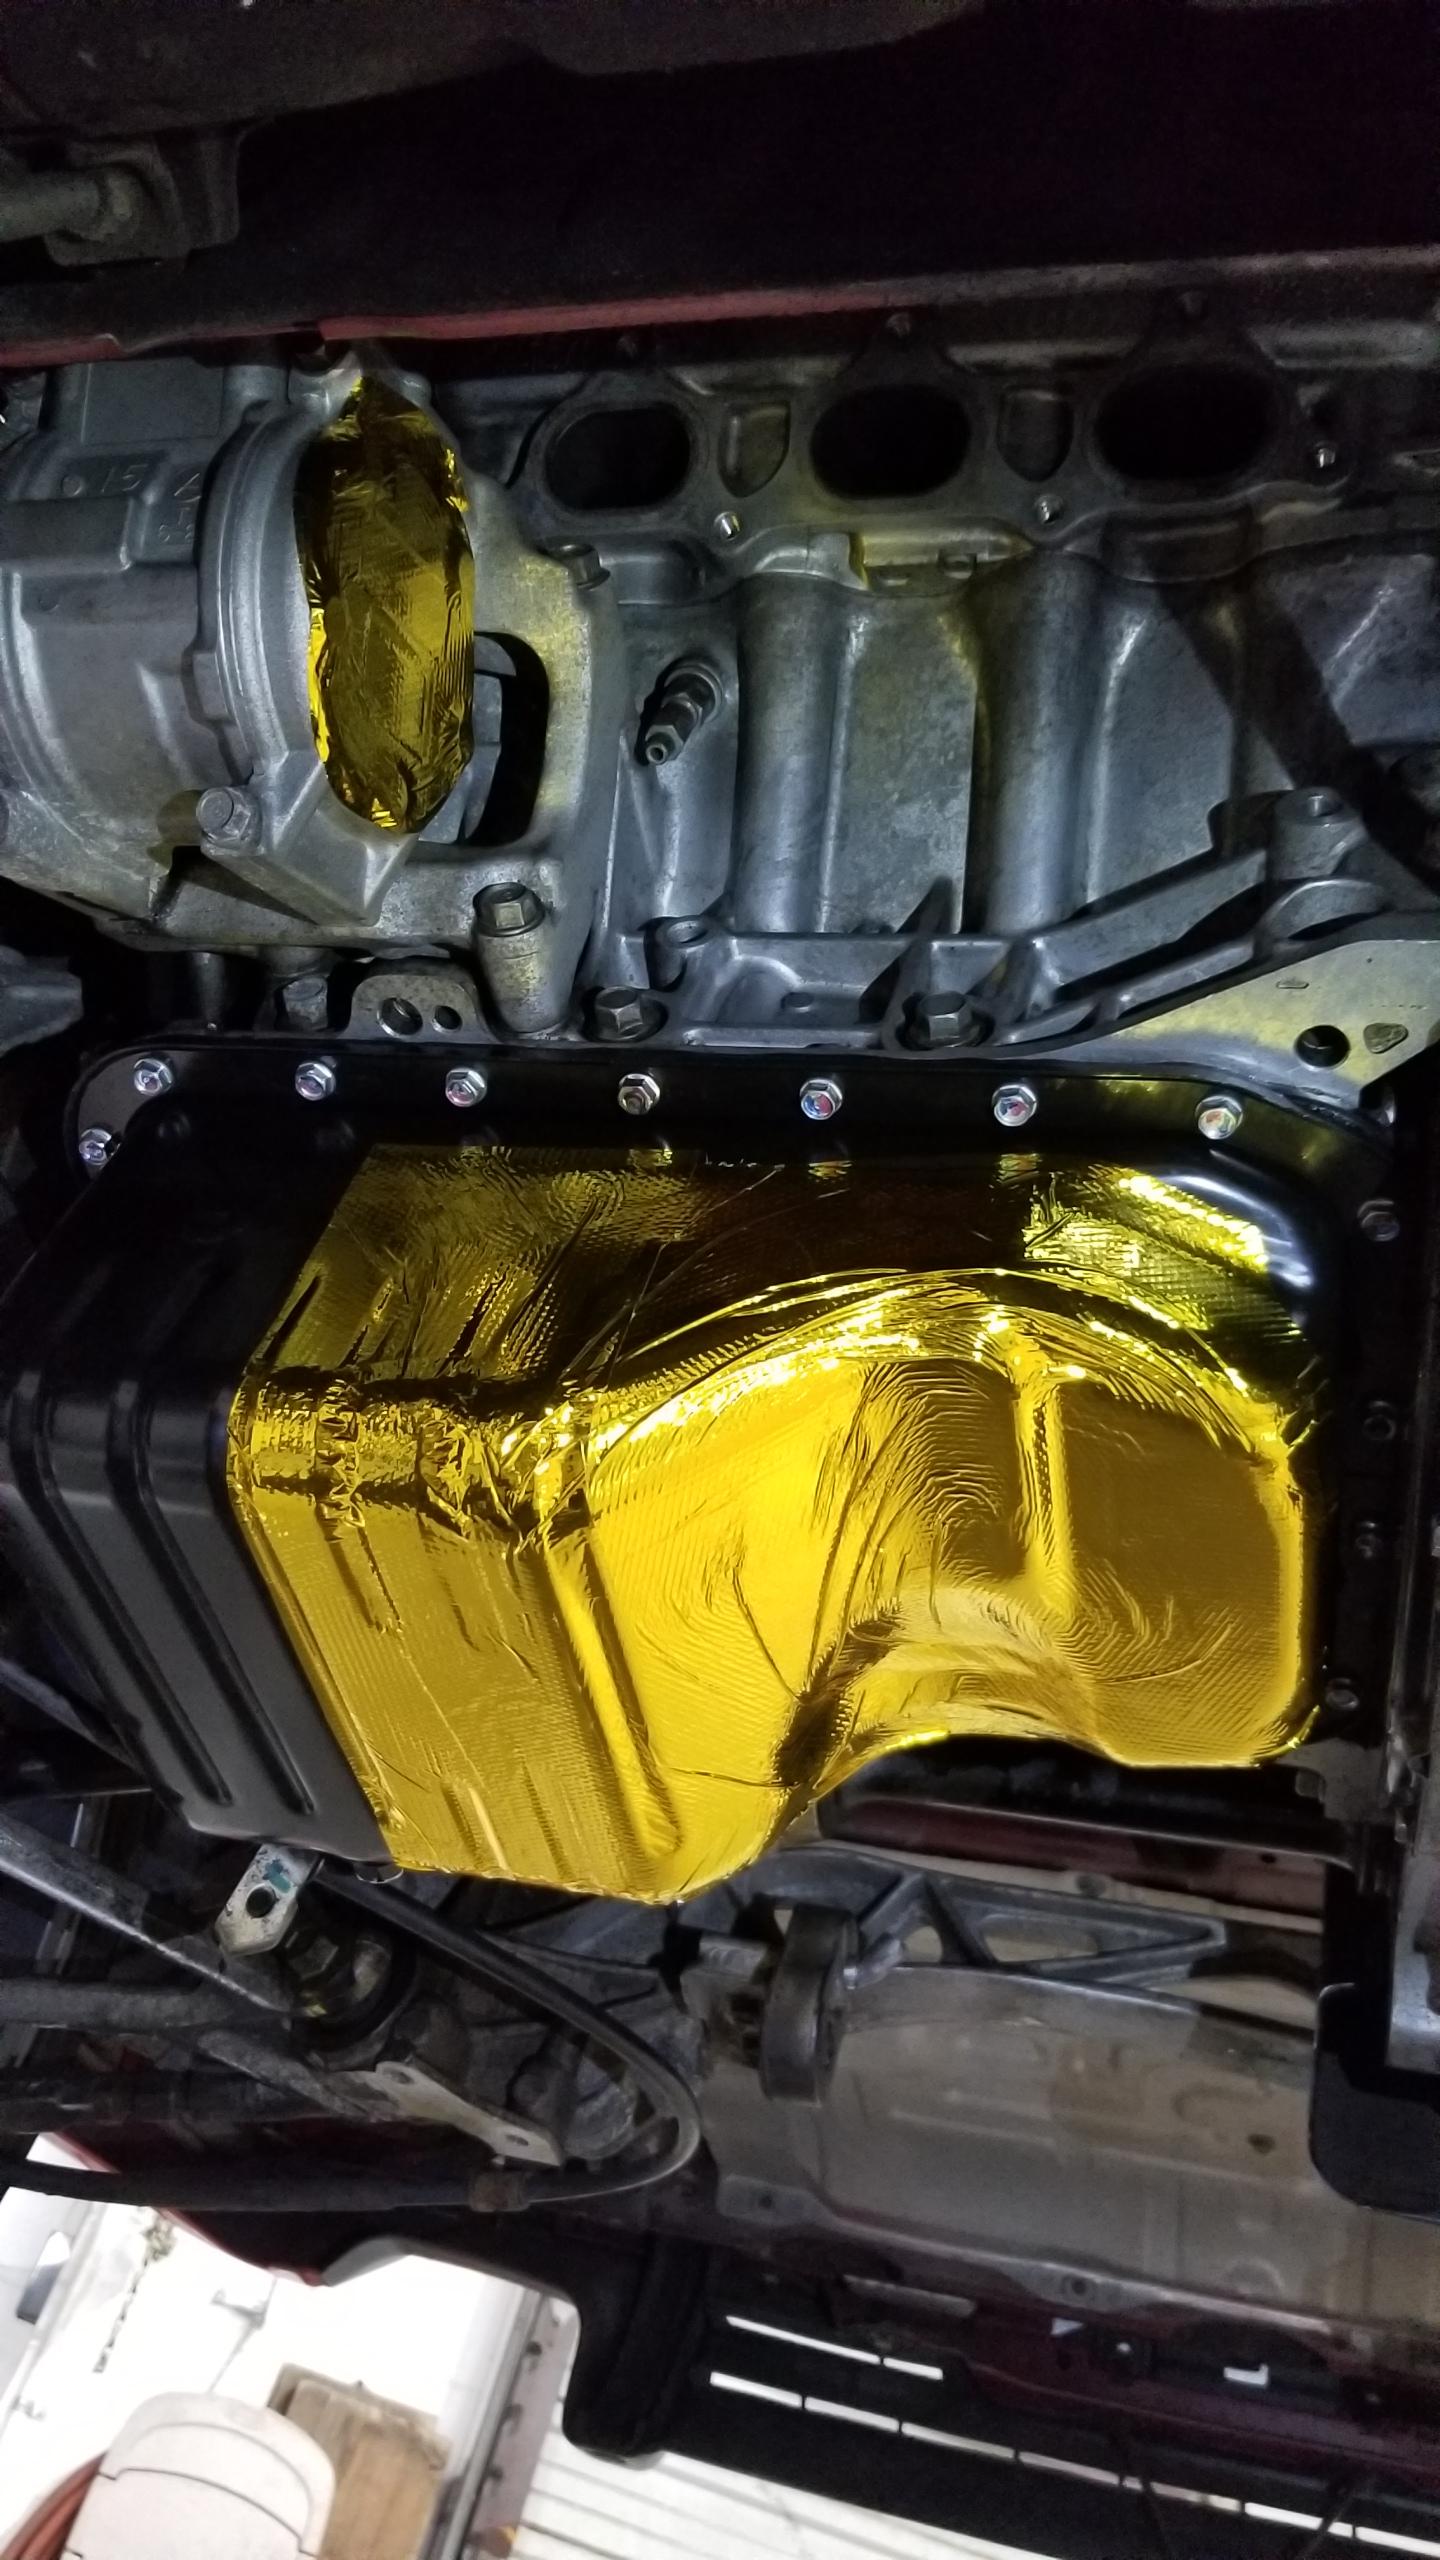
Now that I'm at the halfway point of starting to put stuff back on, I started to put on some leftover heat-reflective tape from a wrecked McLaren F1 at my local Pull-A-Part. I spared a bit to put on the back of the A/C compressor to cool it off a bit from the headers which run right next to it.
At6Hht6.jpg


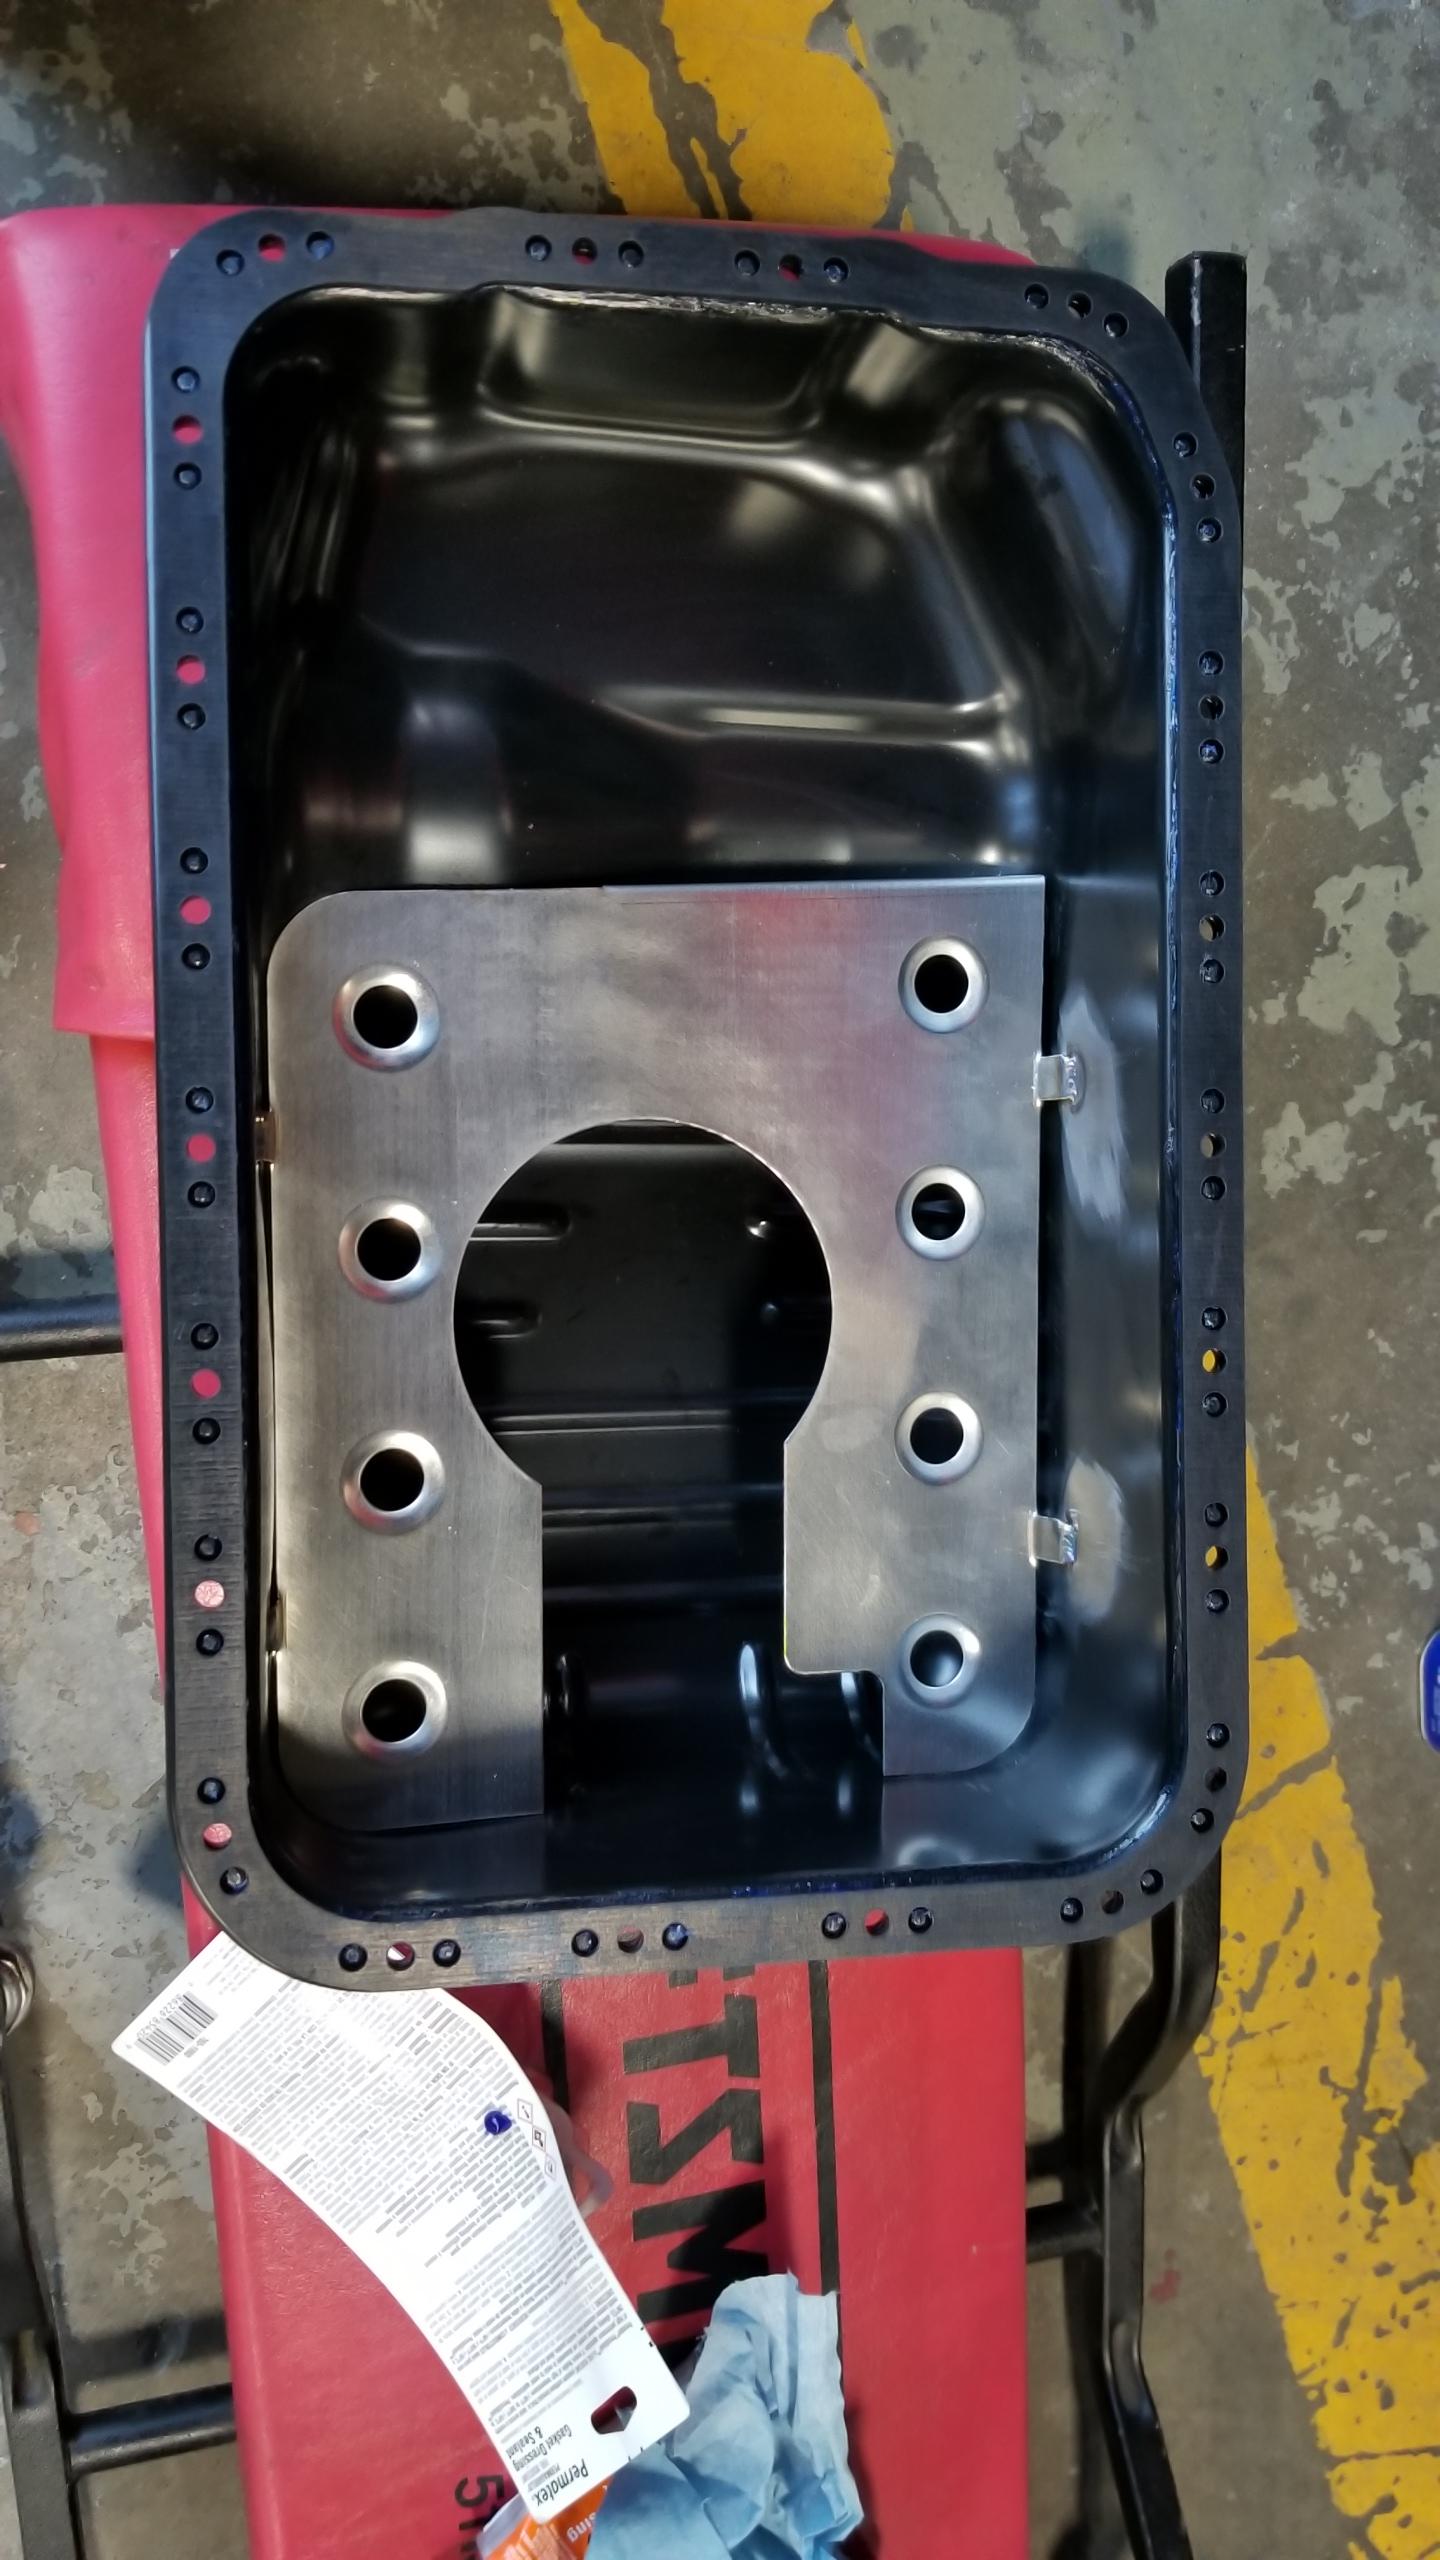
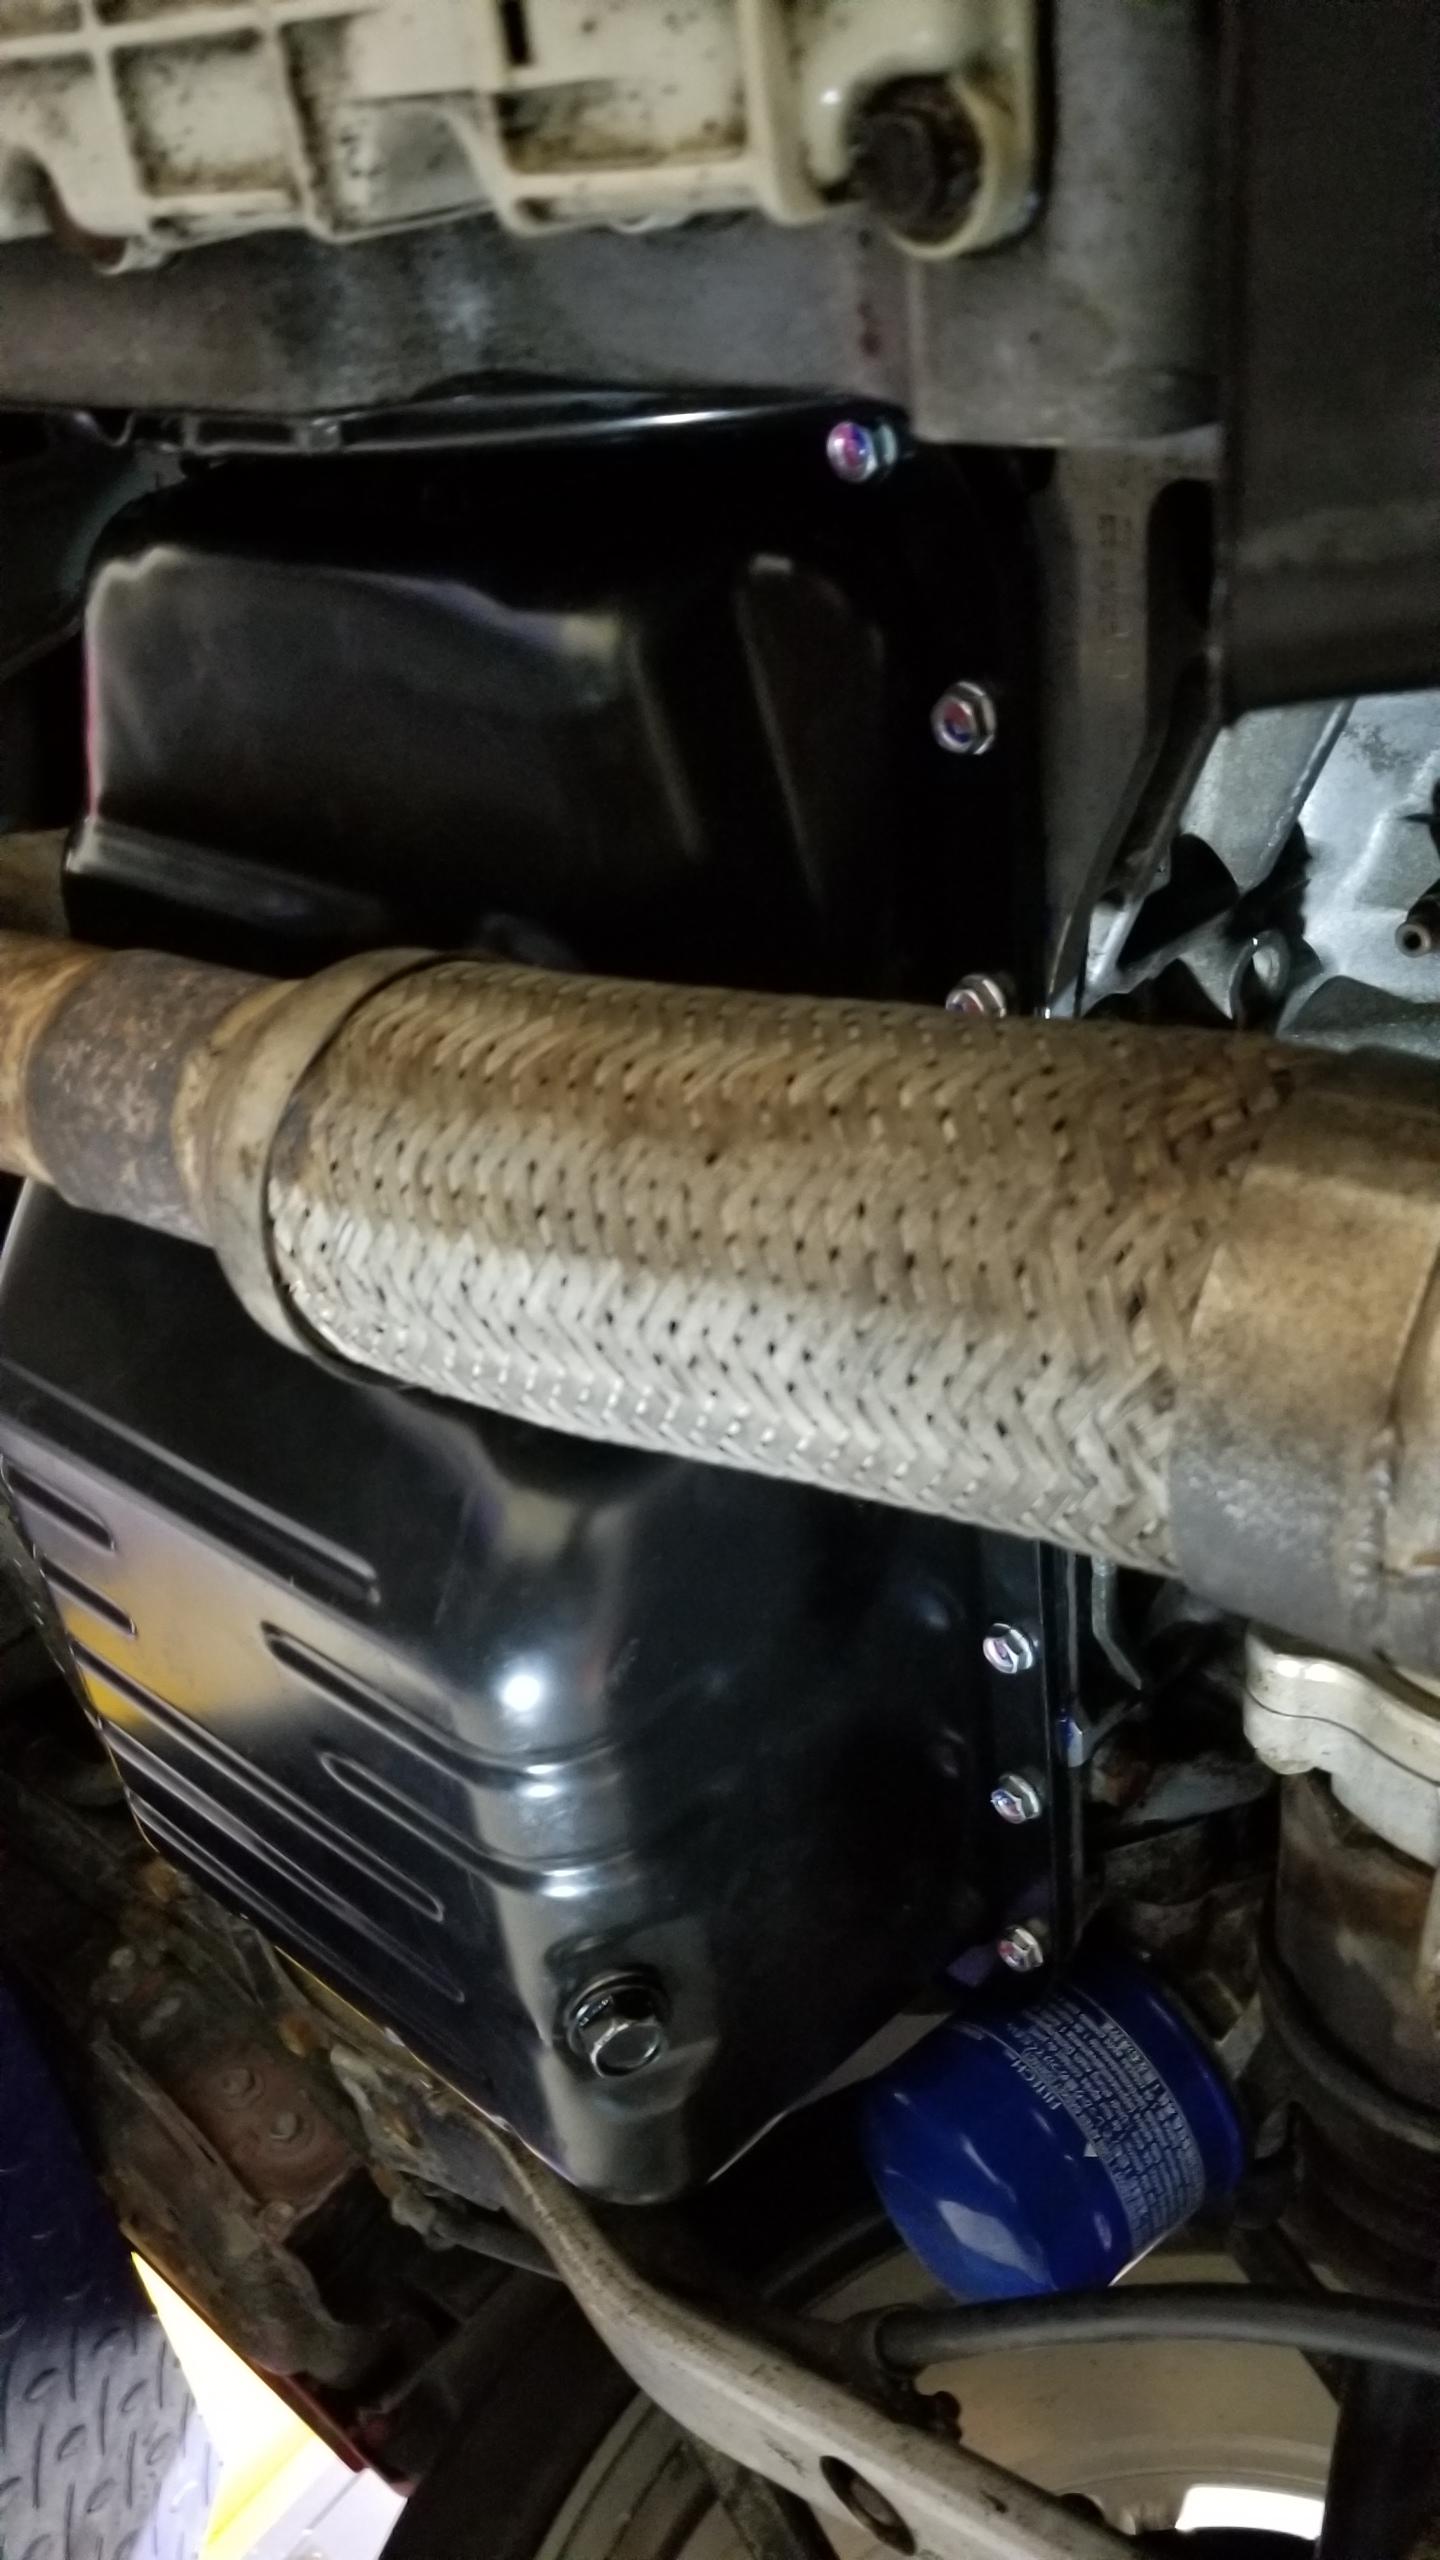
Spared a lotta-bit for the bottom of the oil pan for some future-proofing to reduce oil temps by a couple of degrees. I'd be lying if I said I had data to justify that but my engineering gut tells me it would help oil temps with the new headers with more surface area under the pan. The ceramic coating should help a bit too.
4JKJXdK.jpg


The rest of the Reflect-A-Gold went to the underside of the trunk since I had no other use for it and it might help cook my groceries a bit more slowly. It does get pretty hot in there after driving for any longer distances.
qAxKzWp.jpg


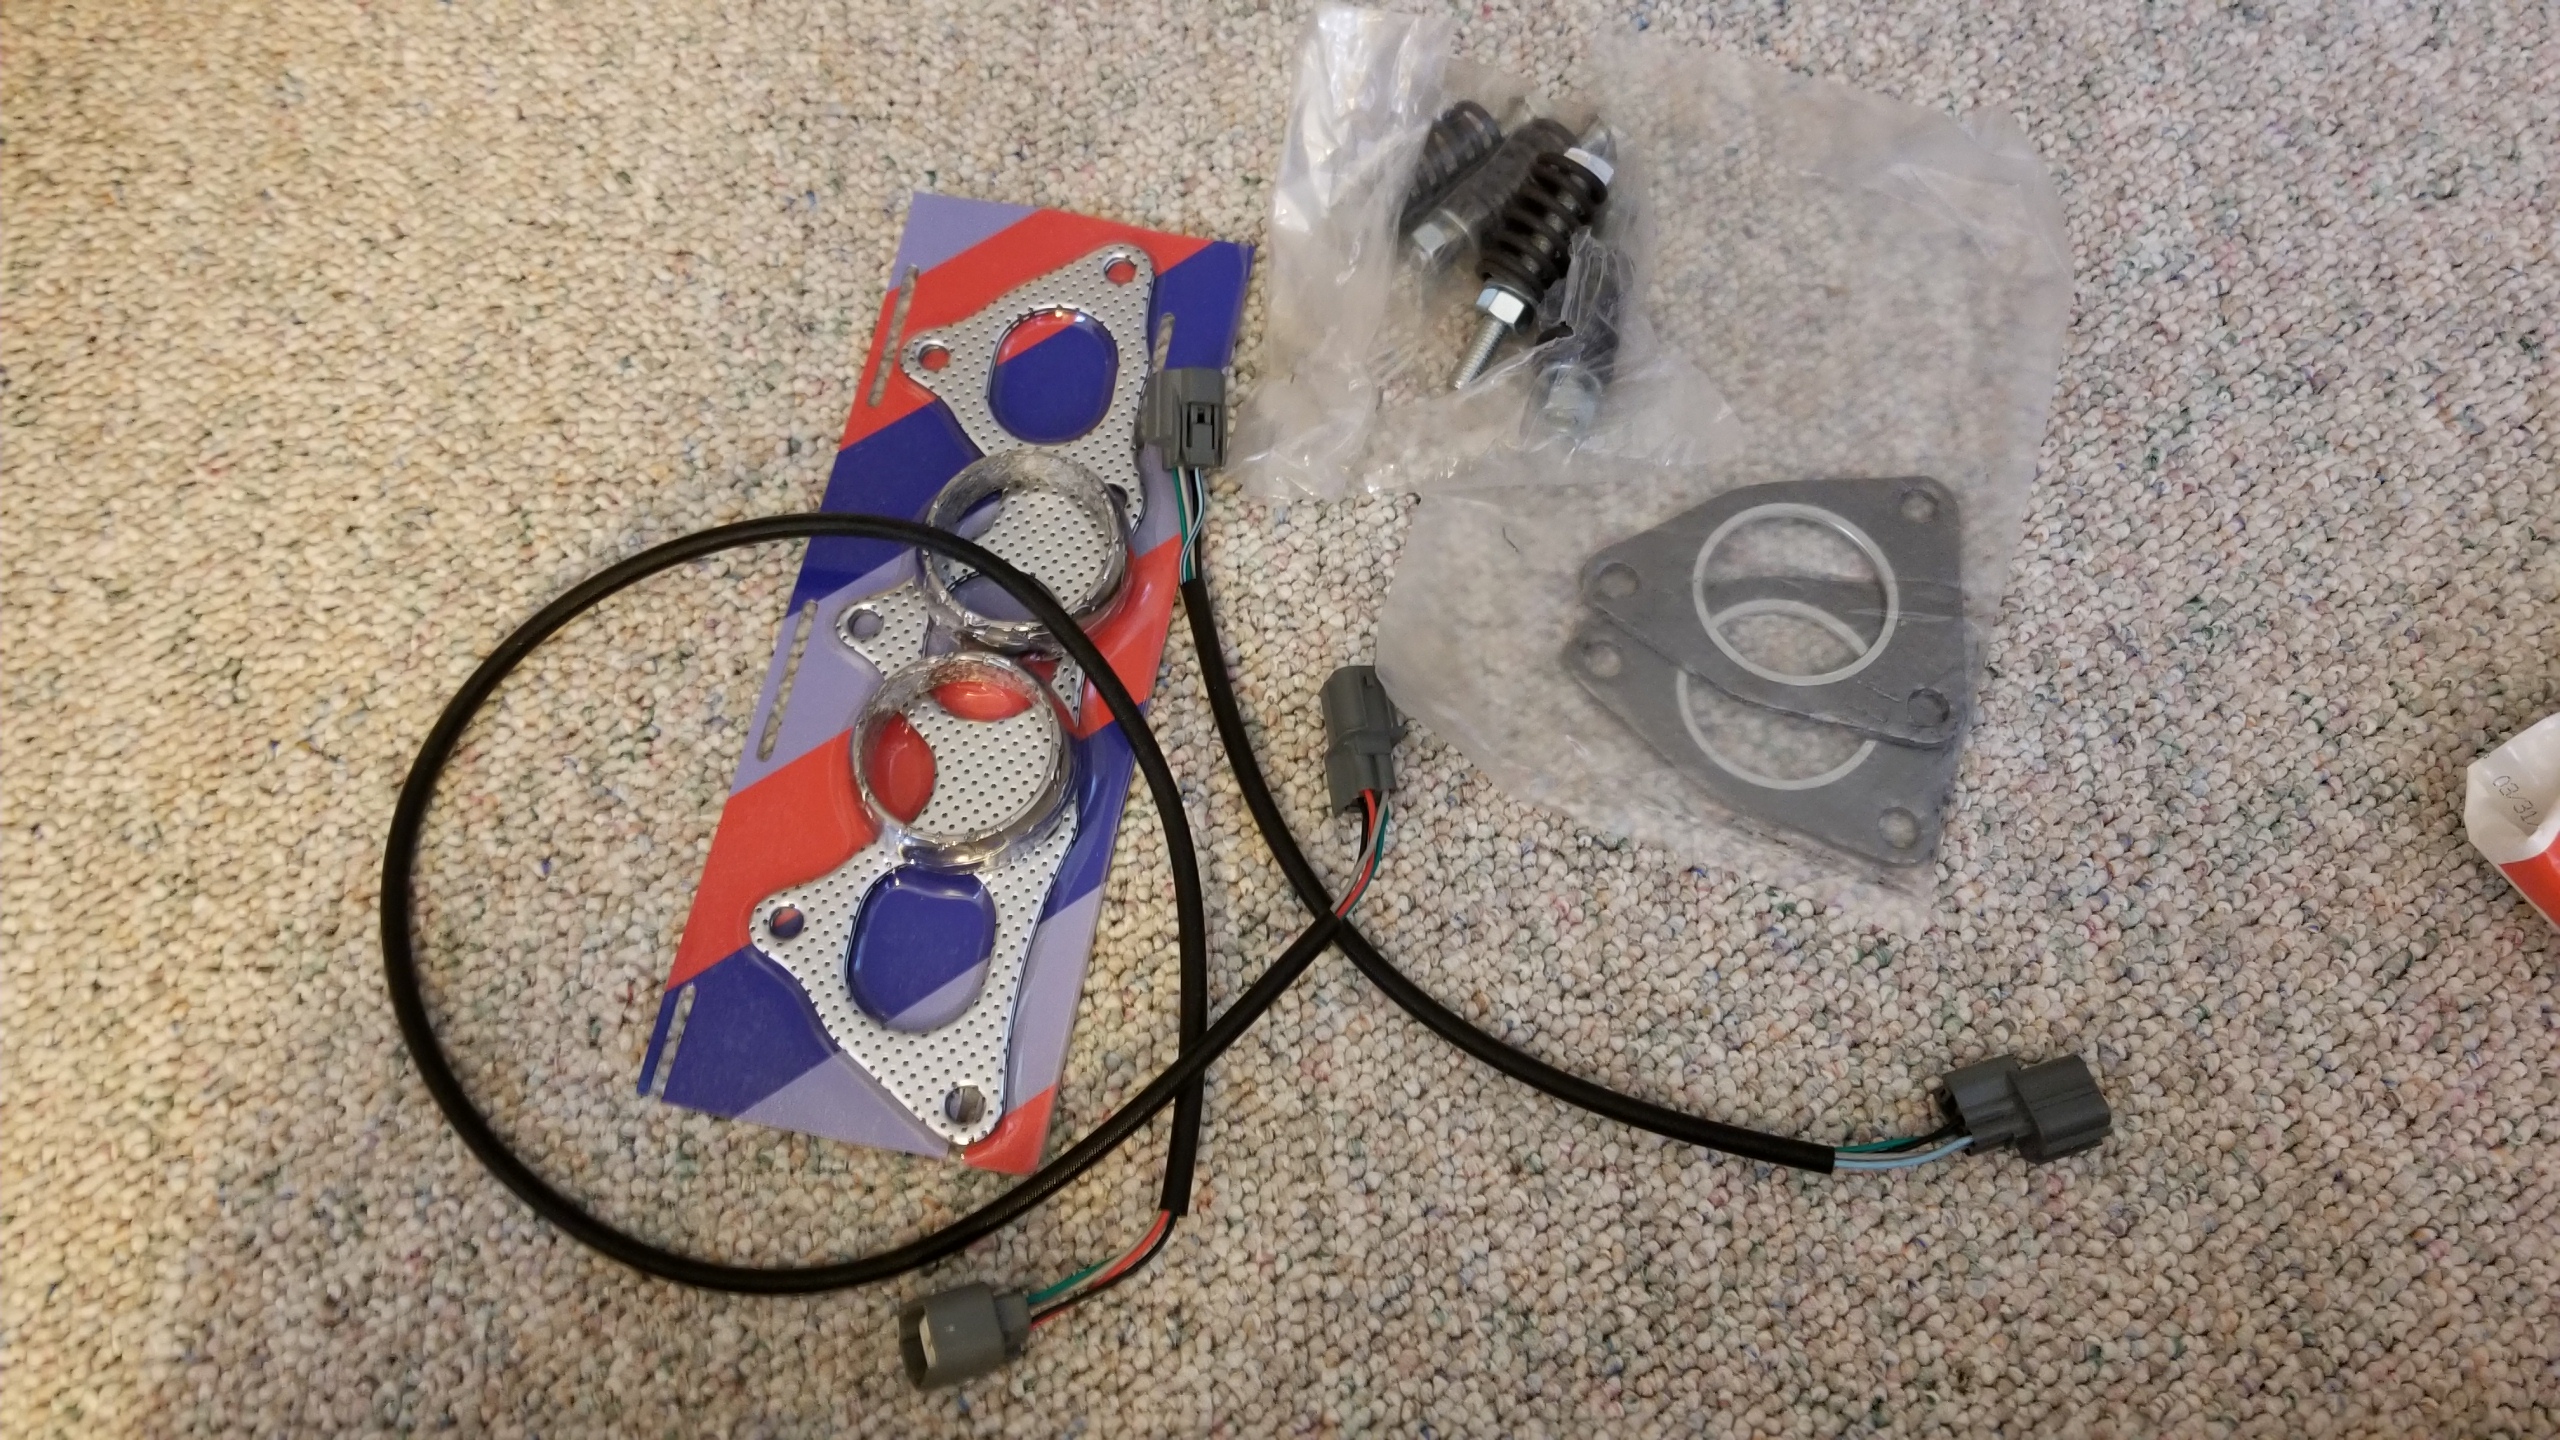
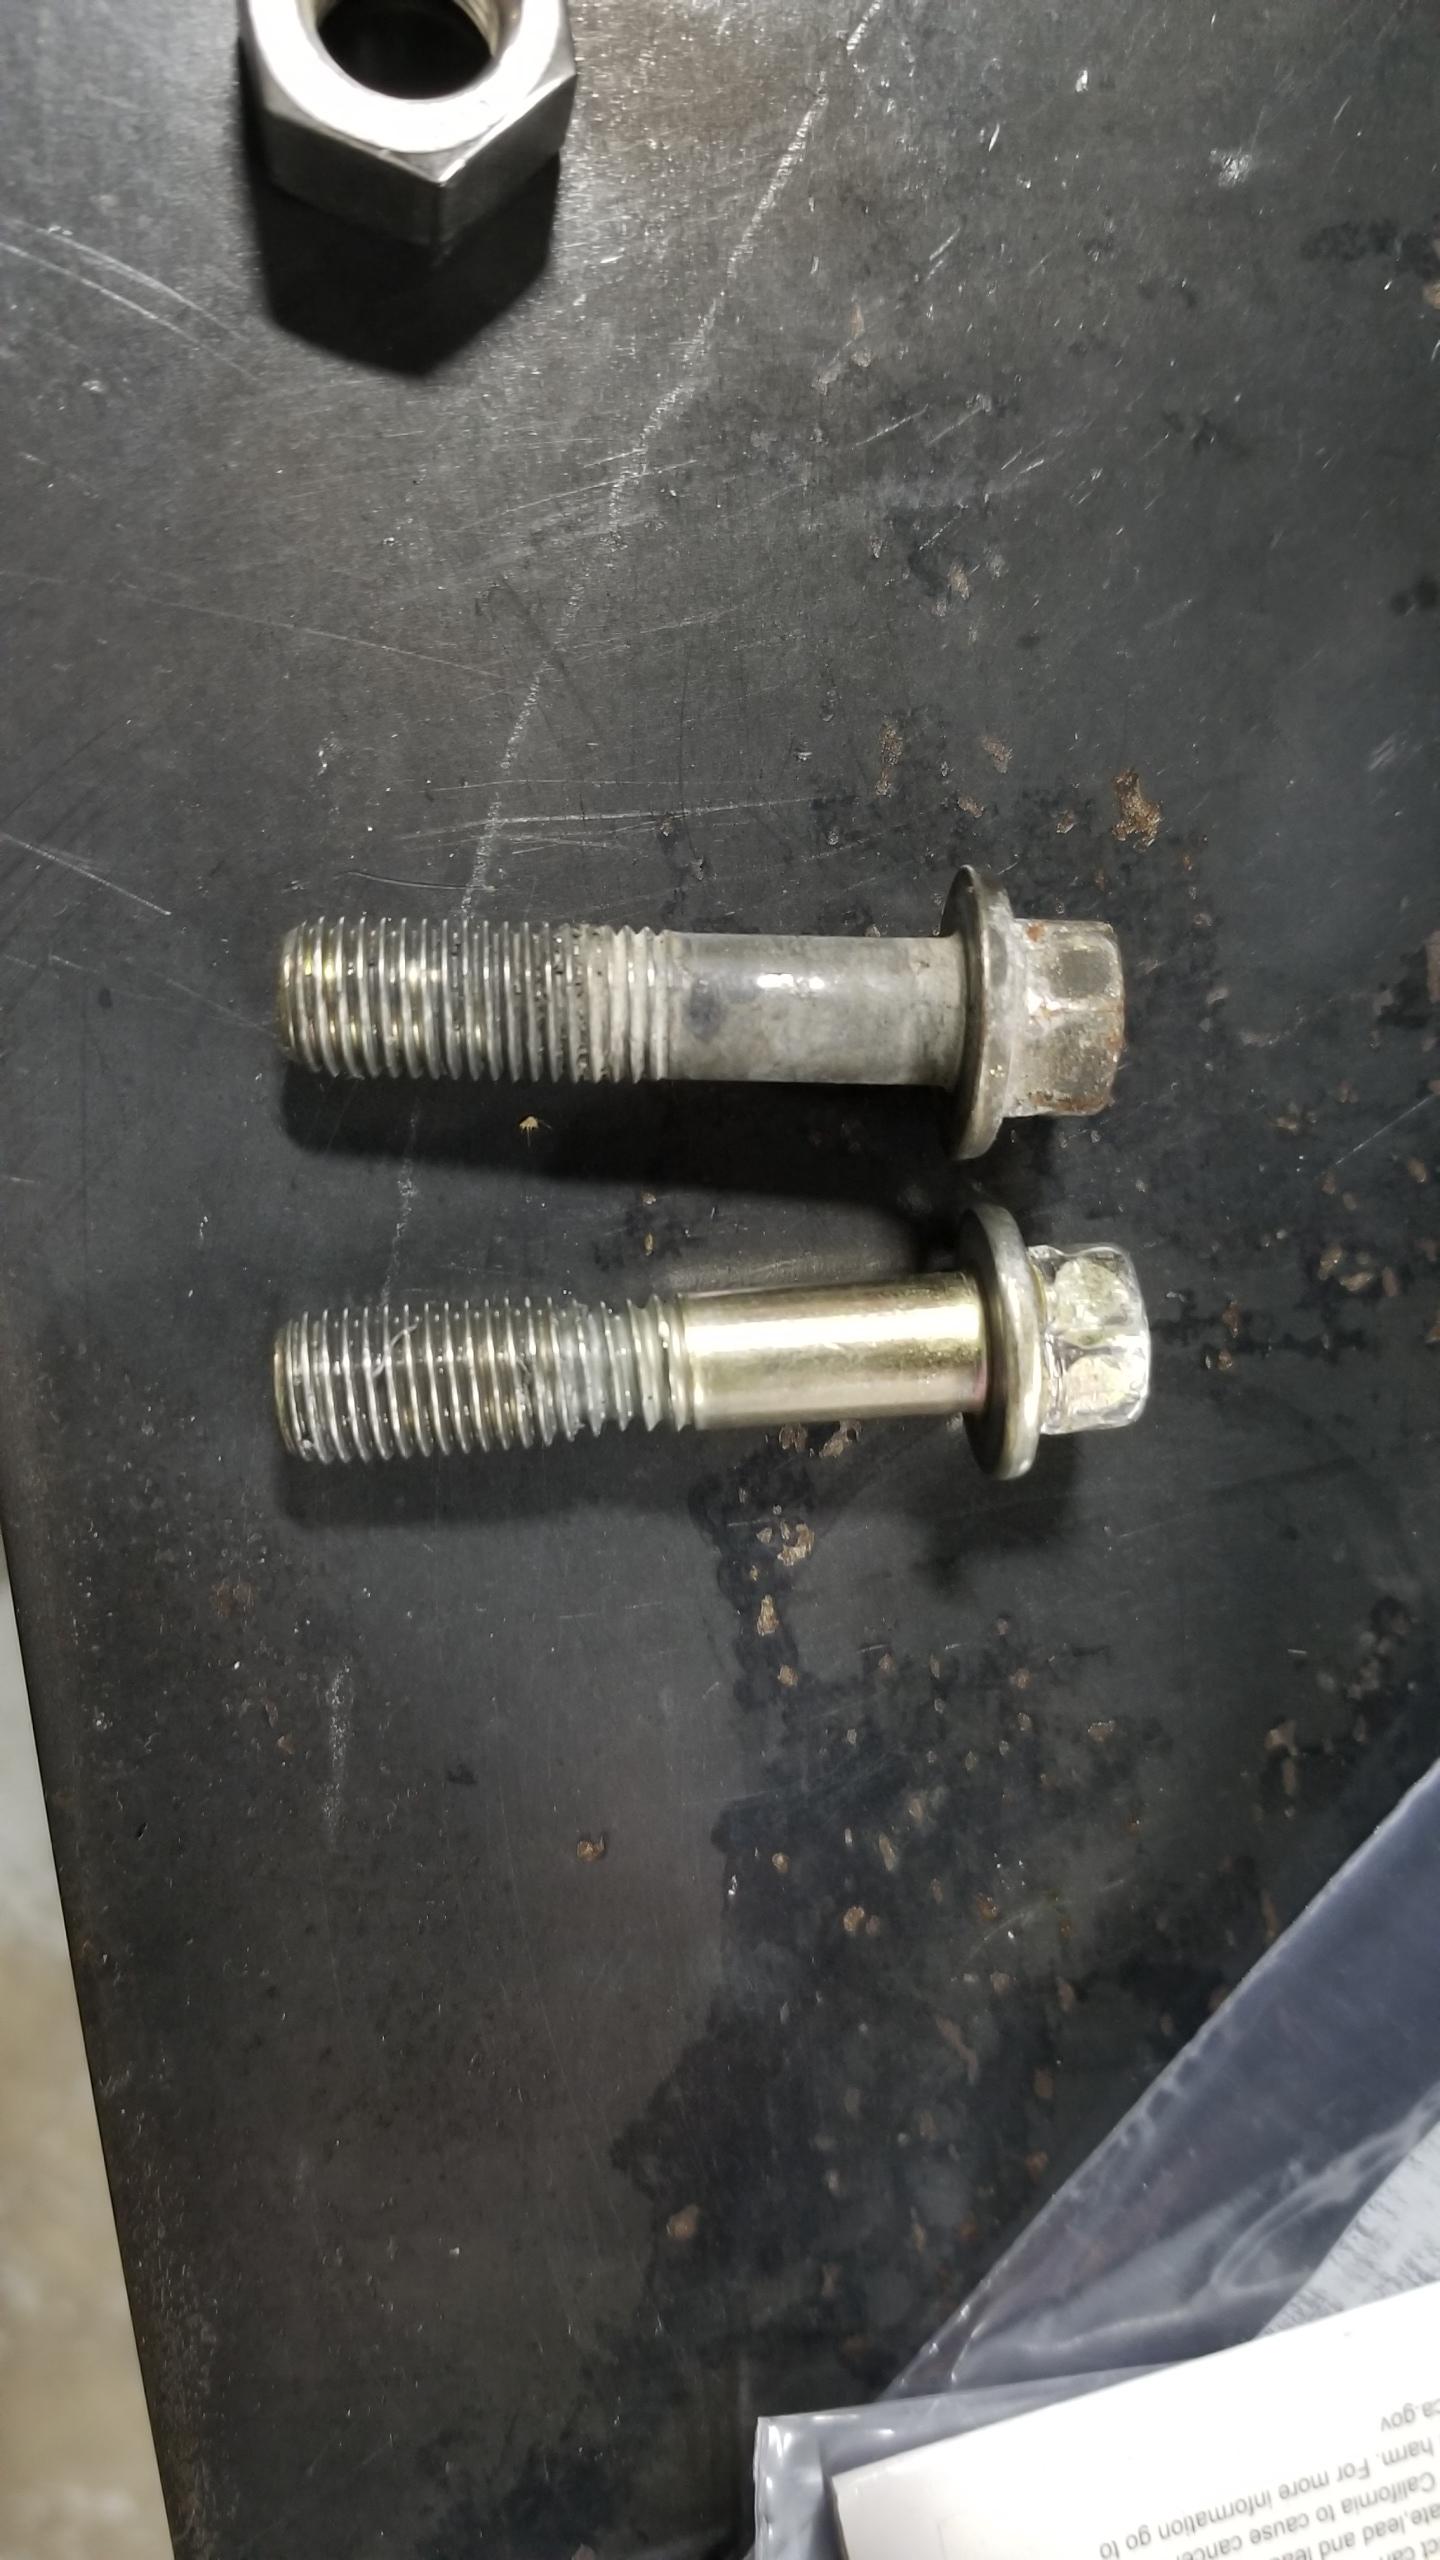
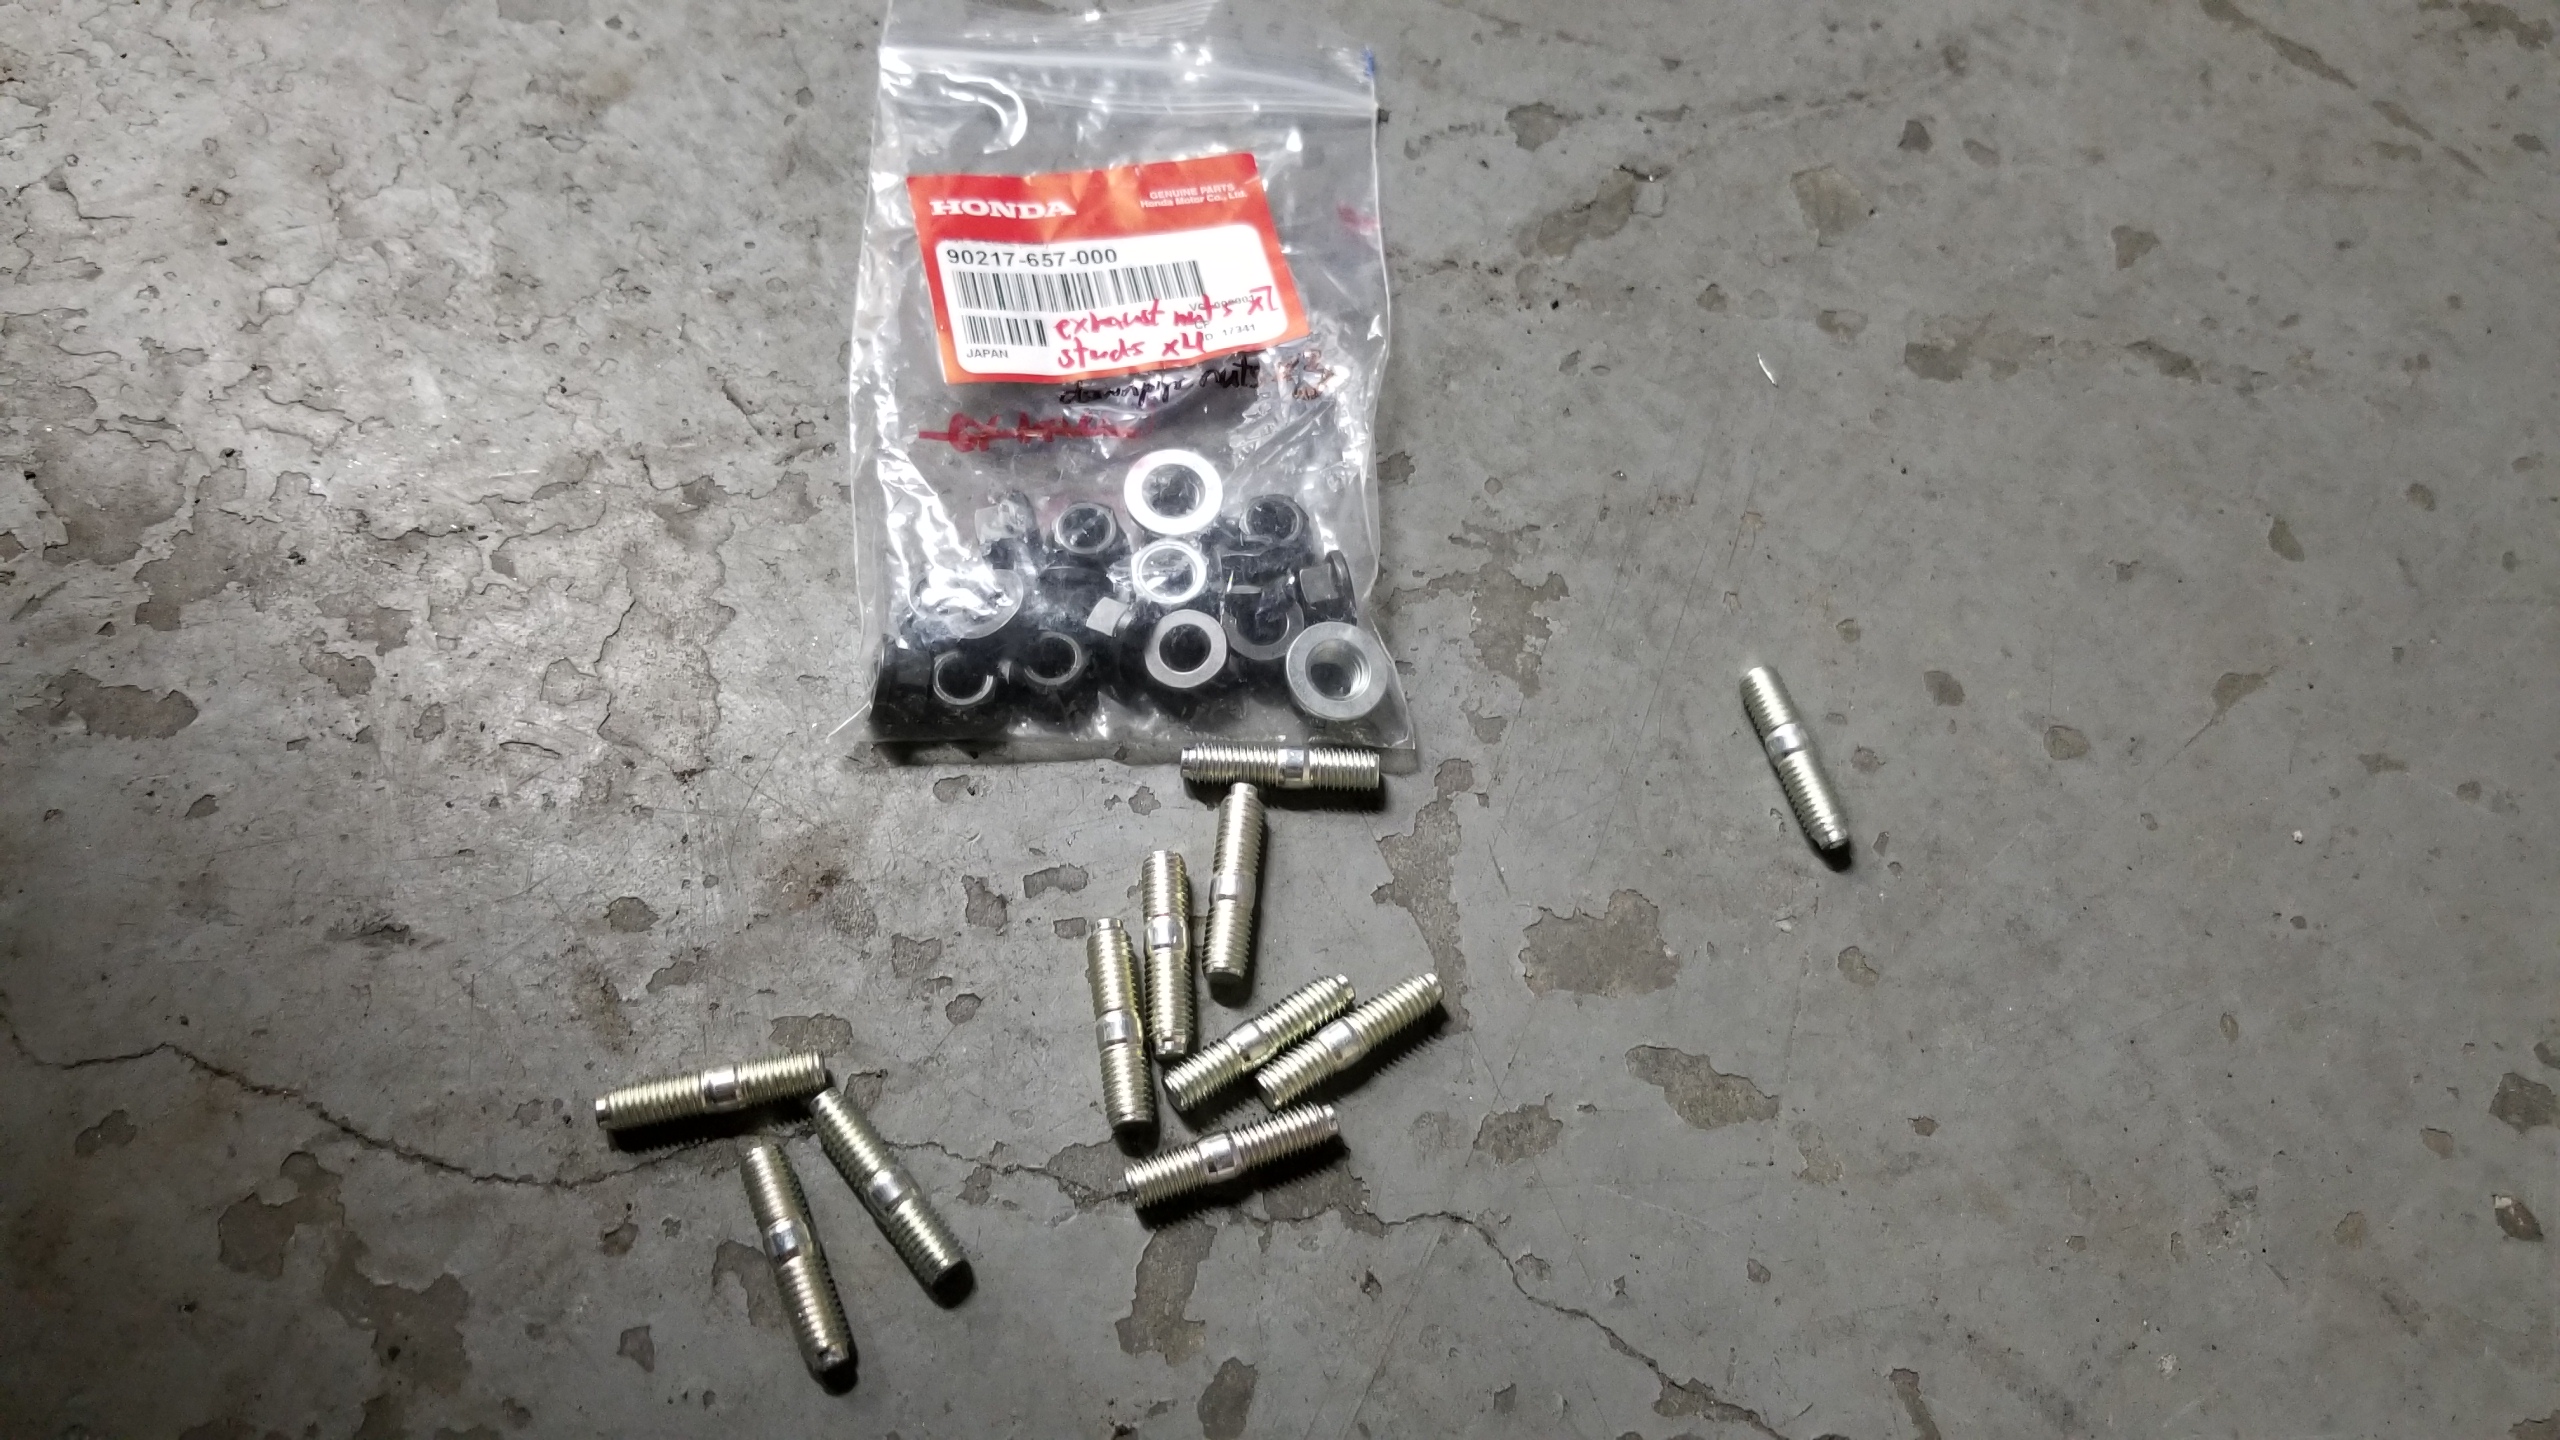
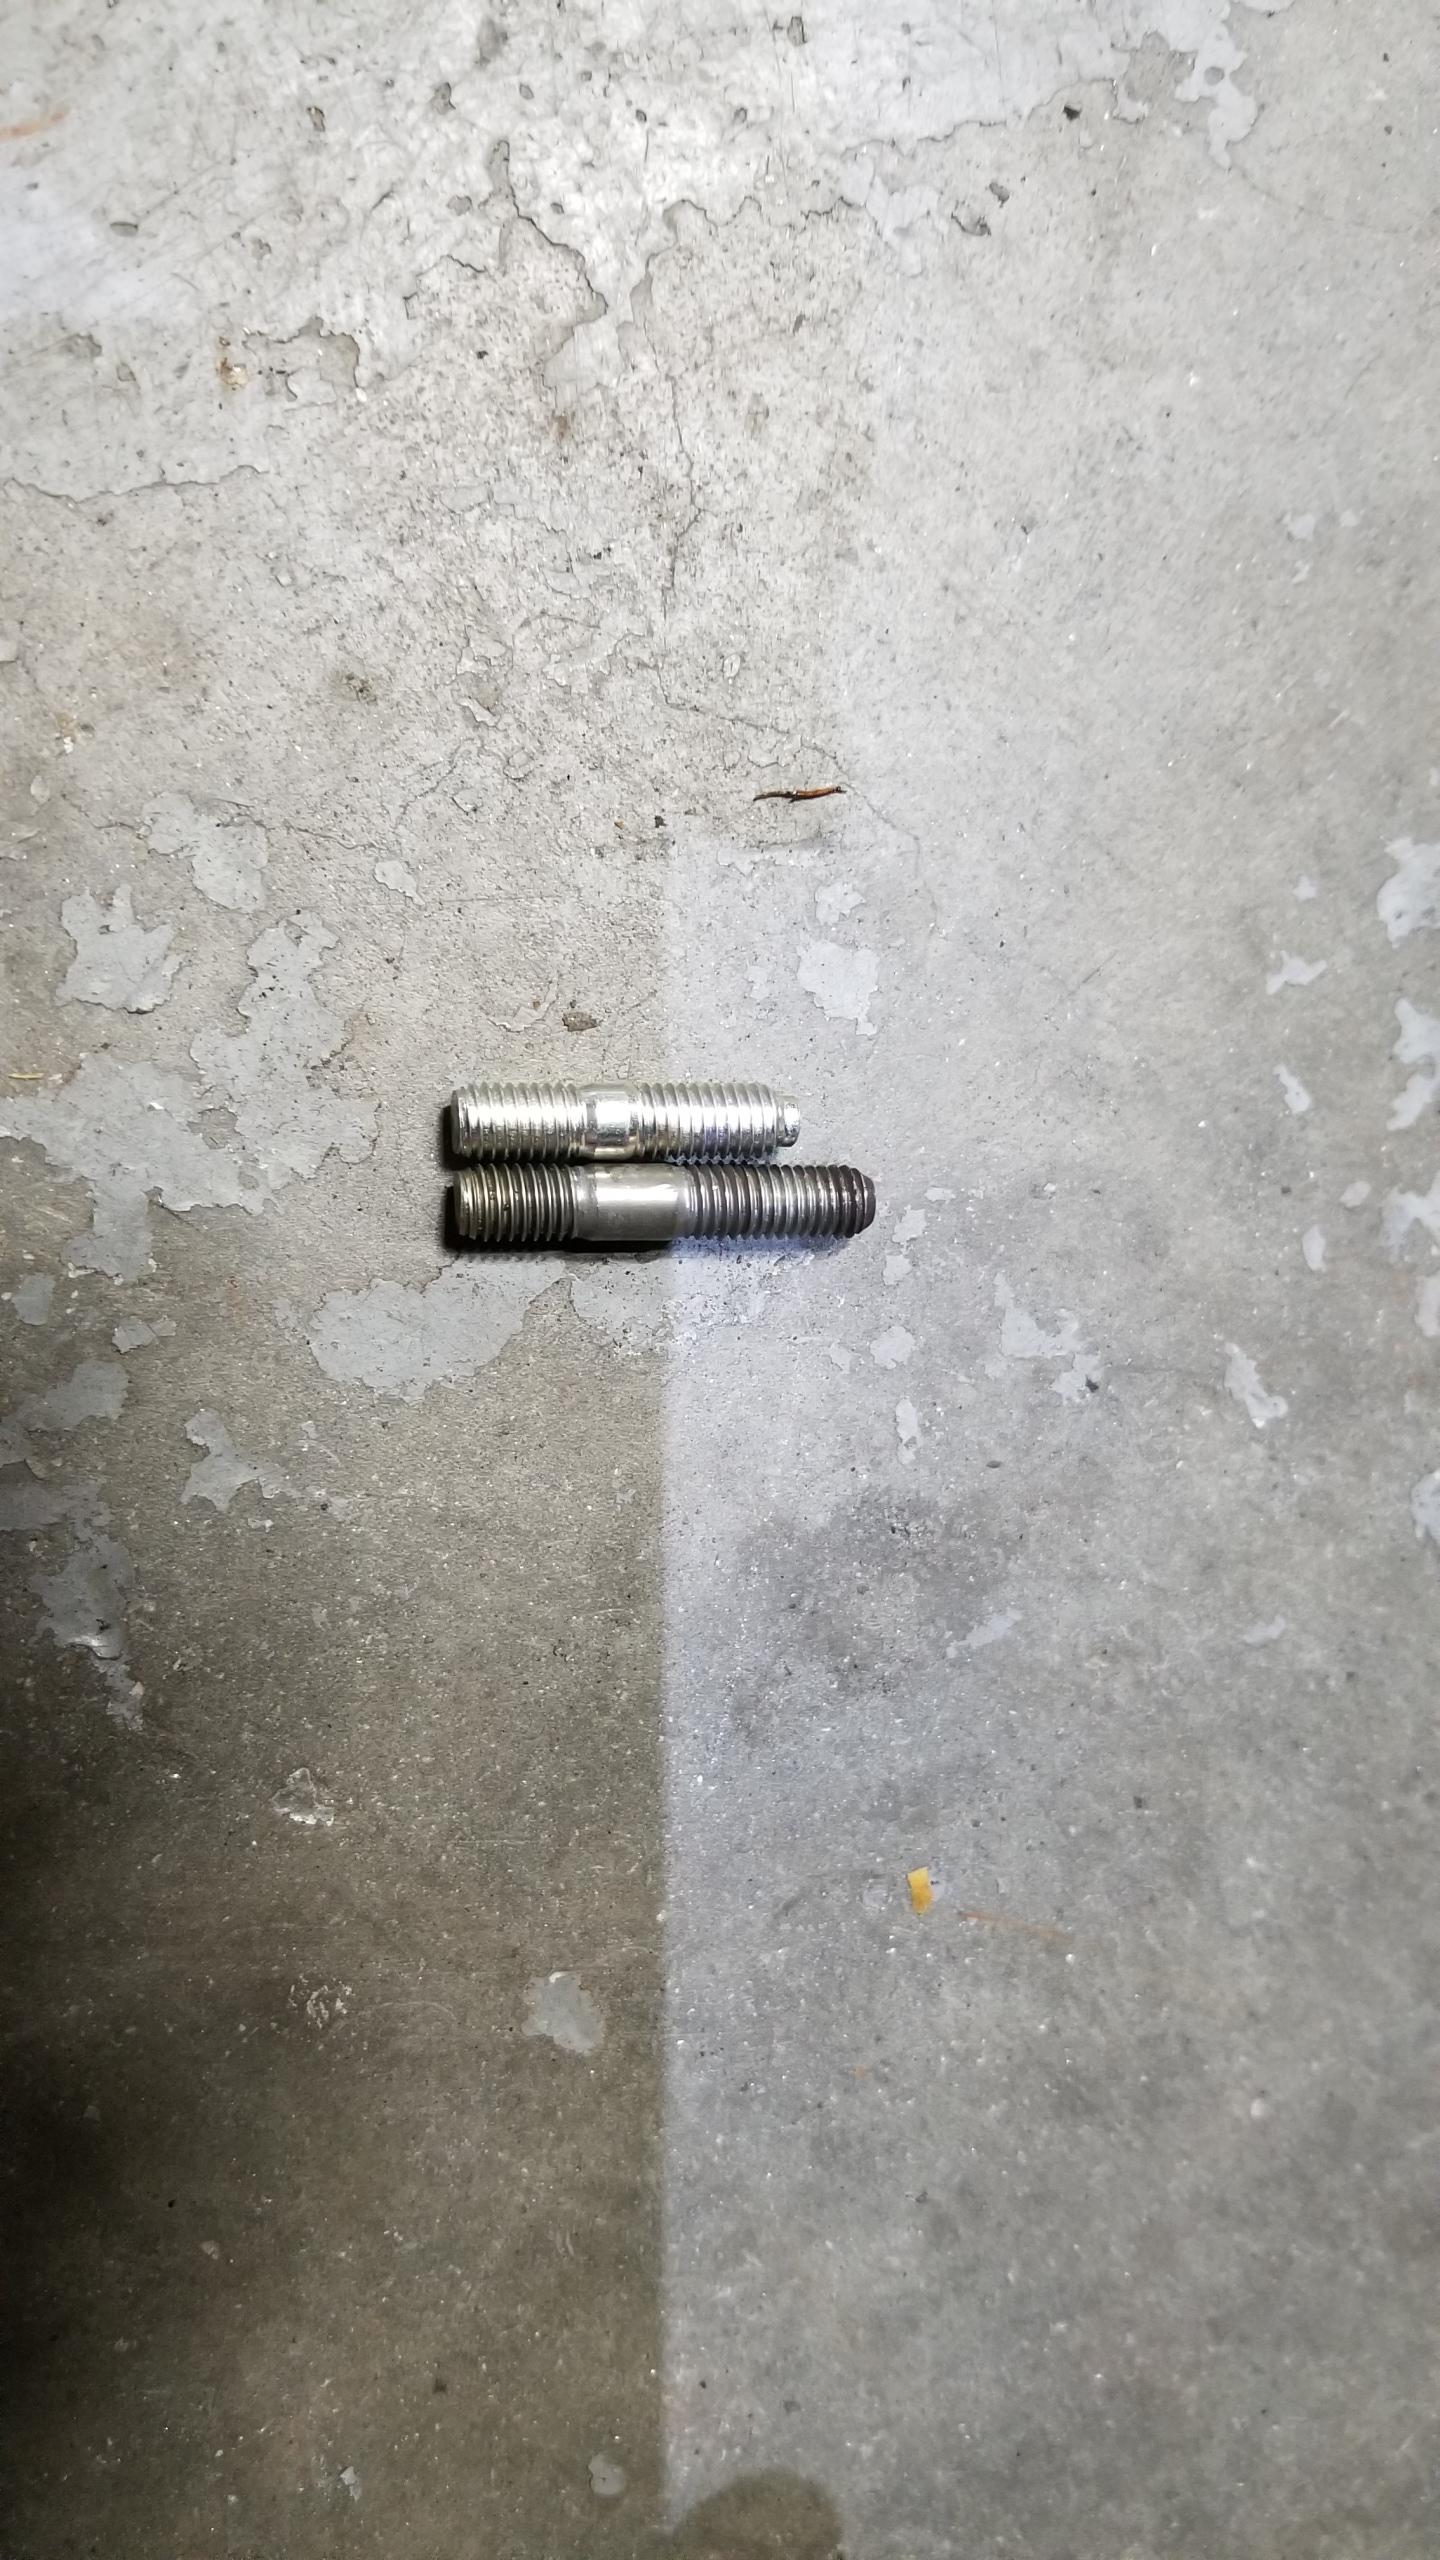
New manifold hardware. I manage to get 11 of the 14 new "NA2" updated studs, the remainder was backordered or otherwise unavailable at my Acura dealer so I had to re-use 3 of the old ones that looked the cleanest.
BYSjuIW.jpg


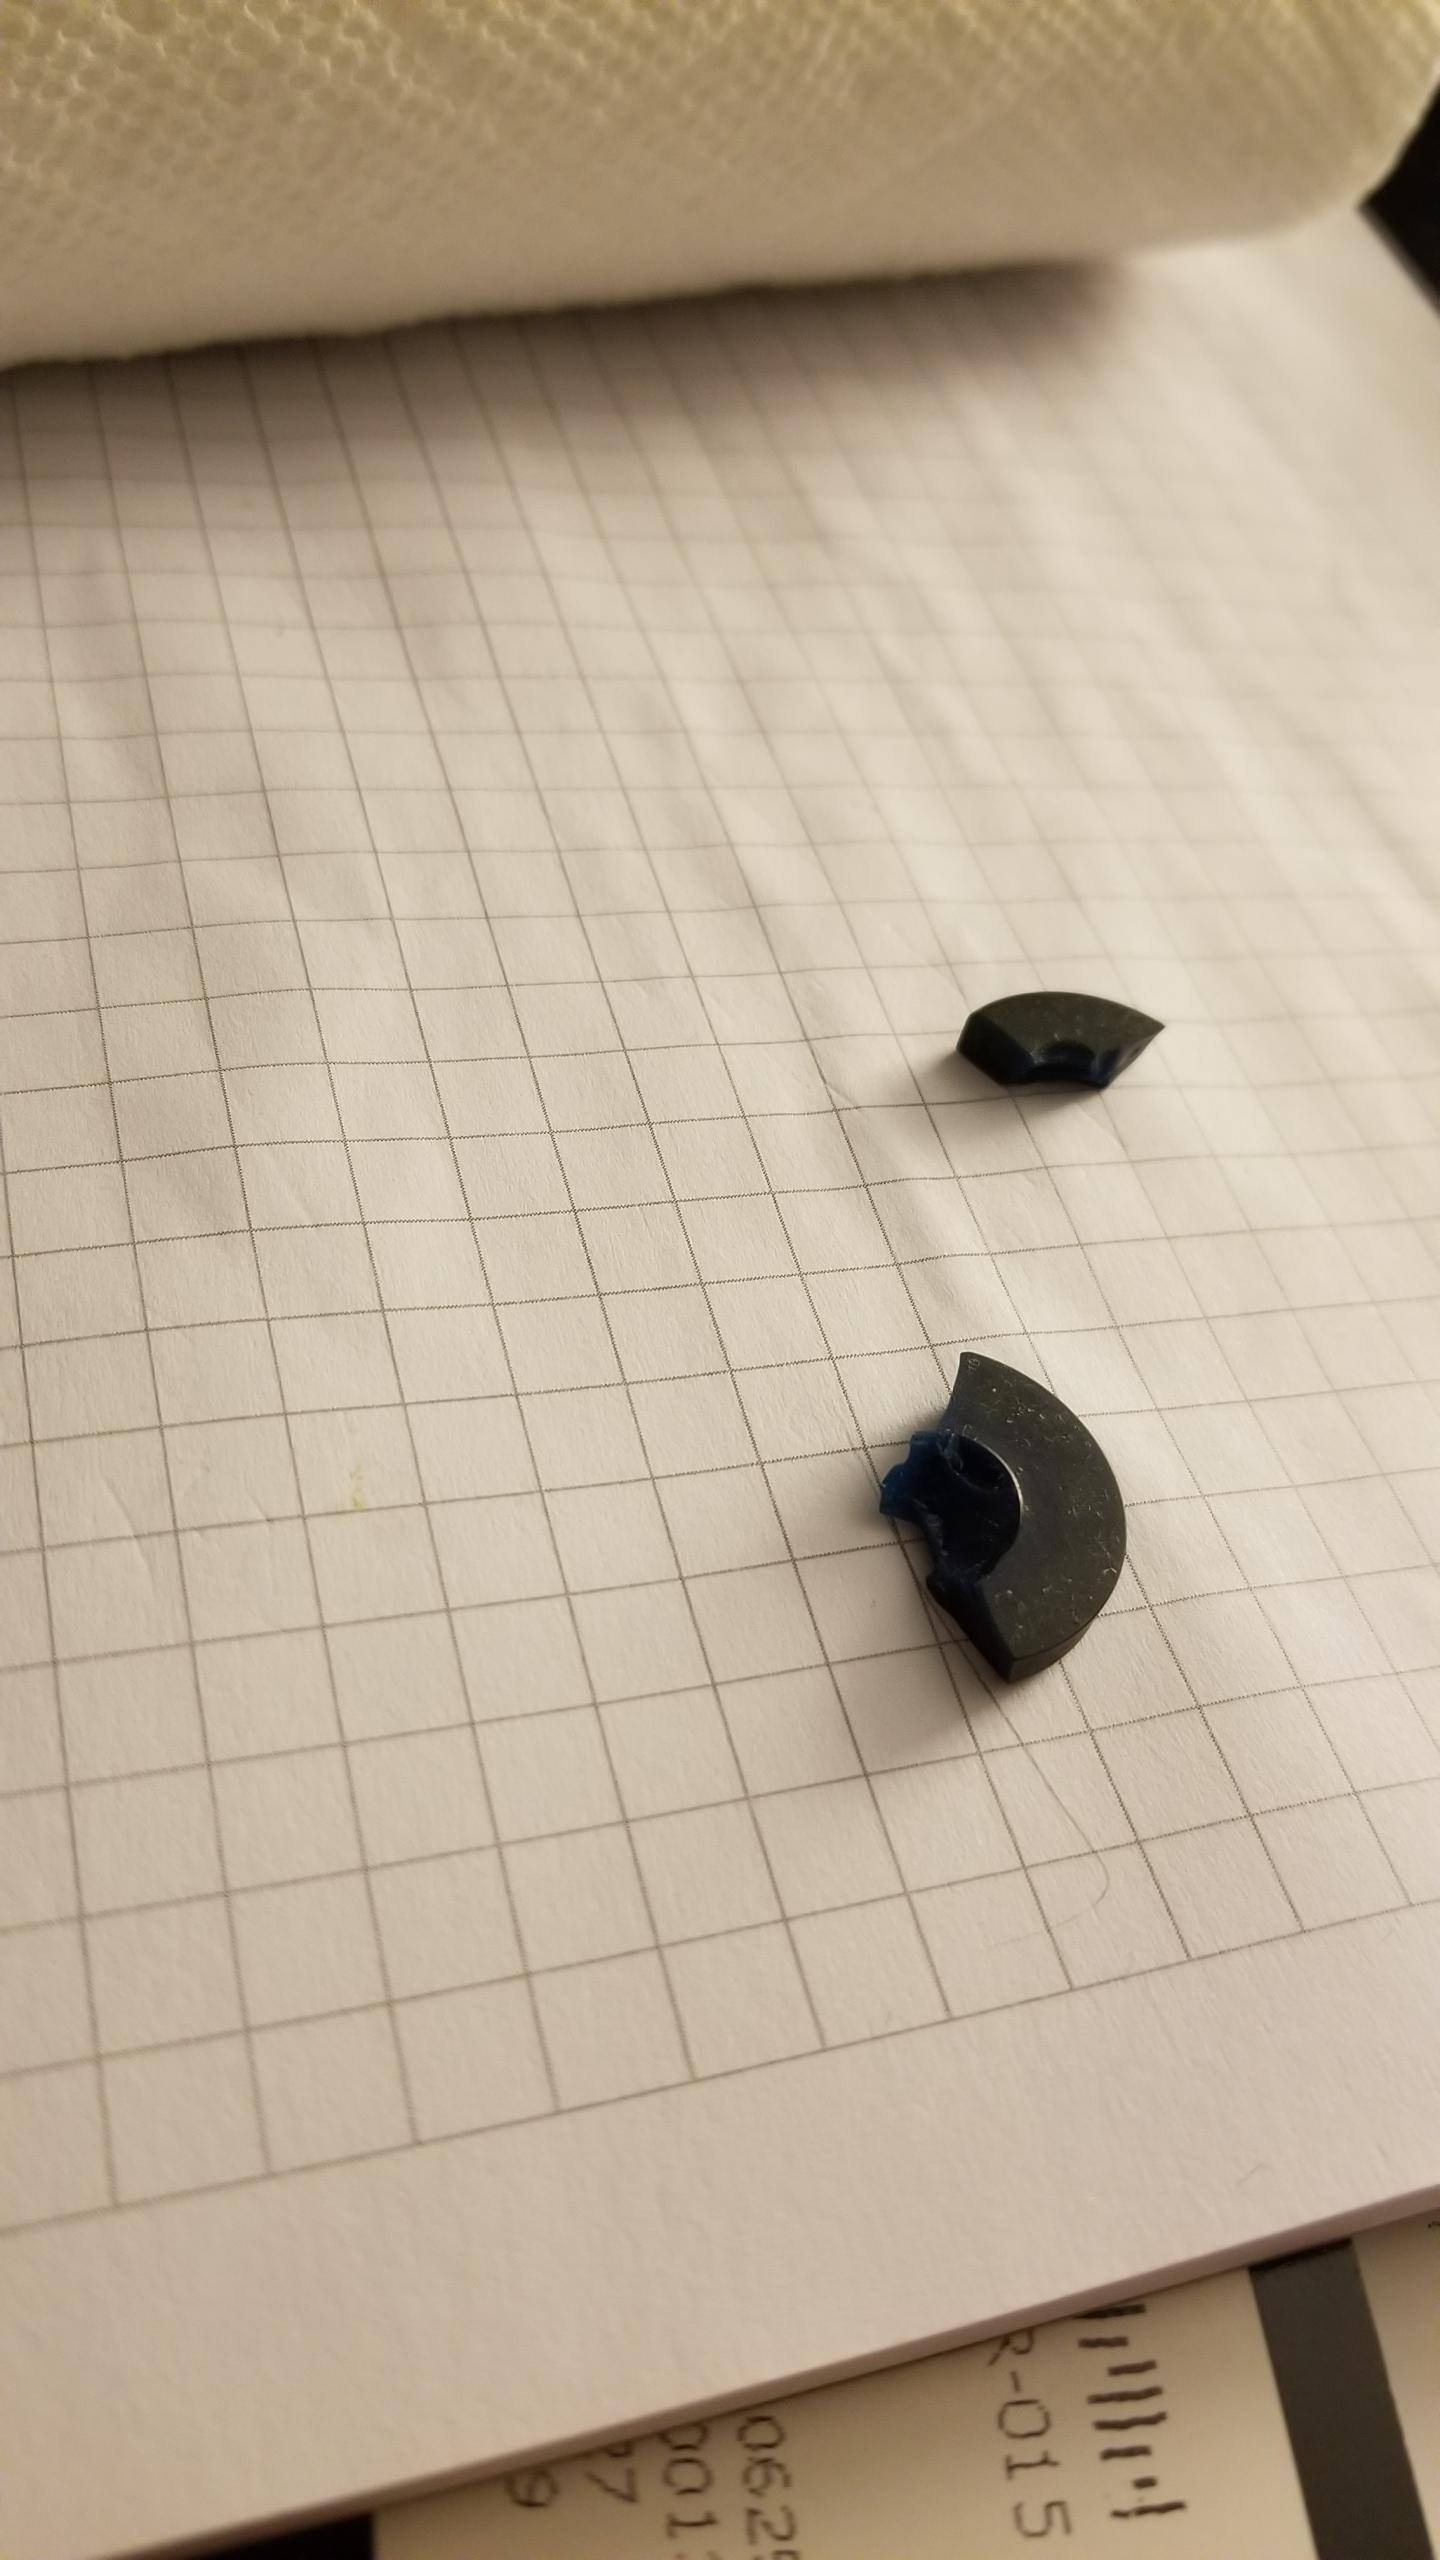
1st gen vs. updated stud design. Not sure if the materials used are different but the shorter stud helps reduce the amount of corrosion on the threads.
rMNxcQQ.jpg


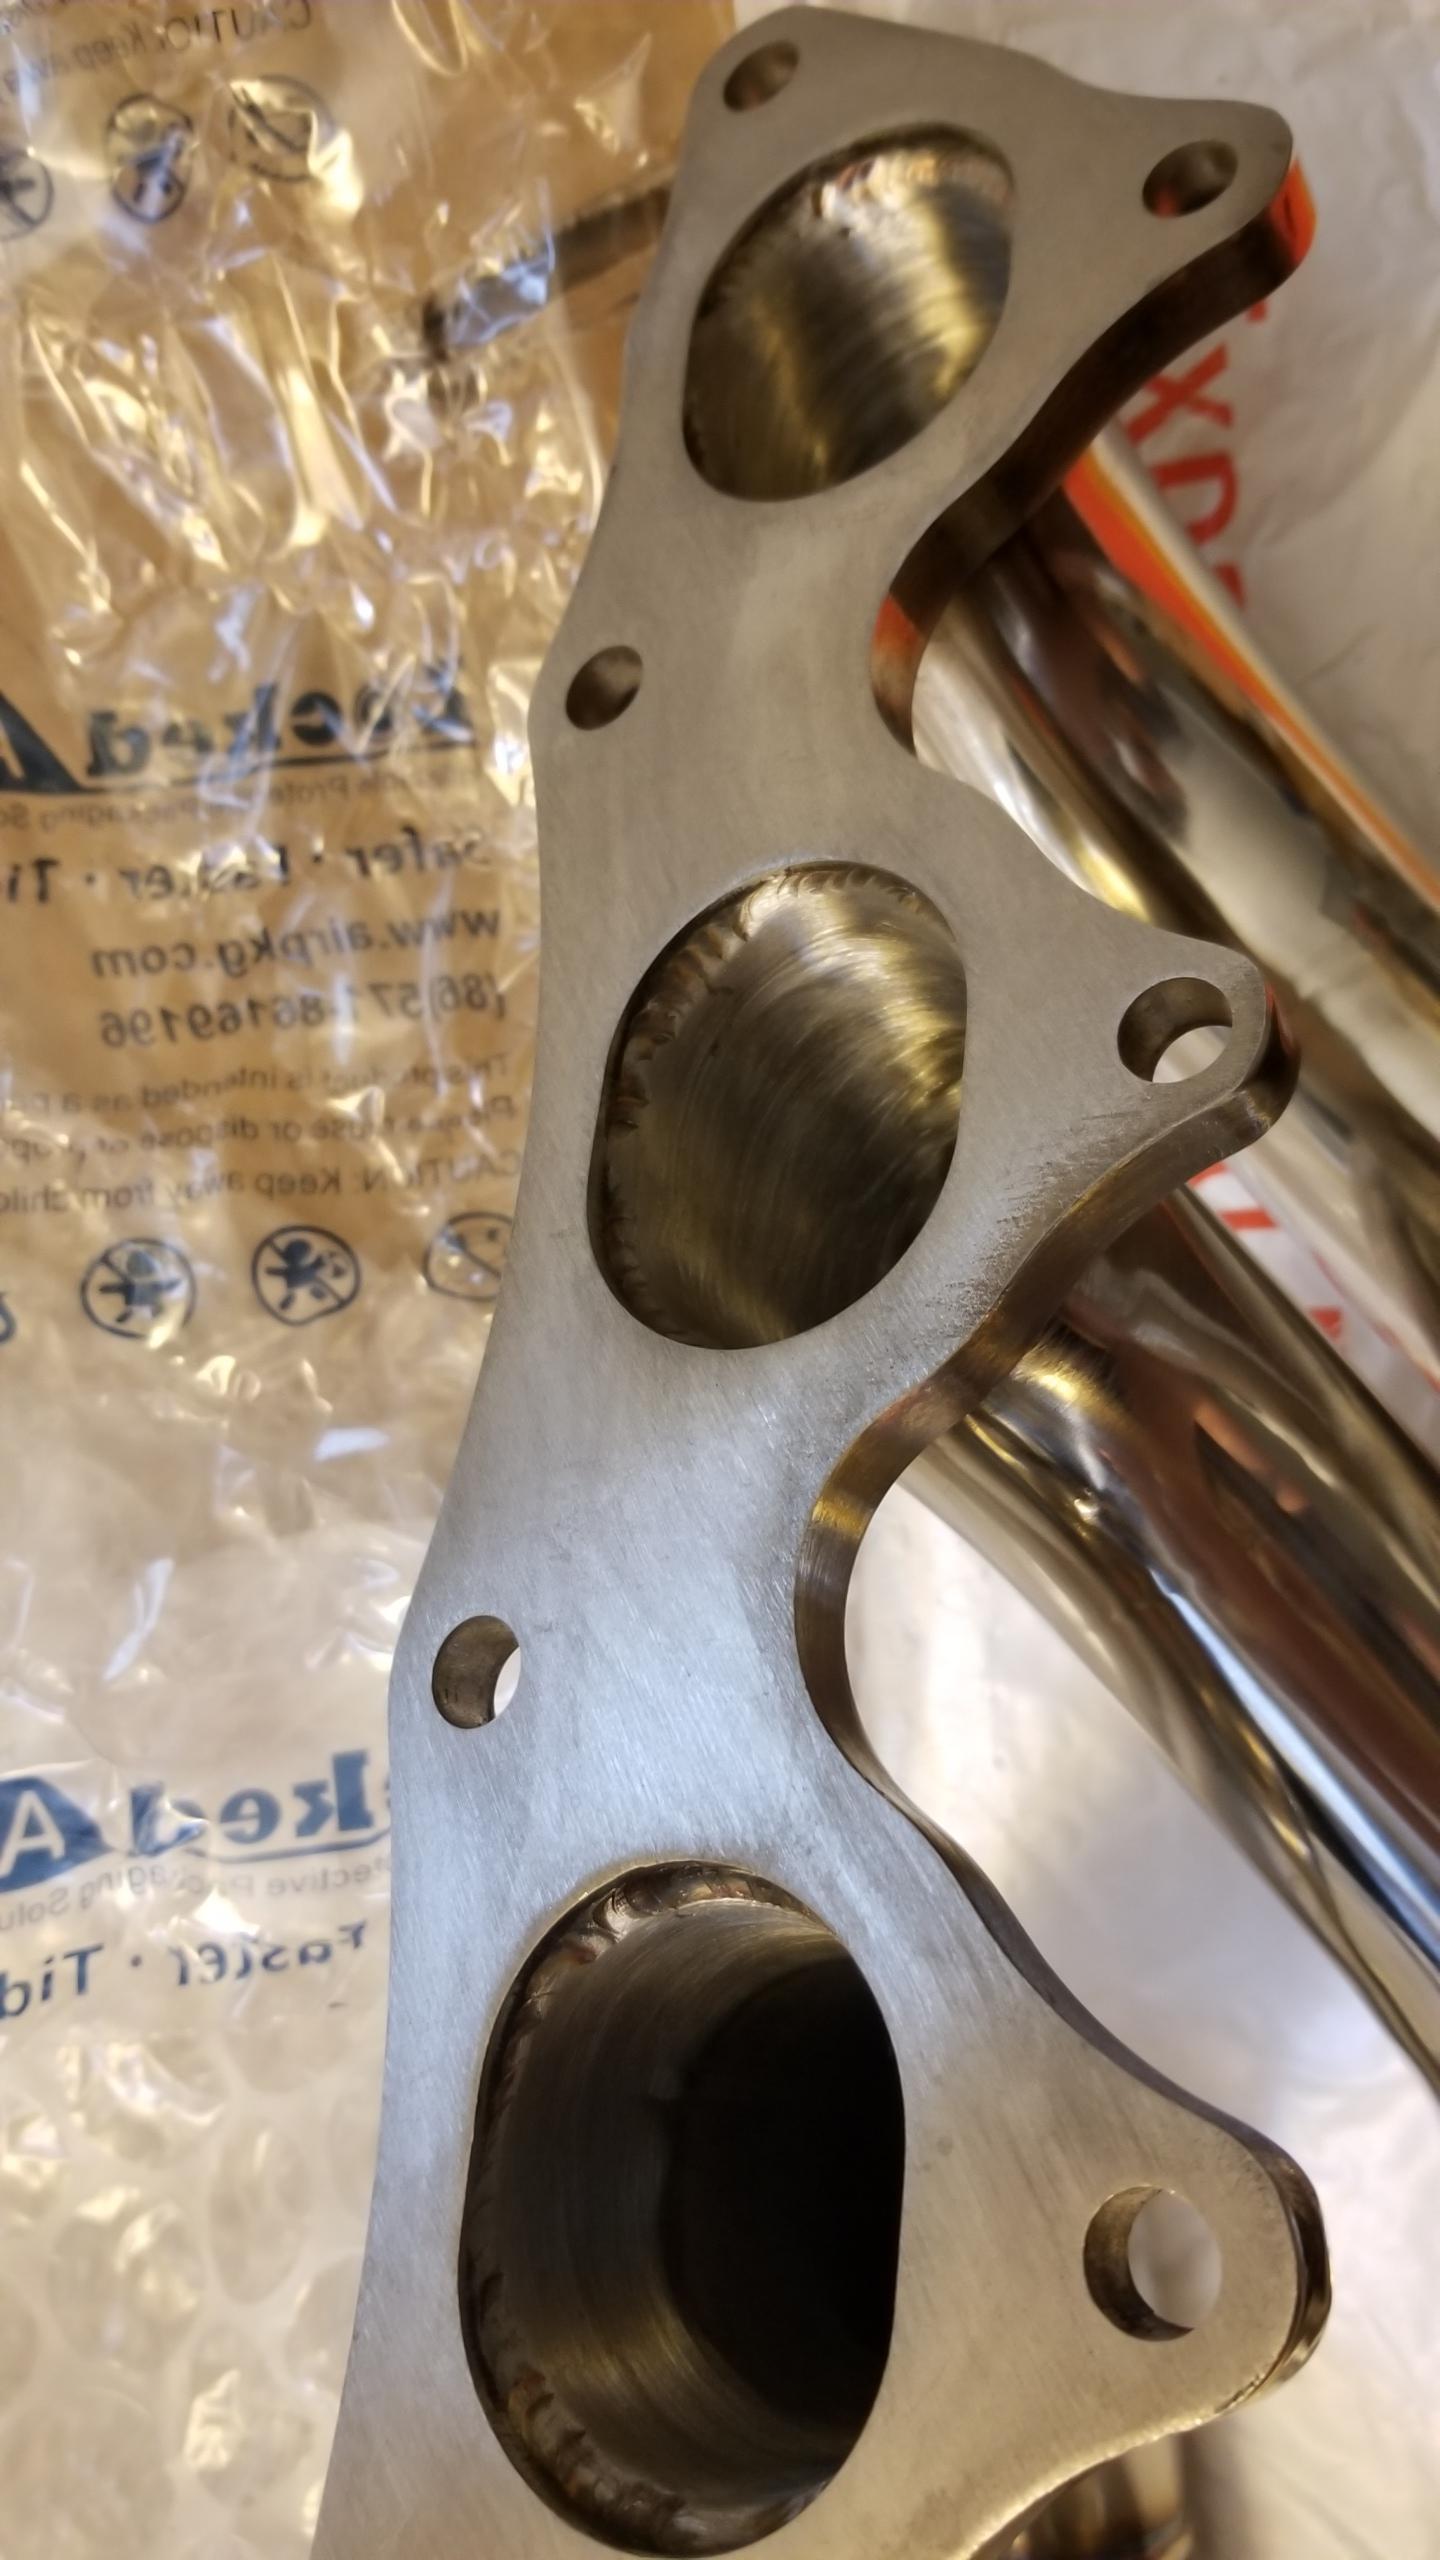
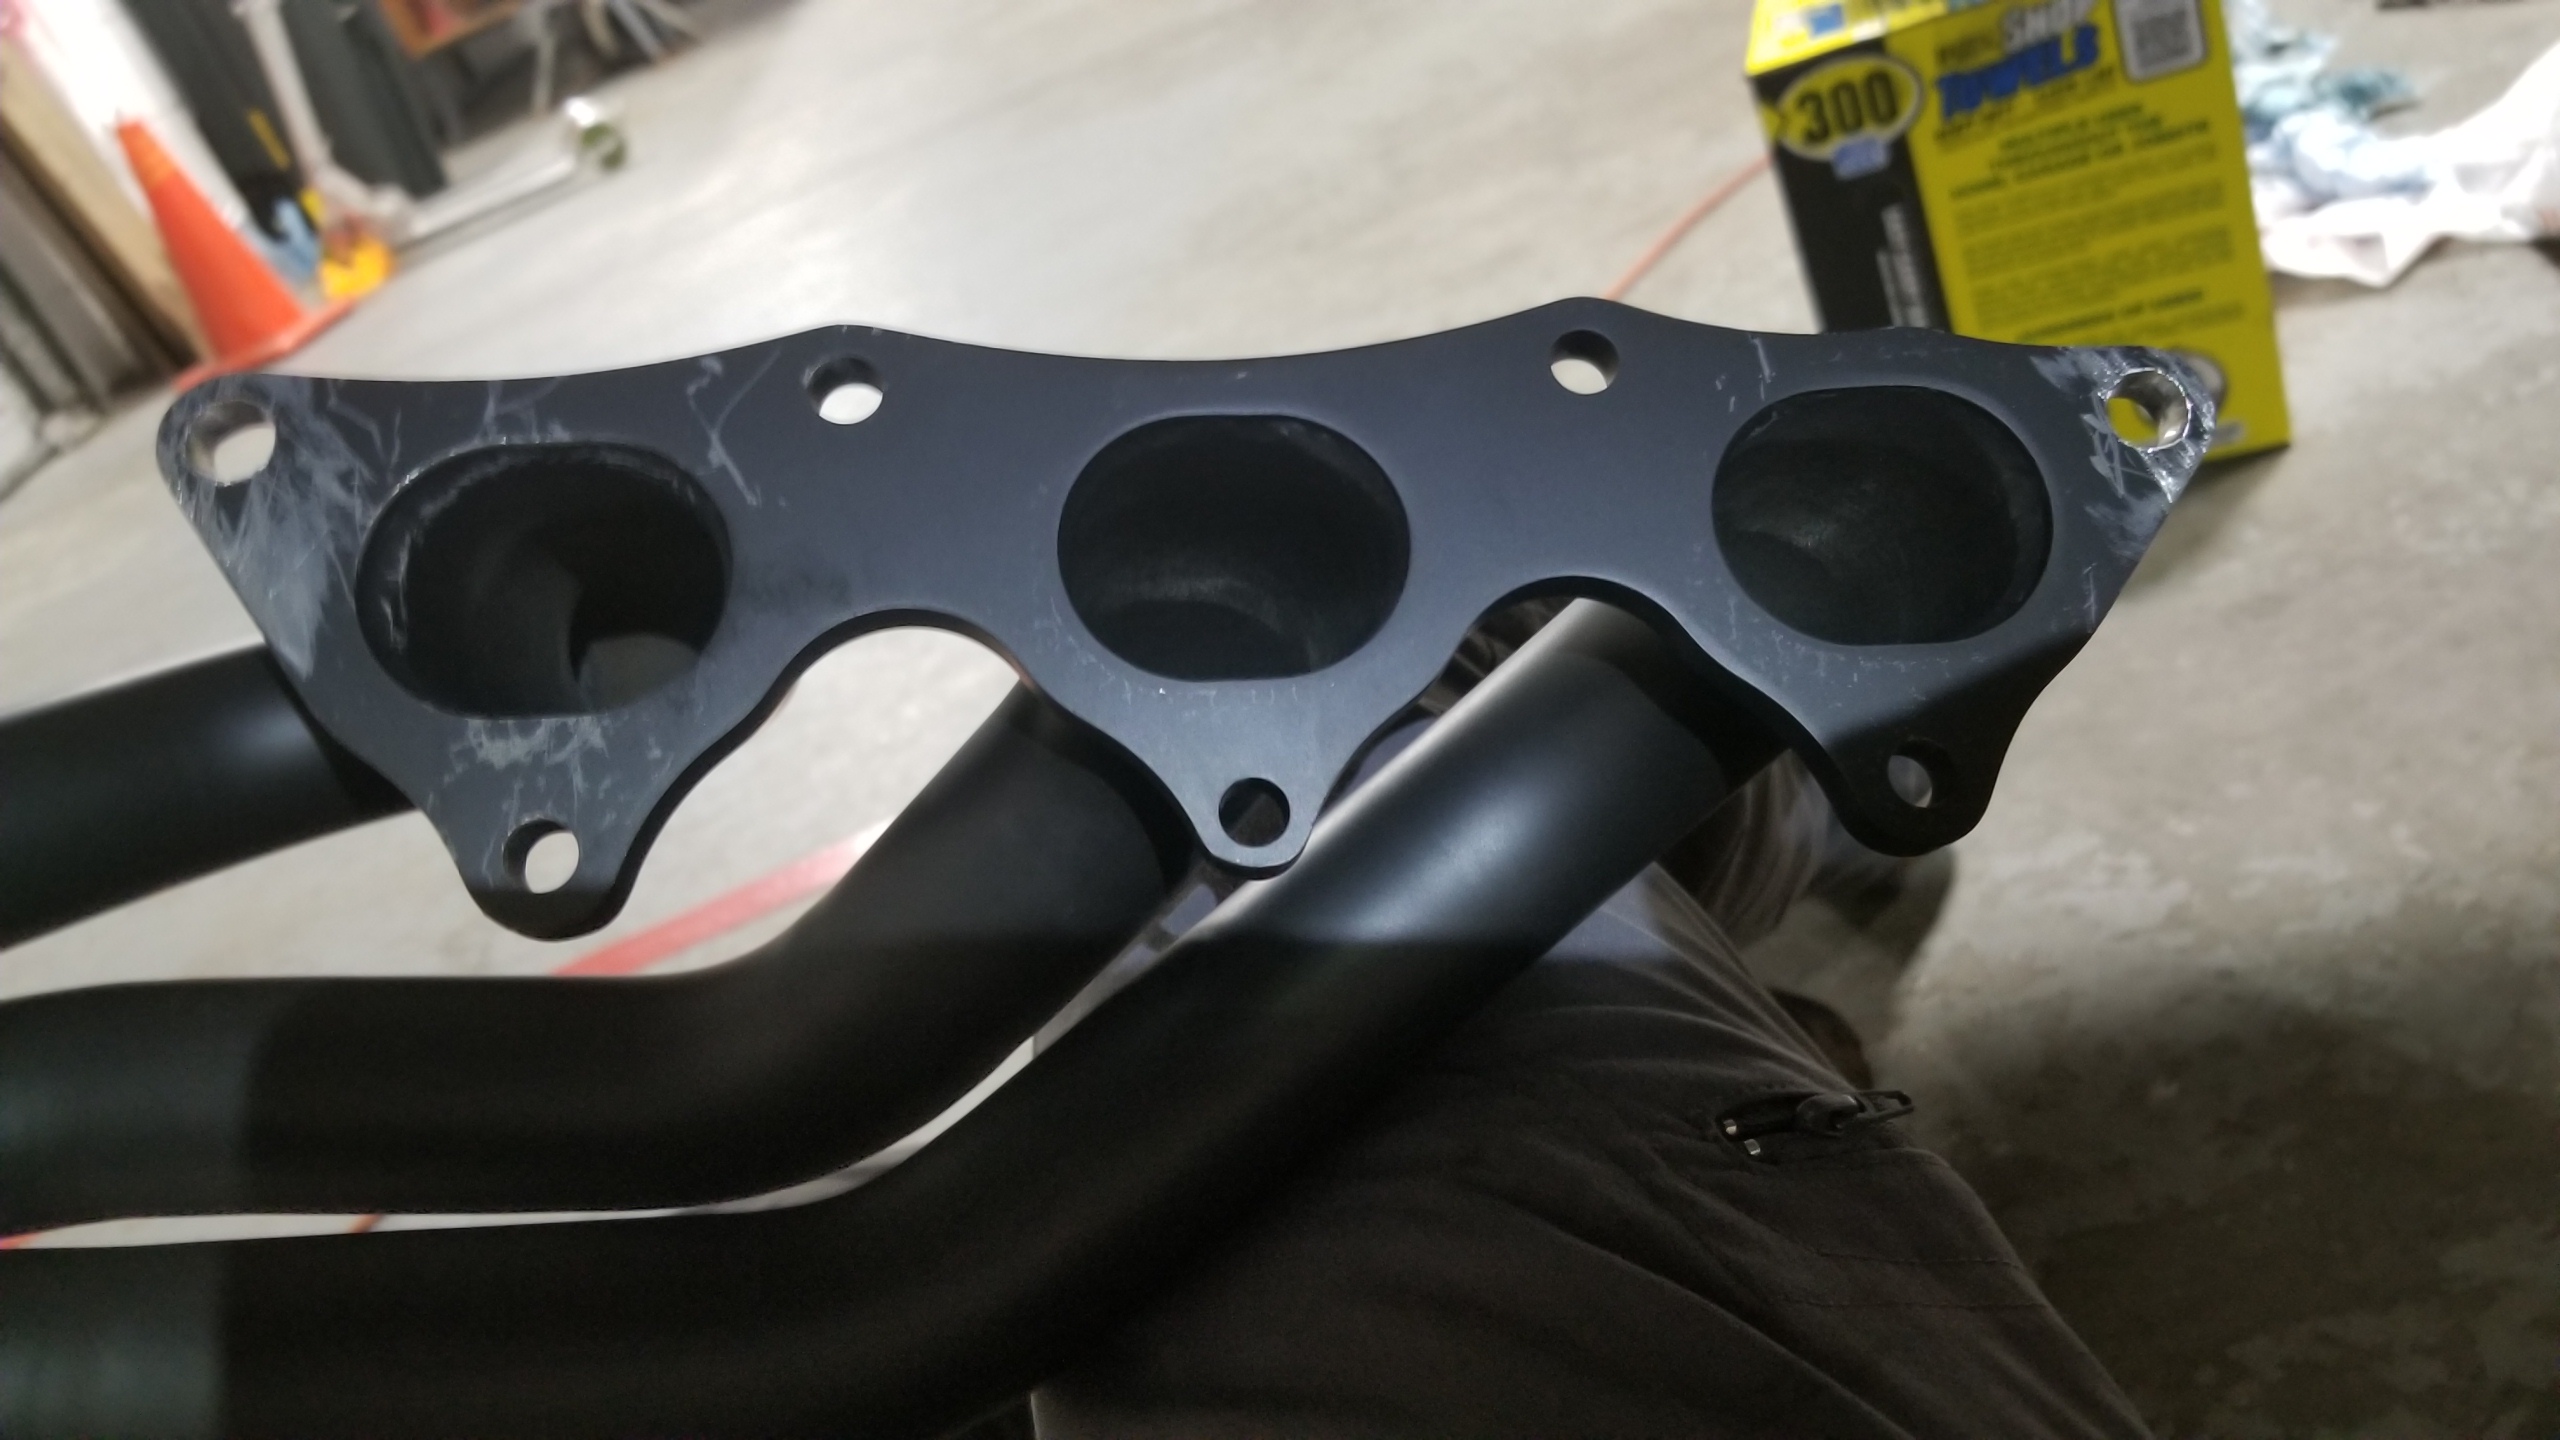
Here's one of the parts that really shit in my oatmeal, the Pride V2 headers did not fit on the manifold studs on the block. The two lower holes on each end were 2-3mm too close together, and the headers would not fit properly on the studs. I had to drill out both of the holes on both the front & rear headers to allow them to slip on. Yes, they were square to the block when I tried to fit them and no, taking the studs out and trying to put them on after the header would not have worked. That was a waste of two hours and a ruined coating on the flanges from drilling & filing. Disappointing but not enough to stop my progress.
ZIjnDNb.jpg


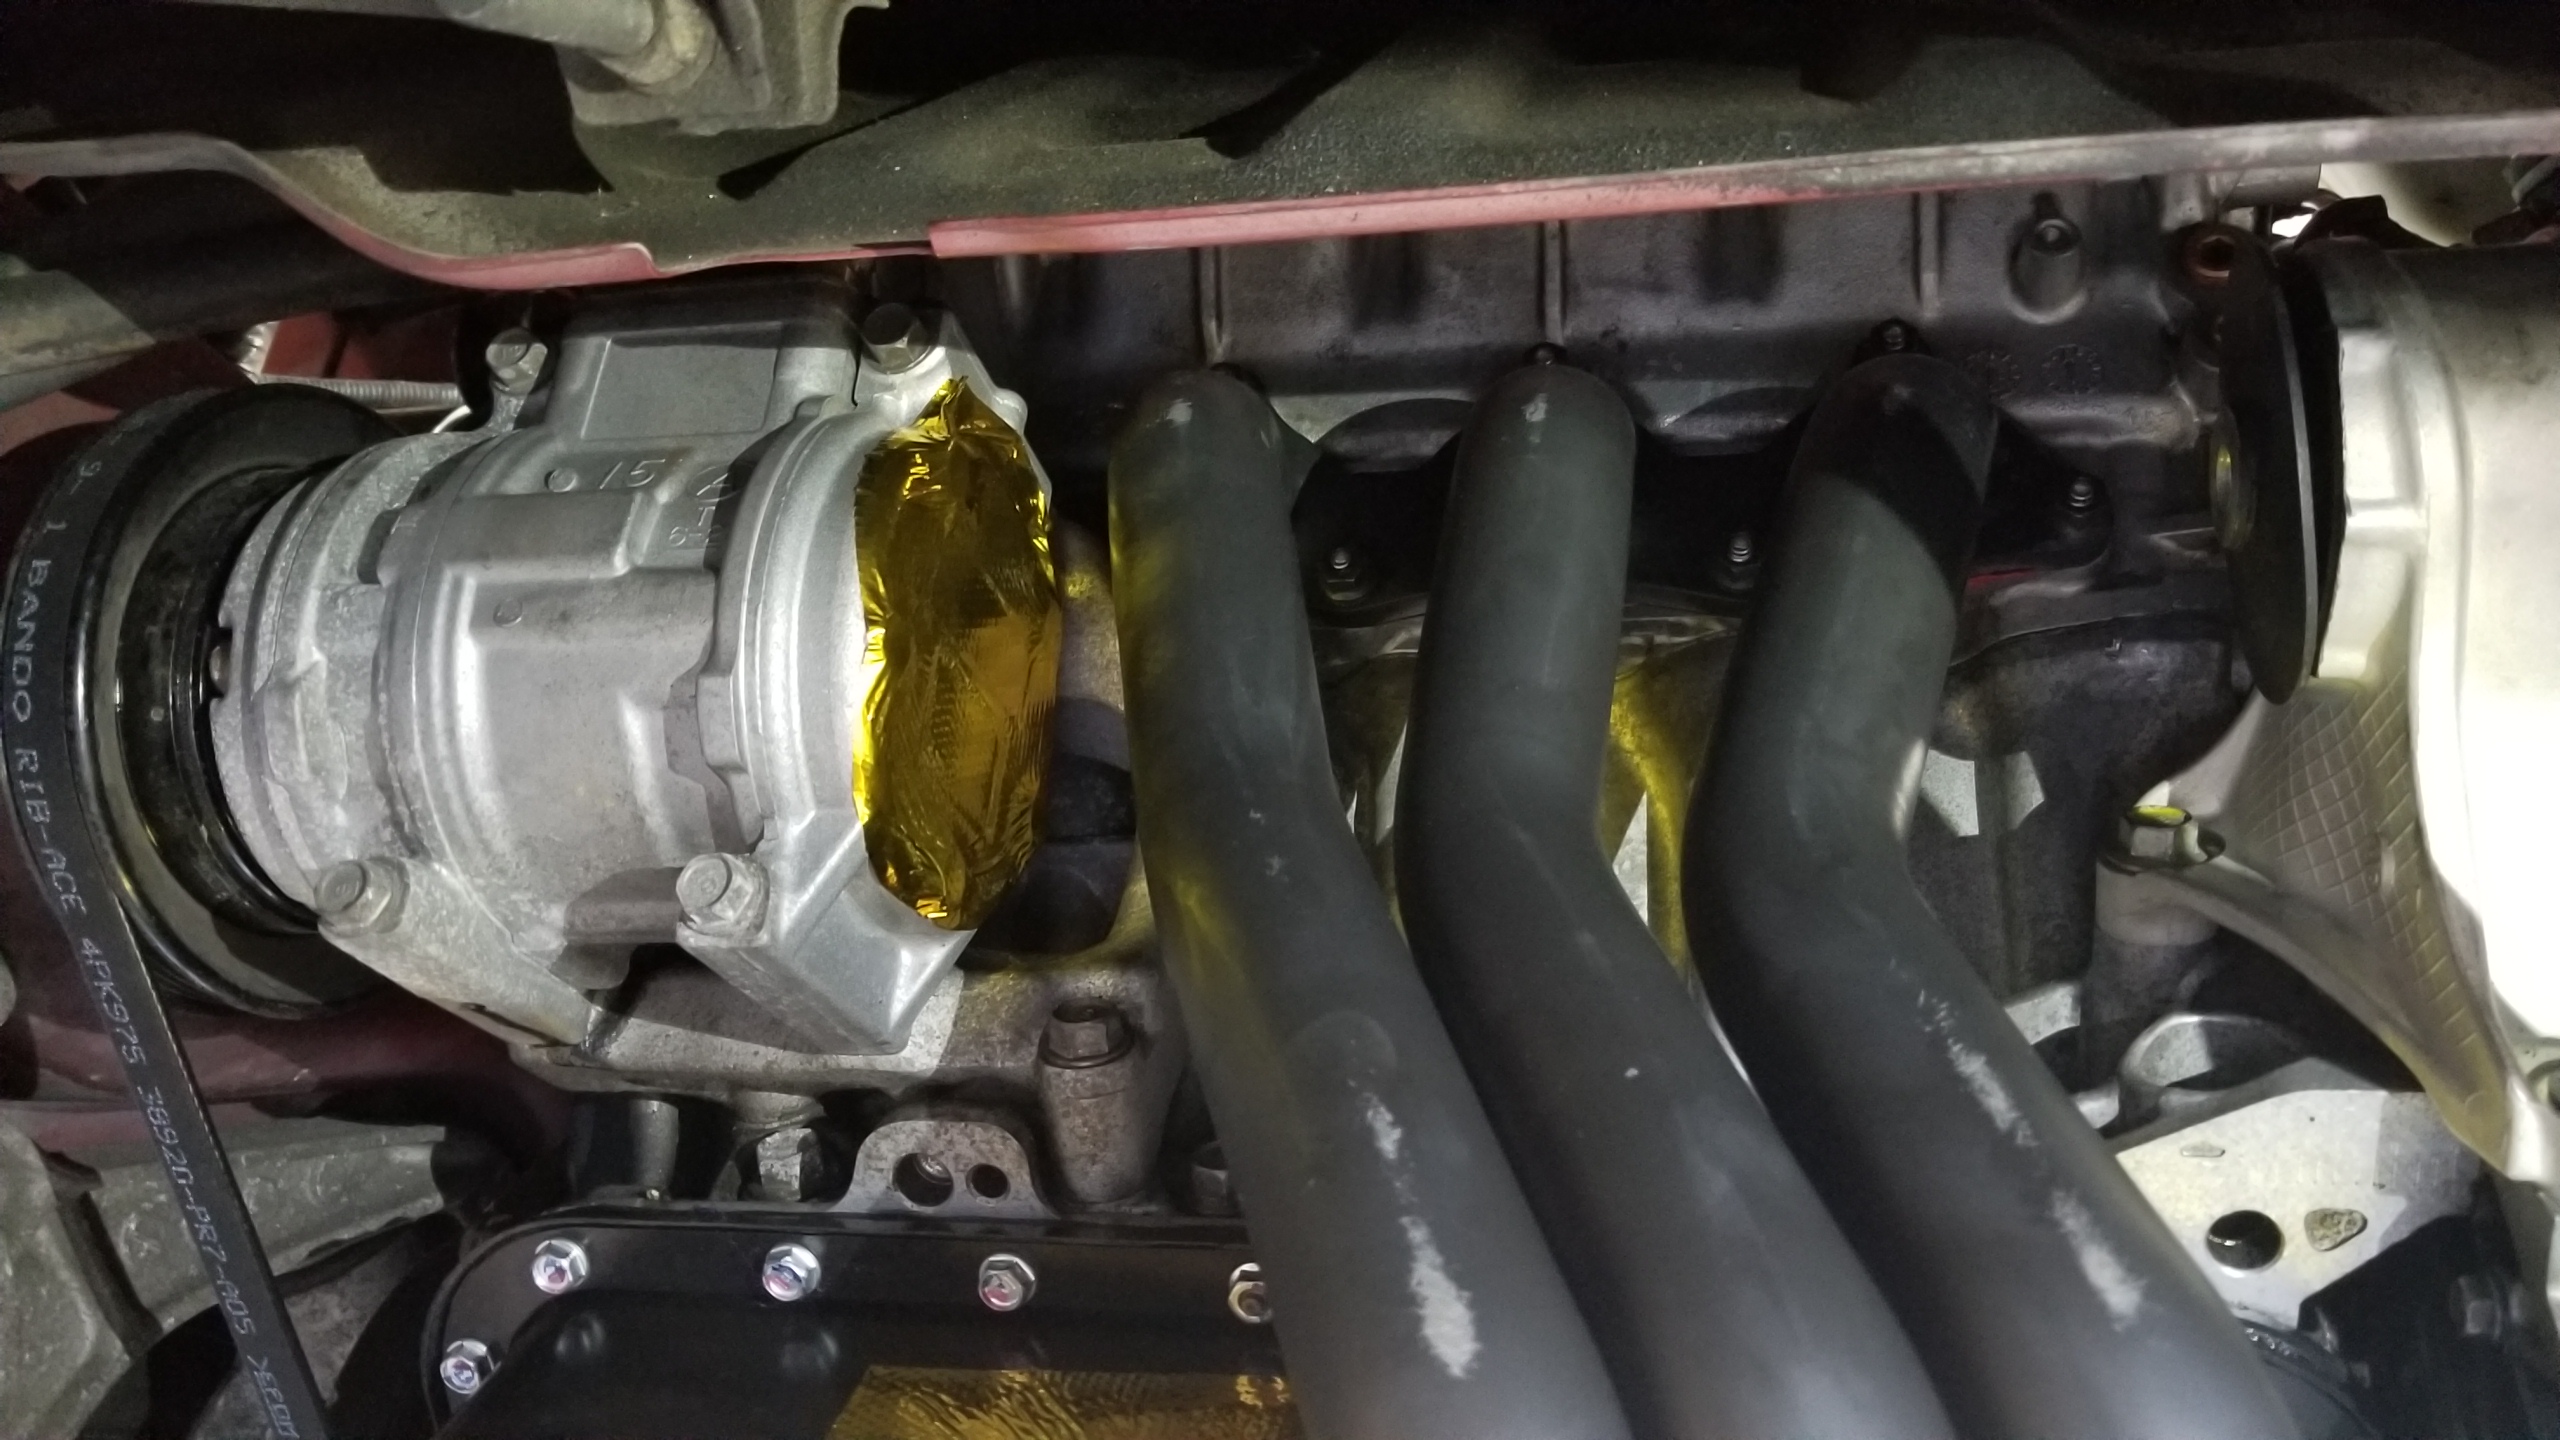
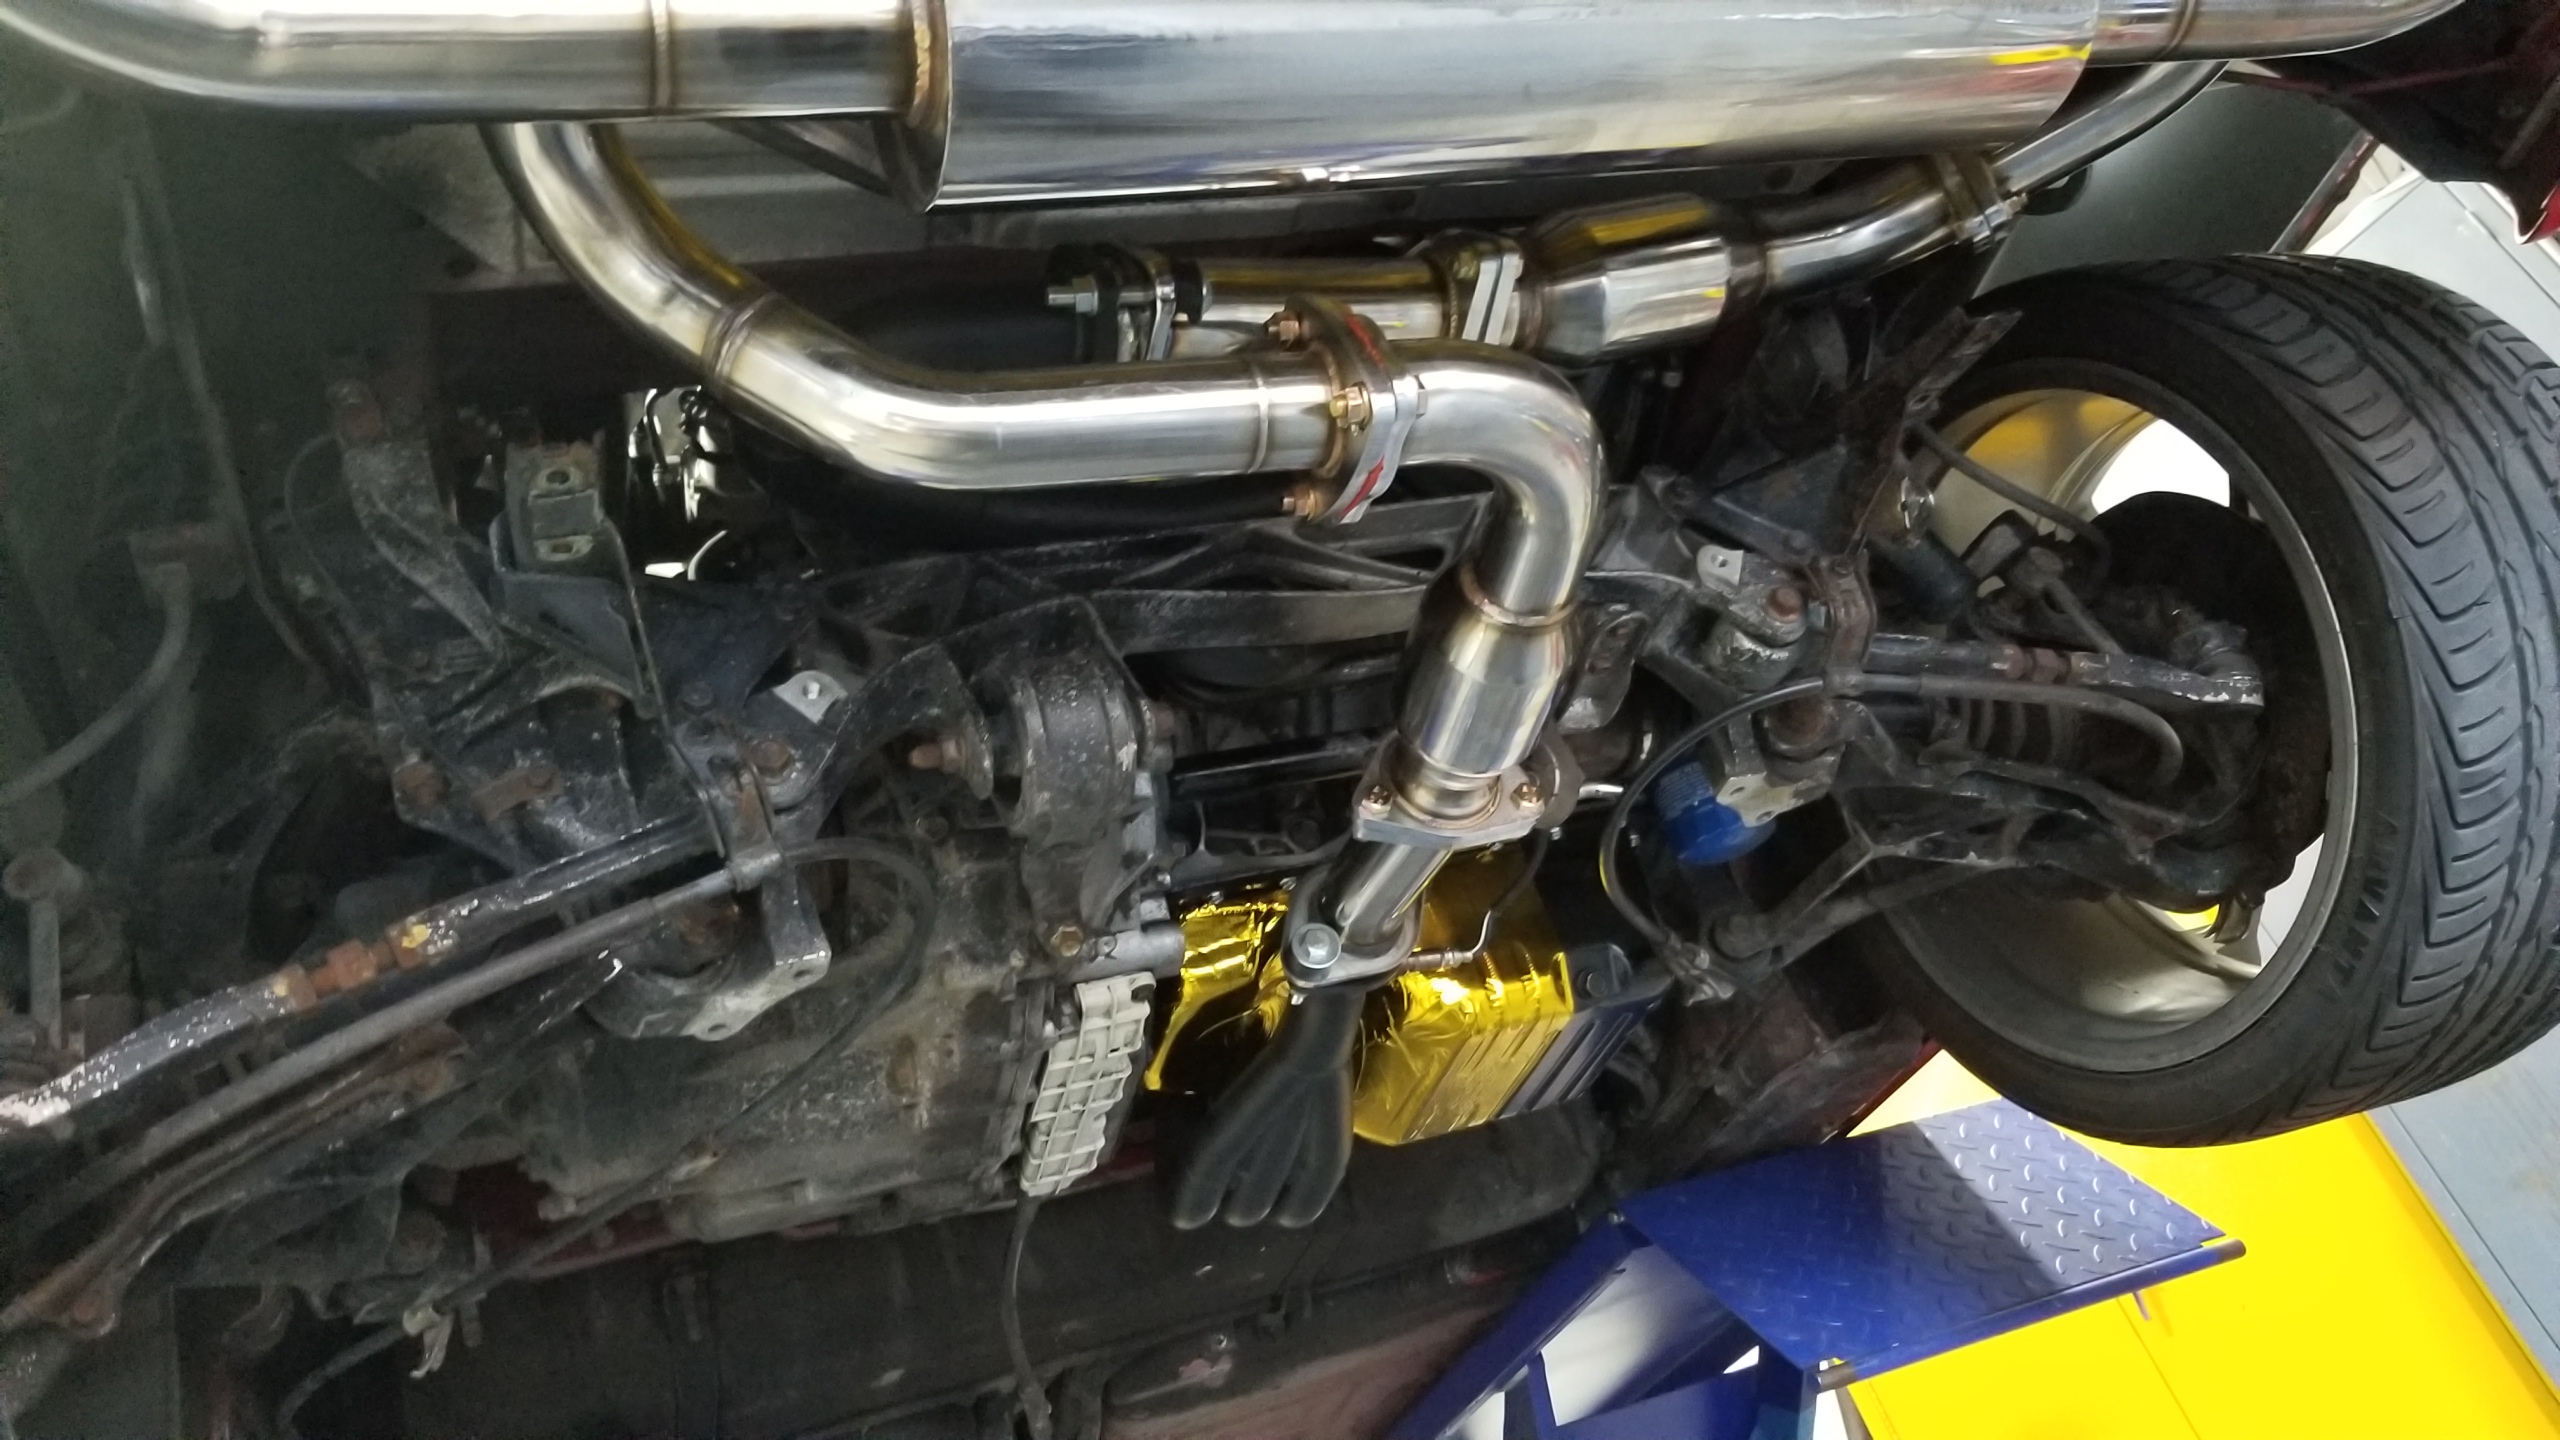
Fronts finally installed. The coating scratches quite easily and test fitting the headers several times to check my new holes didn't help keep it fully intact but it should be fine. All the nuts were oiled & torqued on, the only one I couldn't torque was the one under the A/C but I got it gutentight.
82c4nBw.jpg


Rears installed & torqued. You can see the new location of the rear O2 sensor, I think it's a bit easier to get to now. The wires could be routed the same was as factory with with the wire extensions, there was enough slack between the bracket and the connector clip that I just zip-tied the wires to the upper wiring harness across the rear valve cover. Don't want the wires drooping down onto the headers and melting.
Ag3RI8Y.jpg


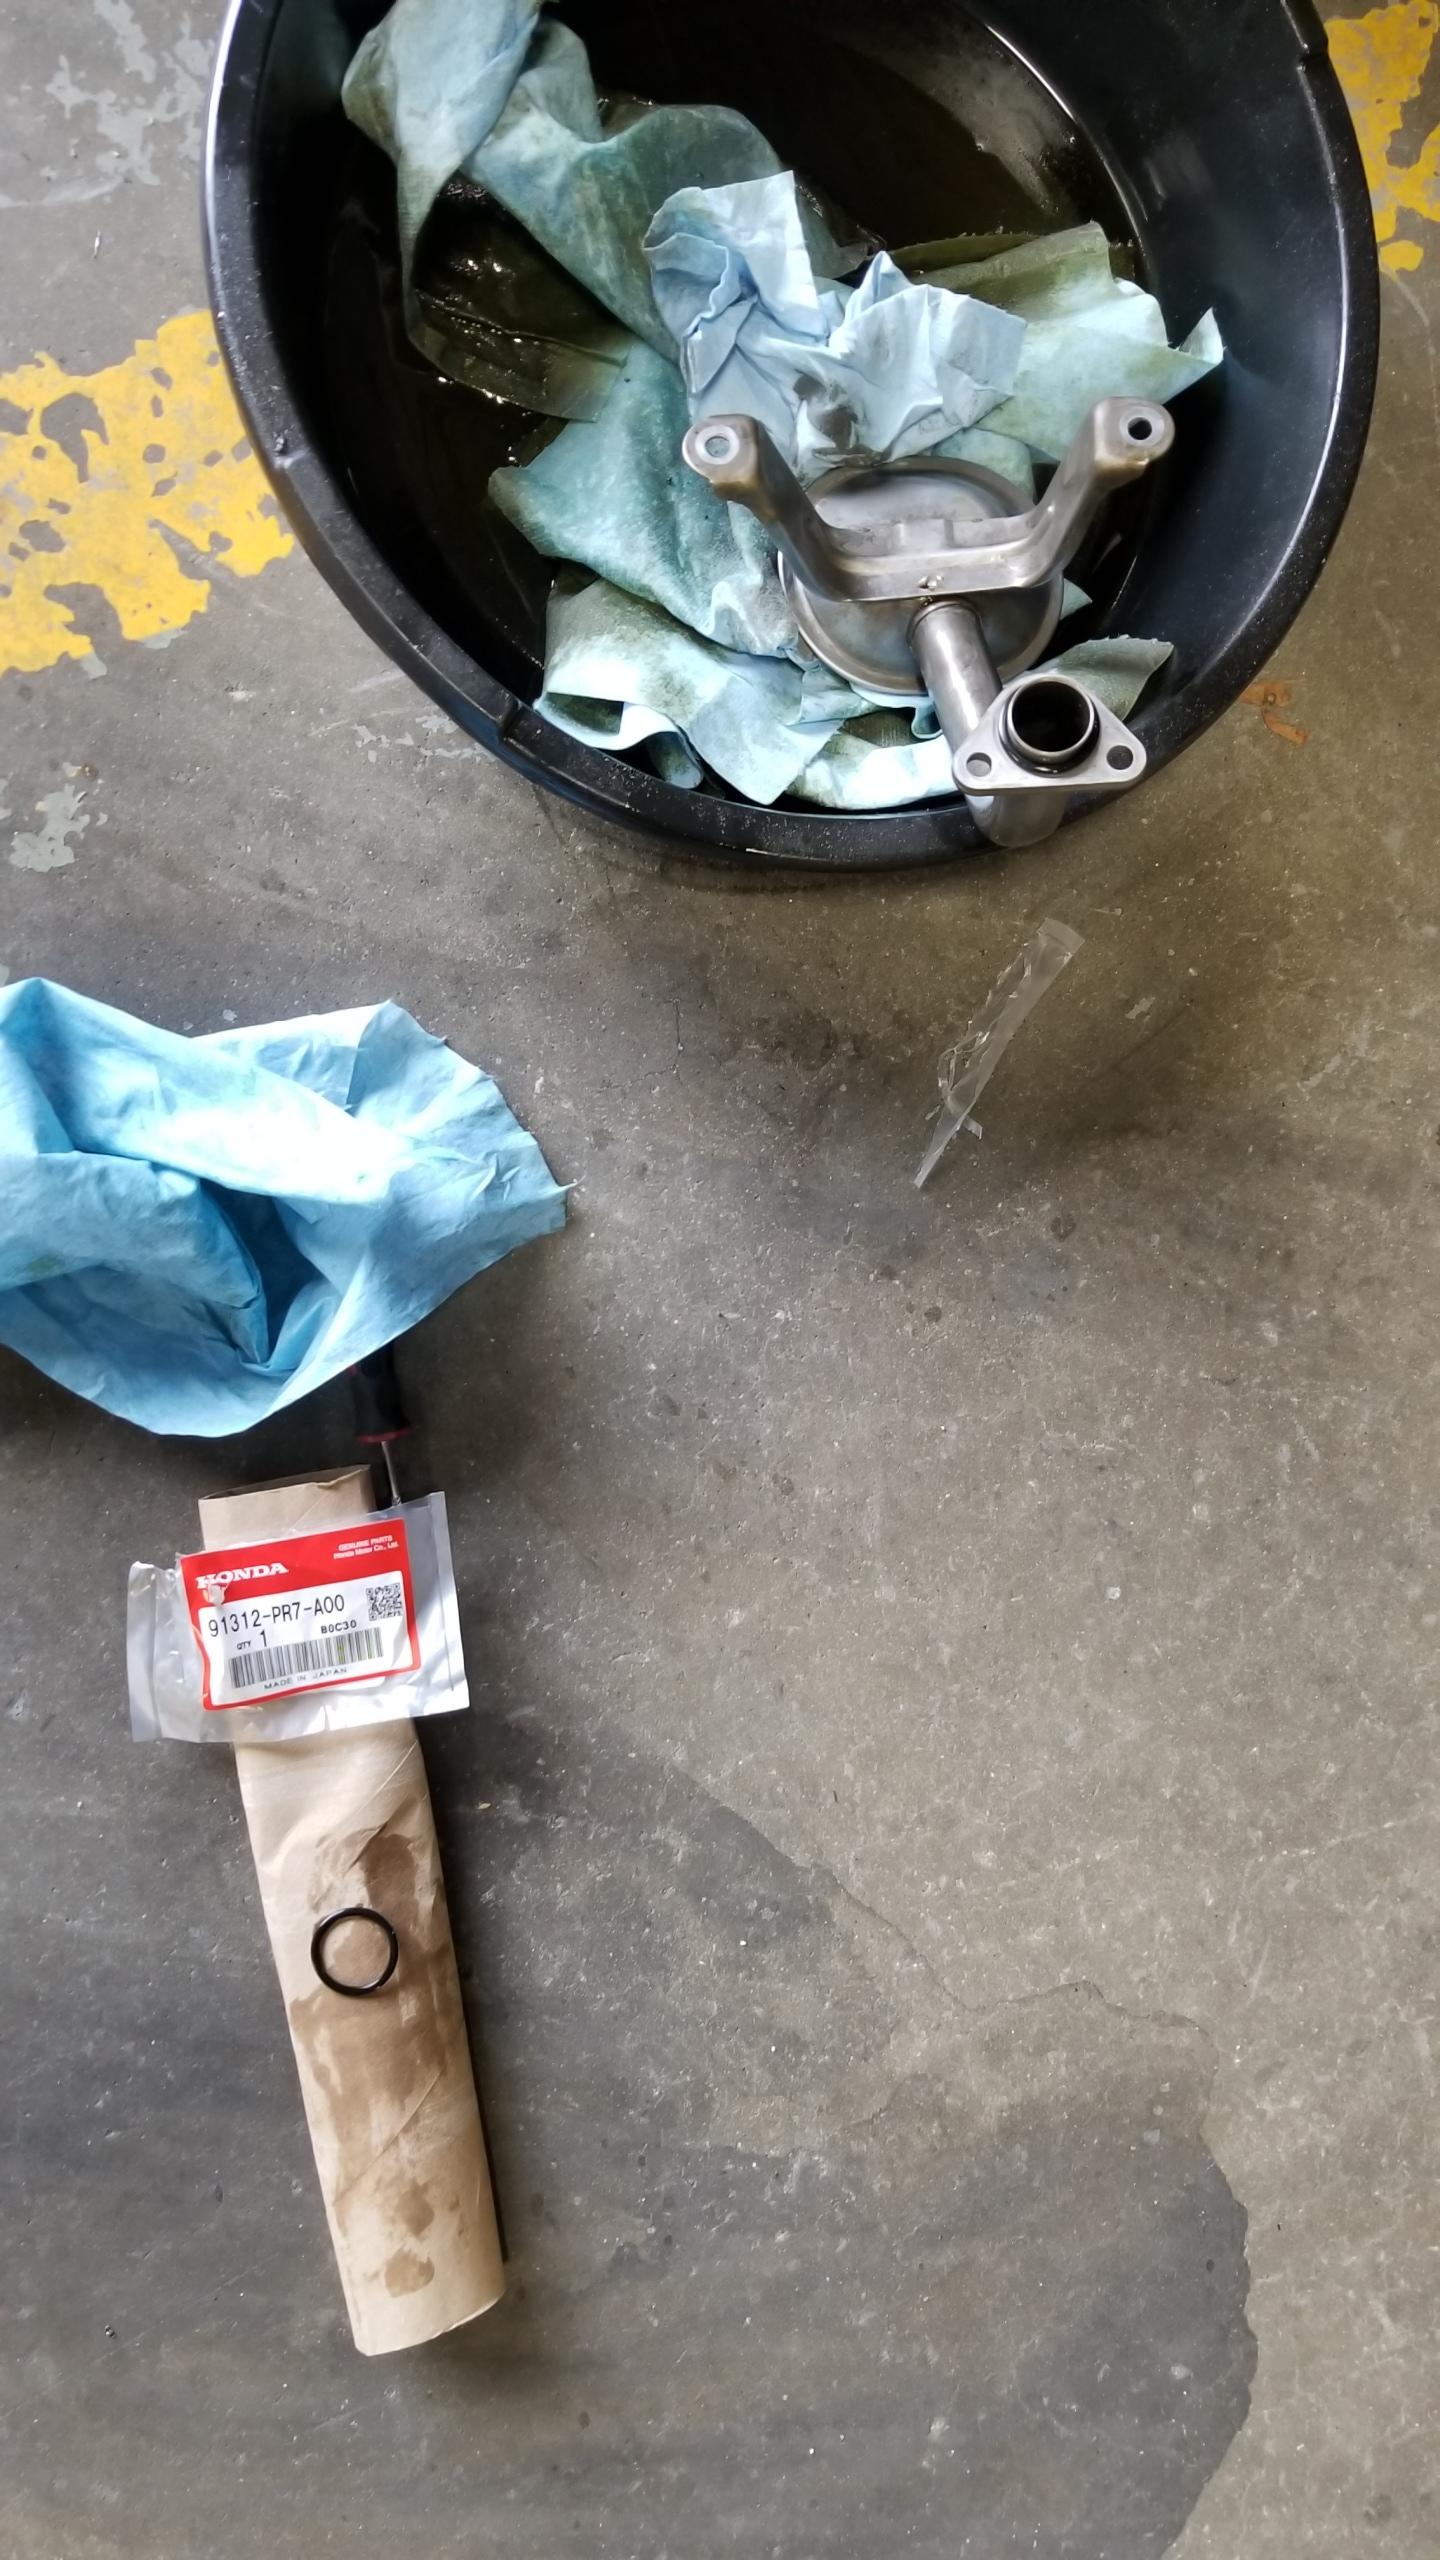
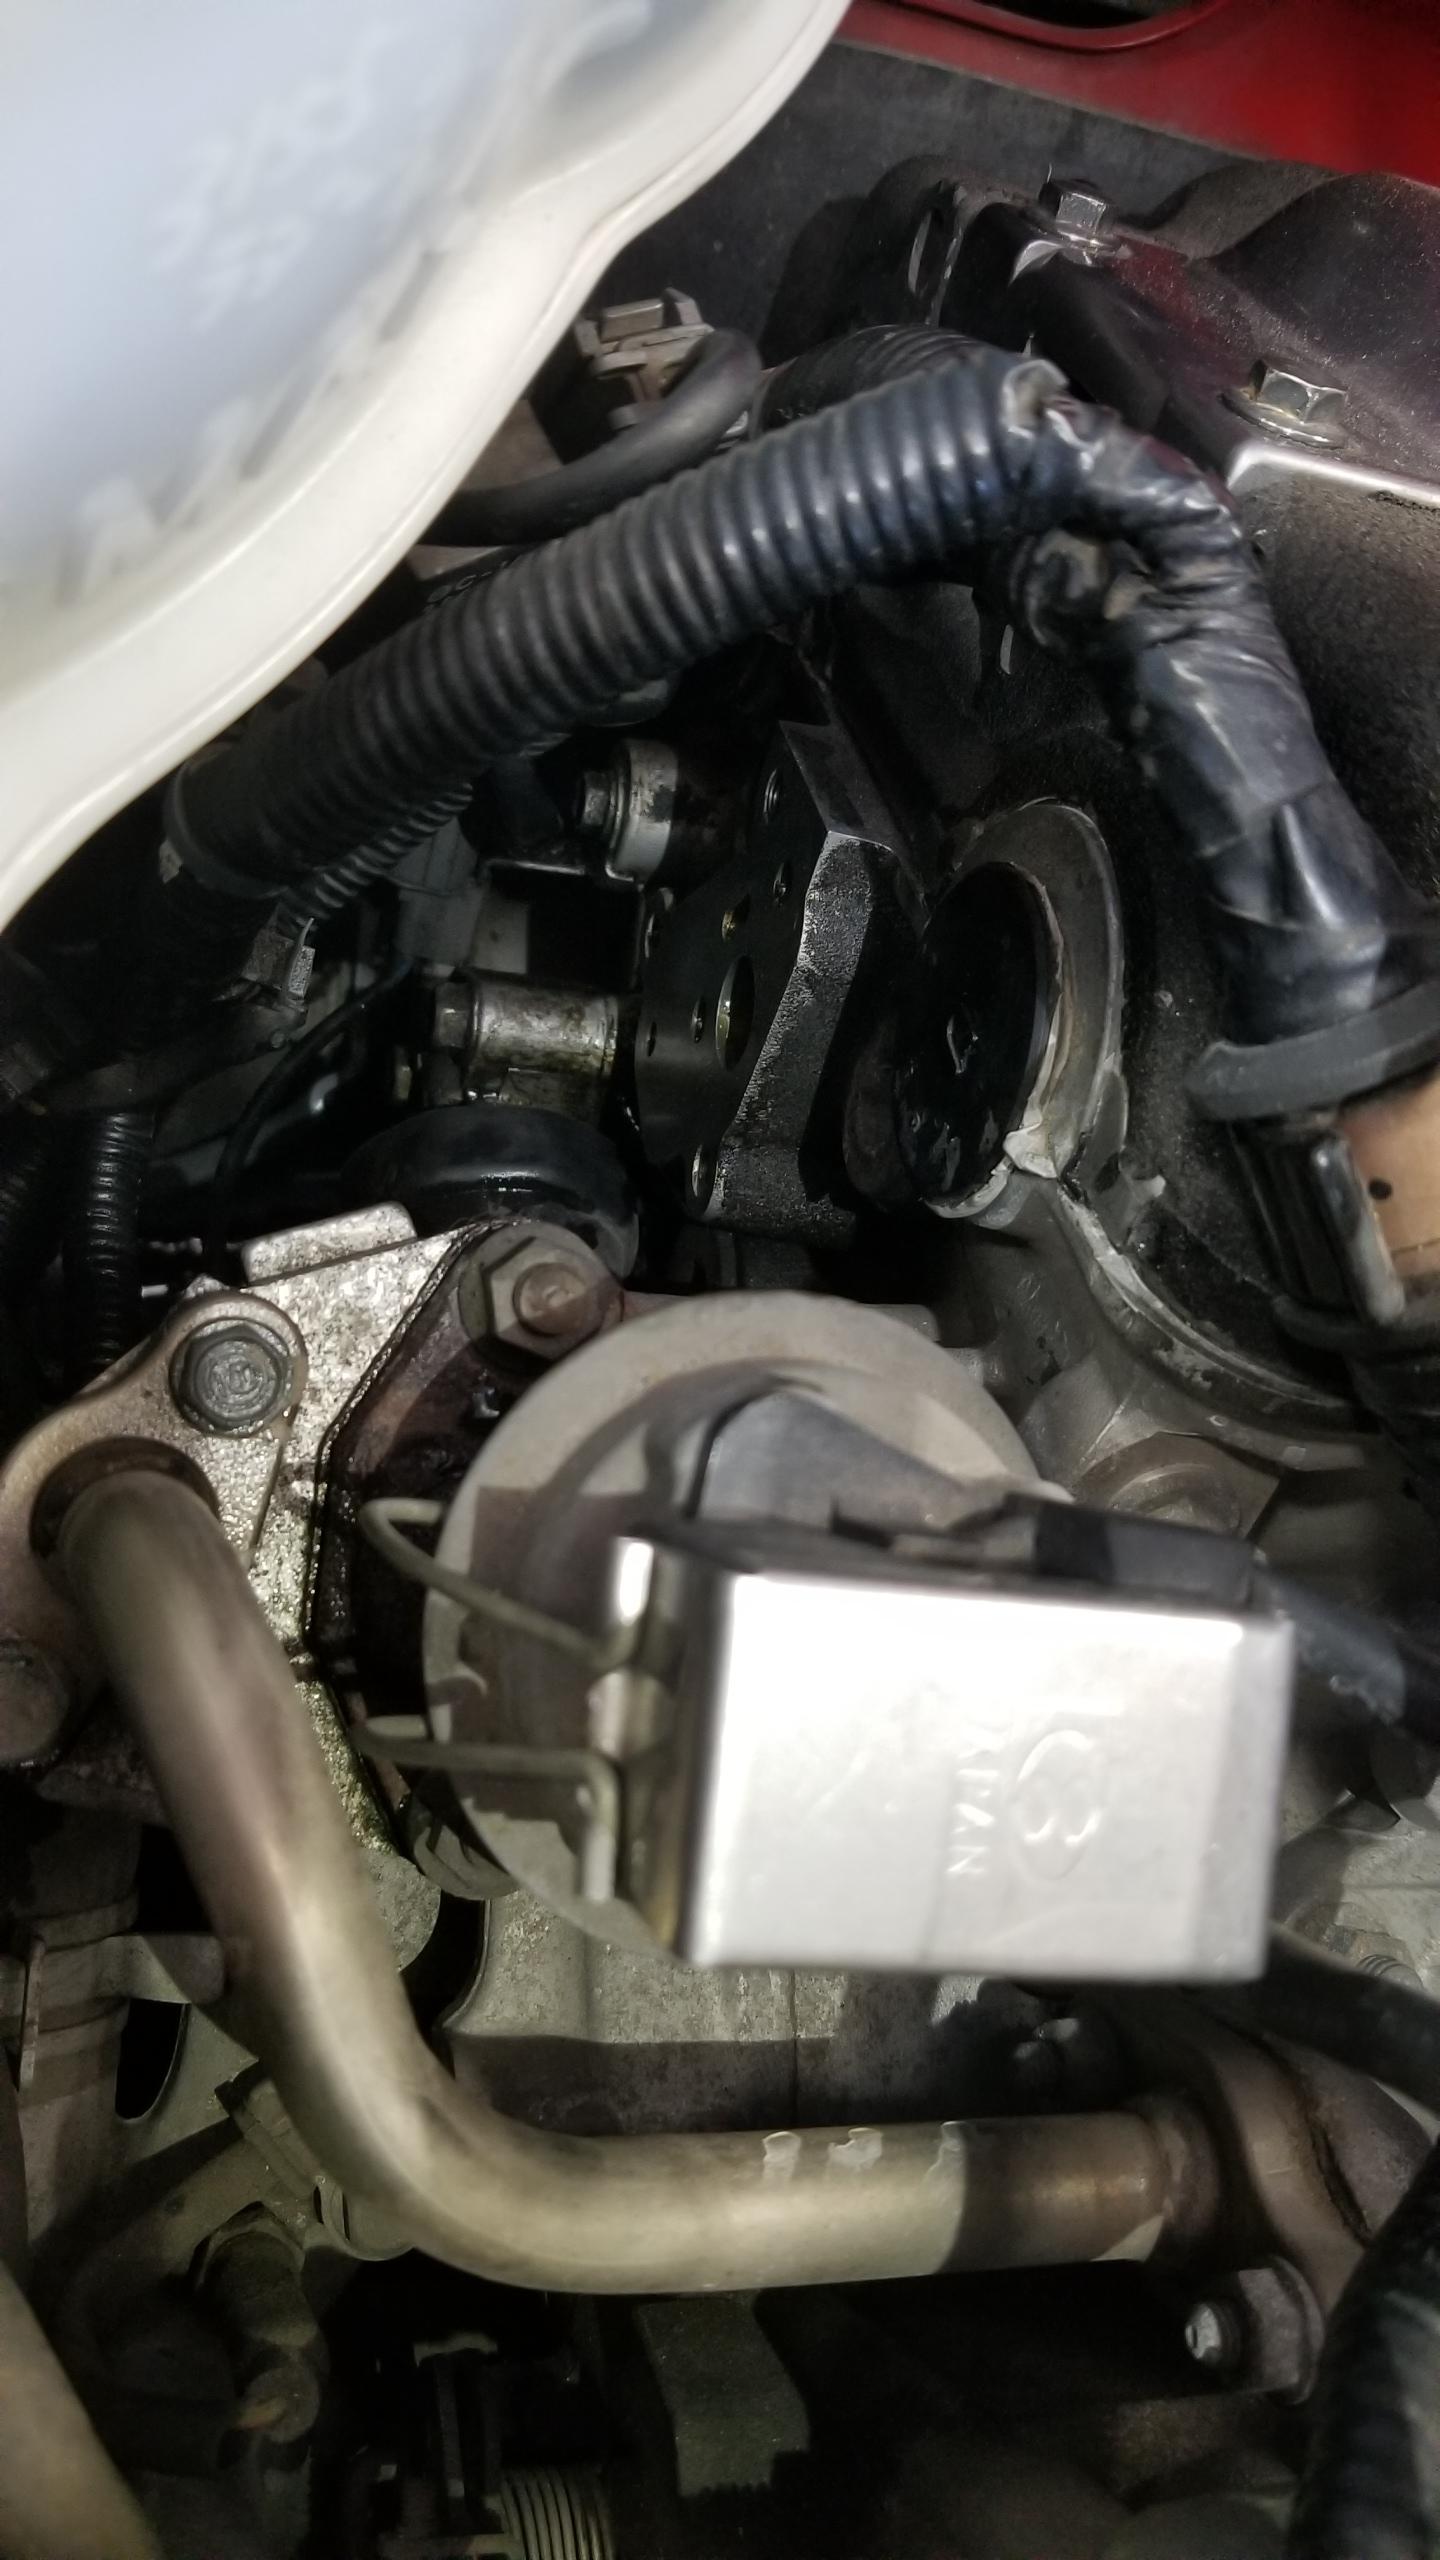
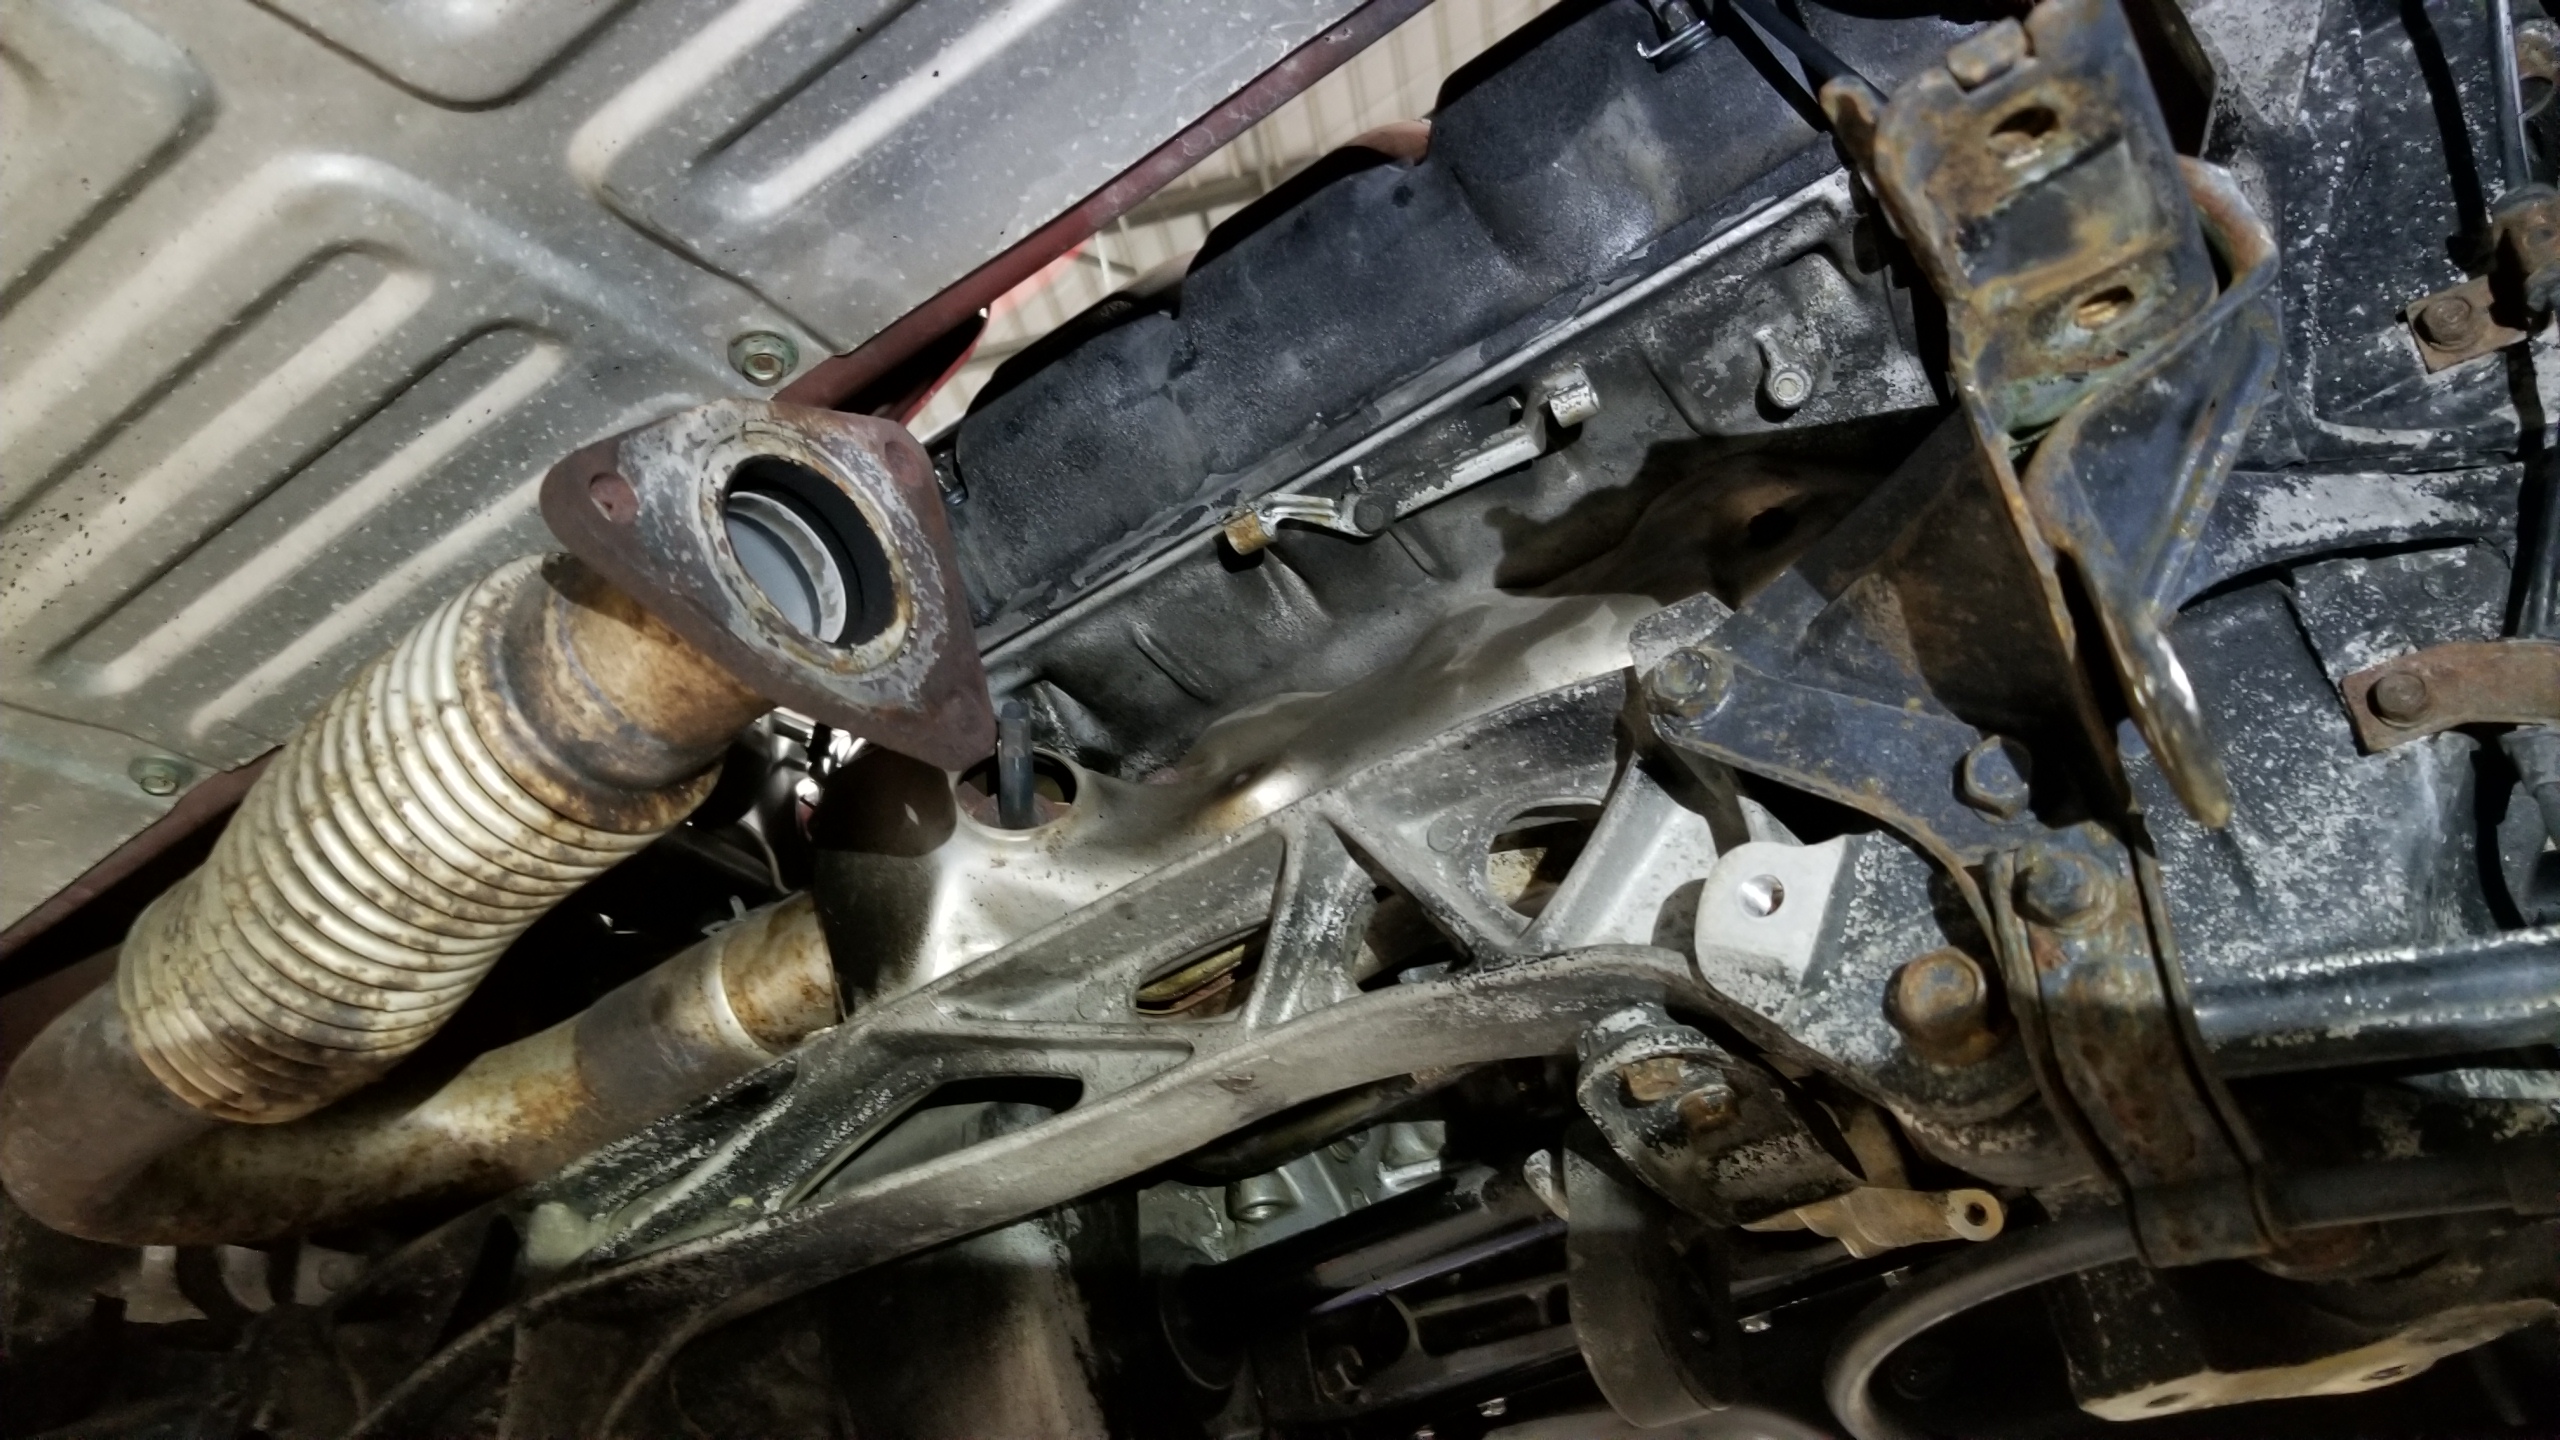
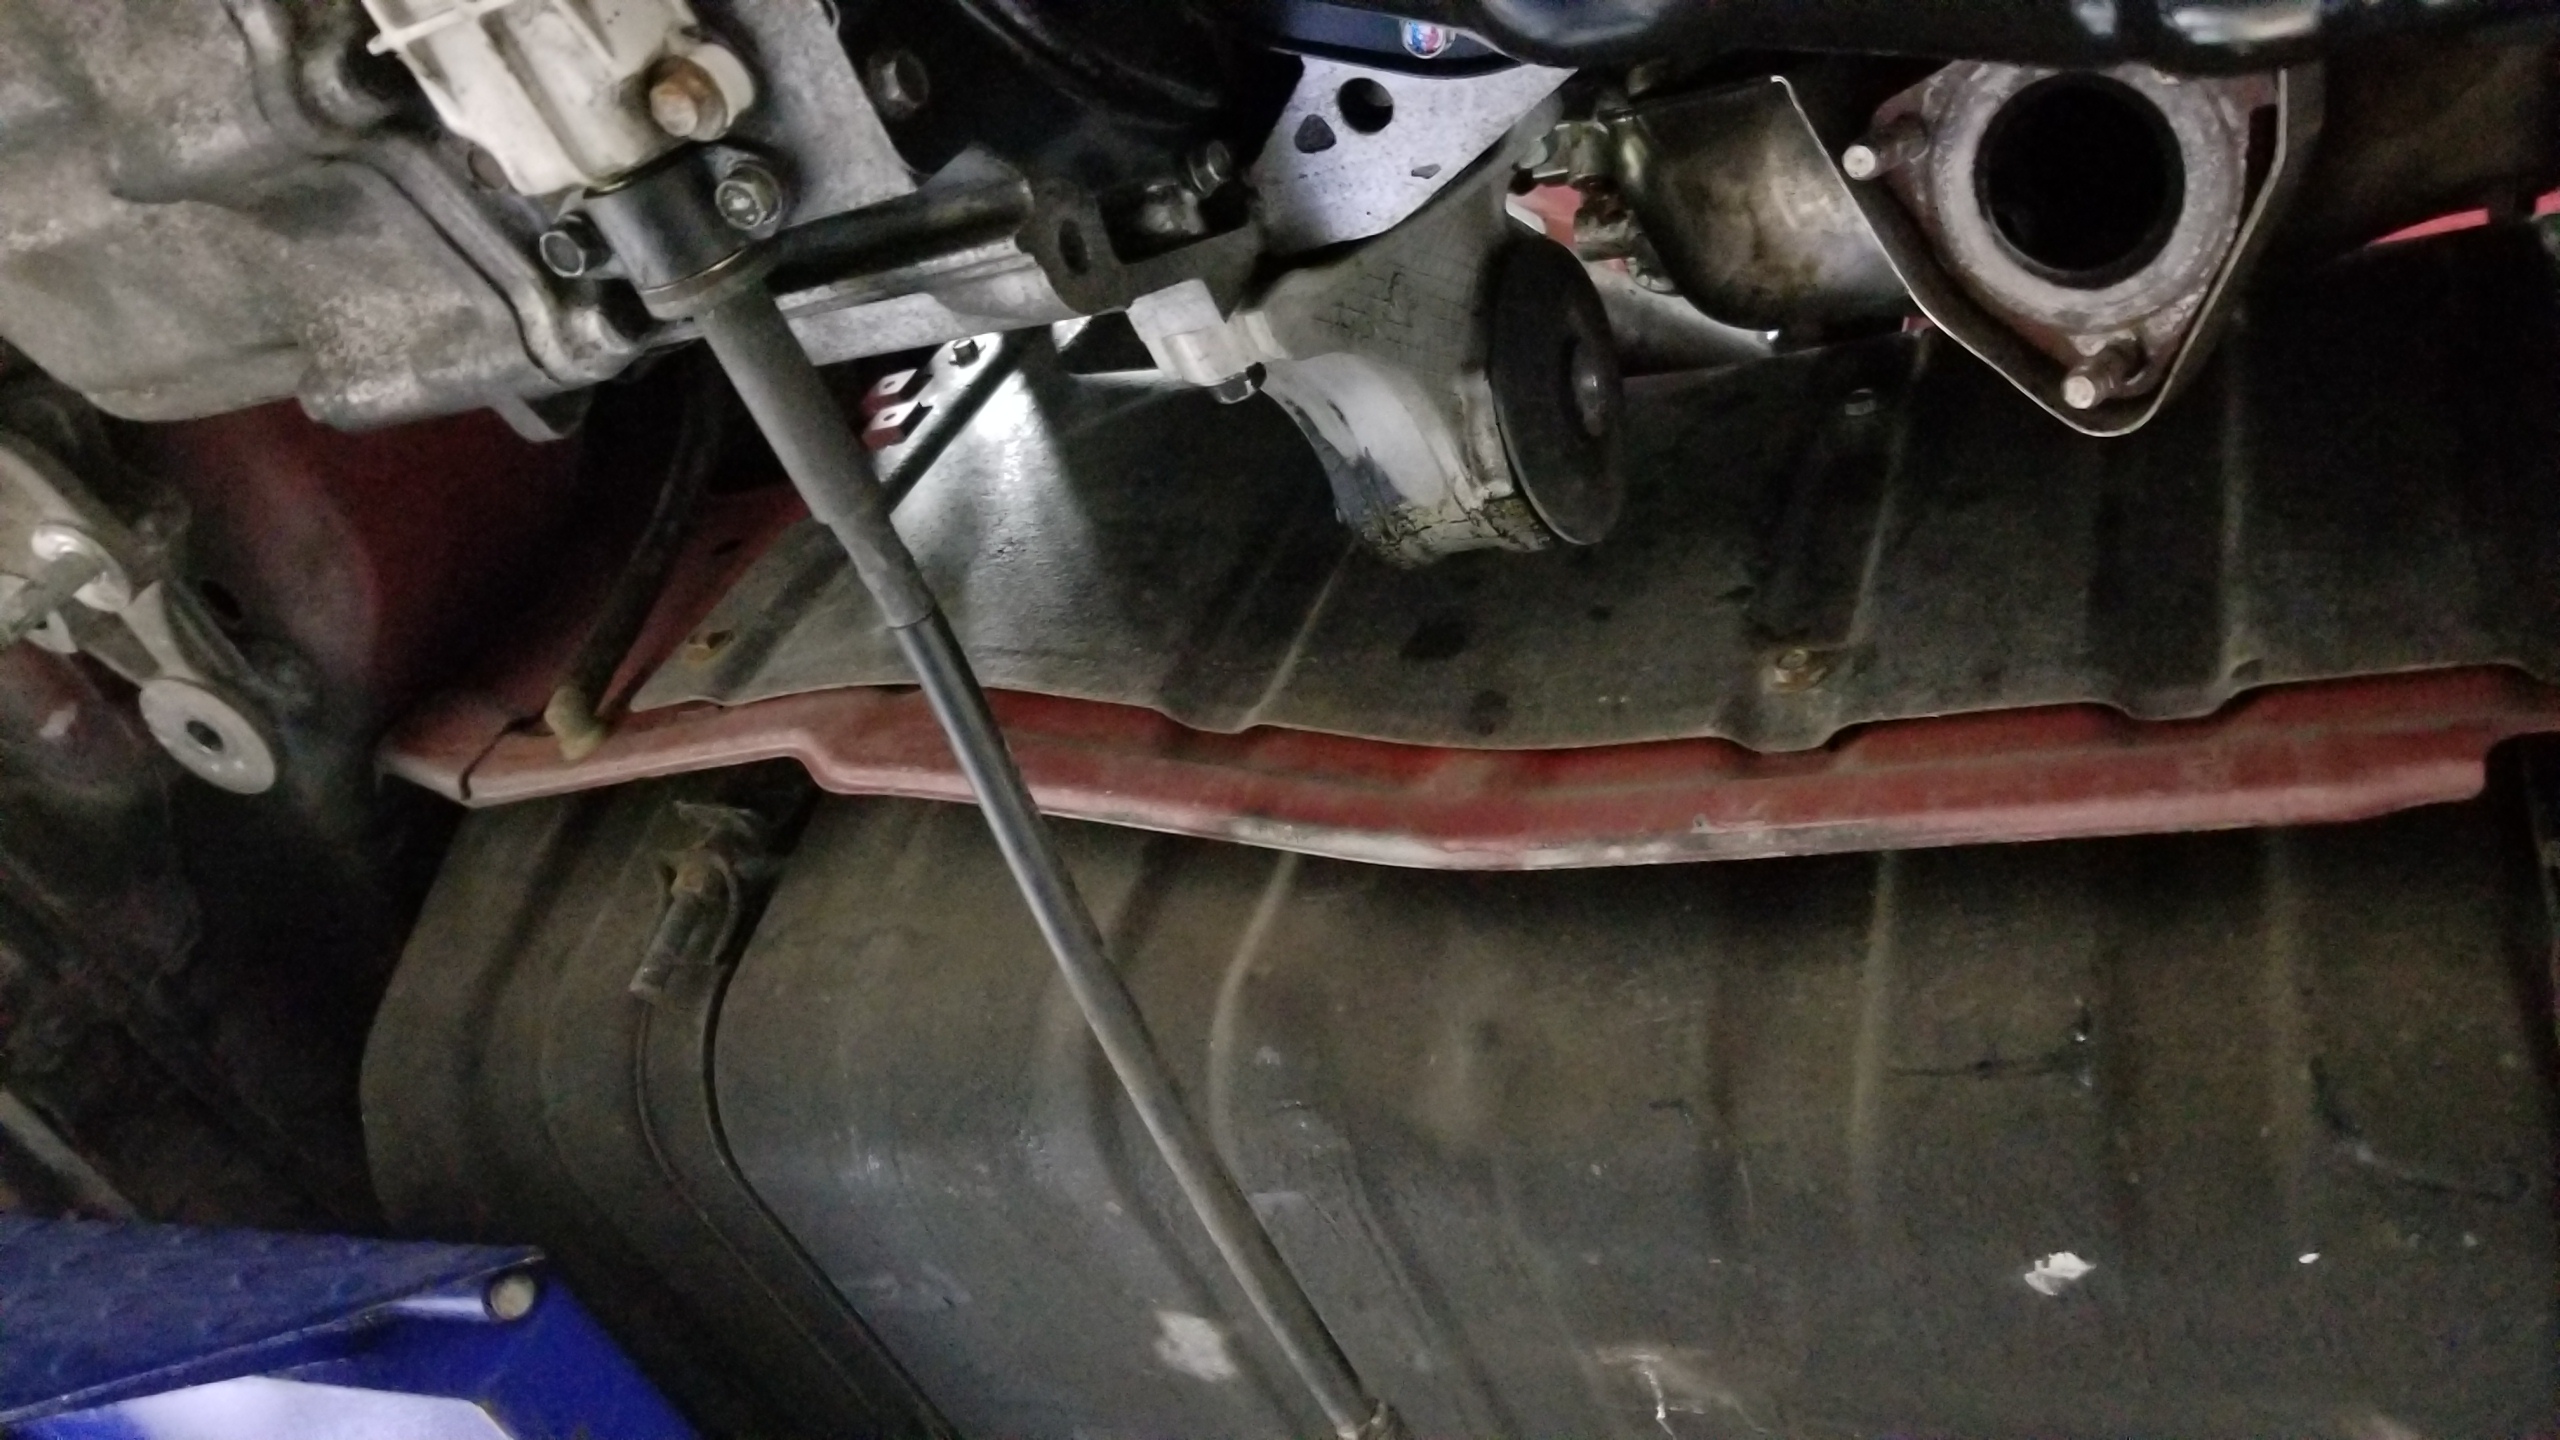
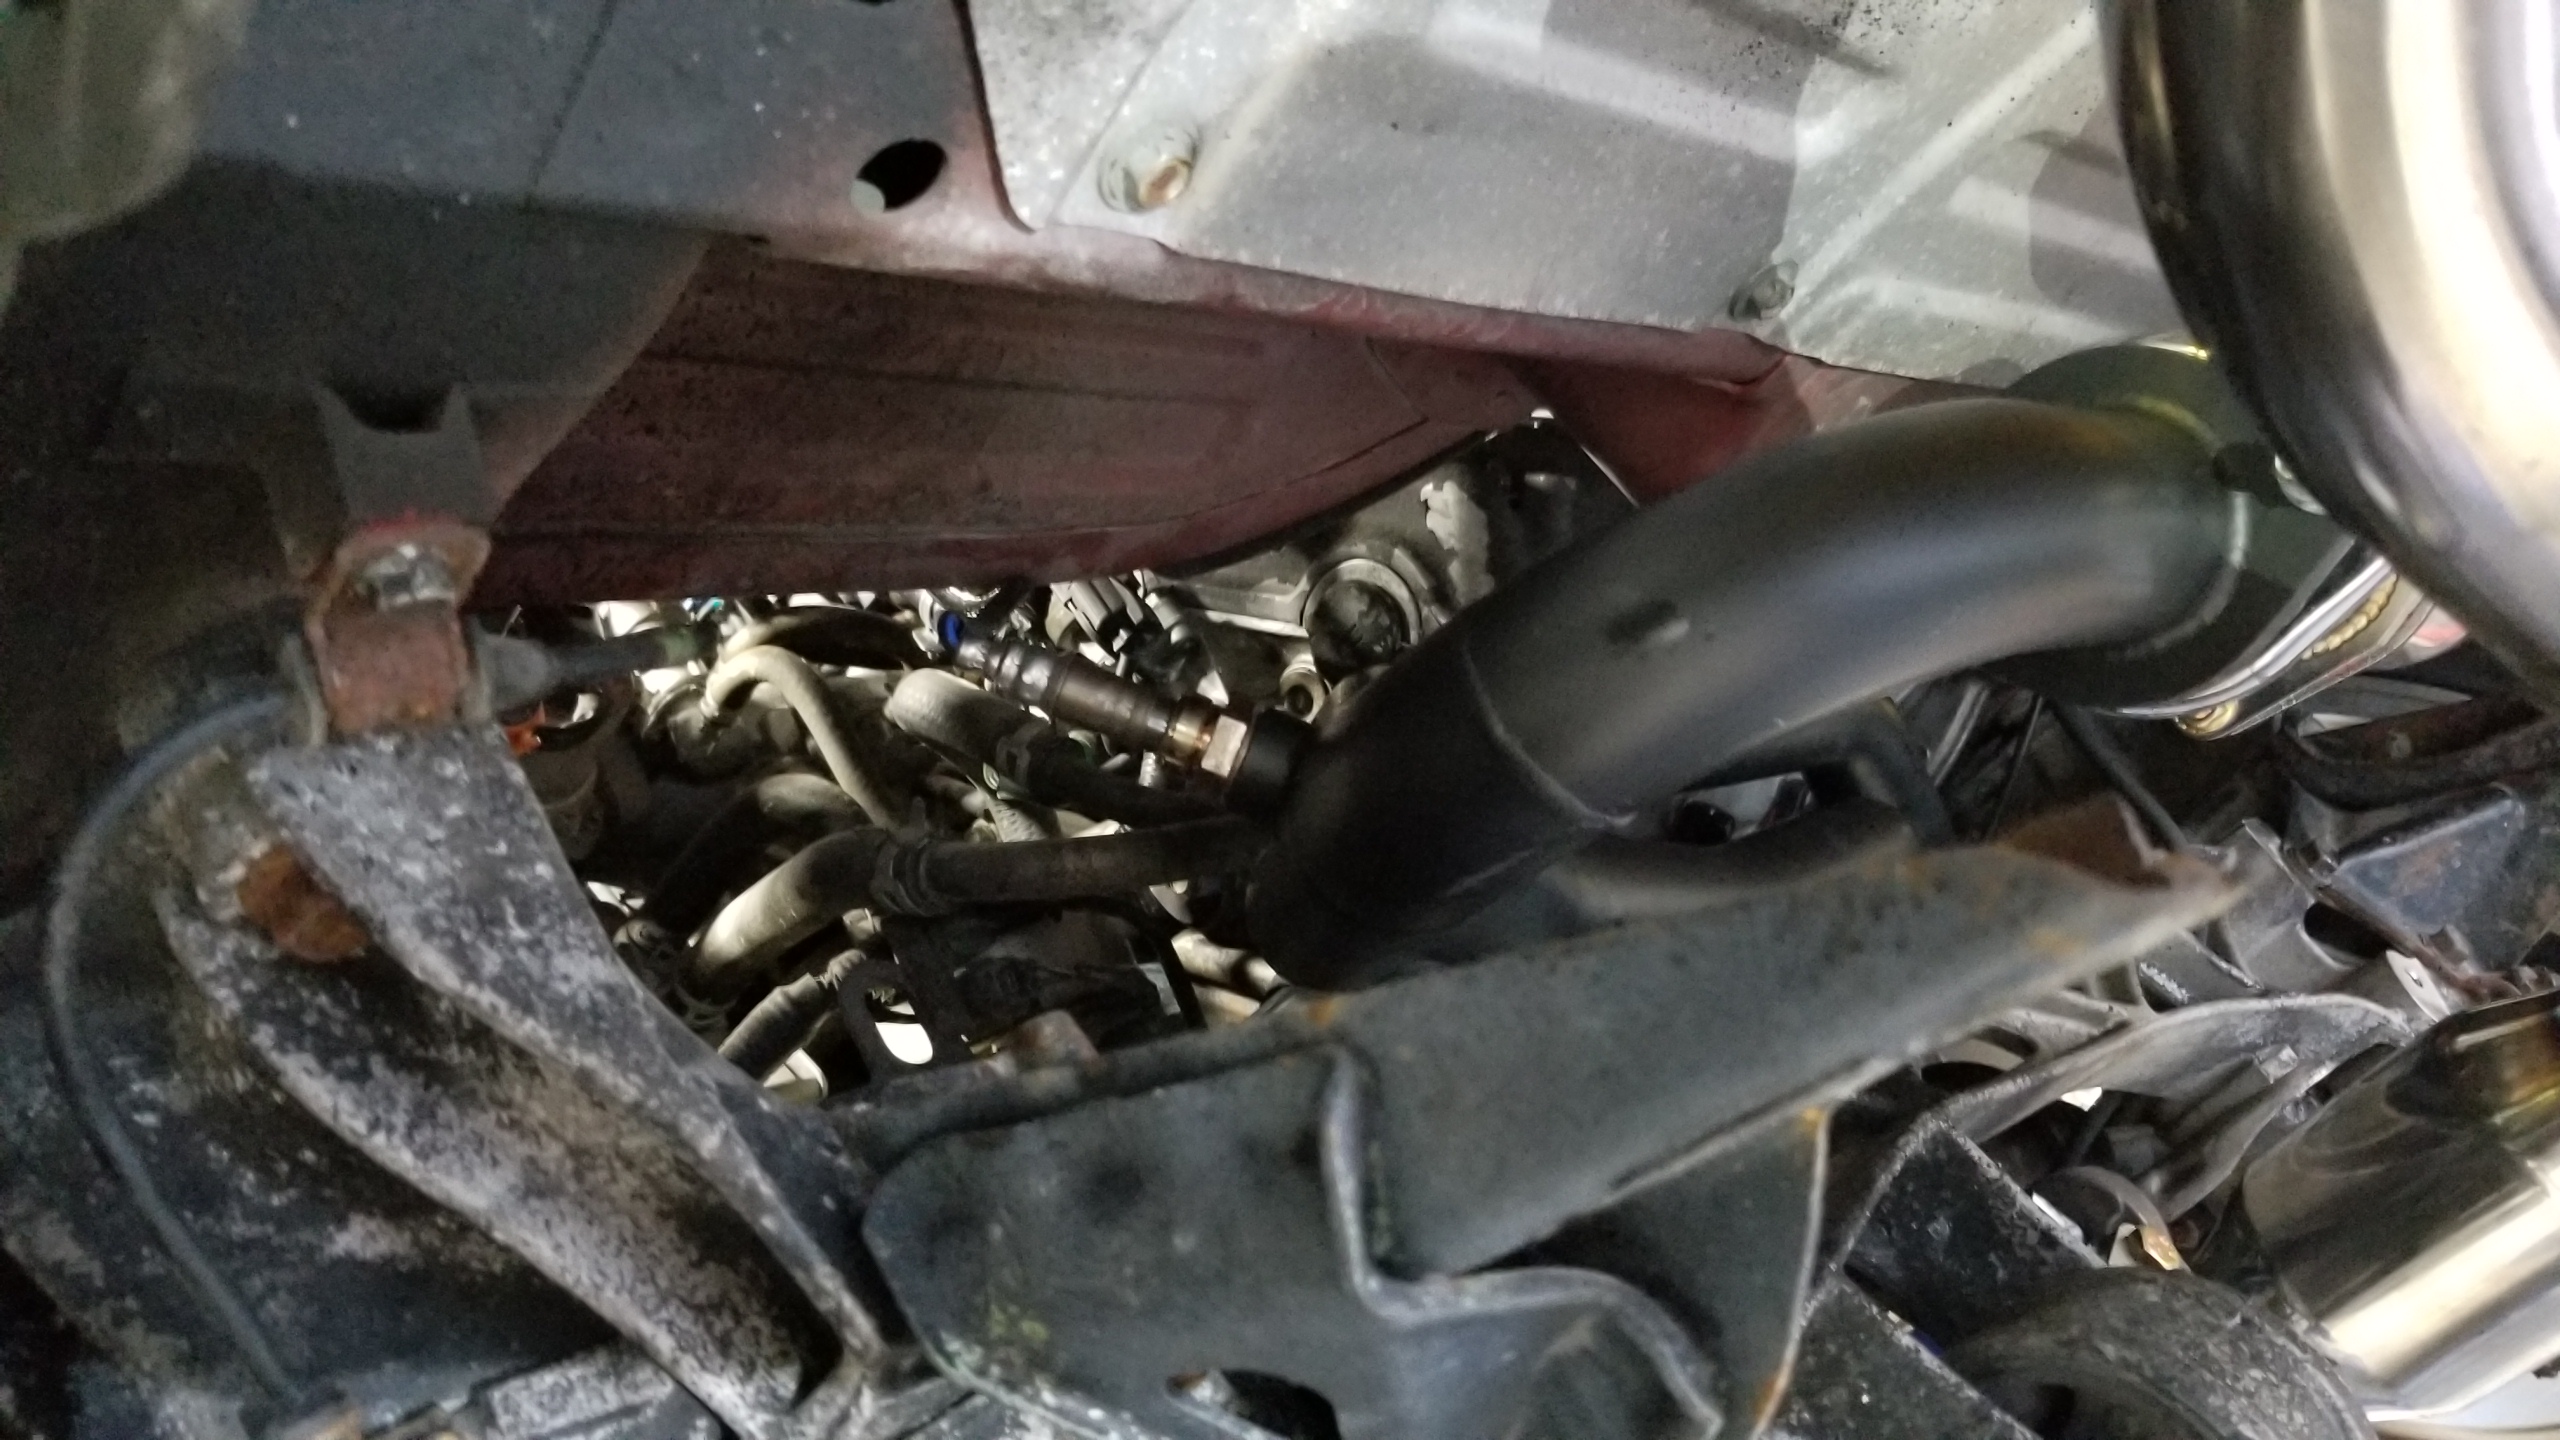
Little out of order, but this is where the new front O2 sensor sits, behind the oil pan. I routed these wires up through the rear brace (away from the CV axles and rear header), up to the rear O2 clip, and over the engine near the alternator up to the front valve cover where the factory plug was. The longer wire extensions with the Pride kit weren't long enough to use the OEM clips, so I removed the little black ignition coil/wiring cover and moved the O2 bracket up to the top valve cover nut.

By the way, there is a large metal black piece in the rear of this pic that covers the back of the A/T and the intermediate shaft, I assume it's a protective cover/heat shield. It has to be removed to have a chance of fitting the rear headers on at all. It would've been nice to have some instructions for this.
WSQTuEC.jpg


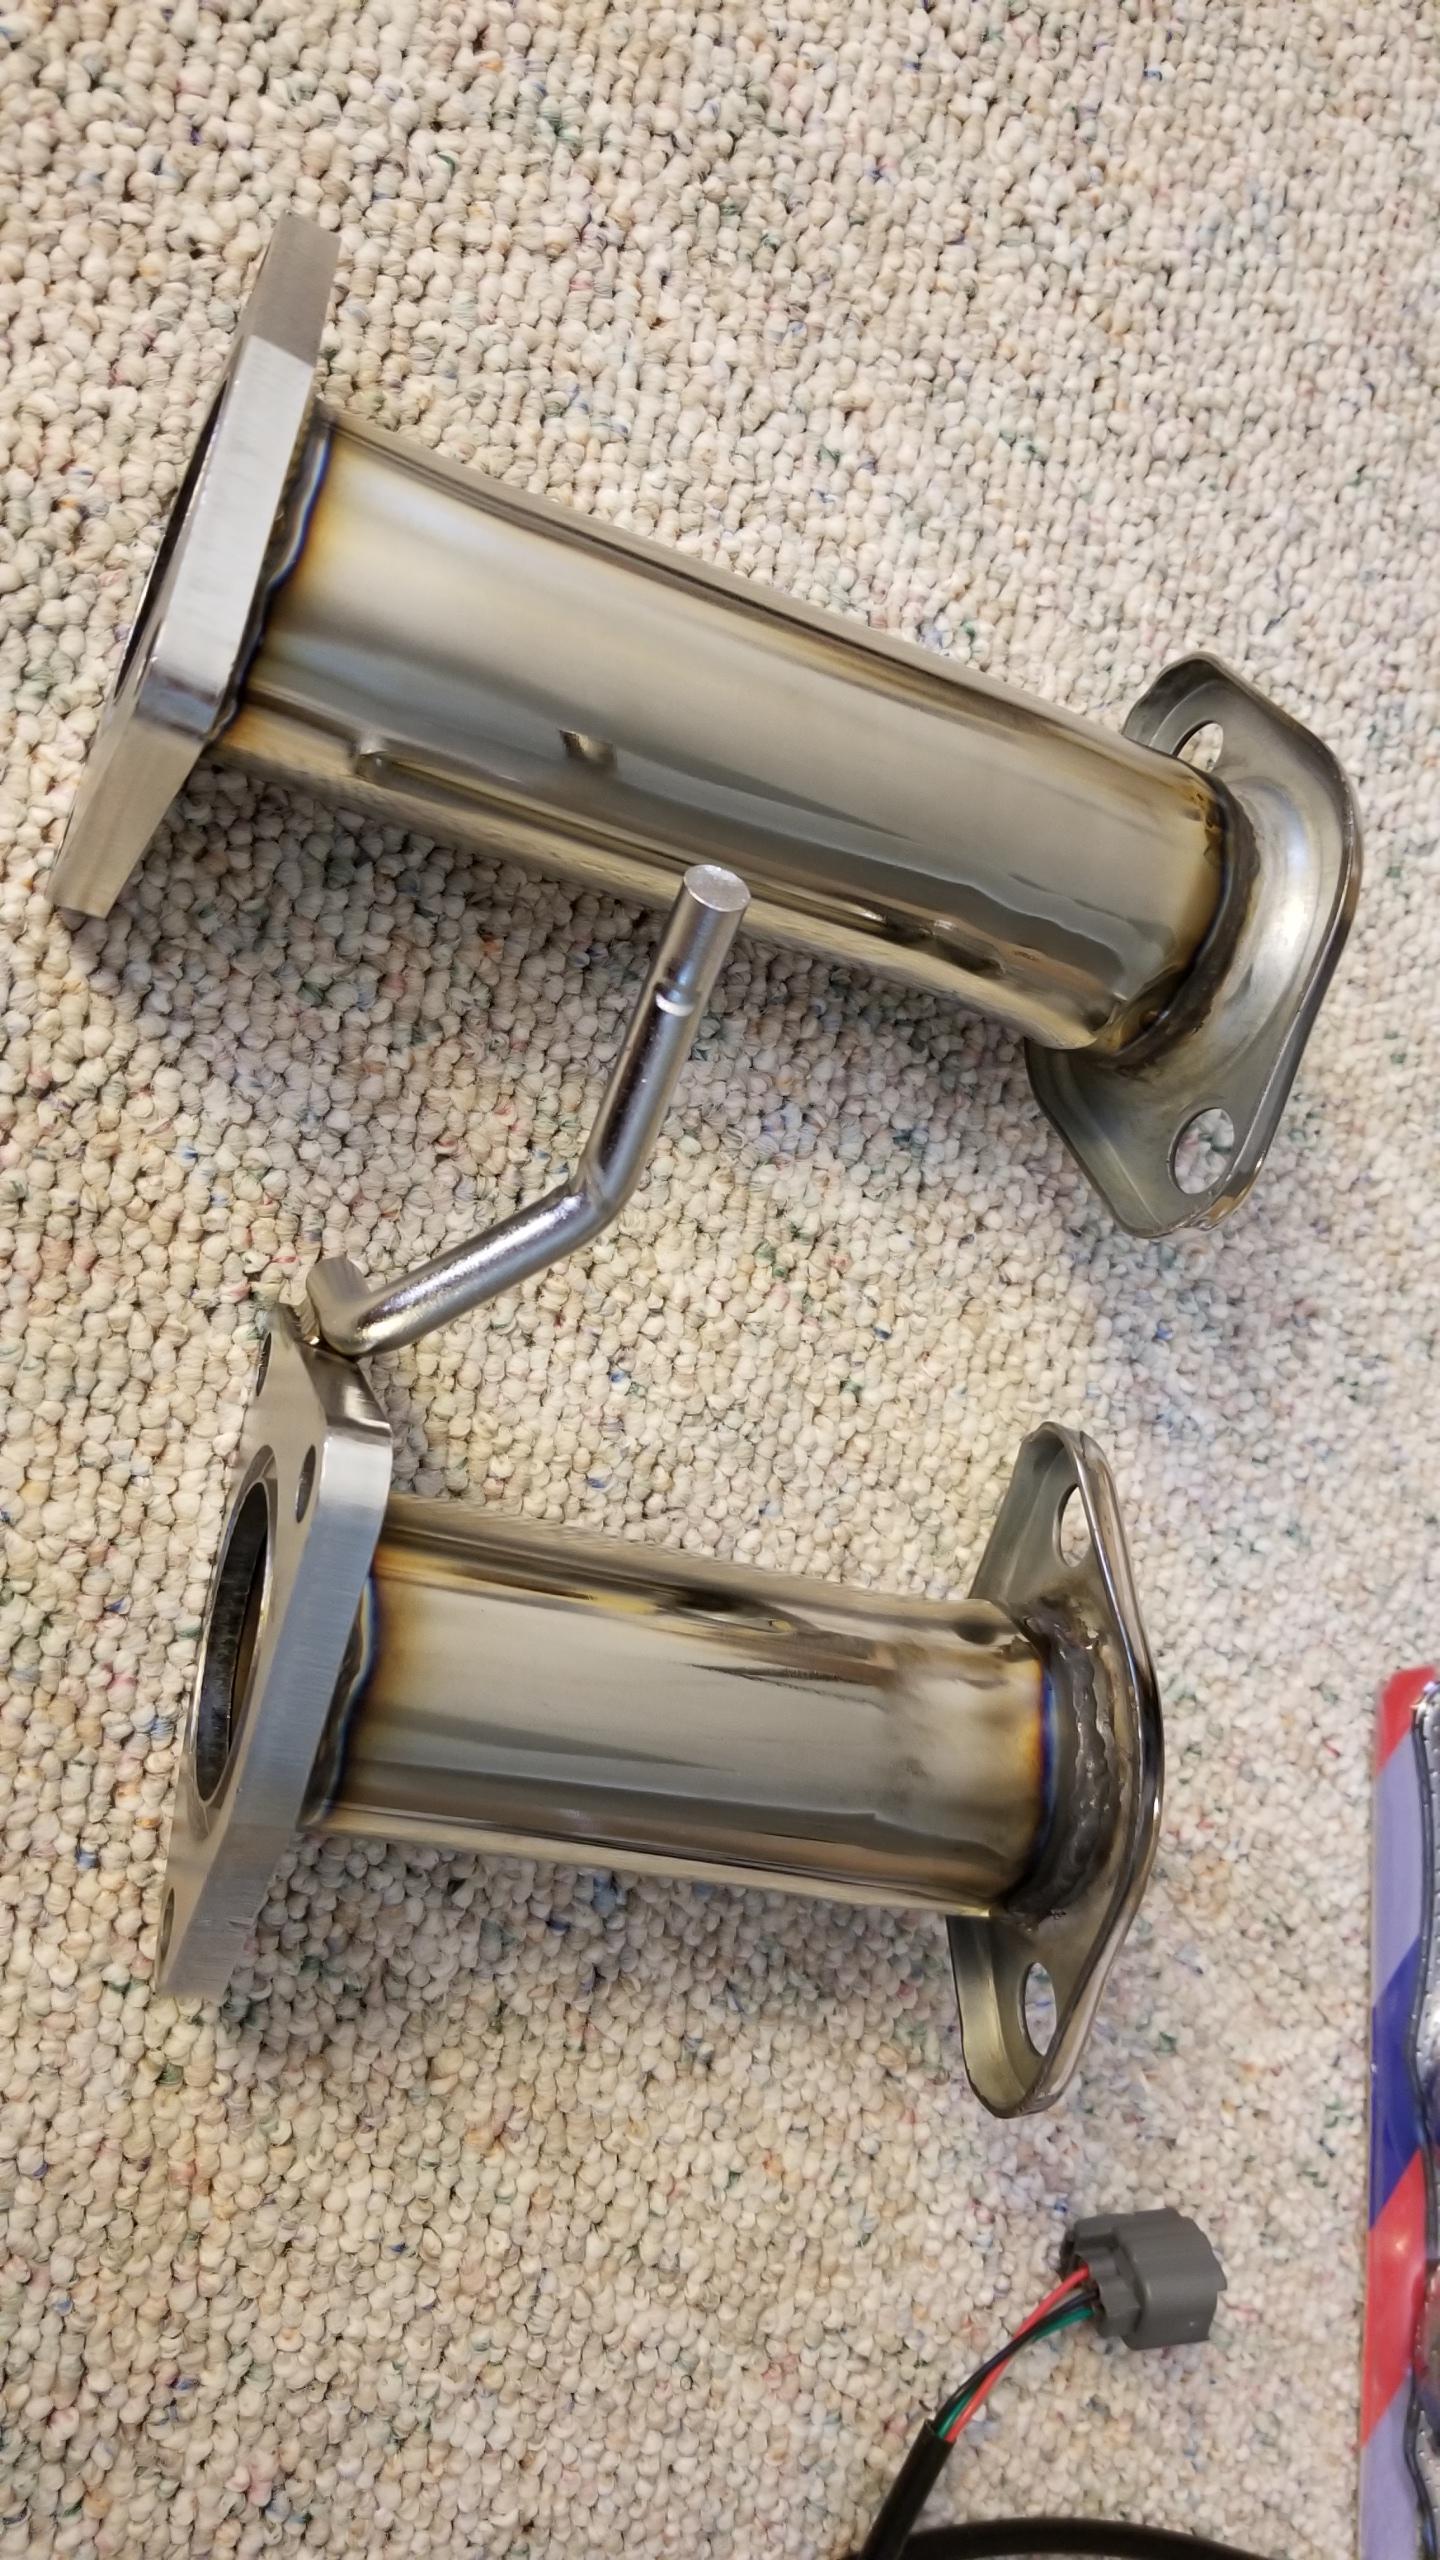
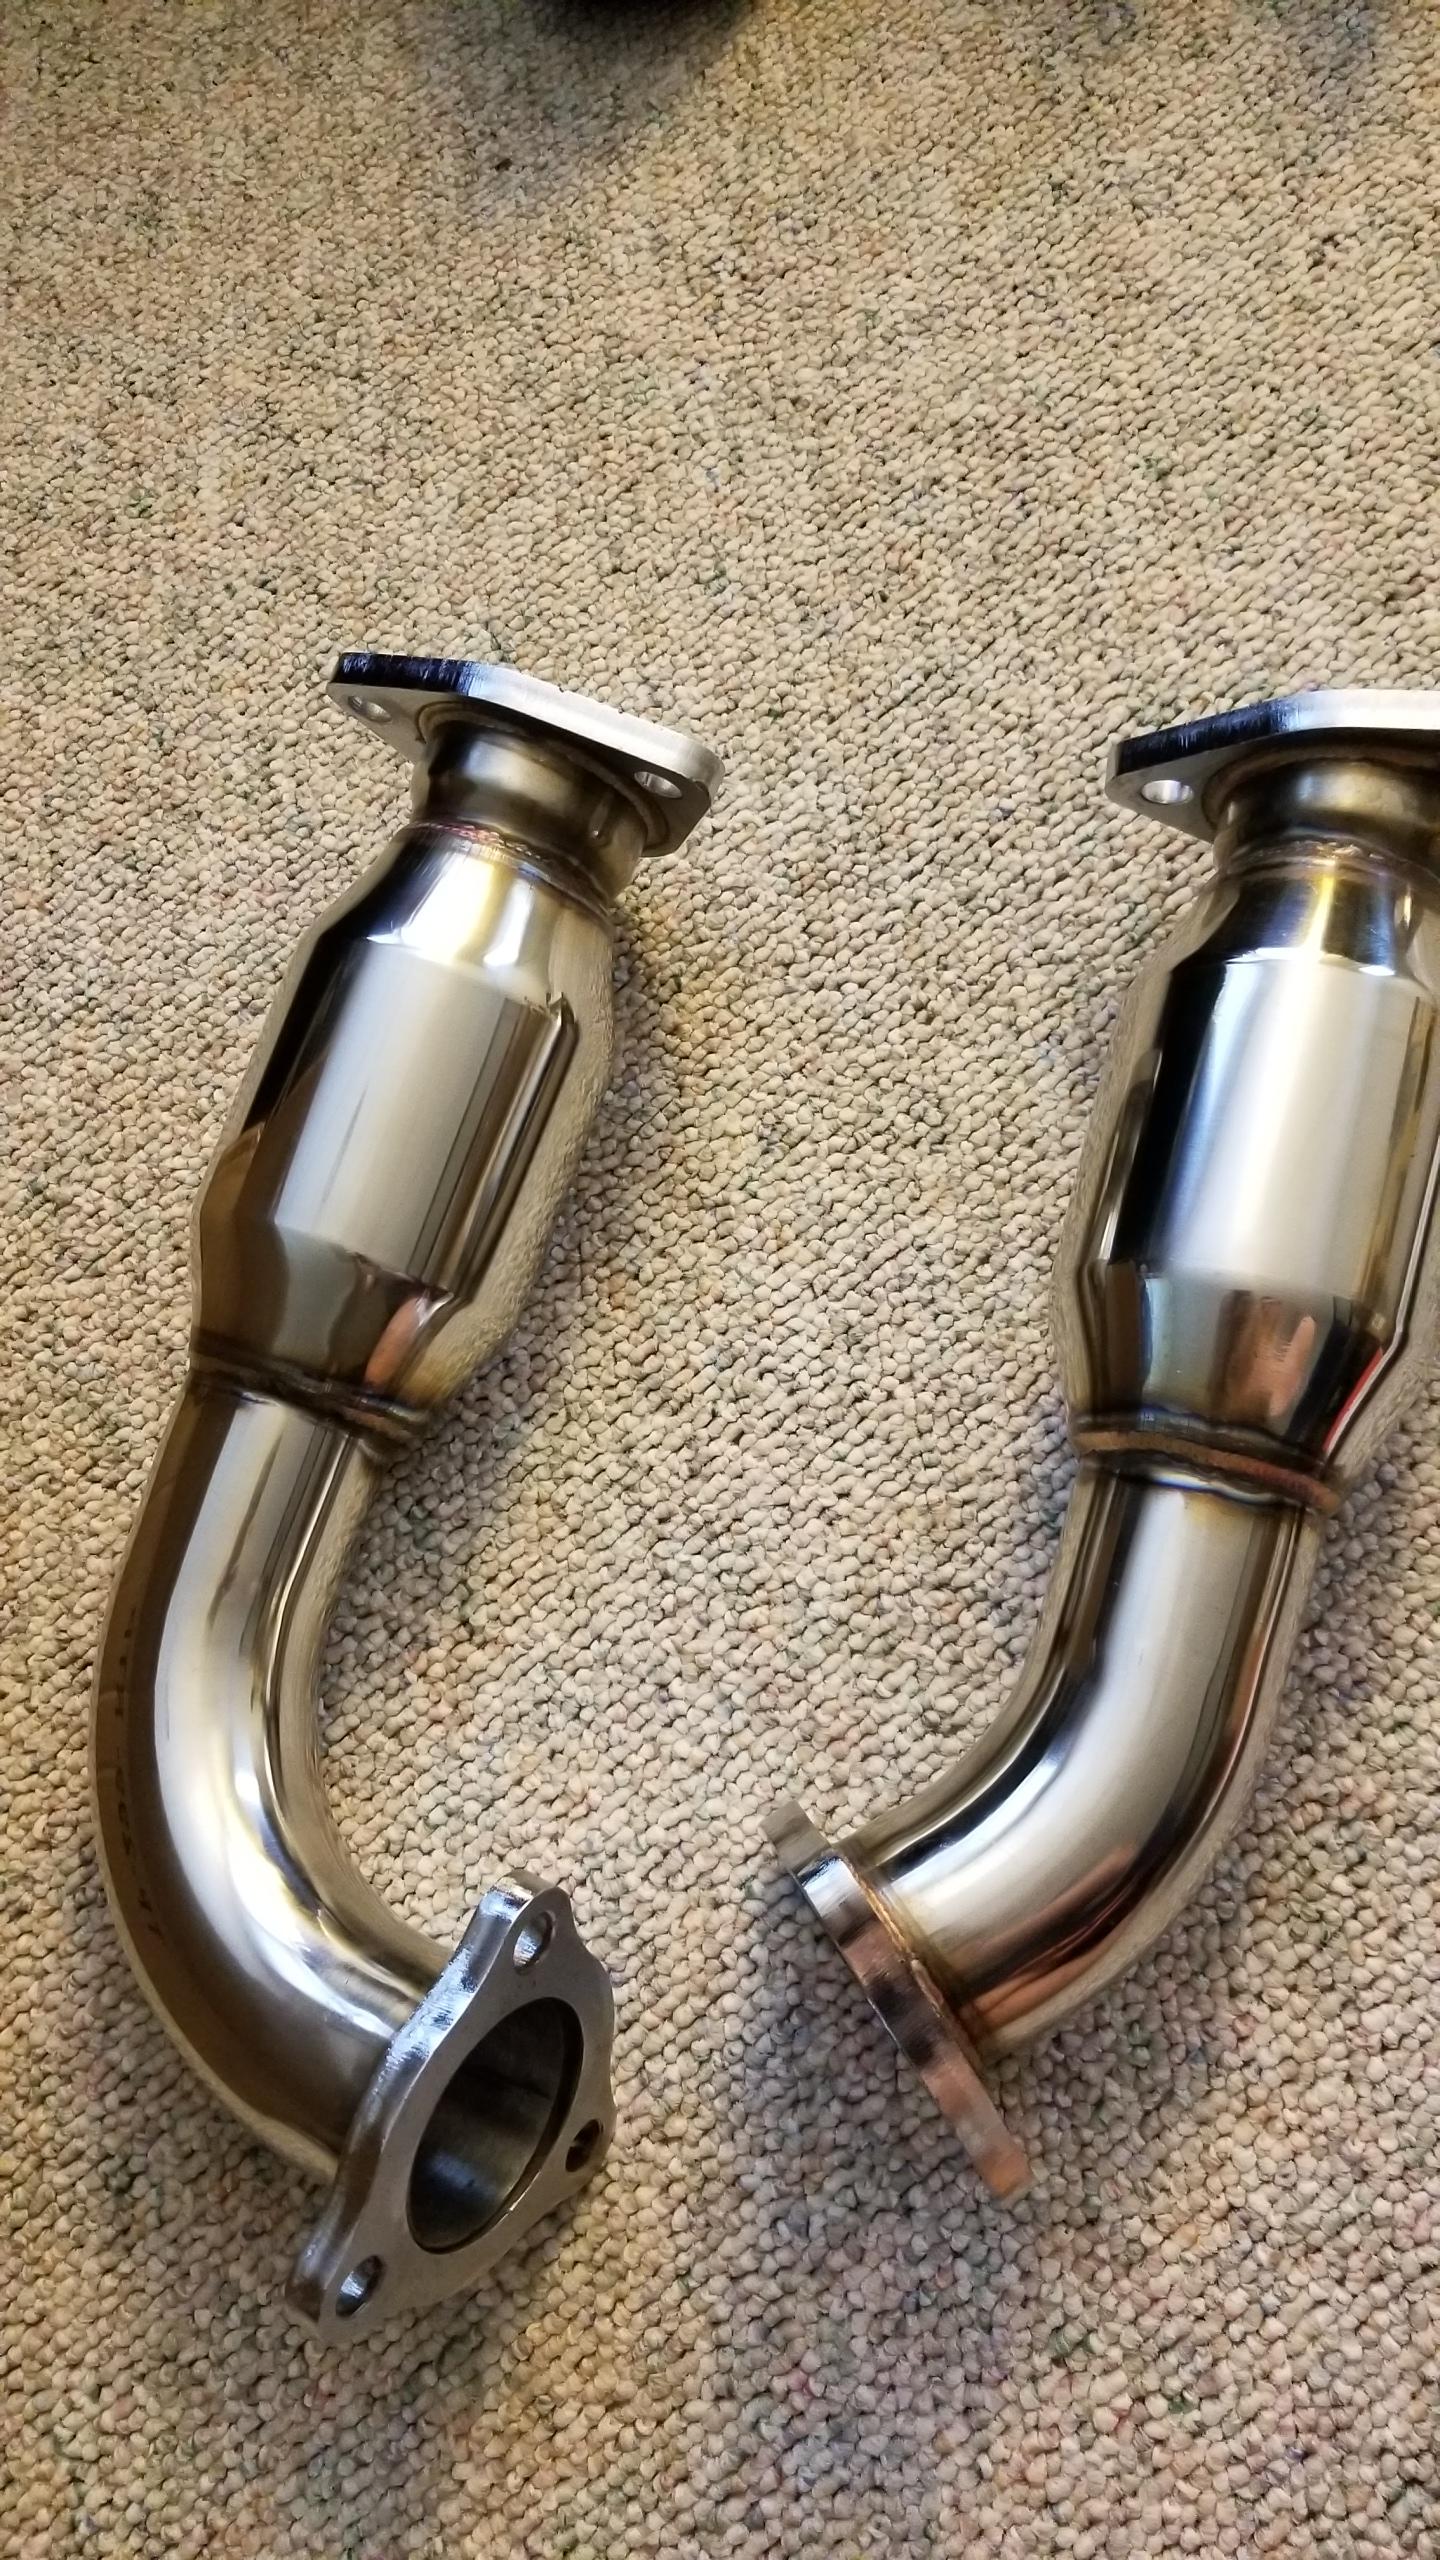
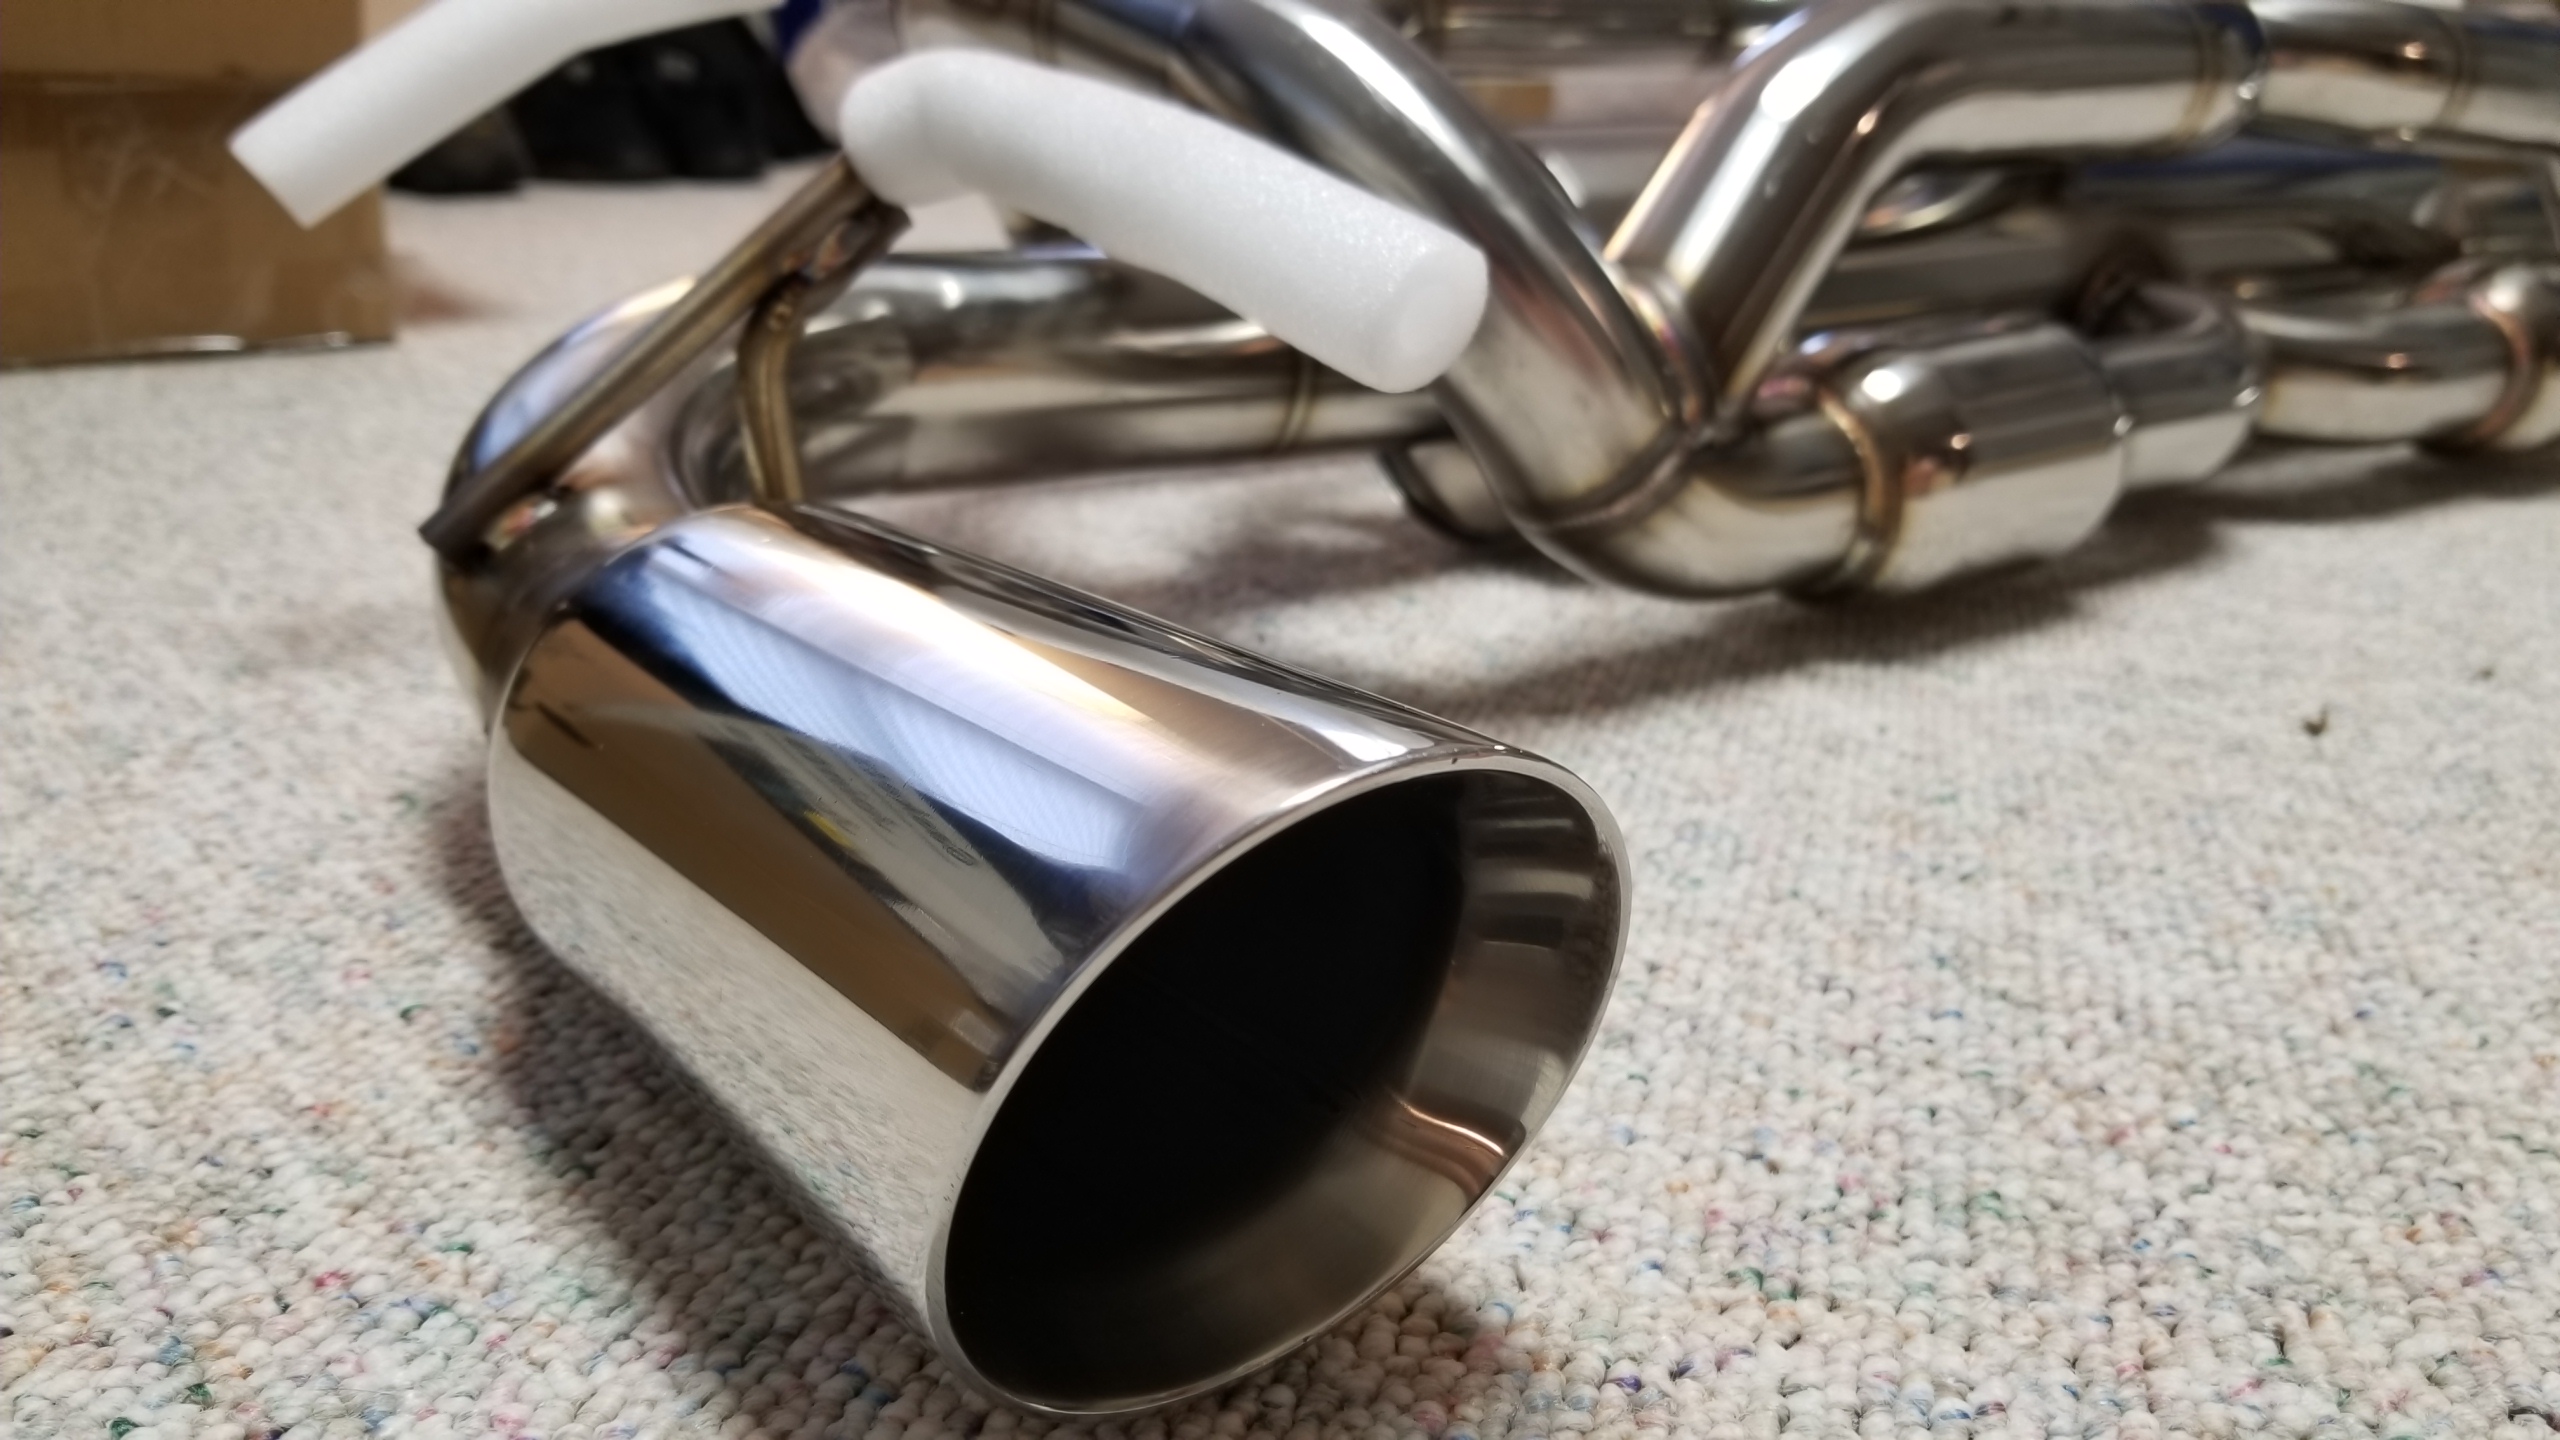
Working from the headers back, a friend an I put the rest of the exhaust system on, including header adapters/donut gaskets, test pipes, and the V2 muffler. I left the hardware loose to try and line all the flanges enough to get bolts through them. There was a hydraulic lift table to use that I took to lift the new exhaust up into place and fit the old rubber hangers onto it, so it was fairly easy. It was a bit challenging getting all the flanges to line up properly, but after an hour or two of adjust this and loosening that, all the bolts were on and then we could tighten everything up.

Reassembly was pretty self-explanatory but I was rushing a bit more and didn't take many pictures, so this is the best I have of the whole thing as-installed.
Bpxuw9M.jpg


Basically, once the whole exhaust was together, I just put the old stuff back on the car. Rear braces, anti-roll bar, front crossmember (took like an hour to figure out as expected), shift cable brackets, shift cable, and the U-shaped bracket "rod A".

Of course, not everything was peaches and creme. I found out that the rod A happens to pass right by where the flange for the front exhaust adapter & test pipe sits, so by tightening down the rod, I pushed the whole exhaust pipe up by like 1/4-1/2" as the bracket was pulled up by the bolts. This is a pretty big fitment issue, and I might end up having to remove the adapter & TP to have the flanges cut off and re-welded an inch away so they aren't right on top of the bracket. Pride has been responsive enough and suggested some washers under the bracket to push it away from the flanges, so now I have to remove it again, measure everything, spend more on expensive stainless hardware (thick washers & longer bolts), and hope that it gets me enough clearance. I am concerned that it might cause damage to my headers or even to my studs & block threads in an extreme case if I leave it for too long. That would be an absurdly expensive mistake.

Just to reiterate, the rear headers were missing an O2 bung (Pride sent the bung & paid for labor, appreciated), the front & rear manifold downstream flange bolt holes were too small to fit the provided spring bolts (same welding shop drilled them out for me since a kind Primer let me know beforehand), the spring bolts had washers that were too small (Pride offered to pay for new ones but I just got them), the manifold end bolt holes were too close together (I had to drill out myself during the job), and the exhaust adapter flange hits a major body bracket and I have to figure out how to get enough space without grinding my flange or bracket. I would buy the same exhaust package again, but there were more issues than I expected. I still recommend Pride's stuff and will probably buy from them again in the future, but I would wait until they get the issues with the V2 headers ironed out before buying. Chase & Mark @ Pride have been helpful and responsive so I don't really hold it against them.

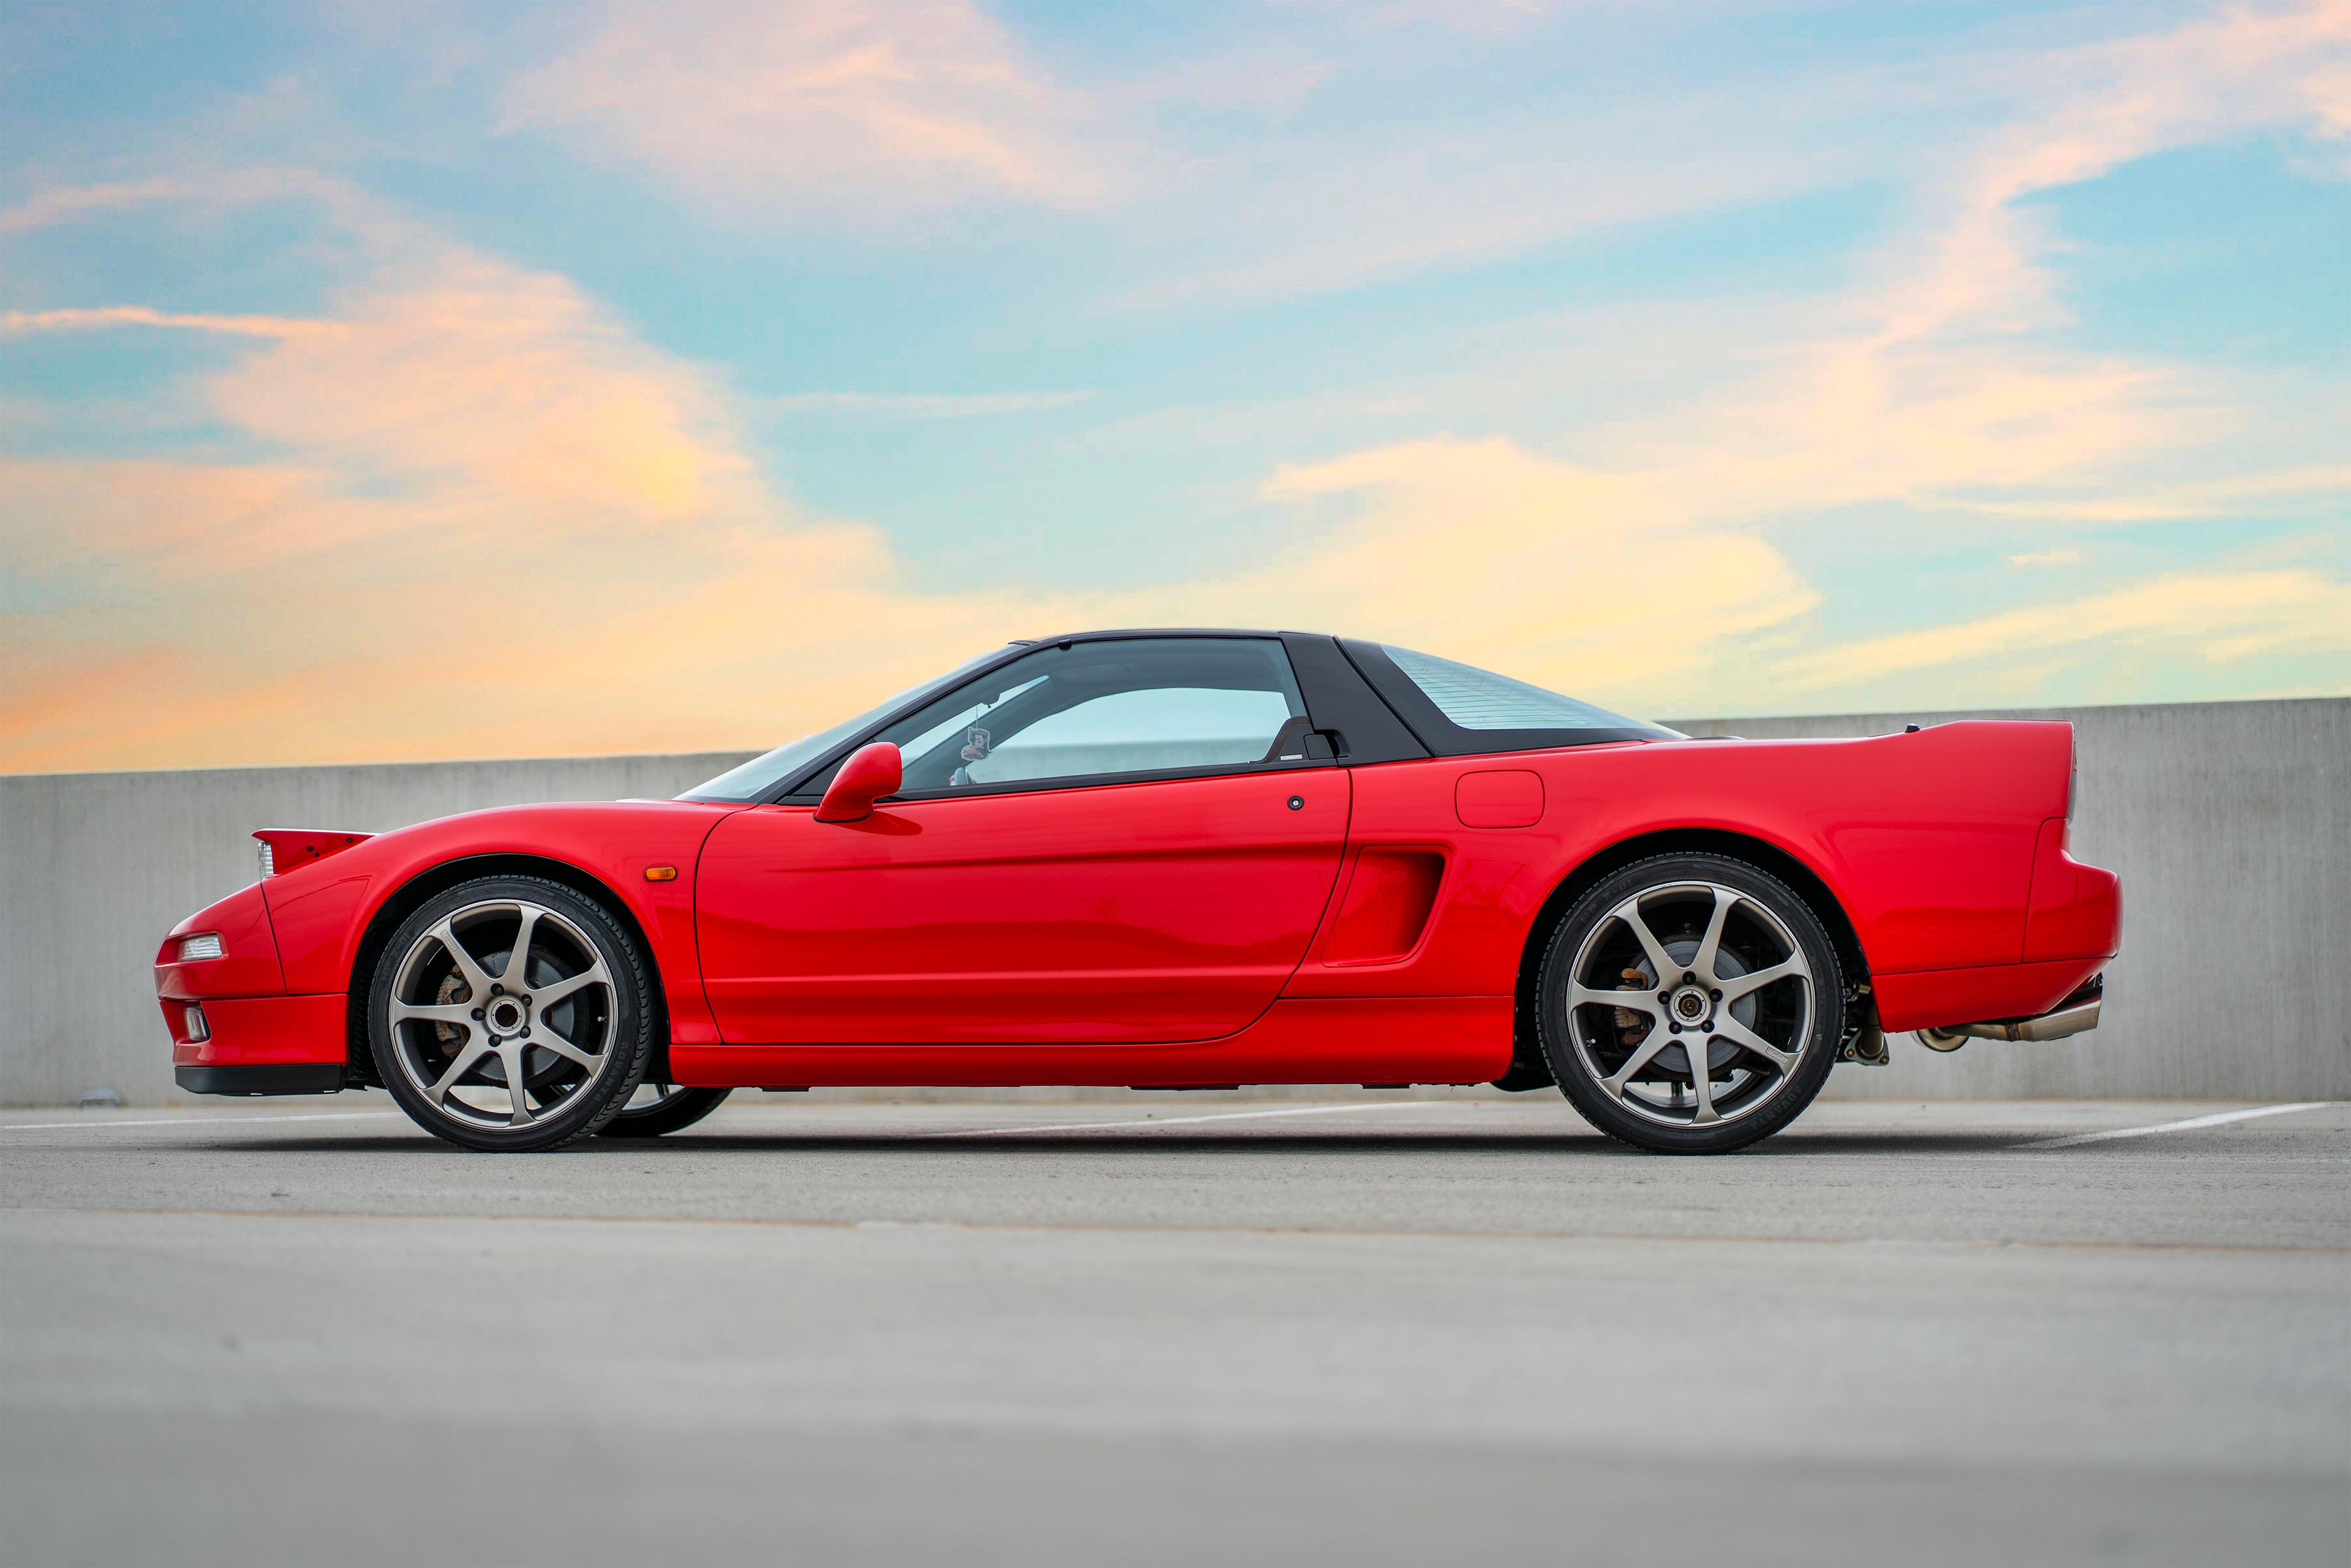
I will say, I am very impressed with the overall results. Sound at idle is deep but not too loud, cruising with 0% throttle all the way up to highway speeds is basically silent with a slight warble from 5-20% throttle, and very little drone at highway speeds especially with light accelerator pressure. Inside the cabin it sounds great at any RPM, but never really too loud as to be annoying which is good. Outside the cabin, at WOT or more than 50% throttle it is ABSURDLY loud, waaaaay more than any car I've ever driven. I love it, lol. I really have to take it easy at night in residential areas or I will get the cops called on me, rightfully so. GA is not too strict on exhaust laws so I don't expect much trouble unless I'm really dumb. Oh yeah, and my butt-dyno says the car is a bit faster, but I haven't wrung it out enough yet to get a feel for how much better it is.

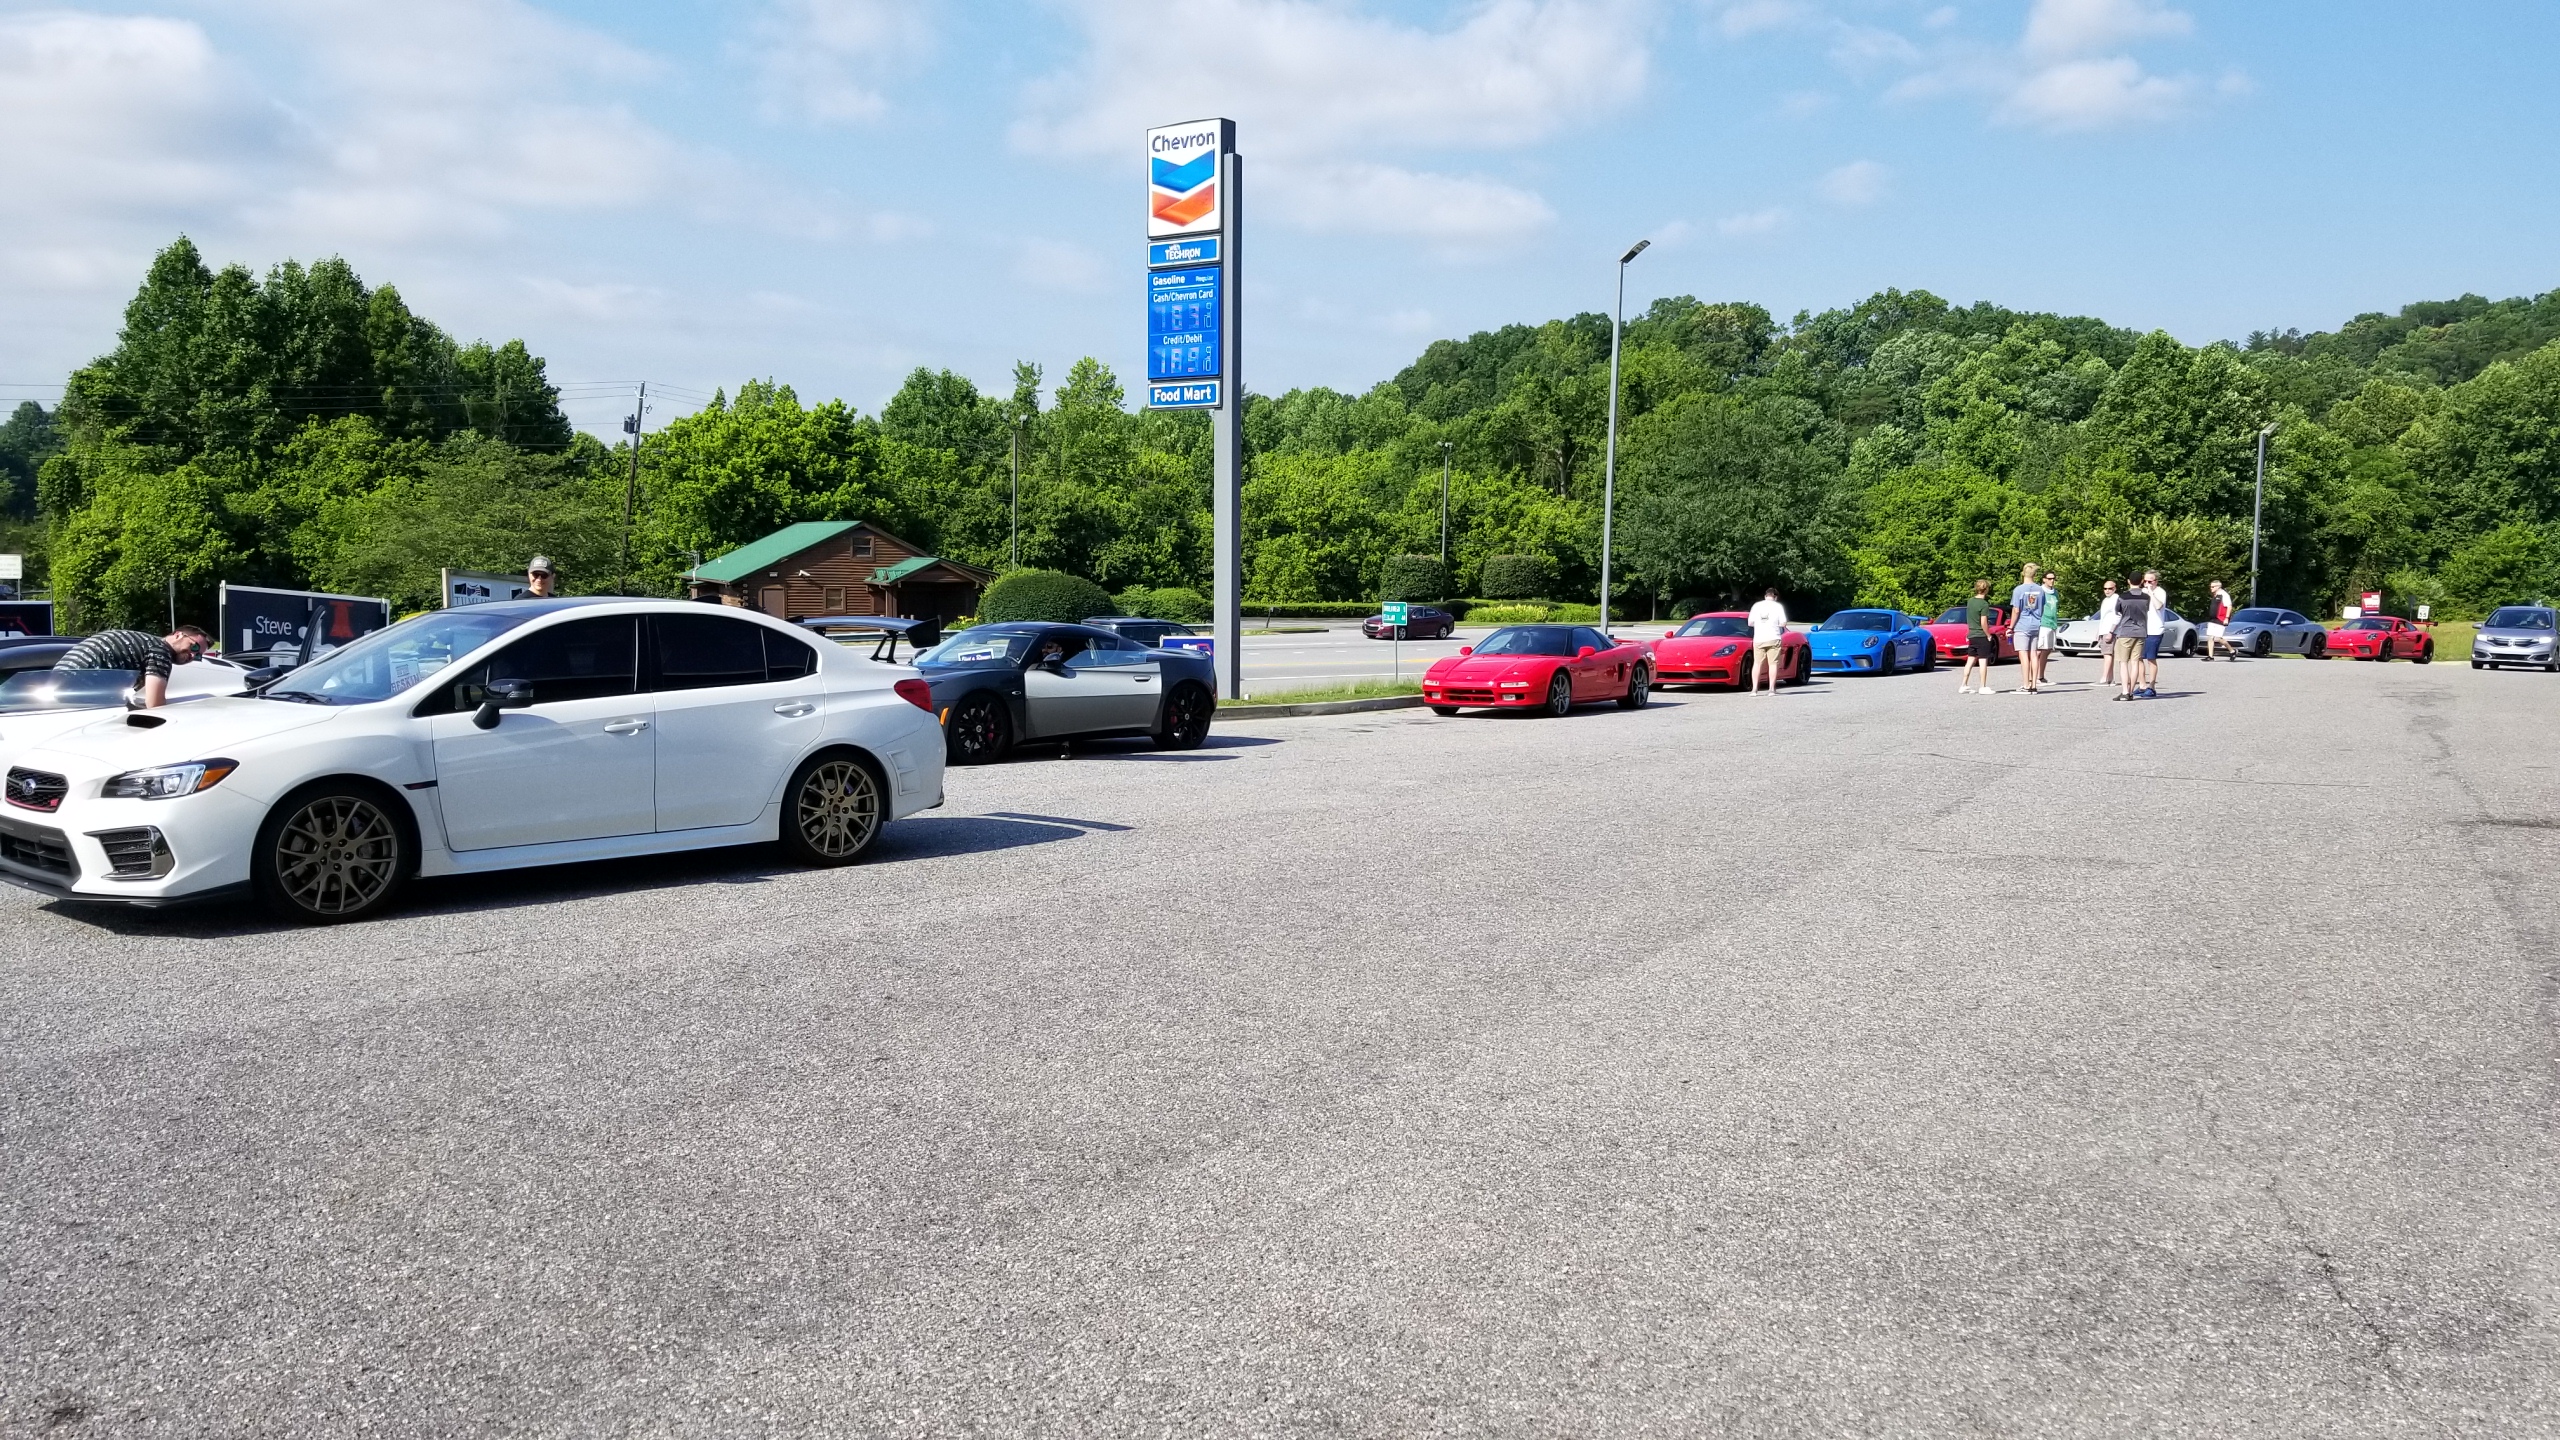
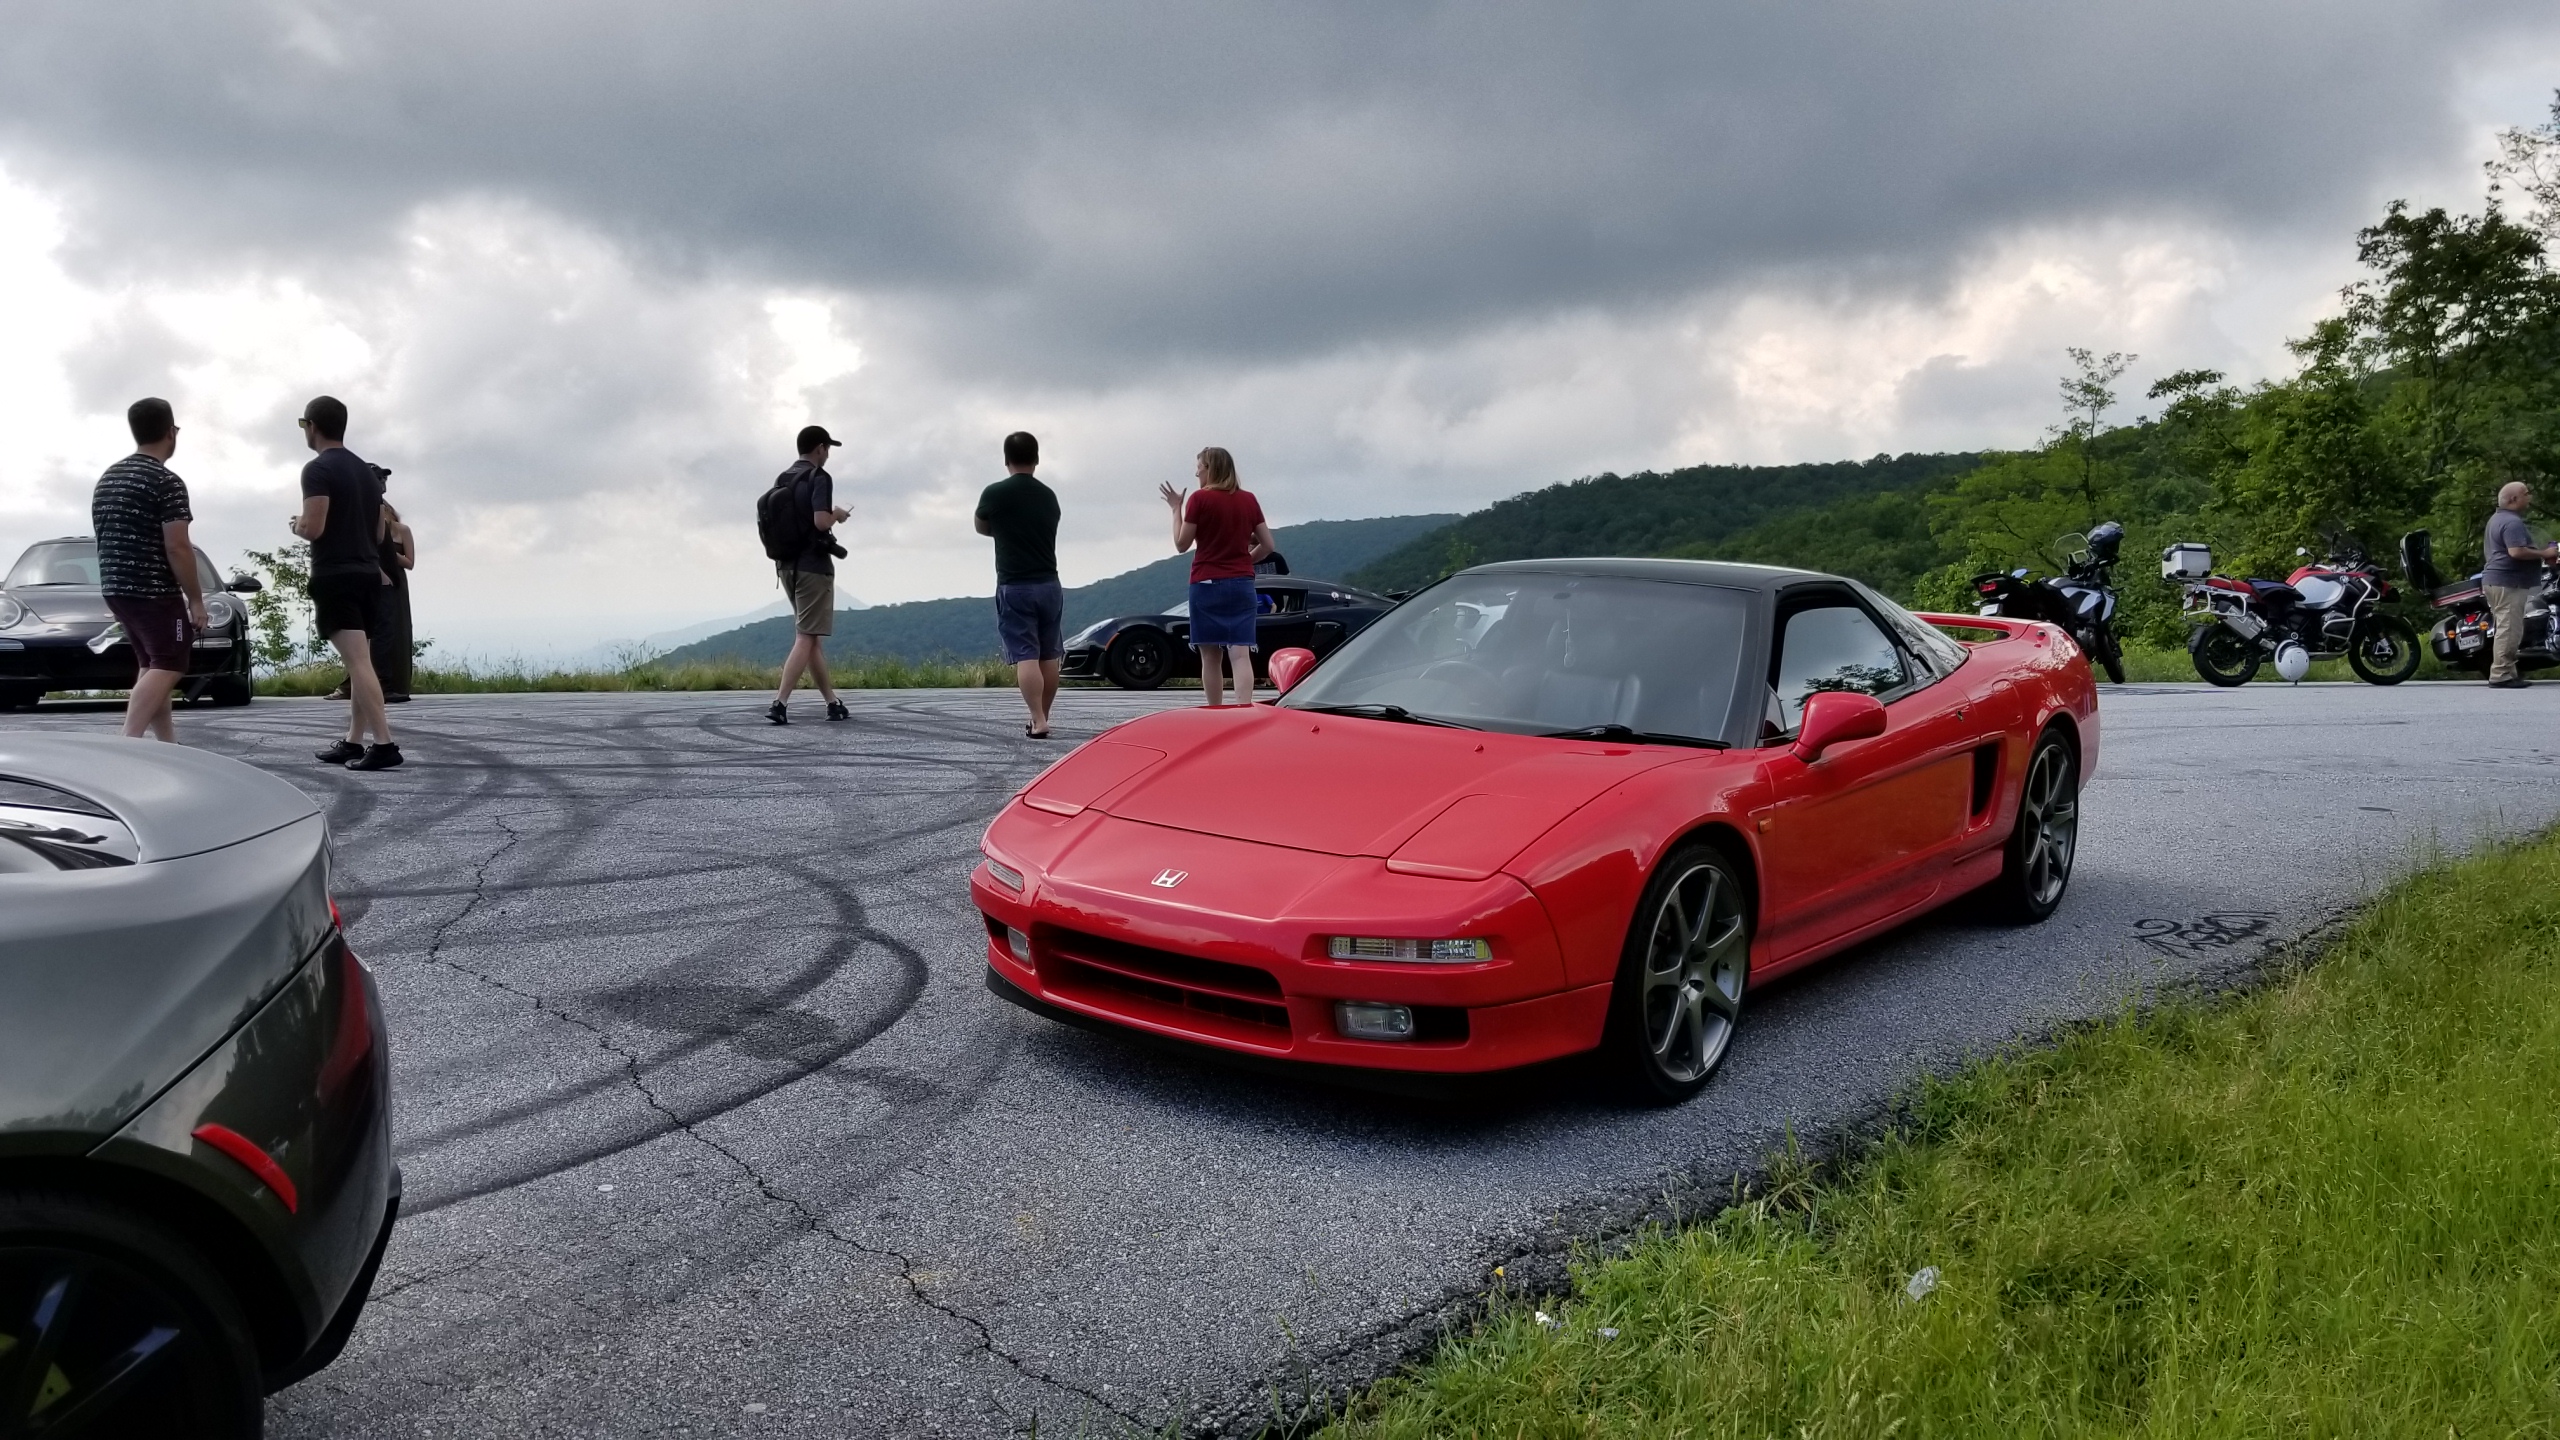
I promise I'll have better pictures of everything back together and maybe a video of how it sounds soon, I just didn't have a chance to get one yet since it was late and there was a car show to get to in the early morning, as usual. Already got several compliments on how it sounds so Pride did good :cool:.

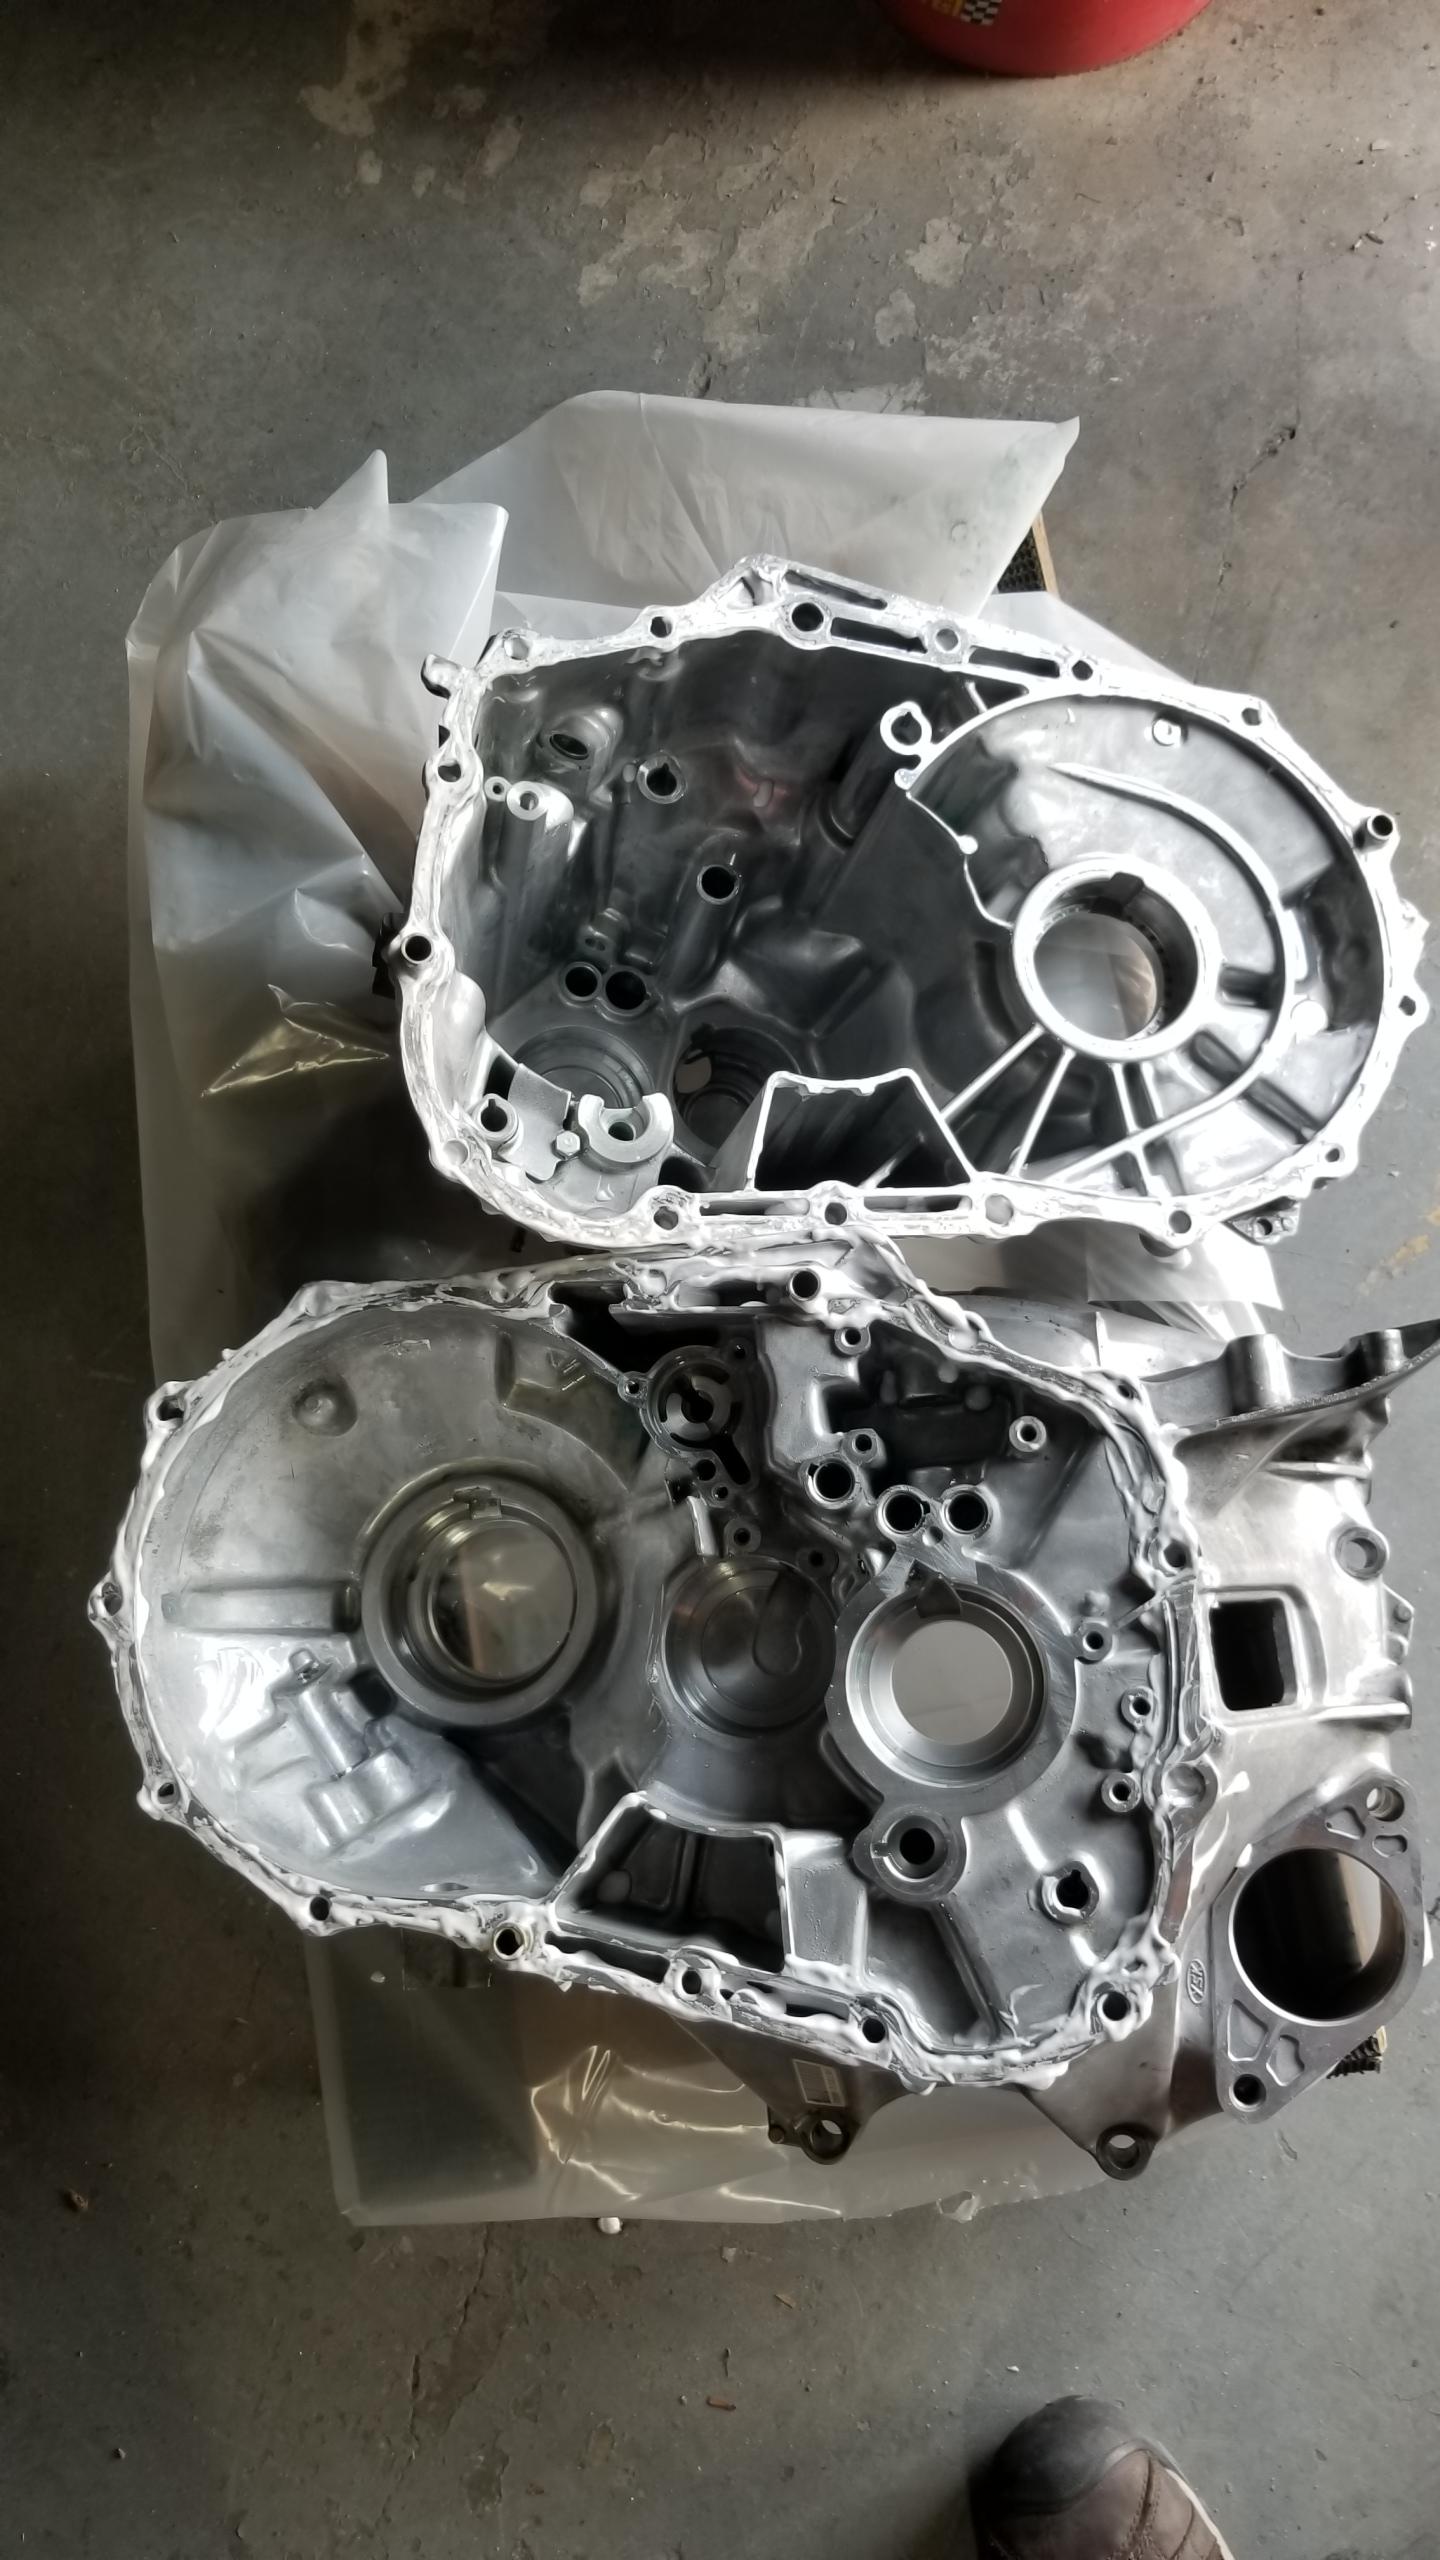
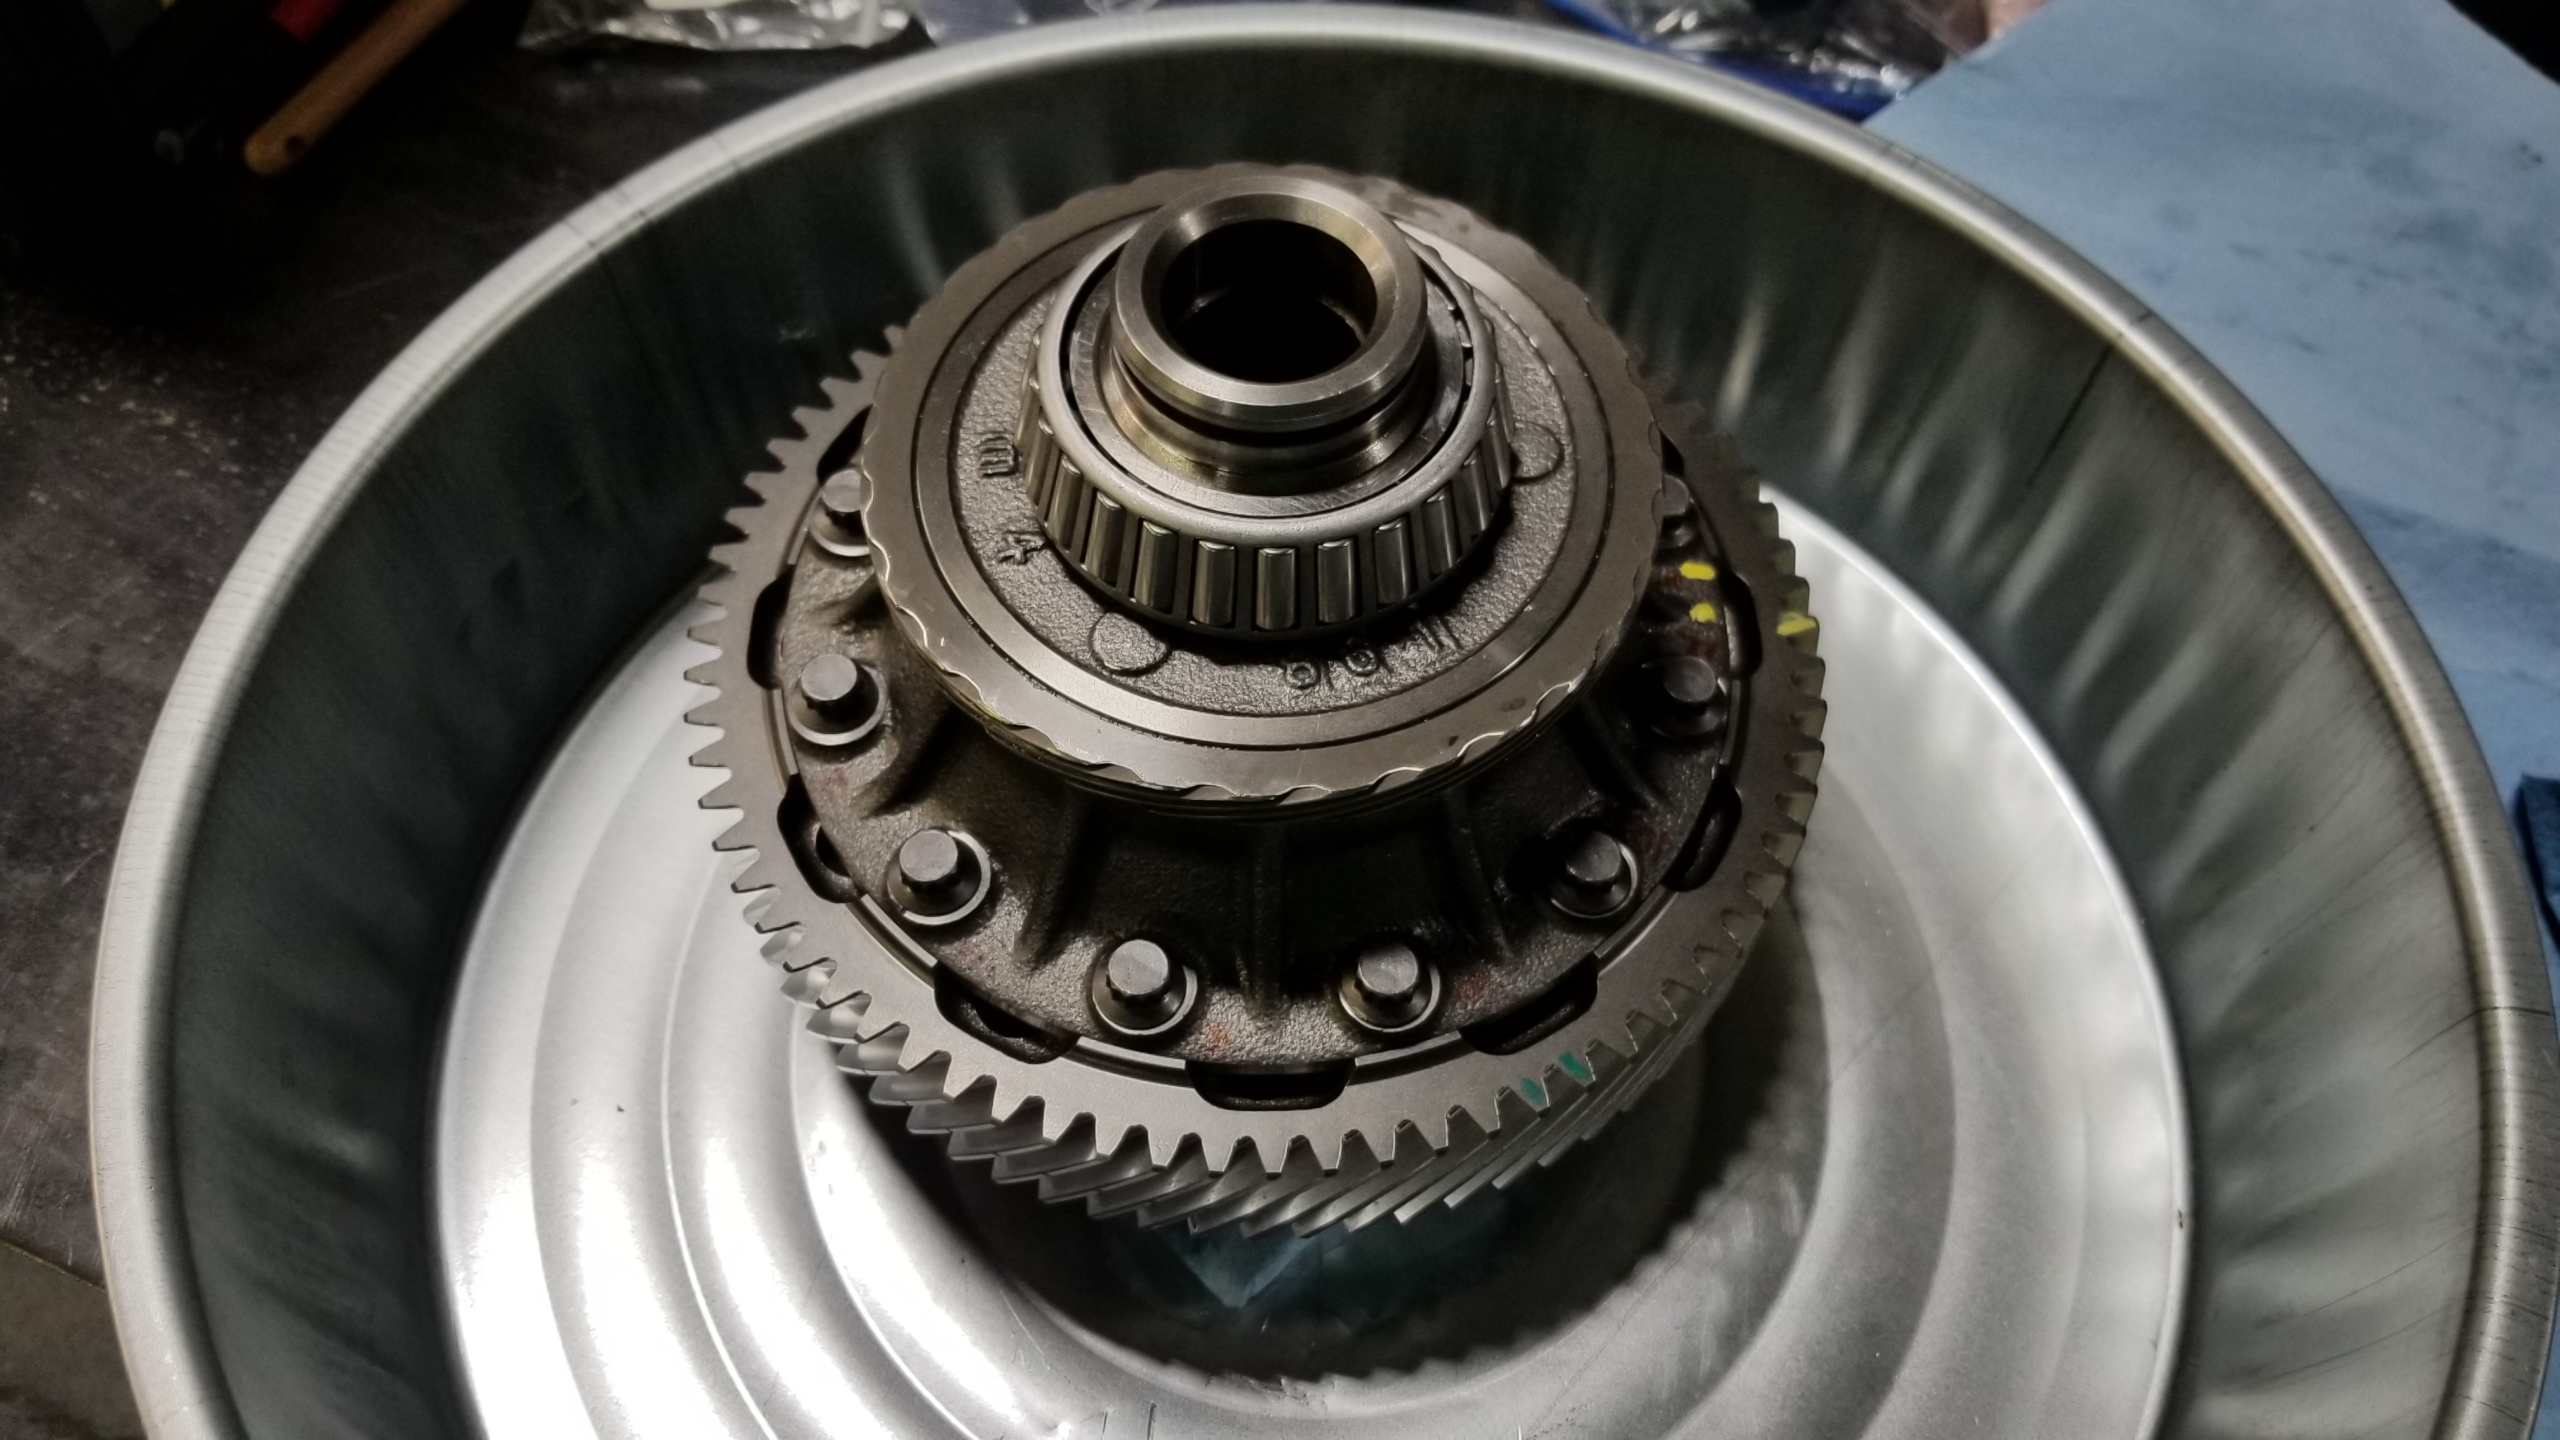
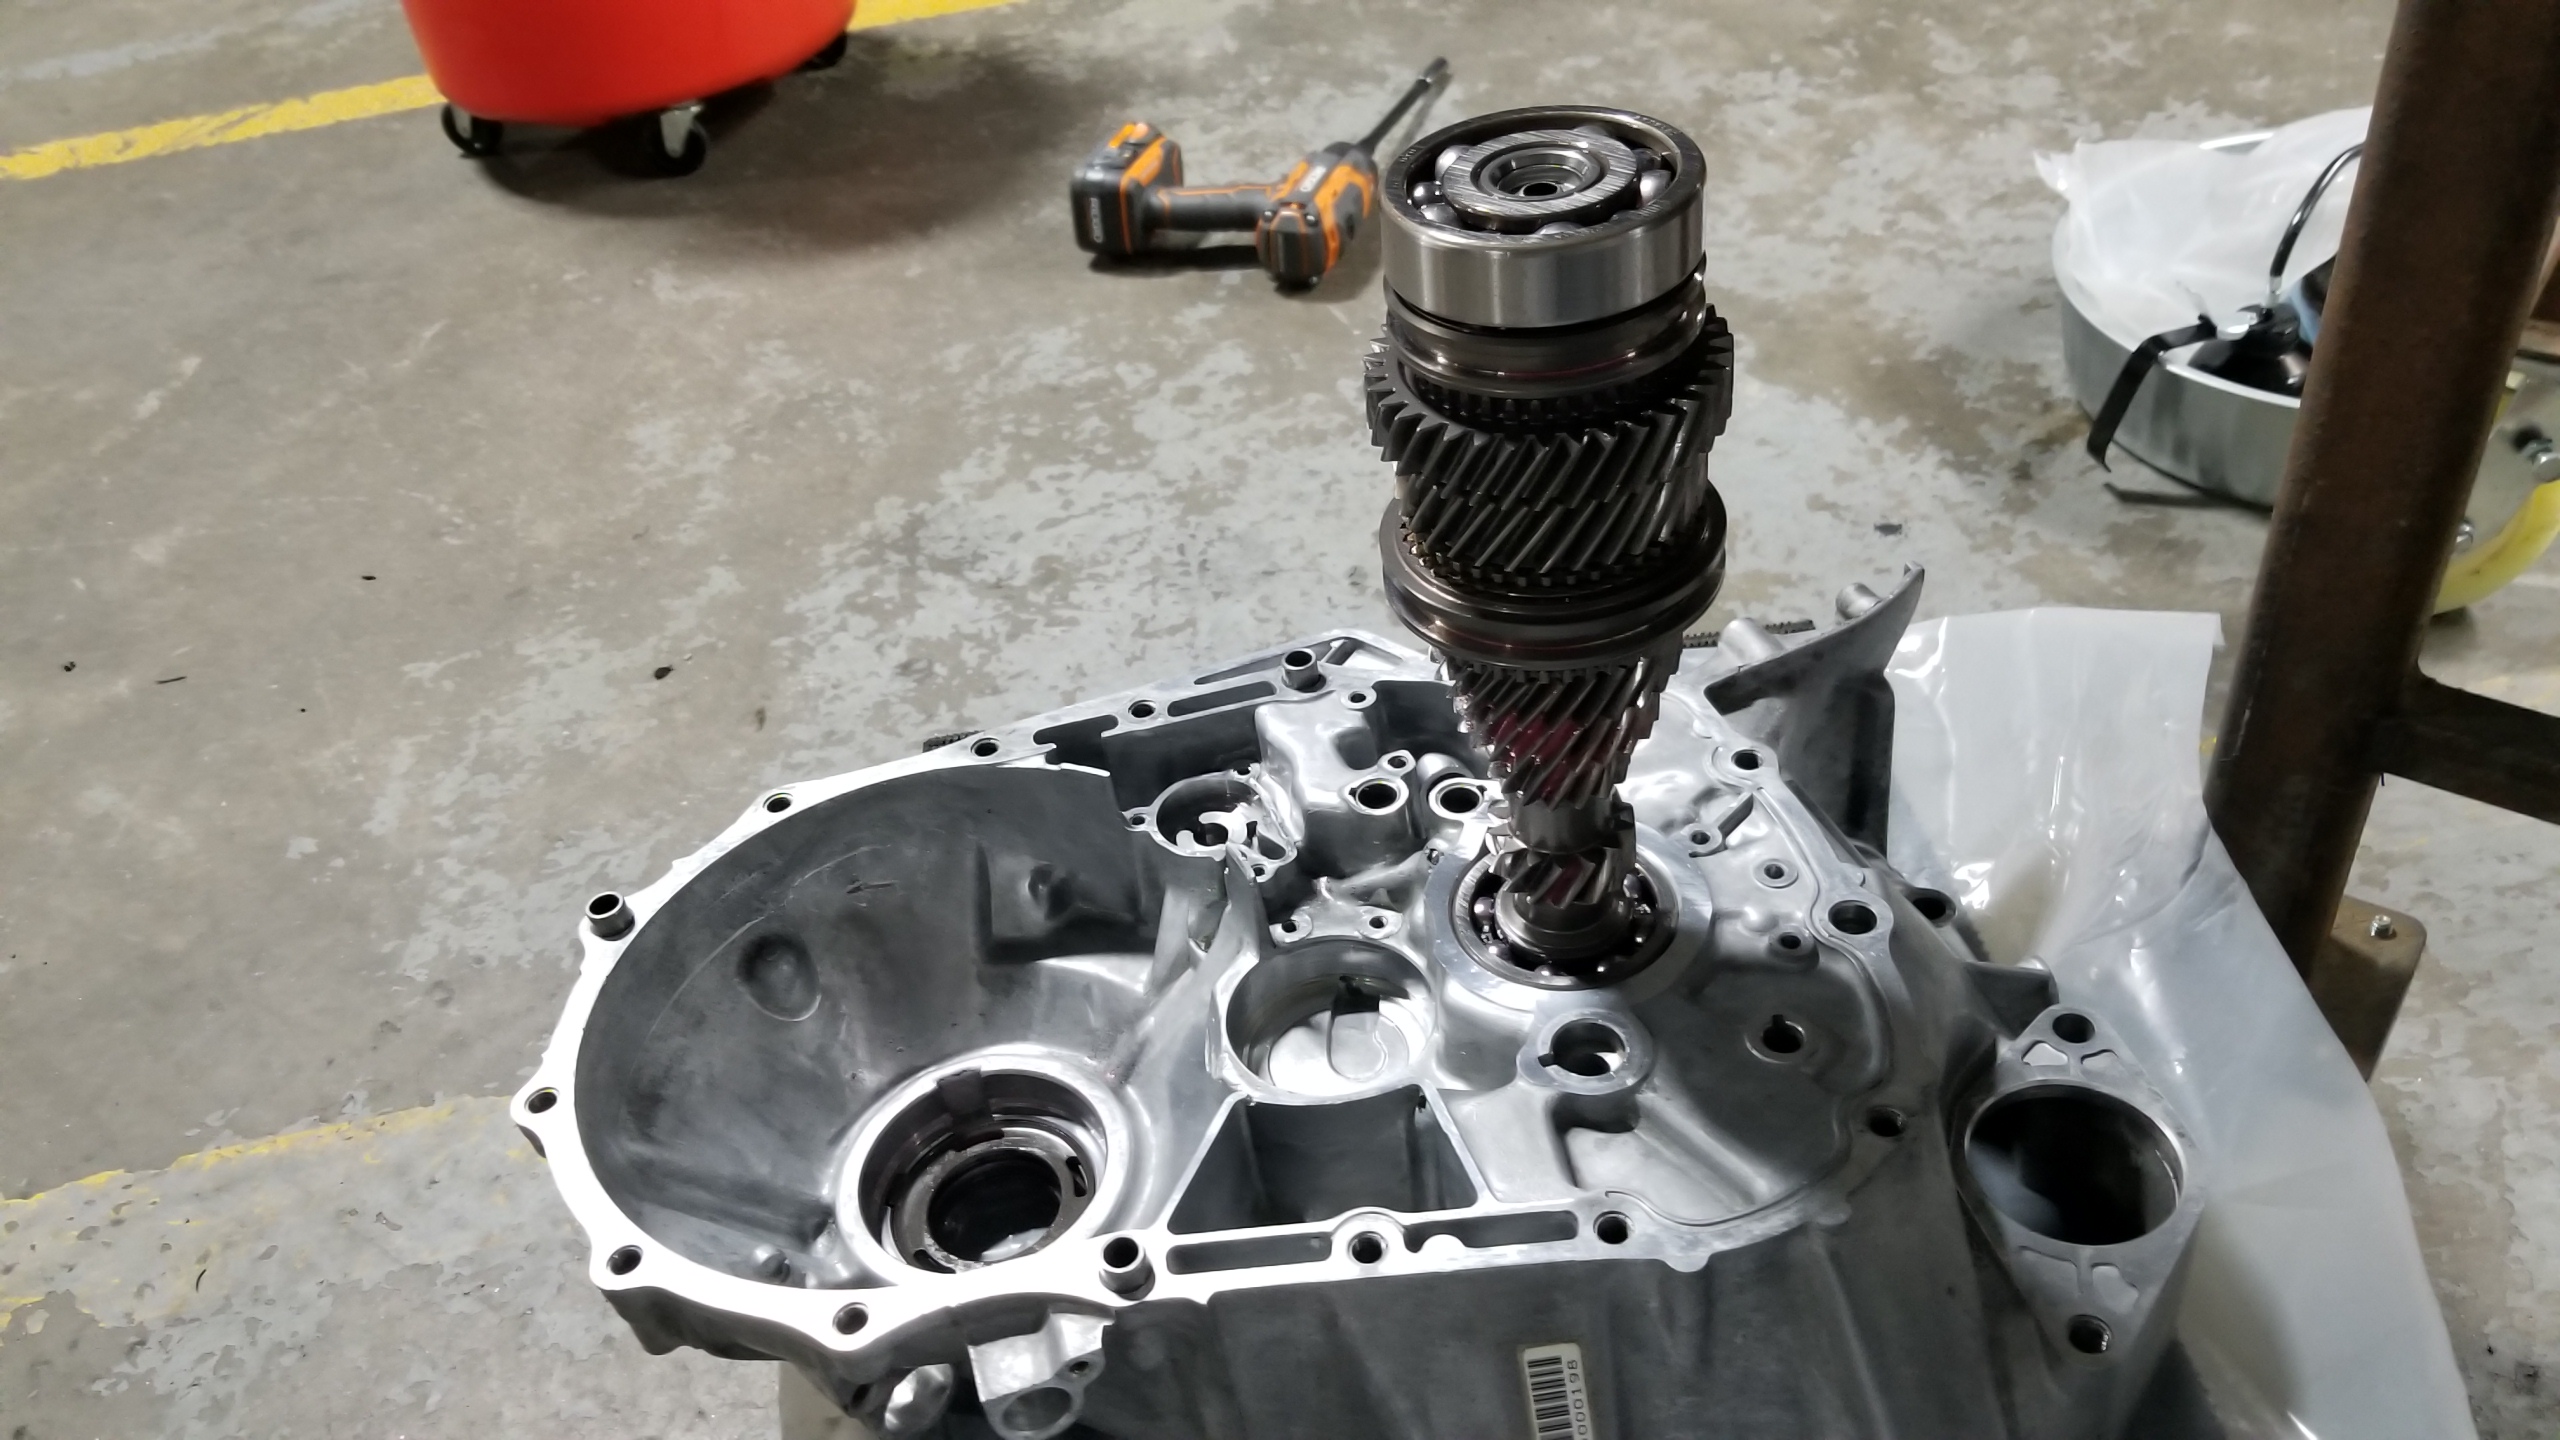
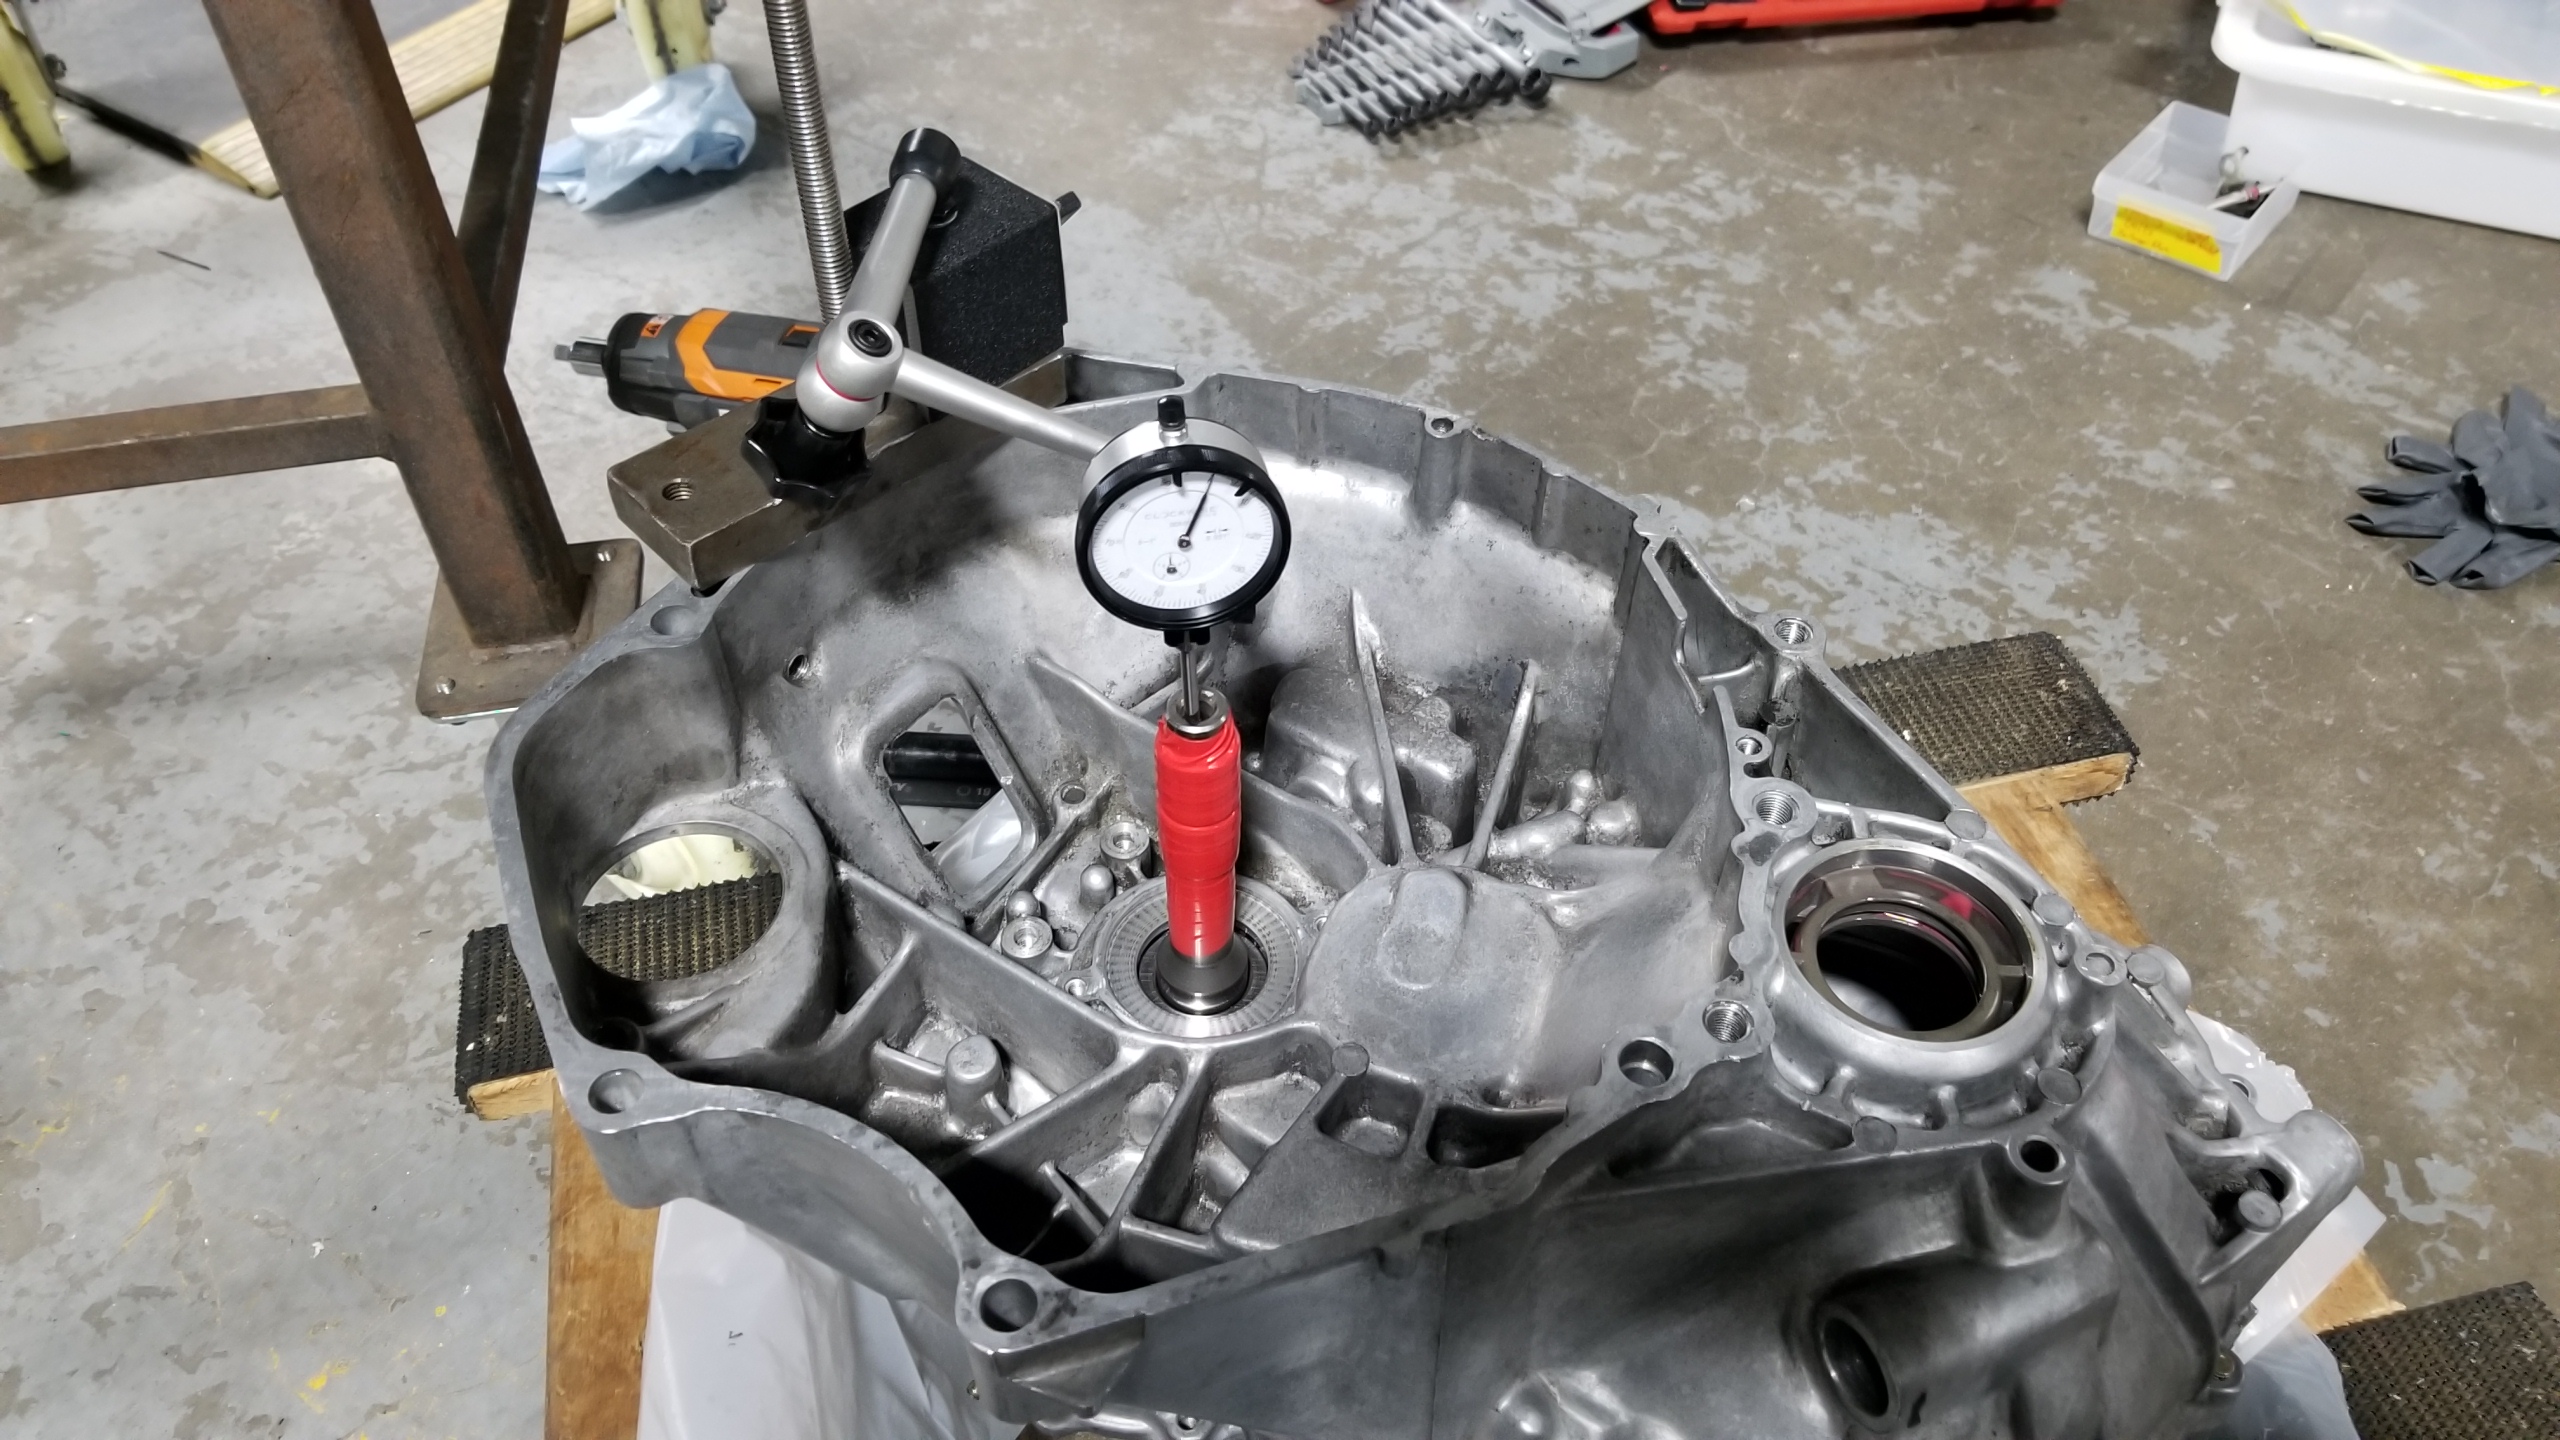
In summary: the job went okay, not as bad as I thought it would be, some fitment issues, fixed my CEL so I finally have no lights on my dash anymore, love the sound & performance, overall pleased. Once my overseas parts arrive in the next few weeks, I can finish my transmission rebulid and buy the clutch kit, THEN I will finally have all the parts I need to do the fabled transmission swap. I'll be taking a whole week off work for that :biggrin:.
 
Misc Swap Stuff

My sibling takes great photos :)

i96CTT0.jpg


Took some time to refinish the used shifter base for the M/T swap since it was pretty rough. Not that anyone would ever see it anyways.
PlrEzm3.jpg


Some new OEM connectors and other wiring tools arrived from Cycle Terminal. This will let me make patch harnesses for the few connectors I need to tap into which will let me leave the original wires and connectors untouched. No butt connectors or T-splices here :biggrin:. I got some other terminals too for future fuse box accessories and to make a service connector loop to replace my paper clip.
QKdDWR9.jpg


For example, here's the Sumitomo HD 090-3 which fits into the 3P Japan-spec clutch pedal switch. Now I can make my own harness which will connect the pins to ground, the cruise control computer, and the ECU. I've also modified some wiring diagrams from a Japanese blog page with Honcho's help and will post them once I start making the harnesses.
BGIxLfm.jpg


Most importantly, my last Amayama order finally arrived today from Fedex :cool:. It took a little longer because of the backorder on the '02-R clutch pedal and a slight customs hiccup but nothing as bad as USPS.

Got what should be my final transmission shims, "Y" is the thickest Honda one for the differential and either A or B will be for the mainshaft. I just need to find the time to put these in, measure again, and then hopefully put everything back together again. Just like any good project, this is taking much longer than I had planned.

Also finally got the replacement '02 Type R (or S) short shift lever. This completes the list of a clutch damper delete, Type-R short throw clutch pedal, short shifter w/extended threads, and the Cedar Ridge short throw mod kit. I will probably need to get a nice and heavy shift knob to help me get more leverage.
fEpMU6H.jpg


Now that I've replaced my lost M/T swap parts, I'm actually very close to being able to start "The Swap" as much as I keep talking about it. The list goes: finish transmission rebuild (one weekend), salvage some OEM wires & clutch pedal collar (still discontinued..), buy the SoS clutch kit and various fluids, and then take a week off work and get to wrenching. I prefer to get stuff like this done all at once instead of mothballing the car for weeks or months at a time waiting for parts or time off, and I will probably need the whole week off to get the car at least driveable again.

I still have to finish fixing some fitment issues with the exhaust install, namely the adapter/TP flange & rod "A" hitting and also aligning the exhaust tips with the rear valence (it's a little skew as-is). Just need to find a day to get under the car again to loosen the exhaust hardware, realign things, and tighten everything down again.

Come on everyone, we just need 3 more posts to get this thread to 5 pages and save us all the trouble of scrolling past a million images :eek:
 
Man you have McLaren F1 Gold Foil engine coating on your NSX, that supper cool.

Im surprise that someone let you take stuff that car...or it not picked up for spares....post pictures of the F1 next time you see it.

Bram
 
I'm wondering if some of the fitment issues you had with the headers and where the flanges are located and the clearance is due to the A/T? From what I've seen most of the companies doing aftermarket headers/exhaust typically only state they fit M/T and they "may" fit A/T. Either way, glad to see you have a temporary solution figured out and I'll be curious to see if the fitment issue is there after the M/T goes in...provided you don't have the flange moved prior to that.

...on to page 5...:biggrin:
 
Back
Top